
Likes
Comments
Share


@FatalFarmer
Follow
The cheese looks ready, all pistils have changed.. but she's small. Pistils are changing on the rest (45-55% white), will be trying to use this microscope more to check the trichs but I struggle to get them in focus 😟
Going to start reducing the MC starting tomorrow, roughly 2 weeks left, will flush with ph'd water for the last 2-3 waterings. These girls are sticky, sweet, fattening up and looking really nice
Stay high, and stay tuned 😁


Likes
7
Share

@Skynets_Growing
Follow
Week 8 is my horror week with Tamara. I have doing mistakes and a lot of at the same time. Sorry my love (Tamara). I heared to much light isn’t a problem for Cannabis plants and to much fertilizer you can give her only water. That was really really stupid…but I have done it and the problems came fast and a lot of. But I have done my best and at the end of Tamara‘s week you can see, all mistakes I have done … she is such a beauty with her little mistakes .

Likes
19
Share


@MiyaguiOkPolilla
Follow
Esta variedad me encanta, huelen genial y sus cogollos son super densos y llenos de resina siempre. Poca tolerancia a los excesos y es muy fácil de estresar. A pesar de todo sigue siendo una de mis variedades favoritas ya que su aroma old school con toques ácidos me fascina!. Actualizaré luego del secado y después notas de humo. Saludos!
Likes
32
Share

@TheBloomer1
Follow
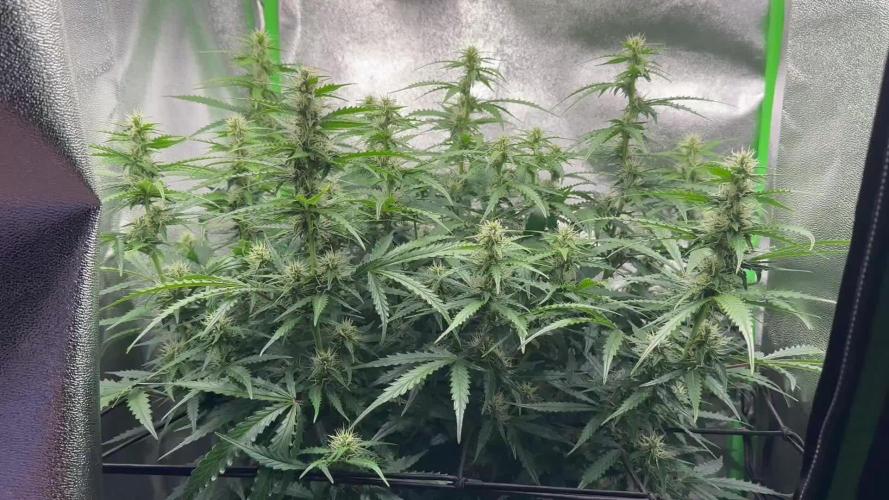
In der woche befanden sich die Pflanzen in der späten Blütephase mit klar fortschreitender Bud-Reifung. Die zuvor etablierten Trainings- und SCROG-Strukturen zeigten weiterhin ihre Wirkung, da die Haupttriebe optimal im Licht verteilt waren und eine gleichmäßige Canopy bildeten.
Die Blüten nahmen sichtbar an Dichte und Gewicht zu. Besonders die oberen Budsites entwickelten sich stark und begannen, sich deutlich zu verdichten. Die Harzproduktion nahm spürbar zu und die Pflanzen wirkten insgesamt sehr stabil in der finalen Füllphase.
Das Blätterdach blieb größtenteils vital, wobei einzelne ältere Fächerblätter begannen, ihre Nährstoffe in die Blüten umzuleiten.
👉 Eine sehr produktive Woche, in der die Buds klar an Masse und Struktur gewonnen haben.


Processing
Likes
150
Share


@RussianGrower
Follow
Hello, again in touch Russian grower. Today my girls 70 days, 10 weeks. The fruits make me very happy, and the smell knocks me down. Soon I plan to make the harvest Bubblelicious Auto, my patience is not enough, and in appearance we can say that this is a full Mature flower.
Despite the additional air filtration and automated odor neutralizers for bathrooms, the smell is coming out the door. But it remains to endure quite a bit, so I'm not afraid. The most difficult is behind, but a lot of pleasant in the future.
Bubblelicious Auto - The smell of these plants has become simply stunning, like a hammer blow to the face, I hope the quality of the final product will not be worse. They look like beautiful porn Actresses 😍 In the microscope I see amber trichomes.
Neville Haze Auto-lives up to my expectations. They do not have enough space for full flowering, but soon they will be spacious. Because of their neighbors, I can't really smell them. The plant is very cheerful, progressing, but I think it will bloom for at least three weeks.
I also have some good news, mail delivery brought me measuring instruments, so now my diaries will be more accurate.
I Express my gratitude to all those who follow my progress and support me. Your moral support is very important to us. I'm not going to stop, and promise to please you with new and more interesting diaries. Hope all goes well and the police pass by me! 😎


Likes
4
Share


@CanarianGrow92
Follow
Week 4 for the Apricot from fastbuds 420
All good so far, we continue to apply addictives from xpert nutrients and add some more bloom nutrients as some of the girls are demanding a little more bloom nutrients.
All good so far and not much more weeks to go, lets see of the girls continue to swollen up a bit more
Likes
2
Share


@Shefman93
Follow
Transplanted from 15 gallons to 25 gallons at the start of the week. Changed amendment ratio to 50/50 of 444 & 284 as this is the last week of veg. Adjusted lst to have the canopy level and I will take clones before the flip to flower.

Likes
29
Share


@Mack_420
Follow
09.07.24
Wir haben jetzt 6 Wochen Blüte hinter uns. So langsam geht es auf die Zielgerade „Ernte“ zu. Die Große zeigt schon seit letzter Woche Mangelerscheinungen und doch hab ich wie von Anfang an beschlossen nur mit dem Living Soil und Wasser zu Arbeiten, ganz nach dem Motto von Florganics „Flo & H2O“
Ausserdem ist Blütetag 43 und somit werden die letzten Störenden Blätter entfernt für den Endspurt.

Likes
2
Share


@Franco123
Follow
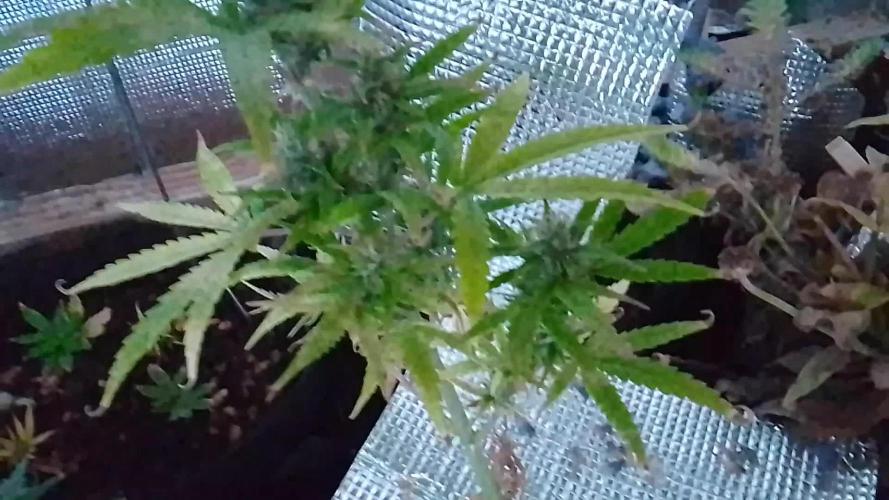
this week the plants have started flowering and I notice that the two that previously were more leafy are yellowing I try to increase the fertilizer slightly and see if they settle but everything else seems fine to me
Likes
45
Share


@SherbGrows
Follow
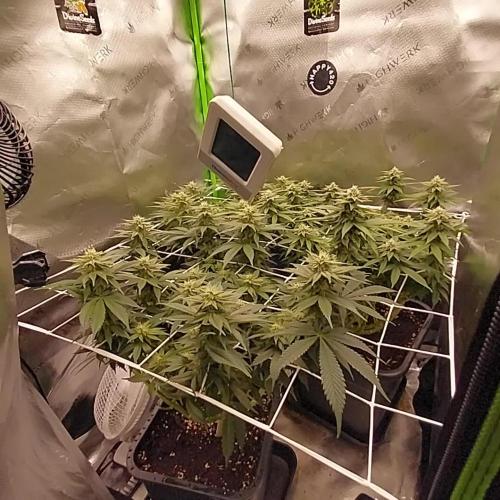
Time for another update!
During Week 9
Light defoliation on bottom canopy
Added 1 heaping tbsp of GEO Bloom dry amendment 3-12.5-9 with regular PH'd water
Watering every 3 days with 1/2 liter of water or more. Trying to keep soil moist without drying out. Seems to be improving the plants
Plan week 10
Installing ViparSpectra XS2000 light to help with better light coverage in the 4x4 tent
Going to keep RH around 45% and keeping up with airflow
Planning to put in dehumidifier in upcoming week if necessary
Weaning down on light defoliation at this point.
Happy with how these girls are doing! Hoping the new light set up with the ViparSpectra XS2000 will make a difference in yield this far into flower. Trying to combat a little bit of light burn happening at the moment as well.
Thanks for checking in! See you next week

Likes
41
Share


@TheBulldozerSicily
Follow
Sabato 6 luglio Aggiungo 50 lt acqua per livello basso
Venerdì 20 luglio Aggiungo 50 lt acqua e il doppio dei nutrienti, vediamo che succede. Ho dato anche una bella defogliazione e pulizia rami inferiori
Martedì 23 luglio
Inizio controllo ec 3999 ph7
Cambio soluzione parto da 75 lt acqua osmosi inversa + 5lt acqua rubinetto ottenendo ec 473 ph 8.4
Aggiungo tutti I nutrienti ottenendo ec 1489 ph 6.5

Likes
1
Share


@SessionMeister
Follow
Overall very pleased. All the leaves are dark green and the plants are looking very happy. I’m giving them a couple more days before they are flipping into flower. All of them handle defoliation really well but Somango is a little to bushy to really do any organized Lst. I will try after Defoliation next week and give her a bit more surface area.


Likes
117
Share


@StarLorr
Follow
Welcome to my autø Møøn Røck 1 Diary.
In this Diary:
Seeds: Sponsored by Ðivine Seeðs
Media: Pro~Mix HP *•ns
Nutrients: Remo Supercharged Kit *•ns
*•not sponsored
___________________________
Feeding:
Wed 30Oct: 2L Remo/Recharge pH'd 6.5
Sat 02Nov: 2L Remo/Recharge pH'd 6.5
___________________________
Trichomes are all whites and no amber yet(no pics):(
Buds are heavy on the branches😋
Almost there!
___________________________
Thanks for stopping by, likes and comments are appreciated!👊🏻😎
Keep on growin!
Keep on tokin!!!
😙💨💨💨💨💨

Likes
8
Share


@pzwags420
Follow
On day 1 things are going well. The buds are getting larger by the day and I'm starting to smell the terps. This is an interesting one, I can't figure it out just yet but there seems to be grapefruit in the background at least. I also did my last defoliation to bring in more light to the canopy. On day 3 the girls are doing well. My PH pen broke so I'm back to indicator drops until amazon hooks me up with a new probe. On day 4 the plants are doing well. I applied my final BTI treatment. The fungus gnat population is way down and almost completely eradicated. The girls are putting on more trichs everyday and the smell is increasing :) On day 5 I see no more fungus gnats :) I should receive my PH pen tomorrow and will finally be able to adjust my reservoirs pH with more precision. On day 6 the plants are doing well. On day 7 my new PH pen was ready for use. I discovered my reservoir got down to 5.5 PH yikes! I used PH up to get the PH to 6.1. I then changed out my reservoir with new nutrients. I PH'ed to 6.1
Likes
10
Share


@HerrnLubitz98
Follow
We’re done! Thanks a lot again to Zamnesia and Greenhouse, next big shoutout to Spiderfarmer and Biobizz.
For further updates and more stuff hit me up with a follow on IG @herrnlubitz88
Stay tuned for next run!
Likes
44
Share


@rhodes68
Follow
10/13 Day 43 Fed Bio-Bloom 15ml/ Bio-Grow 5ml/ Big Bloom 15ml per gal
Mel and Lisa 1 gal each Kim and Jen 0.5 gal each, they just dont drink like their more sativa sisters. With Lisa being a green bud pheno think out of the 9 LSD-25s I have grown seen the most common phenos purple bud, green bud ,big leaf, thin leaf, dry leaf, oily leaf, yellow leaf (not sure about that) tall plant, short plant, and they come in all combinations it seems though I have only seen the "oily leaf" on the big leaf phenos. Have 20 more to grow in the coming year so time will tell.
Likes
27
Share


@GhettoSetUp
Follow
Flowers are starting to stack, all at different rates due to different phenotypes.
I've given up trying to feed them all according to their different needs, they react unpredictably.
Some are hungry and eating their bottom leaves while others look to be overdosing on nitrogen.
I am now applying standard doses of dilute fish mix and normal dose bio-bloom to all plants.
I think it will probably be a staggered harvest. The sativa pheno is likely to take the longest, with the hybrid pheno being the quickest. Indica pheno somewhere in the middle.

Likes
8
Share

@Crazy_Doofus
Follow
Good! Hope she fattens good!! Cut the lowest 2 branches into clones, wanted them gone anyway. They already flowering though, so not expecting much
BLOOM lights on, 12-12 lights
