The Grow Awards 2026 🏆 


Likes
Comments
Share
@bioaccessory
Follow
Приветствую, коллеги! 💚💛❤️
В этот раз я захотел вырастить сативадоминирующий сорт, Strawberry Cream от SumoSeeds как раз подходит:
"Прямо из района Эр-Риф Марокко, эксклюзивный гибрид Goji Haze с Strawberry Haze, знаменитой фруктовой сативой от Арьена из GHS. При курении этой красотки будет замечен приятный сладковатый аромат клубники." Звучит интригующе.😏
Теперь пару слов о проращивании: обычно после замачивания в стакане воды(RO water), я проращиваю семечки во влажных ватных дисках и зип-пакете(так мне легче контролировать нужную влажность). Но при этом способе нужно следить за корнем, есть риск вростания в ватный диск, что и случилось с одной из семечек. В этом случае извлекать семечку нужно предельно аккуратно(см. видео). Видимо в следующий раз я попробую менее рискованный способ проращивания. Ах да, перед стаканом с водой я слегка подпилил семечки по острой грани маникюрной пилочкой.
Итого:
23.01(вечер) поместил в стакан с водой
24.01(утро) поместил в диски
25.01(утро) появились корни
25.01(вечер) корни ≈1см. посадил в кокос
26.01(вечер) взошли
На всякий случай отметим, что чуть позже взошла растишка из правой(на фото) семечки, и она же была заметно крупнее.
Кокос(уже с перлитом, спасибо линейке Plagron) я зарядил слабеньким компотом(A+B-2, B52-1, CalMag - 0.5 pH5.9 ppm514), полетели!
Спасибо, что заглянули, и будьте здоровы! 🙏
Продолжение следует ...😶

Likes
42
Share
@AutoCrazy
Follow
This plant was a BEAST!! She loaded up on frost as much as one could want. She smells super pungent!! The weight of the buds are becoming too much for the branches.
This plant was pure gold for a fast photoperiod!!
😎🌱

Likes
34
Share
@LockDownGrow
Follow
My first time making alcohol tintcure
Using the c1 ,
Hold on tight gonna be a trip


Likes
34
Share
@Maggie_de_Block
Follow
Really enjoyed this grow, improved a lot compared to my previous grow. Love all the colors on these buds. Will update when dried and weighed
Final outcome was just a little over 100grams, very happy with the outcome and a pleasant smoke! Will update further when cured


Likes
38
Share
@Wicked_Stix
Follow
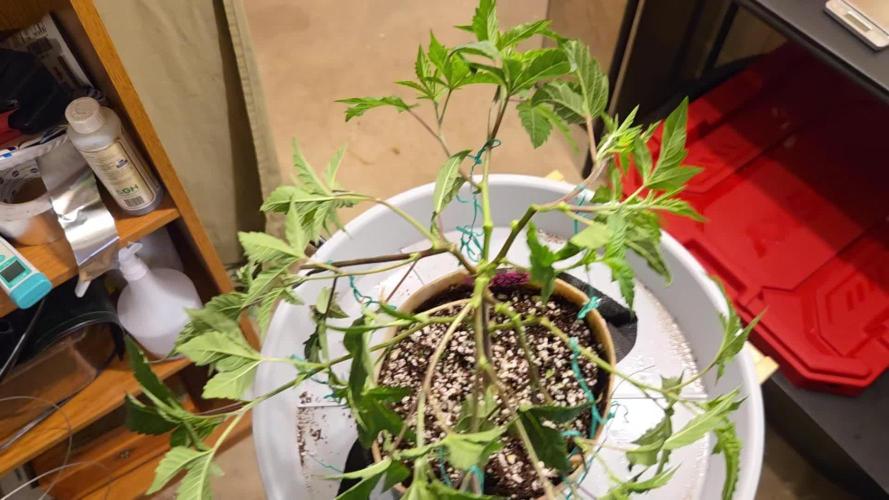
Day 21 and I tied down a few branches to spread them out a little. This platonium has a lot bigger node spacing than the other plants. They seem happy with the nutrients so I didnt mess with the reservoir this week. Will probably give them a little calmag before the end of next week. Just going to try to keep up with some training to get as many tops as possible. Debating on building some type of scrog this run but still undecided.


Likes
141
Share
@Tropicannibis_Todd
Follow
💩Holy Crap Growmies We Are Back💩
Well growmies we are at 35 days in and everything is going great 👌
👉 Shes a short chunky little plant 👈 We got some very pretty colors😍 👌 She's got some odd colors kinda like tiger leafing,😉
Lights being readjusted and chart updated .........👍rain water to be used entire growth👈
👉I used NutriNPK for nutrients for my grows and welcome anyone to give them a try .👈
👉 www.nutrinpk.com 👈
NutriNPK Cal MAG 14-0-14
NutriNPK Grow 28-14-14
NutriNPK Bloom 8-20-30
NutriNPK Bloom Booster 0-52-34
I GOT MULTIPLE DIARIES ON THE GO 😱 please check them out 😎
👉THANKS FOR TAKING THE TIME TO GO OVER MY DIARIES 👈
Likes
10
Share
@Growing_healTHCare
Follow
I am a day early but I am in the flower room and figured I would go ahead and update.
The girls are still pushing along. Sweet smell, very sweet with a bit of berry at this stage.
Branches have been leaning for awhile now, but I came into a room with a couple bent over but luckily not broken. Who am I kidding... I would have done a quick dry and enjoyed an early taste.
Week 7 is done at lights out and I will be 1 week from the early side of Barney's flowering window. I will be checking trichomes regularly from here on out looking for the signal that these girls are done.
I am uploading a quick video. I hope it turns out as good as it looks on my phone..
You know that you want to click that like button.. 😇
Edit: Been dropping night time temps and the dark colors are coming out. More so in the lowers but the tops are coming along.

Processing
Likes
42
Share
@Gabarram
Follow
03/12/2019 Day 81 The Dr seems to be concentrating in forming buds but I think she's grown some half centimeter, is she going to touch the ceiling? She has to know that is is confined and the sky is not the limit, at least in her condition.
Day 82 (04-12-2019) The shoot at the rear left is almost touching the celiling of the grow tent😨 and i keep on tying other shoots and keeping them the farthest from the burning lights (many leaves' tips are scorched, but fortunately it's just the tip and the bud is still far from that hot point. Other leaves that are close to the lights, well, I took scissors and there's no need to speak further. Look the hard work I'm having with this plant height's issue. Goddammit why can't I have a normal grow like everyone?
Day 83 just looking the video and the pics is self explanatory. No further comments 😒
Day 84 Ithe tallest shoot has reached the ceiling and seems to try to keep on growing so she needed to start bending at the very top because she wouldn't get past the tent fabric.
Regarding EC, I am using a fertigation solution about 1,3 mS/cm and the runoff EC at 1.5 mS/cm. EC has been kept controlled since I raised fertigation volume to 6 L per fertigation event (1/day), unfortunately this solution containing nutrients goes to waste :(
Day 85 07/12 I'lllst the tops that get to touch the ceiling and keep observing and acting as needed. I fear she'll stilll keep going up for a while. Fertigations as usual, got runoff EC 650 ppm today (1.3 ms/cm) which I think it's very good of a value.
Day 86 (08/12/2019) Following advice I defoliated and even cut some thin and improductive shoots. Removed a lot of foliage and even supercropped a long tall shoot, I want to see how this high stress technique affects her. Because I plan to keep it doing if other shoots decided to continue growing.
I wonder why do shoots continue growing vertical after having passed the light's level. Is it the glow coming from the reflective walls perhaps? Many questions.
I decided to take down some tall shoots by suspending little weights near the tip, it seems to work more or less fine.
Day 87 luckily the HST seems to have worked fine, the shoots are recovering and point upwards again. The main tip is quite unruly, today I supercropped that tip. Runoff EC is 650 ppm, perfect.
Day 92 /14-12-2019) I think that despite her exaggerate growth she's managing to thrive fine with some limitations, buds seems going well. Shoots are still growing vertical but supercropping and resistance seems to have hampered her a while, but now I see she engaged on growing some centimeters more :/
Day 93 two days from starting the 14th week, despite the lights and the heat of this season (added to the lights I had to keep the tent door open for there was 32 ºC inside) the Dr is taking it well, I see the buds foxtailing as I expected, and I'm positive this grow will get to a good end. I'll work day by day to achieve that. Regarding fertigation, I gave her a solution half concentrated (relative to the solutions that I had given her the preceding days) because I noticed salt build-up by the EC measurements. I left run off EC at 800 ppm which is still a bit high for my liking but not excessively. For the amount of runoff I collected today, I see she seems to be drinking a little more.


Likes
12
Share
@GYOweed
Follow
Raised lights a bits.
2 seeds one 2 gal pot in a 2 gal bucket.
Same structure 2 very different smells one turns color.
It's tricks for your fucking mind!
Left one is very sweet smell. Right one that is turning darker is very rotten skunky.
Gavem a prune job cause the lower buds all bleached lookin and need a tan.


Processing
Likes
21
Share
@420cfm
Follow
Wow. They are very crystallized now. Buds are fattening up every day. Lots of orange hairs and milky trichromes. Plan to go to 8 weeks if I can and flush week nine. Will see how they go but so far so good.


Likes
Comments
Share
@Cletus5150
Follow
Put 2 Blue Ritz and one Super Sherb into one gallon grow bags and begun Supercropping.

Likes
2
Share
@magicgarden
Follow
petite carence avec la hulk berry de RQS carence en fer apparemment du a un PH un peut élever du terreau j'essaie de rectifier ce problème mais pas facile si non sur les trois autre de chez KANNABIASEED les 3 gorilla king aucun problème ça stretch bien et elles se porte très bien


