
Likes
Comments
Share


@Pureleelove
Follow
So Ill start by talking about her smell. Maria has been super super low key in that so far my room has not stank of weed super badly. My room was fresh and had a herby comforting lining, but no blue-cheese-skunk-on-the-loose type scenario. But when you frisked up Maria, a persons nostrils might describe it something like ...walking through a mystical forrest eating your favourite candy, after you've just blessed a fat one with Bob Marley.. its a feeling not a smell. But if you were to describe it, its like a summer fucking cocktail' bish.
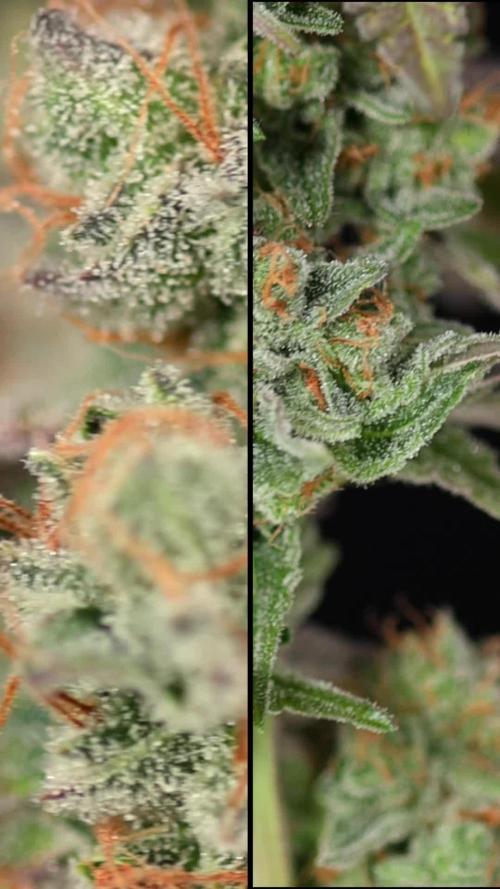
She has also started to show some red hairs, Id say about 1/3 of her hair is ginger at this point. I think a point to note is that she has been drinking a lot more water (About 3l water every 3 days) as she's bulked up and started to shine.
Im super happy with the grow so far; Ive made mistakes, and not all circumstances have been ideal. BUT, its been such a rewarding experience so far and I'm also glad I got to start with fucking dank genetics from Dinafem. You guys are fuckin' super stars.
Ive been supplementing her with some LOVE. I can not get over how beautiful it is?! Cannabis is just so mystical? Being my first grow I'd still never got to see a late flowering cannabis plant in my life! I grew up in Dubai where Cannabis is hecticly-illegal, and lived in cities thereafter most my life. Maria is like a child who I will later kill in her sleep before she wakes up and hang upside down in my cupboard to dry out. But I truly love this plant.

Processing
Likes
14
Share


@DUBDOLLASIGN100
Follow
Flowering well with that potent smell this OG will be some fire🔥🔥4 weeks outdoor today from a 5 week indoor veg.
Likes
54
Share


@rhodes68
Follow
3/11 Week 11 a day early due to schedule - Day 26 of Flower
Buds building very well no signs of any deficiencies and the tips are ok so leaving all nuets as is.
Halfway to projected harvest date according to Fast Buds, I believe them from what I am seeing.
Having some humidity issues due to our funky weather.
Humidity running higher than is safe on lights out , 60-70%, so installed one small dehumidifier but getting a larger one today to add to it.
That is the extent of our problems so aint beechin guys
One final comment here, these Fast Flowering photo strains seem tailor made for growing indoors.
The flowering times, the way they grow and the lack of strong odors even with larger buds just impresses the crap out of me.
👍 Fast Buds
3/12 - 27/Flower
Continue to stack up the buds I had to raise the lights one click to keep em at 16" on both lights.
The increased feed PPM is showing in rapidly growing buds.
No changes in feeding at this time.
My wife has sweetly pointed out I messed up reading the calendar.
This is day 27 of flower
😜
Yeah it was real good for 23 days too LOL
So FB pegged 45 days of flower on the FF7 , with 18 days remaining.
Flush could begin in 11 days at the soonest.
Which consequently is when I drop the seeds for the last grow before my vacation. 😉
3/13 Day 28 Flower
Raised the lights up a bit, want better dispersal from the two light sources and since there is now almost too much light this seems wise as the buds continue to stack up.
The two light together are 1100 and 700 umols at a minimum so with 1800 Umols (the same as a 1000 watt HID) I can afford a dispersed pattern of light sans hot spots and dark corners.
Multiple light sources is the way to go no doubt now. maybe pics later if I've time.
Pics
3/14 Day 29 Flower
Ye though there be no toilet paper in the land we do have buds...
This virus thing is just insane aint it.
Why toilet paper I wonder...
Anyway increased PK to max 5ml/gal as I see no toxicity and they are building like crazy so feed em.
This is the last week for the PK booster cutting it out in a few days, plenty in the pot to carry her through the flush.
No other issues to comment on pretty easy grow so far.
Pics


Likes
11
Share


Likes
12
Share


@Preston22
Follow
Still looking Good .. Buds Looking good
Added some big bloom in last week… got some yellow fan leaves on it
Sticking with 13-14 weeks before harvest time

Processing
Likes
11
Share


@CocoLogic
Follow
Sept 20th: (F34)
Fertigation once a day with NEW recipe (1300 EC 6.1 PH) watered until 10-20% run-off
Sept 21th: (F35)
Fertigation once a day with same recipe (1300 EC 6.1 PH) watered until 10-20% run-off
Sept 22th: (F36)
Fertigation once a day with same recipe (1300 EC 6.1 PH) watered until 10-20% run-off
Sept 23th: (F37)
Fertigation once a day with same recipe (1300 EC 6.1 PH) watered until 10-20% run-off
Sept 24th: (F38)
Fertigation once a day with same recipe (1300 EC 6.1 PH) watered until 10-20% run-off
Sept 25th: (F39)
Fertigation once a day with same recipe (1300 EC 6.1 PH) watered until 10-20% run-off
Sept 26th: (F40)
Fertigation once a day with same recipe (1300 EC 6.1 PH) watered until 10-20% run-off


Processing
Likes
22
Share


Likes
3
Share

@Bread_n_Buds
Follow
This is the third LA Kush Cake from @zam.nesia that I've harvested, and I'd love to grow at least 1,000 more.
It's truly beautiful in terms of color; during the fade, this one revealed a purple and yellow that blend together in a truly romantic way.
The flowers are beautifully full and solid this time, and the resin is excellent. The scent is the original vanilla with a hint of spice.
The parents are Wedding Cake x Kush Mintz. Once again, I'd like to emphasize that where Kush Mintz, a particular phenotype of GSC, is present, the plants are wonderful. It never disappoints.
The flowers are in the drying room; I can't wait to taste them.
It grew in an 11-liter Zamnesia canvas pot and was topped with a top dressing for 16 branches, then I trimmed the weakest ones.
We used @plagron_official from start to finish for both soil, base feed, and additives. I choose the 100% Natural line, but there are literally thousands of options for all growing styles. Check out their website, they do it all.
www.plagron.com
This strain reminds me of another strain in my top 5: King's Tart by GHSC, which is crossed with LA Kush Cake.
Our L.A. Kush Cake looks amazing, try it!
Z - https://www.zamnesia.io/en/11097-zamnesia-la-kush-cake-seeds.html
Z - Want to take your growing to the next level? Now you can with Zamnesia's LA Kush Cake. Originally bred by Seed Junky Genetics from a Wedding Cake and a Kush Mints, this indica-dominant strain produces large quantities of resin-coated buds, rich in sweet terpenes and a relaxing effect.
LA Kush Cake seeds produce stocky plants that thrive in any environment. Indoors, they require only 8-9 weeks of flowering to produce dense, trichome-rich buds with a pine-like structure and very compact calyxes. Outdoors, LA Kush Cake can be harvested in early October. Plants produce up to 600 g/m² indoors and 850 g/plant outdoors. In the right conditions, LA Kush Cake can develop intense purple hues that add to its appeal. As you open the jars of these buds, you'll feel a wave of pungent vanilla terpenes wafting through the air, balanced by spicy notes of pepper and mint. Whether you smoke or vape, you'll be instantly intoxicated by its distinctive flavor, with a velvety, creamy aftertaste followed by a powerful yet functional high. Enjoy a relaxing effect that will melt away any tension while keeping your mind clear: perfect for unwinding, enhancing intimacy, or simply enjoying a pleasant smoke. If you need to stay focused, you can: LA Kush Cake relaxes the body while leaving the mind clear and focused, making it the ideal choice for experienced smokers seeking a dynamic, active euphoria that lasts all day. Want to try a potent, productive, and delicious strain? Don't wait: buy LA Kush Cake seeds now and start growing her premium buds at home.
You know it, but I recommend it: here you'll find so many wonderful things, practically "all the best nature has to offer."
Z - www.zamnesia.com
Music // G-RAP and West Coast Music
www.radionula.com
+ Feng Shui Music
+ 432 + 528 Hz Frequencies


Likes
29
Share


@yvet_te
Follow
Finally was able to get my humidity down! I had to leave the door open to the room since it wasn’t exhausting outside. Cracking the window wasn’t enough. Also added a small dehumidifier inside the tent.
Plants seem to be doing well with the nutes right in the AC Infinity watering bases. I manually fed Big Bloom since it’s full of sediment and I was worried it wouldn’t work with the wicks. They’re pretty handy so far, but I’m worried I’ll have to clean them out before the grow finishes.
Had to move my oscillating fan to where my camera was, so my timelapse is going to be screwed up. Oops.
One plant is super close to my light, hoping she will stop stretching soon…
Excited to see those frosty sugar leaves coming in!

Likes
18
Share


@GlyoFE
Follow
Friday 1st December 2023
So today marks the start of week 2! Both plants are growing every day, everything seems to be going well so far! The TS600 *should* be arriving this weekend so that will be a nice upgrade. I've started with nutes today, introduced CalMag, Biobizz Grow and Canna Rhizotonic whilst following all feeding advice I can find online. Got my PH Pen calibrated properly today, after mixing my first batch of feed the PH was 8.7! I'm glad I took the time to review those readings as I'm sure this would've been very bad for the plants. Brought the PH down to 6.5 on the nose and gave both plants a good watering, won't give them anymore for a few days and see how they respond over the next few hours. Fingers crossed!
Any advice on watering, feeding and nutrients would be greatly appreciated 🙂
Saturday 2nd December
The post man must've hated me today! Lots of stuff delivered for the tent and I've installed it all, up and running! Gone for a 4 inch inlibe fan with carbon filter exhausting out the top of the tent, completely invisible from the outside, almost silent and feels like good airflow. My Mars Hydro TS600 also arrived, so hooray for no more purple photos! The light intensity is a huge increase over the amazon special in the tent prior to this, but it's done well so far so I'll stash it away as an emergency backup unit. The TS600 seems to be a perfect fit in the 80x80 tent, it's exceptionally light and wickedly bright. Here's to hoping the plants benefit from a few conscious upgrades 😊
No watering today as media still damp, plants looking healthy and pushing out more leaves every time I check them. Hopefully we are doing well so far!
Sunday 3rd December
Plants are continuing to grow well, I do think the new light has made a good difference to them! Have made a point of swapping the pots left to right and rotating the plants to make sure they get even light coverage. Using the extractor and carbon filter now as the plants have started to give off an aroma. Going well and nothing seems to be struggling, I'll keep doing what I'm doing and follow my feed schedules. See you tomorrow!
Monday 4th December
Plants looking great again. After doing research decided to go up to my 11L pots in plenty of time to prevent as much stress as possible. Surrounded the old fabric pots with coir, surgically removed the old 7L pot with a razor blade and lifted it out ever so carefully. Went super smoothly, the roots are nowhere near the outer edges of the 7L pots anyway so they just slid out with minimal disturbance to the plants or the substrate around them. I hope this was successful as I took extra care and followed some good guidance. Lightly watered to encourage the roots to their new home, fingers crossed they hardly noticed what happened and have minimal stress as a result, but I'm expecting growth to slow as a result and I'll take it nice and steady from here.
Tuesday 5th December
Checked the plants at 7am before work and they looked very sorry for themselves. Droopy and exhausted looking, I spent the whole day at work convinced I'd come home to two dead plants from transplant shock. Instead I've come home to two ladies that have stretched their legs and grown even more! Super relieved, let's see how they go this next few days with more space to root in to 😁
Wednesday 7th December
Plants are doing great! Spreading out and growing really well, the soil was bone dry when I checked them at 7pm so I mixed a fresh batch of nutrients up and gave them a steady watering. Lots of new leaf development, I'm really happy so far 🙂
Thursday 8th December
Came home from work to lots more growth, as a first time grower it's absolutely amazing just how fast these things grow! They don't seem to be struggling at all and I'm being really careful watering them.
I have also introduced a cheap 2L humidifier for the tent, running it on low to see how it affects the overall humidity as it keeps dipping low. It's winter here so really dry with central heating.
I guess we keep going as we have been and see what week 3 brings us!

Likes
42
Share

@rhodes68
Follow
Four plants in all eventually
1/31 First of the Bond harvests, Pussy Galore first of the FFT-7s, two more follow.
Pussy Dry weight 312 grams
3/5 Holly 665 grams wet into dry - dry 98 grams
Two more F7s to go
3/25
Pussy-1 clone yields 1107 grams wet in dry --- dry yield 181 grams
One FFT-7 Remains Pussy-2 buds look a bit larger
3/28 Pussy-2 wet weight 1295 grams in dry. 242 grams dry. This concludes the FFT-7 harvests

Likes
24
Share


@FrostyCloudzz
Follow
Diese Woche haben sich nochmal schön Knospen und Nebentriebe gebildet sie schlucken viel Wasser und sie machen sich gut hoffe die Knospen werden fetter.
Werden bald anfangen zu spülen

Likes
3
Share


@SupaDank
Follow
Moved to 5 gallon bucket for a bigger root ball.
Buds are starting to swell and doing fine. Pictures are from Feb 20th day 29 of flower. Moved the White Widow and Royal Gorilla out of the 4x4 tent so the Critical has more room to move around.


Likes
25
Share


@7THBEZ
Follow
PLEASE 🙏🙏🙏**** NEED SOME SPONSOR FOR LIGHTING ****🙏🙏🙏
Could i show you about what lighting i use?😭
it is a combination of 5 LED bulbs,,,,,😂👉😍
it should be the last week , maybe 👍😘
so , i only water6.5PH with no any nutrient😂
love that nice berry smell and nice purple 👉😍
thank you for watching 👊
hope all of you enjoy , see ya✋