
Likes
Comments
Share


@RickJames_Mcdank
Follow
As soon as she is dried aftyer 10 to 14 days I will provide more info on this train. 😎
****UPDATE****
So she cured for 10 to 13 days. man she smells so sweet.
The effect is good its a clear cerebrale high. Good for in the morning and you wont get lazy or slow.00

Likes
4
Share


@Grow_bob
Follow
Vorgestern hesi Dünger gegeben Heute nur Wasser und Supervit das in 2 tage nochmal und in 4 Tagen weiter düngern mit hesi

Likes
14
Share

@TrichoWitchka
Follow
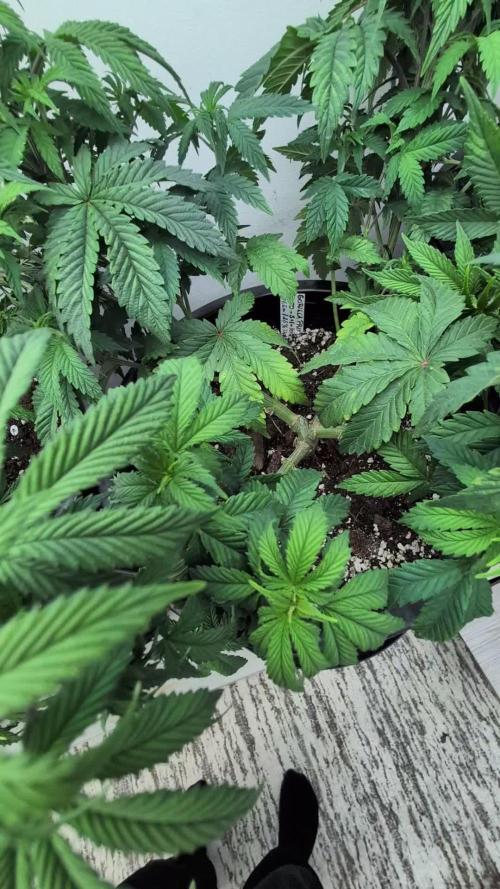
Cawte,dnes 1.12. nam zacina 7.t fotaky a 4.t auta.🙂🌱 .Hnojim kazdu druhu zalievku (kazdy 4den). Teplota 24-26st. Vlhkost 65-67%. No a konečne dostali novú frizuru🤣✂️. Dufam ze sa im to bude pacit a nezmyslia si nahodit z trucu los bananos😁🍌 lebo bude adios amigos sekeros

Likes
9
Share


@Silverlok
Follow
Hey guys,
Nothing special happened.
They are still looking fine and doing a good job!
As you can see, i lollipopped them yesterday. Maybe a little bit too much! :D But i think its okay
Greetz
Likes
59
Share


@AsNoriu
Follow
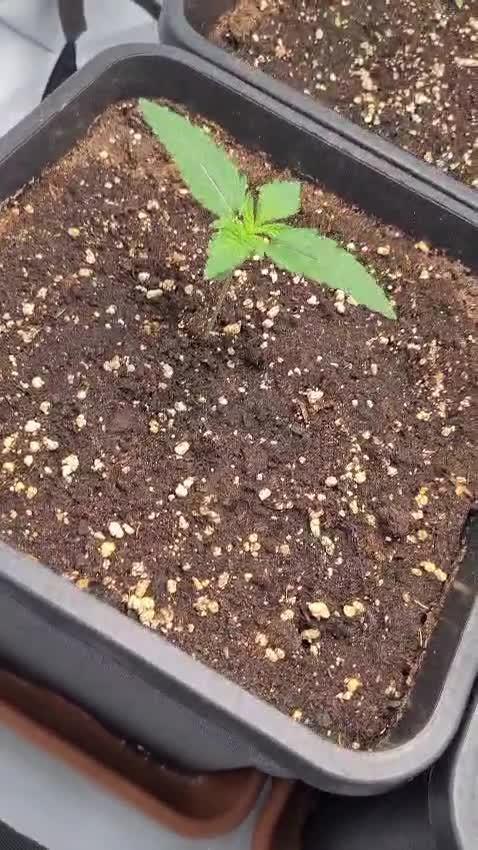
Day 1. She is out !!!! Let's all stupidity start NOW ;)))
Still have no pH up down, just boiled water, 7.4 pH ;)))))
So , because life is so unfair, I decided to cheat from time to time, think all evenings she will spent under 12W table light ...
Simple Lux meter app shows 1000 lux during day ;)))) under table light I get 8000-10000 reading ;))) easy cheat, no regrets !!! ;))))
Evening. Girl is getting green colour, but slowly, still worried about pH... let's see ...
Day 2. Gave 0.5g of BioSys from Ecothrive and 7 ml of 6.3 ph water
Day 3. At 18 pm lost all electrics at home, she spent 22 hours without light, +11 at night, +16 during day ....
Day 4. Mycelium is here !!! She looks nice !
Day 6. 20ml of 6.3 ph . Looks nice, just lanky, bought fan too ;)))
Damn math getting higher... 3 seeds + 11£ for ph+-, 3.50£ for BioSys, now 12 for fan ... Plus couple pennies for nutes.
Electrics at home included into rent, so light and fan run for free, hope she wont stink a lot ;))))
Happy Growing !!!

Likes
4
Share


@sunnykuyall
Follow
04 - 07 May 2023 - Germination Week
08 - 14 May 2023 - Veg week 1
15 - 21 May 2023 - Veg week 2
22 - 28 May 2023 - Veg week 3
29 - 04 June 2023 - Veg week 4
05 - 11 June 2023 - Veg week 5
12 - 18 June 2023 - Flower weel 1

Likes
10
Share


@sunshinegroww
Follow
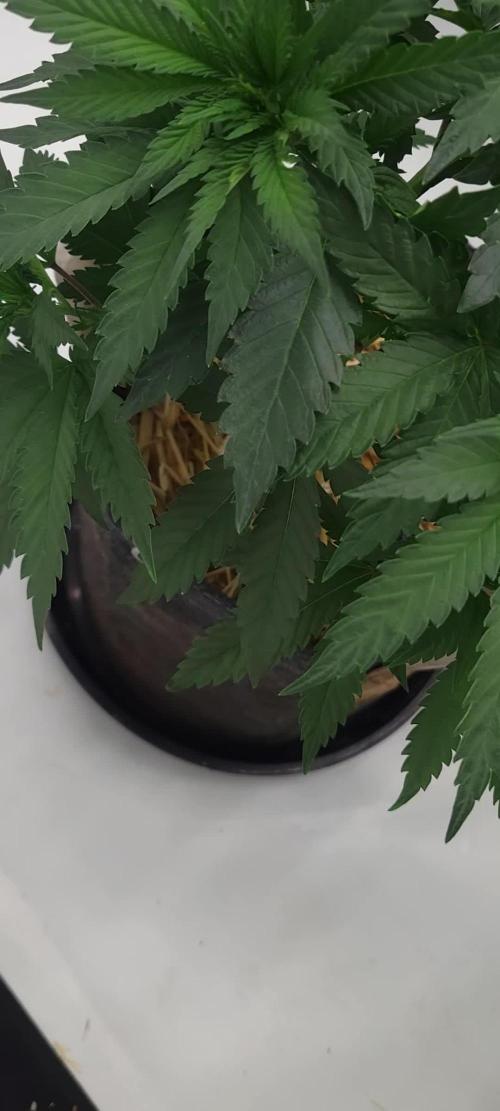
Shes just growing and growing biggest of all so far looking nice and heal

Processing
Likes
Comments
Share


@8_SafeMode
Follow
The weather is very important in making flowers💪🏽Then will report again💚

Likes
189
Share


@Green_Man_420
Follow
Evening fellow growers hope you all had a great weekend. Massive shout to James @RQS for supplying the beans for my current grow.
⚠️ I add photos as the week progress so please stop by and check out the progress.
Day 29 the start of week 5, we have entered flower. Let’s hope for some stretch now. Really happy with how they are progressing. Still trying to figure out why the big one at the back is looking sad. She is growing at a rate of knots so I’m bamboozled to say the least! Watered last night will introduce some flower nutrients this week.
Day 31, watered today upped the amount to 1 litre also started with some bloom. Will add some photos either day or tomorrow. ✌️
Day 32, nothing to report just letting them do their thing. 👊🏻
Day 35, not been a good couple days. The dodgy looking one at the back is no longer part of the crew. She tried and I gave her all the best help I could but she just stopped growing. The bud sites were like nothing I have ever seen before I really don’t know what happened. The other mimosa is doing fine. She is stretching and the bud sites are looking good. Watered last night with plain water. Will probs give her one more feed of grow then onto the bloom. ✌️
Once again thank you all for the love and likes on the current diary. ✌️
Likes
3
Share


@DeepSouthDank
Follow
Pheno number #1 is white and smells like sweet exo cheese, great smoke and effect too. The rest are pretty good too. 3 and 4 lacking terps. very woody..
Great grow all in all. about 35g of premium bud per plant.
Happy growing!


Likes
58
Share


@m0use
Follow
The time is finally here to post the harvest. I waited till it was all done and dry before updating the dairy so will add in the dry weights next on the 2nd half of the harvest entry.
I enjoyed this plant a lot, its grew well and loved how it was shorter and fatter. I wonder if it was at the dame distance from the plant if It could have done even more. Had some issues with the yellowing that was happening on the other plant in this tent. I should have treated this faster with a flush but was super reluctant and it may have hurt the yields a bit. The top best looking buds looked and smelled amazing even the lower buds where doing well not so larfy like the other plant.
There was crazy strong smells with this plant, sour berries and hints of lemon, it was a best smelling plant I have grown to date. This would be a great plant to grow for beginners, cant take a lot of stress and still produces quite well and even on lower wattage leds it was good. It was not the most crystally looking plant, not like the maltezerz but still had some finger hash buildup but a small amount. I feel this plant would be a winner for a rosin press.
I don't plan on growing this strain out again despite me liking a lot of qualities about it. I'm only trying to grow cbd dominate plants is the main reason. If my friends really like this I have some clones so can always give them some. Speaking of clones they are doing well outside, greened up a lot and showing signs of revegging.
Took some photos of the weed hang drying on day 1 in the tent and a week later to show how much they shrink.
Only some of the lower growth is larfy, will make good edibles or hash, that will be a fun project to do and may include that in my projects diary.
That's about all I can think of if you have any questions just ask.
m0use
Disclaimers:
1. I have divided the total watts of light in half, 300w(150w) for this diary. It will accurately reflect the g/w ratio as the two plants growing in this tent are listed in two separate diaries.
2. I include any shake/trim in my gross totals as I use them to make edibles.
3. I did not follow any proper ways of listing my nutrients. Some are ml/l of total solution watered, others ml/l of total medium and some are just the total amounts I added, not as a ratio.
If you have any questions let me know!
+++++++++++++++++++++++++++++++++++++++++++++++++++++++++++++
Cost + Time Analysis Of Growing Cannabis. m0use’s Breakdown
+++++++++++++++++++++++++++++++++++++++++++++++++++++++++++++
Light Schedule
===
Veg [Dec 18th 2021 - Mar 11th 2022]
18h on 6h off - 6am-12pm
Flower [Mar 12th 2022 - May 10th 2022]
12h on 12h off - 9am-9pm
This is extra tricky this harvest as I went through 2 different hydro rates in three different periods, plus a veg and bloom switch between them.
Mon-Fri are TOU rates, all weekends are off-peak pricing all day.
Off Peak = 7pm-7am + all weekend
Mid peak = 11am-5pm
On peak = 7am-11am + 5pm-7pm
TOU rates:
Dec 18th 2021-Jan 17th 2022
Cost of kwh with on-peak "17.0c", mid-peak "11.3c" and off-peak "8.2c".
Jan 18th 2022 - Feb 7th 2022
Cost of kwh with on-peak "8.2c", mid-peak "8.2c" and off-peak "8.2c".
Feb 8th 2022 - Current
Cost of kwh with on-peak "17.0c", mid-peak "11.3c" and off-peak "8.2c".
—
Dec 18th 2021-Jan 17th 2022
Weekdays “21 days”
6am - 7am -- 1hr @8.2c/kwh off-peak
7am - 11am -- 4hr @17.0c/kwh on-peak
11am - 5pm --6hr @11.3c/kwh mid-peak
5pm - 7pm -- 2hr @17.0c/kwh on-peak
7pm - 12am -- 5hr @8.2c/Kwh off-peak
Weekends “10 days”
6am - 12am – 18hr @8.2c/kwh off-peak
6h @17.0c/kwh
6h @11.3c/kwh
6h @8.2c/kwh + [email protected]/kwh weekdays/weekends
—
Jan 18th 2022 - Feb 7th 2022
Weekdays “15 days”
6am - 7am -- 1hr @8.2c/kwh off-peak
7am - 11am -- 4hr @8.2c/kwh on-peak
11am - 5pm --6hr @8.2c/kwh mid-peak
5pm - 7pm -- 2hr @8.2c/kwh on-peak
7pm - 12am -- 5hr @8.2c/Kwh off-peak
Weekends “6 days”
6am - 12am – 18hr @8.2c/kwh off-peak
18h @8.2c/kwh + [email protected]/kwh weekdays/weekends
—
Feb 8th 2022 - Harvest
Veg
Feb 8th - March 11th 2022
weekdays “24 days”
6am - 7am -- 1hr @8.2c/kwh off-peak
7am - 11am -- 4hr @17.0c/kwh on-peak
11am - 5pm --6hr @11.3c/kwh mid-peak
5pm - 7pm -- 2hr @17.0c/kwh on-peak
7pm - 12am -- 5hr @8.2c/Kwh off-peak
weekends “8 days”
6am - 12am – 18hr @8.2c/kwh off-peak
6h @17.0c/kwh
6h @11.3c/kwh
6h @8.2c/kwh + [email protected]/kwh weekdays/weekends
—
Flower
March 12 - May 10th 2022
weekdays “42 days”
9am - 11am -- 2hr @17.0c/kwh on-peak
11am - 5pm --6hr @11.3c/kwh mid-peak
5pm - 7pm -- 2hr @17.0c/kwh on-peak
7pm - 9am -- 2hr @8.2c/Kwh off-peak
weekends “18 days”
9am - 9pm – 18hr @8.2c/kwh off-peak
4h @17.0c/kwh
6h @811.3c/kwh
2h @8.2c/kwh + [email protected]/kwh weekdays/weekends
—
Total hours in each peak period
126+144+168 = 438h @17.0c/kwh
126+144+252 = 522h @11.3c/kwh
306+378+288+300 = 1,272h @8.2c/kwh
Lights
===
LED’s I use are 48w and 18w, per stick, they are arranged on an array totaling 300w.
6400k 18w*6 = 108w + 3000k 48w*4 = 192 108w+192w=300w | 300w/1000 = 0.3Kw
* note I am using 150w as stated in my disclaimers to account for the missing plant in a separate diary.*
Using the previous c/kwh numbers above I can find out the total cost of the lamps in the 3 peak periods. I converted the cents into dollar amounts beforehand to avoid dividing by 100. 8.2c/h = 0.082$/h
438h * 0.17c/kwh = .46kw * 0.15kw = .17 on peak
522h * 0.113c/kwh = .99kw *0.15kw = .85 mid peak
1,272h * 0.082c/kwh = 4.30kw *0.15kw = .65 off peak
The "h" hours and "kw" kilowatts cancel out and we are left with a value of $ dollars per peak period, add all the peak periods up and you get your total cost of running the lights in dollars.
.17 + .85 + .65 = .67 for the grow light only.
My light grew for 20 weeks and 4 days, or 144 days. almost 21 weeks total.
.67 / 144d = 0.2477$/d average of about 25c a day in electricity
337.2kw for the entire grow.
Using the regular calculation of grams harvested divided by watts used is not accurate to me, it does not account for all the time the lamps are on, the length of grow to the over all cost. The calculation that makes sense to me is this, harvested dry weight of usable cannabis buds/trim/keif/whatever in grams divided by total kw used. Could also combine it with grams per total single use costs “anything you used only for this grow and wont reuse in the next, or fractions of multi use items like fertilizers if they ½ full” and see how much you’re investing per gram.
"kw" ÷ "g" = kw/g
"$" ÷ "g" = $/g
I have harvested 4.57oz or 129.6g on 337.2kw.
337.2kw ÷ 129.6g = 2.60 kw/g of usable cannabis. This is not an ideal ratio for me and looks like a lot of energy waste happened from the extended veg period.
.67 ÷ 129.6g = 0.28c/g
It cost 28c/g when comparing total electricity cost to gross yield, almost identical to the comparison of total electrical cost to the number of days in the grow 25c/day.
Neat!
legend,
kwh = kilowatt per hour
kw = kilowatt
w = watt
h = hour
c = cents
$ = dollars
d = day
LED= Light Emitting Diode

Likes
Comments
Share
@Thegrungegsx11
Follow
Week 6 for these ladies. They are nice and healthy. The MAC in Alien Icicles lineage is shining through. A bit of a slow grower and is compact. We'll see what the stretch is like. She has stretch in her genetics so it could get interesting. Guillotine Gas is showing good vigor and growth. I will flip them to flower in a week or so.
Likes
7
Share

@BtownOrganics
Follow
06.09. Sprayed the soil a bit with around 100ml water for each plant.
07.09. 200ml water for each plant.
08.09. 200ml water for each plant. First time used a bit of Bio-Grow (0,4ml/1l).
09.09. Sprayed the soil a bit with around 100ml water for each plant.
10.09. 200ml water for each plant with Microbes.
11.09. 200ml water for each plant with CalMag, Heaven and Acti Vera.
12.09. Sprayed the soil a bit with around 100ml water for each plant.


Likes
25
Share


@Spike_KCanG
Follow
A couple of problems arose with my two newest grows so I thoroughly checked the compost pot and looked if the worms were okay.
After harvesting the GDP, I wanted to throw out her soil. It had been used two runs and I have no place to reuse it outside. Did my best and sifted through the dirt looking for her worms. Found only six 😔. Four adults and two adolescents who were just getting their red color in.
This was not a good sign. The worms were obviously not reproducing enough to keep up a colony, and that was most likely due to the soil ph. Don't have the instrument to measure it, but as my ph meter was broke the past two weeks.... 😅😅 Time to check in on the Vermicompost and see if they are still 'grinding'.
-----------------------------------
April 17
Last picture I have of her soil structure.
-----------------------------------
April 23
Took that thing apart!!
It must have took 3 hours to sift through all the soil, rip up bark coco and what not. sift out the worms and keep them moist, but it was finished.
I don't know how many worms there are but it's a good handful. About the same amount I put in there in the beginning. There were also perhaps 20 or so eggs that caught my eye. These are good signs!
After the manhandled soil was put into an other pot, I drowned her with 12L of dechlorinated tapwater (thanks to Envi Chlorine Clear!!).
BioDown to 6.3 ph + 0.2g/L Microbes.
I don't know how many liters of water ran off, but that soil is definitely at 6.3 now...
.. and the sewage pipes might be clogged 😅😇😂
Let the pot set to dry, at a tilt. Changed position every 5 minutes or so, about 2 hours long. Hopefully all the excess water is out!
Introduced the Army of Wiggles to their new accommodations and said good night.
There are probably still remnants of BioBizz nutrients in the soil, and I'm too lazy to flush again. Won't start her on the new microbial food until I'm sure the Living take hold of this environment. Coming from a possible 7.5 down to 6.3ph might be an adjustment.
I'll check the topsoil in a week or so and see how the Living are getting along.
-----------------------------------
Thanks for stopping by 👊
See you with the next update!


Likes
62
Share


@KellosaurusGrows
Follow
This girl was definitely one of the best looking plants I’ve ever grown, also outpaced all my other plants and didn’t have any problems like my others did Fast buds has clearly done a good job with the purple lemonade line huge yield this time at 138 grams plant finished around 34 inches from pot
Likes
50
Share


@Fibro_Witch
Follow
It was a good week for Night Nurse👍
Now that they're in the ground they're doing much better and putting out more growth.
The one on the end could have better color, since her new growth is a bit yellow. I gave her an extra feeding last night after I transplanted some Calendula into the bed since it's a good pest repelling companion.
We're getting some much needed rain today🙏
Otherwise there's not much else to report!
Update 6/26- I totally forgot to add that on Monday the garden got a spraying of horn manure. Horn manure is a biodynamic preparation of cow manure that's been fermented in a buried horn. This results in a material that's teeming with beneficial flora and fauna for the soil. Ideally it would be sprayed prior to planting in the spring as it encourages healthy root growth. I purchased the pre-potenized so that I only had to spend 20 mins stirring rather than an entire hour. That would have been brutal😵
I sprayed it at night when the earth is breathing in and used a spruce bough to sprinkle it over the plants in the garden. The extra icing on the cake was that there was a rain the day before, and another the day after I sprayed so it was well watered in.