


Likes
4
Share


@Demaro
Follow
The ph in the soil is very low, causing the plant not to grow at all, very sad.<font style="vertical-align: inherit;"><font style="vertical-align: inherit;">😅</font></font>

Likes
2
Share


@AZTERPHUNTER
Follow
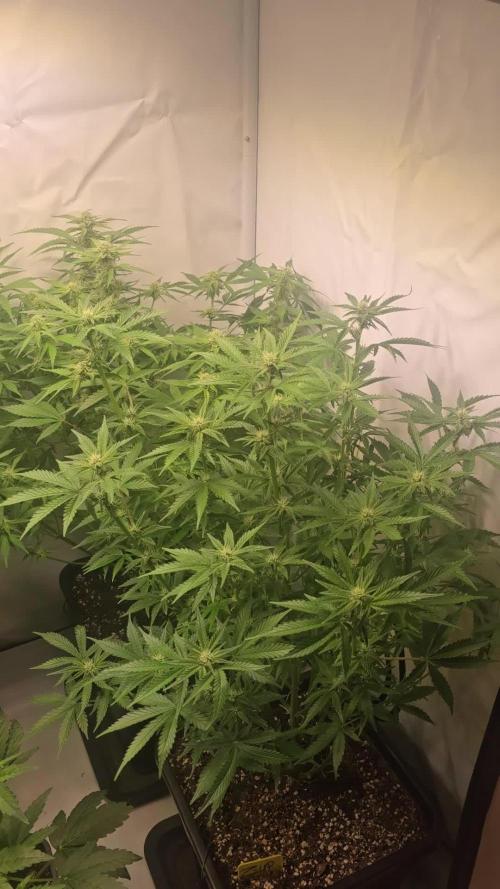
Little closer missed couple weeks but nothing really new yet just waiting to fatten up


Likes
5
Share

@ThatsmyGrow
Follow
It took a really long time for it to flower, but after 2 weeks it's already quite far along in flowering.
Processing
Likes
6
Share


@ladyjane
Follow
6/29 - 4 days after I gave everyone the compost tea, the Jack Herers have sprung back to life! The compost tea was a literal life saver. Just a few days later and her leaves have smoothed out, there's virtually none of that glossy, dark green, twisted and gnarled growth. They are looking great!
6/30 - Top dressed all with Uprising Grow and Uprising Foundation
7/1 - Today I did a little selective defoliation on the Jacks. They are looking stronger and stronger each day.
7/2 - Today was feeding day. Gave them a dose of their regular nutrients. They are very happy!
7/3 - Added some red wigglers today! I ordered some Red Wigglers from Uncle Jim's Worm Farm and they arrived today. I added about 10 to each pot then moistened the soil a bit with just RO water pH to 6.6. I can't wait to watch them do their thing!

Likes
97
Share


@JieGrow
Follow
The girls are coming on a treat! These are the type of girls you could strip down to near enough naked and the next day they look bushy as again👌🏼😏 this would be ideal but since we are scrog'in it's proving a bit difficult so unsure if we are going to go for a true s.o.g or use it just to create space ! The girls are coming along great and are brilliant to grow - 4 out of 5 of the girls are spot on! The middle one , is around 30cm smaller and taking her time! But apart from that super skunk is spot on! Flowers have started popping through everywhere so looking forward too seeing the profession over the upcoming weeks 😁
Happy growing 🤗😎

Likes
6
Share


@HappyPetals
Follow
So far so good. Heatwave is back and they are loving the humidity. I've needed to water a bit more often, ever other day due to the heatwave.
But now we are forecasted to have rain for the next few days. Should be a nice relief.
The one I had topped almost 2 weeks ago is still doing well. She is must shorter than the untouched one as expected. I have also tied down the bottom branches; experimenting with LST and so far she's responding well and adjusting.

Likes
22
Share


@UnorthadoxDude
Follow
Hey! Welcome to week four for Misty, a mystery auto from FastBuds.
I update daily so go check last week which is now complete. :)
Day 22: I have reconfigured the tent - see video for new config. Misty has more light now. Fertigated 2l.
Day 23: I have heavily pruned the companion plants and performed some LST and defoliation (where big fan leaves block nodes, or are in the way). Pretty radical looking changes, brutal perhaps. I did it to Nesia last week and she responded very well. So let's see how Misty handles it. I have been doing increasingly tough LST since Day 7 in preparation for this brutality so she should bounce back.
Day 24: See? :)
Day 25: Misty had breakdrought at 0900. Fertigated approx 4l.
Day 26: Trying to wait a week before further training.
Day 27: Did a little gentle LST and took off 2 leaves. Didn't manage to wait a week only 4 days.
Day 28: Fertigated 5l.
Likes
86
Share


@DogDoctorOfficial
Follow
Greetings, fellow cultivators and green enthusiasts! Week 9 of our Apolo F1's cosmic journey has unfolded with a sense of anticipation and reflection as we approach the long-awaited harvest. Join me as we delve into the depths of this extraordinary odyssey, celebrating the growth, discovery, and botanical brilliance that has defined our journey thus far.
Nine weeks ago, we embarked on this botanical odyssey with a tiny seedling filled with promise. From those humble beginnings, our Apolo F1 has blossomed into a majestic specimen, a testament to the power of cultivation and the wonders of nature. Each week has been a chapter in our shared story of growth and discovery, filled with moments of triumph, challenge, and unwavering dedication.
As we stand on the cusp of harvest, we are surrounded by a sea of vibrant blooms, each one a testament to the meticulous care and nurturing environment we have provided. From the delicate tendrils of her infancy to the lush canopy of her maturity, Apolo F1 has been a beacon of botanical brilliance, inspiring us with her resilience and vitality. The floral symphony she has orchestrated fills the air with its intoxicating aroma, a fitting tribute to her journey of growth and transformation.
In celebration of this momentous occasion, I have curated a special photoshoot showcasing the beauty and wonder of Apolo F1. From evocative images of swirling smoke to captivating glistening trichomes, each photograph captures a glimpse of the magic that has unfolded before our eyes. These images are not just snapshots; they are a reflection of the passion, dedication, and love that has gone into nurturing our green companion every step of the way.
Throughout this journey, I have incorporated enzymes into our watering regimen, recognizing their role in promoting healthy soil and ensuring the vitality of our plants. As we prepare to harvest, I am mindful of the importance of nurturing care and sustainable practices, knowing that the soil we tend today will nourish the gardens of tomorrow.
As we stand on the brink of harvest, I am filled with a profound sense of gratitude. To Aptus for crafting the nutrient symphony that fueled our journey, to Royal Queen Seeds for providing the genetic star of our green opera, to Grow Diaries for their unwavering support and camaraderie, and to the entire community for sharing in this remarkable adventure. Together, we have proven that with dedication, passion, and a touch of magic, anything is possible in the world of cultivation.
Join me in the final chapter of our Apolo F1 Mission Diary, where we'll witness the culmination of this extraordinary journey and celebrate the harvest of a lifetime. Until then, may your gardens flourish, and your green endeavors be ever blessed by the spirit of growth, discovery, and botanical brilliance.
#aptus #aptusplanttech #aptusgang #aptusfamily #aptustrueplantscience #inbalancewithnature #trueplantscience #rqs #ApoloMission #MoonHarvestAdventure #playwithlego #lego #legotime #legovideo #tothemoonandback
More info and complete updates from all my adventures can be found - link in the profile description
Friendly reminder all you see here is pure research and for educational purposes only
Growers Love To you All 💚💚💚

Likes
11
Share


@XoticGROW666
Follow
DAY 28 of Flowering 🌸🌼
Dense small buds delicious terps comin off her 🍉🎂


Likes
3
Share


@TS_Greens23
Follow
This grow is stretching out a Lot longer than I anticipated,,, but goes to show that good things take good time ,,and this girl doesn’t want to leave any stones unturned,,packing it on top to bottom,,,😉😁🙏💚💚💚🇦🇺
Likes
3
Share


@Adam420
Follow
Long flowering due to minor reveg.
Bouncing back well and should show true colors by next week


Likes
9
Share


@GetTheGat
Follow
I have no idea how to weigh the grow wet ....and its still drying ..... tried a piece for a test ....... its very satisfying the first taste and feel of your first grow ...... Im actually giggling ATM .....I just beside myself ....cuz I figured Id end up doing something terribly wrong . it was surely nerve racking wondering ...whats it suppose to look like ...what im i suppose to do when where how ..... and so many ways to skin the cat ! I am very thankful to All the people that offered advice and criticism ....it was so appreciated and I learned so much. From the bottom of my heart Thanks Guys .. Cheers ...... I will update the finished weight when its dried ....... Happy growing everyone .............. I Love All the Diaries in here ....so much Talent ..... Peace ! 😎😏 😜

Likes
33
Share


@TeknoRanger
Follow
🌱 Sour Apple⠀⠀⠀
🌸 flowering 9 weeks⠀⠀⠀⠀⠀⠀
💚 70% Indica, 30% Sativa⠀⠀⠀⠀⠀
💣up to 27% THC⠀⠀⠀⠀
👅Apple, lemon⠀⠀⠀
⚖️ 550g/m²⠀
Sour Apple was created by an intersection of the original Sour Diesel and a Pure Kush. It is an indica dominant hybrid with a combination of both indica and sativa effects. It has an delicious intense taste of sour apples and lemon and a gigantic potency.
The rockhard buds are covered in a thick layer of milky white trichomes and are packed with sweet resin. Users describe the high of the sour Apple as a strong mental shift, a uplifting head high that leaves you motivated and focused with a sense of overwhelming euphoria and social tendencies. This is followed by a slow fade into an intensely overwhelming couch-lock. Sour Apple sends her 27% of THC stright to your mind to kick you in other psychedelic spheres. We proudly present this unique goddess to all the growers in the world.
GROWING SOUR APPLE
When growing indoors it is a good idea using screen of green or sea of green methods. You can expect big yields of 500g or more per squae meter indoors, 700g per plant outdoors. The flowering time is 9-11 weeks. Indoors, Sour Apple is a vigorous grower with many side stems which can be trimmed to keep the plant in bounds. Indoors, the plants grow between 1,00-1,50 m depending on the introduction of the flowering phase, outdoors Sour Apple can reach four metres of hight.
MEDICAL USE
Because of its strong effects Sour Apple is an ideal strain for treating patients who suffer from conditions such as chronic stress or anxiety, chronic pain due to injury or illness, and sleep disorders (insomnia and sleep apnea). In low doses it is daytime suitable for medical applications, at higher doses, it is the ideal weed for medication at the evening.

Likes
142
Share


@MadeInGermany
Follow
Hi people 🤗
A lot has happened this week 😄
The 3 Blue Cheese and 2 Kosher Tangie Kush which have been in the flowering tent for 1 week have become very bushy 👍
Unfortunately I just noticed that I completely forgot to take pictures of the Blue Cheese Phenotype # 3 🤦♂️🏻
The picture will be given later.
The rest of the Vegi tent is also progressing very well.
They are repotted in 11 liter pots this week, and then come to the flowering chamber die the following week
The next week there will be new pictures, until then I wish everyone a nice start into the new week 🙏🏻💪🏻
Let it grow 🍀🌱


Likes
17
Share


@Naujas
Follow
This is my second growth in a suitcase, I got 30 grams of dry flowers from the first growth, but this growth together with FastBuds is obviously much better than the first one :) although the girl's leaves burn from the light, which is only 10-15 cm from the flowers, but the girl copes with it perfectly :) good luck to everyone.


