


Likes
11
Share


@StartGrowingShxt
Follow
Week 15
May 21
-ladies are still swelling all but the grapefruit pheno but she is frostier than the rest so good with the bad I guess hopefully she just takes longer to finish
-just been ferments with recharge mostly and been doing well alternating between top and bottom watering and watering every other day
-light burn and possible calcium deficiency on one plant but she’s the chunkiest girl and might finish before the rest
-smooth sailing other than that
Likes
82
Share


@PapaNugs
Follow
Big week here. Got the girls transplanted to their 7 gallon pots. First time with pots this big. Gonna really let them grow. Got a little water with BT and mycorrhiza.
Likes
5
Share


@ROY4L_GU4RD
Follow
Week 6 here and I'm going back to the 6/9ml macro/bloom amount. What do yall think so far? A little over halfway at this point.

Likes
51
Share


@Corwinism
Follow
WEEK 16 - (06/13/2021 - 06/19/2021)
Week 8, Day 50 - FLOWER: 06/13/2021
After inspecting the trichome development for the last 7-10 days or so, I’ve decided that today would be the ideal time to begin flushing. The American Pie #1 does not look like it’s ready to begin flushing quite yet, as she appears to be about a week behind in maturity. Despite that, I’ll still begin flushing her today too.
Recycled water: 70ppm, 69℉
+ pH Up: 7ml
Mixture: 95ppm, 6.4 pH, 69℉
ppm/ppm = runoff/soil
JB#1 - 895/800, 6.1 pH
AP#1 - 529/434, 6.5 pH
AP#2 - 365/270, 6.7 pH
GC#1 - 624/529, 6.3 pH
--------------------------------------------------------------------------------------------------------------------------------------------
Week 8, Day 51 - FLOWER: 06/14/2021
Did a trichome check on the plants today. Spent more time with the Jelly Banana to better determine her maturity level. She actually looks like she is ready to harvest today. I’d say trichomes are 75-80% milky, with an amber trichome here and there.
I’m going to try and push her through at least one more low-ppm watering and test the runoff. If I start seeing more amber trichome development, I will cut her down.
--------------------------------------------------------------------------------------------------------------------------------------------
Week 8, Day 54 - FLOWER: 06/17/2021
Recycled water (8 gallons): 69ppm, 5.8 pH, 70℉
+ HydroGuard: 8ml
+ pH Up: 3ml
Mixture: 82ppm, 6.0 pH, 70℉
ppm/ppm = runoff/soil
JB#1 - 688/606, 6.5 pH
GC#1 - 602/520, 6.5 pH
AP#2 - 633/551, 6.9 pH
AP#1 - 685/603, 6.5 pH
--------------------------------------------------------------------------------------------------------------------------------------------
[SUMMARY]
I expect this to be my last full week of flower. All the girls are looking ripe for the chopping.
The aroma that bursts out of the tent when I unzip it every time is heavenly. American Pie #1
is still about a week behind in maturity, but she will get cut down with the other plants
regardless. Jelly Bananen started to turn a lime green color so she'll probably get chopped
and hung up in the next few days when my second tent arrives (4x2 AC Infinity).
That wraps up this week! See you ladies and gentleman in the next entry. 🙏


Likes
19
Share


@GoldenWeedGrower
Follow
Legend
Timestamp: 📅
EC - pH: ⚗️
Temp - Hum: 🌡️
Water: 🌊
Food: 🍗
pH Correction: 💧
Actions: 💼
Thoughts: 🧠
Events: 🚀
Media: 🎬
D: DAY, G: GERMINATION, V: VEGETATIVE, B: BLOOMING, R: RIPENING, D: DRYING, C: CURING
________________________________
📅 D56/V49 - 10/01/24
⚗️ EC: 1.1 pH 7.2
🌡️ T: 23 °C H: 58%
🌊
🍗
💧
💼
🧠
🚀
🎬 Added Time lapse video
________________________________
📅 D57/V50 - 11/01/24
⚗️ EC: 1.1 pH 7.2
🌡️ T: 23 °C H: 58%
🌊
🍗
💧
💼 Big Defolation and LST
🧠 Preparation for blooming stage
🚀 Finally she has her space back, so all the grow box is for her 😊
🎬 Added 4 pics
________________________________
📅 D58/V51 - 12/01/24
⚗️ EC: 0.9 pH: 7.6
🌡️ T: 23 °C H: 58%
🌊 Added 4L
🍗 Added Bud Candy - B52
💧
💼 Added ScrOG net. Defolation and LST to prepare the blooming stage
🧠 Blooming mode almost ready
🚀
🎬 Added Time lapse video and 1 pic
________________________________
📅 D59/V52 - 13/01/24
⚗️ EC: 0.9 pH: 7.6
🌡️ T: 23 °C H: 58%
🌊
🍗
💧
💼
🧠 pH is rising too much, but I'll not adding nothing for now
🚀
🎬 Added Time lapse video
________________________________
📅 D60/V53 - 14/01/24
⚗️ EC: 0.9 pH: 7.4
🌡️ T: 23 °C H: 58%
🌊 Added 6L
🍗 Calmag - Grow A-B- B-52 - Bud Candy
💧
💼
🧠 It's time to bloom triggering, in the next days I'll change the water for flush and bloom nutes
🚀
🎬 Added Time lapse video
________________________________
📅 D61/V54 - 15/01/24
⚗️ EC: 0.1 pH: 7.4
🌡️ T: 23 °C H: 58%
🌊 RES Changed 💦💦💦. Flushing until tomorrow
🍗
💧
💼 Passed lights to 12-12 (21.00 ON and 09.00 OFF)
🧠
🚀
🎬
________________________________
📅 D62/V55 - 16/01/24
⚗️ EC: 0.1 pH: 7.4
🌡️ T: 23 °C H: 58%
🌊 Flushing almost finish, all is ready
🍗
💧
💼 Made some LST
🧠
🚀 Let's BLOOMING !! YEAHHHHHH 🎉🥂
🎬

Likes
Comments
Share


@DruidaDeJah
Follow
Este 27 las paso a floración.
Me faltará espacio?
Agregaré un nuevo sistema por goteo.

Likes
4
Share


@Forrbiddenterpz
Follow
Moved the rest of my autoflowers to my 4x4 tent on 3/21/23 they will be under a 12/12 light schedule until my last photo period plant finishes up

Likes
23
Share


@Piorkeed
Follow
Eighth week of flowering started.
I've changed the water into the pots. I will continue with the same nutrients ratio (more bloom and micro, less grow). The fan is turned three hours on, one off. Inkbird parameters are unchanged (20° -3° H +2°C). Plants are healthy, bushy and tall. Light power @ 100%. Extractor @ 100%.
D49: changed the water into the pots. Added 15 ml grow, 30ml micro and 40ml bloom. pH@6 EC 1.2
D52: plants are drinking and growing a lot, today I've added 3 liters of water to each pot. The #1 reached the maximum height I can manage with my little tent, I cannot raise the light any more than this.
D55: the plants grown a lot reaching the top of the tent. Lesson learnt: only one plant in hydroponics for this tent

Likes
77
Share


@Basementganja
Follow
I love the sativa shaped nug-towers! When my plants grow big, I like to grow them until the very end of their cycle! That's why the extended flower period.
Video of Measurement of yield: T=Tops(92grams), M=Mids(59.1 grams), L=Lowers(58.6grams)
Total: 209.7 grams (1-2 grams worth, was taste-tested prior to scaling.)


Likes
37
Share


@DogDoctorOfficial
Follow
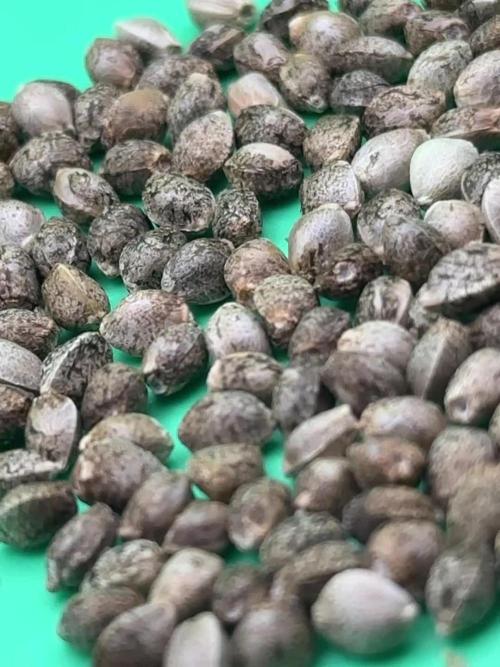
🌱 Germination Journey with Terpyz Mutant Mentha de Croco 🌱
Hey Grow Fam! Today kicks off an exciting adventure with Terpyz Mutant Mentha de Croco genetics. I’ve got 10 regular seeds ready to sprout, and I’m looking forward to discovering some beautiful female phenotypes—and maybe even a standout male for potential future breeding. It’s been a while since I’ve worked with regular seeds, so I’m thrilled to dive in!
Germination Process Overview:
Here’s a step-by-step rundown of the germination setup and process, with a special focus on the equipment and nutrients that are helping these seeds thrive right from the start.
Step 1: TheCannaKan Germination Pod 🌱
For germination, I rely on TheCannaKan—a device I’ve come to love and trust. It’s designed to create the perfect microclimate for seed germination, and within just 24 hours, the seeds started showing signs of life. By the 32-hour mark, they were all ready to be transferred to the next stage! I can’t recommend this gadget enough for anyone serious about getting strong, early growth from their seeds.
• Why TheCannaKan?
• Humidity Control: Ensures seeds stay hydrated without oversaturation.
• Stable Temperature: Maintains an even temperature around the seeds, so there’s no shock or stalling.
• Enhanced Oxygenation: Keeps fresh air circulating, helping prevent mold and ensuring seeds don’t suffocate.
Step 2: Transfer to Root Riots & Aptus Holland Supplements 💧
Once the seeds were sprouted, I transferred them into Root Riots, known for their excellent water retention and structure that encourages strong root growth. Root Riots also have a pH-balanced, spongy texture that makes it easy for roots to penetrate, promoting sturdy, healthy root systems.
At this stage, I started using Aptus Holland’s Regulator and Startbooster at 1ml/L each. Here’s why I chose these products for early growth:
• Aptus Regulator (1ml/L): Helps strengthen the plants against environmental stresses by supporting cell wall structure. It’s a fantastic choice for giving young seedlings an early boost in resilience.
• Aptus Startbooster (1ml/L): This product provides essential microbes and nutrients that stimulate root growth and early plant vigor. Especially for regular seeds, the early root development makes a noticeable difference in later growth stages.
Step 3: Lighting with Future of Grow (FOG) LED at 200 PPFD 💡
For lighting, I’m using a Future of Grow (FOG) 600W LED. For the germination stage, I’ve dimmed it to around 200 PPFD (photosynthetic photon flux density), which provides just enough light for healthy, strong seedling growth without overwhelming them.
• Why Low Intensity?
• 200 PPFD ensures that young plants aren’t exposed to too much light, which could cause stress or stunting. This level of intensity is perfect for encouraging healthy development without risking “stretching.”
• The FOG LED provides a balanced spectrum tailored to plant growth, setting up these young sprouts for success as they grow.
Step 4: Environmental Control with TrolMaster Tent X Controller 📲
For monitoring and control, I’m using the TrolMaster Tent X Controller, which lets me dial in every aspect of the environment to make sure these little ones have the perfect conditions for germination and early growth.
• TrolMaster Benefits:
• Precision Control: Adjust temperature, humidity, and lighting all in one place.
• Notifications: Sends updates in real-time to my device, so I can make adjustments as needed without being physically present.
• Consistency: Maintains stable conditions around the clock, reducing stress on seedlings and ensuring they’re thriving.
Grow Tips & Reflections:
Germination is one of the most crucial stages in a plant’s lifecycle. Starting with strong genetics like Terpyz Mutant Mentha de Croco, combined with a solid germination setup and the right nutrients, creates the foundation for a successful grow.
💡 Quick Tips for Fellow Growers:
• Hydration Balance: Don’t oversaturate! Moisture levels should be high enough for the seeds to sprout but not so wet that they drown.
• Light Management: A low PPFD for young seedlings prevents stretch and keeps nodes tight, preparing them for a healthy vegetative phase.
• Environment Consistency: Use a reliable controller like the TrolMaster Tent X to manage your settings, and consider monitoring tools for real-time adjustments.
Shout Outs to the Community:
Big thanks to Terpyz Genetics for these incredible seeds, Aptus Holland for their top-notch nutrients, Future of Grow for the stellar LED lights, and TrolMaster for the amazing controller. Also, shout out to all of you in the growing community—you make this journey exciting and filled with endless learning. Let’s keep growing and sharing together!
That’s it for the germination update! Next up, I’ll be monitoring growth closely to identify strong females (and maybe a standout male for breeding). Stay tuned for updates on our Mutant Mentha de Croco adventure—this is just the beginning!
Genetics - Mentha De Croco
https://terpyz.eu/products/menta-de-croco-fern-type?_pos=1&_sid=e9237cbcb&_ss=r
DogDoctorOfficial Discount Codes @ terpyz.eu - DOCTOR 15% off
Nutrition - @aptusholland
https://aptus-holland.com/
Led Power @ F.O.G. Future Of Grow
https://www.thefuturofgrow.com/en/online-store/BLACK-SERIES-600-p489093171
Controls @ TrolMaster
https://www.trolmaster.eu/tent-x
As always thank you all for stopping by, for the love and for it all , this journey of mine wold just not be the same without you guys, the love and support is very much appreciloved and i fell honored with you all in my life
With true love comes happiness Always believe in your self and always do things expecting nothing and with an open heart , be a giver and the universe will give back to you in ways you could not even imagine so
Growers Love To you All 💚

Likes
4
Share


@HowtoBubatz
Follow
My Strawberry Gorilla Automatic from Fast Buds is now in its third week of flowering, and I couldn’t be happier with how she’s progressing.
She looks incredibly healthy, with vibrant green leaves and strong branches. The stretch phase is nearly over, and she has developed a solid structure with a well-defined main cola.🌱
One of the most exciting changes this week is the first appearance of trichomes on the main bud. Under the light, they’re starting to sparkle, hinting at the resin production that’s about to take off.
The buds are forming nicely, and I can already smell a faint but promising aroma developing.
So far, she’s responding well to the nutrients and environment, with no signs of deficiencies or stress. If she keeps going at this pace, she’s going to be a real beast by harvest time.😊
Likes
3
Share


@Dysons12
Follow
Day 7 i I transplanted the seedlings in jiffy’s to the DWC basket water level was “just” touching the bottom of the basket which meant there was 1mm- 2mm air gap between the water level and the jiffy’s. The high pressured air in the water to spit when air was released at the top which kept the bottom of the jiffy moist which had minimal roots showing to the exterior of it.
Day 7-13 I originally had 7.5 litres of water that was to the bottom of the basket. I replaced the water on the 13th which meant the water was changed after 6 days at such an early stage I will regularly change the water in the buckets. You can change every 7-14days but I am taking no chances.
I refilled and added nutrients on Day 13 which was yesterday. And the plants are doing really well and are a nice VEG green colour. Hard to tell on the pictures with the light colour but you can see their progress.
When I replaced the water this week I put 6.5L of water in each bucket With nutrients PH’d as close to 5.8 as possible. Some varied from 5.72 - 5.9. I have noted these on each bucket so that I can check if one does better than the others or shows deformities or stress I can amend it to match the others but hopefully not in such a close proximity of 5.8ph with an EC of 700+-
The roots are now showing in every pot with the longest being some 6inches.
The new Wakyme grow light is top notch so far with VEG button on only. Anyone contemplating buying one it cost me £99.00 from amazon and so far is performing just how I would like.
Humidity has been taken care of with a cold air intake fan which is pulled from another area of the building of a cooler environment.
Temperatures are spot on where I want them but I do allow a 2degree +- allowance but it does change back to its original temperature quickly enough.
5 more speed bud germinated and 2peyote critical feminised photoperiod germinated.
Crystal candy XL auto ordered x10
Gorilla glue, Pineapple Express and Cali Kush waiting in the wings. I have these already
If I can be anymore help to anyone let me know. Your diaries are helping me and hopefully I can provide the same to you


Likes
181
Share


@CaliGrown
Follow
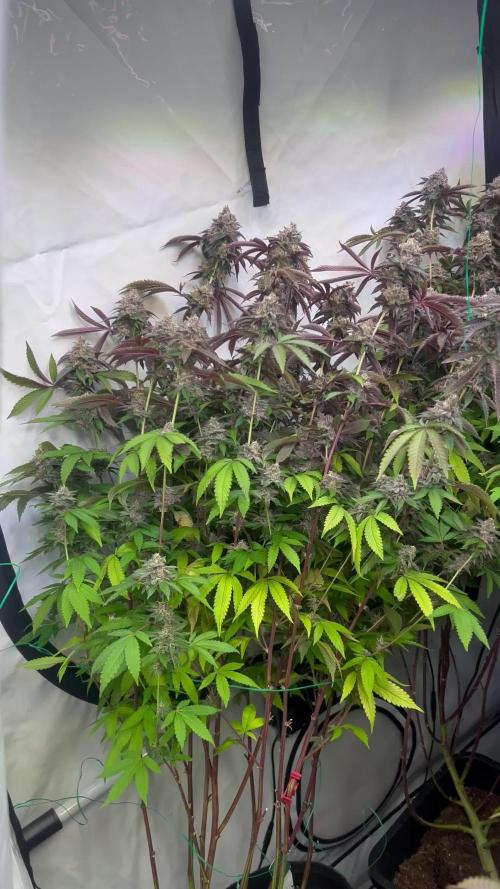
Day 78- She is ready with about 5-10% Amber Trichomes. I can’t tell you how Amazballs she smells. Super limey like a green sour patch kid. So frosty I couldn’t be happier with Xmas around the corner I am going to be blitzed off of this for the Holiday😎 . Going into 2 days of dark then the choppers. I will upload more pictures beofore I chop and hang her. I defanned her before the dark period so I can just chop and full plant hang for about 10 days. Then into jars for cure.
Chopped Her and came out to 597 grams full plant. Can’t believe I got her on my scale but I did and was epic.


Likes
9
Share


@Rko41
Follow
Régénération de la culture du printemps que j’ai ressorti dehors au mois d’avril et que j’ai re nourri et elle est reparti on va essayer une 2 em récolte. C’est vraiment un essai pour le fun

Likes
10
Share


@Papastroumf
Follow
Day 40 : Watering today community after 3 days. They were too thirsty and drank 2.5L per plant. I added a lot of food to the water. But it finished with 800ppm only. I think Biobizz decreased the density of nutrients. I added 1 co2 tab / 5L as every time. Also made small defoliation to the bottom for all ladies. She have reached 45cm. There is something strange in this one. She is indica phenotype as its obvious, which means she flowers faster but she looks a bit behind. Maybe she felt the air so much in front of fan. I moved her and places DsD in front of fan.
Likes
1
Share


Likes
1
Share

@SmokeyBoroGrows
Follow
Hello smokers and growers 👋
Today is day 4 of flower! Exactly 5 weeks of veg and they started to strectch last week anyway so honestly I could have flipped sooner. It’s just a pheno hunt I’m not looking for yield here! Made sure to keep the DLI increasing slightly even with less hours of light.
We have found our keeper pheno(s) of icing kush and stardog breath x goat supreme! Placed the moms back into the veg tent and took 6 clones of each to get started! I have 2 clones of all the icing kush sorted by pheno as well. The nose of the icing pheno is outstanding! Great vigor and node spacing. Classic gas nose and there’s no flowers yet 😫 Exciting! For the stardog I chose the one with the best vigor and node spacing that shows pistols since those are regular seeds. I had to cull a male since I don’t plan to do any breeding with these right now. Might be one more male hiding out… Getting Set for the next few rounds!