Processing
Likes
Comments
Share
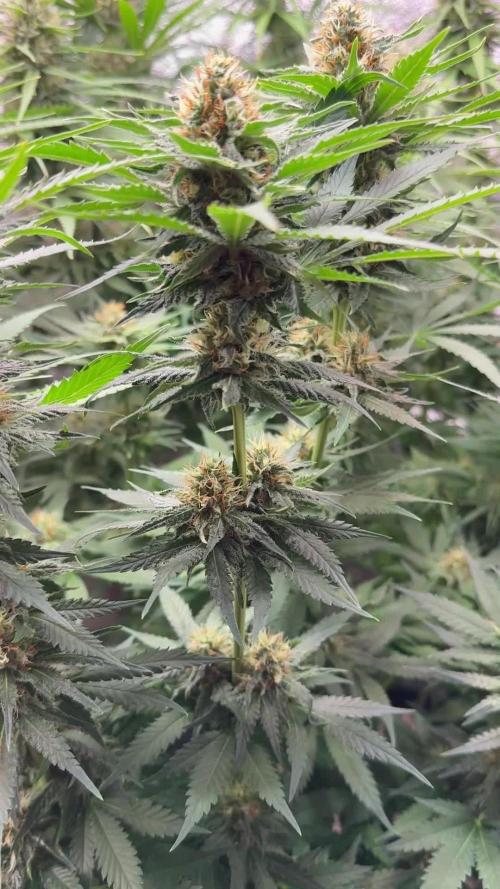
She is a strong and resinous plant. I am seeing some kind of deficiency but I'm too far into flower to care about fixing it. Same thing happened to my last bluetoof. Same nutrient mix as the toof decay and that plant looks great. She smells sweet :)

Likes
12
Share
A lot more happening this week! As shown in the pics, and as suspected, I have a manganese deficiency. I've been keeping my pH level at 6.2 in coco, manganese is taken up best by the plant below 6.0 pH. Dropping my ph level to 5.8 pH, and flushing with lower pH, hopefully it will solve the issue over the course of a few days. I made a new frame for a SCROG, with a "custom bend" in the CPVC pipe on both ends. The bend will allow me to take advantage of the slack material in the sides of my 4x4 tent. I'd previously taken 4" out of all the upright poles to shorten the tent so it would fit in the room due to low ceilings, meaning I had extra slack in my tent walls. The bend in the net frame pushes the sides of the tent out to 5 foot wide. My first SCROG net was a 6" mesh from Amazon, immediately knew I wanted a smaller mesh. Next time around I built my own with a 4" mesh and used the 4" for several grows. This time I decided to go with an even smaller, 3" mesh, and already I like it better. I don't really see myself going much smaller than 3" mesh though. It seems to work well, and any smaller and it may be too tight trying to work the plant through the opening sometimes, which if not careful, will damage the plant. I usually use a & gal cloth pot, grow off rules stated we 0had to use a 5 gal pot. Seeing as I only had 7 gal on hand, I was stuck picking up a Root Farm 5 gal cloth pot locally, as you can see, the roots didn't really stay contained, nor did they "air prune", i had to tear them off before installing the net above. On the last day of week 6 I finally got my net installed, and the plant SCROGged. I should have put the net in place a week or two earlier, it would have been easier to manipulate the plant, however the plant will still have a week to recover. I tie the net in place above the plant, and slowly lower it down, as I bend and super crop the main stalk over parallel to the net, and work all the branches underneath and spread them out. As the plant grows I'll continue to push branches back down through the net and moving them out to the next hole. This will greatly increase yields by allowing light to more bud sites, keeping all buds the same height and thus the same distance from the light. small budsites on a vertical branch, will transform into their own cola once the branch is laid on its side. Instead of a Christmas tree type of plant, with one large main cola, and smaller and smaller buds as you move further down the plant, you end up with a bunch of colas that are all close to the same size, and more importantly, the same level of maturity. The SCROG method, combined with super cropping, and defoliation has greatly increased my yields. As the plant is getting worked into the net, I'll defoliate where necessary, ie a huge fan leaf covering bud sites, however for the next several weeks I'll be defoliating so mush every night or two, systematically trimming off all fan leaves, and stripping everything below the net, and any small bud sites that wont produce well. Usually by the time I'm half way through the flower stage there are no big fan leaves left to be found. It helps with light penetration, which results in a higher quality, higher quantity yield, as well as airflow, which will help prevent White Powdery Mildew and other molds etc. Once a fan leaf is 14 days old, its ability to photosynthesize light, starts to degrade. Once it reaches a certain point, the leaf drains more energy from the plant, than it's giving the plant. My best yields have been from heavily defoliated plants, my last grow I couldn't physically defoliate quite as heavily as usual, and I ended up about 25-30% less bud than expected
Likes
Comments
Share
A couple days early because I have to leave town for a few days. I adjusted nutrients and added CaMg for the rest of the run. Came out to 450ppm, PH 6.3
Likes
40
Share
@GYOweed
Follow
End of 14/10 going 12 12 today. Rooted some SS after 6 days. Gg4 and HS on way in dome. Twenty20 Genetics stretchier because of outdoor genetics. All top stems pinch to slight pop to keepem short. 2 x 2 6 weeks veg success Not bad from seedling with 100w led shared all 4 so 25w each!
Likes
14
Share
Venga familia que ya viene la cosecha de estas Barcelona Puff de Seedstockers, que ganas que tenia ya de darles tijeretazo. Que variedad , me encantĂł cultivarla , sacaron unas flores alucinantes. Las flores aparte de piedras, se ven resinosas, son muy pegajosas, desprenden olores florales. a sido una genĂ©tica reciĂ©n salida este 2026 con la que disfrutĂ© bastante, fue muy fĂĄcil cultivarla. Y a la vez es resistente, aunque tarde alguna semana mĂĄs merece la pena Agrobeta: https://www.agrobeta.com/agrobetatiendaonline/36-abonos-canamo Mars hydro: Code discount: Eldruida https://www.mars-hydro.com/ Hasta aquĂ­ es todo , espero que lo disfrutĂ©is, buenos humos 💹💹.
Likes
58
Share
@AsNoriu
Follow
Day 97. Fast Buds Thank You !!!! Day 109. Girl is in jars and waiting for Christmas ;))) Happy Growing !
Likes
5
Share
#1 Has stretched up and out! If she continues to fatten as tight as the other two, she will probably be the one with the most weight. Her branches are the tallest and reaching up at least 4-6 inches past both her sisters. Her main cola has some light bleaching, nothing I can do about that, we’ll see how she wraps up. #2 is going to be a producer! She has so many tips and they are all fattening and developing at about the same rate, she is going to be a beast! Her main cola is rock hard. Did a defoliation on her, she is appreciating the extra light penetration 😎💹 #3 is fattening up! She never did stretch, but then again I had her tied and trained pretty far out. She has been thirsty, I have been feeding a dose close to 700 ppm every other feed which has been every 3rd day for her. During the lower feeds, ppm has been around 275. Her tricomes are mostly clear, with some cloudy starting to show. She has the longest to go, but us already dense, and will only get better.
Likes
7
Share
Hey guys, Been extremely busy with work so the plants were neglected a bit but they are plants and survive. Getting a really nice fade to the end of this grow. I will probably cut the plants down this Sunday or Monday. Big fat colas and a really strong lemon smell going on it’s very overwhelming haha this run has been super easy with the organics and no ph’ing Next post harvest
Likes
27
Share
@Pennello
Follow
Hi guys, At the end of the story, I am very happy with the whole cycle and finally the outcome, since I almost killed everything in there 😂 The Z&Z is a well balanced 60% - 40% Indica - Sativa dominan strain with a short flowering period. I did have problems throughout the cycle overfertilizing the plant. This is on of the strain that did notice more my mistake, can be clearly seen on the final product. Iinfact, a good part of the flowers, went for bubble hash. I topped them, and then practiced LST training to help them growing wider. Probably If I wouldnt have messed up with the ferilizer I would have had a much better final product, this time, talking about quantity and quality. The whole plants were dried for 18 days after which they were finished in jars for another 6 weeks, if I dont fell sooner. Really looking forward to grow this strain again Indoor, I'am amazed by the terpene profile and the amount of resin they've produced, even under my multiple attempt to screw em!! STRONG GENETIC! I would like to thank Grow Diaries for this amazingly-organized community they have created, where we all can learn a lot, and share something we really love. Thanks to everyone who stopped by and looked at the diary, squeezed the like button or comment the diary. 13/12 I'VE MADE MY FIRST RUN OF BUBBLE HASH! Very very happy with the end result, did not weight anything yet because is still wet big time, I lightly squeezed it a bit, before let it drying on parchment on a cardboard. The smell it's just absolutely crazy. I can smell strong citrus notes in the 120”m but the 90”m and 73”m explodes with crazy-sweet note. While the 25”m (did not use the 43”m) where I did collect most of the hash, smell like good and sweet hash, nothing crazy like the previous ones but a very buttery like consistency that makes me want to eat it like this...dont ask me why...even though I know you all probably felt this way too... Anyway, the paper sheet says it all about timing, washes and ”m used for the extractions, but just in case I'll explain it down here. I have done 3 wash with different timing. 1Âș wash: 5 min only to get the most brittle trichome heads 2Âș wash: 10 min stardard 3Âș wash: 30 min to stock up a bit 😅 I could have done an extra wash for sure and get more out, but I was running out of time so...I will update with the dry weight, it was not the only wash I've done, that were just too many grades to weight up..so I chose to do it once all dry! See you really soon with on the nex run pals!
Likes
25
Share
Stretch 10 centimĂštres Jour52 lĂ©gĂšre defolliation et arrosage avec deux litres d'eau ph6.3 Petit rappel sur le meilleur cycle de lumiĂšre pour les autofloraisons QUEL EST LE PLANNING LUMINEUX OPTIMAL ? Le cannabis Ă  autofloraison peut survivre avec Ă  peine 5 heures de lumiĂšre du soleil par jour. Mais si vous voulez que vos plants s’épanouissent, atteignent le pic de leur puissance et produisent une lourde rĂ©colte, ils ont besoin d’au moins 18 heures de lumiĂšre par jour. Le planning optimal de lumiĂšre pour la culture en intĂ©rieur du cannabis Ă  autofloraison est un 20-4 constant pendant tout le cycle de vie. Bien entendu, des plannings de 18-6, 20-2 et 24 heures non-stop ont tous leurs avantages, mais nous avons obtenu les meilleurs rĂ©sultats avec le planning 20-4. Les cultivateurs en extĂ©rieur peuvent potentiellement lancer la culture dĂšs le printemps. Cependant, nous recommandons toujours de faire germer les graines et de cultiver les jeunes pousses en intĂ©rieur sous des lampes artificielles pendant une semaine ou deux pour obtenir les meilleurs rĂ©sultats. Nous parlerons des options en extĂ©rieur plus en dĂ©tail un peu plus bas. LE CYCLE DE VIE DU CANNABIS À AUTOFLORAISON La plus grande diffĂ©rence entre le cannabis Ă  photopĂ©riode et Ă  autofloraison est que l’horloge tourne pour une auto dĂšs le moment oĂč la coque de la graine s’ouvre. Le cycle de vie post-germination de la grande majoritĂ© des variĂ©tĂ©s Ă  autofloraison modernes est de 8-12 semaines au total. Au contraire des variĂ©tĂ©s Ă  photopĂ©riode, les autos n’ont pas besoin du planning lumineux courant 12-12 pour faire la transition vers la floraison. Une variĂ©tĂ© Ă  autofloraison progressera dans son cycle de vie indiffĂ©remment du cycle jour-nuit. CROISSANCE VÉGÉTATIVE ACCÉLÉRÉE Il est presque impossible de dĂ©limiter la phase de la jeune pousse de la croissance vĂ©gĂ©tale avec les variĂ©tĂ©s Ă  autofloraison de nos jours. De plus, en 30 jours, la plupart exploseront soudainement en phase de floraison. Donner aux autos un bon dĂ©part, solide et sain est un facteur critique pour une culture rĂ©ussie. Beaucoup de choses peuvent se passer pendant une semaine avec un hybride Ă  autofloraison vigoureux en culture. Il n’y a pas non plus beaucoup de temps pour la transplantation. Nous recommandons d’utiliser notre kit de germination ou de planter directement dans les premiers et derniers rĂ©cipients dĂšs le dĂ©but. Des pots/rĂ©cipients en plastique de 10-20 L avec de nombreux trous de drainage au fond sont parfaits. Les Air-Pots sont encore mieux. Beaucoup de cultivateur dĂ©couvrent Ă  leurs dĂ©pens que les petits pots ne sont pas durables pour les hybrides autos modernes plus grands. PrĂ©parez-vous Ă  devoir ajuster quotidiennement votre lampe de culture pour Ă©viter de brĂ»ler le feuillage. De plus, tout comme les variĂ©tĂ©s Ă  photopĂ©riode, les conditions environnementales optimales pour les jeunes plants Ă  autofloraison sont des tempĂ©ratures entre 20 et 25 °C et une HR dans une fourchette de 50-70 %. En outre, les besoins en nutriments seront considĂ©rablement plus faibles que les variĂ©tĂ©s Ă  photopĂ©riode. Il n’y a donc aucune bonne raison de ne pas cultiver bio. GĂ©nĂ©ralement, les autos prĂ©fĂšrent avoir un milieu de culture lĂ©gĂšrement fertilisĂ© et bien aĂ©rĂ©. Les terreaux lĂ©gers et/ou le coco sont des substrats fortement recommandĂ©s. La plupart des cultivateurs prĂ©fĂšrent des lampes CFL blanc chaud, LED et MH pour la courte pĂ©riode vĂ©gĂ©tative. Cependant, les lampes HPS Ă  double spectre sont tout aussi efficaces et probablement plus pratiques Ă  utiliser. FLORAISON RAPIDE ET FÉROCE DĂšs que vous pouvez voir les pistils pousser Ă  partir des premiĂšres fleurs, vous pouvez vous dire qu’en 45-60 jours, les plants finiront le cycle de floraison et seront prĂȘts Ă  la rĂ©colte. Que vous soyez prĂȘt ou non. Mais vous serez prĂȘt, car vous aurez fait les ajustements nĂ©cessaires en temps et en heure. Les apports en engrais de croissance vĂ©gĂ©tative Ă  un dosage faible Ă  moyen seront remplacĂ©s par des nutriments pour la floraison et des doses appropriĂ©s de complĂ©ments et boosters de floraison. Une fois de plus, un rĂ©gime alimentaire spartiate est recommandĂ©. Pas besoin de changer le planning des lampes, car vous allez suivre votre planning originel jusqu’à la rĂ©colte. Mais il faudra vous assurer que les tempĂ©ratures ne dĂ©passent pas les 28 °C et vous devez rĂ©duire votre HR vers une fourchette plus basse de 40-60 %. Les plants vont s’étirer Ă  des degrĂ©s divers. Quoi qu’il en soit, vous devez faire attention et toujours maintenir une distance optimale entre la lampe et la canopĂ©e. Un ensemble de cordages ou de crochets rĂ©glables rendront la tĂąche bien plus aisĂ©e. Ne vous imaginez pas que toutes les autos dĂ©velopperont une structure courte de buisson, Ă  moins que le sĂ©lectionneur ne donne des donnĂ©es qui le suggĂšrent. Naturellement, les deux derniĂšres semaines de floraison devraient ĂȘtre rĂ©servĂ©es Ă  un rinçage en profondeur du milieu. De l’eau pure, ou une solution de rinçage lĂ©gĂšre fonctionneront trĂšs bien. Quand la majoritĂ© des poils ou pistils sur les fleurs auront changĂ© du blanc Ă  l’orange/rouge, vous devriez passer au rinçage. Ne sautez pas cette Ă©tape finale critique. Vous mĂ©ritez les fleurs les plus savoureuses, sans contamination. COMMENT LES AUTOS RÉPONDRONT AUX TECHNIQUES DE TAILLE ET DE PALISSAGE ? La rĂ©ponse courte : trĂšs bien ! La plupart des variĂ©tĂ©s Ă  autofloraison de nouvelle gĂ©nĂ©ration rĂ©pondront trĂšs positivement au LST. Et tant que vous taillez tĂŽt, l’étĂȘtage et le fimming peuvent multiplier les tiges de tĂȘtes et en plus booster les rendements. De plus, la mĂ©thode ScrOG peut ĂȘtre combinĂ©e avec toutes ces techniques pour un rendement maximum. Cependant, la culture Ă  grand volume utilisant la mĂ©thode SOG est probablement le style de culture le plus populaire Ă  prĂ©sent. Un nombre croissant de cultivateurs d’autos expĂ©rimentent avec les mĂȘmes pratiques courantes de taille et de palissage Ă  haut rendement que les cultivateurs de cannabis Ă  photopĂ©riode utilisent. Les cultivateurs dĂ©butants ne devraient probablement pas se lancer dans une taille ou un palissage intensif ou excessif avant d’avoir de l’expĂ©rience. Cependant, plier un peu les pointes de croissance pour crĂ©er une canopĂ©e plus plate ne peut pas nuire aux rendements. De mĂȘme, une dĂ©foliation minimale pour augmenter la pĂ©nĂ©tration lumineuse ne stressera probablement pas des plants en bonne santĂ©, tant que vous vous limitez Ă  l’élimination des grosses feuilles nourriciĂšres qui font de l’ombre aux sites de floraison. May the force be with you đŸ’Ș
Likes
4
Share
Que pasa familia, vamos con la sexta semana de floraciĂłn de estas F.U.H. feminizadas de Seedstockers. Vamos al lĂ­o, las plantas se trasplantaron a macetas de 7 litros. El ph se controla en 6.5, la temperatura la tenemos entre 24/21 grados y la humedad ronda el 50%. El ciclo de crecimiento puse 12h de luz, el foco estĂĄ al 100% de potencia. Tenemos como visitante de nuevo los trips, comprĂ© depredadores que coloque. Me gustarĂ­a estar mĂĄs encima este cultivo pero la salud me estĂĄ impidiendo un poco estar 100% con el proyecto. - os dejo por aquĂ­ un CÓDIGO: Eldruida Descuento para la tienda de MARS HYDRO. https://www.mars-hydro.com Hasta aquĂ­ todo, Buenos humos 💹💹💹
Likes
21
Share
@DogterB
Follow
Week 9 Day 57 (9/11) Things are going well, or so it seems. She looks like she is starting to bulk up at her bud sites. Her pistils are everywhere and I'm hoping to see the buds forming soon. Being a first timer, I have no idea what I'm looking for, but it's still exciting! Temps and humidity have been holding fairly steady. I think I'm to to point of bumping the humidity back some, keeping it below the 60% range. I have a couple VPD charts I'm trying to go by and they give me a range I am trying to keep the temp/humidity in. I fed her last night and she seems happy. Haven't noticed any of the discoloring or anything continuing, so that's good. I added some Alaska Fish Fertilizer to the mix just because I got it for free and wanted to give her a little nitrogen boost because her youngest leaves are kind of pale. I've heard that it's hard to overdo it with it, so figured it was safe enough. It has an NPK of 5-1-1, so I thought the P & K boost might be good too. Day 58 (9/12) Humidity keeps getting a little high, so I busted out a dehumidifier. There is some yellowing on some newer leave serrations, but idk if it is new or I'm just thinking it's new. Day 59 (9/13) Yesterday got a little rough for her! I kicked on the dehumidifier I have before I left for the day, and good thing the wifey was home to check in! Apparently that dehumidifier pumps out some heat! Within a few hours, the tent temp was almost 93F and humidity was nearly below 40%. She was quick to turn it off, crank the exhaust fan, and get the window opened to cool it off. When I turn it on in the future, I'll have to be sure to keep an eye on the room temp. I feel like she is a long way off from being ready, really doubt she will be anywhere near the 70-77 day grow time. That's fine with me, as long as she's happy and filling out, she'll get there eventually. Most other journals I've seen, they don't chop until week 12 or so. I also felt up one of the forming buds a bit, and the smell she left on my fingers is maddeningly delicious, about knocked my socks off. Day 60 (9/14) Pulled her out last night and tried tucking in a bunch of leaves to get more light to some of the lower bud sites. It's wild how many she has. She probably could have used some defoliation, but being an auto (and my first time growing) I held off. Maybe in future grows I'll give it a shot. Doing a better job at LST would probably have helped as well. She's still trucking, starting to see some start of frostiness. Day 61 (9/15) She seems fairly light in the pot, I'll probably try to feed her tonight or tomorrow morning, it just depends on when I get outta school today. I have surgery today, so I'll be here until late so will more than likely just get it mixed up tonight for in the morning. Day 62 (9/16) I mixed her up some feed last night. She's been having some yellowing on her tips and serrations, likely from phosphorus deficiency. Hoping what I mixed up is plenty to stave that off. I mixed it last night and gave it to her this morning after lights on. Her smell has really kicked in, I'm glad I got a filter and exhaust fan or the house would smell amazingly illegal. I was running late this morning and didn't even remember to get a pic of her this morning. I'll try to get one tonight before she goes to bed. Day 63 (9/17) Some of her lower leaves are starting to yellow between veins, showing magnesium deficiency. I almost put some cal-mag in yesterday with her feeding, now I wish I did. I'll wait it out and get her some next time she gets watered, or sooner if she's gotten worse since last night. I feel like she is just gobbling through her food, but honestly idk. I may be just keeping her right at the edge of deficiencies.
Likes
2
Share
Again not very happy but still gonna have some clean smoke but not want I wanted tbh
Likes
4
Share
Day 30. Worried about running out of space. I have been tying the plant down perform LST which is helping. Only change in feeding schedule is I have reduced call mag from 5.0 Ml to 3.0 ML and have added big swell by aurora nutrient lines 2.0 ml
Likes
4
Share
Second week of flower and I defoliated again. There are small bud sites starting to form at the end of week two flower. The apple fritter has fascination which is making the stems grow interestingly with lots of bud sites.
Likes
16
Share
**Update** 96.5 grams dry from 1 Autoflower! Amazing smells, still has some of the 🍈 funk. She needs to cure to let the Terps and Flavors come out. She is still very sticky and resinous. Will update once a week or two of cure is done, but with the 1 joint I smoked, full heavy hitter, body buzz and heavy head high. Looking forward to the finished product. This plant flourished with little work on my part. Good nutrients, and not being too hands on let this beast do her own thing. I would definitely recommend as a beginner strain/auto flower to go with, she is easy to see through to the end. Didn’t really need much attention until flower came on and she fed hard for phosphorus and potassium while she stacked. I’ve got some of her cousins already sprouted and am looking forward to trying some different techniques to see what she can do! Happy growing all đŸŒ±đŸ˜Ž
Likes
9
Share
@pzwags420
Follow
On day 1 the rez is at 6.2. The highest cola is 8.5" from the light. On day 2 the rez is at 6.2. The highest cola is 7.75" from the light. On day 3 the rez is at 6.1. The highest cola is 7.5" from the light. On day 4 the rez is at 6.3. The highest cola is 7.125" from the light. On day 5 the plants are smelling and doing well. On day 6 I changed out the rez and PH to 6.1. The highest cola is 7" from grow light stretch is deff slowing down and should be over shortly. My avg PPFD at canopy is around 800. On day 7 the rez ph is 6.0. The highest cola is still 7" away from light 😅 close but not too close in my small space.