Likes
Comments
Share


@CzAlmighty
Follow
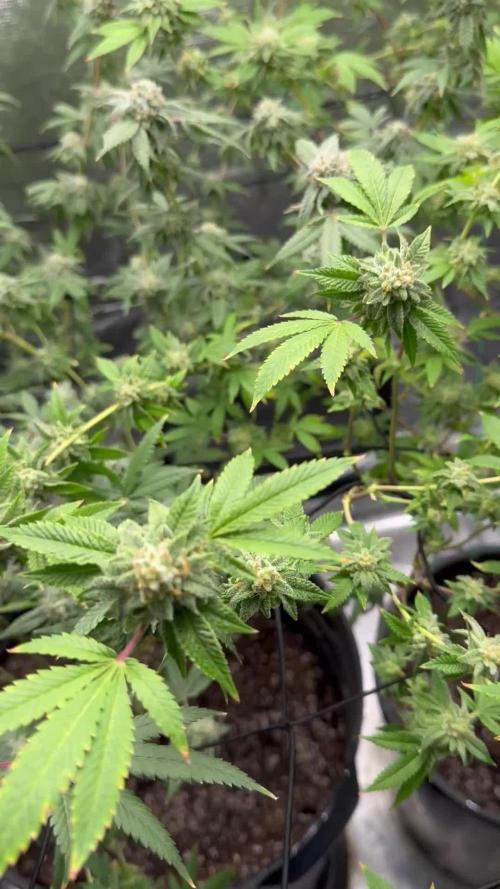
Amazing flower time 💚💚💚
Buds is strong ...verry strong . smell AMAZING 💚💚
Unbelievably fragrant plant. The flowers are beautiful and slowly begin to ripen. My guess is to wait another two weeks and it will be harvested.💚. Thank you watch


Likes
42
Share

@StickyHands
Follow
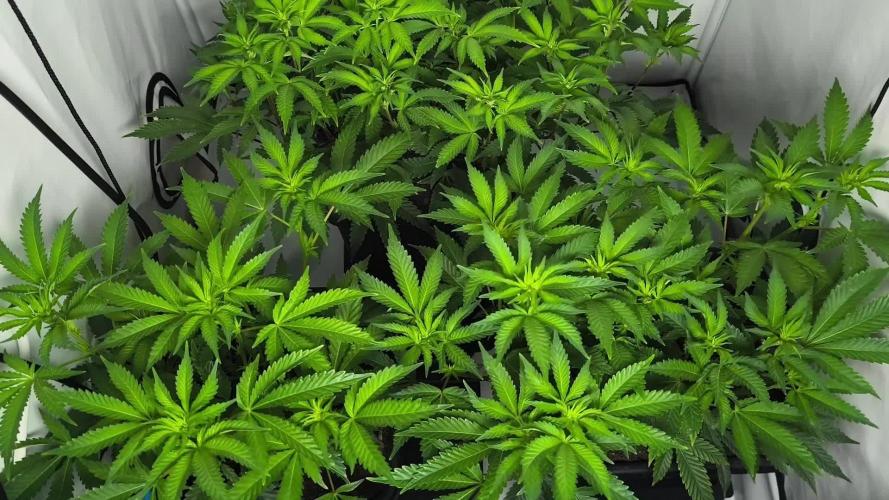
Today is day 8 of flowering.
I returned yesterday from a 7-day vacation. For this reason, there are no pictures from the first week of flowering. The AutoPots did a good job, and the plants drank 25 liters of water.
This week I'm using compost tea and Rootinn foliar spray (MG12).
Likes
6
Share

@Borberad
Follow
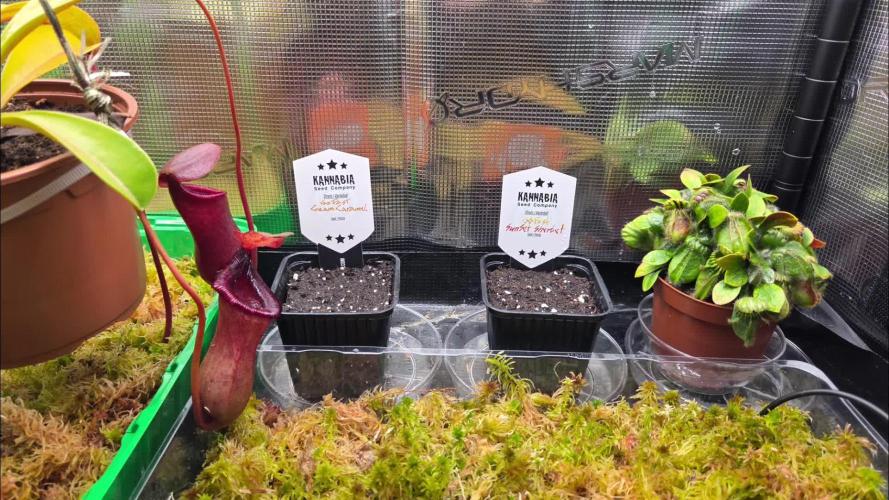
Verehrte Chronisten des grünen Treibens im Hause Borberad! Diesmal wagen wir uns an einen wahren Sprinter der feminisierten Cannabissorten: Cannabis indica L. var. Candy Cream Go Fast aus den geschätzten Händen der Genetiker von Kannabia Seeds.
Bereiten euch auf eine weitere tiefgreifende und süße Untersuchung des pflanzlichen Wachstums vor. Unsere bewährte Methodik der fast täglichen Bilddokumentation und sporadischen Videoanalysen wird auch bei diesem Exemplar, wohlgebettet in unserer standardisierten Erdmischung zum Einsatz kommen. Wir werden Zeuge der Entwicklung einer Pflanze, deren Name bereits ein außergewöhnliches Aroma und damit ihre – sagen wir mal – 'süße Verführungskraft' verspricht. Verfolget mit uns, wie sich diese 'Zuckercreme' im Rekordtempo entfaltet und welche duftenden Herausforderungen uns Borberads bei ihrer Aufzucht erwarten.
Detaillierte Sortenbeschreibung: Kannabia Seeds Candy Cream Go Fast
Genetik: Candy Cream Go Fast ist das beeindruckende Resultat einer gezielten Kreuzung von Indica Cream und Auto Indica Cream. Diese zu 60 % indicadominante Melange besticht durch eine drastisch verkürzte Blütezeit (Fast-Version), ohne dabei auf die bewährten Charakteristika ihrer Cream-Familie zu verzichten.
Größe: Im Innenbereich erwarten wir für die Candy Cream eine kompakte Wuchshöhe von etwa 80 bis 100 Zentimetern. Dies macht sie zu einer ausgezeichneten und leicht zu bändigenden Wahl für unsere Zeltlandschaften.
Farbe: Die Farbpalette ist von satten Grüntönen dominiert, an denen sich im fortgeschrittenen Stadium äußerst dichte und harzige Blüten bilden. Ein wahrer Augenschmaus, der im Licht der LEDs oft so wirkt, als wäre er großzügig mit Puderzucker bestäubt.
Geschmack: Der Name deutet es bereits an: Eine süße Symphonie! Das Geschmacksprofil ist eine cremige Mischung, die stark an Vanille und Karamell erinnert, sanft abgerundet mit fruchtigen Anklängen und feinen, erdigen Untertönen. Ein geradezu buttriges Geschmackserlebnis.
Eigenarten: Diese Sorte ist ein wahrer Sprinter mit einer rasanten Blütezeit von lediglich 46 bis 49 Tagen. Mit einem THC-Gehalt von rund 20 % liefert sie ein sanftes, beruhigendes Body-High. Ihre hohe Resistenz gegenüber Feuchtigkeit und Schädlingen macht sie zu einer überaus robusten Kandidatin für unsere Aufzeichnungen.
Rechtlicher Hinweis:
"Abschließend sei wie immer angemerkt, dass dieses Growtagebuch die dokumentarische Begleitung eines privaten und legalen Anbauvorhabens im Rahmen der jeweils gültigen Gesetze darstellt. Wir bei Borberad distanzieren uns ausdrücklich von jeglichen illegalen Aktivitäten und betonen die Wichtigkeit der Einhaltung der lokalen Rechtsvorschriften bezüglich des Anbaus von Cannabis."
Woche 0: Die Keimungsphase
Das Keimen des VIP-Samens hat im Mars Hydro Anzuchtzelt begonnen.
Tag 1
Entgegen unserer gewohnten Vorgehensweise nutzen wir kein Tauchbad mit 1% H202 zum Quellen der Samen sondern lassen den Samen vollständig im von Kannabia freundlicherweise zur Verfügung gestellten Sproutly Keimen.
Tag 2
Nach 36h wurden der Sproutly das erste Mal geöffnet und zeigte gekeimte Samen mit ca 5mm langer, weißer und gesunder Wurzel.
Also rein in die Vorbereiteten und zuvor temperierten Anzuchttöpfe, anstelle der in letzter Zeit üblichen Easyplugs.
Tag3
Warten
Tag 4
91 Stunden nach dem Start des Quellen waren die kleinen Keimlinge dann schon ohne Helmchen ins Licht gewachsen.
Tag5. Die Keimblätter sind entfaltet und die ersten echten Blattpaare öffnen sich.
Tag 6
Sie macht einen soliden Eindruck.
Tag 7
... und lässt sich etwas Zeit.
Düngung & Messwerte: kein zusätzlicher Dünger notwendig. Fokus auf stabilen VPD von 0,8 kPa.

Likes
12
Share


@SamDo
Follow
Hello! Semaine 5 de croissance.
Je suis très content de l’évolution pour cette semaine. Les plantes ont très bien réagis à la légère défoliation de la semaine dernière. Elles ont bien grandis et se sont bien densifier.
Je vais pouvoir espacer un peu les pots pour leurs laisser de la place pour se développer encore. J’ai aussi fabriqué et installé un filet pour le scrog.
Je vais rester sur un ec de 1.5/1.6, elles semblent apprécier. Et je leur fait un flushing aujourd’hui, pour limiter l’accumulation de sels dans la coco, je fais ça tout les 15 jours environ.
Voilà pour cette semaine...
Happy grow...😎

Likes
14
Share


@goeser
Follow
The ladies started to flower
They dont need a lot of attention even if the leafes are looking a bit meeeh .
Lets see what the next days being

Likes
17
Share


@Naujas
Follow
This is my second growth in a suitcase, I got 30 grams of dry flowers from the first growth, but this growth together with FastBuds is obviously much better than the first one :) although the girl's leaves burn from the light, which is only 10-15 cm from the flowers, but the girl copes with it perfectly :) good luck to everyone.

Likes
48
Share


@Wackytabacky_420
Follow
🚨 🚨 Week 9 update 🚨 🚨
🚨 🚨 week 6 flower 🚨 🚨
" Blue Dream" 420fastbuds grow. Plants total life is 63 days old. With these plants having only 3 weeks of veg before flowering I feel these plants are not producing like my last scrog grow. But I wanted to see 4 myself if the scrog made a difference. These 4 plants that are supposed to be heavy yielding are not even close to producing the results my last scrog grow produced. All this info I have gathered is helping to determine how my next grow will go. I will be growing a blue dream photo. I have already concluded that I will be topping and scrogging. I also will be vegging 4 longer than 3 weeks! Overall it is what it is and move on. Still learning everyday!
I have to say I'm most impressed with Blue Dream #3 which was my last to go in 🌸. She is the shortest and is the heaviest producing. She's also the happiest!! Blue dream #4 was the first in 🌸 and is most likely going to be my first girl finished. Her pistols are already orange and her tricomes are starting to cloud with an amber here and there. This is their feed schedule 4 the week...
2/9/2022
2ml cal mag
2ml micro
1ml gro
2ml bloom
1/4 ml ph down
Ph 6.44
563 ppm
Solution temp 72.4F
2/13/2022
2ml micro
4ml bloom
1/4 ml ph down
Ph 6.28
410 Ppm
Solution temp 73.2F
Well that wraps it up for this week guys!! Till next week Best of luck and Happy Growing!!🌱💚💨🔥🔥
Likes
51
Share


@FoTwenny
Follow
🗓️ Week 17: 3/23 - 3/29
📆 Week 7 of 12/12
🌄 The plant is starting to go into senescence and presenting some beautiful colors as she begins to fade.
💡 Received new lighting courtesy of Growers Choice. They sent me the ROI-E420 with the Master Controller. First impression is amazing. Looks and feels like very high quality build. The spectrum seems more blue than the 3000k lm301H Kingbrite bars I have been using. The bars are thinner and packed with a lot of diodes, so they do run a little hotter than the KB at full power. I adjusted and now running them at 90%. For now the Kingbrite bars are being used as side lighting dimmed to about 30-35% depending on Grow room temps.

Likes
175
Share


@love_2_grow
Follow
Day 15
Today I switched the lights from the Seedling program to the Growth program. I measured around 640 PPFD at the canopy level so a bit high for early veg but I will leave it where it is now and keep an eye out for light stress, and raise the lights if I have to.
I also added a second USB fan for increased circulation. USB fans are great when the plants are small and you don't want the stronger winds that the regular clip fan generates. I also started the clip fan but directed it towards the lights to help keep them a bit cooler.
I adjusted the extractor fan from 60 secs Off/30 secs On to 30 secs Off/30 secs On in order to remove more hot air. This will have to be tweaked further and I'll monitor my temps to figure out a suitable setting. It becomes a balance between temp and humidity. I really wish I had a system where I could set a target VPD and then the system would automatically adjust temps and humidity to follow that target. Not practical in my small setup though but maybe one day...
Temps are always an issue in my setup as I have two powerful lights inside one small tent without AC. I have set the light cycle so that the lights are on during the night but off during the day to help to balance the temp a bit. I'm also considering getting some extension cables and put the LED drivers outside the tent to see if that helps to bring down the temps a bit further. Later in the grow I will use CO2 so that will help a bit against higher temps.
Finally, I watered the plants as they were getting a bit dry. The left plant got 1 liter and the right plant 1.5 liters as the sensor reported that that pot was a bit drier. I reckon it has to do with the plant being larger (almost double the size of the other plant!) I should also really get my ass in gear and hook up the Blumat system so I don't need to worry about hand watering.
Day 16
Nothing to report really except some additional growth, both vertical and horizontal.
Day 17
Watering time again. Gave them 6.2 pH water this time and once again more to the right plant as it drinks more. I guess around 1.3 liters for the left plant and 2 liters for the right one. I tried putting in my small USB humidifier into the tent but I soon realized that it can't share the USB power that the fans are running on so will have to get another USB power cable in there. Didn't expect that small humidifier to use that much power. Oh well, that's a job for another day.
Day 18
The girls are thirsty it seems as I had to water again today according to the Blumat sensors (I really, really need to install my Blumat system as soon as possible but should get the last bits that I need in a day or two). I gave them 2.5 liters of water (pH 6.7) and once again a bit more to the right plant.
I also was able to squeeze in my tiny humidifier into the tent even though the tomatoes are still in there. Turns out that all I had to do was to switch the USB power adapter from the old Samsung one that I used to a more powerful iPad charger. Now it works just fine to run the fan and the humidifier on the same power. The reason why I'm using a small USB humidifier instead of a proper one is simply due to the lack of space in my small tent. This (very basic) humidifier is the smallest one I could find yet have a decent size tank so I don't need to fill it up all the time.
Day 19
The cover crop EXPLODED since yesterday so the first thing I had to do today was to cut that back a bit. I also started brewing some compost tea (AACT). I mixed together worm castings, rock dust, biochar, lime, bentonite, neem meal, kelp meal, and molasses and will leave it brewing for 24 hours and then feed it to the plants tomorrow. Would have liked to add alfalfa meal as well but haven't been able to find any. I usually put my seed starter warming mat under and taped to the brewing bucket to increase the tea temperature and microbial activity.
The plants are doing their thing, a little bit taller and a little bit wider. I will probably top the right plant next week but not sure about the left one as it is smaller so might need another week.
Day 20
The compost tea was ready today after 24 hours of brewing. I fed each girl with around 3 liters of tea (pH 6.8) and as I wasn't planning any foliar feeding this time around I kept the tea unfiltered. So that everything that went into making the tea ended up as a top dressing. I guess I don't have to water for a couple of days after this.
Not much change is plant size but the leaves are filling out.
Day 21
Today was completely uneventful so not much to report except that I probably will top the right plant tomorrow as it is up to 5 nodes.

Likes
19
Share


@willertex
Follow
📅 D79 - 18/01
📜 Made the flush and then feed her again. Waiting signs of ripen to start the final flush
✍️ 1 EC
♒ 7 pH
🌊 10 L
📏 50 cm
📅 D82 - 21/01
📜 Final flush started
✍️ 0,2 EC
♒ 6 pH
🌊 10 L
📏 50 cm
Likes
13
Share


@Corwinism
Follow
So it has begun... I've had to start utilizing string to hold up branches by tying them to the ceiling rods and surrounding equipment. These plants are healthier and happier than my first grow, so I wasn't quite expecting them to blow up like they did, therefore my single-layer screen was not enough to support the branches. Not to mention the net used was store-bought and kind of sucks. I prefer my double-layer from the first harvest.
The Mimosa is packing on some major frost, followed closely by the Glookies. American Pie trichomes seem to appear and ripen much closer to the ending stages of flower.


Processing
Likes
2
Share


@Squaregrouper
Follow
She is pre flowering enter phone ring I would imagine this week.... I expect a pretty nice sized tree

Likes
1
Share

@Grow_bob
Follow
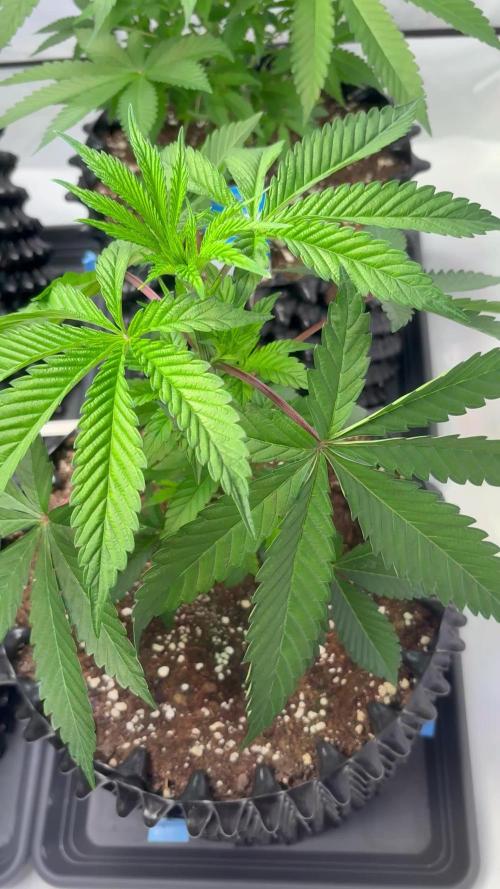
Sie wird immer größer xD ma gucken ob nach 5 Automatik Versuche auch die fem drauf hab 😅
Wurden vor 2 Wochen von 1L AirPods zu 12,5L umgetopft … mfg

Likes
45
Share


@gottagrowsometime
Follow
Welcome to my Sour Strawberry scrog diary sponsored by Spider-Farmer & Barneysfarm.
Veg Days 29-42 Days 35-38 Days 35-37 49-52 Weeks since sprouted 7.5-8
Plant is pushing along. As with the others she had ph issues. Pushed through. Last week I pult Alga Grow as Plagron suggest it be a week r 2 apart from alga bloom But, she was lacking N. So, I added Raw N in just 150ppm. And the N issue was curved. Kept them both going on everything. Probably could of been flipped last wk. But, I'll do so this week. And weave the nodes and attach them to the net. I'm sure I'll figure it out during the stretch before pre flower. Then once that's over. I just let it grow. And tops that will grow beyond the canopy I'll pull them down. Hoping for a 5-8cm difference in the canopy. I'm gonna to have to cut a lot out that doesn't reach the net. But, I've made sure there's more than enough growth to sustain a full 50cm2 tent full of buds/colas with my limit of a canopy where all colas/bud tops are within 5-8cm. Pref 5 would be ideal. Let's see how the stretch goes. Its been harder than I thought. I defo wouldn't do this again with 2 different phenos. Clones really is a must id of been able to flip 2 weeks had they been the same. There's so much growth that isn't gonna make it, the stems are thick I've been stripping a defol the past 2 weeks and 70% off the nodes are up at the net. So, maybe I'm a bit ahead. You'll see where I'm at in 2 weeks.
Diet
Pult Alga Grow about 10 days ago. And she was threw into shortage of N. So, I gave 150ppm added to tap. And, seems to be doing a great job. Will start of Alga Bloom this week. And maybe I'll add 50 ppm of Raw N into it. I'll see.
Thanks for stopping by, look forward to seen your grows. Either way, good growing.


Likes
4
Share

@Oldwied
Follow
Light Power: 60%
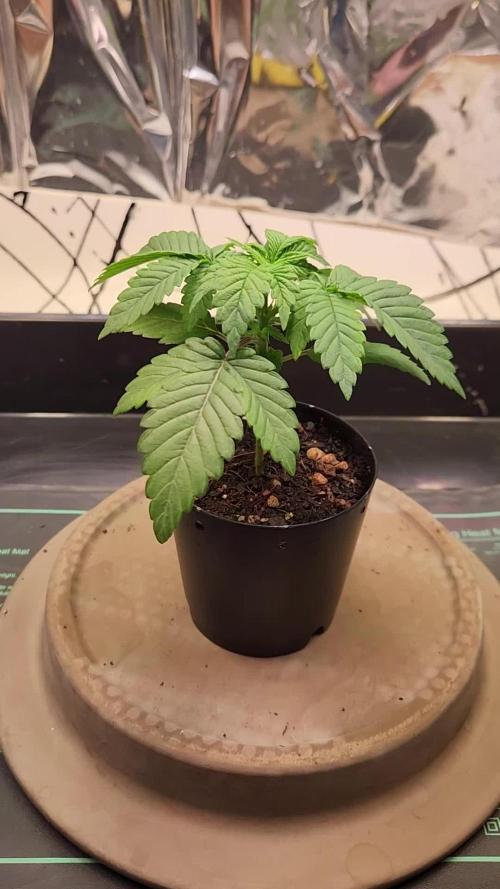
If you're going to stress, do it right. So I repotted the little one and topped it.
Every other day I sprayed and watered with fresh LAB. I store the LAB in the refrigerator for over a week and dilute it before use.
Thanks to budtrainers, your budcups work great.
Day 20
Photoshooting
Repotting
Topping
Likes
8
Share


@R1pp3r
Follow
A pesar de ser una semilla regular responde bastante bien al estrés.
Al parecer al doblarla ha desarrollado mucho mejor sus ramas y no ah tenido un estancamiento en su crecimiento