The Grow Awards 2026 🏆 


Likes
Comments
Share
@Cdaddk
Follow
I have removed almost all fan leaves , so i cut it down and hang it in my drying room for about 10 days before i trim it more and final weight , all small nugs will be used for bubble hash 👍💨


Processing
Likes
37
Share
@MG2009
Follow
GTH SEED #1 in training, just super cropped on one side to even conopy.
The first site im recording will be a clone,it is on back side of plant and will not produce. #2,#3,#4 pics,#2 is stripped of leaves at about 12 inches.
06/16/18
#4 is showing
pre-flowers,#2,#3, no sign yet. #1 check in the morning.
06/19/2018
Still no pre -flowers on #1,#2,#3, #4 however is female so I Fimmed her to encourage side shoots to grow biggest of wider canopy. #1 reacting well to supercropping 20 tops as of today. Praying she is female🙏🙏. She is a stretchy girl in flower 2 to 3 x her vegged height so trying to be low profile as possible.👍
Likes
17
Share
@Ksouth1
Follow
Last two weeks have gone well. She is growing steadily and becoming a monster. I can't even imagine how big she is going to be by fall. I did some defoilation to allow more light to penetrate further in and I adjusted the lst ties to open her up some. Took a few clones from her that are doing well. Can't wait to get her stuck in the ground. She is going to be the biggest plant I have grown based on her current size. I know I am going to have to brace her branches when flower starts to be safe. Until next time happy growing to everyone!

Processing
Likes
6
Share
@Peteg420
Follow
Week 2 and three i was really busy and didn't get good picks.. But I have 3 thorsberry regs.. I can't wait til I can see if they are male or female lol. Im slowly working toward getting my grow all set up.. Thx for any advice$!

Likes
37
Share
@GODSGIFT_2005_JM
Follow
For LIQUIDS & NUTES ******GREEN BUZZ NUTRIENTS***** organic.
Also i’m using their LIVING SOIL CULTURE in powder form!
MARSHYDRO ⛺️ has large openings on the sides which is useful for mid section groom room work. 🤩
☀️ MARSHYDRO FC 3000 LED 300W
💨MARSHYDRO 6” in-line EXTRACTOR with speed-variation knob, comes complete with ducting and carbon filter.


Likes
4
Share
@Creme_De_La_Creme
Follow
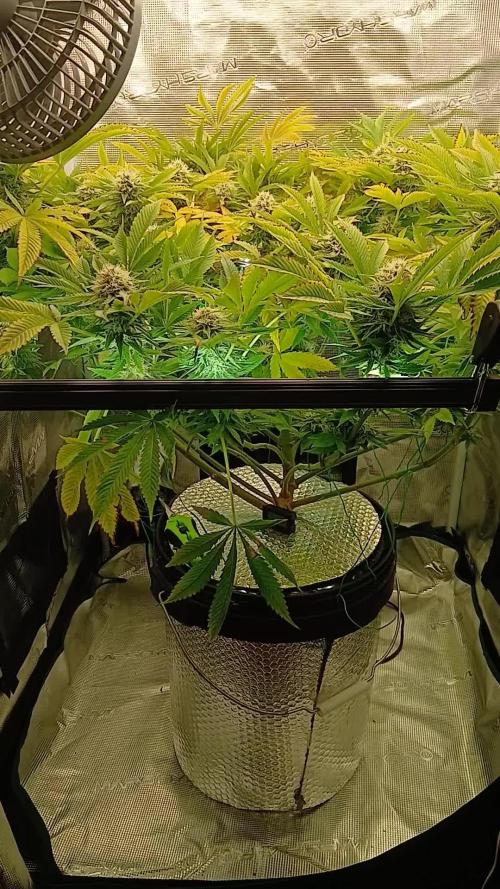
Autopot system was turned on day 15 !!
Now everything is on automatic 🦍🍓🦍🍓
Im not touching this girl until day 50 or some like that, no LST, no topping, just a stress free VEG, lets go !
NO DEFOLIATION AT ALL
Likes
6
Share
@valiotoro
Follow
Hello everyone week 8 of flower has passed for this Mint Jelly auto ❄️
She’s ready !
For the feeding schedule i stopped feeding Power Roots and Pure Zym and started feeding Green Sensation 0,5/l
Mars hydro FC-E6500 75%
have a great day and wish you all happy growing 😎

Likes
16
Share
@BluHaze007
Follow
I still believe that Banana Kush #2 and Zkittlez are stunted, I wanted to remove those two but i think i will just let them grow out for the experience. I'm really banking on Banana Kush #1 to bring home the bacon.
Likes
18
Share
@Nazgul420
Follow
Zatím vše Oukej .
Obě ty GUANA nechám zozpustit v 5 l. Vody 24 hodin. Pořádně v barelu protřepu a rozdělím mezi tři princezny.🍨🍨🍨

Likes
21
Share
@pattyG
Follow
Plants are loving their new pots and are drinking a lot - 500 mL each per water, 2x daily, which is enough for some runoff. Had to turn the light down to 75% to maintain lower heat since it gets very hot here in the summer.


Likes
14
Share
@BLAZED
Follow
Week 12 (17-4 to 23-4)
17-4
Temperature: 23.1 degrees (lights on) 19,1 degrees (lights off)
Humidity: 62% (highest) 50% (lowest)
18-4
Temperature: 22.5 degrees (lights on) 17.9 degrees (lights off)
Humidity: 61% (highest) 52% (lowest)
Opened the reservoir for a couple of minutes. ec 1.4 ph 5.7
19-4
Temperature: 22.5 degrees (lights on) 18.4 degrees (lights off)
Humidity: 64% (highest) 54% (lowest)
No pictures.
20-4
Temperature: 24.1 degrees (lights on) 19.1 degrees (lights off)
Humidity: 65% (highest) 54% (lowest)
Light increased from 50% to 60% strength.
I also made a new 10L feed, and added it to the reservoir, there was still 2850 ml in the reservoir, so i can calculate how much they get per watering.
Opened the reservoir for a couple of minutes.
21-4
Temperature: 24.4 degrees (lights on) 19.3 degrees (lights off)
Humidity: 66% (highest) 54% (lowest)
No pictures.
22-4
Temperature: 23.7 degrees (lights on) 19.7 degrees (lights off)
Humidity: 67% (highest) 42% (lowest)
Opened the reservoir for a couple of minutes.
23-4
Temperature: 23.6 degrees (lights on) 17.7 degrees (lights off)
Humidity: 64% (highest) 50% (lowest)

Likes
33
Share
@Roberts
Follow
Cali crasher just went to ph water. Looking to cut her down in two weeks. Everything is looking great under the Hortibloom solux 350. Thank you Hortibloom, and Doctors Choice. 🤜🏻🤛🏻💪🏼❄️🌱
Thank you grow diaries community for the 👇likes👇, follows, comments, and subscriptions on my YouTube channel👇. ❄️🌱🍻
Happy Growing 🌱🌱🌱
https://youtube.com/channel/UCAhN7yRzWLpcaRHhMIQ7X4g

Likes
9
Share
@Trinidad
Follow
24.10.25
When I look at the leaves I see them yellowing and fading which I thought was natural, however I think it is too early in the plants life cycle to be doing that. From my research online, it looks to me to be nutrient burn. At 1st I was thinking light burn. I'm a relatively new grower so if anyone has any ideas let me know. Thanks.
Reservoir change out today.
I also reduced feeding by half recommended amount.
Likes
2
Share
@Oldwied
Follow
Light Power: 60%
To slow down the faster growth compared to strawberry cola. I filmed it at the beginning of the week. Five days later, it was topped and repotted.
Every other day I sprayed and watered with fresh LAB. I store the LAB in the refrigerator for over a week and dilute it before use.
Thanks to budtrainers, your budcups work great.
Day 20
Photoshooting
Fimming
Day 22
Photoshooting
Topping
Day 25
Photoshooting
Transplantation
Likes
8
Share
@ManilaGrowOp
Follow
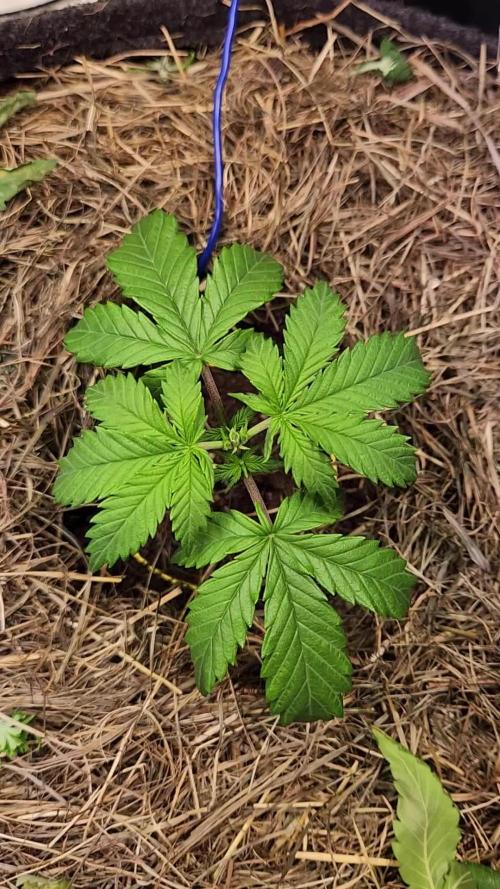
She took off like a rocket. This week she’s definitely growing day by day. I bought a cctv to monitor my plants while I’m not at home.
She loves the nutrients I’m giving her. I’ll probably grow her for about 1.5 feet in height and flip her until she can cover the entire 2x2 tent. We’ll see in the next weeks
Likes
38
Share
@Wicked_Stix
Follow
Not going to call flower on this one yet, but it looks like she is starting to stretch and switching to flower. She has really strong branches and everything is running smooth. Tried to spread her branches out a little but she fights every bend. Probably just do some defoliation on her and let do her thing.
Likes
60
Share
@Secretflower
Follow
Hello my friends,
...June 7, 2022.. ..Day N°87...
...Flowering day N°31...
My two Feminized Royal THCV are fine and beautiful, they are monster plants, the stretching seems stabilized and the flowers smells awesome sativa.
#1...140cm
#2.. 145cm
I give them water with a tablet of Easy Micronutrients from RQS Organics Nutrients.
They are under a MarsHydro TSW 2000 at 70% of power and at 20cm of the canopy.
www.royalqueenseeds.com
www.mars-hydro.com
www.marshydro.eu
Thank you very much for passing by.
Wish you the best with your green projects, peace.
See you soon 💨💨💨
Likes
2
Share
@victorwellgrew
Follow
thanks if ya still following this diary hope your as pleased at the progress as i am!!!!
im excited writing thia diary as i already know whats comin!!!!


