Likes
Comments
Share


@PinonAraucano
Follow
Después de germinadas las semillas, la planta comenzó a crecer rápido. Las hojas espigadas agarraron fuerza. A pesar de ser la misma cepa (las semillas venían juntas en el mismo packaging), una de las dos se disparó en su crecimiento y la otra está algo estancada. Por ahora, las plantas se ven sanas, con un lindo color verde.

Likes
6
Share


@artems
Follow
Bad Guy is thriving, but some lower leaves are yellowing. I've boosted feeding and will keep a close eye. Despite that, its upward growth is impressive, and I'm excited to see how it progresses. 😊🌿

Likes
10
Share


@AutoCrazy
Follow
Week 2 of flower
This plant is healthy and happy but she sure is taking her time adjusting to 12/12. I don’t see any pistils coming out yet. She could just be a late bloomer lol. Looking forward to her getting on the flower train lol. It could be that she wasn’t quite mature enough at the flip … 🤷.
6.0 pH
500 ppm
65 F water temp
71 F tent temp
41 % Rh


Likes
17
Share


@DimiTryCool
Follow
9 week
Smells excellent, sweetly and fruity.
Begin change color from green to rose .
Looks really wonderful.
Starting prepare for harvest.
Last nutrition at the end of this week.
Then flash

Likes
8
Share


@GreenForce
Follow
Hey Growers,
Week 7 Day 1, girls growing well, good juump in week 6.
We can see 2 girls more developed then other, since i dont know the strains (yet) i dont know the days off flowering.
Thank you.
Have a great Week, i will come back next year, with updates.
Good entrances for everyone 😎.
_GrF_

Likes
10
Share


@RFarm21
Follow
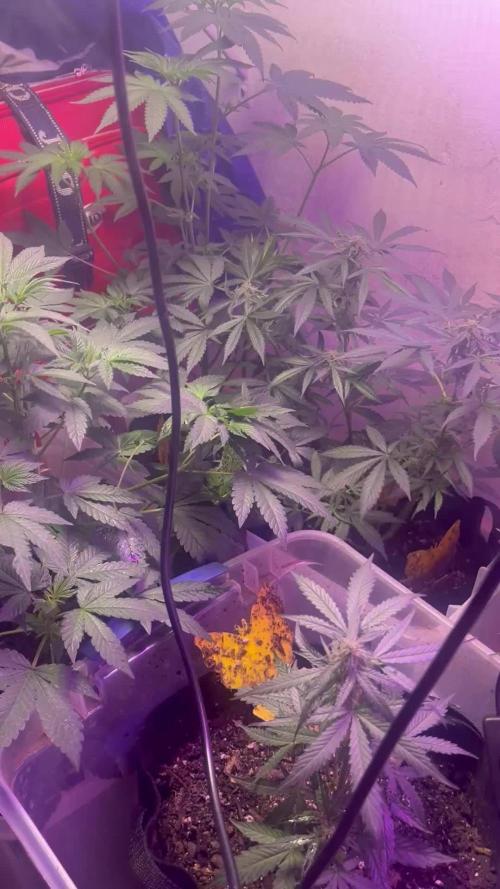
Semana 7 julho - 13 julho
9 julho - feed day - bloombastic 0.5ml/l - causou uma ligeira queima de nutrientes aparentemente.
12 julho - feed day (2L)

Processing
Likes
13
Share


@CannaScuzzyB
Follow
Hey everyone! So this week has been pretty good, no sort of issues really as I've decided to incorporate kelp meal into my next grow. With 4 weeks left of flowering, I feel this won't affect harvest too much considering my last group was showing cal/mag deficiencies before even going into flowering. Anywho, this bad boy is a monster and the buds are getting fat. I brushed up against some sticky leaves and all you can smell are literal blackberries with a skunky pungent smell to it. Exciting :) Buds are getting fat by the day, about toonie sized and getting some vertical growth to them..nice pine cones ;) Smell is incredible in the tent...sweet, skunky berries. Bye for now guys!
Likes
9
Share


@caspersaints1
Follow
Day 51-26
Fed 2 L till run off . She was thirsty from no feeding yesterday but humidity still fighting hard in the high 50s
Day 52-27-
Fed 1.5 L
Starting to lower nutes
Day 53-28-
Fed 1.5L
Day54-29
Fed 1.5L
Day 55-30
Missed
Day 56-31
Fed 2.5 L
Day 57-32
None
Day 58-33
Fed 2L
Day 58-34
No feed
Day 35
Feed2 L
Day 59-36
In one
Day60-37
Fed 2L
Day 61-38
None
Day. 62-39
Feed 3 L . 1st L plain ones water as no run off last few days
Then fed 2L with nutes
Day 63-40
None
Day 64-41
None
Day 65-42
Fed 2L
Day 66-43
Nothing - starting to see fading I think . Might start flushing in next few days
Day 67-44
Fed 2.5 L
Say 68-45
None
Likes
49
Share


@masterofsmeagol
Follow
7/4 SUN was poking out a little bit. Plants loved that little feeding and seen to he noticeable larger this morning. I'm considering starting the nutes. At least the organic ones as well as upping the water intake I've been scared to water with all this rain and my experience last time. I plan on applying BT this afternoon and doing some work on the bottoms of the plants. I also saw a chipmunk in my cage so I have some spots in my fence that need to be patched. I know I can't compare this year to orher years as these are seeds and all the other years were clones. I CAN say for certain that my plants are healthiest they've been out of any of my journals. Previous plants were much larger but I was fighting numerous fungal, pathogens and pests at the sane time. Ear wigs would've lollipopped most buddies by now but I've seen no sign of them. I'm going to apply more poison where they were and add some rat traps inside the cage for the chipmunks. Once I fix the cage I think I'll be good.
UPDATE: Went back over and fixed the holes on my cage from high winds. I found an old wire trap or cage and just cut sections and ziptied them to the existing wire and to the structure thus covering any open holes. I'll need to put lathes aroubdvtge outside because if a rodent REALLY wanted in they could get in. My belt had been wearing thin but I use shit until it breaks (yesterday the heal came off my shoe lol) so I was working hard sweating my nuts off and my belt gives out totally. At least ive got the major stuff done. I took a few videos too. I'm imagining it was this little bit of sun that gave these plants that boost of growth but I'm wondering if the added nutes had anything to do with it. Bags weren't light and I could feel moisture in the soil so I didn't water. I'll check again tomorrow morning. Since I didn't see many plants or even leaves for that matter with damage I decided to hold off ob the BT and the plant doctor. Only time will tell if that was the right decision.
7/5 Plants look fantastic. I see a few more holes in leaves sporadically amd I'm hoping it's pillars. I've seen lots of lightning bugs on my camera though and grasshoppers are abundant. Not one growth shoot has been chewed (knock on wood) which is what the earwigs had always done. I watched a video from last year and by nowcthey had lollipopped all lower leaves. It may not be the best weather growing season wise but despite the rh consistently in the 90's I still don't have pm or fungal pathogens. Need to get the BT out. Didn't water as we've had all that rain. I'll water either tonight or tomorrow morning. Sunny high in the 90s low is 66. Tomorrow looks good too.
UPDATE WENT BACK OVER AROUND FIVE. IT WAS 88 DEGREES SO I WANTED TO CHECK THE GROW BAGS. THE POTS ARE FINE. IT WAS HUMID AS HELL. ONE PLANT WAS SLIGHTLY DROOPY BUT VERY LIGHT AND DRY. I FOUND TWO OTHERS THAT SEEMED LIGHTER THAN THE REST BUT HADNT DROOPED. I MIXED TWO GALLONS OF WATER WITH 1TSP KANGOROOTS AMD PHED IT CLOSE TO 6. I FED THE 3 PLANTS THAT WERE SUPER DRY LIKE A HALF GALLON AND SPRED THE REST OVER THE OTHER EIGHT PLANTS. THEY WERENT DROOPING BUT THEY WERE VERY DRY. I PLAN ON A FULL WATER TOMORROW. I WOULDVE DONE IT TODAY IF THE TEMPS WERENT SO HIGH. ITS RAINED A MONTH STRAIGHT SO I HAVENT HAD TO WATER. I MADE A COUPLE VIDEOS BUT I'LL HAVE TO UPLOAD TOMORROW.
7/6 Another super hot day. I hefted the pots and they still had some weight but I could tell they were dry. This rain has messed up my watering schedule. Well it made it so I didn't NEED to water. These are big plants now. I need to get a schedule to stick too. They're going to probably need a gallon a piece at least. I'm still nervous watering. Right now I'm just reading the plants. I added .5tsp kelp me/you to 1 gallon of water to help with heat stress. I fed an additional two gallons to the garden this morning including the two container plants in the back. They were dry on top too but I know they have water deeper down. Next watering I'll be more consistent and try to give them there 10%. It's great having the bags elevated. I can finally see when I start getting run off. I could even measure the ph of it instead of relying on that meter. Ill check the ph when I go back over. Still a few 🐛 holes but they are few and far between. I really don't want to spray for such a small problem but if I cant find them at night that's what I'll do.
UPDATE: Another 90 degree day. I went back over and gave the garden a gallon of water as they were dry and it didn't rain. Tried to use a soil ph meter to check ph. First couple were 6.4, 6.5 then I got 7.3 and I accidently dropped it. Then I got somethings that were high eights and even one 9! Obviously the Meter shit the bed. I'll lower the ph of the water slightly when I fully water tomorrow and I'm going to measure the runoff.
7/8 I must've messed up the journal again as the dates are off. GAVE PLANTS A FULL WATERING. Each girl got a gallon. I couldn't upload my videos this morning as I had to break up a fight. 3 on 1. Didn't give me a chance to put the videos up. I'll take some stills then I can upload them. I took stills and they all uploaded but didn't fucking save. I'm nit going to keep trying to upload if it's not going to. Noticed a few more holes in leaves and one skeletinized leaf so I need to either spray the bt or something more versatile. I'm putting more poison around the cage and de between the bags. I'll go check things out tonight. Sick of writing a book and uploading to just hace them disappear
7/9 Did a quick video today. Noticed the bags were fairly light despite the plants being soaked amd the pallets wet. I was pressed for time. I gave two gallons to the entire garden. I hope that will hold them over until tomorrow. I'll need to up how much water I give them. Going with a gallon and a half next time. I see more pillar spots and a moth took off when I shook the plants this morning. So I'm gonna have too apply the BT. I figure if I go over before dark tonight I might be able to see aju nocturnal insects around. Luckily my dad feeds the birds and they are always there. I think they help with pests.
UPDATE IT WAS A LITTLE COOLER TODAY BUT MICH MORE HUMID. I WENT AROUND SIX TO MAKE SURE THE GIRLS WERE OK WITH WATER AND TO GIVE THEM A TREATMENT OF BT. I WENT THROUGH THE GARDEN ANDCGOUND THREE LEQVES TO DEFOLIATE AND LITERALLY A COUPLE LEAVES ON TWO PLANTS WITH PILLAR HILESM WHEN I ARRIVED TWO BIRDS FLEW OUT. A HORNET CAME IN WHILE I WAS THERE. THIS DO LESS APPROACH SEEMS TO BE REALLY WORKING. I DODNT SEE NEARLT ENOUGH DAMAGE TO WARRANT SPRAY8NG MY EXTREMELY HEALTHY GIROS WITH ANYTHING. ILL KEEP AN EYE ON THEM AND CLEAN THEM UP A BIT. I DO NEED TO INSTALL THE VERY8CAL TRELLIS FOR SUPPORT. THEYRE PRETTY HEALTHY THOUGH. ONE PLANT IS ABOUT AS WIDE AS IT IS TALL. STILL......PLANTS ARE EXPLODING AND ITS GETTING TIGHT IN THERE. I NEED TO GET THE TRELLIS UP THOUGH.
7/10 I went over and was planning to water. Plants were wet and it's raining. Top of the medium was moist but the bags were light. ONE bag was super light but seeing that we are having showers all day and an additional half inch of rain coming tonight so I didn't water them. Especially since they looked great. Decided to to spray BT yet as the damage is so small and i think the birds have been taking care of the pillars for me. Now I'm wondering if I should've gave that ONE plant a little bit of water but it will be find. Did a video. I'm being careful not to over water. Last year this is when all my buddies were devoured by earwigs. And no senescence like the years before. I think it was hust those earwigs. I haven't lost shot for leaves. Even the stalks are bright green and look amazing.
Likes
171
Share


@Roberts
Follow
Pineapple Express auto from Amsterdam marijuana seeds has germinated, and sprouted. Is looking great. I am unsure when roots will make it to the reservoir, but I would imagine it won't take long. 🤞 my mix is not too strong. First time around. Nothing new to report beyond that. She is being grow in a spider farmer 2.3x2.3x61 tent. With 4 inch inline smart controller extraction fan. Powered by a SE3000 which just got bumped to 45 percent yesterday. To purchase these items there is links below. Thank you again AMS, and Spider farmer.
Thank you grow diaries community for the likes, follows, and subscriptions on my YouTube. I greatly appreciate the support, and happy growing 🌱🌱🌱
To purchase a SE3000 please follow appropriate link
https://amzn.to/3jwCTO7
US:https://amzn.to/396hXXb
CA:https://amzn.to/3ol4oK4
DE:https://amzn.to/3q15SJT
UK:https://amzn.to/2L7NVKN
AU:https://amzn.to/3pZD6ZQ
FR:https://amzn.to/2Xkomsi
IT:https://amzn.to/3nk7A7h
Link for 3x3 tent: https://www.amazon.com/dp/B083K89FFJ
Link for 4" inline fan: https://www.amazon.com/dp/B08S7BKS3Q
Discount code on amazon: saveurcash

Likes
5
Share


@Bluethum94
Follow
I topped all but one the one I didn’t too hasn’t had a happy life but I’m getting it there
Likes
39
Share


@J4kpvp
Follow
Hello:)
Man, these plants are really taking their time:( The front 2 plants are ready, I could‘ve cut them even a week ago and the back two still look the same as last week in terms of trichomes. It looks like I need to wait at least a few more days for them..
I also cut the two buds which I thought had some mold, luckily there was nothing… I‘m still thinking about an early harvest though… don‘t want to risk all 4 plants…
RH is under control again, my dehumidifier was just broken:)


Processing
Likes
8
Share


@GrownwithLED
Follow
The two surviving Barbarian (=AK-47 x Barbara Bud) plants develop well after they were planted in soil. The first pot is very small (0,25 l) and only a little watering is necessary now. As you can see in the pics the roots grow VERY WELL with the Voodoo Juice from Advanced Nutrients.


Likes
40
Share


@Tazard
Follow
Wow what a beautiful monster she has become. I think (hope) she is done stretching. I have had to support most of the colas this week. A few had lain over towards other plants and if they were not blocking them then I left them lain over. The buds are really looking great and they are getting fatter on the daily.
Thanks again for following me on my adventure with making my own seeds.

Likes
20
Share

@Grow_Outside
Follow
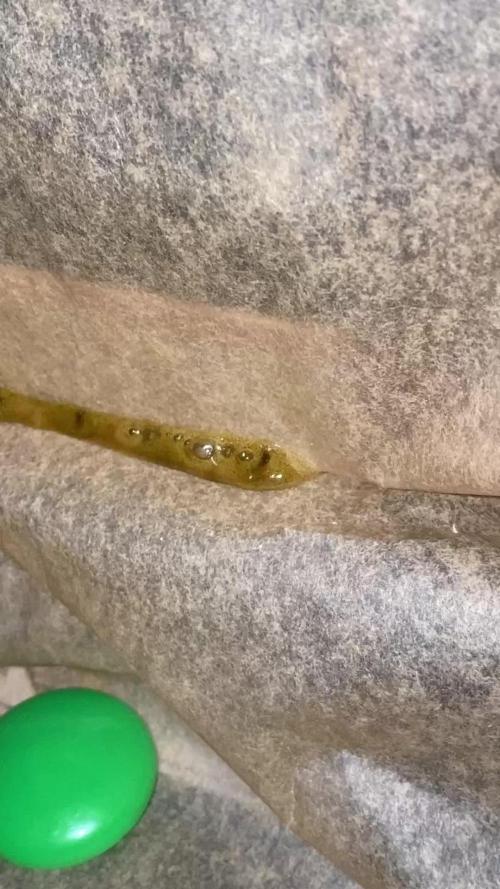
THE FINAL STEP🍯
Nach 6 Tagen der Trocknung hab ich das Bubblehash weiter verarbeitet☘️
Dafür hab ich eine Grasspresso V2 mit 2 Tonnen benutzt die Super easy zu bedienen ist 😅
Ein 35mikron Bag von Graveda war ebenfalls von Nöten! Gefüllt hab ich das Bag mit 2g vom Hash und unter die Presse gelegt, gepresst hab ich mit 85 Grad und den Timer auf 300 Sekunden
Die ersten 30 Sekunden hab ich nur mit den Platten das Material erwärmt und dann langsam angefangen zu pressen, ca alle 20 Sekunden wurde der Druck erhöht und ja was soll ich sagen :)
Seht selbst 🍯☘️🍀💚

Likes
8
Share


@smoothbutter07
Follow
5/30 update: both plants have been jarred for curing! A little disappointed with the over all yield but a lot to learn from this first grow! Expert seeds gg#4 comin next 👌0