


Likes
Comments
Share


@MrJoint
Follow
🛁 Beginning to clear roots.
✌️🎃 Thank you for checking my cultivation.

Likes
37
Share


@Roberts
Follow
Mandarin XL auto is growing great. She had a solution change early week. She has been growing steady, but is not showing any pistils yet. Which is fine. I seen plants get really big when they take a long time to start flowing. Everything is looking good. Thank you Gen1:11, Medic Grow, and Ganja Farmer. 🤜🏻🤛🏻🌱🌱🌱
Thank you grow diaries community for the 👇likes👇, follows, comments, and subscriptions on my YouTube channel👇. ❄️🌱🍻
Happy Growing 🌱🌱🌱
https://youtube.com/channel/UCAhN7yRzWLpcaRHhMIQ7X4g

Likes
3
Share

@GoodTimesOrganics
Follow
Hi liebe Community and Welcome back! 💚
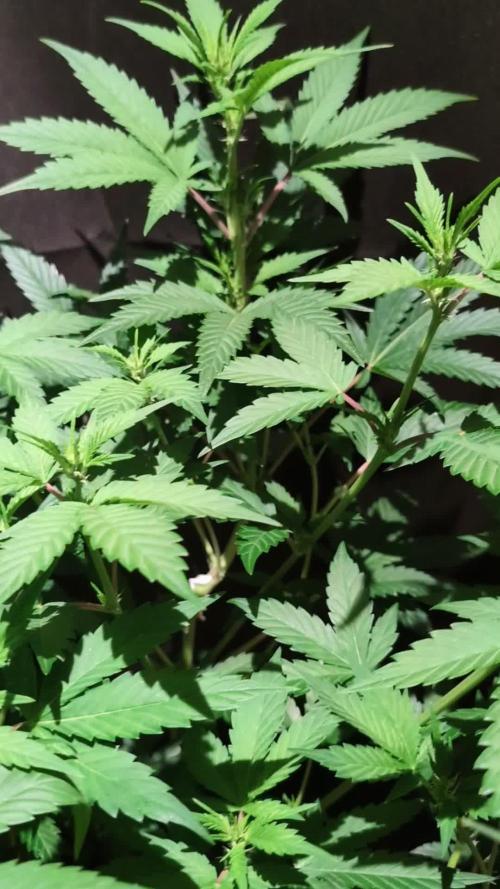
Der zweite Strain von Good Times Genetics. Entwickelt sich wunderprächtig und es sind sehr schöne große und Breitgefächerte Blätter zu erkennen. Ein schönes Wuchsbild verreint mit einer starken Indica Dominanz.
Nach der ersten Blütenwoche entwickeln sich allmählich die Blütentriebe und die ersten Stigmen sind sichtbar.
Also Düngerkomponenten kam das Greenhouse Feeding BioBloom und der entsprechende Enhancer zum Einsatz.
Der Stängelabrieb duftet schon stark nach säuerlichen, dieselartigen Nuancen, mit einen etwas GMO typischen Aroma.
Die Wachstumsbedingungen im Growzelt sind aufgrund der trockenen Heizungsluft zwar gut aber schon sehr trocken:
———————
🌞 Temp: 22°C
🌚 Temp: 20 °C
💨 RH: 38%
VPD: 1,33 kPa
😎PPFD: 830 mqm
———————
Stay Tuned! 💚


Likes
Comments
Share


@Chamed33
Follow
Just feed her ph water for the last couples of days I’ll be chopping her down this week due to heat wave in my area ..
wish I could let her go few more days
At this stage she’s releasing nitrogen still
Likes
2
Share


Likes
36
Share


@nonick123
Follow
Día 44 (15/07) Wow! No hay shock de trasplante! 😍💥😁
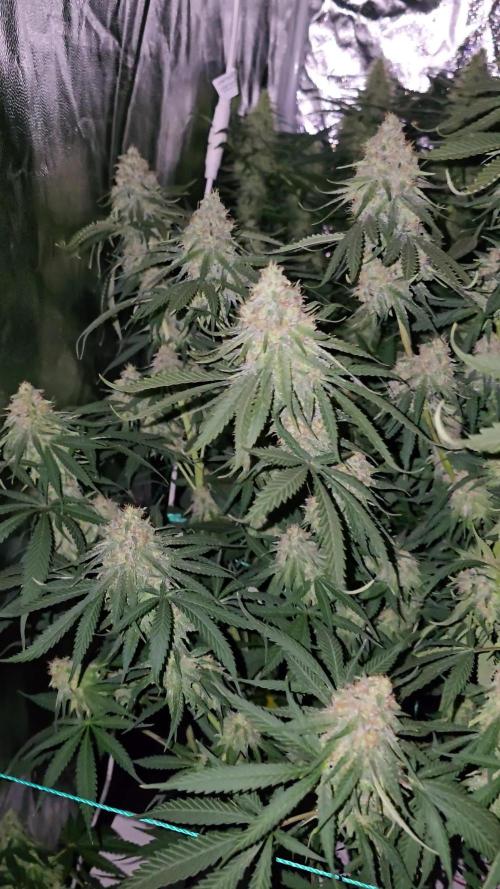
Todas las ramas se han estirado hacia arriba tras el ajuste de LST y se están formando nuevos nodos rápidamente
Esta combinación de nutrientes de Lurpe + substrato de PRO-MIX HP es una maravilla 😍
Día 45 (16/07) Ayer tuvimos ola de calor (37 ºC) y han aguantado muy bien!
A última hora de la tarde (cuando ya no había sol directo) les apliqué H2O en spray foliarmente para refrescar los estomas
Hoy parece que vuelven las temperaturas estándar para esta época del año: 29 - 30 ºC en las horas centrales del día
Riego con 1 litro de H20 pH 6,5
Día 46 (17/07) Pequeños ajustes de LST
Hay algunas ramas inferiores que no se han formado / estirado mucho
Lo más probable es que haga una buena limpieza este domingo, 7 días después del trasplante, para dejar solo los brotes por encima del 4º nudo
Día 47 (18/07) Riego con 0,5 litro de H20 pH 6,5
Este domingo (día 50) haré limpieza de partes bajas y tal vez también de nuevo topping en las 4-6 ramas principales 😁
Día 48 (19/07) Día de muchísimo calor con 37 ºC. A ver como lo llevan!
Riego con 0,5 litro de H20 pH 6,5
Día 49 (20/07) Para ayudarles a llevar mejor el calor de las horas centrales del día, coloca una malla de sombreo (70%) sobre el invernadero
Lo cierto es que se nota que baja mucho la temperatura debajo de la malla! Van a estar más fresquitas! 😍
Riego con 0,5 litro de H20 pH 6,5
Día 50 (21/07) Training session!
Hago limpieza del tercio inferior de la planta, de todas las ramas y nudos que no superan la línea del dosel marcada por el 4º nudo (1er topping)
También hago topping (2º) a todas las ramas principales
La idea es tener 12 ó 14 colas principales para que no se hagan muy altas
De paso saco unos cuantos clones de las ramas inferiores eliminadas 😁💥
Para superar el estrés, hago las siguientes aplicaciones y riego:
- Riego con 1 Litro de Té Vegetativo de Lurpe Solutions. Preparación: 24 horas con bomba de aire (oxigenación) con ingredientes:
Green Sunrise 8 ml/L + Insect Frass 16 ml/L + Hummus Lombriz 8 ml/L + Melaza 1 ml/L + Kelp Hidrolizado 0,25 g/L
- Aplicación foliar Kelp hidrolizado de Lurpe Solutions a 0,25 ml/l
💦Nutrients by Lurpe Solutions - www.lurpenaturalsolutions.com
🌱Substrate PRO-MIX HP BACILLUS + MYCORRHIZAE - www.pthorticulture.com/en/products/pro-mix-hp-biostimulant-plus-mycorrhizae



Likes
18
Share


@Hawkbo
Follow
They all doin pretty good, leaves are a little too yellow for my liking at this point I should have added some grow to the mix but they will be fine I think. This one has a much different structure than the others, both I'm growing are similar, short and stocky with very stiff branching very compact. In the picture its the one in the second row in front of the tallest plant.
REMEMBER , IF YOUR SHOPPING FOR GEAR YOU CAN USE THE CODE “BANGDANG” FOR 10% OFF YOUR ENTIRE PURCHASE FROM ANY OF THE FOLLOWING COMPANIES.
@greenbuzzliquids
@rainscience_growbags
@gorilla_grow_tent
@growlightscience.led
NEW* @Rocbudinc Seeds on his website *
*****Gorilla grow tent discounts extend to all companies affiliated with grow strong industries which include..*****
@super.closet
Lotus Nutrients
Kind LED grow lights
Likes
12
Share


@smoking_hills9
Follow
Top strain, very easy 2 grow with amazing results in the end.Some smells just insanely tasty . All done, very tasty but not strong at all, good for beginners and girls
So final results are 440gr of quality solid buds🤩✔️ that's not include the bottom trim and small buds.
5kg top solid buds total weight of harvest of 54 trees. Around 2kg of small bottom buds
Likes
2
Share

@Mars8_8
Follow
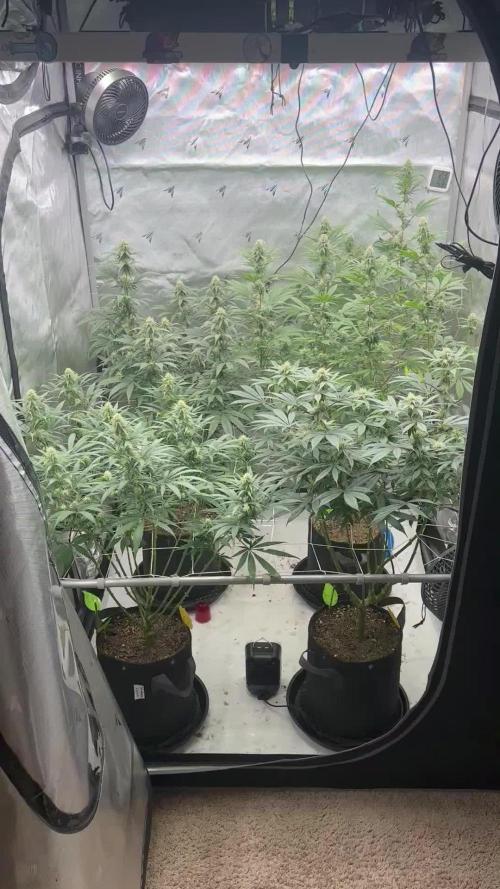
The 3 gallon pot struggle, back right is hungry af. Top dressed, tea’d em, then gave em a build a bloom feed to hopefully catch it up.
Have the lights at level 8/10 maximum height, 2 hour sunrise. Bouncing from 7-8 trying to find the perfect range. So far the chem brulee smells like a desert I can’t stop putting my nose against it. Northern lights and 5150 slowly starting to terp up to.


Likes
45
Share


@chapadux420r
Follow
Hello guys!
So it’s the end of week 2 of flowering and all is going well. Been watering every 2 days and, as you can see, we have white pistils and small buds in every plant
Not much to say, the ladys are green, stretching and growing buds as it should
Yesterday i’ve defoliated one of the critical + 2.0 clone and next week I’m going to defoliate the rest of the plants. Just wanted to test when it is better to do the defoliation so it’s kind of an experiment
Tell me what do you think of how this is going


Likes
175
Share


@love_2_grow
Follow
Day 36
First day of the final week of vegetation. Originally I was planning on vegging another few weeks but since the right girl already has a bigger bush than a 70s pornstar I'll flip soon, before space will be an issue. Preferably I'd veg the left girl longer as she is still lagging in size but it's too big of a mission to set up my second tent and move her over there.
Super easy day today, all I did was to give the right girl 3 liters of pH 6.1 water as well as tightening a few LST wires.
Day 37
All I did today was to tighten some LST wires, removing some more leaves down low on the plants, and watered the girls with pH 6.6 water. The left girl got around 2 liters and the right one only got a liter since she wasn't all that dry considering that she was watered yesterday. I also started brewing some compost tea to feed to the girls tomorrow. I used the same recipe as previously: worm castings, rock dust, biochar, lime, bentonite, neem meal, kelp meal, and some molasses.
Day 38
Open the tent today and was met by a surprise - one of the tops on the left girl had broken off. I tightened the LST wires yesterday and all was ok when I closed up the tent but I guess that I had tightened a bit too much so the top eventually broke. Sigh. Wasn't planning on topping again this week but yeah, gotta roll with it. Maybe I move one of the girls to the second tent after all. We'll see.
All I did in the tent today was to feed the girls some compost tea. Each girl got around 0.5-liter tea as a foliar spray and then an additional 2.5 liters in the pot. True to form I naturally forgot to pH the tea. No idea why I always seem to forget to pH my compost tea but I really should make an effort to remember it next time.
Day 39
All I did today was to give the right girl 3 liters of pH 6.6 water. She is so much bigger than the small plant so she drinks a lot more. Currently, I'm watering around 10% of the pot volume per day.
I'm pretty sure I will move out the petite girl and put her in my small drying tent and keep the right beast in my main tent as I'm kinda curious to see the yield I will get from her when she can spread out properly. I have already ordered another grow light and it should arrive tomorrow.
Day 40
Today was a busy day in the tent as one of the girls moved out to her new home. Before I go into details, I should take a step back and explain my setup.
I have this tiny tent that is 40x40x120 cm big (16x16x48 inches) that I use as a drying tent. It has a circulation fan, an extraction fan, a carbon filter, a temp/humidity monitor, and an inkbird humidity controller to control everything.
I have been considering turning it into a small grow tent to fool around and see what I can grow in such a small space. I've always been fascinated by small challenges, to see what you can accomplish within strictly set (and small!) boundaries — both in size and in budget.
I was planning on setting up this tent after the summer, but as I'm running out of space in my main tent, it seems like a good idea to do it now instead.
The only thing the tent lacks to start growing is a light, and I already have a ViparSpectra P600 light, but it is currently used for my chilis and tomatoes while they are waiting to move outside.
So I bought a new low-budget light to use with the veggies and move in the ViparSpectra light into the tent. The P600 is also a budget light, but I'm hopeful that it will still work well in such a small space. After putting in the light in the tent and measuring the PAR level, it looks like the ViparSpectra is more than up to the challenge as I had to dim the light not to fry the canopy below.
The entire build with everything in it (tent, light, fans, carbon filter, etc.) is well below 250 euros. So about half of what one of the lights in my main tent costs. lol.
Once the light was installed in the tent, it was time to move the left girl. First, I carefully removed the scrog net, and it was pretty easy as the plants hadn't grown into the net yet. The small tent has a tiny door that it was a challenge to get the girl in but with some help from my girlfriend and some brute force; the plant went in. It is very tight in there, and I will have to do some selective pruning for sure, but I'll do that over the weekend.
In the main tent, I moved the girl into the center and put back the scrog net. I will have to train her further to fill up the space entirely, so maybe I do another week of veg after all. I'll work on her over the weekend as well and see where I'm at on Monday.
I adjusted the lights to read similar PAR levels at canopy level in both tents, but once I go into flower, I'll bump up the main tent as I have CO2 in there, so the girl should be able to handle more light and heat.
Finally, I gave each girl 3 liters of pH 6.1 water.
I had to use the ultrawide lens on my phone to capture each plant in the photos. Fun to finally use that lens :)
Day 41
Today I moved the small tent back into its stealth location, another IKEA wardrobe. There's no real risk that anyone would discover my grow but I still prefer to keep everything as hidden as possible. Watered the girls, each one with 3 liters of pH 6.5 water. I also removed all LST wires from both plants but attached some new ones for the right girl. (I'm going to keep calling them left and right even though they aren't in the same tent anymore.)
Finally, I defoliated the bottom of the left girl. That's it. All in all, a really chilled day.
Day 42
Today was the last day of week 6 of vegetation. I know I said earlier this week that this would be the last week of vegetation, but I might veg the right girl another week. To give her a bit more time to fill out the tent. I'll decide that tomorrow, but in any case, I'll flip the left girl as her tent is so tiny, and I don't want her to get any larger.
The left girl is now 38 cm tall, and the right girl is 46 cm tall.
The right girl got 4 liters of pH 6.1 water today as she is sooo thirsty right now, but the left girl didn't need any today, so I left her alone.
I started brewing some compost tea (worm castings, rock dust, biochar, lime, bentonite, neem meal, kelp meal, and molasses) as I want to do one final foliar feed tomorrow before sending the girls into flower.

Likes
2
Share
@Riddle_Fawkes
Follow
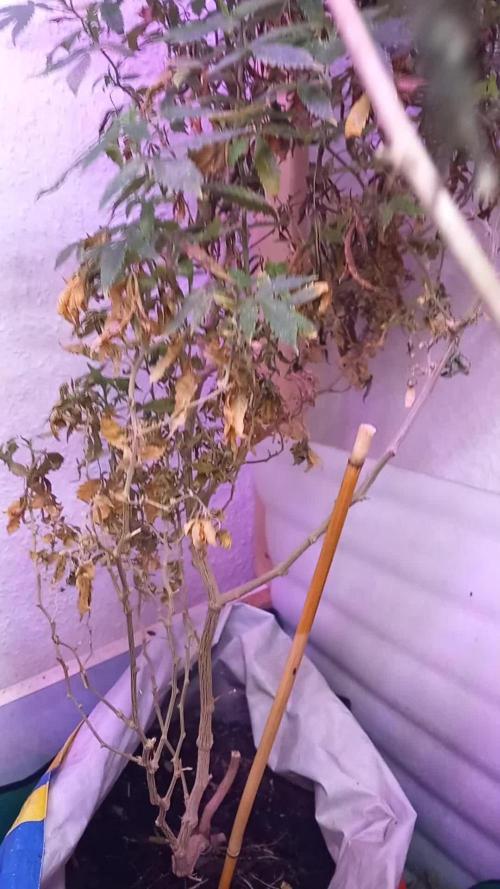
Very very strong genetics. Seeds almost gone resellers still have it


Likes
17
Share


@HIAZ_urbanbudfarmer
Follow
She is going well, topped main & secondary branches ( 2nd topping) & performed some l.s.t. training & mainline training. Thanks to Fast Buds for the cool apparel & FF seeds, my prize for being 1 of 10 winners for November diary of the month 👍
Likes
Comments
Share


Processing
Likes
7
Share

@Hawkbo
Follow
They all doin pretty good, leaves are a little too yellow for my liking at this point I should have added some grow to the mix but they will be fine I think. This one is a one of the shorter ones with fat buds.
REMEMBER , IF YOUR SHOPPING FOR GEAR YOU CAN USE THE CODE “BANGDANG” FOR 10% OFF YOUR ENTIRE PURCHASE FROM ANY OF THE FOLLOWING COMPANIES.
@greenbuzzliquids
@rainscience_growbags
@gorilla_grow_tent
@growlightscience.led
NEW* @Rocbudinc Seeds on his website *
*****Gorilla grow tent discounts extend to all companies affiliated with grow strong industries which include..*****
@super.closet
Lotus Nutrients
Kind LED grow lights

Likes
6
Share


@Rugginho94
Follow
I cut another part of the girls, and the total is even greater than the first part!
We wait another week for the final sums, but right now the flavor is unique.
Likes
24
Share

@Organic473
Follow
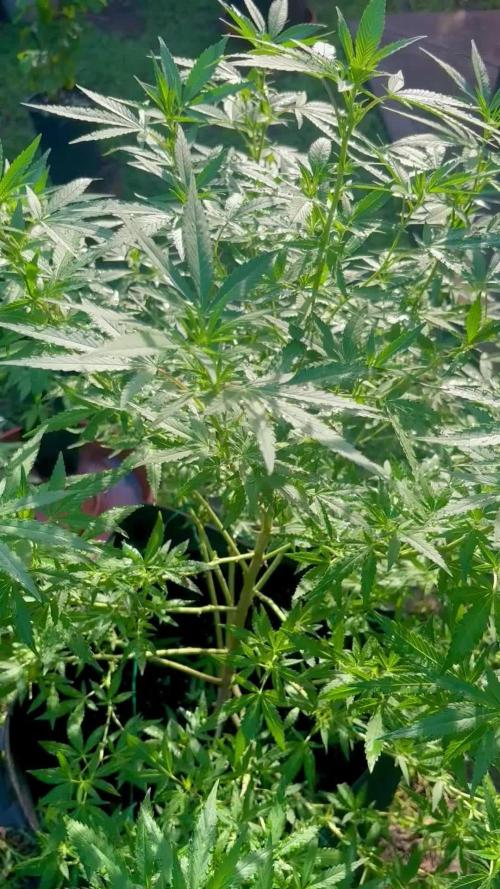
I added a friend and low stress her to control the humidity so far so good.
Likes
7
Share


@Ieiogrow94
Follow
Eccoci qui...
Tutto va per il meglio, questa settimana ho eseguito Lollipopping e Defoliation per far si che le cime principali sprigionino al meglio il loro vigore.
Siamo verso la fine del progetto ora bisogna solo aspettare la fine...
Grazie a tutti per il supporto🔥🌲❤️
