


Likes
Comments
Share

@Rayshian
Follow
Day 78-Day 15 of flower for GSC and 19 for GG#4. Did some rearranging in the tent because I ordered a new flowering tent setup. I’m excited to split these two girls off from the auto in the tent and put them under 480Ws. Fed em with 2L of nutrient solution and left it at that.
Day 82- After I got the new flowering tent setup I did some defoliation on my girls so they can soak up all that extra light they’re getting now. Just put em under a 480W Ecofarm LED but it’s only at 50% power for now. I’m not supposed to be doing any of this because of the surgery I just had but I just can’t bring myself to wait for someone to come around and set it up for me.

Processing
Likes
2
Share


@CanadianFillmore
Follow
Start of 12/12 light cycle, round 2 with the citrus skunk strain. Increased feeding to 6L per plant (water + nutes), hopefully this increase will keep the plants healthier throughout the grow.


Likes
6
Share

@SOme_Venutian_Weed
Follow
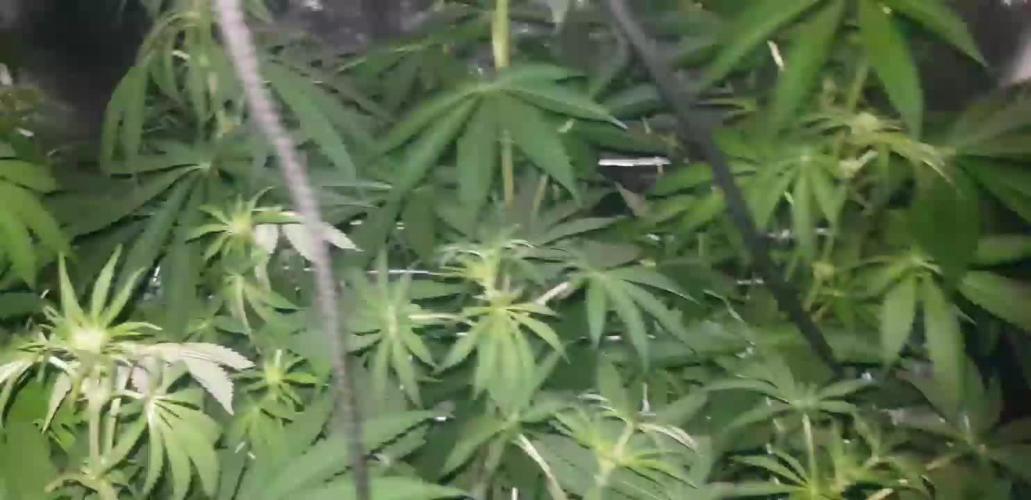
Sorry for the lack of update smartphone fell into the water a new one is coming on monday , you'll all see the amazing view i have in the garden today :)


Likes
12
Share


@MH_RDWC
Follow
Pics from Christmas Day are actually last day of week 6 but video is week 7 so grouped them together. They’re in the big tent now and very happy.

Processing
Likes
14
Share


@rainman
Follow
Week 5 start, no signs of flowering yet, very strange. But i think it will start in next 2-3 days. Overall previous week was very good and productive, plant grew double or triple size. Let's see what this week brings.
Day 30 - Its hard to see on a photos, but scrog is doing a great job and theres a lot of bud sites. Some are covered by big ass leaves, but i check it and fix as often as i can. Will get some better pictures and video tomorrow.
Day 32 - Decided to give plamt a flush right before flowering, so it can start with some fresh roots. Plant is growing really well, will need some leaves cut. 4L with FloraKleen.
Day 35 - Flowering is going full speed, will cut some leaves tomorrow, as they just block a lot of light. Almost no smell. 4L with nutrients.
Peace.

Likes
8
Share


@jsnafu
Follow
She is growing well, after a slow start. Light is 17” and the par is 600ish. I am going to make canister with yeast. Having a problem with low humidity and high humidity at night in the 70% range. Still just watering with cal mag, VJ and B-52 about 50-100 ml every other day.
End of week update: the environment is doing better. Moved the light a little closer about 700 par. Watering has been 2-3 days about 75ml. Exciting things to come…


Likes
Comments
Share


@Yiyis_Grow
Follow
- Luz: Bestva Pro 1000W / 18 h/d
-FloraNova Grow G.Hydroponics: 0.6ml/l
- Armour SI G. Hydroponics 0.4ml/
- Rhizotonic Canna : 4 ml/l
- Everest: 0.5 ml/l
-Sustrato: 2 partes de JIFFY fino con perlita + 1 parte de sustrato universal FLORAGARD
- Diatomea y aguande grifo

Likes
38
Share


@Cariboo_OG
Follow
Utopia Haze is a rare heavily sativa dominant hybrid (90% sativa/10% indica) strain created through back crossing Brazilian Sativa strains. This tasty little bud took home 1st Place for Best Sativa in the 2008 High Times’ Cannabis Cup and for good reason – with its potent 18-22% average THC level and long lasting cerebral effects, Utopia Haze is one powerhouse smoke. The Utopia Haze high comes on soon after you finish your first toke, hitting you with a strong cerebral lift that infuses you with a sense of hazy relaxation.
Type: Feminised/Photoperiod
Cultivation: Indoor/Outdoor
Flowering Time (days): 70-75
Indoor Yield (g): Up to 650
Feminised Outdoor Harvest Month: October
Feminised Outdoor Harvest Month Week: 3rd-4th week
Aroma: Citrus, Woody, Pungent, Mint
Effect: Cerebral Lift, Hazy Relaxation, Sleepy
Welcome Everyone to the Final Entry of my Utopia Haze Grow !
There is so much to discuss ! I have been extremely busy as of late trying to get this Harvest together, but i am happy to have it here for you now !
I Seriously under estimated the amount of time, help from others, and my own necessary skills to pull this off.. and i still kind of screwed it up lol !
But its worth noting i have never actually done this before and trying to document it during....was extremely hard.
It is next to impossible to work an iPhone with rubber gloves on !
First I want to discuss everything step by step so before you jump straight into the comments on how the end product is so small in "quantity"
Rest assured i am happy with its"quality"...and thats all that matters to me because Life is a journey not a destination! and i have learned so much from this grow that I couldn't be any happy even if i messed some things up :)
But at the very least I hope you read through this entry in its entirety with an open mind and focus more on the process, rather than just the outcome!
I ran out of Ice & i was only able to wash three times..(normally I've heard you should go sometimes 5-6 washes)
Preparation is Key & things will be much better next round :)
Photos 1-22
These are pretty self explanatory but for those of you just tuning in now.. this is what happens to a very happy plant when you don't have the necessary tools to monitor key components of growing cannabis.. Ph, as well as EC levels play a very key role in the outcome of your grow lol that being said I was just able to save this plant by purchasing both tools but that doesn't mean the plant didn't suffer because of the prior events.. This was a Huge reason behind me choosing to turn this harvest into what i would consider
"Solventless Hash Rosin" from "Ice water extracted Bubble hash".
Pictures 23
The idea here is the process of using "fresh Frozen Cannabis" this has been discussed many a time online on such sites as instagram and here on grow diaries as well.. I personally have Never tried the process so i decided to try it out and make a judgement for myself..
Video 24
The Cannabis has now been in the freezer for 72 hours making it very well frozen.. as you can tell i struggled getting it all into the 25u Screen Wash Bag. One thing of note i would do differently is i will de-stem my next batch as i also believe this played a part in the amount of plant matter that escaped through the sieves.
Photo/Video's 25-28
The idea here is "ice water Seiving" & especially with the bags that I am using here that are only have screen material on the bottom portion of the bag it is very important to have spaces in-between the screens to allow the water to pass directly through the screens into the bottom bucket with the least amount of resistance.. because the hash is so extremely temperature dependant if it gets warm on the side of the bag.. it will stick there and not make it to the bottom to become use able product..
29
You do not need to use as much Ice as i used here lol... the idea is to keep everything very cold..i certainly achieved that but at the sacrifice of using so much that i ended up grinding product and producing "contaminants" but in the end they are just plant matter that i would be smoking when i rolled up my joint either way so.. I'm not super disappointed..
But it should be noted that what you want to achieve here is a Layering effect where you have the wash bag between two small layers of ice while the "water current" washes the Trichomes away allowing them to be separated by the screens setup below :)
Before Starting the machine you should allow some time (i.e.;10-12minutes pre soak to allow the product to become saturated) before the first cycle.
By video 32 I have just ran out of ice lol..
Video 33-34
Here I have a tip for you.. to separate the screens that you sieve through.. cut 5 gallon buckets to stretch them across nice and tight.. it'll make scooping your Bubble that much easier ! i learned this from the many "Frenchy" videos I have watched :)
Picture 35
Here in lays the problem for most people.. drying your hash without loosing vast amounts of "Terpenes" whilst also stay ever vigilant against mold !
Thanks to all those videos I've watched on youtube.. id like to think this was one of my most successful parts of this process..
Things to Note; Terpenes start to seriously evaporate at temperatures 68F or 20C
you need to stay as cold as possible whilst bringing the Relative Humidity in the space down into the 40-30% to stay away from that nasty mold !
I used my cold storage room in the basement.. with a dehumidifier running to keep the space at 45% RH & staying at a constant 15c.
All while spreading the hash as thin as possible across parchment paper, on top of the white screens with a fan moving air across both sides of the paper.
Pictures 36-38
These are some macros i took in the middle of my drying session I fell in love with the colour.
Yes i know the black spots are plant material but they will get caught when i bag the hash & squish the oil out.
Thing to Note; at this stage it is important to ensure you 'micro plane" the hash down as fine as you can whilst staying weary of the temperature... any "chunks" will hold pockets of moisture.. that lead to potential problems..ie; mold ...
Picture/Video 39-41
Successfully planed bubble hash ready to be bagged and Squished !
Picture 42
Ive decided to follow Pedro.. from Pedros Grow Room and double bag to be on the safe side so i don't have any blow outs.
So thats One 25u bag inside one 160u bag ! :)
Pictures 43
This is almost 3 grams of the bubble hash from above, already melting in the bag.. this is where i ran into trouble again lol things started getting to warm in the house and i was only able to get one of the three squish's i did on video :( things started getting sticky.
Picture 44
This is basically just a photo of the equipment I'm using; 3x5 LowTemp Cage in the frame I built myself, with a 20Ton bottle jack.
Something to note here is this is an older Lowtemp model with only a single heating zone which is which i have it closed here heating Both sides of the press :)
As well as the importance of having adequate pressure on your plates.. my rig is very overkill for the size of hash bags..lol
Video 45
Here is the lovely press video.. its didn't quite work the way i wanted either lol my directional folding wasn't quite tight enough for a big "drip" :)
&the Press was set to 65°c
Photo's 46-50 are pretty self explanatory :) I had a blow out.. but still managed to pull an 80% return from the hash once squished...& yes it tasted amazing :)
Was it worth it in the end... that could be debated.. for some..i understand..its not your thing, but for those of us that are interested in making our own concentrates.. free from Solvents...
I wouldn't make it any other way :)
If even ONE of you reading this diary finds it helpful to reference for ANYTHING.....even if its "what not to do" ill consider it a success !
Thanks again for tagging along on this garden adventure.. its been one heck of a journey !
Much Love from B.C. Canada,
Until Next time,
Cariboo

Likes
1
Share


@PigBearMan
Follow
Hey there.
All photos and videos from flower day 27.
Plants are developing pretty good.
On flower day 26 (end of flower week 4) I started adding Green Sensation.
See you next week.


Likes
67
Share


@AwfulBuddy
Follow
the roots obstruct the drainage of the system and the water does not descend into the tank easily and the rockwools and roots are flooded, this causes the increase of ph in the reservoir and in the rockwools.
this week I hope to solve the problem, for the moment I use a timer for the water pump (15 on 30 off).
update:
I solved the problem of the roots on the drain by folding the mat on itself with the whole pack of roots descended into the tub, a little rough but functional.
but unfortunately I lost almost a week to flush the girls due to the flooding of the root zone
I have to start halving the doses of nutrients again ...
... it was a bad week but maybe I learned something 🍀
water pump restored 24/24h
Light lifted up from 50 to 90cm
Ppfd 1300 > 1000


Likes
47
Share


@Wastent91
Follow
Ehi ragazzi come va? A me sembra tutto bene!però questa ragazza non capisco come mai, rispetto alle altre cresce più lentamente sia in altezza che a livello di cime laterali, la dos si dos invece praticamente si è fermata e cresce come una nana, secondo me può essere il substrato di entrambi che questa volta ho utilizzato uno un po più ricco di fertilizzanti, ma pensavo che i nutrienti della green House con i loro funghi li avrebbero smaltiti e dati alla pianta, ma a quanto pare ci deve essere qualche problema di blocco di nutrienti, sinceramente non so cosa fare se non aspettare e aggiungere solo acqua , è la prima volta che uso questi nutrienti indoor, di sicuro avrò sbagliato qualche dosaggio o qualcosa altro io, xke i nutrienti green House organici nn sono loro il problema, mi dispiace davvero tanto ragazzi, speravo che venisse su almeno anche lei come le altre sue sorelle in cui uso nutrienti bio tabs sui quali ormai ho una certa esperienza... Speriamo che la situazione si risolva, metterò le ultime foto come domanda questionario spero che qualcuno mi aiuti magari, buon 420 a tutti! Vi lascio qui sotto in descrizione comunque sempre i link Dell equipaggiamento della Mars hydro che è grazie a lei che tutto questo è reso possibile! Inchiniamoci a Mars Hydro! Ahahah 🤣😺😼😽😺💖🧑🌾🌱🌿🌲💨🤩
https://marshydro.eu/products/mars-hydro-100x100x180cm-grow-tent/
https://marshydro.eu/products/4-inch-inline-duct-fan-and-carbon-filter-combo-with-thermostat-controller/
Likes
33
Share


@valiotoro
Follow
Hello everyone 😎
After 24hours in a glass of water with a few drops of hydrogen peroxyde all the seeds have germinate🌱🎢
They will grow under the new Mars Hydro FC1200 evo💥
Likes
35
Share

@squalino
Follow
bonjour à tous
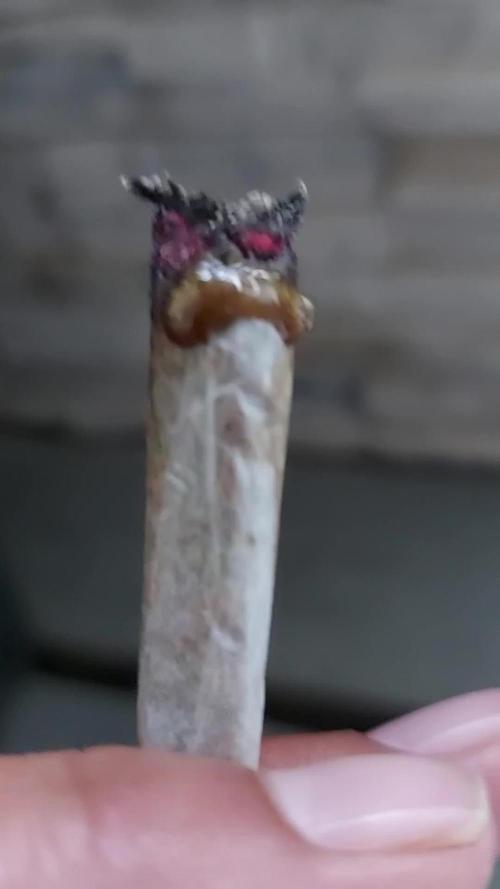
après quelques mois de curing voici la rosin de ma papaya .
je la trouve magnifique.
sa couleur a la lumière est splendide. on dirait de l'ambre.
à l'ombre elle paraît plus sombre .
sont goût tire dans le floral .un délice ❤️❤️❤️
ca puissance on en parle pas . un décollage au cerveau instantané. phénoménale.
Processing
Likes
11
Share


@AvoidantGrower
Follow
day 71
she is putting on weight even with all the burned leaves
I believe Jeff123fish is right about the soil being toxic - the run off had about 1000ppms but the pH was good and I think the light distance was a little close and just accelerated the already damaged leaves. I flushed and raised the lights some. She smells like skittles and I think she will pull thru just fine.

Likes
15
Share


@THC123
Follow
Day 118
Another check fan alert. Exhaust stopped working. We’re now back in action. Hoping this one will hold out for another week until harvest! Next batch of seeds have been put into Jiffy pellets. Will update on the plant I moved outdoors right before I put them into flower. It looks incredible!
Day 119
Trichomes are still glass-like. Some are beginning to cloud, but it looks like probably another week or so to go.
Day 121
Turning the humidity down to try and simulate fall weather. Try and get these plants to flower a bit quicker before the get nanners
Day 124
Just starting to get some amber trichomes! Ready for harvest. Putting it into a 2 day flush and then she’s getting cut down!


Likes
5
Share


@Eljardindemargarita_grower
Follow
Buenas compis
6 semana ya ...
Esto se va acabando
Afrontamos las ultimas etapas de este seguimiento , en el que comenzaremos a limpiar raíces , en días
Ya parece que van acabando su ciclo , así que irán bien de tiempo ..
Mil gracias
Un saludo
