The Grow Awards 2026 🏆 


Likes
12
Share
@Mr_Haze_Chile
Follow
Todo va bien es asombroso como las magnum a pesar de haber terminado el mes de crecimiento vegetativo siguen creciendo de manera exuberante! Se le aplicó una poda súper cropping + LST en la punta o tallo principal por así decirlo


Likes
29
Share
@GrowingGrannie
Follow
I've rather ignored these ladies this week as a lot of other things were on my agenda - but they don't seem at all bothered by the lack of attention. In fact, they seem more than happy to just do their thing.
We've had more hot days and fairly cool nights and nothing is fazing them - nothing! Their pistils are just starting to go brown but I don't foresee a rapid change here... they just keep bulking up and bulking up... whoever said that sativa buds were light and airy have never met these gals! They're out on my deck with 3 indicas and if I hadn't labeled the pots, I'd have a hard time figuring out which was which except for the smell! Kudos to the Super Sativa Seed Club!!
Still a few weeks to go but I'm VERY pleased with their progress!

Likes
8
Share
@Thedibber
Follow
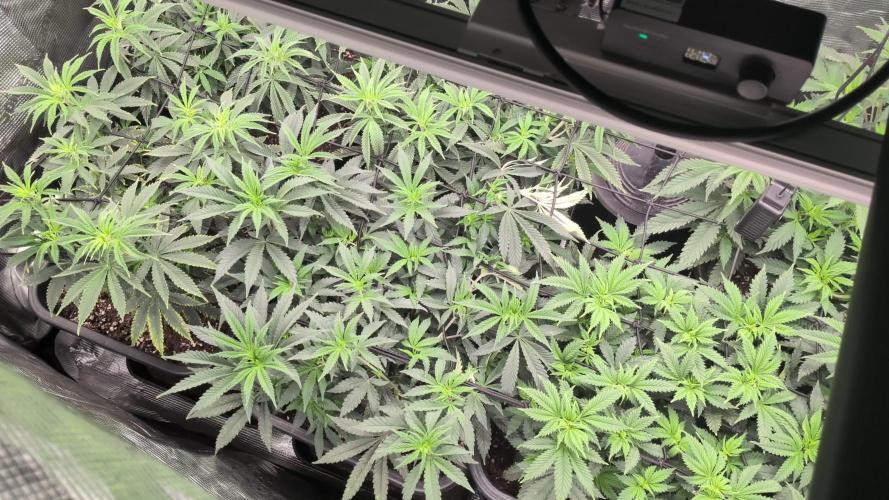
Scrog added 22/01/26 and already recovered the next day filling out well
Processing
Likes
7
Share

Coming along nicely in a week or so I will Super crop and scrog shortly thereafter flip to 12-12
Supercropped November 9th 2018
Sugar Black Rose clones humidity dome
Lollipoped and Topped and Scrogged
Nov. 11, 2018


Processing
Likes
11
Share
@ganjaman24
Follow
It’s bern roughly two months these guys have been growing! Lst’d Both but untied the gg because I wasn’t sure she was benefiting from it so I’m going to do it over. These ladies (I hope) will start their flower journey next week when I revive my new flower tent 😎..stay tuned for some epic buds..I hope!!

Likes
21
Share
@m0use
Follow
***Sponsored Grow*** = Medic || https://medicgrow.com || Grow = ***Sponsored Grow***
This week was fun, realized I was giving my plants close to 60DLI vs 40DLI so I lowered the lights back down to 80% they should be within the range of 38-42DLI depending on specs, I lack a tools to monitor this in house so have to go off of specs and calculations I have from manufacture and other people who reviewed the lights online. main big one is 2.8 vs 2.2 effectivity on the diodes. Noted that the white dandruff coming out the runoff was indeed spring tails. looks like they have made a home in my medium and I don't care. must be eating all the dead shit. Still ph'ing my water up to combat the acidic whatever in the pots. maybe this is from the spring tails or bacteria in there. good thing is they eat mold and other nastiness in the soil. I do think I messed up quite a bit on this grow, I am hoping the next one will be better. First time using liquid feed vs dry soil amendments. The seedsman plants are doing quite well vs the others, the spread out habit of this plant is allowing lots of light to hit all the bud sites. and I keep getting different smells off of it depending on the day and the last time I watered. Will know its true profile when I can chop and cure. Guessing this will be about 2-4 weeks out.
Till next week.
***Sponsored Grow***
Official Website: https://medicgrow.com/
Facebook:
https://www.facebook.com/medicgrowled
Twitter:
https://twitter.com/medicgrow
Instagram:
https://www.instagram.com/medicgrow420/
YouTube:
https://www.youtube.com/channel/UCNmiY4F9z94u-8eGj7R1CSQ
Growdiaries:
https://growdiaries.com/grower/medicgrowled
https://growdiaries.com/grow-lights/medic-grow

Likes
25
Share
@eldruida_lamota
Follow
Ya estoy de vuelta y esta vez se trae la quinta semana de crecimiento de estas Casey’s rollex O.G. de Dutchfem. Están fenómeno los 3 ejemplares van al mismo ritmo y entre nudos tenemos muy poca distancia, se nota su genética indica, la temperatura va de 21/23 grados ya sea de día o de noche.
.
La humedad anda entre 50% y el ph está en 5,8/6,0.
.
AgroBeta:
1 ml x L Growth black line , vía radicular.
0,2 ml x L Tucán , vía radicular.
0,2 ml x L Flash Root , vía radicular.
0,05 ml x L Gold Joker, vía radicular.
.
Hasta aquí es todo familia, espero que os vaya gustando el proceso tanto de crecimiento como la futura floración 💨💨💨 buenos humos.

Likes
2
Share
@ESExPincheb00f
Follow
All three plants were loving the big bloom and voodoo juice I gave her. I raised the ph and kept it at 6.5 she’s just been really happy ever since. Giving that its an auto its going to go into flower pretty soon! ✌️✌️😎

Likes
5
Share
@Acid_joker
Follow
Я. Уже. В канце. Парни дадейюсь палучить харошие фрукты буду рад. За. Помашь. И. Знакомства ,,😎👽🔥🌴🍁


Likes
6
Share
@Domenik
Follow
The jack herrer had some problems so she wasn‘t really tall, but the buds turned out really well so all good :)


Likes
7
Share
@SupportiveMango
Follow
Started to flush GG Auto 2 (Grown in 70% Coco & 30% perlite). Since she's getting heavy and falling over I bought a cheap net (the wrong size ofcourse lol), but it does the job. Just waiting for those amber trichomes now!
Hoping to harvest her on day 90.
It's very humid here where I am, so have had the dehumidifier going non stop which is making it much hotter in the tent. Trying my best to keep temperatures below 30c during the day.
First grow so any feedback would be really appreciated!

Likes
70
Share
@Kid_Colombia
Follow
They are doing good, flipping into flower next week. They love the new light.
It’s been a little too hot since adding in new light. 30-31 degrees during peak heat - thinking about getting an ac machine next week


Likes
16
Share
@Northern_Ent
Follow
Aug 31: Overdose is doing fine and is now five weeks into flowering (or a week behind my two big photoperiods). I broke one of the main stems about a week after topping so it has a weird shape but there are lots of good bud sites so she’ll be fine.
Shorter veg time than my two big photoperiod plants and only topped once because I was expecting an auto not a photoperiod plant. If it’s Overdose Fast I’m cool with that as I’ve decided that I prefer fast photos to autos which are more sensitive to setbacks and generally trickier to deal with at large scale.
Sep 2: strong plant with lots of buds.
Sep 4: adding some potassium silicate every couple days lately while watering.

Likes
1
Share
@nijuana
Follow
I had a big problem with the nutrients unfortunately I think it was an excess she was stressed I recorrected the problem
Likes
11
Share
@Papastroumf
Follow
Day 40 : Watering today community after 3 days. They were too thirsty and drank 2.5L per plant. I added a lot of food to the water. But it finished with 800ppm only. I think Biobizz decreased the density of nutrients. I added 1 co2 tab / 5L as every time. Also made small defoliation to the bottom for all ladies. She have reached 50cm. I also added a small bowl under to let her take more light.

Processing
Likes
5
Share
@I_roll_my_own_420
Follow
Hello growers! flowering is doing good, healthy and tough. cheers!