


Likes
Comments
Share


@GuerrillaNo_4
Follow
OVERALL:
~ Very happy with the grow, I really dialled everything in well this run.
~ She grew super fast, I put it down to the constant oxygenation of the rootzone along with consistent and constantly optimized light DLI and leaf to air temp variance. The extra Co2 helped push the plant to its limit in terms of heat, allowing it to push its hardest.
~ The lack of HST and Defoliation I feel let it finish faster due to lack of stress and stunting. The faster finishing time along with the big yield and efficient MarsHydro light, it hugely reduced my electricity costs per gram and freed up space much sooner for the next plant.
~ Turned into a very dense bush of buds, there is even smokable dense buds at the base of the plant due to the under canopy lighting (Not as dense as top canopy buds but still decent)
~ Ran a thin line between stressing the plant and letting it flourish. The buds came out big and very dense, also it's hard to see on camera but they're very frosty too (Prob from UVB)
YIELD:
~ 145g (dry) in just 9 weeks from seed.
~ 753g (Wet)
~ 0.91g/watt
GENETICS:
~ MSNL - Gorilla Glue Auto ~ my favorite strain, as you can tell by my username!
STRAIN REVIEW:
~ Heavy hitter, like an indica but has some of that "feel it in your face" sensation of a strong sativa. Not as heavy or as strong as other GG#4's I have smoked, which would make me question the genetics used to produce the auto version. I will wait till after a cure and judge it again.
TRAINING:
~ No defoliation or HST (Bar last week for pics)
~ A little LST and leaf tucking but largely just left the plant alone to do its thing. I felt chopping healthy parts off the plant would slow the plant down and leave it with less chlorophyll to photosynthesize the light.
~ I did prune by lightly plucking dead leaves away, when the plant was ready to let them go easily.
DRYING
~ 20/21'C 50% RH with air circulation.
~ Homemade Drybox made using: 2 x Bankers Boxes ~ 2 x USB Desk Fans ~ 1 x Carbon Filter ~ 6 x Clothes Hangers
UPDATE: Day 5 after Harvest:
~ Fast dried some small batches, as we couldn't wait to sample.
~ Chopped off branches as some are down to 12% moisture whilst bigger buds are up at 18%. Moving to paper bag for couple of days to even moisture out then transferring to jars
CURING:
~Curing in jars 3/4 full.
~ Dark closet/18'C/50% RH
~ Jars burped once Hygro passes 65% and sealed when it drops to 58%.
~ Stabilised it at 62% and after 2 weeks I'll drop it some more and stabilise it at 58% to bring out more of the flavour.
~Sitting in jars with Boveda 62% at this stage.
~ Already tastes and feels great.
WATER:
~ Condensed (Starting at 40ppm)
~ Disinfected prior to adding nutrients etc. (Using COOSPIDER UVC - 253nm & 187nm bulb)
CLIMATE:
~ Ambient Air Temp = 29'C ~ 28'C LST ~ Leaf to air temp variance of between 1'C
~ Night Temp = 22/23'C ~ Day/Night temp differential 6-7'C
~ Under Canopy Temp: 26'C (Day) ~ 21'C (Night)
~ Relative Humidity = 50-60%RH (Avg. 55%RH)
~ VPD = 1.45kPa (Avg.)
~ Co2 ranges from 900ppm to 1500ppm (Avg. 1200ppm)
AIR PRESSURE:
~ Ambient Air Pressure (outside tent) = Mean Avg. 1010 mbars (101 Kilopascals)
~ Actual Air Pressure (inside tent) = Mean Avg. 1005 mbars (100.5 Kilopascals)
~ Air Pressure Differential = up to 0.5 kPa range between inside & outside
LIGHT:
~ UVB (High intensity @ 45cm) ~ 2 hours daily mid light cycle.
~ Warm White 3000K/White 5000k/Far Red (660nm)
~ At plant canopy = PPFD 900-1000umols/s/m2 ~ Lux 45,000-55,000 ~ Daily Light Integral 55-65
~ Under canopy lighting ~ Blue (460nm)/ Red (630nm)
NUTRIENTS:
~ Mostly Advanced Nutrients (For base nutrients and most additives, as only company I could find scientific data on)
~ Canna (For Calmag Agent and Cannazym)
~ Plant Success (Great White Mycorrhizae)
ADDITIONAL GROW TECHNIQUES:
INFECTION PREVENTION & CONTROL:
Infection control practices i.e
~ PPE, Alcohol Hand wash
~ Gray room outside tent,
~ Carbon filter
~ HEPA filter
~ Plasma Ionizer
~ Inline UV-C germicidal bulb
~ Also using an additional higher powered COOSPIDER (UVC) 253nm & 187nm bulb, to disinfect the gray room outside of the tent once a week for 30 mins.
~ Ozone (o3) gas that is produced using the COOSPIDER, is then directed into the tent to further control any unwanted pathogens.
~ Ed Rosenthal (Zero Tolerance organic pesticide), sprayed once a week as preventative measure. On hand for heavier use (Once every 3 days before lights out for 15 days) in the case of an outbreak
(No outbreaks yet, due to aforementioned preventative measures)

Processing
Likes
21
Share


@LittleBigTrees
Follow
I harvested just under an ounce from each of the two plants grown in 4ltr pots.
Likes
Comments
Share


@Uneasy
Follow
one of the plants could not stand the heat any longer. I cut almost all of its branches, I will cut it completely. Others struggle with the heat, but there's nothing I can do.

Likes
12
Share

@GoodTimesOrganics
Follow
Hi liebe Community and Welcome Back! 💚
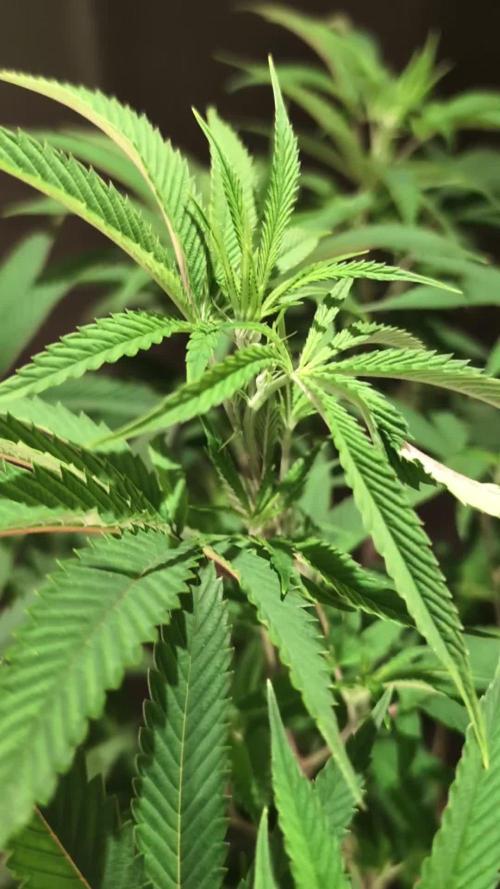
Slush Mint Cake von Dutch Passion!
Die Pflanze würde nochmal Ausgedünnt und defoliert. Jetzt am 19.07. war es Zeit die gute in die Blüte zu schicken.
Die Pflanze hat nun eine Höhe von 90cm erreicht.
Die hat eine wunderschöne Wuchsform.
Die Wuchsform ist kräftig und Energie geladen.
Die Bedingungen im Growschrank sind für die Wachstumsphase Top!
—————
🌞 Temp: 26
🌚 Temp: 18°C bis 19°C
💨 RH: 64%
VPD: 1,1 kPa
💡ppfd: 330 mpm
—————

Likes
12
Share

@ThatsmyGrow
Follow
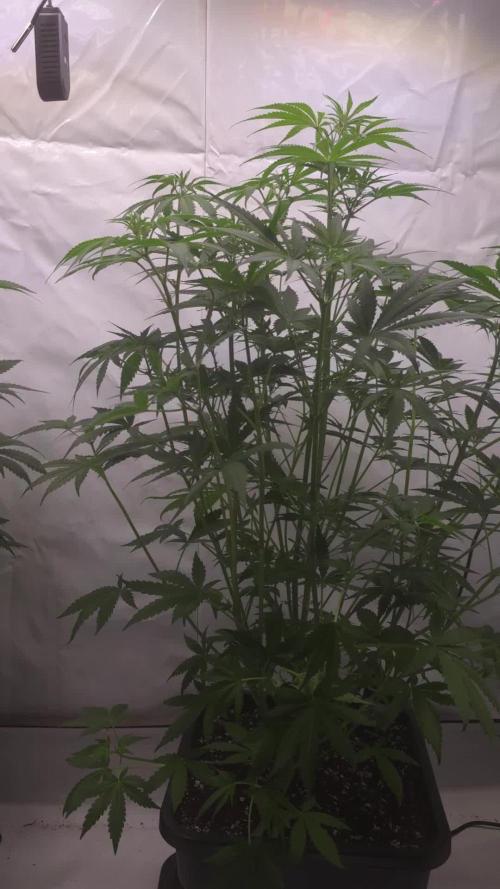
🌸 Week 6 – Gorilla Cookies Auto Pheno Hunt
Another week is in the books and the differences between the phenos are becoming impossible to ignore now 👀🔥
Stretch has been very different across the plants and some phenos are clearly showing completely different growth patterns despite running under the same conditions. It’s getting easier every week to identify which phenos stay compact and bushy and which ones want to reach for the sky.
📈 Current observations:
Pheno #3 and #4 have stretched aggressively and are now above 70 cm
Pheno #5 took the lead and is currently sitting at around 101 cm 👀🔥
Pheno #1 and #6 are still in early flower / preflower and developing noticeably slower
Plant architecture is becoming very clear now — some phenos are growing dense and bushy while others are showing strong vertical growth
At this stage I already have clear favorites:
⭐ Pheno #4 and #5 are currently standing out the most for me in terms of structure, vigor, and overall development. But the real decision will come once the flowers fully build up.
🍃 Maintenance & development:
Canopy management continues and I’m still removing leaves only where necessary to improve light penetration and keep flower sites exposed.
📊 Current environment:
Temperature stable around 26°C
Relative humidity sitting around 67–70%
VPD target remains unchanged and is being monitored continuously
Light intensity continues to increase gradually as flowering progresses
The next weeks should become really exciting — structure is one thing, but now the buds will decide who becomes the real winner of this pheno hunt 🌸🔥
💬 Which pheno would you bet on at this point?

Likes
2
Share


@PalmaGrow
Follow
Hermosa floración mucha resina
Defoliación para permitir mejor ingreso de luz
25 - 31 agosto

Likes
5
Share

@psychonaut420
Follow
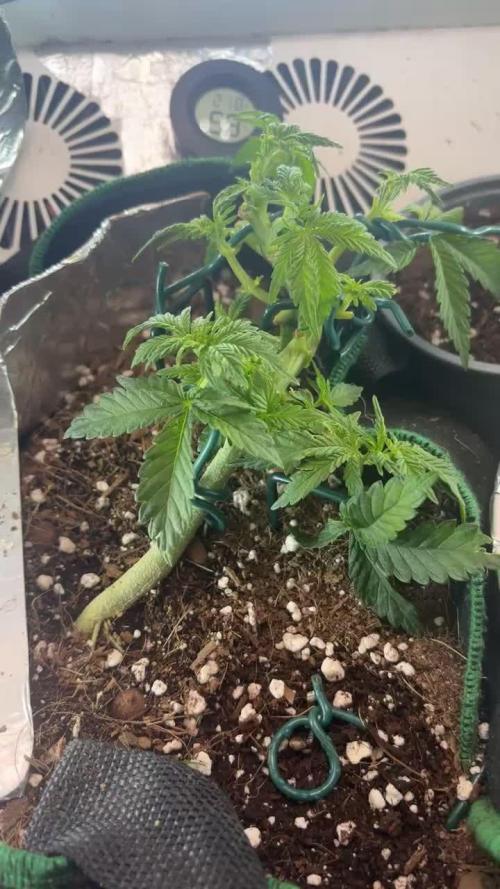
Decided ima leave her in vegataive stage till she recovers some more from the lst/hst been using cannacure to help with the mystery pests and deformed leaves have been seeing her start to regenerate and new growth is visible thinking week 7 or 8 till I switch her to 12/12 light schedule to flower bit streaching side branches and smaller side branches off the side branches are forming

Likes
5
Share


@Happygrowing
Follow
She smell really good of cherry and fruits.
She dont have soo much trichomes but I love the structure while she was growing...
A productive one too.
The only 2 are starting making orange hair.

Processing
Likes
4
Share


@Englandshigh
Follow
This week she has been thirsty,and getting really frosty and producing all her colours/pistols and dank smell,

Likes
9
Share

@MrGrowDiarie
Follow
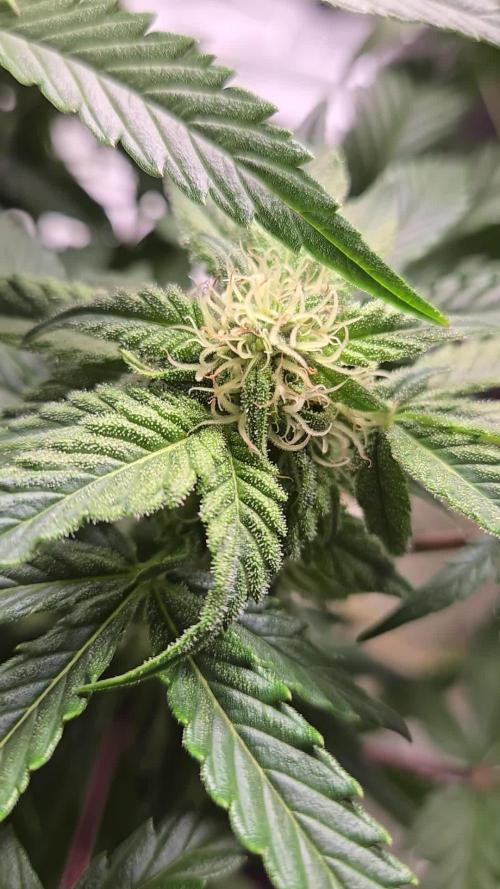
Day 49
The plants are progressing well into the flowering stage. Bud development is becoming more noticeable, with small clusters starting to form and fill out. The leaves are a healthy green, though some are slightly curling down, possibly due to a bit of overwatering or humidity fluctuations. Overall, the plants look strong and vigorous. Light distance and airflow are being monitored closely to keep conditions stable. Over the next days, the focus will be on maintaining consistent watering, adjusting nutrients for mid-flower needs, and supporting steady bud growth
Likes
31
Share


@BlackForestGrower
Follow
Nach einer langen Zeit und vielen Problemen ist hier das Ergebnis zweier kleinen Stecklingen
pro Pflanze ungefähr 22g trocken

Processing
Likes
12
Share


@Silverback_Guerilla
Follow
2/17:
I spent a little time rearranging today. I bought some 32" x 14" plastic ventilated storage shelves and cut the legs down on two of them so I have some different-height platforms for the shorties in the garden. I should also be able to easily flush 6 plants in 5 gallon pots, or 9 plants in 3 gallon pots at a time now, that's a win!👈
2/18:
I debated whether to feed or not, and settled on watering them with about 1/2 gallon each. including bembe, cal-mag, signal, humic acid, and a little beastie bloomz.
The new dehumidifier is pulling about a gallon and a half per day from the air, so I should be able to feed them in a couple of days.
I've reached the ceiling again with my lights. Both plants are budding up now.
2/19:
Rainy day outside, so I'm pulling in 99% humidity, plus the pots are still petty saturated, but the new dehumidifier is keeping up. RH is holding at about 45% today.👍
2/20:
Day 31 of flower...the tall one grew another couple of inches overnight! Damnit!😟 After emptying the closet (again) today and supercropping more branches (and some of the same branches again), a semi-solution occurred to me that allowed me to raise the lights another 3-4 inches! Now I'm truly maxxed out...
Not a very stable strain..just look at the difference in the two I grew...
I really needed everybody to finish in the same week so I could get my Spring autos going...😶
I'm still hoping that they will get their groove-on and finish by the EHD(3/11), but it's not looking possible for the taller one at this point...
The shorter one is starting to smell really nice...faint, but funky.
I took photos and videos of all the plants today since I had to empty the closet and it wasn't a feeding day.
2/21:
I fed them today with about 3/4 gallon each including beastie bloomz, tiger bloom, big bloom, signal, bembe, and cal-mag...no grow big this time.
2/22:
The short one continues to pack on the pistils, but the taller one is slow as hell....😟
2/23:
I ordered some Terpinator because I'm not so sure about Signal's efficacy at this point....I'm usually dealing with odors more by now..😕

Likes
18
Share


@BudMunchies
Follow
11/19: they are now on just water and flawless finish. In 8 days I will chop them down. I am going to just fresh freeze them and then make bubble hash out of them a couple of days after.
I am still angry about the lack of purple, but happy with the grow as a whole, despite the dramatic differences in phenos.
Likes
5
Share


@GermGrowFox
Follow
Die 6. Blütewoche hat begonnen und es ist schon echt gut Volumen vorhanden. Beim öffnen des Zeltes kommt ein sehr starker Geruch entgegen! Ohne Aktivkohlefilter wäre es unmöglich das zu managen 😂!
Es stehen weiterhin keine Arbeitsschritte an, außer alle 3-4 Tage Wasser + Nährstoffe zu verabreichen.
Spätestens in zwei Wochen beginne ich die Trichome nach Reife zu checken.
1. Januar….
Happy new year 💚❤️
Meine Runtz hat nun doch gezwittert und mir das Zelt bestäubt… erste Samen werden erkennbar… bin grad etwas traurig aber it is what it is… wären nur noch 4 Wochen gewesen :(

Likes
12
Share


@Lemon_Honey_420
Follow
temps got a little crazy a couple days(up to 90) but was able to keep them below 85. Realized this week I've been running an undersized exhaust fan(4" 165CFM) when I should've been running a 6". With my size room, ducting, and a carbon filter I need a minimum 260CFM. The 6" is rated at 400CFM which is more than enough. Can't believe I'm just now realizing this. Should bring temps down significantly

Likes
89
Share


@Nebula420
Follow
Finally I begin grow report of strain Gorilla Girl from Sweet Seeds,
Thanks you Sweet Seeds)))😘 The last time the plants blew away wind, and rip.😇
I love cookies, Gorilla girl is a sativa dominant hybrid of the legendary Gorilla Glue X Girl Scout Cookies.
Vegetation: will be in the outdoor for 35-40 days for natural light,
Flowering: in Indoor with 600w HID lamp,
Nutrients: from GHE, and Advanced Nutrients .
Pot Size: 4Gal - soil/perlite 50/50.
Gorilla Girl : This strain is the resulting hybrid from the cross between two of the most famous and powerful genetics coming from the USA: Gorilla Glue X Girl Scout Cookies.
The GSC specimen used for this cross comes from the phenotype known as “Thin Mint”. An Indica-Sativa hybrid with Sativa predominance.
Gorilla Girl®️ is a strain with a very powerful effect, featuring very high THC levels that can reach to between 20% and 25% in optimum growing conditions. Some specimens can even exceed these levels. The resin production of this strain is copious, covering all the flower calyxes with aromatic trichomes. The buds are very resinous and compact.
Gorilla Girl®️ features intense taste and aroma, with cypress tones and a touch of wood, complemented with hints of earth and citrus.
The plants look like balanced Indica-Sativa hybrids, very productive and vigorous, with long and flexible side branches.
Indica/Sativa 40% / 60%
THC 19-25%
CBD 0,1%
Indoor Yield 400-550 g/m2
Outdoor Yield 350-600 g/plant
Indoor Blooming 9 weeks
Outdoor Harvest late September
Sex Feminized
Effects Psychoactive, Euphoria, Stimulating, Creativity, Happiness
Flavor Cypress, CITRIC, Earthy, Woody
Likes
241
Share


@Tropicannibis_Todd
Follow
💩Holy Crap We Are Back At It And Loving It💩
Growmies we are at DAY 21 and she's just killing💀it👌
So Shit , I gave them just a tad to much nutes 👈 But I have since fixed it
So I'm starting to pull her over and do some low stress training 🙃
Lights being readjusted and chart updated .........👍rain water to be used entire growth👈
👉I used NutriNPK for nutrients for my grows and welcome anyone to give them a try .👈
👉 www.nutrinpk.com 👈
NutriNPK Cal MAG 14-0-14
NutriNPK Grow 28-14-14
NutriNPK Bloom 8-20-30
NutriNPK Bloom Booster 0-52-34
I GOT MULTIPLE DIARIES ON THE GO 😱 please check them out 😎
👉THANKS FOR TAKING THE TIME TO GO OVER MY DIARIES 👈
Likes
29
Share


@Rko41
Follow
2 plantes aux extrémités souffre peut-être d’un surengraissage! A voir je vais arroser à l’eau clair avec juste du pk!


Likes
Comments
Share

@All_about_420
Follow
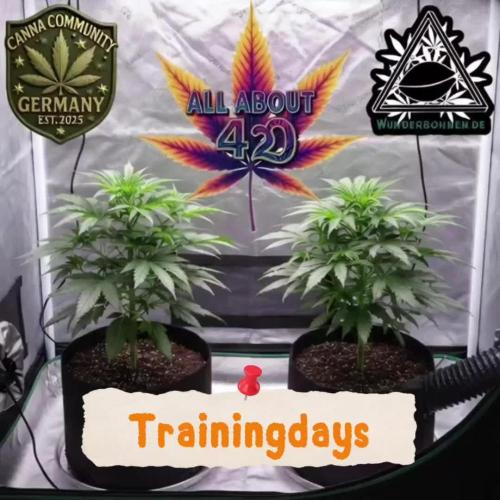
Das erste Training und Topping hat sie gut weggesteckt und sich erholt.
Außerdem gab es ein neues Zuhause im Endtopf.
Auch dafür bekommt sie jetzt erstmal eine kleine Reha-Phase,
sodass es dann gleich mit dem nächsten Topping und mehr LST weiter gehen kann.
Likes
1
Share


@Kern420
Follow
Woche über haben sich die Blüten weiter entwickelt. Die Trichome wurden mehr und man fängt an erste Terpene zu riechen.
Wir haben Donnerstag (BT 2) stark entlaubt und schauen jetzt wie die Pflanzen wachsen.
Tropi fängt an erste Farbakzente zu entwickeln in den Buds.