
Likes
Comments
Share


@ReggaeShark_420
Follow
Happy about this harvest. Very strong orange citrus aroma with some dense buds along with it. Definitely a sativa dominant bud, with a smooth smoke. Have experimenting on self pollinating and tried it on one particular bud on this plant, and i have to say, it has worked! One seed has been found and is directly been placed in soil 3 days ago. Have not seen any faces submerged yet but hopefully fat monkey #2 is on the way soon with some new growing techniques 😏

Processing
Likes
10
Share


@LittleBigTrees
Follow
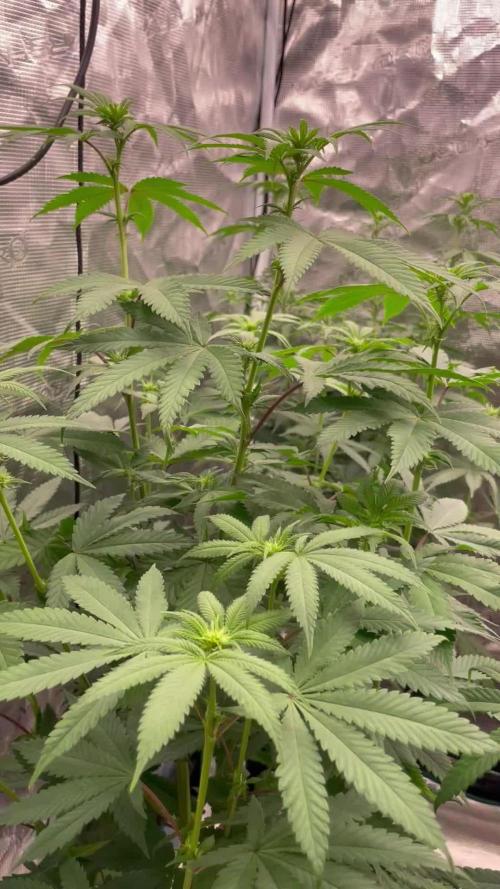
She's stretching at the moment, hopefully bud formation will start soon.
It's looking like mid to late October if she lasts that long 🤞
Likes
7
Share


@Pjm70
Follow
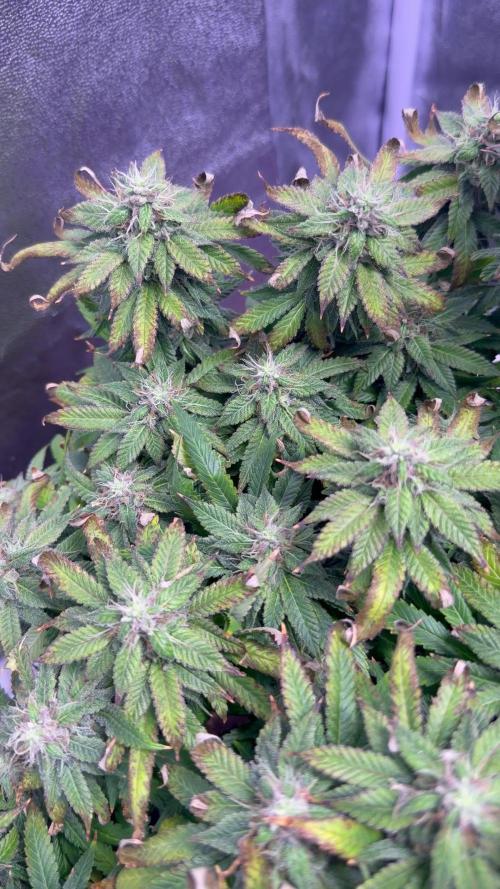
10/11 111 days old, 42 days since flip and any time now. She is wrapping things up quick. She gets cold at night. The pictures do this plant no justice. She is not green, she is purple. 70s during the day and 60s at night really brings the color out.
This strain is supposed to finish in 54 to 60 days. She will not make it to 50 before finishing. Really she looks done now.
She was grown in living soil. I added more worm castings, myco and zolmite. That was it for her entire veg stage. She was a beautiful dark green and not one sign of deficiency. All I did was add water.
For the flower stage I added more castings and Gaia Green power bloom. Then when she started flowering I added the Fox Farm bloom nuits. Probably didn’t need the Fox Farm but I had it so I used it. She has been on straight water for the past week.
I added defoliation even though it’s not really defoliating. The leaves are drying up. I’m pulling them off to let the light go deeper.
The Soil Makers, Colchester CT is where I got the living soil from.
10/13 she is almost ready. Watered her last night. Waiting to see is she is still drinking.
10/14 chopped her down, Timber. Did my first trim, took a couple of hours. That was taking my time. She was not that hard to trim. Between being lollipoped and this strain is not very leafy. Trimming was very easy.
I chopped her at the bottom after trimming and hung the whole plant. Since it’s the whole plant I didn’t bother getting the wet weight. The whole plant is very heavy, over 5 pounds. Wet doesn’t tell me much so why bother. Going by looks I should net about a pound, give or take.
Now I’m going to try and give her a slow dry and cure. Also can’t say harvested until i am able to get some weight.

Likes
47
Share


@blazin_skywalker
Follow
Day 44 - Today it's time to say sayonara to the undergrowth as I clear away a lot of the fan leaves and make room to further shape the canopy.
I took each of the 8 branches that I previously cuffed off to fan leaves, and tied them down into their final resting place - rounding out the final shape of the plant.
Day 47 - Defoliation ✂️ - over the course of 3 days, this lady bushed out like woah - causing me to dive back in the the scissors.
Ermahgerd! 😱 She showed me a ♥️!

Likes
11
Share


@Sejnik
Follow
Holky vypadají naprosto úžasně. Nemají žádné nedostatky a už jsou trochu cítit. Mám z nich velikou radost ale ještě si na ně musím 2 měsíce počkat.
Tento týden jsem do svých děvčat zainvestoval trochu peněz. Pořídil jsem jim 2 dodatečná světla 2x42w a výkonný odvlhčovač vzduchu. Sbohem vysoká vlhkosti. Sbohem plísně. Mám velikou radost že vlhkost konečně klesla, protože jsem měl opravdu velké obavy z plísně.
Bohužel mě to stálo jednu rostlinu a tou byla Haze Berry 1. Byla to ale nevyhnutelná oběť, kterou jsem musel podstoupit, jinak by se mi odvlhčovač nevešel do stanu. Nebyla jiná možnost.
Zalévám jednou pouze s RQS tabletami easy bloom booster (jedna tableta na 8 litrů) EC 0.7-1.
Podruhé RQS tablety easy bloom booster (jedna tableta na 8 litrů) + hnojiva od Biobizz EC 1,4-1,6.
Zalévám každou z rostlin tak, aby měla dostatečný odtok vody ze spodku květináče.

Likes
7
Share

@sunshinegroww
Follow
She is beautiful so far so good just want feed and thirsty in few day will clear ber bush

Likes
59
Share


@JeyGanesha
Follow
Un altra settimana è passata e tutto procede bene.per fortuna non ho più trovato nessun nanners 🙏✌️💪..belle piantine mie, continuate così che farete delle belle pannocchie....
30/8/24 gente ho combinato una bella cazzata.pur avendo esperienza, mannaggia a me,mi sono portato a casa dentro il box, il cazzo di ragnetto rosso... fanculo...
Ho già iniziato a ripulire tutto, box e piante con Neem...li sterminerò tutti 😂..

Likes
10
Share


@CANNASIM
Follow
Hello, long time, no grow. I’m trilled to start on a new grow project, i’m away from growing a long time, but my love for ot was always present, i miss it a lot so i have got a few strains from Fastbuds to test and come back with a minimal setup.
I have got the Festberry, Bluedream, and the 1:20 cbd, they have sent in the Banana Purple punch
Ok, so what is a minimal setup? For this grow i have choose to grow in my balcony, it is fairly big and i gave good sunlight, we are in summer now, so temps are high, swinging a lot. It is raining often as well so I did not need to water much.
For the nutrients i will go organic i think, in my substrate i have about 30% warm castings, so i’m good for till mid grow length +-, i might add a bit of nutrients in 30 days mark.
The objective of this experiment is to use as little as possible, 360 degrees.
For the germination process i have used a mixed process method, that i have learned from Fastbuds and i have loved it, 24h in a glass of filtered water, paper towel for about 24h -48h and then the Floraflex gremination pellets, i have tested on the jiffy and worked fine as well. Cool about this method, if you are more on the anxious side or like to control more the process this is the way, you can follow the hole process and see the development in parts. I will add images later on, for this breakdown.
Well that is it, lets hope for a cool, safe journey for this girls.
—
The Blue dream i had germinated two and both look great so I have decided to keep two in one vase. Never done it, so let’s see what will happen.

Likes
4
Share

@PurpleBeen
Follow
week 8
I’m going to empty it and give only water (for the Strawberry Lemonade) for a maximum of 2–3 more days, then harvest it. As for the plants in soil, the one on the left (GMO Cookie) isn’t completely finished yet, so I’ll keep giving it plain water for a while. The one on the right (unknown strain), I think I’ll harvest right after the last heavy watering — around 34 liters to flush the pot using FlashClean, then harvest.
And wtf, the difference between the two is insane — they’re not even comparable 🤣🤣🤣. The DWC is giving the soil grow a real spanking, even though I prefer the terpene profile of the soil-grown one.

Processing
Likes
5
Share


@Mr_nugs_lover_David
Follow
She looks very healthy and strong, maybe a little bit small for 22 days old but it's okey,she's a happy wonderful lady,let's hope she can get a big enough size with the preflower stretching.

Likes
21
Share

@LueRootsGrowGermany
Follow
Hallo zusammen,
Ich berichte kurz über die Blütewoche 2
Bisher verlief alles ruhig. Sie wächst sehr gut und sieht sehr stabil aus.
Blätter entfalten sich prächtig und so langsam bilden sich Blütenstempel.
Zum Gießen
Sie trinkt wirklich gut und nimmt mit der Zeit auch immer mehr auf.
Besonderheiten
Noch immer bleiben Fraß Schäden im Außenbereich nicht aus.
Ich muss sagen, dass ich es geschafft habe mein Frustlevel dahingehend arg zu Reduzieren :-)
Insgesamt bin ich zufrieden!
Ich wünsche euch allen eine angenehme und Erfolgreiche Woche!
Viele Grüße
LueRootsGrowGermany


Likes
22
Share


@dr_Thompson
Follow
Rather big and greedy plant, doesn't demand a lot of attention. Has shown good reaction to scrog and lst.
I've already grown it once, and I'm sure I'll do it again.
Довольно большое и прожорливое растение, не требует повышенного внимания, хорошо реагирует на scrog и lst. Поднимаю уже не в первый и точно не в последний раз:)


Likes
11
Share


@goeser
Follow
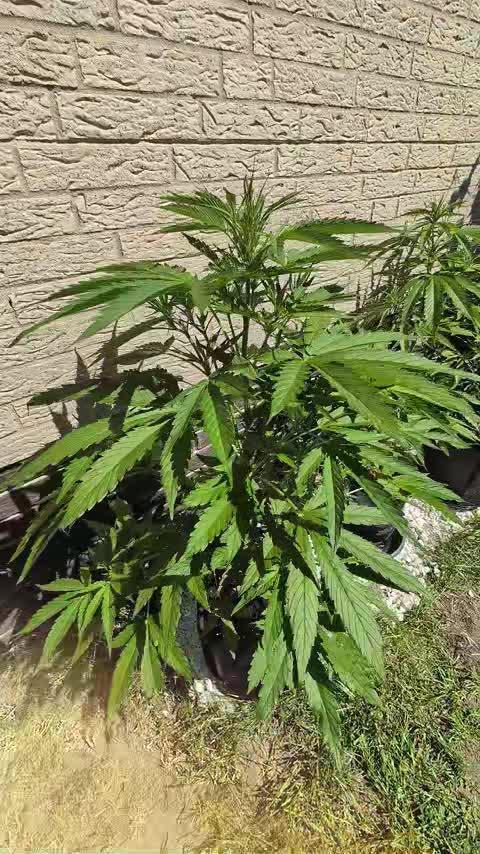
I am not doing anything at all ,
this plant is just staying arround in my garden.
i just tried topping technic the first time and it worked well.
now i just have to hope that this plant will be a lady, then i think i will get a good harvest
in september/october.
Likes
34
Share


@Maggie_de_Block
Follow
She's definitely taking longer than expected, but i don't mind since the buds seem to still fatten up
didn't have time to water again this week so she's a little dried up, I removed some fan leaves that were completely dry and brittle
there's some beautiful purple coming through
should be ready anytime soon now
Likes
7
Share


@iLoveGoodWeed
Follow
The buds are spread everywhere and they are nice and frosty in next 2 weeks she will get fat.

Likes
30
Share


@coyote2thick
Follow
I’m lightly defoliating each and making sure my bud sites are exposed. Everything seems to be swelling up nicely.

Likes
4
Share


@Relentless-Pressure
Follow
Day 100+
Flushing process is Now activated since a week with Athena fade and calmag pro
Likes
10
Share


@Autoflowergirls06
Follow
Let me know what y’all think I went all out on the training and defoliation 🤟🏻Started adding some molasses into the water schedule there’s a couple that are stunned for sure already budding. Just trying to learn as much as possible thanks gromies! Ps Excuse my long toes🤣
Likes
7
Share


@Alejangrow
Follow
Did some defoliating and moved these ladies into the flower room. ✂️
Now just to watch them blow upp.😎💣
