The Grow Awards 2026 🏆 


Likes
Comments
Share
@TickTockCroc
Follow
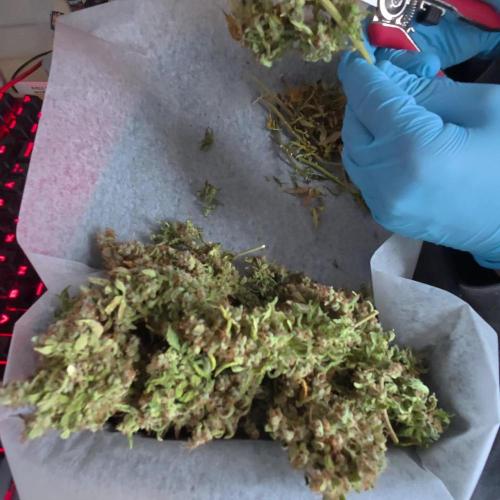
So, I harvested my 2 older girls around 4 weeks ago, the 2 younger ones took that extra 4 weeks, just chopped them now! Initially, I was really upset when I harvested the first two - they just looked really bad and loads of fluffy larf. So, I wrote a negative review but I deleted it because when I smoked some, it was really good! LOL. But still just had no good aesthetic. I decided to feed the younger ones way more nutes than I was giving the other ones, and increased the rate of water feeds... and WOW. They responded so well and they came out HUGE!!!! MAN!!! These nugs came out beastly. The older ones 100% were being fed way too low a dosage of nutes, and were not watered frequently enough.
I've only just chopped them all and hung up to dry. Will update with a smoke report when they're ready!
So, the pics im posting are of the two younger plants that were harvested later. I do not have pics of the earlier harvest, unfortunately, but it looked terrible (from my own doing it seems as I mentioned above). As you can see in the first pic, I had to hold her up as she was falling over on her own weight because the nugs were so heavy (actually had to use many ties to keep both the plants from falling in the final 2 weeks).
Not too many pics but just an idea of how they were looking. Dense, big, frosty - not SUPER gassy in smell but still smells good! The side branches were all looking like main colas! Didn't LST or anything, just a bit of lollipopping and let it do its thing! Each pic is of a different bud site. Will also update with more details such as weight when it's dry!
Stay safe, friends!
┏(^0^)┛
-TickTockCroc

Likes
5
Share
@Mr_nugs_lover_David
Follow
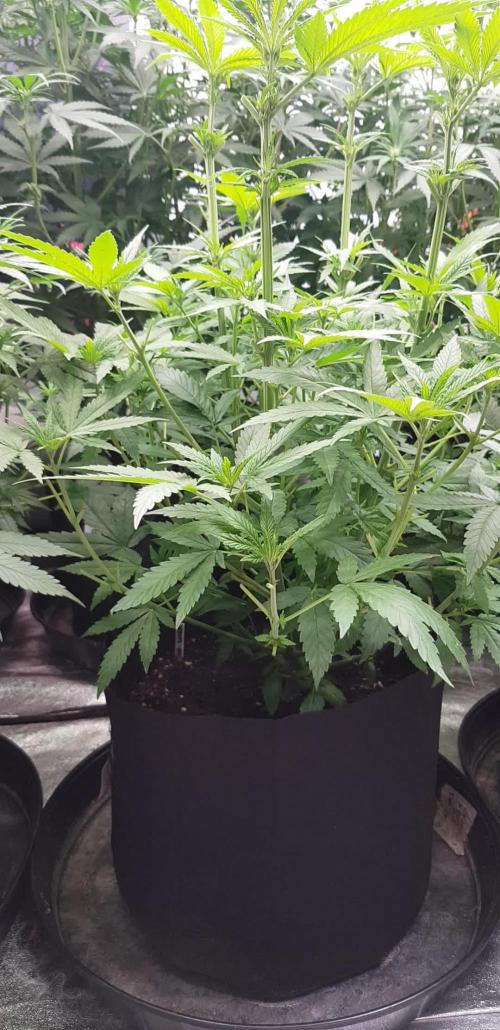
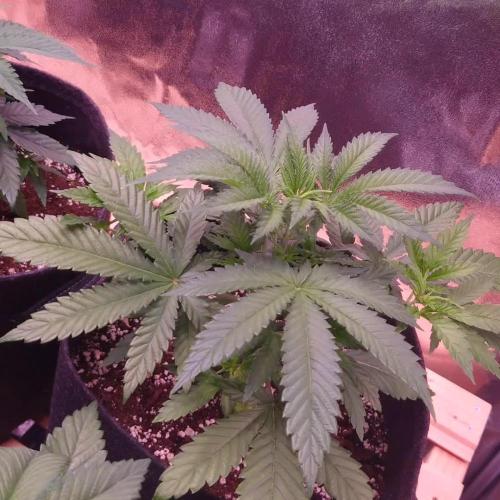
This amnesia pro has peformed amazing, both phenos #1 and #2 have produced beautiful hard dense colas, full of citric lemony terps, ideal to use for daytime, very nice cerebral buzz. Hope you guys have enjoyed my work! Peace 💚💛❤️👨🌾

Processing
Likes
22
Share
@MaxGrowCanada
Follow
Everything seems alright. Working on the new grow room, starting the next round shortly

Likes
5
Share
@GanjaFarmer101
Follow
9 weeks and 5 days to harvest.
Will update later when it's all weighed and cured.

Likes
14
Share
@ClydeGrows
Follow
Seed was sown today ✨ 10/11 🇨🇦
Helmet on the rise 13/11
Good luck everyone!
Edit 24/11: I pulled the trapped seedling and sowed a new seed today... It's now a Seedsman freebie- critical+ 2.0 auto 🤙

Likes
8
Share
@Inceptionist
Follow
Mystery Made 2 already stopped showing male traits. I only plugged 3 or 4 there in total. Melonade Runtz on the other hand still is developing but I have the feeling that it is slowly getting better.
All in all they look amazing and are growing very nicely. The trichomes are also developing great!


Likes
2
Share
@ViherPeukalo
Follow
Now it needs to dry and then i can test trim leawes and take weight before cure. hang dry in the middle of dark 60x60 tent w/semi good airflow.
around 60% hum.
After 4 days of hang drying nugs are feeling dry but stems are not yet snapping. Allmost ready for trim and cure. hum. has dropped to 55%
Day 6 of drying desided to chop away the stems and branches to get the flowers sealed in bonnebag. timelapse of the trim added to gallery.


Processing
Likes
6
Share
@LeylaGrowFantasy
Follow
She Is a beautiful babyyy. Growing so fast, and She love lst and topping. I think, She will give me some beautiful flowers 😍
Likes
18
Share
@DaddyPrime
Follow
7/17 she is SUPER fucking frosty 😍💚 buds are filling out too. Cant wait to see her a couple weeks from now
7/21 she was getting super bushy so I defoliated alot of the bigger fan leaves
Likes
4
Share

Processing
Likes
67
Share
@Ageddd
Follow
This week gaver the plant nutes each 2 irrigations (WATER/NUTRIENTS): using a high dose of Top Bloom, (maximum is 4 ml/l, using 4.5 ml/l at the moment,), Top Candy 2ml/l which adds carbohydrates, and Big One which gives the plant extra PK to help developing new hairs what means more budding sites..
Good Vibes !!
- 20/08/2018 -

Likes
7
Share
@GERGrowDesigns
Follow
Welcome to Flower Week 1 of Fast Buds Papaya Sherbet
I'm excited to share my grow journey with you from my
FastBuds Project . It's going to be an incredible ride, full of learning, growing, and connecting with fellow growers from all around the world!
For this Project , I’ve chosen the Feminized Photo strain Papaya Sherbet :
Here’s what I’m working with:
• 🌱 Tent: 120x60x80
• 🧑🌾 Breeder Company: Fast buds
• 💧 Humidity Range: 50
• ⏳ Flowering Time: 58 Days
• Strain Info: 30%THC
• 🌡️ Temperature: 26
• 🍵 Pot Size: 0.5l
• Nutrient Brand: Narcos
• ⚡ Lights : 600W x 2
A huge thank you to Fast Buds for allowing me to try my Best with this amazing collection from Automatic and Photo Strains they managed to Sponsore . Big thanks for supporting the grower community worldwide! Your genetics and passion speak for themselves!
I would truly appreciate every bit of feedback, help, questions, or discussions – and of course, your likes and interactions mean the world to me as I try to stand out in this exciting competition!
Let’s grow together – and don’t forget to stop by again to see the latest updates!
Happy growing!
Stay lifted and stay curious!
Peace & Buds!
Likes
96
Share
@DevilsBud
Follow
10/10/21 new week for CBD spliff berry
Growing almost a month now did some topping last week and today started to LST the main everything going great so far plants loving the new FC-4800 so as i absolutely no extra heat is coming of them 👌🏻
I maybe will top some more but as far it Goes for LST this will be the only thing i will do to the plants let the rest grow freely
14/10/21
Growing very nicely giving them the watering and nutrients when they need it . I am trying to understand plants better by looking at feeling soil etc instead of a regiment. And learning we do every day because bin growing in 11L pots but now in 8L pots so that means that there gone be smaller then my first grow . But hey got now 12 plants going on and not 4 so that will help lol
15/10/21
Did some small defoliation and some of them get light penetrating better
visit www.marshydro.eu
for your best gear and use the PROMO CODE: DEVILSBUD
Fully marshydro supported Setup:
Marshydro GT120x120x200
Marshydro FC-4800 LED lamp
Mars Hydro tent handy info
●【Lock All Light Insid】MARS HYDRO Grow Tent Interior is made of diamond mylar. Non-toxic to the environment, no harm to plants. High-quality 1680D canvas being double stitched, (ALL OTHERS BRAND grow tent is 601D canvas) which is tear-proof for perfect light locking, No light leaks or rips at all.
●【Durability Grow Tent】Stable Metal corner adapters and poles are the trustful supporters of the tent. No rusting nor paint-falling. Quick easy tool-free installation. Carries strong heavy-duty SBS zippers, double layer lining to create a light-proof seal.
●【Easy Observation of your Plants】Special peeks window made by double layers of cloths. Observe the growing conditions of your plants without opening the tent and avoid disturbing plants. The peek window also serves to dissipate heat and ventilate air.
●【Removable Tray Keep Clean】The package includes a removable waterproof floor tray to hold soil and fallen leaves. The tray can be taken out easily to wash. Removable and water-proof makes cleaning easy.
●【Good Ventilation&Fast Assembly】 Circular double-sleeved vent holes with adjustable nylon strap for air circulation by exhaust fan, ducting, carbon filter, or reflector. Better allows proper light, heat, and airflow. Quick tool-free installation. Reinforced by a sturdy metal frame to ensure security and stability, supports up to 140lb. Perfectly safeguard your plants to thrive even in winter.

Likes
9
Share
@Dthebudguy
Follow
Few weeks to go it’s looks great cola development noce sweet piney mix of smells triche are beautiful

Likes
2
Share
@CanadianFillmore
Follow
Wow! 303 grams dry weight off these two girls, thanks to a higher feeding each week. Absolutely blown away by how much more weight, size of the buds and the insane stickiness of the buds! Extremely happy even though this strain was the most difficult I've ever grown.


Likes
4
Share
@Leprechauns_Garden
Follow
Alle Ladys super gesund und ordentlich am wachsen.
Keine neuen Informationen.
Nächste Woche werden sie getoppt und entlaubt.
Bis dahin haben sie aktuell 450 ppfd und ca 2 Liter Wasser alle 2 Tage.
Ab Woche 6 werde ich mit leichter Düngerzugabe beginnen.
Let IT grow 🌱🌿💚

Likes
11
Share
@Amsterdamsonkruid
Follow
Its been a pleasure,
Looking for the best weed ever? Go and grow OMG the name says it

Likes
97
Share
@mcflow
Follow
I don’t know why I took so long to grow a lemon haze strain, I wanted to do it forever, and it turns out to be a great decision! I love everything about it, the lovely smell, the intense green, the awesomely pleasant feeling of inhaling and the high overall! Great strain!
Likes
15
Share
@SamDo
Follow
Hello, fin de semaine 5, semaine 1 de floraison. Les plantes se portent très bien. Elles ont bien récupérées de la défoliation de la semaine précédente. Je viens de les passer en 12/12. Le stretch se fait bien. Je me rend juste compte que j’ai mit trop de plantes je pense. Elles commencent à être un peu à l’étroit. Mais rien de méchant. Voilà c’est tout pour cette semaine.
Happy grow...😎