Recommended
Likes
1
Share
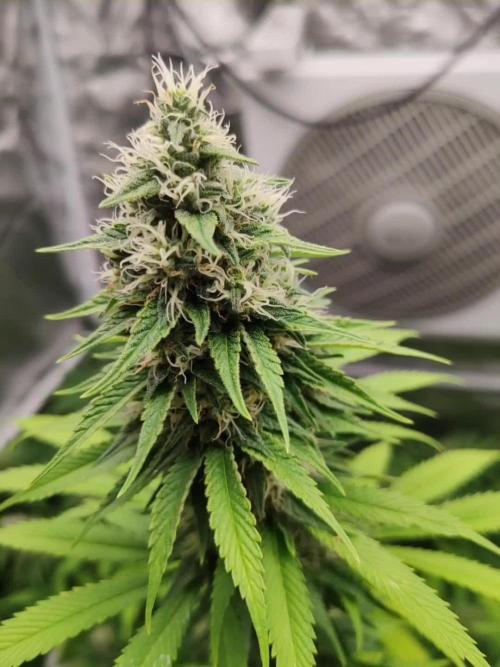
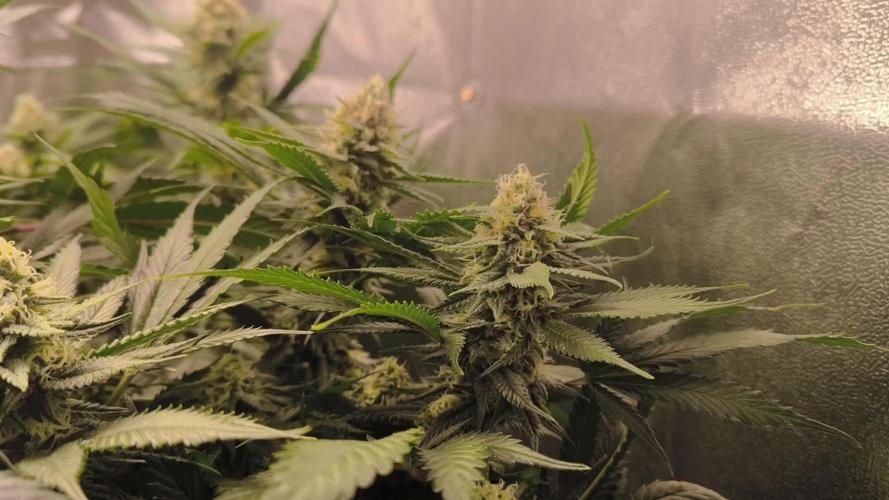
Week 6 of flowering 10/23/24 Changed nutrients to fit week 6 Buds are getting even bigger and thicker. Defoliated a little. Noticed a PH of 4.8 in runoff, same as the late stage of flower in my previous grow. After lowering feed EC, CalMag on max strength, flushing with 0.8ec nutes for 3 days in a row, nothing changed and PH stayed the same. Read in a forum thread about constant low PH in the rootzone when growing in coco. Got great info about CEC, water, nutrients and little chemistry from a detailed explanation. (https://www.icmag.com/threads/recurring-problem-with-low-ph-in-coco.338385/page-2#post-10843765) Flushed plants with tap water + calmag, PH 6.5. Used 120L total for 4 plants in 2 days. 1st day: flushed after lights on, did not water until 2 hours before lights off and flushed again. Runoff PH went up a little, but not to the correct range. 2nd day: flushed after lights on and checked runoff EC + PH, of each plant. Fortunately, PH got corrected to 5.8, and I returned to automatic watering 4 times a day (with 10%-20% runoff). Thoughts: In the last grow, I thought I had a problem because of salts buildup in the media with constantly low PH in late flower. I didn't fully correct the problem till chop day. Same problem here in the same stage of flower without the salt buildup. After reading every forum I could find about the problem, I understood that my bloom nutes were the main problem because of their chemical composition. The coco ability to exchange ions lead to the low PH in the rootzone. It got worse quickly because I did not use any tap water with the feedings, so the PH could swing easily and drastically without resistance. After I looked online for the T.A. feeding chart, I saw they used TriPart Grow till week 7 of flower, the Nitrogen type they are using will up the PH. CocoForCannabis chart that I'm using, has not enough nitrogen to combat the bloom nutes PH down effect in flower. It gets even worse with RO water because there are no minerals that can resist PH down. Now I'm using 30% tap water with rest RO water, T.A. TriPart feeding chart with calmag and silica. Hopefully I have corrected the problem for the rest of the grow. It wasn't easy, because there were lots of variables that worsened the problem quickly. Now I'm checking runoff PH and EC daily. Update on next week :)
Likes
48
Share
@Theia
Follow
I am very happy with the Chiquita Bananas in the end. Clones were total seed factories but I think we may have a go at making some hash with those as the foot long buggers are caked in crystal.. 62g and 63g . Plant 1 is just a monster for me 365g wet. Long dense buds thick dank smell of tropical sweets. Not as much seed as I thought there would be so glad I was convinced to push her a bit more. Plant 2 is smaller but has taken a pure turn in the last week.i don't think she was stressed at Al. I did switch to just water for last 10 days but apart from that I dunno. I don't think she has any thing with pure in her genetics but either way she looks beautiful. 169g wet from her. Everything is drying for the next 10 days when I shall report back. Happy grows.🌿🌱👊 Stay safe.😷
Likes
15
Share
@GYOweed
Follow
Transplanted the cbd cnc. Doing well SD pruned again awaiting another week to see if it recovers
Likes
15
Share
@jcfarms
Follow
Due to security issues, I had to harvest early and did not have time to take pictures Day harvest 58
Likes
67
Share
@Ageddd
Follow
Whats up GD !!! ------------- GROWTH------------- They keep growing without problems, but added more micro vita and microbes are eating nutrients too fast, but does not matter as tomorrow im transplanting both plants. I hope taller cheese can eat more, as you can see, lower leaves are yellowing a bit. Wether is not good... cloudy days.. Started the training season !!! :) Used threads to bend the plants. You have to check the roots !! This combination works flawless.. They are more stinky this week, when you touch a plant smells like lemon skunky notes ... ------------- IRRIGATION------------- Watered both ladies, around 0.2-0.3l each one with nutrients. ------------- NUTRIENTS------------- Deeper underground (2ml/l) + Bio-Grow (2ml/l) + Micro Vita. New soil, mixed with Micro Vita + 1 ml/l Green Explosion + 1 ml/l Biogrow + 1ml/l Deep Underground 7l aprox pot --------------------------------------- Good vibes !! _24/04/2018_
Likes
5
Share
Last two weeks were pretty harsh for the plants. This is week 10 and in Week 11 I will harvest due to moving to a new appartment. Summer hit with full force and a struggled to have a day without humidity or heat issues. Tried to nail the VPD which worked but I had to run high humidity in high temperatures. The Blueberry started to become purple and the Weddign Glue started to die. Maybe due to the heat, I did my best to keep her alive.
Likes
18
Share
And it starts like this. an official collaboration starts with the friends of Zamnesia, from today I will only grow, grow and flower Zamnesia Seeds plants and I really like it. We are close to a flowering in the extreme heat and therefore we opted to start with 4 very fast F1s, they are not joking guys when they tell you that they are made to be more resistant, stable and fast they are not telling you something false. The girls are super fast, even those from other brands tried in the past are excellent and a sliver and this one from Zamnesia have all it takes to be the best autoflowering on the market. The Watermelon Candy F1 were also born at the speed of light, 18 hours in water, 24 on land and we were already born, both of us. Oh yes, a lot of research is being done on autoflowering plants, you have all noticed monstrous improvements compared to Low Rider and subsequent derivatives. Whoever works best wins and from what I have been able to see so far Zamnesia is working very well. I know, there is a group of sceptics, friends I'm here on purpose, give me a couple of months and we'll see. Zamnesia is the best online shop in the situation, you can find everything from seeds, to mushroom kits, through vaporizers and a thousand other things https://www.zamnesia.io Watermelon Candy F1 seeds specifically https://www.zamnesia.com/10666-zamnesia-seeds-watermelon-candy-f1-automatic.html Site Description ZAMNESIA SEEDS - WATERMELON CANDY F1 HYBRID AUTOMATIC: BUDS BURSTING WITH FLAVOR If you've been looking for a flavorful strain with superb genetics that's effortless to cultivate, the hunt is over. Thanks to reliable F1 hybrid genetics, Watermelon Candy F1 Automatic showcases the highest degree of productivity and efficiency. This strain takes everything you know and love about the original, and packages it in a plant with even greater potential. GROWING WATERMELON CANDY F1 HYBRID AUTOMATIC Derived from Watermelon, Candy Kush, and ruderalis, Watermelon Candy F1 Automatic is a finely tuned medley of genetics. This cultivar is fast to flourish and reliable to grow, no matter where you choose to grow. Taking just 9–10 weeks from germination to harvest, she provides a uniform growing experience culminating in a huge haul of buds for her size. Reaching heights of 65–80cm, Watermelon Candy F1 Automatic stays pretty grounded, making her perfect for smaller growing areas where space is a commodity. It also means you can fit more plants in if you have the room! Once ready to yield, growers will see a return of 400–450g/m² indoors and up to 100g/plant outdoors. Moreover, Watermelon Candy F1 Automatic is highly resistant to pests and disease, making it an ideal strain for newcomers and fans of low-maintenance cultivation. AROMAS, FLAVORS, AND EFFECTS OF WATERMELON CANDY F1 HYBRID AUTOMATIC If we haven't already sold you on the power of F1 hybrid genetics, the proof is in the pudding. Watermelon Candy F1 Automatic is teeming with terpenes and cannabinoids, making for a lively high coupled with huge flavors. Just one hit is all it takes to sample rich fruitiness mixed with sweet candies and a slight earthiness to back it up. And with an average THC content of 23%, the effects are euphoric at the start but settle into deep relaxation soon after. Whether you're chilling alone or with friends, Watermelon Candy F1 Automatic will see you right.
Likes
20
Share
Muy buenas, otra semana más por aquí! Pues ya está la floración bien encaminada para el éxito!🙏 Esta semana le hemos dado la máxima dosis del fertilizante Basis, y le hemos subido también la dosis del C4. Ya han empezado a mostrar sus lindos aromas, y a cambiar un poco el tono de sus hojas. Un saludo y buenos humos!👋
Likes
24
Share
Buena cosecha, nos costo un poco mantener la alimentación ya que con 1.6 Ec pedían más , les subimos algo en las últimas semanas y dio resultado. El panel.es muy potente les mete mucha carga lumínica. Estas GELATO-K han ofrecido varios fenotipo con sabores muy dispares.. aún así todos bastante buenos. Ha sido un buen aprendizaje. Gracias a todos los que pasan a visitar mi perfil. En breves volvemos con más! Saludos
Likes
13
Share
Questa settimana ho dovuto scalare le ore di luce purtroppo visto che in box ho due fotoperiodiche , nel complesso la #2 sta andando alla grande mentre la #1 si è ripresa da poco da quasi sicuramente uno stress che ho causato io alle radici , la #2 mi sta mostrando i segni di un inizio di fioritura, spero vadi tutto bene buona visione :)
Likes
20
Share
Ciao a tutti! Molto bene si stanno formando i fiori speriamo ora gonfino per bene!!! Sono carichi di tricomi è una dietro sta iniziando a diventare viola! Si nota un andamento dei pistilli ma solo su alcuni fiori. Al prossimo aggiornamento 🤪 Maryjane23
Processing
Likes
3
Share
@Dico29
Follow
Day 141 still going started to reveg but lowered light schedule
Processing
Likes
5
Share
@Ensign420
Follow
Week 02 Introduction This week has been a bit of a struggle. Had my first experience dealing with slime and brown algae. But I think adding enzymes and increasing the beneficial bacteria helped to fix the issue. Also experienced nutrient burn for the first time. My nutrient solution strength got as high as 671 PPMs. So backed it down to about 430 PPMs during the end-of-week reservoir change. Also cut Hydroguard (expired?), CaliMagic, and Superthrive from this grow. Now she's still stunted, but is starting to recover. Hopefully... [START OF WEEK 02] Day 01 - Monday - 08/10/20 - Total Days: 008 ----------------------------------- - [0830]: Still looks a bit yellow. But getting larger! --- Solution strength was at 248 PPMs. --- Just topped off with a bit of distilled water --- PH went up to 6.1 so PH'd down to 5.8 --- Ran the top feed for a bit to wet the hydroton. - [2130]: She's looking even more yellow now. --- Even the new leaves are really yellow. --- Decided to add more base nutes. --- Added 4ml of Sensi A --- Added 4ml of Sensi B --- Now at about --- Solution Strength went up to 304 PPM. --- PH was at 6, --- Also raised the water level a bit more. --- I really hope it's a nutrient deficiency and not an over-watering issue. --- Please live! Day 02 - Tuesday - 08/11/20 - Total Days: 009 ----------------------------------- - [0830]: Looking less droopy. But still yellow. --- Decided to do a reservoir change. --- 4.5gal of distilled water --- 8ml of Sensi Grow A --- 8ml of Sensi Grow B --- 8ml of Voodoo Juice --- 4ml of B-52 --- 4ml of CaliMagic --- 4ml of Hydroguard --- 4 drops of Superthrive --- PH'd down to 5.8 --- Solution strength: 302 PPM --- Since I didn't want to risk over-watering the rockwool, I did not to do a top feed, may do one tonight after the sleep cycle (lights are still set to go off at 10am and back on at 4pm). --- As I was doing a reservoir change, I noticed that the tubes and bucket were a bit slimy. Didn't really stink or anything. Is this normal? Maybe due to the Hydroguard and Voodoo Juice? --- I hope she gets better soon! - [2215]: Getting larger! But still yellow. --- Also can see a root growing through the net pot! Tiny little thing but it's there! Will have to start dropping water once more appear. --- After looking over a few DWC diaries using AN nutes, seems like my solution strength is still too low. Most around this stage average around 500 PPMs with about 4ml per gallon. --- Top fed for a minute to wet the top of the hydroton. --- Solution strength went down to 263 PPM. --- Added 8ml more of Sensi A --- Added 8ml more of Sensi B --- Now base nutes are at 16ml for 4.5 gal of water. --- PPMs went up to 411. --- Still lower than 500 PPMs, but that's okay. --- PH was at 6. Not sure if I should adjust PH using AN nutes. So going to not ajdust unless PH goes above 6.1. Day 03 - Wednesday - 08/12/20 - Total Days: 010 ----------------------------------- - [0830]: Looks like more root growth! --- She still looks yellow. But leaves are perky. --- PH was at 6.2 so lowered down to 5.8. --- Solution strength was at 394 PPMs --- Since roots are still growing, I decide to lower the water level a bit. Now water level is a bit below the net pot. - [2200]: Root is getting longer! --- Slime is returning. Not sure why. --- Solution strength: 357 PPMs --- PH: 6.1 --- Decided to add an enzyme along with more beneficial bacteria to hopefully cure the slime. --- Added 16ml of Sensizym --- Added 5ml of Hydroguard --- Added 8ml of Voodoo Juice --- New solution strength: 430 PPMs --- New PH: 6.1 --- Top fed for a minute. --- This slimy residue is really freaking me out! I hope the added enzymes will help eliminate the slime. --- Going to do a full reservoir sterilization/nutrient change over the weekend. Please survive until then girl! Day 04 - Thursday - 08/13/20 - Total Days: 011 ----------------------------------- - [0930]: I think the enzymes worked! There is little to no slime now! --- Although I think the root was also dissolved in the process. It's now just a little stub sticking just below the net pot. The enzyme is also suppose to dissolved dead roots too but guess that root was too weak? Not sure what happened there. But I think the slime is cured! --- Solution strength went down to 395 PPMs. Decided to add more base nutrients. --- Added 8ml of Sensi A --- Added 8ml of Sensi B --- Added 4ml of B-52 --- Solution strength went up to 598 PPMs. --- PH was at 6.1 --- As long as the PH is between 5.5 and 6.3, I'm not going to use PH Up or Down. But still will monitor PH levels. - [1715]: Checked up on her after her nap and shes looking alive but stunted. But no slime! --- Decided to add some sugars to help maintain the enzymes and beneficial bacteria. --- Solution strength was at 587 PPMs. --- PH was at 6.2 --- Added 8ml of Bud Candy --- Solution strength went up to 671 PPMs. --- PH also went up to 6.3 --- Lowered water level a bit to hopefully promote more root growth. --- Top fed for a minute. --- She is getting bigger, but still looks yellow. Day 05 - Friday - 08/14/20 - Total Days: 012 ----------------------------------- - [0915]: Leaves look a little burnt on the tips. Still no slime. --- Going to back off on the PPMs to hopefully fix the nutrient toxicity. --- Solution strength was at 632 PPMs --- PH was at 6.3 --- Added/Removed water until PPMs were at 536. --- PH was still at 6.3 --- Raised water up a bit, then top fed for a minute. - [2200]: Looking better. Still yellow though. --- Solution strength: 514 PPMs --- PH: 6.5 --- Added PH down. --- New solution strength: 518 PPMs --- New PH: 5.2 --- PH was kind of high. So decided to PH down. Had to use quite a bit to bring it down. But eventually got it to drop down to 5.3. A little low, but so far, the PH has always gone up so wanted to start it really low. --- Ran the top feed for a minute to re-saturate the top of the hydroton. Day 06 - Saturday - 08/15/20 - Total Days: 013 ----------------------------------- - [0830]: She looks stunted. leaves are still yellow. --- Solution strength: 514 PPMs --- PH: 5.6 --- Top fed for a minute. --- Not sure what to do at this point. Going to do another reservoir change soon. Hoping she lives until then. - [2145]: Looking pretty much the same. --- A bit of slime has returned. Since I've been diluting the nutrient solution, the enzyme ratio has dropped. So I guess this is expected. --- Also noticed that slime build up was on the air-stones. Never really checked the stones so not sure how long that has been there. Looks brown too, which can't be good. --- Going to do an H202 sterilization of the system (minus the net pot) tomorrow so did not add anything. --- Lowered the water level to below the net pot. --- Then top fed for a minute. Day 07 - Sunday - 08/16/20 - Total Days: 014 ----------------------------------- - [0900]: STERILIZATION DAY! --- Decided to skip today's night cycle for a deep clean. --- I'm hoping that skipping a night cycle won't be too stressful. --- Temporarily moved her to a new bucket. --- Used about a half of gallon of straight distilled water to flush out the net pot. --- Drained the system and wiped up all the brown sludge. Also removed the air stones and cleaned up all the goo. --- Filled the system with 2 gallons of distilled water and at least 30ml of food grade hydrogen peroxide (35% strength). --- Yea its a lot, but since I'm not going to sterilize the system overnight, I went with a really high doseage. Basically I kept adding until I started to see little bubbles start to form. --- Then I ran the water pump. - [0915]: Boiled the air stones in tap water for about 10 min. Then reconnected them to the airlines. --- I let the air stones and hose soak in the sterilization solution for about 5 minutes so the peroxide can absorb into the stones. Then ran the air stone to help mix and agitate the solution. --- Occasionally, I'd repeat the process of turning the air pump off for a few minutes to let the stones soak. - [1000]: Covered the top two row of holes of the net pot with some aluminum tape. Hopefully this solves the light leaking in through the hydroton. - [1200]: Used an old toothbrush and scrubbed the pump clean. Then drained the system. --- Refilled with more distilled water and peroxide. Again added a lot. --- Ran system again to sterilize even more. - [1530]: Drained the system and refilled with distilled water to rinse. --- Ran the system for a few minutes, then drained and rinsed again. --- Did this a few more times over about an hour. - [1630]: Added 4 gallons of fresh distilled water. --- Added 15ml Sensi Grow A --- Added 15ml Sensi Grow B --- Added 12ml of B-52 --- Added 16ml of Voodoo Juice --- Added 16ml Sensizym --- Solution strength was at 430 PPMs --- PH was at 5.6 --- I was going to add Hydroguard, but I think the bottle is expired. Since 2017 or 2018!? I think Hydroguard is good for up to 2 years from the date on the bottle or 6 months after opening. So not going to use from now on. I wonder if this could have contributed to the slime build up. --- Also removed the CaliMagic and Superthrive too. Going to only use AN products to eliminate the chance of incompatible nutrients. --- Placed her back in the bucket and top fed for a minute. --- Here's hoping for the best. Going to let it ride until morning! Please feel better! [END OF WEEK 02]
Likes
19
Share
Likes
17
Share
@SkyWhal3
Follow
First time growing the sticky and decided RDWC was worth a try. Took longer than I wanted to, to get the RDWC done. Pics are day 8/9 after RDWC Transplant. ChemCookies on the left (larger one) started sprouting about 2-3 weeks before I was given a seed of Compound Genetics Apples and Bananas. Took about 3 more weeks to get all the equipment set up so they have been chillin' in soil for quite a while. Going to SCoG when the net gets here. This is an odd grow, the next round will be the same strains and germination schedule. Think Ill veg them for another 1-2 weeks then put them into flower.