
Likes
Comments
Share


Processing
Likes
3
Share


@Therbalist
Follow
Looks great can't wait to see what she smokes like if it is a she!
Likes
1
Share
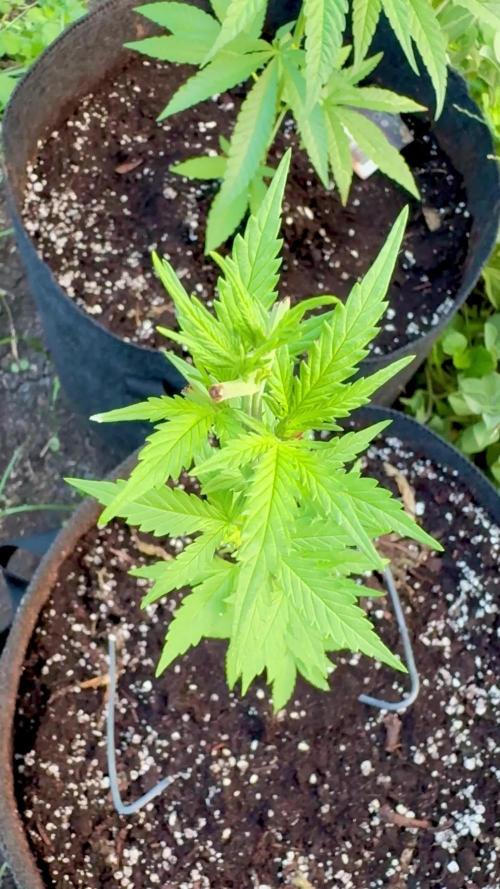

@Organic473
Follow
I defoliated her entire main leaves. All her branches are popping out now which was my intention. She was also topped..

Likes
13
Share


@SzkolaZiola
Follow
Last days for most of them - only Strawberry Cough will stay longer - she is super hungry and I can not keep up with feeding her - most of leaves are yellow now. 😱
The rest - four plants will be harvested on the weekend - 2-3 days from now and frozen - I'll be making bubble hash and fresh frozen live resin from them in the following weeks 😈
Trichomes are mostly milky with some amber starting - ideal ripeness and time to freeze those glands


Likes
10
Share
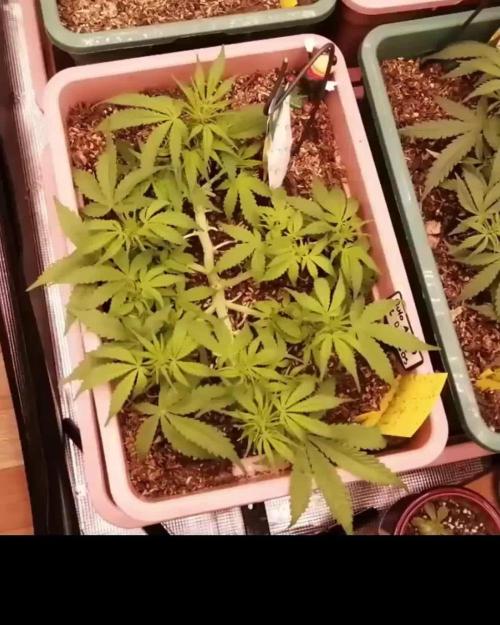

@All_our_small_plants
Follow
Bewässerung: 700ml
pH-Wert: 6,1
EC-Wert: 1,2
Temperatur: 25ºC
Luftfeuchtigkeit 62%
Schädlingsbekämpfung:
PPFD: 500 µmol/m²/s
DLI: 33
Düngemittel: Mineralischer Dünger 3.5-6-6
Besonderheiten: Wurden direkt in die erde gepflanzt in einer Kokos-Quelltabletten.
-Tag 37 Heute haben wir sie wieder gegossen und mit dem Blüten Dünger begonnen. Wir haben ihr nur noch 2 oder 3 Blätter entfernt und werden ab jetzt nur noch diese entfernen die Stören
-Tag 39 Sie hat heute etwas Dünger bekommen 😍
-Tag 41 Sie hat mit dem Stretch angefangen. Heute hat sie Wasser mit Effektive Mikroorganismen und Plagron Power Buds bekommen und sie war beim Friseur 😝

Likes
2
Share

@TheBulldozerSicily
Follow
Dopo un bella blocco per over di nutrienti, abbasso ec e provo a farla ripartire, da un ec oltre i 3500 siamo scesi a 1600... continuerò fino a che non tornano a mangiare, per poi integrare qualche boost
Likes
21
Share


@hydro_newb42
Follow
It has been very difficult keeping the temperatures down due to the hot summer weather. It has been over 90 degrees 3 weeks in a row here and I'm running lights during the day... bad combination. These plants haven't slowed down though...

Likes
16
Share


@DaddyPrime
Follow
So the only thing I wish couldve been different about this grow is that I wish she didnt stutter/stall with the flowering in the begining. She shot out pistils but stalled for like 2 weeks or so. So if she wouldve been flowering for the full time, I thibk I couldve gotten better product(I'm still impressed) but I feel like I couldve done something better with her.
7/26 Day 2 of drying. Everything's still wet. The room is 75 °F with 50%humidity
7/27 day 3 of drying. Everything felt crispy and dense. Humidity was 40% and temp was 75F
7/29 weighed and put into jars with stems the weight was 51.2 grams and without stems 45.5 grams.
Processing
Likes
28
Share


@Elysian_gardens710
Follow
Day 22 and 23:
Going easy breezy so far!! I released some ladybugs in my tents on these Chocolate Mint OG's 21st day. So far so good lol.
Last night when I watered I gave a little real growers recharge to help with the recent transplant (it definitely gave them a boost!)
Its mid summer here in MI and 84+ temps 😬 keeping the house and tents cool has been a challenge to say the least. Thankfully all my plants are in Veg and seem to like the heat. Except the Choc Mint.they are showing mild heat stress on the top fan leaves(at least that's my guess) Tent temps have been around 86 down to 84 daytime. I lowered them so they are 24" from the lights 🤞 hopefully that helps. Other than that, no problems. And some generally happy plants! The recharge and soil combo burned them a very little bit as well.
Day 25&26
Nothing too eventful. I watered #2 on day 25. With some real growers recharge. The stuff is awesome! No nutrients needed if you have good soil!
Day 26: snip 2 fan leaves from #2(the topped one) she was getting a little bushy. And tucked the other fans under to promote some lower branch growth. #1 I'm letting roll totally natural unless I clean up lower canopy to prevent pests.
Day 27:
Plants are doing great! #1 is really getting tall and # 2 is staying short and squat because of the training. We are letting #1 go naturally. Today's update is we added some LST wire to #2 to pull down her lowest branches
My equipment and gear:
2x4 vivosun
Es300 lighting
Vivosun oscillating tent fan
Honeywell Hurricane fan
6" exhaust outside
15,000 BTU air conditioner
8,500 BTU in tent air conditioning
Some sick ass Genetics 😁

Likes
29
Share


@DreamIT
Follow
Sponsored by:
ORIGINAL SENSIBLE SEEDS-💡VIPARSPECTRA💡-💐GREEN BUZZ LIQUIDS💐-🛠️WEDRYER🛠️
28/7 this beauty is growing monstrously. the two lower branches have divided themselves into two apical ones, very nice to see, very particular. these days it will be cut to see how it behaves in cloning and will be put into flowering early next week. Yeah!
2/8 grows really luxuriant! beautiful and with a scent of orange in the background. I can't wait to see it in bloom
__________________________________________
Personal advertising (contains affiliate links)
__________________________________________
🦄Highest quality seeds since 1992, a real guarantee! (no affiliate link)
✅https://bit.ly/Originalsensibleseeds
__________________________________________
Did you know that Green Buzz Liquids fertilizers are 100% vegan? A complete line of products ready to give the best to each of your plants! Visit the site and see my journals to see how they work 🦄
🤯 And with the code "dreami t" you will immediately receive a 15% discount on your purchases
✅https: //bit.ly/GreenBuzzLiquidsPro
__________________________________________
👀 Are you looking for a good lamp to start with? 👀
🌞Viparspectra has something more than the others, take a look at their site.
⏩ Use "GDVIP" for an extra discount or "DREAMIT3" for an extra 5 %% discount
👀 Search for it on Amazon
✅Amazon USA: https://amzn.to/30xSTVq
✅Amazon Canada: https://amzn.to/38udUVe
✅Viparspectra UE: bit.ly/ViparspectraUE
✅Viparspectra USA: bit.ly/ViparspectraUS
______________________________________________
🌈 Tired of blowing on your weed hoping it dries quickly? Check out the Wedryer website! You will find a well-made accessory that will help your weed dry in just 8-10 days without the annoying risk of finding mold or other annoyances! (no affiliate links)
✅https: //bit.ly/Wedryer_
______________________________________________
📷🥇Follow the best photos on Instagram 🥇📷
https://www.instagram.com/dreamit420/
Backup
https://www.instagram.com/dreamit4200/
🔻🔻Leave a comment with your opinion if you pass by here🔻🔻
🤟🦄💚 Thank you and good growth 💚🦄🤟

Likes
Comments
Share


Likes
7
Share


@Coman
Follow
She might need one more week, but 2 branches broke down do to the weight of buds, so might harvest her soon. Buds are really big and juicy. This could be my new record on one plant.
Likes
5
Share


@AK1210
Follow
The flowering on this lady has been very fast, she is giving off a nice orange 🍊 aroma.
I have had to move her position in the tent to allow her to grow to her fullness.
The weather has been really good this month and we have just had a few days that have been above 29 degrees Fahrenheit which has been welcomed at this stage.

Likes
7
Share


@Cultivatorcarlos
Follow
december 20th gave her half a gallon of dechlorinated tap water phd to 6.6 with 1/2 tsp of bloom nutes to each 3 gallons of water. runoff tested at 6.3 ph. she was showing a few deficiencies
Likes
11
Share


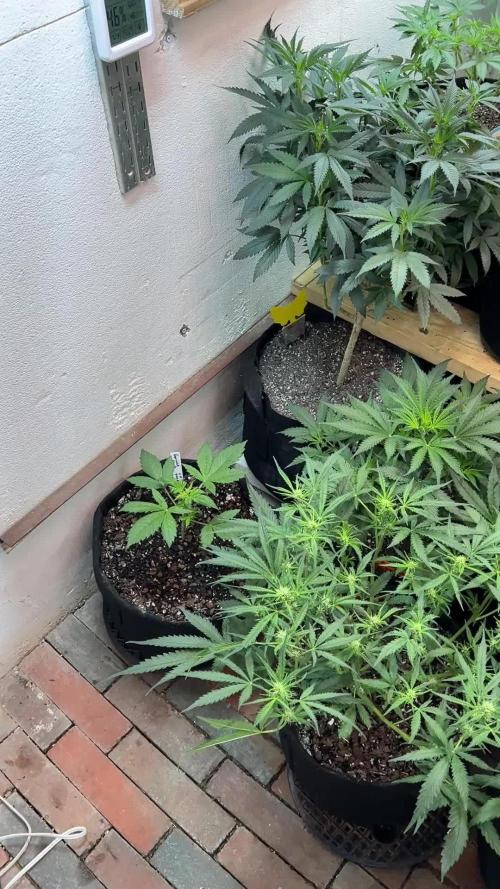
@Paradox_1ste1
Follow
Stardog room it is looking pretty good and is thriving. Hopefully get the results we asking for.
Aya room up to now is giving pretty impressive results and it looks like they like the enviroment even tho its not fully equiped.
After adding the c4 neet to celan the insides a little bit more and see how it will react.
Likes
107
Share


@DogDoctorOfficial
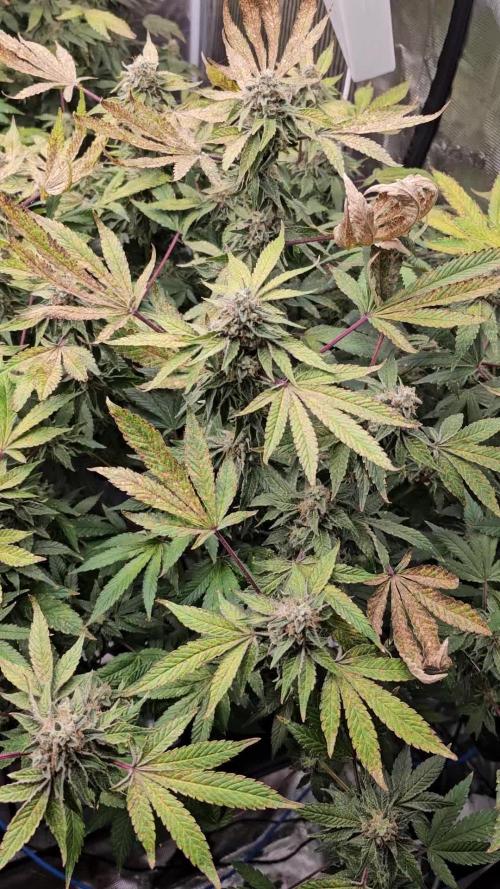
Follow
Get ready to step into the mesmerizing world of my Purple Lemonade FF, as we embark on an exhilarating journey through Week 6 of flowering.
A Standing Ovation for Fast Buds' Mastery
Hold onto your gardening hats because this week's update is an ode to @Fast_Buds, the creative geniuses behind this botanical masterpiece! With an immense shout-out, let's celebrate the magic they've woven into the Purple Lemonade FF. She's not just a plant; she's an embodiment of their dedication, expertise, and passion for excellence.
Trichome Wonderland: Where Magic Meets Science
Now, let's venture deep into the world of trichomes—a magical realm where science and enchantment collide. These tiny, glistening structures aren't just eye candy; they're the heart of the matter. Trichomes are like nature's jewelry, sparkling with resinous elegance. And guess what? They're not just about looks. These beauties are the treasure troves of cannabinoids, terpenes, and other compounds that make your plant a powerhouse of goodness.
Colors and Aromas: A Symphony of Abundance
As we dive into this purple symphony, let's take a moment to appreciate the colors. It's not just about visual appeal; those shades of purple are like whispers from the plant itself. They tell a story of cool nights, warm days, and the dance of chlorophyll and anthocyanin. And the aromas? They're a melodic overture to the flavors that await, a sensory adventure that will delight the senses.
Buds of Grandeur: Embrace the Beauty
Size, my friends, is a matter of grandeur in this garden. The buds have grown into mammoth proportions, dripping with resinous promises. Each nugget is like a tiny universe, a world of wonders waiting to be explored. It's a testament to our care, a tribute to the nurturing journey we've embarked upon.
Celebrating Nature's Artistry: A Glimpse Within
And now, as the sun sets on this week's chapter, here's a snapshot from the heart of the grow room. Feast your eyes upon the breathtaking sight of my Purple Lemonade FF, standing tall and proud amidst her leafy companions. It's a sight that encapsulates the joy of cultivation, the artistry of nature, and the wonders we've unlocked together.
Embrace the Journey, Savor the Beauty
As we venture onward, let's continue to embrace the journey and savor every moment. The trichomes, the colors, the growth—it's all a reflection of our dedication. With every leaf we nurture and every bud we tend, we're cultivating more than just plants; we're cultivating a connection to the heart of nature.
Thank you for joining me on this awe-inspiring voyage. Until the next chapter unfolds, keep those hearts and plants thriving!
Genetics - Fast Buds Purple Lemonade FF
Ligth - Lumatek ZEUS 465 COMPACT PRO
Food - Aptus Holland
#aptus #aptusplanttech #aptusgang #aptusfamily #aptustrueplantscience #inbalancewithnature #trueplantscience #fastbuds #dogdoctorofficial #growerslove
With true love comes happiness <3 <3 <3 Always believe in your self and always do things expecting nothing and with an open heart , be a giver and the universe will give back to you in ways you could not even imagine so <3 <3 <3
All info and full product details can be find in can find @
https://2fast4buds.com/
https://aptus-holland.com/
https://autopot.co.uk/
https://lumatek-lighting.com/
<3 <3 <3 Growers love to you all <3 <3 <3
" Arising from a cross between purple and citrus Cali genetics, Purple Lemonade FF (Fastflowering) offers a complex high made up of perfectly balanced cerebral and body effects that are ideal for daytime use. Expect an extremely enjoyable high that boosts your mood while deeply relaxing your whole body and getting rid of muscle pain. This meticulous cross produces up to 550 g/m2 of some of the most beautiful purple buds, with pinkish and reddish hues that will catch everyone’s attention. The beautiful purple buds are ready for harvest in 7-8 weeks and come hand-in-hand with unbelievably sugary citrus terps that are just as refreshing as a cold lemonade on a hot Summer day. It’s the ideal variety for the sweet-tooth stoner seeking strains that deliver both in quality and quantity of resin.
Bud Description
Purple Lemonade FF grows chunky, spade-shaped buds that boast a whole range of pinkish-purple hues with rich, dark orange pistils shooting out of every direction. This variety stands out for the, oftentimes, lilac trichomes that give them a gorgeous pink tint and make for outstanding purple concentrates. The buds give off a delicious tart lemon aroma that reveals a sweeter, more fruity scent as you break the buds open. Definitely a must for flavor chasers and those looking for pungent terpene profiles. Smoke Reports
Purple Lemonade FF offers an effect that’s just as unique as the flavor. Expect a potent uplifting high that gives you that energy boost you need to get things done while 100% happy and stress-free. The effect gradually transforms into a wave that works its way along the limbs and through the muscles, deeply relaxing your body and putting you in the right mindset to go through a busy day with a huge smile on your face. This is an excellent all-day smoke as it not only increases energy but can also help combat chronic pain, migraine and stress. Plant Appearance
This feminized photoperiod variety develops a thick and strong structure, growing a medium-sized main cola with multiple shorter side branches, typical of hybrid strains. Purple Lemonade FF develops fairly short internodal spacing with gorgeous purple buds growing stacked on top of each other, making it the perfect choice for growers of all levels looking to get lots and lots of top-shelf purple weed, as this variety can produce up to 550 g/m2 in a 7-8 week flower cycle.
Grow Tips
This is a super fast feminized photoperiod version that takes approximately 7-8 weeks to flower with a 5-week vegetation cycle,, this means you can have faster harvests by shortening the veg cycle or have a longer veg cycle for bigger yields. Purple Lemonade FF (Fastflowering) makes for a great candidate for growers of all levels as it’s a vigorous strain that will thrive with basic maintenance both indoors and outdoors. This is a resin powerhouse so make sure to have your trim bin close by as all the resinous sugar leaves will make for the most mouth-watering hash and extracts. Flavor
Expect a long-lasting citrus zest that taste just like it smells. Purple Lemonade FF reeks of a delicious blend of sweet fruits and tart citrus that’ll make your mouth water. On the inhale, expect sour flavors that taste just like lemon candy with hints of orange and a really subtle earthy background. And on the exhale, the citrus flavors open up, giving place to a more sugary berry fruitiness that leaves your whole mouth tasting like an extremely sweet weed-infused lemonade.
Processing
Likes
9
Share


@Belverde
Follow
Ok, here we are again in the kitchen😄 ...
This young Girl Scout Cookies was the only one, along with another seed, to decide to sprout ... three others didn't want to come out of the shell ... so it wasn't really a super deal for the moment .... but you know, anything can happen in nature and I don't want to complain, at least until I see how this and her new sister will behave, and she decided to go out today from where it was planted (after about two days) ... you can see it under half a plastic bottle in the video 🌱...
always in the video you can see together with those who share his house ... after there will remain less ...
seems to be growing well .. today I have once again given the root stimulator, root juice, about 1ml for 1l water pH6, 5 , also to moisten the entire substrate well, but not excessively..
The oven is on .... we hope to have a good sweet smell..
see you next week ...
Let me know if you like it😉...
Good growing
Bye ✌️
Likes
6
Share


@Stickygreens420
Follow
7/22/2023 - Day 18 Veg: she is definitely small for her age. She looks healthy, so I'm assuming it must be a watering issue. My environment has been dialed in with an averge VPD og .85, so the plants should be growing well. The cover crop is doing great. I've only been watering every 3 or 4 days, so I'm going to try watering more often, but with less water. Not too worried about it as long as she stays healthy. I had the light pretty high, so I dropped it today, bringing the PPFD up to just over 500. I was at about 300, so that should get her going. The shore fly issue seems to be getting better, but it comes in waves, so I'm not sure if I've been totally successful yet.
7/23/2023: foiler fed today with Pure Protein Dry, BuildASoil Big 6 Micro Nutrients, calmag, silica, and ThermX-70. Also did a light watering with the same mix.
7/24/2023: it looks like she like the foiler feeding yesterday.
7/25/2023: today is veg day 21, so officially the three week point. Watered today, mixed with silica, calmag, Rootwise Bio-Catalyst, and Yah-Whey Thrive.
7/26/2023: Time to chop and drop the earth box today.

Likes
1
Share

@Cmftrblynmb
Follow
Flipped my lights this week so ready or not, here we go. I am afraid if I wait too much longer I will be totally out of room, and I have some Autos beginning to flower. I want to wrap this one up and move on to another grow where I can implement some of the things that I have learned.
Likes
35
Share


@Hiroots420
Follow
08/06/2021 (F DAY 11)
Comenzando la segunda semana de 12/12 el alargamiento ya se puede observar, como siempre las pomelo tienden a estirarse mas y tiene una estructura muy poco ramificada! digna de una buena sativa.
Las Sweet Cheese vienen creciendo a pasos agigantados!
Todas las plantas ya mostraron sus sexos y están listas para su flora.
10/06/2021 (F DAY 13)
Se incorporan 180W de Citizen mas, quedando en 360W totales!
Las plantas ya comienzan a estirarse y a mostrar más pelos!

Likes
11
Share


@KcKoolaidMan
Follow
So the soil plants have reached the flushing stage. Hit the with the last dose of kleanse two days ago and then a big bath of straight ph water this evening. Will flush them for about another week. The plan is to cut the four soil plants down next weekend. The trichromes are all cloudy and starting to get some Amber’s. The buds especially the tops are all dense and sticky. All four plants even tho being same strain have very unique characteristics. But all have the same sticky gas smell. The frost production is pretty amazing with the cyco I was a little nervous about the bud density at first but they really packed weight in the last few weeks.
The hydro plant is about a week behind but man is it big AF! It’s got as much bud as two of the soil plants easily! The roots have been kinda out of control but it will be fine with how late it is. The hydro buds already have more density I. The buds compared to where the soil plants were at this stage but so that is exciting. I have a good feeding of the flowering nutes in the res now. I’ll keep an eye on it and start flushing it here shortly as well.
Hopefully the next update will be some harvest pics!
Thanks for stopping by and as always cheers 🍻.