


Processing
Likes
10
Share


@BodyByVio
Follow
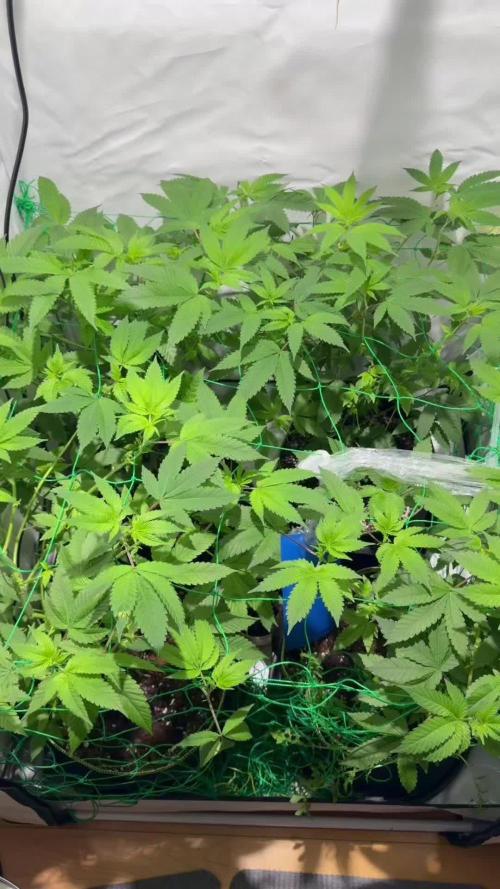
This week I Supercrop all the plants and spred them out over both lights. One more week of Veg and they are ready to explode
Check me out on Instagram @growmorestressless

Likes
60
Share


@BOMbolenath
Follow
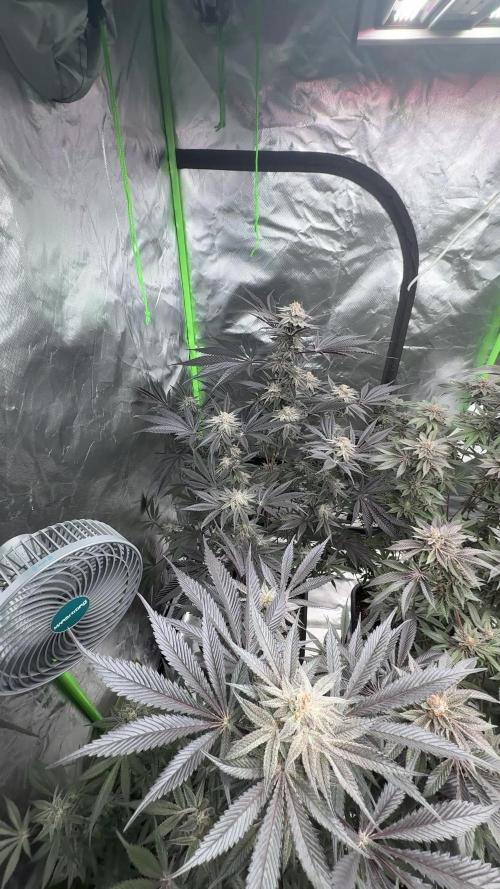
Beginning of eight week, buds are very heavy and dense. Smell is incredible. Very sticky!
One of top buds broke because of the weight and dryed. So i got it to smoke and its incredible tepene. Its fruit gas, very complex. Now its one of my top 3 strains.

Likes
1
Share

@GasoGrow
Follow
The buds are swelling and gaining more color and the UV setting is being extended by 15 minutes

Likes
Comments
Share


@GreenQueenz420
Follow
This girl is thriving and growing packing some weight on! Loving her development.

Likes
2
Share


@DrBud420
Follow
The plants were fed 3 days ago for the last time.. after the soil has dried, only flawless finish will go (probably from tomorrow) for the next 10-12 days, how long will it last... Glookies has a strong, exotic smell, it smells a lot like melon, sometimes a little like coffee... the smell is intense and can be felt even at 40-50 meters, especially at night... it is currently in full potency, some 90% trichomes are cloudy-milky and sometimes amber, when it is removed it will be exactly what an indica dominant hybrid should be... Dos Si Dos 33# also smells a bit like melon, but I think it will completely lose that smell by the end, no lime, citrus and mint as it says, it smells mostly like gelato, which makes sense because it's genetics,but I like it...it's like I planted gelato lol...but unfortunately I won't leave it as long as it requires because the weather won't allow it, I'll take it down in 12 days at the latest because after that the temperatures will go up to 3 degrees Celsius at night, the humidity will go over 70 , it's going to rain, there's no point in keeping it longer than that, I'm just increasing the risk of mold, and it's not like I haven't already thrown away a couple of moldy heads...50% of the trichomes are cloudy-milky, the rest are transparent and some amber... I hope that by the end it will be able to achieve at least full potency because time will not allow for more amber
These plants are real viking warriors, they didn't miss a bit of stress, but thank the dear Gods, it was reflected in the potency, and not in the production of seeds... this season is the worst season I've ever experienced, and so are my plants ...throughout the season they were under stress, and I was under even more stress...the weather in May and June was cold, without enough sun, temperatures were low, constant rain, ice and storms...after that came abnormal temperatures that easily exceeded 60 degrees Celsius in the direct sun....drought for almost 3 months, without a drop of rain, on the hottest days some plants drank 100+ liters of water, including food, I couldn't believe it with my own eyes... outdoor this year cost me more than if I did indoor... there were a lot of storms throughout the season... the last storm completely uprooted 3 of my plants and I had to take them down... of course I didn't manage to cut that much grass in time, so I ended up with over 600 g of dry moldy gorilla zkittlez( that's about it, the quarter that I cut gave 150 grams of dry matter, so I realized that there was no reason to continue cutting) it got worse because I didn't have time to cut it, and it was soaked from the rain... I still can't complain even if I I don't like the smell, I'm not a fan, it's potent and the work is relaxing and divine, I managed to save about 20 grams without it being touched at all... I have more strains that have been in jars for some time, but this is not the place for them now, I will certainly include some footage of them in jars as well...all the strains are superb and each is beautiful in its own way...I couldn't stop I decide on just one... dos si dos 33, runtz x layer cake, glookies and mimosa x orange punch I'm definitely planting again in the future..
I'm also interested in what barney's amnesia lemon is like because I really like this one, so next year I'll probably plant it too
Dos si dos is about 120 cm tall, glookies 2 m
These two plants had additional stress unlike the others which also didn't suffer...they were in smart pots, staked and one morning I go for a tour and see the plant broken, and the pot torn all the way, like a beast that was there.. .did some wild animal fly over there and got tangled up and uprooted it all... and it was as if someone had cut it with a knife, after a few days the same with the other plant, the same completely... then I seriously started to i mean someone is casting a spell on me lol then they were transplanted in early bloom into direct soil
Then glookies was transplanted to a place with much less sun than it was in, but at that moment I couldn't choose, what is there is..

Likes
9
Share


@rolling_stoned
Follow
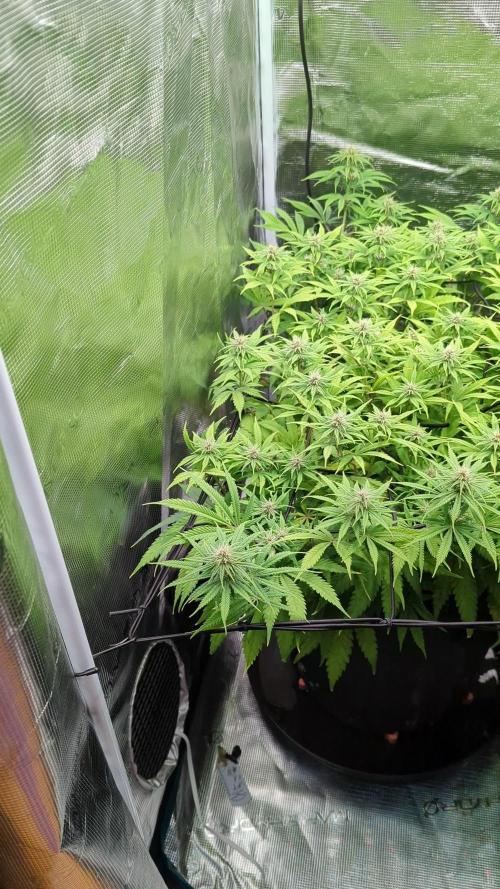
I gave the plants a good trim to try and get more light to the lower buds and replaced the water and nutrients, negating the CANNA PK13/14. Buds are starting to take shape and smell fantastic—hopefully, I can harvest them in another couple of weeks. I have learned a lot from this grow and will be applying all the knowledge gained into the next.

Likes
33
Share


@Titoff
Follow
Malgré les erreurs commises la culture suit son cours, cependant je pensais commencer mes deux semaines de rinçage mais étant ma première culture, j’ai préféré observer l’avancer des trichomes à l’aide de microscope et lentille macro se fixant sur son smartphone, la prise en main étant plus aisé, j’ai pu me rendre compte que la majorité était translucide, j’ai donc décidé de faire une semaine d’engrais supplémentaires.
Ce qui est plaisant, c’est de travailler près de ces filles, on plaque de partout et l’odeur, je vous raconte pas...
Likes
23
Share


@DreamIT
Follow
Sponsored by:
⚖️HUMBOLDT SEESDS⚖️-💡VIPARSPECTRA💡-💐GREEN BUZZ LIQUIDS💐-🛠️WEDRYER🛠️
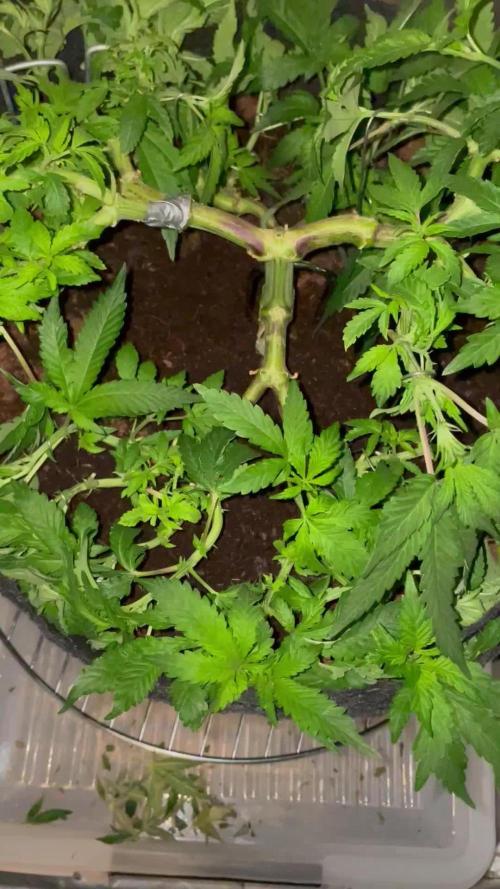
28/7 cut made and clone fixed. Monday entry into bloom. super yeah
2/8 this beauty was cut to make a clone, but I will pick two more before sending it into bloom
__________________________________________
Personal advertising (contains affiliate links)
__________________________________________
🦄 Highly professional graphics and website, one-of-a-kind genetics, and a legendary story! Anonymous shipping!
✅https: //bit.ly/HumboldtSeedsCompany
__________________________________________
Did you know that Green Buzz Liquids fertilizers are 100% vegan? A complete line of products ready to give the best to each of your plants! Visit the site and see my journals to see how they work 🦄
🤯 And with the code "dreami t" you will immediately receive a 15% discount on your purchases
✅https: //bit.ly/GreenBuzzLiquidsPro
__________________________________________
👀 Are you looking for a good lamp to start with? 👀
🌞Viparspectra has something more than the others, take a look at their site.
⏩ Use "GDVIP" for an extra discount or "DREAMIT3" for an extra 5 %% discount
👀 Search for it on Amazon
✅Amazon USA: https://amzn.to/30xSTVq
✅Amazon Canada: https://amzn.to/38udUVe
✅Viparspectra UE: bit.ly/ViparspectraUE
✅Viparspectra USA: bit.ly/ViparspectraUS
______________________________________________
🌈 Tired of blowing on your weed hoping it dries quickly? Check out the Wedryer website! You will find a well-made accessory that will help your weed dry in just 8-10 days without the annoying risk of finding mold or other annoyances! (no affiliate links)
✅https: //bit.ly/Wedryer_
______________________________________________
📷🥇Follow the best photos on Instagram 🥇📷
https://www.instagram.com/dreamit420/
Backup
https://www.instagram.com/dreamit4200/
🔻🔻Leave a comment with your opinion if you pass by here🔻🔻
🤟🦄💚 Thank you and good growth 💚🦄🤟

Likes
1
Share


@Rigs70
Follow
Killed both plants.
One of my plants was a hermaphrodite and turned both of them full of seeds. Tio bad cause buds were big and smelled great and was super sticky.
Likes
73
Share


@Rando1314
Follow
Flushed HARDCORE this week!! Ladies are not looking well nor do they seem like they’re reacting to the flush well either!! Almost seems like they’re locked out but also having deficiencies! I could use some advice on this. 3/5 of the taller plants have yellowed out and the other 2 look great!! Pretty much all the same watering and neuts. I think the issue was that I’m using fabric pots and not allowing enough penetration to the bottom and it created a salt pocket. Correct me if I’m wrong
Updated a few more pics of the deficiency/lockout issues all the help is appreciated thanks to everyone whose chiming in and helping!! Y’all the real deal!!

Likes
12
Share


@Slurpy_Terpy
Follow
stretching nicely!
she is filling up a bit more than 1/3 of the tent
she is stretching pretty evenly, easy so far :D
the buds are developing early! (compared to the rest, she is in advance)


Likes
24
Share


@Guerilla_Jack
Follow
End of 5 week of flowering. All three full of resin.buds are very sticky.. nice smell from closet.we will see in the end. 3 weeks till flashing my plants i think.

Likes
1
Share


Likes
6
Share


@Weedzoks
Follow
Bienvenue à tous sur ce nouveau journal de culture 😃
Nous partons sur une graine d’une OG BubbleGum en version automatique, croisement d’une BubbleGum x OG Kush avec une Ruderalis.
D’après le vendeur la graine met entre 50-60 jours de la graine à la récolte.
C’est parti !


Likes
17
Share


@ArtisticGrown
Follow
We are in week 6 of bloom on a 7 to 8 week flowering time! I am LOVE LOVEING this strain!
Within this last week its gotten a Bit hotter later in May! We sare doping grereat tho, She is showing some signs of heat stress in my eyes causde of the burnt tips, I dont think nutrients caused this cause I have not been giving here many nutrients, the top feed and one tiime I gave her some Tastey Terpenes from advanced nutrients.
This living soil has been amaazing I honestly dont think I needed to give the plant the Nirvana, I do think it helped.
I am light watering with irrated ph balanced for the next few days, might gvive her some sugars molasses yummm.
much love looooking to harvest soon, This strain is blowinig my mind, so is this soil. With everything I put into the soil and learning how to build a soil has beeen a journey and im on it! Hoping this plant swells up some in the next weeek put some weight on, now that all the pistols are brown ill check thrichomes soon!!

Likes
16
Share

@BudsPerMinute
Follow
Woche 10
Diese Woche wurde wieder mit Nährstoffen gedüngt da die Pflanze anfangen hellgrün zu werden. Außerdem hab ich in der Mitte der Woche final Canopy Management betrieben indem ich mit Clips und Co paar ausbrecher triebe nach unten gebracht das wieder alles so eben wir möglich ist. #16 (rechts auf den Bildern) ist nennen wir es "Charakter stark" hier habe ich die meisten Triebe nochmal runter biegen müssen damit sie eben bleibt bei ihrer Schwester #8 musste ich bis jetzt am wenigsten anpassen trotzdem sind beide wunderschön auch wenn ich das Scrog im 90x90 Zelt nicht perfekt voll bekommen habe sind wir dennoch bei 90-95%. Tolles Ergebnis für das erste mal Scrog meiner Meinung nach.
Mitte der Woche gab es das erste mal PK Booster und ab jetzt gieße ich wieder mit deutlich mehr Regenwasser da ich vermute das die Salz Belastung wieder zu hoch wird in der Erde.
