
Likes
Comments
Share


@Gutismoke
Follow
Just feed the girls some compost tea and overall they look healthy growing stronger by the day... she has a lot of bud sites and is getting thicker by the day

Processing
Likes
6
Share


@Lennys_Laboratory
Follow
Coming along lovely , for a first time with this strain she’s definitely left a good first impression 😍


Likes
3
Share


@CreoWeed
Follow
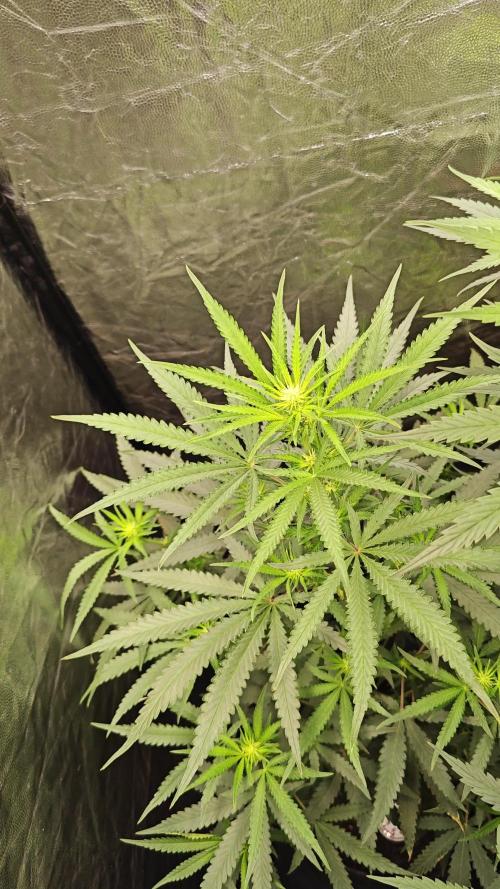
This week can be simplified as EXPLOSION!!
The plant doubled in size and I can see many main branches now, which is pretty awesome!! This is exactly what is LST is for, right!?
I am pretty amazed for seeing this explosion in the 2nd week of flowering and cannot wait to introduce the booster when flowers are going to be a little bigger, in around 6~10 days.
Now I'm keeping training her for at least 5 days, and then I'll stop so she can focus on flowering. At the e moment I'll stop training her she will also be able to have more space for herself in the tent as the other plant are going to be chopped pretty soon (other diary updated).
So stay tuned and stay high nice people!
Cheers!

Likes
5
Share


@Easygrower
Follow
Hello growers day 59 in the garden with crystal meth what can I say the buds on her ain’t massive but they are pure purple smells so sweet I’m going to start flushing for the next week or two and we will see how it goes until next week be sure and happy grow and happy 420 to all the growers ✌️


Likes
3
Share

@Growhome_90
Follow
07.07:
Nach dem Stress die letzten Tage (Umtopfen, Toppen), darf sie sich in den nächsten Tagen ein wenig regenerieren und neue Blattmasse ausbilden.
Der Plan für die Zukunft:
*4-Way-Main-Lining*
Im laufe der Zeit nehme ich die Triebe unteren Nodie ab und habe somit 2 Nodien (2./3.) mit der ich weiter trainieren werde.
Likes
29
Share


@Ga4rd2en0er
Follow
2/8 Preflowers appeared on the GG and BC. The only one not on the Preflowers train is the GSC but she is 10 days behind the others. Branches on all plants are solid and sturdy, humidity has been an issue and I am working on it.
2/9 raised lights another inch and GSC now has Preflowers
2/10 TB and BC must of took their roids last night cause each grew 3.5 to 4" over night. More Preflowers and budding sites appearing on all plantd. Stretch is coming the stretch is coming. Raise lights 4" and lifted up GG 2 inches. All plants avg 40k on lux meter. Rotating plants everyday now.
2/13 everybody is exploding upwards. I was focusing a lot of time on my other grow and I am pretty sure I missed my LST window with these ladies. My 4x4 tent is filling up rapidly. Had to raise my lights up another 3 inches with distance ranging from 12 to 18" from all tops. Just going to take group shots until pistols start appearing. Probably going to switch over to HPS over the weekend
Likes
14
Share


@TOMI08
Follow
9.hét
Rég voltam itt
A lányok szépen fejlődnek
Tegnap kaptak neem olajat
Csak esővizet kapnak
Lehet a tápanyagot növelnem kéne?mit gondolsz?

Likes
14
Share


@ParadiseGrower
Follow
Hurra! 😊
This as been an explosive week for the plant.
From Day 18 I started doing LST... it's the first time i do it.💀
I'm watering the plant with not a precise scheme, when it's dry, i wet, the pot intelligent so you can't do wrong, no more accumulations of water.🌱


Likes
4
Share

@Pot_Portraits
Follow
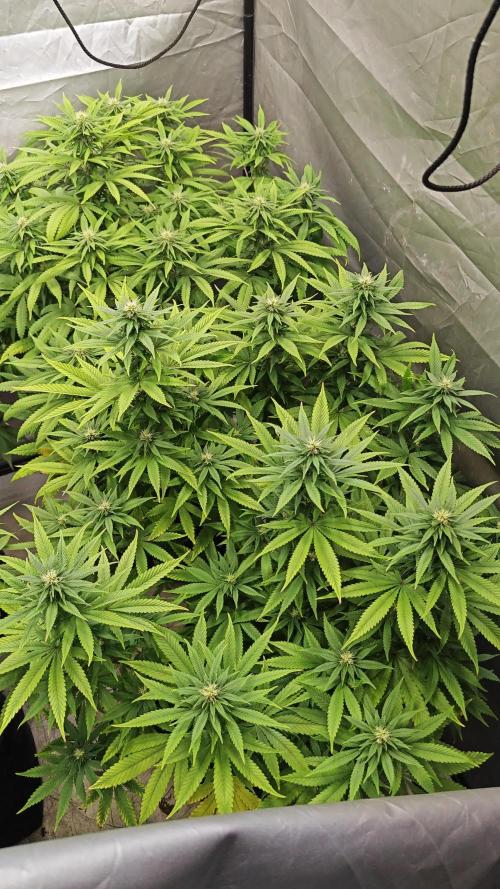
Week 2 of flower for the Candy Kush, she is FAST !
Flowers are developing great, she grows every day without any problems and she is happy praying to the lights !

Likes
18
Share


@valiotoro
Follow
Hello everyone week 2 of flower has passed for this Strawberry Gorilla auto 🍓
Spider Farmer SE7000 80%
have a great day and wish you all happy growing 😎👨🌾🏻
Likes
31
Share


@Ghost2022
Follow
Week 1 has gone really well. Currently no issues. Plants are about 4 to 5cm. Have about 3 sets of leaves on them. Temperature is at about 23C. PH is at 6.8. Still watering very sparingly. Using 2ml of voodoo juice per litre.

Likes
95
Share


@Ferenc
Follow
Day 58, 11th of November 2020:
I set the lamp 15 minutes shorter to switch off earlier so she receives 11:45 of darkness. I would like to imitate the nature when longer nights come with time till the 4th week (when she will receive 13 hours darkness a day 15 minutes minus 4 times = 1hour) so every week 15 min longer darkness for 4 weeks and then back to 12/12 to have bigger buds from the 4th week....
Tropicanna poison... Nice plant well done Sweet Seeds....
Little beauty sex appears by the pistils are coming out so I assume strech is ending soon :)
All good look at her fertilization happnes every 2nd day by the mix above and the ratio.
Let's see....
She is promising haha :)

Likes
4
Share
@Pot_Portraits
Follow
Wedding gelato, very chunky plant and she is doing well considering the heat we experiencing recently, beautiful strain overall excited for the final outcome !
Likes
4
Share


@UrbanBoer
Follow
Talk about a mission accomplished, dam you Lamby… you had me excited at one point when I thought you were an auto, but to my shock, you are a regular, you just have a long ass flowering window… at least unlike her sisters within the 4th cycle, she did not reveg she just focused on flower, the buds are bulky and firm, scent is amazing, you would mistake her for a cheese strain. I should not be disappointed by the plant’s size! Because I planted her during winter, and all outdoor or greenhouse(unless you have a GH that is climate controlled), do not grow as big as the would during spring or summer season, and due to this factor, I only got 59g of wet bud. But I have faith the other ladies will produce a higher yields.
Last I smoke this strain was earlier late summer or early Autumn, and from smoking to growing now harvest, I wish I am blown out the water with this strain, it’s time to conduct that questionnaire. Or even better go to an established cannabis club, and get them to samples bud, and ask for a review.
Likes
89
Share


@GreenAutoConsumo
Follow
Ofreció muy buenos resultados, es increíble el aroma de sus flores y no sólo eso, la dureza, la resina y lo pegajosa que es!! Una variedad que recomendaría sin duda!!
Likes
5
Share


@Reaper
Follow
next time i will veg this longer as i am very happy with the buds from top to bottom. very dense and dank. i cant explain the smell, i reccomend this strain to every pro and beginner even small plants yield very good buds and no much stretch during flower. very easy to control 🤙🏻 def one of my top 3 favorites !

Likes
14
Share


@eecc_photo
Follow
These future nugs started show some sugar ending week 5
20 cm between each plant
And very curious on how much of a yield difference there will be between apical cut plant and whitout.
Pls feel free to coment.

Processing
Likes
3
Share


@Uberfetus
Follow
Growing at her own pace.
Lights are about 40 inches away.
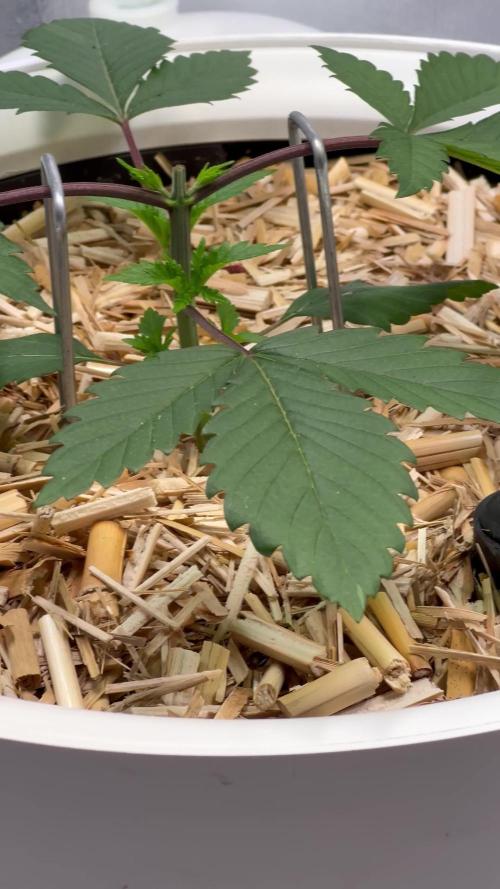
Day 4 I realize that my solo cup has tons of holes in it. This means the roots will grow through the cup and when I went to transplant it'd rip the roots. I pulled the cup up and there were only a 3 or so roots sticking out of 60+ holes. When I went to transplant I fucked up and the soil spilled everywhere and she toppled over and got fucked up.
I just picked her up pat her down. She responsed by bouncing back and growing even more. So I fed and watered her in. First feeding week 2 day 4. You can see she bounced back.
Fed her right after transplant. Bad idea, she needed two more days. Ah well. She's growing.