


Likes
Comments
Share


@Pleasant_Internet
Follow
Growing at a good pace. Going to top the leaders at the 3rd node on day 28. Might wait a week for the others. Going to mainline my grow for the first time. I will wait to defoliate after they heal from being topped. I will update this week with more pictures after they are topped.
Topped day 28.
Defoliated day 30.
Lst day 32?

Likes
19
Share


@ThatoneAKguy
Follow
The 3 little engines that could! I used the paper towel method on these girls and they wove themselves right in with tap roots that were nearly two inches long. I had to rip open the rapid rooter to get them in and then put them in their rock wool home. Off to the races!


Likes
116
Share


@Kitties_and_Colas
Follow
~_~_~_~_~_~_~_~_~_~_~_~_~_~_~_~_~_~_~_~_~_~_~_~_~_~_~_~_~_~_~_~_~_~_~_~_~_~_~_~_~_~_~_~_~_~_~_~_~_~_~_~_~_~_~_~_~_~_~_~_~_~_~_~_~_~_~_~_~_~_~_~_~_~_~_~_~_~_~_~_~_~_~_
10/07/21
👋😺Hi grow family!! We're beyond excited to try out this new MarsHydro LED for our latest grow, the SP-3000 is INCREDIBLY bright!! ..I have never seen a light more appropriate for a 4x2 tent in my life, we (happily) replaced 3 "600 watt" blurple LEDs with this single rig ( something we've wanted for a very long time). There should be no issue achieving perfect coverage, corner to corner with this light. Its been years since we've flowered under LED ( and never one of this quality), we're a little bias towards HID/CMH, especially my hubby but I think this might just be the LED that changes our mind! We'll be growing Gelat OG Auto by Seedsman (we've heard amazing things) for our first grow under the SP-3000, all plants in 5gl fabric pots, Promix-B (25% perlite) on a 20/4hr cycle. We're starting with 4 plants but if they become unmanageable, we'll move one or 2 of the plants to another tent. We use a glass of water and a paper towel as our germination method. We soak seeds roughly 24hrs and then in a wet paper towel for another 12-24hrs, we average roughly a 90% success rate doing it this way... Thank you for reading if you made it this far and happy harvests everyone! ❤️💡🌱😽💨
⚡Mars Hydro/SP-3000⚡ Specifications ⚙️:
Diodes: Samsung LM301B / Osram 660nm (960 total)
Driver: Meanwell 300watt 🔌 (300W±5% @AC120V-277V)
PPF: 824umol/S ☢️
PPE: 2.8 µmol/j 〰️〰️
Lifespan: >50k hrs ⌛
Veg Coverage: 3 x 5 ft 🌱
Flowering Coverage: 2 x 4 ft 🌼
Weight: 10.1 lbs (4.6kg)
-No-fan design: the SP-3000 uses an aluminum heatsink, and the driver can be removed then placed outside the tent🌡️⬇️
-IP65 waterproof ratings, tolerant to high humidity grow environments 💦 ..
-Up to 30 of these lights can be daisy-chained together and controlled from a single light!
💡~💡~💡~💡~💡
~_~_~_~_~_~_~_~_~_~_~_~_~_~_~_~_~_~_~_~_~_~_~_~_~_~_~_~_~_~_~_~_~_~_~_~_~_~_~_~_~_~_~_~_~_~_~_~_~_~_~_~_~_~_~_~_~_~_~_~_~_~_~_~_~_~_~_~_~_~_~_~_~_~_~_~_~_~_~_~_~_~_~_
10/10/21
🤘😺 100% germination!! All seedlings have broken the soil today.. I'm so in love with this light!! ❤️💡🌱
~_~_~_~_~_~_~_~_~_~_~_~_~_~_~_~_~_~_~_~_~_~_~_~_~_~_~_~_~_~_~_~_~_~_~_~_~_~_~_~_~_~_~_~_~_~_~_~_~_~_~_~_~_~_~_~_~_~_~_~_~_~_~_~_~_~_~_~_~_~_~_~_~_~_~_~_~_~_~_~_~_~_~

Likes
8
Share


@Jonny_Blaze269
Follow
Wk4, Day22, 4/27/22
Wk4, Day23, 4/28/22, continued defoliation and tied down tops, each plant has at least 6 tops
Wk4, Day27, 5/2/22, no issues requiring adjustments
Wk4, Day28, 5/3/22, heavy tie downs and defoliation to finish Wk4

Likes
8
Share


@Kindbudz
Follow
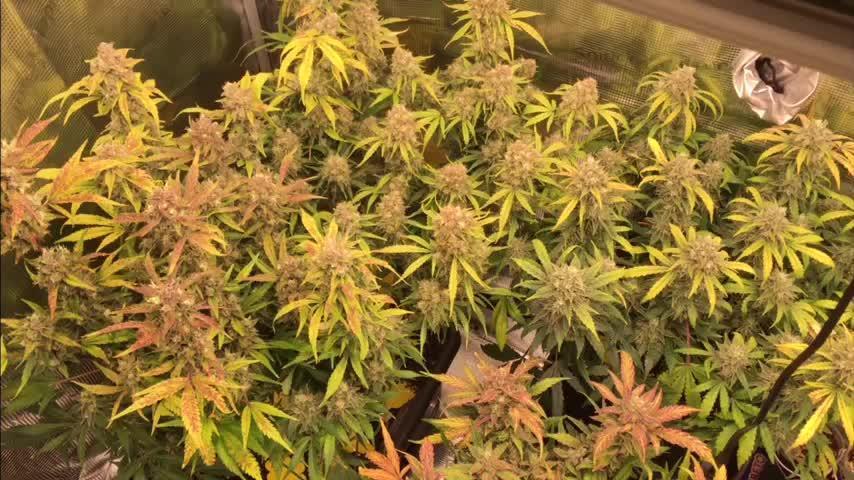
This was the most beautiful grow I have done to date. There were a few mistakes I made along the way, like not defoliating enough and some over topping but I still highly impressed with the results. Looking forward to growing this again.



Likes
11
Share


@RadDad
Follow
This week has been fun. The sea has exploded with green lots of growth tips pushing up past the big fan leaves. This is our last week of veg so towards the end of the week I'll defoliate a little bit and then give them some time to recover before we switch to 12/12.
Not feeding any extra nutrients just rain water into the living soil and I think I got some mycelium growing, which is awesome.
Given how impressive the vegetative growth of this train has been I am super excited to see what flowering is going to be like.

Likes
15
Share


@Kurow
Follow
I’m just happy I’m this far along with these two! Well I’m shocked that one of them is still trying to stretch so late into the grow. Otherwise I’m excited for flowers.

Likes
22
Share


@romi27
Follow
Yellow climbed all the way up both plants. Been flushing for a while. Trichs seemed to be maturing very slow, since the sugar and fan leafs were already yellow and crispy. About to harvest even with only about 15% amber trichs. Should reach normal maturity while drying and curing. I'm going to give them a full 48 hours of darkness before the chop.


Processing
Likes
51
Share


@Silverback_Guerilla
Follow
2/1:
I flushed the taller/skinnier Muscadine Wine and lightly fed everybody else.
2/4:
I moved the taller/skinnier MW into the dark for a day...she and several other plants will be harvested tomorrow.

Likes
131
Share


@PapaNugs
Follow
Big week here. Got the girls transplanted to their 7 gallon pots. First time with pots this big. Gonna really let them grow. Got a little water with BT and mycorrhiza.

Likes
2
Share


@Yiyis_Grow
Follow
Lámpara: Bestva Quantum Board LED LM301B
Sustrato: 2 Jiffy fino : 1 Floragard
Especies: Charlotte Dream CBD - Auto Dark Purple - Purple Kush - Triping 25 - Gelato Ice
Acontecimientos:
1. Se empezaron a suministrar fertilizantes a 5 de ellas, las otras 5 van un poco retrasadas.
2. Se puso tierra diatomea en el sustrato para evitar así plagas. En casa hay muchas plantas y las plagas abundan.
3. Luz 20h/día, viento, agua y nutrientes.
Buenos humos


Likes
21
Share


@OGTrauma
Follow
took some feedback from other media where i published this shit and it's a must that i need to improve a bit my uniformity, energetic efficency, air flow and hygiene as key factors ( the previows grow this setup references besides lighting and results itself it's like ok thats something to keen in a positive way because every other aspect looks like a old blanket full of crusty dry cum stains from your bf/gf and a big mass of cheetos crumbs as soil medium ), so i need to visually depict a bit of the setup as this is some legacy shit and it's on my shitty tent.
there are 6 usb fans that take 2,5w of comsumptions, i preffer to do this rather than oscillating ventilators because DB noise is way less and got a decent CFM flow by numbers , and the 5w profan its now working as a very quiet yet active intraction as some dude told me to correct that and was right. i use 15/25w (2 level of power) house fans that just fit on my ducts by luck, pretty caveman setup.
i obviously cleaned with the vacuum from the previous grow and im starting from scratch with fresh seeds, buy some ... just decent substrate to avoid any plague that could come from my own smegma. because fuck im a dirty cheap bastard and i need to do my bare minimum here by stating the shit that is exposed on the ppt slide, as i change and improve things i forgot some other shit and i dont want to get sloppy results, i would totally like to get like the best results and reduce negative & i told you risks.
DAMN SHAWTY, IM TALKING A LOT ABOUT HYGIENE AND HAVING BECAUSE I GOT JUST ONE DAMPING OFF( a seedling died) AND I SWEAR BY MY DICK THAT WAS CAUSED BY MY DIRTY VENTILATION as germination was 100% dope, and that's the only logical explanation as if i over watered them, they could be like way more casualities so its not that . (hope autotranslates well as i know the slide won't translate and require a bit of english. Not all my Chilean/Latam/Worldwide niggas that read this shit are 666% fluent unlike my case a lot of reeferman dialect was scavenged from my old magazines, forums and random indian dude youtube video tutorials.
Coming back to the gig , this week was 24/0 photoperiod, just considering that i want to stabilize and keep my best killer kush fv exemplars and at the same time not fuck them like previous paragraph as i can count them like ... 12 of 9 , if i go below 9 it means is a orange flag for me & my big cock is not as big as i think . nevertheless, they are taking very small doses of top crop's top veg now and next week i will change photoperiod (20/4) to give them a bit of resting time for physiological processes of the newborn plants , and lifespan / fatigue of the electronic devices as well.
BIG GAS LEAKS MOTHERFUCKERS !!!!

Likes
21
Share


@Dunk_Junk
Follow
Wow look at her this week. Buds really filling out.
Beautiful.
I think she has 2 weeks left referencing my previous AutoGlueberry.

Likes
73
Share


@MisterZ
Follow
Bonjour les amis growers,
Cette semaine, mauvaise nouvelle, j'ai découvert une boucle en bas de l'apex, juste au-dessus du collet. 😰 . J'ai posé une question. Apparemment ce n'est pas très grave. 😳.Cependant la plante est très penchée. Elle est quasiment à l'horizontal. Je ne vais appliquer aucune technique de lst ni hst.
Por l'instant, elle est en bonne condition et les feuilles bien vertes et en bon état.
J'ai commencé l’engraissage avec une combinaison 10-10-13.
À bientôt,
M.

Likes
4
Share

@BudBeezy
Follow
Strawberry Gorilla Auto - FastBuds
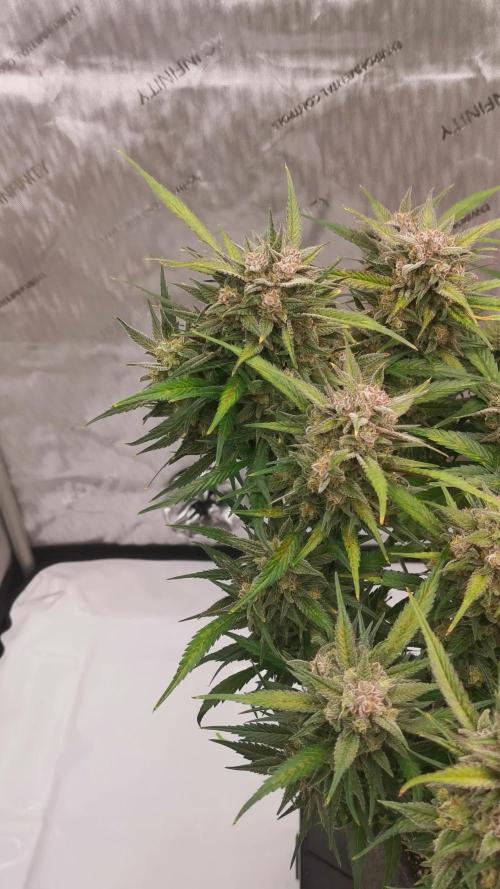
Welcome to week 11 of my grow diary, which is also the last week. As predicted last week, the weather has become even warmer. The heat has now completely taken over the house, and it has also rained for a few days, causing the humidity to rise again. Unfortunately, this led to mold forming on one shoot, so I decided to take action. Normally, the plant could have stayed in place for another 1-2 weeks for my needs, but I didn't want to take any risks and harvested it in week 11. Overall, I was satisfied with the growth of the plant. Environmental conditions are unpredictable in summer and more difficult to control than in winter/spring. I was able to gain more experience with this grow and now know that I should take a break in summer from now on. I really liked the mainlining. Before, I topped above node 2 and left 4 main shoots. With 2 main shoots, it is much easier to work with and does not require as much defoliation as with 4. I will definitely use this technique again in the future.
Here's some initial feedback on the Strain "Strawberry Gorilla Auto" from FastBuds and the Organic Starter Kit from Advanced Nutrients:
The plant grew really well and has enormous potential. The buds were so swollen towards the end that I was amazed. The organic fertilizer from Advanced Nutrients probably also had an influence. This was my very first purely organic grow, and I think I can be satisfied with the result. I can wholeheartedly recommend the fertilizer. I will definitely use it again in future projects and will probably do a comparison grow between the mineral and organic starter kits.
Avg. Temperature - 27°C
Avg. Humidity - 68%
Avg. VPD - 1,16kPA
The lamp runs at 60% which is 356w according to the energy meter. At a distance of 20cm the plant gets around 950-1100ppfd.
Thank you for following me so far. I will give you an update after it has dried. I hope you enjoyed my grow diary. If you have any questions, please feel free to ask me.
See you next week ✌️
Soil:
Plagron Lightmix
N 180 mg/L - P 210 mg/L - K 360 mg/L
Fertilizer used:
Advanced Nutrients - Vodoo Juice Plus
Advanced Nutrients - Iguana Juice Bloom
Advanced Nutrients - Big Bud
Tent: AC Infinity Cloudlab 844
Exhaust air: AC Infinity Cloudline T6 incl. activated carbon filter
Lamp: Kingbrite P55 / 480w, dimmable
Fan: AC Infinity Cloudray S6 Gen. 2
Controller: AC Infinity Controller 69 Pro
Pots: Gronest 25L
PH Pen: Bluelab Onepen
Likes
13
Share

@squalino
Follow
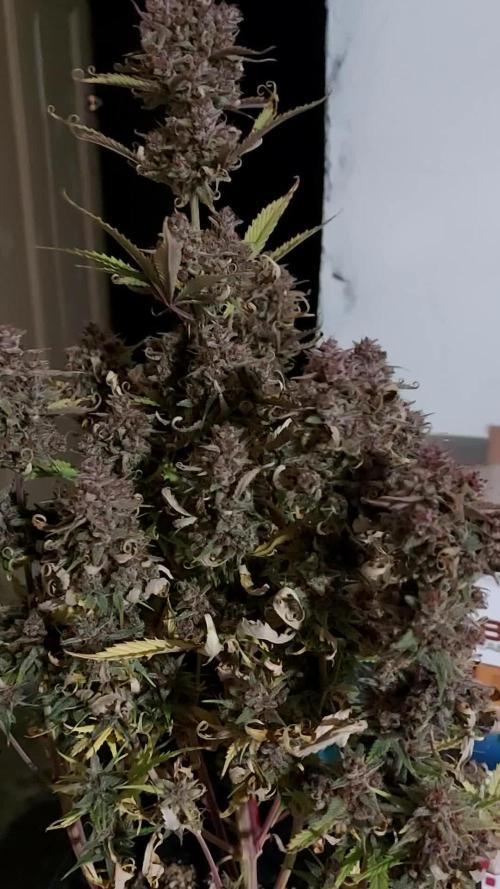
malheureusement je ne peut que montrer le résultat final
très belles plantes
120 grammes recolte
énormément de terpene
prochain jour extraction HBO
feuilles au congelateur de papaya
Likes
5
Share


@Autower
Follow
This was the untopped gorilla cookies not positive that topping made much difference this time but then again who knows still 480g wet weight is good for me has a very pine and cookies smell very sticky can’t wait to try all these fat bud strains will update dry weights I due time thanks for viewing and onto the next