
Likes
Comments
Share


@GreenHouseLab
Follow
Should of could of would of removed more lowers because how bunched up everything is. She smells amazing and starting to pick up stems putting on weight

Likes
1
Share


@Cannabis_Therapy
Follow
Planted seeds June 12th at 12:26am. While germinating the seeds and during the night time I will be keeping them all in a 2x2x5 grow tent under three 2 foot T5 bulbs to maintain a 24 hour light cycle. I am also using a seedling heat mat to raise the root zone temperature, along with creating a humid environment.
Three seeds are visible from peat pellets June 14th at 8am.
Last seed is visible through medium at 5pm.
All plants sprouted with cotyledon leaves June 15th at 11am.
Transplanted all the plants into 5 gallon fabric pots with pre-amended medium at June 17th. Three plants have first leaves forming, while one seems to be a little behind. Gave a light watering, along with heavy misting on the soil.
Last plants first leaves started forming June 18 at 7pm. All plants are progressing well with minimal stretching.
All 4 plants have their 2nd set of leaves starting to grow June 20th at 12pm. Put outside right at 12pm, then brought them inside at 9:30pm.
Put outside June 21st at 1pm
Watered them lightly twice with several hour gap in between. All leaves are praying up and all growth is progressing. Put inside at 11pm.

Likes
13
Share


@punktkomma
Follow
I harvested the last plant in several steps. The results are impressive. The first fluffier one was not as productive with 301g wet and 43g dry, but I also harvested it too early for other reasons. I'm going to make myself a snack from the buds.
The other one performed great. The buds are hard as stones and smell like tropical fruit gums. I'm really excited to see how it tastes!
I'll update when everything is dry! 👻👽
UPDATE DRY:
The run is done! The Tropicanna Poison was super easy to grow and smells simply great. The first testers almost blew me away, really strong. More than expected.
I would definitely grow it again.
I harvested the first one way too early on day 65 because I had problems with the humidity, so as expected only 43g dry.
The beautiful but small one with the massive buds gave me 76g of super dense and delicious buds. Less than 2g of popcorn :)
Of course, I only kept 49.9g of the most beautiful flowers and properly destroyed the rest. 😕

Likes
71
Share


@DogDoctorOfficial
Follow
Greetings, fellow cultivators! Week 6 has brought us to a pivotal moment in our Anesia adventure as we witness our green beauties reach new heights of vitality and vigor. Join me as we delve into the latest developments in our thriving veg garden!
Our Anesia girls continue to impress with their robust growth and lush foliage, each plant a testament to the care and dedication poured into their cultivation. From the graceful Future#1 to the energetic Zoomiez, it's a sight to behold and a joy to witness their journey towards maturity.
But the excitement doesn't end there! As we enter the final stretch of veg, anticipation is building for the transition to flower and the promise of bountiful blooms to come. With each passing day, our plants grow stronger and more resilient, ready to face the challenges of the flowering phase head-on.
And speaking of excitement, I'm thrilled to announce that Episode 1 of "Welcome to the Green Oasis" is now available on YouTube! Join me as we embark on this journey of growth and discovery, exploring the wonders of our green sanctuary and celebrating the beauty of nature in all its glory.
So be sure to check out the link in my bio and join us on this epic adventure. Don't forget to like, comment, and subscribe for more green goodness, and stay tuned for the next chapter in our Anesia saga. Until then, happy growing!
https://www.youtube.com/watch?v=8l_e2Jc2Q0E Welcome to the Green Oasis: Episode 1 - Tent Transformation! Direct link with full explanation of whats happening as the video is to big file to upload here
Genetics Red Banana Pudding = RBP
Apricot Oreoz = AO
Zoomiez = Z
Future#1 = F
https://anesiaseeds.com/
Plant nutrition - Aptus Holland - https://aptus-holland.com
LED Photons - Future of Grow - https://www.thefuturofgrow.com/
Controls - Trol Master - https://www.trolmaster.eu/
Watering - Autopot - https://autopot.co.uk/
Tent - Mars Hydro - https://marshydro.eu/
Love and attention - Me, myself and i
As always thank you all for stopping by, for the love and for it all , this journey of mine wold just not be the same without you guys, the love and support is very much appreciated and i fell honored and blessed with you all in my life, With true love comes happiness. Always believe in your self and always do things expecting nothing and with an open heart , be a giver and the universe will give back to you in ways you could not even imagine so
More info, the ocasional give-away and exclusive updates from all my adventures can be found - links in the profile description
Friendly reminder all you see here is pure research and for educational purposes only
Growers Love To you All 💚

Likes
64
Share


@Wastent91
Follow
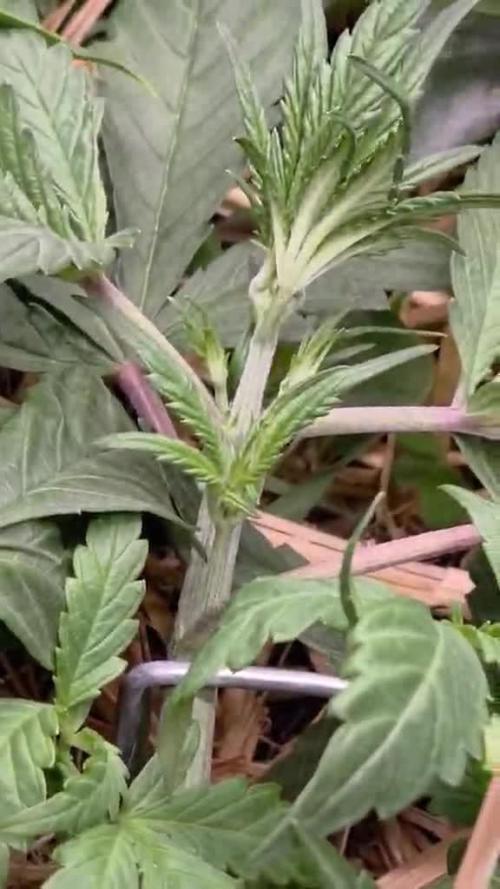
Scusate il ritardo ragazzi ma purtroppo ultimamente nn riesco a stare dietro a tutti i progetti, apparte questo questa settimana sta andando tutto per il meglio, la ragazza è un esplosione di vitalità, ho provveduto a fare topping della cima principale e di tutti i rami più bassi, poi ho legato le cime per farle andare più latelaralmemte, poi volevo fare la stessa cosa con le due cime principali, ma stupidamente ho tirato troppo e nel mezzo di è spezzata leggermente, però per fortuna per ora nn ho avuto problemi e spero che la ferita che ho provocato involontariamente, si rimargini senza dare particolari problemi futuri alla struttura della pianta, vedremo se adottore dei tutori per quei due rami oppure che si irrobustiscano da soli.. Per il resto i nutrienti stanno facendo il loro dovere e la pianta è in ottima salute quindi non posso che essere più che felice per come stanno andando le cose! Grazie come sempre a Mars hydro per la nuova spettacolare luce, che sono sicuro farà la differenza insieme ai nutrienti professionali di cui dispongo! Grazie mille a tutti voi che mi seguite un buon 420 a tutti!


Likes
3
Share


@WeedM8
Follow
Hello m8 welcome to this journey with me in this diary will have very interesting strains hope u find something useful
O.G. Kush Titanium
- [ ] 1st week Veg: germinated in substrate lighting very close so it jets medium high humidity after the 3rd day they started sprouting
- [ ] 2nd week Veg: this week my ventilator broke down and as the temperature stayed very warm nothing developed much
- [ ] 3rd week Veg:fortunately this week i had fixed the ventilation and the temperature has go down a bit allowing the little plants to develop and reinforce
- [ ] 4th week:very good developments in this week I already started feeding a bit two times but i didn’t have to…once was enough
- [ ] 5th week Veg:this week they were very strong green i only had to water them good and keep the ventilators going no stop .They have good hight already ,but as i have to strains together. I want to transplant them when the hight of the other one have stretched… I’m thinking to transplant next week if not the next one
- [ ] 6th week Veg: this week it went great fortunatly i dont have pests that eat my buds i’ve givven a fed once the substrate is very rich already the plants streached very well i will transplant today so be ready m8 i cant wait to show you the progress
- [ ] 1st week Fl:they started stretching and looking very healthy just transplanted
- [ ] 2nd week Fl this week I’ve been away i had a friend taking care of them they stretching very well i hope that she starts putting energy into the flo
- [ ] 3rd week Fl:they are streaching very well ..getting the light very well
- [ ] 4th week Fl:there we aree guys the good stage is heree good high hope dosent effect de prod
- [ ] 5th week Fl:pumping very good
- [ ] 6th week Fl
- [ ] 7th week Fl


Likes
3
Share

@WeedM8
Follow
Hello m8 welcome to this journey with me in this diary will have very interesting strains hope u find something useful
O.G. Kush Titanium
- [ ] 1st week Veg: germinated in substrate lighting very close so it jets medium high humidity after the 3rd day they started sprouting
- [ ] 2nd week Veg: this week my ventilator broke down and as the temperature stayed very warm nothing developed much
- [ ] 3rd week Veg:fortunately this week i had fixed the ventilation and the temperature has go down a bit allowing the little plants to develop and reinforce
- [ ] 4th week:very good developments in this week I already started feeding a bit two times but i didn’t have to…once was enough
- [ ] 5th week Veg:this week they were very strong green i only had to water them good and keep the ventilators going no stop .They have good hight already ,but as i have to strains together. I want to transplant them when the hight of the other one have stretched… I’m thinking to transplant next week if not the next one
- [ ] 6th week Veg: this week it went great fortunatly i dont have pests that eat my buds i’ve givven a fed once the substrate is very rich already the plants streached very well i will transplant today so be ready m8 i cant wait to show you the progress
- [ ] 1st week Fl:they started stretching and looking very healthy just transplanted
- [ ] 2nd week Fl this week I’ve been away i had a friend taking care of them they stretching very well i hope that she starts putting energy into the flo
- [ ] 3rd week Fl:
- [ ] 4th week Fl
- [ ] 5th week Fl
- [ ] 6th week Fl
- [ ] 7th week Fl
if this was useful please like and follow
Likes
2
Share

@Dameon0803
Follow
Day 22 - No keeping this beast down! Any kind of LST thrown at her has nothing but amazing results! Time to start leaf tucking!
Day 23 - Doing what I can to get those lowers as much light as they can! I saw a pistol or two. Can't wait to see her ignite into flower!
Day 24 - She's filling out and that cover crop is just insane!! I have not been able to get any of my water soluble nutrients in because of the run off. Tomorrow will be the day as its been a few days since I've needed the shop vac.
Day 25 - Early morning feeding. I take my pictures consistently in the evening around 8-10pm. Insane 24 hour difference! Hard to keep the leaves under control.
Day 26 - Installed a trellis net for a few reasons. I like to have a baseline for later lollipopping, it'll help support later buds, and its opening lower sites up for light, giving them their final chance to not get the later cut.
Day 27 - Final tuck with some pulley assistance in areas before I head out of town for a day in the morning. Moving the cover crop to not allow shadow casting. I could always chop it and give it to the soil, but im enjoying the sight.
Day 28 - Had to go out of town for the night, so no picture for today. I'm sure shes happy and raging.

Likes
6
Share


@Hoodoo
Follow
The first picture day 44! Well, we've finally got the purple colours coming in very strongly! Even the fan leaves are turning purple. The progression of the pigment looks like a pathogen has taken over but it's just the cool genetics of this plant. Smell is increasing, they have a very sweet odor so far when crushing the flowers. Still nowhere near harvest but the buds and calyxes are starting to stack. Very exciting that I got this one to grow!
Likes
6
Share


@EKWCR
Follow
They are healthy but i see some calcium deficiency on the leaves, I will supplement the plant despite my water contain a good amount of calcium. I don't think it's a mag exces.
Overall they grow very well and produce good size buds for the


Likes
27
Share


@adam_pawloski87
Follow
Let’s go Day 36 !!! This week went real great, girls built up a lot of structure, and stayed super healthy ! Today they got fed just water phd at 6.5 ! They been really loving that balance! I also removed a lot of under trim since we are going into preflower , so had to shave up those legs lol ! It’s really great for them , the love that airflow , but don’t take off too much or you could shock your plants so be careful ! Can’t wait to see what these girls do this week ! Hope you all enjoy an are ready for another amazing productive week ! Peace , Love , an positive vibes to y’all Cheers LetsGrowwww!!! 😶🌫️💨💨💨💨
Likes
5
Share


@TdogBerry
Follow
It's starting to smell like blueberrys and a ripe banana. As some sort of pie. I thought people talking about the smell were bullshitting but till this point its actually true. I hope buds smell like this later on💀
Likes
13
Share


@Mazgoth
Follow
Really good genetics.A sativa strain that can handle so much cold enviroment and produce so many flowers in 6L pot!😃😁😌
Likes
9
Share


@Gardengobblin
Follow
Les fleure son bien.compact et bien givré . Les arome d'agrumes son très forte av3c une légère différence entre les trois . Plus tropical sur 2 des 3 pheno.
J'ai eu la chance d'avoir 3 pheno different . Une bien bourgogne , une avec des touche mauve et roser et la derniere plus verte avec un peut de violet.
Bien hâte à la fin du séchage pour goûter. Cela fait 6 jour quelle son couper
Likes
14
Share


@Dre25
Follow
Looking Great.👍🏼 lst and added Tiger Bloom purple lemonade not ready for lst. 6/22


Likes
1
Share


@ChitownCannaChica
Follow
So outdoors are always so tricky in Illinois.
This plant started in mid April when it was warm, then super cold with snow, followed by moderate weather, to be harvested a touch early due to high humidity, drought—followed by days of lots of rain. She suffered bud rot on a few sites and was harvested immediately after to save the rest of the plant. Super frosty, great terps and she survived it all! Literally!
Smells like fruit and dough.
Likes
27
Share


@BoytzzBudzz
Follow
Unfortunately I had to go away for a couple days, so the babies didn’t get nutes for a few days - they did get watered though.
Have added BIG BUD in to the mix now; so the plants should be getting that extra PK they are craving.
Other than that, the stretch continues and we’ve seen about 8-12 cms growth in places.
Other than that, everything going as good as can be!
Thanks for reading! 🤟🏻

Likes
5
Share


@Easygrower
Follow
Hello growers day 59 in the garden with crystal meth what can I say the buds on her ain’t massive but they are pure purple smells so sweet I’m going to start flushing for the next week or two and we will see how it goes until next week be sure and happy grow and happy 420 to all the growers ✌️