
Likes
Comments
Share


@LumberjackBuds
Follow
These guys seem to have some stunted growth from being in that shitty rock wool dish setup I had but they are making up for it now that they are in the air pots. I transplanted them into sunshine #4 because my other plants have had problems with N tox in coco loco, the only other soil mix I have...probably won’t ever be using fox farm soil again. Too expensive for what it is and it’s a pain in the ass dealing with nute probs.
Day 8: into the new grow tent tomorrow
Day 10: My Timber Grow Lights 480/500W QB came in! This thing is so sleek. I got it in 3000k which is a tiny bit orange/yellow because I plan on spending most of my time in flower with autos. But I find it works just as well for veg too, hard to notice any slower growth or anything. Since I’m in veg I might add my 2000w blurple to the mix to keep the girls happy

Likes
23
Share


@Kakui
Follow
V4, están creciendo rápido, desde este punto empezaré con una EC de riego más alta 1.5~1.8, hace 3 días que aparecieron las primeras hojas verdaderas, por lo cual la etapa de vegetación ha iniciado.
V6, el día anterior tuvieron un riego con pH 6.2 y EC 1.7, se me pasó el agua y quedaron algo tristes, pero ya se recuperaron hoy, todas las stash presentan puntos de decoloración en las primeras hojas, las cookies están en perfecto estado. Están comenzando a salir raíces por el fondo de los vasos(algo que nunca me había pasado con otras genéticas) además se ven muy gruesas las raíces, están pidiendo transplante ya, en unos días serán transplantadas.

Likes
1
Share


Likes
41
Share


@Ganjagrandaddy
Follow
day 7 Flowering: Hi all . It has been the start of their flowering this week and the initial stages of their stretch period. Time to exploit the burst of growth and set them in position for full light absorbing relaxation. The less stress to get light , the more focus on creating the beauty in flowering hopefully. I took some time to do a clear out of the small scrappy growth low down the stems to focus on the happy growing bud sites higher up. With their shape and size , the flowers would have been within the ball shapes and unable to develop properly. The shape of the plants from the tip spreading is very helpful now. I am able to tuck the really big powerhouse fans , underneath the developing lowers. This supports the lower growth to head higher but also keeps the main stem powered by the very important big fans. As these are autoflowers and able to use the available light through the huge fans , it can only be beneficial to keep them as long as possible while they are not blocking anything.
The difference between the strains is noticable more now with the Strawberry Pie wanting to spread her branching more . Tip spreading has kept them smaller but their nature still has them wanting the long node lengths and cluster bud structures as opposed to long donkey di#ks. The other strains have benefited more from it and in particular, the #2 Six Shooter has an amazing amount of hopeful mains all fighting for focus so should be a good example of how tip spreading really works to create productive , squat beasts. Fingers crossed.lol
They are still being fed just water with no additional boosts beside the last top dressings. I will be watering again with the biosys tea but they look so happy and green that I wont be adding any other products unless I notice a need. Cal.mag being the exception as I want to avoid the expected deficits from using l.e.d , before it can slow anything down in repair/recovery.
The light is covering them all perfectly and with the height still to be lowered after the stretch is done , I know from previous Mars lights, the big solid nugs will appear....
I have used a video to show the past weeks growth rather than the usual pics and hope this will be more interesting than having to scroll pics.
I also noticed a few leaf miners among the other plants and suspect we have some migration here too. Not too serious as yet but before it gets too bad , I used a store bought spray ( organic) to hopefully get to grips before they do. Failing this , a good smoke bomb might be used.
Until the next time , be well and loved.


Processing
Likes
15
Share


Likes
6
Share


@Lickey
Follow
They had way too much mass so lollipopped about another 25% off the bottom.
They are stretched way up into the lights so I had to modify the hangers to put the lights as high as possible.
Did another major leaf strip just around day 18.
Now at day 21 The buds are starting to form and looking okay. Next couple of weeks will tell if they will be close to successful or not.
It’s the end of June and humidity stays around 70%. Not ideal conditions

Likes
30
Share


@ButterfliesLittleFarm
Follow
Hello Diary.
The fifth week of flowering is over, Watermelon is nearing the end of flowering, another week or two and there will be harvest.
The flowers took on a purple color and the hairs began to turn brown. The flowers themselves are not too big, we will see if they will still develop but the smell is wonderful.
The leaves are almost all yellow, and most have brown spots, whatever the cause, her two roommates, Purple Punch are totally ok, they weren’t affected.
Watering is every three days, I stopped adding nutrients, I only regulate p.H of water to values between 6.0 and 6.5.
Conditions on the Farm are satisfactory, the temperature is around 25 degrees while the humidity is below 40%.
Here's what it looked like last week:
17/03/2021 - Day 50.
Watering. I prepared a total of 7 liters of water, adjusted the p.H to 6.3 and watered all three plants on the farm evenly.
Temp / Humidity on the farm - 24.5 degrees and 38% humidity.
20/03/2021 - Day 53.
Watering. The procedure is the same as three days ago.
Temp / Humidity on the farm - 25.1 degrees and 34% humidity.
23/03/2021 - Day 56.
Watering and photography. As for watering, the same procedure as three days ago, after which I photographed Watermelon and her roommates, two Purple Punch.
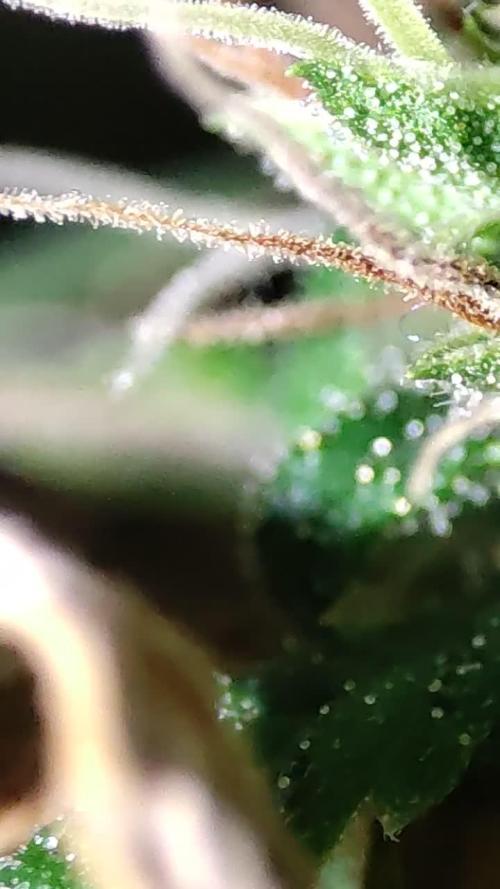
Now I have to water and wait for the right moment. I check with a microscope the development of trichomes but they are still transparent. That’s it for this week, see you soon.

Likes
4
Share

@Selkot
Follow
.
YEAR 5 - 2nd quarter
-----------------------
The 5th season continues with 3 Gorilla Punch from FB and 3 Original XXL from GB in the same tent.
A disappointment: with 6 plants, they yield 179 g, less than the previous 5. But in only 10 weeks.
Green Brand did better than Fastbuds for a first try.
Likes
21
Share


@MG2009
Follow
01/09/2022
Finally time to flower, and all girls went into flower room at lights out.The males will be next week, don't want to put them in to early so I will carefully check every day and separate before they open their flowers. I'm guessing week 3-4
I Will select two branches on each female to selectively pollinate.
01/11/2022
Blue Matter #5 (update #5 culled male) repotted with lemon og seed
Will continue in her own evolving diary. My hope is to eventually graft different cuts for a multiple variety mom plant, I can have 6 total plants
And would be nice to be able to maintain only one mom.


Likes
27
Share

@Bncgrower
Follow
Harvest done, I believe the result would be better if it hadn't suffered so much. But it's within expectations, let's see how it turns out after the drying and curing process..
Likes
38
Share


@Snakeking
Follow
I assume this
Gz #1 Week 8(d50)
Gz #2 week 10(d71)chopped:)
Gz #3 week 8(d50)
Gz #4 week 8(d52) but maturing faster(chopped:)
Gz #5 week 9(d62)last week( chopped:)
Gz #6 week 8(d50)
This week 2 days raining but rest of it is sunny.
One plant is faded more than others and i will chop it one week sooner.
Only 4 plant give light organic and then tap water for a week or more.


Likes
25
Share


@pifflestikkz
Follow
Day 58
30/08/24 Friday
Feed today using de-chlorinated tap water pH 6 with Plagron products.
Day 60
01/09/24 Sunday
De-chlorinated tap water pH 6 with calmag today.
Picture update ✌️💚
Day 62
03/09/24 Tuesday


Likes
16
Share


@Naujas
Follow
the girl is gaining momentum :) I think I'll give her another week of vegetation and then I'll probably switch to 12/12. The girl looks healthy. a little short, but I think it's only a matter of time :) good luck to everyone.:)

Likes
8
Share


@JohnnyBarrel
Follow
Week 3
The 2 first crucial weeks are over. Plants are healthy, vigorous 👌
Daylight 6h35 / 21h20 = 14h45
Sunny days - 26 °C
Continue to stimulate the rooting system.


Likes
22
Share


@emmett
Follow
On cruise control, getting into flush weeks in the bubble buckets. always water in the 30 gallon living soil? worm bin. I dig a small hole in a corner toss in kitchen scraps cover and water.
Likes
5
Share


@Deltatigrou0169
Follow
Salut salut les Amis
Nous voilà déjà à la fin du mois, mes fifilles viennent de passer en pré-floraison depuis vendredi je suis trop content de mes fifilles.
J'ai commencé à leur mettre de l'engrais (PRO ORGANIC Grow et Bloom) pour la pré-floraison.
Je mettrai le (Bloom Booster) pour la floraison.
Je vous souhaite une bonne soirée à tous et à dans deux jours 😉🙃🙃


Processing
Likes
16
Share


@Mrg7667
Follow
Officially day 7 of this adventure! Added a couple more cfl
3 of 1,500 lumen 500k and 2 of 800 lumen 500k
Plants are looking si happy and amazing had a little strech problem with a couole but j just added more soil for support and they all look pretty good now! Still have the stragler Chocolate Marshmallow but she looks great!


