
Likes
Comments
Share


@Santica_Garden
Follow
Watch the video guys, better info on there 👍🏾..................................................................................................................................................................................................!

Likes
15
Share


@All_our_small_plants
Follow
Bewässerung: 500 ml jeden 3 Tag in der ersten Woche
pH-Wert: 5,8
EC-Wert: 0,7 mS/cm
Temperatur: 22ºC
Luftfeuchtigkeit: 50%
Schädlingsbekämpfung: im Moment haben wir keine Anzeichen das es was zu bekämpfen gibt, sobald die ersten Anzeichen da sind werden wir handeln :)
PPFD: 200 µmol/m²/s
DLI: 15 mol/m²/Tag
Düngemittel: COMPO GROW ORGANIC WACHSTUM DÜNGER, Sie bekommen auch ab jetzt immer etwas CalMag von BioBizz zu Prävention. Ab Tag 19 haben wir angefangen sie mit einem Minerlischen NPK Dünger (NPK 7-3-5) zu Gießen .
Besonderheiten: Die Linsen wurden entfernt und wir haben mir dem LST begonnen
-Tag 16 Heute haben wir mit dem LST Begonnen und sie hat sich sehr gut vom Toppen erholt.
-Tag 17 Heute wurde sie Entlaubt
- Tag 19 heute wurden wieder die LST Sticks angepasst damit sie in form bleibt.

Likes
2
Share


@DurbanPoison420
Follow
So I am halfway through my first harvest and I'm starting to feel like I may have been impatient! Would appreciate any advice or constructive criticism from any experienced growers out there! Do you think I harvest the rest of my plant now or leave it a while? Any tips/hints on the best way to maximize bud density? Thanks in advance

Likes
29
Share


@Sidbank
Follow
11.06 - I watered them without fertilizers. They look good and healthy. The leaves around the buds at the tops begin to darken, this is the effect of adding trace elements. Next time I water, I'll add a little more.
12.06, I cut off the two lowest floors of the branches, I left the leaves in case there were any problems with deficiencies. Unfortunately, I've already spotted a few squids with my own eye plus what I caught with sticks. This does not bode well for the future. I'll have to double dose Soil Attack soon.
14.06 They growing fast, I hope that soon they will stop ;). Last watering was with a little bit PK and Bloom Stimulator from BAC and Soil Attack, Azot Bacterias and little bit BAC Silicium. Next watering will be only with little Bit Trace Elements to fight with manganese deficiency.

Likes
8
Share


@JillSkunk
Follow
GEMINATION DAY!
3 of 3 have popped. I'm going t check the taproot again tomorrow and plant them as well. Just waiting another 12- 18 hours from a little more taproot growth.

Likes
22
Share


@Robbaus
Follow
Bellissime, sono proprio soddisfatto. Una Tropicanna banana è decisamente più matura delle altre 4. Peccato per il caldo, ma col climatizzatore quantomeno rimango sui 28 gradi, sempre meglio dei 35 dell'estate scorsa. Ho 3 fertilizzanti specifici per la fioritura in più rispetto alle volte scorse, spero di vederne i risultati, l'ultima volta i fiori non erano gonfi come volevo. Vedremo

Likes
10
Share


@KingJayTk
Follow
Day 15: I removed both branches, in the second node position on the trunk, and LST'd her down in the direction of the removed-downward-node. Also, I noticed the lime green discoloration on the lower leaves which means a beginning of a nitrogen deficiency. I lightly top dressed her pot the first week because it's the first time I grow using these dry amendments. I top dressed her again yesterday and watered her today. It will take a week for the nutrients to break down so I think I will be brewing a terp tea grow to treat the deficiency while the dry ingredients break down.
Day 18: continued to lst her down. I top dressed the soil with 3 tsp of nitro bat guano, 2 tsp of terp tea grow, and 2 tsp of uprising bloom.
Day 20: She started showing sex so I'll be only lst'ing from now on.

Likes
13
Share


@cookingwithninja
Follow
Day 14, some supercropping
Day 15 .. it’s under control 😂🤣
Day 19 lights almost maxed to tent height unless I zip tie led to the top ceiling frame, last bit of monster cropping. Lost 2 top nugs to physical led burn but it’s ok. Everything is fine. Still going very hard on soluble N, and Pk along with b+, fishsh!t, microbial mass, humic acid. Carbs every day with organic booster
Likes
131
Share


@Roberts
Follow
Just cut down the Miller high life bottle grow with QP. Was a really neat micro grow. It got much bigger then I expected. Was a pain to get started, and growing. Finally got it. The Unit Farm UF2000 worked great. Thank you Unit Farm 🌱
I will be back when dried to weigh out.
Happy growing 🌱🌱
Thank you grow diaries community for the likes, follows, comments, and subscriptions on my YouTube channel. 🍻🌱👍
https://youtube.com/channel/UCAhN7yRzWLpcaRHhMIQ7X4g

Likes
38
Share


@Skunkman
Follow
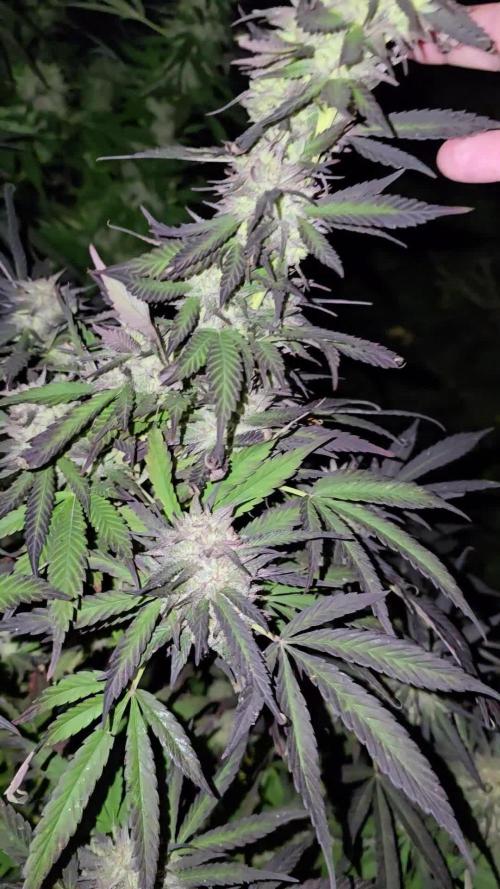
She’s starting to really fatten up now!! The buds feel dense all ready and she’s still got another 3 and a half weeks 👊🏻 She’s mad sticky too 😆😎


Likes
14
Share


@GoldenWeedGrower
Follow
D22/V18 - 22/04/23 - Added water and himalayan salt
D23/V19 - 23/04/23 - Nothing
D24/V20 - 24/04/23 - Nothing
D25/V21 - 25/04/23 - Benting
D26/V22 - 26/04/23 - Benting
D27/V23 - 27/04/23 - Benting
D28/V24 - 28/04/23 - Benting
Likes
30
Share


@dataTwiiix
Follow
04/10: je compte encore lui fonner 2/3 semaines. Histoire de la topping encore 4 ou 8 fois on verra le kours venu.
Likes
86
Share


@Hawkbo
Follow
Pics and video were taken a few days ago been busy as shit lately so the update is a little late. I'm gunna put the video up first on all of them then go back and upload the pics so if come back if the pics arent up yet.


Likes
24
Share


@SmallBatchNugz
Follow
GO ETHOS, GO ETHOS GO!!!!!
this may be the absolute 8th wonder of the world, look at those ladies!!! Oooo la laaa... just started week 5 and added some Purpinator to the mix.. see how she goes.
And you notice that little fancy C02 rockin in style in the corner 😎

Likes
8
Share


@PajaritoUY
Follow
Estas últimas semanas tuve que mudarme y terminé sin poder hacer muchas imágenes

Likes
64
Share


@Cheeba_Inu
Follow
June 26, day 98, the Euforia is in it's final ripening phase, and will be harvested soon! I am dialing down the EC, although I do not do any major pre harvest flushes.
June 28, day 100, emergency harvest time! I was going to push it another 3-5 days, but when I was examining my fattest cola I noticed the physical manifestation of my nightmares: early stage bud rot. I should have harvested days ago in hindsight, as days of rain pushed my RH up into the mid-high 60s. I only noticed it because I was bending bud tissue away from the stem, but there was clearly some white fluffy buildup around the base of a dead leaf stem. The good news is that I caught it very early, no bud tissue has died anywhere on the plant and what mold I could find was still white and fluffy. I had to immediately cut down the whole plant as a result. I cut away bud material around the few moldy spots, and put the rest of the buds from those colas into my pile for edibles/oils. 95 percent of the colas seem totally unaffected. Nevertheless, I have had to totally switch up my dry/cure technique by doing a wet trim of the large buds and a quick dry/cure to start to make sure no spores can spread elsewhere. My priority is really saving what has been accomplished so far.
The good news is that early wet weights are very heavy, even with the bit of bud removal. 600g wet for the top colas, another 350g wet for the mid grade buds, and finally 1000g for the low grade buds left of stems for slower drying. This means I will hopefully end up with 200g+ dry bud for vaping and smoking, and much more for edibles, rosin, etc. I will have more details next week with the full harvest update!

Processing
Likes
7
Share


@maxpain
Follow
Going good did a heavy defoliation looking alot better now cant wait smells good ...
Likes
57
Share


@Regenwurm
Follow
17.01.2021 alle Ladies getoppt.
In der ganzen Woche nur 2 mal gegossen und Pflanzen austrocknen lassen. Am 24.01.2021 alle Sonnensegel entfernt da kein Licht auf die Triebe gekommen ist. Ladies haben sich 7 Tage vom Topping erholen können. Bei den neuen Trieben am Hauptstamm auch am 24.01.2021 Superscropping damit alles gleichmäßig wachsen kann.
Klima ist sehr gut, dort keine Probleme. Düngemenge des Hesi Schema wie letzte Woche angekündigt reduziert ..... also 2 ml pro l .... Düngeplan Hesi sagt 5 ml.... die Pflanze möchte weniger, also bekommt sie weniger. In ein paar Tagen geht es in die Blüte, nächste Woche ist sie Bereit.
