


Likes
Comments
Share


@steadfast_grower
Follow
Note: I didn't necessarily flush but I didn't add any more additives or nutrients while away so I've set the nutrient values in the diary to null.
---------------------------------------
June 12 (Day 90)
---------------------------------------
Away - Camping.
---------------------------------------
June 13 (Day 91)
---------------------------------------
Away - Camping.
After camping, they survived the summer heatwave and look pretty good. The stench in the tent is not like your typical Northern Lights or White Widow. It's straight-up funk that hits you in the back of your throat. I can't really pinpoint any specific scents but it's a very rich and pungent odor for sure.
I’m 100% confident the roots are probably degrading with rot after the warm temps. The only problem I had while away is was the AC fills into a 5gallon bucket and it couldn’t keep up with demand about an hour before I got home. After a quick cleanup, I took a closer look and I’m happy with trichomes on both plants.
This was supposed to be a 65-75 day fast finisher. Today is day 91. I’m satisfied.
I consumed a test bud on weekend that went under a 3 day dry. White ash, no harshness, and punchy in regards to the effects. Chopping them tomorrow.

Likes
8
Share

@DogDoctorOfficial
Follow
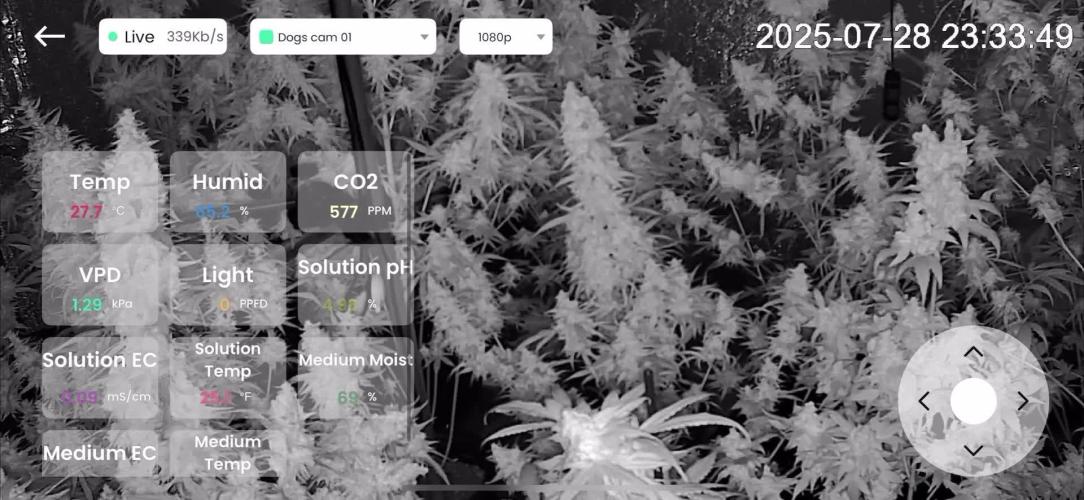
🌸 Week 6 Flower – Gelonade Diaries
The Gelonade girls continue their elegant dance into flower, both Pheno #1 and Pheno #2 shining in their own unique way. Their structures remain remarkably similar, tall, strong, and full of energy, while each holds onto her own personality, expressed in leaf form and flower shape.
This week we noticed a few small spots on the leaves. Nothing dramatic, nothing to sound alarms about, but enough to remind us that plants, like people, sometimes whisper when they need something. It could be calcium, it could be another minor imbalance, but the key is observation. We’ll keep a close eye, watching for patterns, listening to what the girls want to tell us, and adjusting gently if needed.
🌱 Quick Recap (For Those Just Joining)
From the start, this run has been about detail and care.
• Germination was clean and quick, the girls leaping from seed into life.
• Veg was marked by strong branching, healthy leaves, and the unforgettable funky unicorn foliage of Pheno #2.
• Transplanting into super soil and fabric pots gave them the room to spread their roots and breathe.
• The shift into flower was smooth, guided by careful lighting, steady feeding, and a balance of Aptus and Plagron nutrients.
• Weeks 4 and 5 saw sativa-like stretch, white hairs bursting across every cola, and canopy lights filling every corner with photons.
Now here we are in Week 6: the garden maturing, the flowers stacking, the personality of the genetics truly revealing itself.
💧 Feeding & Balance
The recipe continues to revolve around Aptus Regulator, CalMag Boost, Top Booster, and Plagron’s Power Buds, Sugar Royal, and Green Sensation, with Aptus All-In-One Liquid helping tie the orchestra together. We’re keeping EC balanced, always mindful that the soil already provides a strong foundation.
💡 What’s Happening & What’s Next
This week is all about observation. Flowers are swelling, resin begins to sparkle in early traces, and aromas start to hint at what’s to come.
What to expect: denser buds, richer pistil coloration, and a canopy that will soon demand defoliation for airflow.
What not to expect: miracles overnight. This is the stage of patience, where the magic brews quietly within each calyx.
💚 Closing Thought
The Gelonades remind us that growth is rarely flawless. A spot on a leaf is not a failure, but a message. Perfection isn’t the goal, balance is. And balance is exactly what these girls are showing us week after week.
May the flowers swell with grace,
may the leaves whisper their truths,
and may the grower’s patience
be rewarded in full bloom.
PS: Understanding Foxtailing
One of the girls, our Pheno #2, is starting to show signs of foxtailing. For those new to the term, foxtailing refers to when buds grow in elongated, irregular patterns instead of stacking neatly into the dense, conical shape we often expect. The result is a flower that looks “spiky” or “funky,” almost as though the plant is growing multiple little towers from a single cola.
Why does this happen? There are two main sides to the story:
• Genetic Foxtailing: Some strains naturally express this trait, especially sativa-leaning hybrids. In this case, foxtailing is simply part of the plant’s personality, often leading to extra surface area for resin glands, which can even mean more trichomes and aromas.
• Environmental Foxtailing: Stress factors can also trigger it — high heat, intense light (too much PPFD), or shifts in feeding can encourage buds to keep stacking in odd ways rather than finishing their round formation.
In our case, the temperatures have sometimes pushed higher than ideal, and the lights are running strong, so those factors might play a role. But genetics also carry a heavy influence, and Gelonade — being sativa-leaning, can naturally lean toward these elongated flower expressions.
Is foxtailing a problem? Not at all. While it can look unusual compared to the “textbook” cola shape, it doesn’t reduce quality. In fact, it can increase flower mass and surface resin coverage, giving us more material and potentially more complex aesthetics. Some growers even treasure it as a unique expression of their plant’s individuality.
So while Pheno #2 may look a little funky, we see it as a gift, more fruit, more character, more story to tell. This is the garden’s way of reminding us that beauty doesn’t always fit a mold, and that variation is part of the magic of growing.
📲 Don’t forget to Subscribe and follow me on Instagram and YouTube @DogDoctorOfficial for exclusive content, real-time updates, and behind-the-scenes magic. We’ve got so much more coming, including transplanting and all the amazing techniques that go along with it. You won’t want to miss it.
•GrowDiaries Journal: https://growdiaries.com/grower/dogdoctorofficial
•Instagram: https://www.instagram.com/dogdoctorofficial/
•YouTube: https://www.youtube.com/@dogdoctorofficial
⸻
Explore the Gear that Powers My Grow
If you’re curious about the tech I’m using, check out these links:
• Genetics, gear, nutrients, and more – Zamnesia: https://www.zamnesia.com/
• Environmental control & automation – TrolMaster: https://www.trolmaster.eu/
• Advanced LED lighting – Future of Grow: https://www.futureofgrow.com/
• Root and growth nutrition – Aptus Holland: https://aptus-holland.com/
• Nutrient systems & boosters – Plagron: https://plagron.com/en/
• Soil & substrate excellence – PRO-MIX BX: https://www.pthorticulture.com/en-us/products/pro-mix-bx-mycorrhizae
• Curing and storage – Grove Bags: https://grovebags.com/
⸻
We’ve got much more coming as we move through the grow cycles. Trust me, you won’t want to miss the next steps, let’s push the boundaries of indoor horticulture together!
As always, this is shared for educational purposes, aiming to spread understanding and appreciation for this plant. Let’s celebrate it responsibly and continue to learn and grow together.
With true love comes happiness. Always believe in yourself, and always do things expecting nothing and with an open heart. Be a giver, and the universe will give back in ways you could never imagine.
💚 Growers love to all 💚

Likes
11
Share


@Sauce_XL
Follow
3.23.2024: Start of week 10, day 60 from sprout. Plant is moving along nicely. Heavy trichome production. No large buds but whats there is great. Dense too. Lots of purpling on the top leaves. She's probably going to finish sooner than her tent mate.
3.24.2024: Day 61. Fed 1/4 strength nutes. 96oz at 6.5ph.
3.25.2024: Day 62. ZZZzzzZZzzz
3.26.2024: Day 63. 96oz at 6.5ph.
3.27.2024: Day 64. ZZzzzZZz
3.28.2024: Day 65. just the tiger bloom and cal mag today at 1/4 strength. 96oz at 6.49ph.
3.29.2024: Day 66. ZzzzzZZzz. End of Week 9 from seed. Trichomes are starting to get milky...maybe 70/30.

Likes
16
Share


@Ziocannabis
Follow
La più grossa è già 85 cm....una vera Gorilla 🦍
Domani cambio una 50 di litri , diciamo che non voglio rischiare di bruciare la pompa sommersa cambiando totalmente l'acqua... sarebbe un problema svuotare l'impianto completamente...dovrei avere un altra pompa che mi aspiri tutti i 65/70 litri che ci sono adesso
Ha superato di un paio di centimetri il metro di altezza una delle Gorilla Cookies...il problema dell' idroponica è che devi per forza fare lo Scrog,a quel punto riesci a tenere l'altezza anche delle altre
Ho cambiato base per la fioritura, molto più indicati..Sensi Bloom A&B Advance nutrients ovviamente .. aggiungo big Bad...
Ora cerco di lasciare le radici scoperte dalla soluzione in modo da indurre uno stress idrico e accelerare la prima fase di fioritura..da 5 a 8 cm. fuori dalla soluzione

Likes
30
Share

@KnightRider
Follow
Hey Peeps,
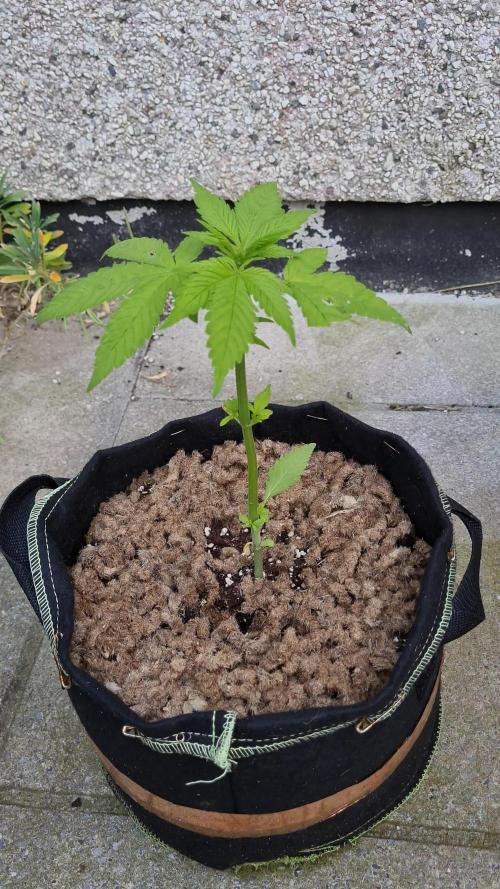
So its been quite a bad week for my girl.
Its rained every day apart from today and shes been lollipoped not by me. The damage that you can see actually occured over one night, in a word carnage 😔
Ive taken her out of her hidey hole about mid week as one more attack like this and shed be dead, just gonna have to risk her out in the open and hope that the neighbours dont notice if she recovers.
Thats all from me this week, thanks for stopping by ✌️
Likes
51
Share


@Dwillsun1
Follow
02/05 - 02/17 Week went very well for this girl. Stopped grow nutes, increased bloom nutes and added unsulferd molasses and she loves it... Started getting frosty the next day. I S&M'd (tied down and exposed all bud sites) her some more and they've now almost double in size as they all thicken.. I also pulled a bit of inward facing bud covering leaves (she's already flowering and kept in minimal). 😁 I'm Very Happy with this groW so fast and the Lady Seems to Feel the same... Let's groW!!! SORRY LOTS OF PICS!!!
Likes
34
Share


@AsNoriu
Follow
Day 85. All is good, could be a bit better, but no care brings such things ...
AK's all grow like twins, solid and strong 40-50 g plants. I like them.
Og's : one is violet and big, great plant. One is very small, one is okeish. Very variable strain, lets see how different product will be ..
Happy Growing !!!

Likes
6
Share

@Wenz004
Follow
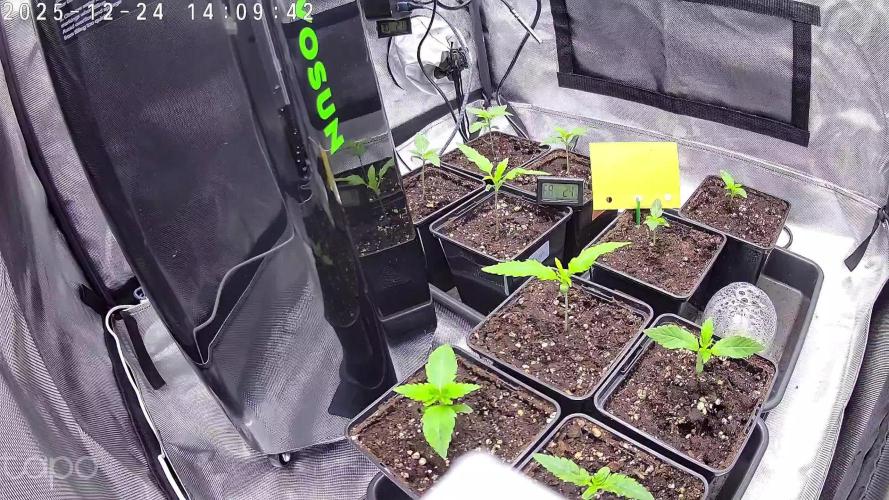
Keimung und Sämlingsphase Tag 1-9
Mal was neues probieren - Samen aus der teilweise deutlich alten Sammlung verbrauchen und so die Mõglichkeit haben mehr Varianten und Geschmäcker auf einmal probieren zu können.
2 x Special queen - promo rest - andere bisher schiefgelaufen
1 x biscotti - promo
2 x tropicana cookies - war mal großzügige Entschädigung
2 x Euphoria - bestellt als Daysmoke - wollte sowas schon immer 😁☝️
1x mexican rush - mal bestellt 1 Stück um Warenkorb auf bestimmten Wert zu bringen😁 - die wird bei dem mix Probleme machen - da Sativa lastig
2 x gg4 gorilla glue - promo
Alle extrem schnell gekeimt nach gerade mal 1.5 Tagen, euphoria sogar noch deutlich schneller 1 x gg4 und einmal SQ erst nach 2.5 Tagen.
Plan - wollte alles unberührt wachsen lassen später in 120 x 120 (keinerlei lst oder hst) mit einer kurzen Vegi - rechne ich ab Tag 10 nach Keimungs -und Sämlingsphase.
KI hat mir von diesem Plan abgeraten - oder wenigstens mexican rush und special queen zu toppen - mal sehen😁

Likes
17
Share


@Plantinator
Follow
Lightly defoliated her for better air circulation and removed a few bud sites below ScrOG net that will never make it to the top.
New light fixture has been added this week;
Mars hydro FC3000, this is the EVO version with the latest Samsung chips. Overkill or killing it? We will see.

Likes
8
Share

@GREENPHOENIX6262
Follow
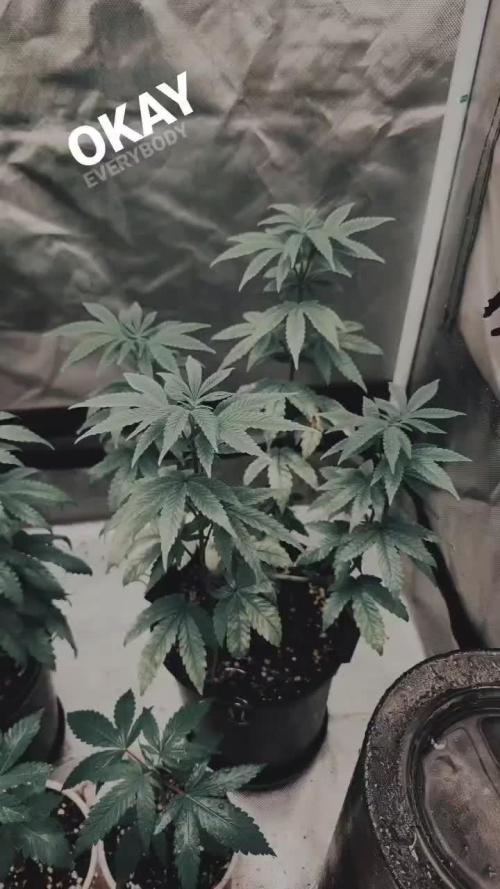
04/19 - They are recovering accordingly after flush - Still has some yellowing but most of their green has returned - transplanting into 5 gallon pots by the end of the week - these will be a short run - No cloning - running as mothers through out the entire grow.
04/26 - Unfortunately these have locked out and are no longer vegging, I will keep the dairy up for research purposes but I will donate these to the fellow grower that runs outdoors.

Likes
11
Share


@Drgreenthumb627
Follow
happy and healthy little plant on day 26, im mostly getting smells of pine off this girl so far. hoping for more blueberry to show out

Likes
15
Share


@Drtomb
Follow
Smells are really starting to come out and buds have begun to bulk up. Tune in now with the subscribe button, to watch.


Likes
37
Share


@masterofsmeagol
Follow
7/2 Last week it was extremely hot (80's-90's) with cold nights. We had a severe thunderstorm last night and it's raining like crazy today. I didn't spend time in the garden as it was pouring. However I defoliated yesterday briefly. I had maybe a half dozen leaves yellow and die a couple days after the organicide application. They were mostly the largest oldest fan leaves most infected with pm. A couple smaller interior leaves yellowed and died as well but they were the leaves most infected. I assume that's normal. As I defoliated I noticed my first aphid of the season. I saw a few dead ones the organicide killed and a couple that were alive. Aphids aren't a big deal. They'll be evicted soon enough. I haven't seen one spot of pm though since the application. Maybe a little on a dead leaf but it seems to be working good. Didn't take pictures today but needed one to update the diary. Trying to upload videos but they take forever.
7/3 Ridiculously hot all last week. Extremely hot yesterday then a severe thunderstorm but it cleared to 90 degrees with 90%rh. This environment is a fungal nirvana. Still a slight smell from the organicide. I'm glad I used it though. I threw away some more leaves but this is the time that starts happening anyway. Before the stretch. With the ideal conditions I saw WPM rear it's head again. Only this time the organicide seemed to still have a residue. The PM only infected the super old biggest fan leaves and a few tiny tiny leaves on the very interior of the plant. I didn't know I had aphids but I've found a few dead on the underside of leaves I defoliated. So it seems to be working. My plants are growing towards the sun (partially due to my tarps which I need to be legal) which make airflow harder to maintain. My dad gave away my pallets this year. I had planned to put bags and supports on pallets with some sort of wheel so I could spin them. Oh well I'll do that next year in my new location. I have also found moth holes in couple leaves so BT it will still be needed. If videos didn't take so long to upload I would have a bunch. Happy growing.
7/5 Watered lightly (as it had been 90's) before feeding three gallons to the garden. Noticed some telltale leafhopper signs on a 9lb kush. The organicide seems to be doing a decent job of keeping PM at bay. The blueberry is now the worst it seems. I'm planning on another application before I try anything heavier. The fishy smell is now totally gone. Plants seem healthy and are a nice dark green. I have had some problems that have effected my ability to fully care for my girls. I have some defoliation I need to do. I also see moths sometimes in the morning plus the pm and the random munch. I guess that's to be expected outside but I need to get on top of this shit. I also have more LST I could be doing.
7/6 Rained all night and still off and on. Can't see any pm but I've found a few spots on the blueberry that could be septoria. I'm going to hit them either tonight or tomorrow with the organicide and if it doesn't work I may try a sulfer based fungacide. Took a few pictures. I need to defoliate as well.
7/7 Uploaded some duplicate pics accidentally. If I could've created the perfect environment for fungal infections I don't think I could've done better than yesterday. Hence the organicide. I was surprised it wasn't pronounced and only a little here and there. Also saw leaf hopper and pillar damage so hopefully this will straighten that out. Blueberry seems weak in it's stalk. I'm not sure if the wind is blowing it against that hard metal circle around it. It may have septoria. If it does I'll have to switch to something different or junk the plant.
7/8 This sucks. I can see signs of leaf septoria on the GDPs. This is definitely not a strain for the Maine climate. It's not resilient enough against diseases. This year has been particularly bad with 40 degree temp swings and rain then bright hot sun. I couldn't engineer better conditions. I appears senescence starts at the same time looking back over the past four years. However maybe that's just the life cycle of the earwigs. Oh yeah. I raked the inside of the grow bag with my hand and AT LEAST a half dozen earwigs came out RIGHT FROM THE SOIL IN THE BAG. I dealt with these prehistoric bastards last year and lost half my harvest. They eat other insects but the spread disease like crazy and they DO eat your plant while leaving behind the worst bacteria and plant disease. I have research to do. Like I said. This sucks. I'm changing locations next year but I need some help dealing with the septoria and the earwigs or I'll be fucked again. I defoliated anything that looked suspect. Still need to improve airflow.


Likes
14
Share

@cangrowz
Follow
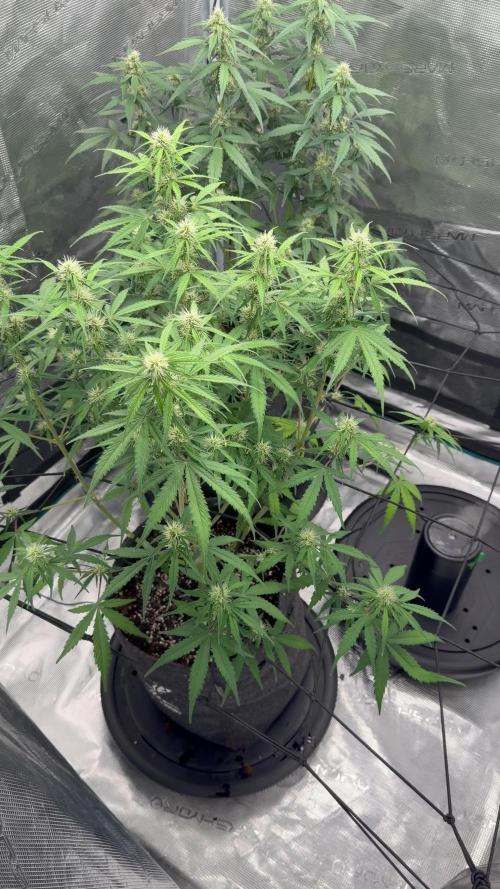
Ende Woche 5 / Anfang Woche 6 – Grow Diary Mimosa x 🍊👊🏻 Barney’s Farm
Die Woche lief vom Wachstum her wieder richtig gut. Die beiden Pflanzen haben nochmal ordentlich aufgebaut und sind auch noch ein Stück in die Höhe gegangen, typischer Stretch in der Phase.
Ich habe außerdem nochmal etwas Erde nachgefüllt (Light Mix von Plagron), um den Wurzeln weiterhin eine gute Basis zu geben.
Bei der vorderen Pflanze habe ich leicht entlaubt, damit das Licht besser in die unteren Bereiche kommt. Habe aber darauf geachtet, es nicht zu übertreiben.
Aktuell bin ich weiterhin sehr zufrieden mit dem Verlauf. Jetzt wird es spannend zu sehen, wie sich die Blüten in den nächsten Wochen entwickeln und wie die Buds an Masse zulegen.
Danke fürs Vorbeischauen im Diary 🙏🏼
Happy Growing Growmies 🌱?💚

Likes
10
Share

@Gamfin
Follow
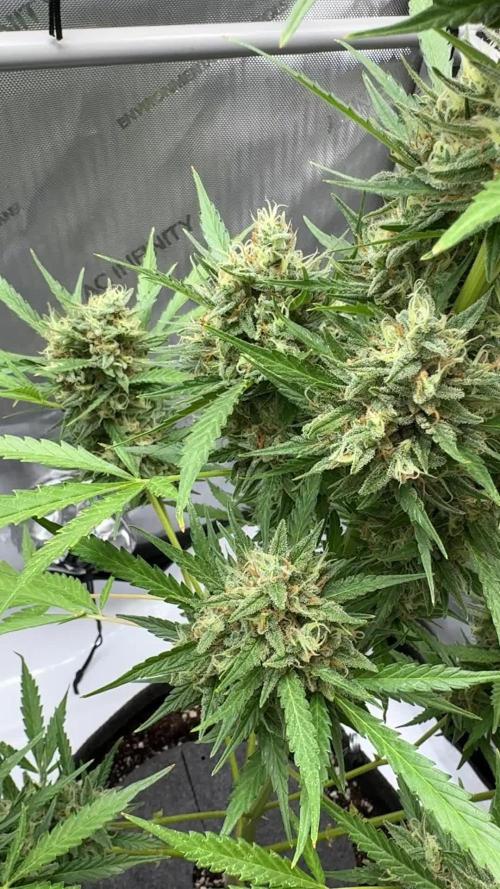
// Day 85
I started to give her only water + CalMag at the last watering. That was 3 days ago and today I gave her water + CalMag again. No nutrients anymore, she still has plenty, which you can see by her green leafs. And she is still drinking a lot, which means that she is not near to be done. No fade on her what so ever which is really sad, I was looking forward to some nice colours at the end of flower. It's day 85 already, she does not look ready at all. I'll give her 2 more weeks max., after that I just chop her down no matter how she looks. I go on vacation and want her to dry during that time. I cannot let her stay in the tent when I am gone so that's her last chance. Hopefully she finishes during the next 14 days.
For the ones who missed it: I removed a head bud from a side branch because of spider mites. I catch some here and there on the leafs but did not spot another camp yet. Hopefully it stays that way and they're not well hidden inside bud sites. That would be a catastrophe. I'll do a bud wash of course but I doubt that you can flush all their well hidden web-camps out, if more of them exist. Let's just hope that I am lucky this time.
// Day 88
Got 3L again, just plain water. No CalMag, no pH adjustment, just hard H20. She does not need anything anymore at this point of life.
Likes
49
Share

@masterofsmeagol
Follow
6/9 I can't believe it but I had faith. The transplant yesterday LOOKED like it was fucked. I cleaned it up though and left it outside. This morning it was standing straight up. Both transplants were! I put tarps up to block the wind tunnel between buildings. It's still overcast and rainy. Sun isn't supposed to come out for a couple poke days. Chance of thubder storms tomorrow but I'm going to try to get everyone in their forever homes today. Or at least most of them. I plan to light dep a few right in the 3 gallon. I'm sure I'll be updating this after I get some work done.
UPDATE: I WENT OVER AND GOT THREE MORE TRANSPLANTED. THAT MEANS FIVE ARE OUTSIDE IN THE CAGE. TWO 10TH PLANET, 2 BLUEBERRY CHEESE AND A LITTLE PURPLE PUNCH. THE 3 GALLON POTS WERE RELATIVELY HEAVY SO I PICKED THE LIGHTER ONES TO TRANSPLANT. I LEFT THE ORHER TWO 10TH'S IN THE GARAGE WITH THE DOOR OPEN WITH THE REMAINING PLANTS. I ALSO ADDED WIND BREAKS AND SUPPORTS TO EVERYTHING. I WANTED TO GET EVERUTHING DONE TODAY BUT THERE MAY BE A THUNDER STORM SO IF I DONT GET IT DONE ITS NOT A BIG DEAL AND ILL FINISH TOMORROW. TRANSPLANTS WENT SMOOTH. I THINK THEY'LL GO EVEN SMOOTHER IF THEY DRY OUT A BIT. STILL HAVE THE 50 AND 40'S TO FILL. Took a bunch of videos but the don't want to load. I'll have to try tomorrow or later tonight.
UPDATE: I TOOK TONS OF PICTURES AND VIDEOS BUT THEY DONT WANT TO SEEM TO UPLOAD. IVE GOT SIX IN THERE FINAL HOMES OUTDOORS 20s and 30 gallon smart pots. Still have massive plants but I'm going to out those in the 50 and the 40. I'll finish this shit up tomorrow and get all the girls in their forever homes and if I don't have room for some I was planning on doing a light dep anyway so that will work out good. I learned a lot and transplanting went a lot smoother todsy than before. I feel really proud of myself. The last Transplant I did break a few leaves off that I didn't notice but whatever. I used tomato cages for suppirt on two and bamboo poles and string on the others. I'll add the vertical trellis as they grow. I'm proud of myself.
6/10 I got a lot done yesterday. Six are outside already. Two are in 20s in the garage. I'm planning on transplanting the rest today or tomorrow. I'll update later. Accidently uploaded lots of stuff on the wrong week. UPDATE: I TRANSPLANTED THAT SUPER TALL PURPLE PUNCH THAT I DIDNT TOP OR HST AT ALL INTO A 40 GALLON TUB. ROOTS WERE DRY AND THIS TIME IT ACTUALLY LOOKED LIKE THEY FELL AWAY. THE PLANT HOWEVER STAYED STANDINGVUP FINE. I THINK THIS PHENO IS GOING TO BE A TOUGH ONE. LOOKS GOOD LIKE AN HOUR LATER. I HAD THE 50 READY TO TRANSPLANT THIS MONSTER BLUEBERRY CHEESE I FIMed BUT THE POTS WERE SUPER HEAVY AND I FIGURED I NEEDED TO SLOW DOWN AND THINK. WE HAVE THUNDER STORMS COMING TONIGHT. TOMORROW IS GOOD. I MAY TRY TO FINISH UP TONIGHT BUT WE SHALL SEE. THE GOOD THING WITH DOING IT A FEW AT A TIME IS THAT IF SOMETHING HAPPENS OUTSIDE IVE STILL GOT A CROP INSIDE LOL. WHAT IM PLANNING TO DO IS EITHER LIGHT DEP THAT BIG BLUEBERRY CHEESE OR PUT IT IN THE FIFTY BUT IM PLANNING TO LIGHT 3 RIGHT IN THEIR 3 GALLON CONTAINERS. HAVENT DECUDED FOR SURE BUT IM THINKING THATS WHATS GOING TO HAPPEN.......of course videos won't upload and the ones that do are old videos. Damn. I need to sharpen my computer skills....and my growing skills. Especially transplanting. I suck at transplanting. I decided not to out all my eggs in one basket and left the 10th planet amd Blue berry cheese in the 20s in the garage. I pulled them out for light further but I'm ousting them back a little tonight. That way I'll have a back up if something catastrophic happens. I doubt it but better safe than sorry. I'm proud of what I've accomplished thus far. I've successfully uploaded my 1 minute plus video several times but it won't appear. Oh well. I'll try to load the videos tomorrow I guess. Just started raining. Just a light rain. Probably what fresh transplants like.
6/11 BEAUTIFUL outside. Today is the day. Most is done and I'll add the supports as trellis as they grow. This new grow space gets about twice as much sun as my old spot. The tar stops the burrowing insects. I'm getting everything out today. I just need to decide if I'm going to light dep that MASSIVE blueberry cheese or bite the bullet and put it in the fifty. Maybe I'll try to get some help from my cousin. Plants withstood the thunderstorm like Champs. I'll update as the day goes on. I planned better this year so I SHOULDN'T have an unmanageable jungle. UPDATE: WATERED THE 3 PLANTS LEFT IN THE 3 GALLONS (1 10th PLANET WITH GREAT BRANCH STRUCTURE AND TWO PURPLE PUNCH THAT WERE THE SMALLER ONES. IM GOING TO LIGHT DEP THEM. EVERYTHING IS OUTSIDE NOW IN A MIX OF 1/3 FOX FARM OCEAN FOREST, HAPPY FROG AND ROOTS ORGANIC 707 IN EQUAL PARTS. TRANSPLANTED WITH MYKOS. EVERYTHING IS OUTSIDE NOW. FINALLY DECIDED TO GET The MONSTER BLUE CHEESE I FIMed INTO ITS FOREVER HOME A 50 FALLON POT. IT WAS TGE EASIEST BEST TRANSPLANT OF THEM ALL. JUST LIKE AETTING A POT IN THE WHOLE. I DONT EVEN THINK THE PLANT NOTICED. ONE OF THE PURPLE PUNCHES HAD ROOTS OB ONE OF ITS LEAVES WHEN I LOOKED BUTVIT WAS STILL STANDING UO STEAIGHT. I KNOW SOME OF THE PLANTS LOOK DROOPY BUT WEVE HAD SEVERAL DAYS OF RAIN AND A MASDIVE THUNDER STORM. I BROUGHT OUT THE EARLIER TRANSPLANTS AS WELL. THEY ARE OUT OF THE SHOCK. WIND IS PRETTY HIGH BUT I DONT WANT TO ADD MORE TARPS. I THINK THINGS ARE SECURED GOOD ENOUGH FOR NOW. IM SUPER STOKED THAT TRANSPLANT WENT SO GOOD! Went back at 7:30pm. Some plants have a little bit of transplant shock and a little bit of burn but it's negligible considering they've been through a thunderstorm with pouring rain and extremely high winds. That blueberry cheese in the 50 transplanted so easy and still looks like it didn't even know the difference. I'll start light dep once I get a plan. Plants are recovering nicely but should something happen to one I could replace it. I'm interested in the light dep though and I've got a pretty good idea how to start.
6/12 The plants that had a little transplant shock are coming out of it. We had a thunderstorm and pouring rain the day of some of the transplants. Wasn't forecasted. High winds moved the plants around a bunch bit they are tough as hell. Everything is out now. Suppisedcto have showers the next few days. I'm putting together a feeding schedule abd setting up a spit to start light dep on the three plants I decided to flower early. The cage now gets twice as much sun as before. This is going to be a good year.
Went back over and plants are perking up and doing even better everytime I see them. I took a video but it might not upload until tomorrow. I may start a new diary for the light dep. I have a few places I'm thinking to use for light dep. I need to make a solid plan before I start so maybe a day or two. Trying to upload again but I doubt it.
6/13 Had a rushed morning but I watered the plants in the 3 gallons as they were dry. I had added more soil to a couple of the bags. The top soil is startingvtj dry out but the plants look good and we are supposed to get rain so I don't really want to water if it's going to be raining. I think I've found my light dep spot and schedule. I'll update after I do something.
WENT BACK OVER AND SPRAYED A LITTLE BIT OF WATER ON THE EXTREMELY DRY TOPSOIL THAT I HAD TOPPED SOME OF THE PLANTS OFF WITH. SHITTY THING IS THAT WAS ADDED AFTER THE THUNDER STORM SO IT MAKES IT HARDER TO JUSTE THE PLANTS WATERING NEEDS. I CAN TELL THAT ONE OFCTHE FIRST TEANSPLANTS IS STILL HOLDING WATER. I MEAN WE GOT A DOWNPOUR AND I DONT WABT TO WATER IF WE'RE GOING TO BE GETTING RAIN ANYWAY. IM GOING TO LOOK BACK OVER THE DIARY. THATS ONE GREAT THING ABOUT THESE. YOU CAN GO BACK AND CHECK YOUR WORK.
6/14 Glad I held off watering. It's raining today. Just showers. We haven't gotten any of that extreme wind we usually do. I have the plants supported but I still worry. Definitely more than I should. Plants are still doing good and acclimating to there homes. I have not started the light dep with the 3 gallons but I think I've found my spot. Once I start it will just be staying consistent putt8ng them in and out. I need to train them anyway. I have some research to do and a joint to smoke so I'll update later.

Likes
8
Share


@s99mrgreen
Follow
It's really hard to get started with conditions and insufficient knowledge. but i did it.
OG Kush really hard to grow, but it's really worth. ill grow this girl again
I added more pictures of Super silver haze, she's baby and only 3 weeks to veg. Just showing

Likes
2
Share


@Madman2020
Follow
Vegetative steering
Aiming for:
leaf Temp -70f
CO2 300
VPD +.93
Planning for:
MJ and bras foilar
60%+1.5/-71f set to 68f+1.5
Leaf Temp is about 3f higher than ambient temp
At 68f outside, grow room still wont hit 68 with lights off
Day 24
No Co2
50-55klux
15inch from light
Leaf Temp 71-73f
60%/72F
Veg steering
Coconut water
Uneven canopy(11 at 29inch, 3ag 31 inch
————————
Day 26
56%68f(humidity dropped because i havnt watered in two days 🤡)
23inch-34inch tal. Arranged in order.
52-59klux
Sprayed
5Bras,(23inch)70 leaf temp
4Jas,(29inch) 70 leaf temp
4Bras&Jas(34inch)72f leaf temp
———————
Day 27
Watered once
————-
Day 28
Im pretty sure the sprays worked.
Noticed leaf burn with 3 plants sprayed with MJat 147ppm(.5ml)
No leaf burn with the .1Bras sprays
I wonder how long both are good for. Also, can i pour the unused spray in the medium? I just dont want to waste it.
Plants are noticeably more vigorous.
I am wondering if now is a good time for my defoliation. i was planning for Week 5. I feel like the buds are to developed for me to be pruning off lower buds and makes me feel like i should have pruned beginning of week4
__________

Likes
10
Share


Likes
3
Share


@Unculti_responsable
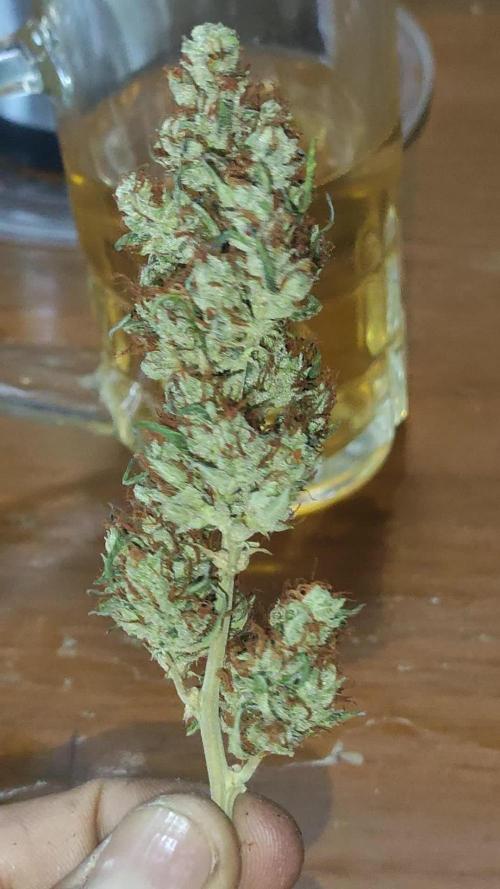
Follow
Esta semana la dejamos más tranquila a la Jack solo le hicimos un trasplante a 5 litros quedo bien , la dejamos recuperar unos días y después le hacemos las últimas podas y ya va a estar lista para florecer
