


Likes
2
Share

@eldruida_lamota
Follow
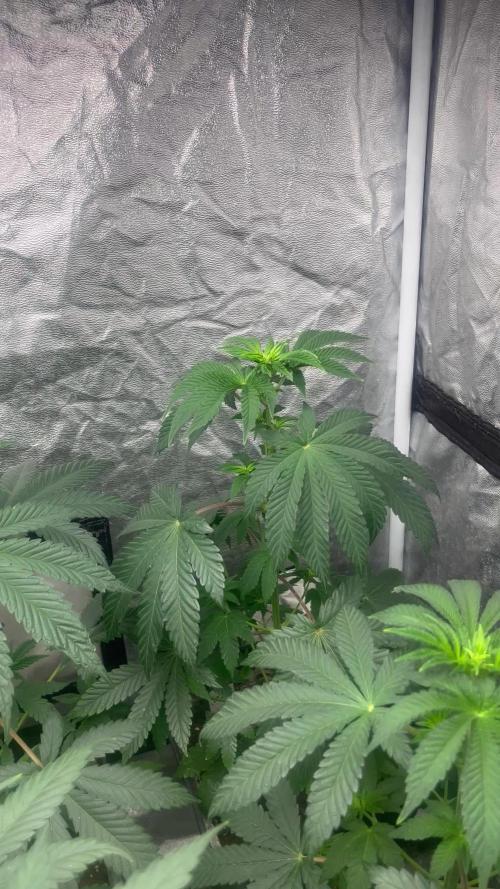
Que pasa familia, vamos con la primera semana de floración de estas F.U.H. feminizadas de Seedstockers.
Vamos al lío, las plantas se trasplantaron a macetas de 7 litros.
El ph se controla en 6.5, la temperatura la tenemos entre 24/22 grados y la humedad ronda el 50%.
El ciclo de crecimiento puse 12h de luz, el foco está al 50% de potencia.
Me gustaría estar más encima este cultivo pero la salud me está impidiendo un poco este 100% con el proyecto. Con suerte la semana que viene andaré mejor.
- os dejo por aquí un CÓDIGO: Eldruida
Descuento para la tienda de MARS HYDRO.
https://www.mars-hydro.com
Hasta aquí todo, Buenos humos 💨💨💨

Likes
36
Share


@Sweetie420
Follow
26.12.2021
Everything is fine. Finally i have my lamps so now we waiting. The plants feel good. I make a lot of humidity. Happy growing guys


Likes
4
Share


@Mr_nugs_lover_David
Follow
Sufro de lumbalgia desde hace 6 años,siempre fui una persona muy deportista,correr y jugar al fútbol siempre me ha hecho disfrutar de la vida,empecé a tener problemas con los isquiotibiales y al poco tiempo acabe con una lumbalgia,cada vez que hago un pequeño esfuerzo,como levantar peso del suelo,bolsas etc, siento unos pinchazos terribles, esta cepa de somango a pesar de ser autofloreciente me aporta pura vida,extremadamente efectiva a nivel físico,te quita cualquiera que sea tu dolor de un plumazo y también te aporta un buen mood como para ver tu peli favorita al final del dia,todo un auténtico placer.sin duda me encantaría cultivar esta cepa mas veces,aun tengo 3 mas, 2 de ellas también violetas. Espero wue os guste mi trabajo.he disfrutado mucho con esta genetica. 💚🤞🌱❤️💛

Likes
11
Share


@TechDCo
Follow
12/02/2024
13/02/2024
MS is growing funny 😁
TF has exactly the same feed mls.
Shes looked forever hungry
14/02/2024
Lite Defoll.
Midday.
TF has never looked the healthiest with the first time using HydroSol + H202 water soluble feed.
I think i have the ratio/some sroted to where I've seen improvements.
First improvements i have seen are:
1. NO Nutritional burn or Lockout!
(non-salt based). P.s ignore the over salas 12% HP at the start (no idea what i was thinking).
Sometimes being ahead; means i am a being with a head that makes human errors. Oh, the joys of plant-discovery. Sorry side tracked lol
2. Quicker Absorbing witb water soluble food. As long as she's hydrated she's eating!
3. No idea yet
Have a ball!!
Listening to this relaxing and i started thibking about Spirituality and how its included in all faiths. But if say "Jesus Christ is a façade and all religions are based on astrological events painted with fictional characters to repent the Christological doctrine to "date" the past.
21 Ways Archaeologists Date Ancient Artifacts are mostly flawed because they only have the "present" to date decay from. They miss the mark and the professionals deliberately push the religious artifacts to match up to the hollyword.
So who's to say what "Date & Time" we are currently living in!
In reality; we can only measure and date time from the the last natural apocalypses or near misses, dor we are the surviours from such events..
Look round at real history! What mordern day academics just brushed under the rug with some made up theories of what they like us to believe happened. Even they are in a Dilemmas (government's) have the knowledge of these such events.
SpaceX and Nasa are all doomsday preppers! As for India going to the moon 🌙 seriously 😐 who's buying this stuff?
I've let go so much that the whole world is my own intention and floods my brain with endorphins of being the observer. The reason we are all "consciousnesses" and in sudden alert of awareness of this world and being alive is because we are in the end time again! We have all woken up to everything because the omens of the apocalypse alerts and kicks in certain parts of the DNA to force memories to the soul like "hey you need to remember this and get somewhere safe"
17/02/2025
Vast improvements
18/02/2025
Defolled to make way for fast growth

Likes
8
Share


@FrostyAutoflowersTV
Follow
I harvested 2 of the 5 plants on day 71. The other 3 plants got harvested on day 80 and are in the drying process. My inline fan is running on 25% and I got a fan running on the lowest setting on the bottom of the tent, so I doesnt blow on the buds directly.

Likes
14
Share


@Aircoholic
Follow
When I got into the room one day before I scheduled the harvest, her branch collapsed under the weight of the buds. Not surprising, the buds were massive and dense! This is one of the best problems to appear during a grow, could never be mad at a plant for lack of strength to support the massive buds. I decided to view it as a sign from the plant, that it's done, it had enough, so the harvest happened a day early.
Her buds were too tall for my DIY Cooler and since the buds were so dense, it wasn't easy to get to the stem to cut it and since the buds were covered in trichomes, the gloves were super sticky.
The genetics were pretty amazing to grow, super happy plant with amazing growth - thank you, @Exotic_Seed for the seeds! 🙏


Likes
8
Share


@Squaregrouper
Follow
Super fruity and sweet way more sweeter Outdoors takes on a different odor.. it reeks of sugary Bubblicious bubble gum the pink kind but with pineapple Dum Dum lollipop heavy odor on fingers and clothes.

Likes
17
Share


@Young_agronomist
Follow
11.05.2023-предпоследняя неделя для ананасового экспресса .
Шишки отлично набрали вес и она стала пить меньше воды .
Перехожу на 10 дней рипена, 2 дня засухи и темноты .
Likes
5
Share


@ToastFarmer
Follow
So far a very easy grow, but I expect to see a nitrogen deficiency after having grown this cultivar before
Likes
9
Share


@Krautbauern
Follow
The tip from a friend to use the Bio Enhancer has absolutely paid off. The plants grow excellently and really soak up the nutrients from the soil. It will soon be time to start flowering, as the plants should not get too big.
Added some more LST Clips, unfortunately we broke up 2 braches from the rainbow. She is a very sensitive girl tho.

Likes
1
Share


@Kern420
Follow
Guava wächst weiterhin ganz gut, die Blüten fangen langsam heranzuwachsen und man kann langsam ein leichten Duft wahrnehmen.
Wir haben die Pflanze am Blüte Tag 21 noch einmal final stärker entlaubt.
Wir gießen weiterhin im Durchschnitt alle 4 Tagen 1,5L.
Likes
23
Share


Likes
9
Share


@Thatgoodgas93
Follow
This week I’m glad I’ve spent time looking at my plants every time I cypher blunts w em because I wouldn’t have spotted seeds growing since their sacs are soo green it hides em pretty well. As you probably may have guessed I banished it from my tent & have cleaned my tent thoroughly to ensure there are no chances my females can get so much as get a whiff of it. Now as I said in my diary last week I was kinda bummed out that I couldn’t at least benefit from one plant giving me seeds but now I have been given a chance to reap something I had no idea I’d been sowing this whole time least of all the strain that wreaks of a very sticky & bubbalicious odor even with the most minimal contact. I must say it was a blessing in disguise cuz tbh them seeds ain’t cheap & as much as the wait may be worth it any & every grower novice (myself) to pro needs a stash on hand at all x to be able to grow or experiment with. It get cold up here in the winter so I be bored in the house on em snow days. As always there’s always something new each week & this week I’ll have to say the terpinator has not disappointed. I have been using far more little in terms of nutrient doses through out this grow as I realized the automatic spray bottle I have is nearly 3 liters & I've only been administering the minimal doses/liter as instructed in the grow diary nutrients chart into the near 3 gal bottle this whole time!! Not going to go crazy & double up but before I up the dosage I’ll perform a very thorough flush from rain in the forecast to reset its Ph. Can’t wait to see how both male & female turbo diesel strains differ in development in the 8 remaining weeks.


Likes
4
Share


About to start flushing in about a week or so
Likes
24
Share


@Antifame
Follow
My new babies from Divine Seeds have arrived. 🙏😇 I gave them a cozy new home.
Looking forward to seeing their little heads poke out. 😊
Boobies for scale. 😋

Likes
3
Share


@Northern_Ent
Follow
June 7: i think Mimosa Shot likes it to be a bit warmer but she’s doing alright. Long daylight hours now and warm enough so she should make up for a slow-ish start.
June 9: loose scrog net is doing the job of keeping the growth tips exposed to light. Very effective. Re-arrange it a bit as needed as the plant grows. No need to even tie it off as the weight of the string is enough.
Video is a tip about keeping leaves moist in dry air. Plants are much happier when their leaves also get some moisture to make up for the low humidity.
June 12: looks good.
