


Likes
Comments
Share


@Boomdrawfyah
Follow
60 días en el proyecto B , empezamos a ver algunos signos que nos dicen que no va a tardar en empezar floración en la variedad 3951 , muy crecidas tambien como el proyecto A , aunque mas a pequeña escala, de estructura muy parecida , y de 11 impares son las hojas mas grandes, a ver cuanto tardan a empezar la floracion y cambiaremos la semana en la tabla de elicitación y nutrición de terranabis a la hora de riego

Likes
14
Share

@DogDoctorOfficial
Follow
🌿 Amnesia Skunk Auto — Week 10 From Seed (Week 6 Flower)
🔄 Quick Recap — How We Got Here
For anyone just joining us, welcome 🤝
This run has been 12/12 from seed, building structure early and transitioning naturally into flower without interruption. What we are seeing now is the result of consistency over intervention — letting the plant express while guiding environment and inputs with intention.
Last week marked an important moment:
👉 minimal intervention until now…
👉 and then, a necessary defoliation to rebalance the canopy
We’re now entering a phase where the plant is no longer building —
it’s refining, stacking, and expressing fully.
⸻
🌡️ Environment — Dialed for Transpiration & Expression
• Temperature: 26°C
• Humidity: 60%
• CO₂: ~1000 ppm
This combination is not random — it’s intentional.
At this stage, we are pushing leaf surface activity (leaf VPD / EPD balance) to keep:
• stomata open
• transpiration active
• nutrient flow constant
This is why these plants are drinking ~1.8L per day in 14.5L soil.
👉 That’s not just “thirsty” —
that’s a fully active metabolic system.
When a plant drinks like this:
• roots are oxygenated
• nutrients are moving
• photosynthesis is running efficiently
This is exactly what we want in mid-flower.
⸻
💡 Light Strategy — Full Canopy Activation
We are currently running:
• Top lighting
• Inner canopy lighting
• Under-canopy lighting
All LED.
PPFD varies between 800–1500, depending on plant height.
This variation is intentional.
Taller tops receive higher intensity, while lower zones are supported from within and below — ensuring:
• no dead zones
• active lower bud sites
• balanced energy distribution
👉 The result: the entire plant is working, not just the top
Airflow across all layers keeps:
• heat pockets controlled
• humidity consistent
• gas exchange efficient
The room is not just lit —
it’s breathing.
⸻
🌿 Structure & Canopy — Controlled Chaos
These girls are… big.
Not plants — bushes.
Dense, wide, expressive.
Until now, we kept a low-touch approach.
But this week, it was time.
✂️ Defoliation
We removed a significant amount of foliage.
Some will say:
• too much
others:
• not enough
I say: necessary.
What we targeted:
• blocked light paths
• restricted airflow zones
• overlapping leaves with no functional contribution
What we kept:
• active fans driving transpiration
• structurally important leaves
• balanced energy zones
👉 The goal was not to strip —
it was to open the plant.
⸻
⚠️ Observations — Minor LED Stress
During defoliation, we noticed:
• minor bruising / light stress on some branches
Nothing major, but worth noting.
Likely cause:
• proximity to high PPFD zones
At this stage:
• plants are more resilient
• but also more demanding
We’ll monitor closely, but no current signs of impact on flower development.
⸻
❄️ Frost Development — Outstanding
Trichome production is already impressive for this stage.
Why this is happening:
• High metabolic activity (drinking + transpiration)
• Strong, stable environment
• Balanced nutrition
• Full light exposure across the plant
👉 Trichomes are not just genetics —
they are a response to environment + energy availability
What this means:
• strong resin potential
• terpene development on track
• good signs for final quality
⸻
Nutrition — Feeding the Engine
Current feed (~EC 2.0 / pH 6.5):
• Terra Bloom → Core flowering nutrition (PK-driven development)
• Green Sensation → Flower density + metabolic boost
• Sugar Royal → Carbon allocation + terpene precursor support
• Pure Zym → Root zone enzyme activity, breaking down dead matter
• Power Roots → Continued root stimulation (yes, even now — keep the engine alive)
• CalMag Pro → Buffering + stability under LED intensity
⚖️ pH Control
• Down: Lemon Kick
• Up: pH Plus
👉 All inputs aligned and consistent — no chaos in the root zone.
Why this matters now:
At this stage:
• plant demand is high
• transport systems must stay clean
• energy must be directed to flowers
This feeding strategy supports:
• uptake efficiency
• terpene expression
• structural flower development
⸻
🌬️ Airflow & Room Dynamics
With this level of density, airflow becomes non-negotiable.
We are maintaining:
• constant air movement through canopy
• no stagnant zones
• balanced humidity across layers
This was one of the main reasons for defoliation.
👉 Light feeds the plant
👉 Air keeps it alive
⸻
👃 Aroma — Loud Already
For this stage…
these girls are loud.
This early terpene expression usually indicates:
• strong genetic potential
• healthy metabolic state
• proper environmental conditions
⸻
🔮 What to Expect (Week 7 Flower)
We are entering the phase of:
• bud stacking
• density increase
• trichome expansion
What to expect:
• visible swelling of bud sites
• increased resin coverage
• stronger aromas
What not to expect:
• explosive vertical growth (stretch is mostly done)
• major structural changes
Now it’s about refinement, not expansion.
⸻
🤝 Final Words — Gratitude
To everyone here:
• the OGs
• the new growers
• the silent watchers
• the commenters
• the skeptics
• the supporters
• the ones showing love here
• and the ones talking with us across platforms
Thank you.
To GrowDiaries — for giving us this space.
To the community — for keeping it alive.
To the genetics — for the expression.
To the LEDs & tools — for enabling precision.
To Plagron — for consistent nutrition.
And to everyone following this journey:
👉 This is not just a grow
👉 This is a shared process
From grower… to growers 🌱
📡 DELETED @ 1K Please stay tuned.we never quit https://www.youtube.com/@TheDogDoctorOfficial NEW 🙏 Thank you for your patience and continued support.
FOR DISCOUNT CODES AND MORE JUST FOLLOW THE LINK https://website.beacons.ai/dogdoctorofficial
📲 Don’t forget to Subscribe and follow me on Instagram and YouTube @DogDoctorOfficial for exclusive content, real-time updates, and behind-the-scenes magic. We’ve got so much more coming, including transplanting and all the amazing techniques that go along with it. You won’t want to miss it.
GrowDiaries Journal: https://growdiaries.com/grower/dogdoctorofficial
Instagram: https://www.instagram.com/dogdoctorofficial/
YouTube: https://www.youtube.com/@dogdoctorofficial Deleted by Youtube - https://www.youtube.com/@TheDogDoctorOfficial NEW
Vimeo : https://vimeo.com/dogdoctorofficial Under construction stay tuned ⸻
Explore the Gear that Powers My Grow
If you’re curious about the tech I’m using, check out these links:
🔆 Lighting & Environmental Control
• Future of Grow — Advanced LED lighting technology
https://www.futureofgrow.com/
DISCOUNT CODE: DOG20
• Lumiflora — Under-canopy LED lighting
https://lumiflorade.com/
• TrollMaster — Environmental controllers and automation gear (past collaboration)
⸻
Genetics
• Zamnesia Seeds — Genetics used in this project
https://www.zamnesia.com/
⸻
🌱 Soil, Substrates, Boosters & Root Support
• Plagron — Substrates, bio mixes, and supportive products
https://plagron.com/en/
⸻
🎒 Storage, Curing & Preservation
• Grove Bags — Curing and storage solutions
https://grovebags.com/
⸻
📸 Photography Equipment & Tools
(Not sponsors, but part of my creative toolkit)
• Sony A6700
• Sony full-frame macro lens + few more
• Stacking photography workflow - learning
• iPhone (for behind-the-scenes shots)
We’ve got much more coming as we move through the grow cycles. Trust me, you won’t want to miss the next steps, let’s push the boundaries of indoor horticulture together!
As always, this is shared for educational purposes, aiming to spread understanding and appreciation for this plant. Let’s celebrate it responsibly and continue to learn and grow together.
With true love comes happiness. Always believe in yourself, and always do things expecting nothing and with an open heart. Be a giver, and the universe will give back in ways you could never imagine.
💚 Growers love to all 💚
📸 P.S. – The Eye Behind the Lens
All photos in this diary (for now — except for the ones showing the camera, which I took with an iPhone) are taken with a Sony A6700 paired with a Sony full-frame macro lens and a few more.
Photography is part of the story — it’s how we share the fine textures, the glow, and the quiet details that words can’t always capture.
I’ve also started experimenting with photo stacking — a technique where multiple images, each taken at a slightly different focus point, are layered together to create one perfectly sharp image from front to back.
It’s not digital enhancement or AI; it’s pure photography — a way to reveal the plant’s beauty in microscopic depth, from trichome to petal.
You’ll even see a few shots of "ghost me" capturing the shots — camera, lens, setup — because every grow deserves not just to be cultivated, but documented like art.
FOR DISCOUNT CODES AND MORE JUST FOLLOW THE LINK https://website.beacons.ai/dogdoctorofficial
NEW DISCORD - Official Server Invite Link : https://discord.gg/ksjAkA5T74

Likes
9
Share


@Mr_nugs_lover_David
Follow
Beautiful looking pheno of ak420 by seedstockers guys this one just line the pheno #1 is showing beautiful purple colors on the leafs, strong smell, not as strong as amnesia and haze but very sweet and flowery aromas, let's see how this wonderful lady performs! 💎👨🌾😋💚❤️💛


Likes
9
Share


@Johnblaze420
Follow
last week but to be fair looks like it might benefit from another week mmmh!! we will see peace peeps and happy smoking 💪👍💯

Likes
9
Share


@TheGreenGroomer
Follow
Guys, I did it! I managed to get to the end of my grow with no problems and a whopping dry weight of 189 grams (6.6 oz). I am over the moon with the outcome, especially considering this was my first time. The buds have been curing for 12 days now, breaking down extra chlorophyll for a smoother smoke.
The aromas are subtle when putting your nose in the jars—nothing crazy—but when you break into a bud, it smells absolutely amazing. It has an aroma almost like Stardog, with a diesel, piney, and gassy scent.
As for the taste, the buds are just as impressive! They taste exactly how they smell: diesel, piney, and gassy, much like a Stardog. The effect is incredible; it numbed my whole body and put me in a couch lock state. This strain is probably not the best for daytime smoking due to its potent, body-numbing effect.
I can't wait to continue this journey with my next grow!
Likes
27
Share


@w33dhawk
Follow
Spülung 🍍🍍🍍🍍🍍🍾🍾🍾🍾
Bilder sprechen mehr als 1000 Worte 63 Tage sind rum und die Ladys haben sich wirklich easy entwickelt der Geruch ist mittlerweile so extrem das meine filter Anlage nicht mehr nach kommt die halbe Wohnung duftet nach cremigem Ananas caramel bonbong mit einem extrem funky Gras Geruch der so stechend Intensiv ist das meine Frau durchs Haus rennt und sagt es stinkt 😂😂😂😂😂 alles richtig gemacht meine Nase ist Mega zu Frieden, und meine frau stirbt halb 😂😂😂😂👌👍. Eine Woche lass ich sie jetzt noch laufen dann sind die Damen 70 Tage in der blüte und bekommen danach ca. 36 Stunden Dunkelheit vor dem chop! Euch allen schon jetzt ein fettes danke fürs fleißige liken und kommentieren bis nächste Woche ihr growmies......

Likes
11
Share


@nossogrow
Follow
as you guys can see our Mary is growing beautiful and it's already smelling really good
we had a emergency but it was looking good despite not having been watered all weekend
so we had a lot defoliation, we took of lots of leafs and more LST

Likes
6
Share


@XanHalen
Follow
Officially week 7
Dec 31:
Came back a week later to very heavy pots, needed 36 hour drying period, not happy, smaller plant has tips of leaves curling down, some like taco, dryed out the pots and went back to normal conservative feeding, need to fine tune the auto irrigation setup before I use it again for sure. All in all, nothing crazy happened. Really cool to see a plant be small, but way bigger after a week of vacation. First grow seems to be going pretty good!
PS: I think my hygrometer is broken, saying 85-100% RA even when I significantly improve airflow and it doesn't seem anywhere near that. Gonna do the salt paste test on the hygrometer
.
Jan 1:
I recalibrated my hygrometer and it’s working great, weird leaf curling of smaller plant still happening but seems to be improving, big plant is frosty and fat for week 7, seems to be at same stage in development as smaller plant but the pheno is beautiful.

Likes
5
Share


@PhatRobs
Follow
She looks good. 2 gallon pot is 100% rooted completely out! No real smell just smells green!

Likes
31
Share


@MadeInGermany
Follow
Hey everyone 🤗.
This week they both continued to develop very well.
Flowering day 35
Today the tent was cleaned, the humidifier refilled and the plants sprayed with Canna Cure :-).
Flowering day 36
The plant was watered today with 1.2 L 🙂.
They were also checked for their health and pests 👍.
Everything looks great 🙏🏻.
Flowering day 37
Again the tent was cleaned and fresh osmosis water was filled into canisters.
Flowering day 38
Today 1.5 l per pot was poured so that some drainage comes out again.
therefor two days are not poured 😋.
Flowering day 39
The tent was cleaned, the humidifier was filled, the plant was checked for vitality and the entire electronics were checked for functionality.
Flowering day 40
Today she was sprayed again with Canna Cure and checked.
Flowering day 41
We got to the last day of this week and 1.2 L were poured again and the tent was cleaned 👍.
I hope you have a lot of fun with the new update, and let it grow 🍀🙏🏻
You can buy this Strain at
https://www.barneysfarm.com/blue-cheese-34
You can buy the fertilizer at
https://www.greenbuzzliquids.com/
Type:
Blue Cheese
☝️🏼
Genetics:
Blueberry
X
Original Cheese
👍
Vega lamp:
2 x Todogrow Led
Quantum Board 100 W
💡
Bloom Lamp :
2 x Todogrow Led
Cxb 3590 COB 3500 K 205W
💡💡☝️🏼
Soil :
Canna Coco Professional +
☝️🏼
Fertilizer:
Green Buzz Liquids :
Organic Grow Liquid
Organic Bloom Liquid
Organic more PK
More Roots
Fast Buds
Humic Acid Plus
Growzyme Big Fruits
Clean Fruits
Cal / Mag
Organic Ph - Pulver
☝️🏼🌱
Water:
Osmosis water mixed with normal water (24 hours stale that the chlorine evaporates) to 0.2 - 0.4 EC. Add Cal / Mag 2 ml per l water every 2 waterings . Ph with Organic Ph - Pulver to 5.8 .


Likes
26
Share


@Rock_n_Roll_Randy
Follow
DID SOME MORE MAJOR DEFOLIATION ON ALL THE PHOTOPERIODS AGAIN, THE 2ND WEEK IVE DONE IT, SO THE LIGHT CAN PENETRATE THE BOTTOM BRANCHES . NOT MANY LEAVES LEFT AGAIN LOL. CHECK EM OUT NEXT WEEK TO SEE THEM HOPEFULLY EXPLODE
FINALLY STARTING THE PHOTOPERIODS AND I HOPE MY TIMING IS GOOD FOR CHOPPING THE AUTOFLOWERS..........SEEDS PUT INTO THE SOIL ON JUNE 22ND.
RUNNING OUT OF ROOM IN THE 8X8 TENT SO I PUT ALL THE PHOTOPERIODS IN THE 5X5 WITH A TSW2000. SOME FAN LEAVES ARE BIGGER THAN MY HAND NOW.
SORRY TO EVERYONE WHO TRIES TALKING TO ME....I STILL CANT TALK TO ANYONE BECAUSE I TRIED CHANGING MY EMAIL ON HERE AND IT MESSED EVERYTHING UP. I CANT LIKE ANYTHING OR COMMENT ON ANYTHING. THE WORST IS I CANT JOIN CONTESTS
STRIVE NUTRIENTS IS THE BEST IVE EVER USED. A MUST TRY AND I BUY IT MYSELF. GOT A SAMPLE LAST YEAR AND ITS SO GOOD I BOUGHT MORE. ITS A 2 PART POWDER NUTRIENT THAT DISSOLVES IN MINUTES AND YOU MIX THE SAME STRENGTH OF THE 2 PART NUTRIENTS FROM WEEK 2 UNTIL THEY ARE FINISHED (BESIDES THE FLUSH), NO MORE BULLSHIT OF SWITCHING TO BLOOM FERTILIZER. THATS MY FAVORITE THING BESIDES THE RESULTS.
CHECK EM OUT AND BELIEVE EVERYTHING YOU READ BECAUSE ITS NO BULLSHIT, AWESOME FRIENDLY AND HONEST PEOPLE
Likes
29
Share


@eldruida_lamota
Follow
Otra vez vuelvo actualizar estas green poison de sweetseeds , tercera semana de crecimiento, ahí van , con buen porte , lástima cayó una en combate pero quedan 3 ejemplares, veremos que tal crecen bajo un ts3000 de Mars Hydro.
.
Se han trasplantado a final de semana a su depósito real 11L.
.
La humedad anda entre 60/70% la temperatura está entre 23/26 grados y como siempre el ph , ya que es de lo más importante,está en 5,8/6,0.
.
AgroBeta:
0,8 ml x L Growth black line , vía radicular.
0,2 ml x L Tucán , vía radicular.
0,15 ml x L Flash Root , vía radicular.
0,05 ml x L Gold Joker, vía radicular.
.
Hasta aquí la tercera semana se estás green poison, espero que os guste , buenos humos familia 💨💨💨.

Likes
18
Share


@Hashy
Follow
Week 7
Light cycle=12/12
Light Power=196w
Extractor controller settings
High temp= 25c
Low temp= c
Temp step=0c
High Rh= 56%
Low Rh= %
Rh step=0%
Speed max=10
Speed min=2
Fri 2/2/24
#3 (Day 43)(Day 5 flower)
📋 raised camera, nearly touching the roof.
Sat 3/2/24
#3 (Day 44)(Day 6 flower)
📋 Defoliate a lot of lower leaves.
Sun 4/2/24
💧💧💧💧💧💧💧💧💧💧💧💧💧💧💧💧
Method= automatic
Feed=bloom nutes.
Neutralise=0.1ml/L
Silicon=1.0ml/L
Calmag=1.0ml/L
Terra Bloom=4.0ml/L
Sumo Boost=1.0ml/L
Roots=0.2ml/L
Easy Ph down=0.115ml/L
Ec=1.9 PH=6.1/6.5
Time start=12.00pm
Finish time=13.45pm
(11×5 minute runs with 5 minute gaps)
Total flow rate=190ml/min
Flow rate per plant=47ml/min.
Total volume made=13L
Total volume left=2.5L
Total volume used=10.5L
Volume per plant=2.62L (Est)
Runoff.
Total runoff=1.75L
Ec=2.4PH=5.9/6.2
💧💧💧💧💧💧💧💧💧💧💧💧💧💧💧💧
#3 (Day 45)(Day 7 flower)
📋
Mon 5/2/24
#3 (Day 46)(Day 8 flower)
📋 H=49cm D=50cm DLI=33.0
Raised the pot a little.
H=49cm D=43cm DLI=35.5
Tue 6/2/24
#3 (Day 47)(Day 9 flower)
📋 Looks like the weather is turning cold again over the next few days.
Wed 7/2/24
💧💧💧💧💧💧💧💧💧💧💧💧💧💧💧💧
Method= automatic
Feed=water
Neutralise=0.1ml/L
Roots=0.2ml/L
Easy Ph down=0.ml/L
Ec=0.2 PH=6.6/6.5
Time start=12.00pm
Finish time=13.45pm
(11×5 minute runs with 5 minute gaps)
Total flow rate=190ml/min
Flow rate per plant=47ml/min.
Total volume made=13L
Total volume left=2.5L
Total volume used=10.5L
Volume per plant=2.6L (Est)
Runoff.
Total runoff=1.5L
Ec=1.74 PH=6.6/
💧💧💧💧💧💧💧💧💧💧💧💧💧💧💧💧
#3 (Day 48)(Day 10 flower)
📋 H=53cm D=39cm DLI=42.0
Thur 8/2/24
#3 (Day 49)(Day 11 flower)
📋 H=55cm D=37cm DLI=45.0
Raised light 5cm.
Lowered power from 200w to 180w
H=55cm D=42cm DLI=37.0
This one is progressing OK. A little bit smaller then the others in the tent by about 20cm. She has lost the battle for space and is the runt of the grow at this moment in time.
Back soon.
Take it easy.


Likes
11
Share


@growerflowerweed
Follow
bueno hemos iniciado el dia de hoy con un transplante final de cada de estas niñas las he transplantado a un sustrato propio hecho por mi con los suficientes minerales y propiedades para qeu este cultivo sea una locura , solamente estoy con pulverixador
Processing
Likes
4
Share


Likes
6
Share

@GreenEldritchGardens
Follow
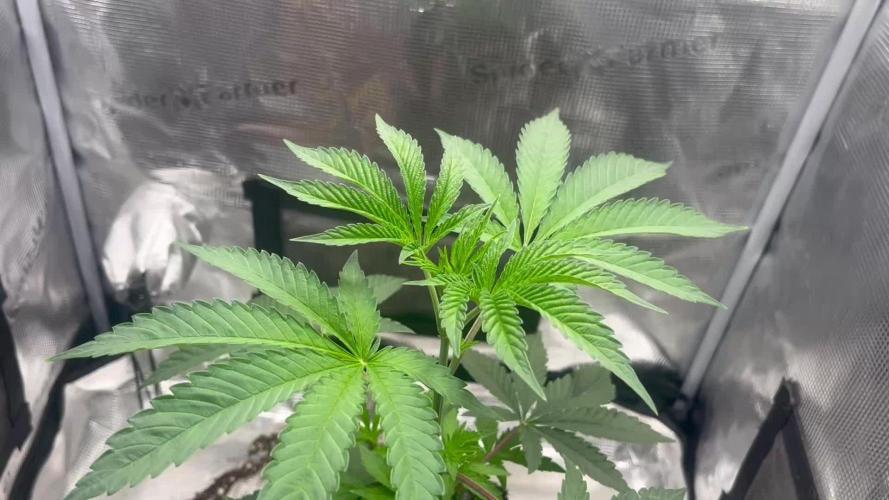
The Curse pushed hard to the sky, probably because of less light. Its roots probably are nice and expanding as with the help from the top dressing.
Also lowered the light to 16/8 since the plants iteself were asking. I’ll now wait 2 weeks or so before the last transplant!

Likes
9
Share


@pzwags420
Follow
At the end of week 6 the buds are bulking up and the trichomes are going milky with red hairs pulling in will wait for more amber trichs before harvest which I anticipate around week 8-10.

Likes
3
Share


@Unculti_responsable
Follow
Unos días antes de mandar a flora hiciamos las últimas podas de bajos y apicales la dejamos recuperarse unos días y hicimos el último trasplante a 10 litros , con eso ya listo empezamos con los nutrientes de preflora , hicimos unos riegos foliares 15 días antes de mandar a flora , el mismo día q mandamos a flora y lo tenemos que hacer 15 días después de mandar a flora , con esto ya estamos más que bien para las primeras semanas de floración después de la segunda semana vamos a empezar a fertilizar con guano de murciélago y unas cucharaditas de melaza , después ya con el engorde , pero para eso faltan unas semanas , ahora vamos a ir viendo como le va en sus primeras semanas de floración
