


Likes
Comments
Share


@Chunkmasta1
Follow
Unfortunately my new landlord does not allow growing and I was given the option to move or cut the plant down Moving is not an option unless I break my lease and that will run a few thousand to do I was two weeks into flower it is upsetting but I was able to grab some clones and passed them off to a buddy until I move I’ll be back sorry guys I added a video of the plant a day before it was cut down

Likes
7
Share


@DisTentAint4Campin
Follow
She is super triched out smells sweet and cakey she is gna be a bitch to trim she has super sticky spikey leaves she grew like a mutant 3 leaves and shit I loved her structure in veg but flower it took me awhile to like it but she swol up on me each branch is a nice cola

Likes
25
Share


@The_Lonely_Farmer
Follow
So these girls are now under their fc3000 and plodding along without issues allthough I have done absolutely no training at all with these girls they are doing just fine. Now entering week 8
I'll be putting them into a more spacious space over this coming week and take a good look at these girls see if anything needs a tidy up and post some better lower images 💚
Likes
Comments
Share


@Lynx_361
Follow
07.07.2025
Flowering day 9 and rooting day 9. Both, flowers and roots show up now.
08.07.2025, 09.07.2025 | Flowering day 10 and 11
Did some lollypoping

Likes
58
Share


@MadeInGermany
Follow
Hey guys :-)
A lot has happened this week :-).
She has developed very well.
Today it was topped on the main shoot for the first time.
How often I will use topping on her, I make it dependent on how everyone else develops.
I want to bloom soon so it won't happen very often :-).
It was poured twice this week with 1 l each time (for nutrients, see table above).
Fast plant spray from GBL was applied 2 times this week.
New was added this week Fast Bud from GBL is preparing her for the coming flowering.
Bio Grow Stay away for a while because the substrate is 30-50 % consists of fresh earth and the ladies are nice and dark green :-).
Today there was another spray with neem oil against the remaining tripse which I will repeat one last time next week.
As always, everything was cleaned and checked.
Have fun with the update and stay healthy 🙏🏻
👇🏼👇🏼👇🏼👇🏼👇🏼👇🏼👇🏼👇🏼👇🏼👇🏼👇🏼👇🏼
You can buy this Nutrients at :
https://greenbuzzliquids.com/en/shop/
With the discount code: Made_in_Germany you get a discount of 15% on all products from an order value of 100 euros.
👇🏼👇🏼👇🏼👇🏼👇🏼👇🏼👇🏼👇🏼👇🏼👇🏼👇🏼👇🏼
You can buy this strain at :
https://www.thegratefulseeds.com/shop/feminized-seeds/limited-edition/blue-javaz/
Water 💧 💧💧
Osmosis water mixed with normal water (24 hours stale that the chlorine evaporates) to 0.2 EC. Add Cal / Mag to 0.4 Ec Ph with Organic Ph - to 5.8 - 6.4
MadeInGermany

Likes
12
Share

@MadeInGermany
Follow
Flowering day 64
Hey guys 😀
Today is the last day came 😍
The lady will be harvested tomorrow and hung upside down.
In the last week, the fertilizer was significantly reduced to 350 ppm and less.
Today it is no longer watered over the day until the harvest tomorrow morning.
She looks so beautiful has a very strong smell and has grown perfectly from start to finish 💚
Have fun with the last growth update. See you at the harvest update 😀
👇🏼👇🏼👇🏼👇🏼👇🏼👇🏼👇🏼👇🏼👇🏼👇🏼👇🏼👇🏼
‘Powered by GreenHouse Feeding’
Copy the link for 10% off all Nutrients 👇🏼
http://shop.greenhousefeeding.com/
affiliate/madelngermany_passiongrower/
👇🏼👇🏼👇🏼👇🏼👇🏼👇🏼👇🏼👇🏼👇🏼👇🏼👇🏼👇🏼
Water 💧 💧💧
Osmosis water mixed with Cal/Mag (24 hours stale that the chlorine evaporates) to 220ppm and Ph with Ph- to 5.8 - 6.4
MadeInGermany

Likes
6
Share


Likes
12
Share


@Jays_Not_Here_Man
Follow
The girls have gone through a lot this week 😬After a couple of days of LST, I let them recover for a few days. Once they were looking perky again, I decided to top all three.
Day 31 - topped the girls after some deliberation. I had been undecided, ultimately figured that it was best for my situation, whether or not I decide to use my DIY scrog screen.
For those unsure of when to top, 5 nodes or true leaf sets seems to work for me. Find the shoot at the very top, make sure it’s got some small shoots on either side started, and snip! It’s that easy. Topping will disrupt the hormones being distributed through the plant instead of the top, and force your plants energy and growth to the lower branches. Not to mention you will now have two main tops growing instead of one 😎 Give the plants some time to recover before doing anything major again, and you should he able to see your plants get bushier instead of taller.
Once they were topped I bent and worked all the stems and branches between my fingers making sure to get all of them. As you can tell from the main stalk, the twisting and bending works, she thicc already!
I also put their wire ties back on and bent all three over as far as I could get them to go comfortably before feeling like they would snap. This was a lot of stress for these girls, but they have shown they have a great stress response, and recover quickly.
Can’t wait till the weekend, my big tent will be cleaned and ready to go from my last harvest, they are growing so fast! Happy Gardening 🇨🇦❤️🌱😎💨

Likes
41
Share


@Skinnytalls420
Follow
Well I have to say even though I had a few temperature issues in the night that I think may have stressed them. They took a lot longer than expected but after drying I don’t know how but I ended up with some fantastic tasty buds a few of the plants even came out purple!! I have to say the purple buds are my favourite 🤩 fastbuds never disappoints!!!!!
Likes
2
Share


@NoProbation4Weed
Follow
Prepared the soil 12 days ago and prepared the pots at the day i put the seeds into glass of water.
I used 50% Dope Light and 50% Coco as light mix for the top layer
I used 50% Dope Soil and 50% Reused Soild + Additives to reactivate my old soil.

Likes
8
Share


@Max1973
Follow
Day 35 - few pics and vids..... everything going along nicely 👍
This is a pretty big update, so i'll add to it over the next few days, as i
finish building it all....
i'm building these 2 x SS haze, the full tent, just finishing up the setup.....
trimming them, changing solutions to 12/12 and flower.....
changed the exhaust fan and filter setup to the better outside the tent method....
and installed 12v CPU computer fan, lol ("alta9" fits in 4in ducting perfectly), drops wattage on extractor fan.... 10w tops...
got a few kg of active carbon and making/replacing the carbon filter ....
i'll add afew vids of the new setup in afew days...
Day 36 - few pics/vid of new tent setup...... "alta 9" fan :)
post tomorrow after i finish trimmin and settin up night mode etc......
and into tomorrow we go, lol ... Day 37....
slowly getting there..... little bit more to go...
this should make things abit more interesting..... right tank (short babie) has : 19 lts of tap water @18oC + 150 ml -dutch master one gold FLOWER.... 6.4 PH - 1400 PPM
left tank has : 19 lts of tap water @18oC + 50 ml of elements a and 50ml of b and 10 ml of nitro and 20ml of Crystalic (molasses/pot) .... 6.5 PH - 1200 PPM
more pics / vids of the finished tent setup.... roots, transfer, etc... Day 37 is alot of vids of the clean and change to flower.....
edit - day after build noticed left tank (nutrifield) not enough bubbles..... pulled out the 4 air pump and swapped to the 2 x original oxipumps...
much better, also to fix the problem with ph goin high, and bubbles not stirin the mix, was to add another 10ml of crystallic and another 5ml of nitro...
then pumped both tanks with ph down and set em to 5.8-6.2 - both plants have fully recovered from the big trim, and bounced back within 12-24hrs,
post pics/vid in abit.....
Day 39 - made a freaky video... was curious about what the plants would see looking up at the lights...
the lights and buzzing of air compressors and bubbling tank water, and dazzling lights turned out pretty cool in vid editor,
was in selfie mode....
and final vid of the bounceback from trim :)
👍😎

Likes
39
Share


@Mastr
Follow
Hi this week I feed her with
.5 silica
2ml root juice
.5 ml bio grow
150ml each Plant and feed them every 3 days 1 plant I just seen bit yelloing in leaves very tiny so I think maybe light stress 80cm far from 300w led light. So I decide to put he but more far from light for couple days or it can be overwatering coz day 5 i feed them with 150ml water and its alot for tiny pot and tidays day 8 and its 3 days gone soil still wet and i still dindt water them after 3 days maybe feed them tomorrow will update what happen
Update day 9 only 1 day after she looks very healthy and happy just little bit smaller than other
Day 12 and they ready for repot but I can't due lack off space I need to wait coz other tent use for drying atm but will finish in 3 days so I will repot them day 13 or 15
Update day 13 in evening I repot all 3 orange sherbat I repot them 2 in 10L plastic pot and 1 in 6L pot so this week I'll give them tons off stress after 2 days they recover from transplant I'll top them from 6th node and then keep doing Lst every other day till day 35 i usually do that to have bit longer veg phase and bigger yield off course the way I growing definitely turn to monster even in small pot but bit take more time than what seed bank said
Also I buy new grow tent with 1200w hps light and 4inglch rhino fan and filtre my current tent is 1m and only good for 3 medium plant and some my plant get l too big that's why I decided to buy another tent to separate big girl and medium sized girl this run 1 have 7 autoflower with 2 tent
3×3×7
4×4×7 hope no lack off space foe this grow 🙏


Likes
2
Share


@brown_tattooz
Follow
Week 2 transplanted from solo cups to 5 gal pots an 1 into 7 gal grow bag. Plants had good healthy roots in solo cups..plants keep growing vigorously from the start!!!
Likes
40
Share


@TheCannaBrit
Follow
Getting rather toasty in my sealed unairconditioned garage/car port grow 90f+. Having to adapt to extreme conditions is always challenging but I find silica works very well to help the old girls deal. Let it be said I much prefer the winter here in southern california for growing my buds!!! Anyone got any tips for growing in this kinda heat?

Likes
24
Share


@Basementganja
Follow
Harvested the Clones!
I'm stoked how #4 grew out, I think she's the winner!
With limited space in my grow, I'm only going to be able to bloom out the rest of the phenos clones to week 3-4.. The show must go on..
It's the price I must pay for using non-ideal cloning methods... Next round of phenohunting will have 100% cloning success, using my new aeroponics cloning machine.

Likes
7
Share


@Chronnoisseur
Follow
Well she seemed to slow down and now her roommates have over taken her. But fingers crossed she still put out some nice buds
The cheese candy is starting to become more smelly this week stay tuned....
Likes
5
Share


@Kinghaze
Follow
- End of week 5
I topped them and they seem to react very well to it.
Looking nice healthy and green , exept for the blue zushi on the right.
It's growing really weird, but it seems to keep up with the other plants.
I don't know if i will put it into flower.
The 2 blueberry cupcake ( back row) on the right, are bigger then the rest.
I bend one of them so it will be more even .
Most of the plants have a different structure.
They are f1 seeds , So there's a good chance you'll have different phenotypes
Now i will train them a litte untill they are big enough, and then place a trellis net.

Likes
10
Share
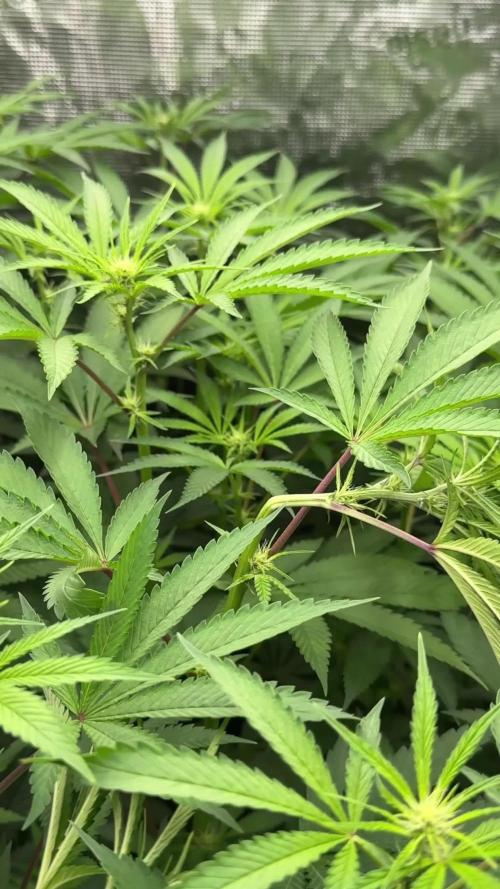

@DogDoctorOfficial
Follow
💙 Project Blue Tent – Week 9
Blue Waffle F1 – Pheno A
🌿 Too Much Stretch, Then a Big Reset
Hello everyone, and welcome back to another chapter inside Project Blue Tent! 💙🌱
If you're new here, Project Blue Tent is our little experiment with four individual Blue Waffle F1 plants from Zamnesia, each documented separately from seed to harvest.
All four girls share the same environment, lighting, irrigation, nutrition and general cultivation philosophy.
And yet, as always...
they each have their own personality.
Last week I was wondering just how much these girls were going to stretch after seven weeks of vegetation.
Well...
I got my answer. 😂
They stretched.
A lot.
And this week became one of those weeks where the grower has to stop watching and start acting.
The plants were getting simply too tall.
With the height of the pots and substrate, the drainage system underneath them, and the distance between the canopy and the LED fixtures becoming increasingly limited, some of the tops were getting dangerously close to the lights.
So we made some changes.
A fairly big reset, actually.
And looking at the room now?
I'm very happy with where we landed.
🌿 Pheno A – She Took the Invitation to Stretch Seriously
Plant A is now approximately 145 cm tall.
😂
Yes.
One hundred and forty-five centimetres.
And when you add the height coming from the pots, substrate and drainage arrangement underneath the plants, that number becomes even more relevant when you're working inside a relatively limited vertical space.
Last week she was already moving quickly.
This week she basically said:
"Hold my nutrient solution."
😂💙
The structure she built during those seven weeks of vegetation gave her an enormous amount of material to work with.
The SCROG distributed that growth beautifully.
But once flowering stretch really kicked in, all of that established structure began pushing upward.
And eventually...
we simply ran out of comfortable vertical room.
So rather than fighting the plants continuously, we changed the room around them.
🕸️ The Second SCROG – Because These Girls Are Getting Big
One of the biggest changes this week was the installation of a second SCROG net.
This wasn't done because the first net failed.
Quite the opposite.
The first net did exactly what we wanted during vegetation:
It helped distribute the plants horizontally and build an even canopy.
But now these girls have become much taller.
And as flowering progresses, those branches are going to become heavier.
So the second net is there for something different:
support.
We're essentially creating another layer of structure through the upper portion of the plants.
This gives the flowering branches something to lean against as the flowers develop and gain weight.
And with plants this tall, I would much rather organize that structure now than discover later that a heavy flowering branch has decided to take a dramatic trip toward the floor.
😂
The second net also helps keep the canopy organized after the major defoliation.
And looking at the room now...
I think it was absolutely the right decision.
✂️ The Big Defoliation
And then came the other major event of the week.
Defoliation.
Not a little cleanup.
Not removing three leaves and calling it a day.
We went deep.
The room had become extremely dense, and with the plants stretching this aggressively, we needed to open everything up.
We removed leaves where they were creating unnecessary congestion and took out foliage from stems where appropriate, leaving the productive growth and flowering structure we wanted to carry forward.
This wasn't about making the plants look naked.
It was about making the structure functional again.
And there's an important distinction here.
We're not defoliating because removing leaves magically creates more flowers.
That's not the objective.
Leaves are valuable.
They're part of the plant's photosynthetic machinery.
The objective here was to manage excessive congestion, improve visibility through the canopy, increase air movement through the plant and reduce the amount of unnecessary foliage competing for space around the developing flowers.
We're trying to create a better working environment for the plant.
Not punish the plant.
Not stress it for the sake of stress.
And certainly not remove every leaf we can find.
🌿 What We Expect From This Defoliation
Now comes the interesting part.
After a significant cleanup like this, I don't expect the plants to immediately look like they're growing faster.
Quite the opposite.
There can be a period where they need to settle.
They've lost a considerable amount of leaf area.
We've physically changed their architecture.
So I expect the plants to spend some time adjusting and continuing their transition into flowering.
What I'm hoping to gain is something different:
better structure.
Better airflow.
Better light penetration.
Better access to the flowering sites.
Less congestion.
And a much easier canopy to manage as the flowers continue developing.
Will it completely stop the stretch?
No.
I wouldn't expect that.
The plants are already well into their flowering transition, and genetics, plant maturity and environmental conditions still have a huge influence on how much they stretch.
But by removing excess congestion and adding the second SCROG, we've made the remaining structure considerably easier to manage.
Now we watch.
🔥 A Few LED Burned Tops – And We Caught It
There was another little lesson hidden inside all that stretching.
Some tops had gotten too close to the LEDs.
And we saw a few leaves and flowering tips showing signs of LED stress/burning.
Nothing catastrophic.
Nothing that concerns me at this point.
But definitely something we needed to address.
And honestly?
I'm glad we caught it now.
Because once the plants were getting that close to the lights, we were already running out of room to work with.
So we attacked the problem from several directions.
We moved the ventilation equipment outside the tent.
We raised the LEDs.
We opened the canopy.
We installed another SCROG.
And suddenly...
we gained some valuable vertical breathing room.
That little bit of extra space can make a huge difference inside a tent.
🌬️ Moving the Carbon Filter & Extractor Outside
Another major change was moving the carbon filter and extractor outside the tent.
Previously, having that equipment inside the tent was consuming precious vertical space.
And with these girls reaching toward the lights, every centimetre suddenly became valuable.
So we moved the filter and extractor to the top of the tent.
The system now pulls air from the tent through the carbon filter and extractor and then exhausts it outside.
This gave us the space we desperately needed.
And that allowed us to raise the LED fixtures closer to the top of the tent rather than having the ventilation equipment occupying that valuable ceiling space.
It sounds like a relatively small modification.
But in a tent with plants this tall?
Huge difference.
Sometimes the solution isn't changing the plant.
Sometimes it's changing the room around the plant.
😂💙
💡 More Room for the Lights
And this is one of the most satisfying results of the whole operation.
Once the ventilation equipment was moved outside, we could bring the LEDs higher.
That immediately created more separation between the flowering tops and the fixtures.
The few areas that had experienced LED stress were addressed before things could become serious.
And now we have much more room to work with.
That's exactly what I wanted.
Because I don't want to spend the remainder of flowering constantly fighting the ceiling.
I want these girls to have somewhere to finish.
They already have plenty of height.
Now we need them to put their energy into the flowers.
🌬️ Two Fans – Creating a Vortex
We also added a second Zamnesia clip fan, positioned underneath the canopy.
So now we have:
One fan above.
One fan below.
And the goal isn't simply to make the leaves move.
We're trying to create a more complete circulation pattern through the tent.
With one fan moving air across the upper canopy and another helping move air underneath, the airflow can circulate through different levels of the room rather than leaving the lower portion relatively stagnant.
The idea is to encourage a kind of vortex-style circulation through the canopy.
Air moves.
Circulates.
Changes direction.
And continues moving through the plant structure.
This is particularly important now because we've spent the week opening the canopy and creating space.
There's no point creating all that space if the air simply sits there.
So now we've got airflow working from above and below.
And looking at the room?
It feels considerably more alive.
🌿 The Room After Defoliation
I have to say...
I love the way the room looks now.
Before the defoliation, it was an absolute jungle.
Beautiful.
Healthy.
But incredibly dense.
Now?
You can see the architecture.
You can see the branches.
You can see the flowering sites.
You can see the second SCROG.
You can see the airflow equipment.
And most importantly...
you can see the plants.
😂💙
The room feels organized again.
And that's exactly what we needed.
These girls have been growing extremely aggressively.
Now we're giving them a structure in which that growth can actually be managed.
✂️ A Word About Scissors
I also want to mention something that might seem insignificant but is actually very important to me.
The Zamnesia curved scissors.
I really like these.
For much of my defoliation, I actually use my fingers.
If a leaf can be gently removed without cutting anything else, that's often my preference.
But that's not always possible.
Some leaves are tucked into awkward places.
Some are smaller.
Some are delicate.
Some require a precise cut.
And that's where the scissors come in.
But there is one rule I don't compromise on:
Clean scissors.
Always.
Even when they're brand new, I still like to make sure the scissors are clean before using them.
When you're moving from plant to plant and making multiple cuts, cleanliness matters.
We're working with living tissue.
So there's no reason to introduce unnecessary contamination into the process.
Clean tools.
Gentle hands.
Deliberate cuts.
And don't cut something just because you happen to have scissors in your hand.
😂
💙 Pheno A After the Reset
And now...
let's come back to our girl.
Because despite all the work this week, Pheno A looks fantastic.
She's still one of the larger structures in this tent.
She's tall.
She's vigorous.
She's got plenty of flowering sites.
And after the cleanup, her architecture is much easier to appreciate.
The plant has gone from:
"How the hell are we going to fit all of this in here?"
to:
"Okay. Now we have a plan."
😂💙
The flowers are there.
The structure is there.
The health is there.
And now she has additional support underneath her developing flowering branches.
This is a very good place to be heading into the next stage.
🌸 From Building Plant to Building Flowers
This is the transition I'm most interested in now.
Up until this point, so much of the conversation has been about growth.
Height.
Branches.
SCROG.
Canopy.
Stretch.
But now?
The plant has done enough building.
I want to see her start putting more of that energy into flowering.
The architecture is established.
The second net is installed.
The canopy has been opened.
The lighting has been raised.
The airflow has been improved.
The room has been reorganized.
Now we let her work.
And hopefully...
the next photographs will show us exactly what all that preparation was for.
Beautiful flowers getting bigger.
💧 Nutrition – The Girls Are Hungry
Another important development this week is nutrition.
The girls are absolutely loving the feeding.
So we've increased the Hydro A and Hydro B recipe slightly.
We're now running:
Plagron Hydro A — 2.2 ml/L
Plagron Hydro B — 2.2 ml/L
Plagron Hydro Roots — 1 ml/L
Plagron Power Buds — 1 ml/L
pH adjustment as required
That small increase has brought the EC up accordingly.
Current recorded EC is approximately 2.49 mS/cm.
And again, this wasn't some dramatic change.
It was simply a small progression because the plants are consuming aggressively and showing us that they are ready for it.
They're growing.
They're flowering.
They're drinking.
They're hungry.
So we listen.
And we adjust.
That's the whole philosophy.
Don't feed a number.
Feed the plant.
🌡️ Week 9 Environment
The current recorded conditions are:
🌸 Flowering: Week 9
📏 Height: approximately 145 cm
💡 Light schedule: 12/12
☀️ Day temperature: 27°C
🌙 Night temperature: 27°C
💧 Relative humidity: 67%
⚗️ pH: 6.01
⚡ EC: approximately 2.49 mS/cm
🌡️ Solution temperature: 25.3°C
🌱 Substrate temperature: 24°C
🌬️ CO₂: approximately 666 ppm
? Pot size: 8 L
💦 Watering: approximately 1.6 L per plant / 24h
The environment remains remarkably stable.
And that's especially valuable after a week where we've physically changed so much of the room.
The plants have enough to deal with simply adapting to their new architecture.
I don't want environmental instability adding another variable.
So now...
stability.
Consistency.
Observation.
🔬 Same Room. Same Conditions. Four Different Girls.
One thing that's fascinating about this particular project is how uniform the room remains despite the plants being so vigorous.
The four Blue Waffle F1 girls are remarkably similar.
They all went through the same long vegetative period.
They all experienced the same lighting.
They all received the same irrigation.
They all received the same nutrition.
They all experienced the same environmental conditions.
And now they're all showing that same general flowering transition.
There are individual differences, of course.
That's what we're documenting.
But overall?
They are behaving like sisters.
And that's making this experiment incredibly interesting.
🌿 What I'm Watching Now
After this week's reset, there are several things I'm going to be watching closely.
First:
How quickly does the stretch settle?
Second:
How do the plants respond to the heavy defoliation?
Third:
How does the second SCROG hold the flowering branches as they gain weight?
Fourth:
How does the new airflow pattern perform under a developing flowering canopy?
And finally...
How much of that beautiful vegetative structure is going to turn into flowers?
Those are the questions now.
We've done the work.
Now we observe the results.
🌸 The Big Lesson From This Week
If there's one thing this week reminded me of, it's that a grow isn't always about having a perfect plan.
Sometimes you make the best plan you can.
Then the plant laughs at you.
😂
We knew they might stretch.
We didn't know they'd stretch this much.
So we adapted.
We moved the ventilation equipment.
We raised the LEDs.
We cleaned the canopy.
We installed another SCROG.
We added another fan.
We adjusted the nutrition.
And now?
The room is looking better than it did before the problem appeared.
That's what I consider a successful grow.
Not avoiding every problem.
Recognizing them early and adapting intelligently.
🔭 Looking Ahead – Now We Let Them Flower
And this is where things get exciting.
The girls have been through a major reset.
The canopy is open.
The second SCROG is in place.
The LEDs are higher.
The ventilation system has been moved outside.
Airflow is now working from above and below.
The plants are receiving their updated nutrition.
And Pheno A?
She's standing there at 145 cm, looking at me like none of this was particularly dramatic.
😂💙
Now I want to see what she does with the room we've created for her.
Hopefully the aggressive vertical growth begins to calm down.
Hopefully the flowers start becoming the dominant story.
Hopefully the second SCROG gives us the support we need as those flowers gain weight.
And hopefully those few LED-stressed tops recover without further drama.
I think we caught that issue early enough.
Now we watch.
💙 Final Thoughts – The Room Is Back Under Control
What a week.
Seriously.
😂
We went from:
"They're stretching a little."
to:
"Okay, these girls are going to hit the LEDs."
And then we went to work.
The carbon filter and extractor moved outside the tent.
The LEDs went higher.
The canopy received a serious cleanup.
A second SCROG was installed.
A second Zamnesia clip fan went underneath the canopy.
Airflow now works from above and below.
The nutrition was increased slightly.
A few LED-burned leaves and tops were cleaned up.
And after all of that...
I look at the room and smile.
Because it looks beautiful.
The plants look healthy.
The structure is organized.
The flowering sites are everywhere.
And Pheno A is absolutely shining.
She's tall.
She's vigorous.
She's beautifully developed.
And now she's finally got some breathing room.
🌿💙
The defoliation wasn't about making her smaller.
It wasn't about forcing her to flower.
It wasn't about chasing some magical yield increase.
It was about taking an overly crowded flowering structure and making it more functional.
The second SCROG isn't there because we expect failure.
It's there because these girls have become substantial plants and we want to support them properly.
The second fan isn't there simply to make the leaves dance.
It's there to help create better circulation through the entire canopy.
Moving the ventilation equipment wasn't cosmetic.
It gave us precious vertical space.
And raising the LEDs gave us more room between the fixtures and the flowering tops.
Every change had a reason.
And now...
we wait.
The girls have done their part.
We've done ours.
Now let's see what Blue Waffle F1 Pheno A does with this new chapter.
Because I have a feeling the next few weeks are going to get very interesting.
💙🌸🌿
🙏 A Huge Thank You
A huge thank you once again to Zamnesia for making Project Blue Tent possible and for giving us the opportunity to explore these beautiful Blue Waffle F1 genetics phenotype by phenotype.
Thank you to Plagron for the Hydro nutrient line and everything supporting these girls through this very vigorous cycle.
A massive thank you to Zamnesia for the Phytonaut LED lighting and for the curved scissors and clip fan that have become part of the practical side of this project.
Thank you to Mars Hydro for the irrigation and drainage system that continues keeping these girls supplied while they absolutely demolish their water.
😂💙
And thank you to GrowDiaries for giving us the platform to document all of this craziness and share it with growers around the world.
Most importantly...
thank you to everyone following Project Blue Tent.
This week was definitely one of those chapters where the plants reminded us who's actually in charge.
We planned.
They stretched.
We adapted.
😂
And now the room is ready for the next phase.
Four Blue Waffle F1 girls.
One room.
One environment.
One very ambitious flowering canopy.
And a second SCROG ready to catch whatever these ladies decide to throw at us next.
Let's see how they finish.
Until next week...
More room. More airflow. More support. And hopefully a lot more flowers. 💙🌸🌿
Growers Love, happy growing, and take care everyone! 🌱💙
Likes
7
Share


@Huntress007
Follow
So shes doing well grew about an inch and a half! Moving into flowering since light change and I am very excited 😊 yum

Processing
Likes
1
Share


@magicjohnson
Follow
so week 11..
The gorillaz are carrying on beautifully, however I realised having 5 plants sharing one reservoir is now quite a bad idea.. 2/5 of them look to be well into flower, fattening up and some tri's starting to turn cloudy but look like theres still plenty of fattening up to do. The other 3 are now just beginning to fully pistil up so will still be requiring flowering nutes when I should be beginning a flush on the other 2.. any comment or advice on this would be greatly appreciated!?
The Stardawgs have basically grown into tennis balls. Such a vast majority of bud sites all the way down look so much larger than I could ever have hoped and i've had to tie some of the buds to the main colas!! I will Be starting the flush this week as most Tri's are now cloudy i'd say around 4/5 currently but more throrugh macros will be taken as the days progress. The only problem i've had is some of the sugar leaves on 2 of the plants have really taken a beating and show some strange signs. I think the LED's aren't to be under estimated and i've battled some burning and what seems to be calmag issues through the grow.