
Likes
Comments
Share


@Drawer
Follow
I still found a few places with bud rot and I keep removing every spot I see.
The plants have been doing fine beside that, they are looking and smelling great, they are super dense and I can't wait for them to be ready.
Most trichomes are still clear so I am awaiting for the first ambers to show up, aiming for around 5% amber and 95% milky.

Likes
7
Share


@wascanna
Follow
👹 Oni Seed Co.
I've been thinking of an all-Oni run for awhile now as he's been one of my favourite breeders since I started! I convinced myself I didn't deserve to run these until I felt more confident in my abilities so here we are, finally giving them an honest go!
🍭 Dub Trop BX1 // Dubble Trop x Tropicanna Cookie F1
🍓 Straw-Picanna // Strawberry Bananna x Tropicanna Cookies
🌿 Tropicanna Kush // SFV OG x Triangle Kush
🔥 Sunburn // TKT (Triangle Kush x Tangie) x Tropicanna Cookies
📦 Likely equipment/materials:
Gorilla 5x5
ChilLED Growcraft x6 / 1000w DIY
StepWell Super Soil + Amendments
Dynomyco Mycorrhiza
📅 Day 1
- Soaked for 20 hours in RO and kelp. 99% Germination
- Went into paper towel.
📅 Day 2
- 24 hours in paper towel.
📅 Day 3
- 100% germination!
- Labelled and into Rapid Rooters
📅 Day 4
- Added super special diffused light shield lol
- Started popping through!
📅 Day 5
- Success! Unfortunately, I accidentally decapitated a Dub Trop :(
📅 Day 6
- "Transplant" into first home! (Tray wouldn't fit 11, so one Tropicana Kush is hanging out in a veg tent with siblings)
- Used BioBizz Light Mix (0.4-0-0) soil.
📅 Day 7
- New home, no dome, with special guest: a small fan. 💪
- That 1 day growth though, let's gooo!

Likes
6
Share


@Smokeyrobinsonthc
Follow
At the end of week three, I transplanted and topped the plants. I also added CO₂ to maintain levels between 800-1250 ppm to support optimal growth.

Likes
10
Share


@Medgrow93
Follow
The Wonder Pie were showing signs of deficiencies so I added 2ml/L of liquid worm castings to see if it helps, also top-dressed diatomaceous earth to help get rid of the fungus gnats. Will top dress the powdered nutrients again in 1-2 weeks. Also foliar sprayed them with Sugar Candy Syrup to help with the deficiencies. I'll go with bigger plants next time because I think I won't get much from these smaller plants. Other than that, just waiting for them to do their thing and hopefully harvest in 5 weeks or so.
Likes
12
Share


@Crusty_Juggler
Follow
60x60 cm tent in a 1920's peek-in-closet
Oversized vent for silence
High power DIY LED
True SoG 12/12 from seed with 15 plants in 2L pots
Watering all plants in bottom tray with 30% of total pot size (10L)
WEEK 1
DAY 1 - Germinated in paper towel
DAY 3 - Planted into pots + Lights ON at 125w
DAY 5 - All plants have broken soil
DAY 7 - Slight stretch - Light at 185w
WEEK 2
Two of the Iced Out are lagging behind, others are on point - I'm trying to push light and nutes to the max.
Extraction fan (AC infinity Cloudline T6) on level 2.
DAY 13 - First full watering (10L) with 20 ml Canna Terra Vega
DAY 14 - Circulation fan turned on (low) during lights on
WEEK 3
Good growth, two Iced Out still lagging
DAY 18 - Light at 225w, Extraction fan on level 3 during lights on
DAY 20 - 2nd watering, 8L with 30ml Vega + Light at 250w
DAY 21 - On point, mostly :) Could've pushed nutes a bit more from the go
WEEK 4
DAY 24 - So far this week I'm just kicking back and watching them do their thing. The two lagging Iced Outs are trying to catch up.
DAY 26 - Watering 10L with 50 ml Vega (one day too late...) + light on 300w (max)
DAY 28 - 4 weeks from popping the seeds, looking good except for the two Iced Outs, one of them is trying to get with the program, the other... Well, some plants are just pricks.
WEEK 5
I think this is the week we'll see them take off :)
DAY 29 - Plants are starting to show sex, removed 2 Urkle Mints males, the other two are females, the rest are fems so we're down to 13 female plants total with only a single weakling
DAY 29 - Watering 8L with 50ml Vega (shouldn't have been later than today!)
DAY 33 - plants exploded over the last 4 days and most are stretching and starting to flower
DAY 33 - Watering 10L with 60ml Vega (feeding Vega once or twice more then we switch to Flora)
DAY 35 - Just cruisin' 😎
WEEK 6
Lots of stretch the past week, flowers are setting in, the laggy Iced Out was culled, 3 plants are a bit behind the others..
DAY 36 - Watering 10L with 50ml Vega
DAY 39 - Watering 10L with 50ml Vega
DAY 42 - Defoliation
WEEK 7
DAY 44 - Watering 10L with 50ml Vega
DAY 47 - Switching to flowering nutes - Watering 10L with 50ml Flores
WEEK 8
Had to break the stem on the stretchy Sugar Cane to keep it low enough
DAY 51 - Watering 10L with 60ml Flores
DAY 54 - Watering 10L with 60ml Flores
WEEK 9
Starting to chunk and frost up.
The 2 Urkle Mints regs are really small and slow but flowering, the slow Iced Out just started flowering and probably won't add up to much by the time the next grow needs to start.
Platinum Jelly, Frosted Apricots, and Platinum Terple are looking really good, I knew PJ would kill
DAY 57 - Watering 10L with 60ml Flores
DAY 61 - Watering 10L with 50ml Flores
DAY 61 - Defoliation
WEEK 10
DAY 65 - Watering 10L with 50ml Flores + 15ml PK 13/14
DAY 69 - Watering 10L with 50ml Flores + 15ml PK 13/14
WEEK 11
DAY 72 - Watering 10L with 50ml Flores + 20ml PK 13/14
DAY 75 - Watering 10L with 40ml Flores + 20ml PK 13/14 (Last feeding)

Likes
85
Share


@Tropicannibis_Todd
Follow
Start of day 49 ...... Nov 27 Start of week 7 ........ 23 DAYS INTO FLOWERING
Check out the full grow video on latest weekly update
Super Exceptional Growth Daily
Still adjusting LST when needed and leaf tucking.......
Water Only when needed but its drinking more every otherday and adjusting lights when needed......
Rain Water Only .......
( DAY 54 AND IT SHOWS ZERO DEFICIENCIES ) IM ALSO DOING VERY LITTLE, SLIGHT DEFOLIATION
( DAY 49 AND RESIN PRODUCTION HAS STARTED )
( DAY 54 AND ALL IS GOOD , THERE FATTING UP )
I hope you enjoy my growlog...

Likes
8
Share


@Whosaysgirlscantgrow
Follow
We’re getting closer, they’ve upped their water intake this week, so I’m thinking we’re on pretty much the last push now! Absolutely stinks of pineapples in there, with a gassy undertone. I’m excited to see how these finish up!! Hopefully not too much longer now.


Likes
5
Share


@Growjardin
Follow
She is doing her thing gave her a good defoliate again to open her up. She had 3 x half ml doses of pk on top of 3ml bloom over the coarse of the week. Pk dropped bloom kept at 3ml. Overall very impressed halfway through this week in the video and boom baby she’s getting there


Likes
13
Share


@Appoldro420
Follow
15-01-2022: These pictures are made about 2 minutes after lights went on. So still hanging a bit. They look a bit hungry I think so I added some fresh water with Ata Awa Max A/B. Why? What's wrong with Hy-Pro? Nothing, I got lazy and this was literally within reach of my hands. Will see what happens.
19-01-2022: They seem to like the higher EC. Buds are swelling pretty fast now. Since the RH is pretty low I don't expect that to be a problem. Still about 3-4 weeks left so pretty curious about the results :)

Likes
11
Share


@RhodiesGrow
Follow
Day 15: Do-Si-Dos Auto is looking strong. First big feed: 4ml FloraMicro, 6ml FloraGro, 3ml FloraBloom, 2ml CALiMAgic, 1ml RapidStart, 1ml Floralicious Plus and 2.5ml Armor Si. RO water PH 6.0
Temp: 75º RH: 63% PPFD: 450 VPD: .53 kPa
Day 16: Do-Si-Dos Auto ahead of the pack. She looks the healthiest in the tent so far. Time to LST that little girl, hopefully she will respond nicely. No water no feed. Temp: 76º RH: 61% PPFD: 475 AVG VPD: .46 kPa
Day 17: She looks real good. Taking the LST well. Keep growing. Will feed tomorrow. Temp 77º RH: 55 % PPFD: 500 AVG VPD: .6kPa
Day 18: Moved up and turned up the lights. Fed 250ml of 4ml FloraMicro, 6ml FloraGro, 3ml FloraBloom, 1ml RapidStart, 2.5ml ArmorSi, 2ml CALiMAGic and 1ml Floralicious in RO water PH 6.2 PPM: 750 Solution Temp: 69º. Tent Temp: 77º RH: 60% PPFD: 575 VPD: .44 kPa
Day 19: Looking good. Tent Temp: 77º RH: 60% PPFD: 550 VPD: .44 kPa
Day 20: Still looking good. New growth. Fed another 250ml RO water with 1ml RapidStart PH: 5.7 Tent Temp: 77º RH: 60% PPFD: 550 VPD: .44 kPa
Day 21: End of Veg Week 3! Looking strong and healthy so far. Almost feeding/watering daily at this point, will up the solution volume and see if it will last a day or two longer. Fed 350ml-400ml of 4ml FloraMicro, 6ml FloraGro, 3ml FloraBloom, 1ml RapidStart, 2.5ml ArmorSi, 2ml CALiMAGic and 1ml Floralicious in RO water PH 6.2 PPM: 750 Solution Temp: 69º. Tent Temp: 77º RH: 60% PPFD: 500-550 AVG VPD: .44 kPa

Likes
2
Share


@Saintvicious
Follow
Flower stretch and bud sites are setting. Lots of tops from the lst. Fingers crossed.
Likes
3
Share


@mquintero7
Follow
Final weeks of flowering, she didn't turn purple unfortunately. Nevertheless buds are big and smelly. Leaves are starting to turn yellow, I have been removing old leaves every day. Harvest will come soon. No fertilization this week, only water.

Likes
4
Share

@Xabii
Follow
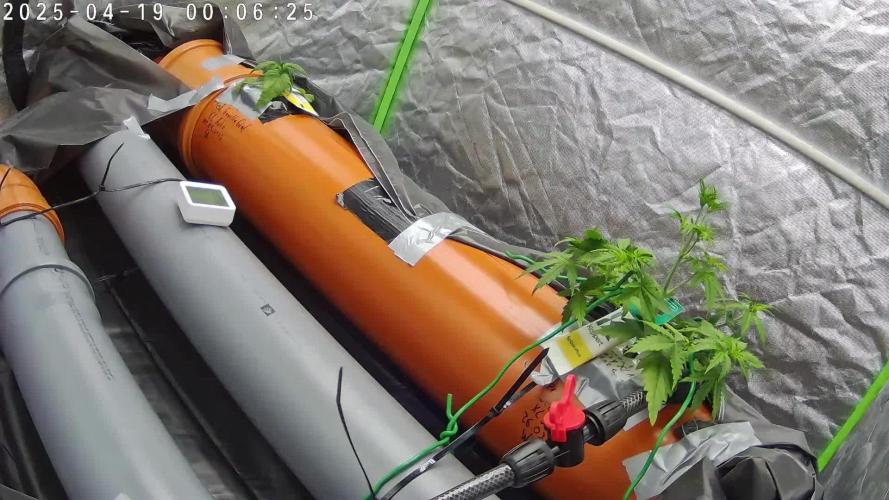
The other plant in the setup had root rot and also infected this one, did a root wash and hope for the best.
Values are average of the day.
DATE - EC(us/cm)
20250419 1638
20250420 1874
20250421 1891
20250422 1868
20250423 1845
20250424 1749
20250425 1774
DATE - PH
20250419 5.81
20250420 6.34
20250421 6.21
20250422 6.11
20250423 6.11
20250424 6.12
20250425 6.09
DATE - ORP (mV)
20250419 93
20250420 -1
20250421 64
20250422 199
20250423 156
20250424 143
20250425 250
DATE - °C - RH% (Tent Temp/RH)
20250419 23.9 48
20250420 25.1 53
20250421 24.0 53
20250422 22.9 58
20250423 22.4 57
20250424 21.6 59
20250425 22.7 55
DATE - °C (Reservoir)
20250419 19.1
20250420 20.1
20250421 20.3
20250422 20.5
20250423 20.1
20250424 19.5
20250425 19.3
DATE - CF
20250419 16.38
20250420 18.74
20250421 18.91
20250422 18.68
20250423 18.45
20250424 17.49
20250425 17.74


Likes
10
Share


Likes
Comments
Share


@LokalGrenz
Follow
Day 36 1/13/25
I think she is taking to the location okay so far and after the first cut I did I’m not sure what I’m doing I’m just doing my own little mainline thing experimenting I guess I’m using APSU super soil and a little bit of build of soil 3.0 left from last grow and it’s a 7 gal pot als
1/14 day 37
Did second and final topping going allow about two weeks to bounce back and allow more growth and LST then flower
Likes
26
Share


@gottagrowsometime
Follow
Welcome to my Lemon Oasis Twin Auto Diary. 1 Seed 2 fully growing phenos. Thanks to Original Sensible Seeds, Spider-Farmer & Xpert Nutrients.
Week 6 Days 36-43 (a lil over a week)
Both phenos are strong. The right one is bigger but the left has more shoots but smaller. I actually think I'm gonna get 2 different phenos. If that's even possible with 1 seed. They should be the same or its either 1 is bigger cause its taken up more, but, its hard to tell at this stage. They're acting very similar. But different in ways. The smell on one is my zingy, and the other is real deep candy lemon. Plant(s) smell amazing. Happy they went well be uppoted to a 20L pot. (I actually cut the pot away like you would a dixy cup placing it into new pot already back filled with soil. So no stress. Ruined a pot. But, hey. Wtfc right. Look forward to seen what happens next wk? Then be sure to drop by and let's hope we get two fat twins.
Nutrients for this girl is the same. I just give it double the amount and that actually is working fine. 450-550ppm core NPK master bloom 6.6-7ph'ed to. 1x of all that's up above. Over 1200ppm per week. 2x 550ppm core feeds and everything else has little to no NPK value. And are given in-between feeds, every 3-4 days.
Much love to my sponsors, whom without, I'd have a lot less gear. Mars, Spider, Terra P, Xpert, ORIGINAL SS and all my breeders i truly appreciate yall over the years. And look forward to starting new relationships come September.
!!!!!DISCOUNT CODE FOR XPERT NUTRIENTS!!!!!
CODE:GGST 20% OFF Xpertnutrients.com
Appreciate all views and look forward to seen your diaries. Either way, thanks for stopping by.


Likes
8
Share


@ButterfliesLittleFarm
Follow
Hello Diary,
Milky Way F1 is truly beautiful, in full bloom and covered in flowers that fill in nicely.
It progresses quite quickly considering the fourth week of flowering, the smell is more and more intense.
Milky Way F1, like its roommates, reached its maximum height this week, there is no change since the last measurement.
Watering has become a little more frequent, I have to water every three days because they drink a lot of water.
I continued this week with the addition of nutrients, bio flowering booster and easy bloom tablets.
The conditions inside the grow box are good, the temperature is around 28 degrees and the humidity is around 45%.
Here's a quick recap of the week.
12/06/2023 - Day 44.
Watering.
I prepared 8 liters of water, added all three components from the bio flowering booster, lowered the pH. at 6.0 and with that amount I watered all three plants evenly.
15/06/2023 - Day 47.
Watering.
I prepared 8 liters of water again, inserted one easy bloom tablet, lowered the pH. and again with that amount I watered all three plants on the farm.
17/06/2023 - Day 49.
The end of the seventh week and it's time to take photos.
That's all from me for this week, see you soon.