
Likes
Comments
Share


Likes
48
Share


@DogDoctorOfficial
Follow
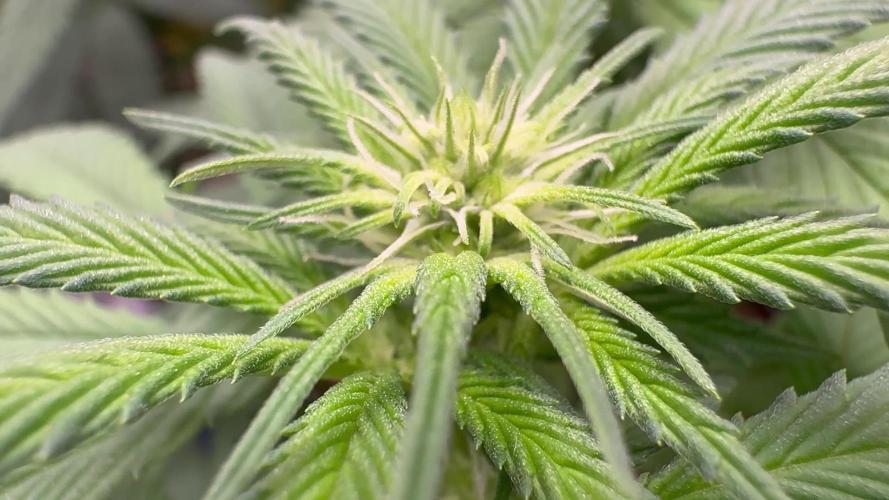
An in to soil she and her sister testers go, i know that for know everything looks the same , apart from the photos, but this will start changing with them growing. For now all of them are growing pretty much the same and now that they move in to soil and start feedings they will start showing the phenotype and genetic differences, but for now all looking great , healthy and strong af!!!
Haded a intro video from seed in to now, including how i transplant and what i use wen doing it so, and from here the moon is no limit for this babes i believe , so stay tuned as this testers they promise to be a interesting ride <3 <3 <3
They are growing great , number 10 moving in to an indica side i think lets see
As always thank you all for stoping by and for supporting me on this journey, i am super passion about growing and fell blessed to have you all with me on this new journey <3 <3 <3
Genetics - Fast Buds Tester 08 09 10 11
Ligth - LUMATEK ZEUS 465 COMPACT PRO
Food - APTUS HOLLAND
#aptus #aptusplanttech #aptusgang #aptusfamily #aptustrueplantscience #inbalancewithnature #trueplantscience #fastbuds #dogdoctorofficial #growerslove
With true love comes happiness <3 <3 <3 Always believe in your self and always do things expecting nothing and with an open heart , be a giver and the universe will give back to you in ways you could not even imagine so <3 <3 <3
All info and full product details can be find in can find @
https://2fast4buds.com/ wen released
https://aptus-holland.com/
https://autopot.co.uk/
https://lumatek-lighting.com/
<3 <3 <3 Growers love to you all <3 <3 <3

Likes
13
Share

@Borberad
Follow
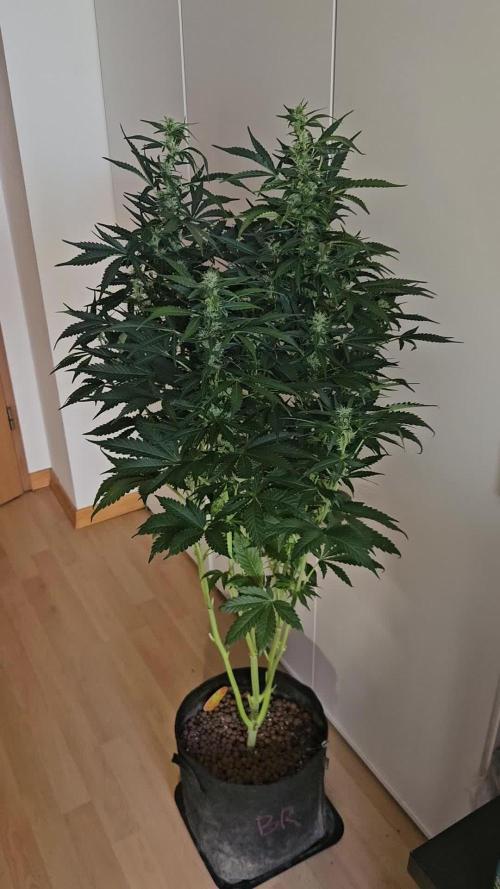
Woche 9
Mal gespannt wie weit sie noch nach oben will. Licht wurde entsprechend angepasst Blütenspitzen auf knapp 900 ppfd, im Zentrum 820ppfd. Müssen nun aufpassen, sobald die Spitzen heller werden, wird die Beleuchtung etwas reduziert um Ausbleichen und Foxtailing zu vermeiden.

Likes
24
Share


@Jays_Not_Here_Man
Follow
Another great week for the Apple Betty girls. I have not seen a single deficiency, other than the odd yellowed or withered leaf under the canopy, typically due to lack of light. I will come through soon and do a defoliation of both tents to allow for more light to penetrate, and perhaps get a good push for some girthy colas 😋.
I have lowered the temps a bit in the tents by controlling my lung room temps, and they are maxing out at 77 degrees and hitting a night time cool of about 70. I have also lowered the humidity to hover between 47 and 52 %. Hopefully will start to get some nice colours as they finish.
As I mentioned before, when I water is when I like to get under the canopy and check the stems and leaves for anything that shouldn’t be… and typically once a week after watering I’ll wipe down the tent and sanitize any surface I can. There is no reason to get lazy, that’s how you get Pests, Mold, and PM. Happy Gardening 🇨🇦👊❤️

Likes
37
Share


@MG2009
Follow
10/13/2018
#1 still looking good, no fade. Start of week 9 of flower hope buds put on some weight this week should be 1 week maybe 2? Gonna be cold mid- week 38° on two nights. I know they can handle lower 40's without any problems but we will see in next weeks update,a cold tolerant sativa leaning girl is welcome hereCanfy
#4 sweet fruit,and smelly shoes


Likes
16
Share


@Pelias
Follow
VIDEO------->
this is my other baby, Maybe she's being attacked by a snail or slug. you know?

Likes
11
Share


@DixTheReal
Follow
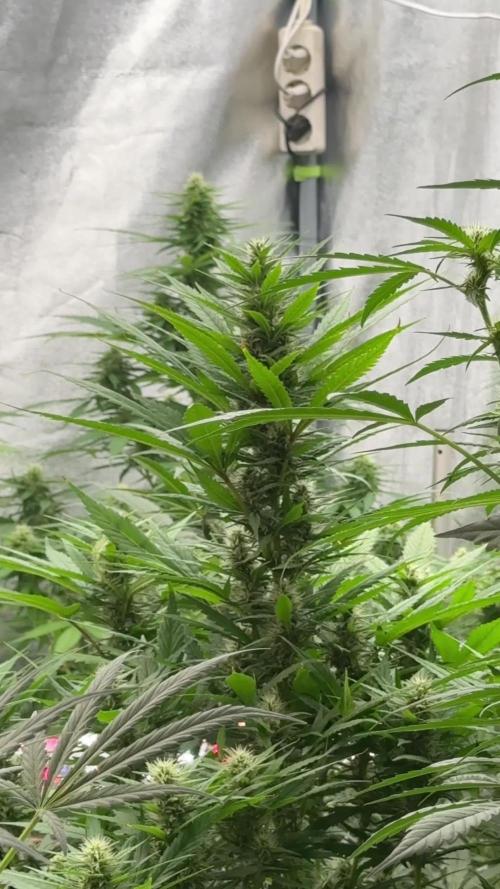
In questa settimana la crescita é stata veloce anche grazie ai fertilizzanti. LST ho dovuto sistemarlo ogni giorno perché continuavano a crescere nuove gemme e l’apicale tornava sempre su. Il tronco si é irrobustito tanto.


Likes
8
Share

@Hempcules
Follow
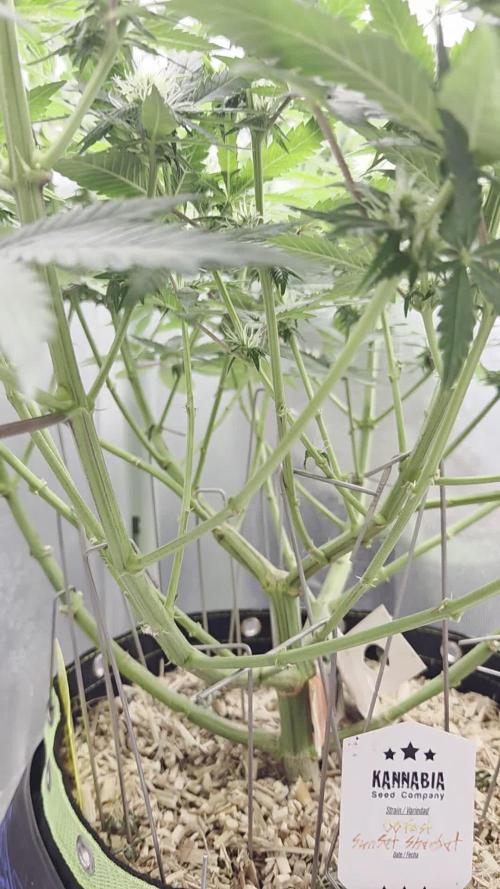
WEEK 8
My Zoapaya is growing quite nicely and isn’t giving me any problems.
It has also become very tall, but in return it has very strong and stable shoots.
I’ll increase the nutrient supply from now on and hope that beautiful flowers will develop over the next few weeks.
PPFD: 750µmol/m²/s
Water: 2x water 1x nutrient solution
Vpd: 1,6Kpa

Likes
16
Share


@HowtoBubatz
Follow
LST went good the plant is growing ervery day for 1-2 cm
I am very happy with the products used.Until now i didnt run in any issue :)
Starting to give a little more Water.
Likes
17
Share


@DimiTryCool
Follow
1 moth passed from germination. In result we have 12 strong plants and 4 reduced.
They begin presenting wonderful scent!
Increased my led on 40 % of power and it seems great.
Buen fin de semana a todos !
Likes
16
Share

@DogDoctorOfficial
Follow
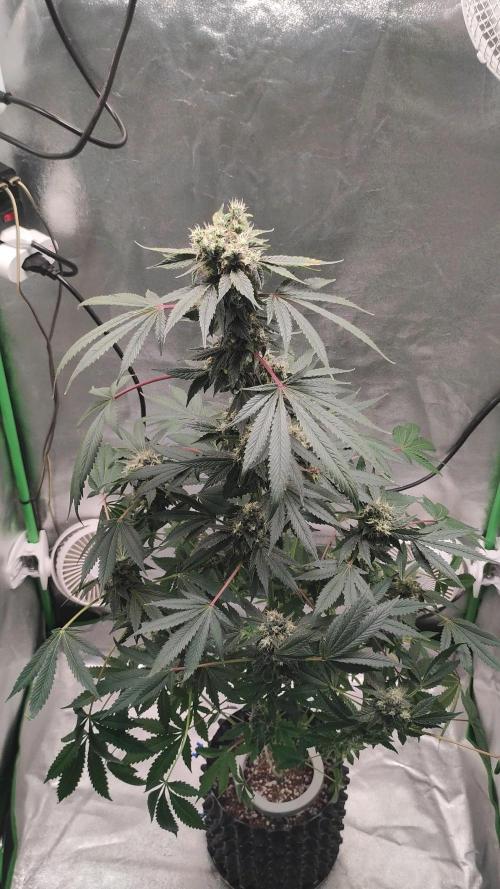
🌸 BlueBerry – Week 4 Flower Update
Grower’s Journal | Zamnesia BlueBerry
⸻
🌱 The Girls Today
Our two BlueBerry ladies are 120 cm tall, strong, elegant, and stretching beautifully into the light. Both are showing spectacular frost coverage already at Week 4.
💎 What frost means this early:
• Frost at this stage is a sign of healthy resin production beginning early.
• It points to strong genetics (thank you, Zamnesia) and a well-balanced environment.
• More frost now often means denser trichome carpets later, and with BlueBerry, that classic sticky sparkle is already writing its story.
⸻
💡 Inner Canopy Light – ICL 300
This week, let’s talk about a special piece of gear: the ICL 300 inner canopy light.
• Inner Canopy vs. Under Canopy:
• Under canopy lights push light upwards from below, filling shadows.
• Inner canopy lights like the ICL 300 spread 300° of light inside the plant structure, wrapping the middle and hidden nodes in usable spectrum.
• The result: more even growth, healthier lower bud sites, and improved overall stacking.
💡 Specs of the ICL 300:
• Designed for high penetration into dense canopies.
• Emits a balanced spectrum that complements the top LEDs.
• Reduces “shadow zones” and helps those mid-layer buds become full players, not just secondary fluff.
This week, the ICL 300 is clearly doing its work: the whole canopy feels alive, not just the tops.
⸻
✂️ Defoliation – Light Touch
I performed a light defoliation:
• Removed some fan leaves blocking major bud sites.
• Opened the canopy so light (especially from the ICL 300) could penetrate deeper.
Minimal stress, just enough to help airflow and light distribution. At this stage, it’s about balance, not stripping, just guiding.
⸻
🔄 Quick Recap of the Journey So Far
From Cannakan germination in pure water →
to early soil boosters with Aptus →
to steady veg under Future of Grow, ThinkGrow, and Lumatek Zeus LEDs →
to smart environment control with TrolMaster + sensors →
now flowering strong, stacked, and sparkling.
The girls have walked a legendary path already, just like their name. BlueBerry is not just any strain, it’s a classic, a true legend in the world of medicine. And this run is honoring that legacy with beauty and frost.
⸻
🔮 Looking Ahead – Week 5+
What to expect:
• Heavier bulking as flowers begin to swell.
• More trichome coverage, turning frost into snow.
• Stronger terpene release (that nostalgic BlueBerry perfume beginning to show).
What not to expect:
• No more big vertical growth. Stretch is nearly done, from here, it’s all about flower development.
⸻
💬 Final Thoughts
Week 4 is a milestone. The girls stand tall at 120 cm, frosty, thriving, and glowing from top canopy to inner canopy thanks to the ICL 300.
Every detail — from careful defoliation to balanced feeding, from genetics to gear, is creating a perfect environment for these legendary BlueBerries to shine.
This is only the beginning of their flower story, and they already look breathtaking.
📲 Don’t forget to Subscribe and follow me on Instagram and YouTube @DogDoctorOfficial for exclusive content, real-time updates, and behind-the-scenes magic. We’ve got so much more coming, including transplanting and all the amazing techniques that go along with it. You won’t want to miss it. • GrowDiaries Journal: https://growdiaries.com/grower/dogdoctorofficial
• Instagram: https://www.instagram.com/dogdoctorofficial/
• YouTube: https://www.youtube.com/@dogdoctorofficial
⸻
Explore the Gear that Powers My Grow
If you’re curious about the tech I’m using, check out these links:
• Genetics, gear, nutrients, and more – Zamnesia: https://www.zamnesia.com/
• Environmental control & automation – TrolMaster: https://www.trolmaster.eu/
• Advanced LED lighting – Future of Grow: https://www.futureofgrow.com/
• Root and growth nutrition – Aptus Holland: https://aptus-holland.com/
• Nutrient systems & boosters – Plagron: https://plagron.com/en/
• Soil & substrate excellence – PRO-MIX BX: https://www.pthorticulture.com/en-us/products/pro-mix-bx-mycorrhizae
• Curing and storage – Grove Bags: https://grovebags.com/
⸻
We’ve got much more coming as we move through the grow cycles. Trust me, you won’t want to miss the next steps, let’s push the boundaries of indoor horticulture together!
As always, this is shared for educational purposes, aiming to spread understanding and appreciation for this plant. Let’s celebrate it responsibly and continue to learn and grow together.
With true love comes happiness. Always believe in yourself, and always do things expecting nothing and with an open heart. Be a giver, and the universe will give back in ways you could never imagine.
💚 Growers love to all 💚

Likes
28
Share


@J_diaz420
Follow
Comienza la floración de estas pequeñas!!
Cambiamos línea de fertilizantes gracias a b.a.c 👍👨🌾🏻🍀


Likes
14
Share


@Hoodoo
Follow
Here they are, finished! The plant in the smaller tent definitely packed on much more weight. The issue with the other plant was being in a 12/12 tent and having a taller plant in there which was hogging the light. Still got beautiful smelling flowers. These were all taken in the last week of flowering. Super happy with the new setup that I put in with the Mars Hydro light! Very nice plants but they did take their sweet time in the beginning.
Likes
17
Share

@THcHunteR23
Follow
Super elle prend 2 l d’eau à tout les 2 3 jours . Elle a l’air très robuste et facile à mener à terme. Jusqu’à présent j’adore !


Likes
2
Share


@gr3g4l
Follow
Esta semana le hemos dado un poco de marcha con el Hemplex
A finales de semana el trasplante a maceta de 6L textil y las pasé al armario con el lumatek al 50%. 150W. a una distancias de unos 50 ctms. En uno o dos dias subiré al 75%, 220W. Le doy uno o dos dias al 50% para que se vayan acostumbrando