
Processing
Likes
Comments
Share


@710_Squish
Follow
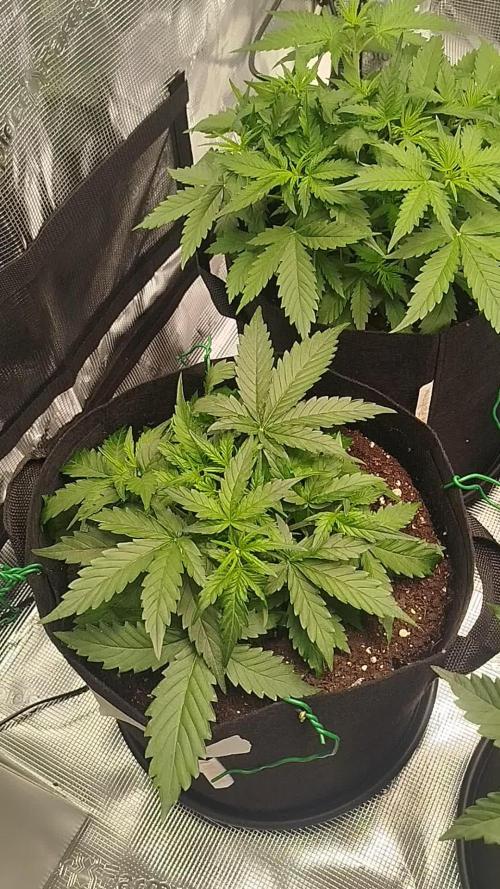
She is going all out right now. Nothing slows her down. I did a heavy defoliation and she just kept going balls to the wall. The silica blast has really toughened her up.

Likes
11
Share


@SintrexGrow
Follow
This week the plant got her first topping and it was a success as the topped part has formed into 2 new branches.
This was my first ever topping 💪
Added a 20w flood light on the side of the plant so the plant has access to more light under the big fan leafs.
Overall very happy with the growth

Likes
4
Share


@Big0zGrower420
Follow
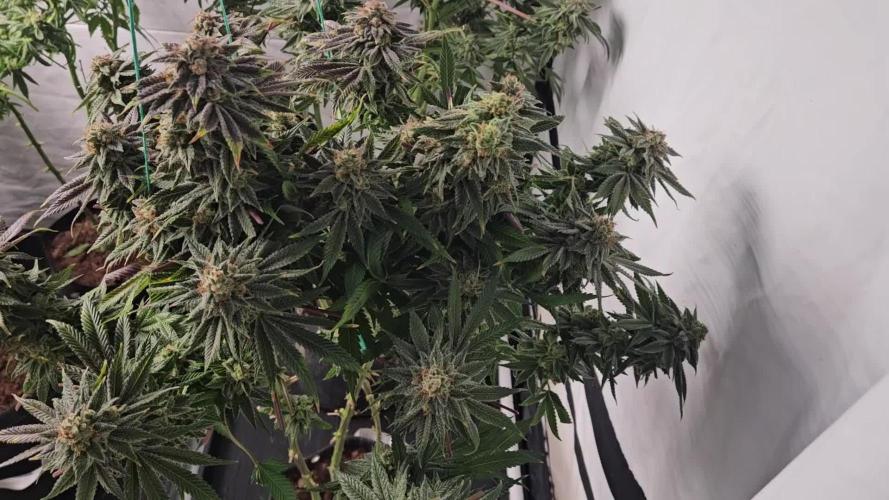
Got a couple more days until day 56 (week 8) but just wanted to add a few things from this week. The flush is coming along nicely and getting some really nice colors to come out, Really excited for the finish.
Just uploaded the day 56 pictures, shes looking beautiful!

Likes
38
Share


@PolishFarmer
Follow
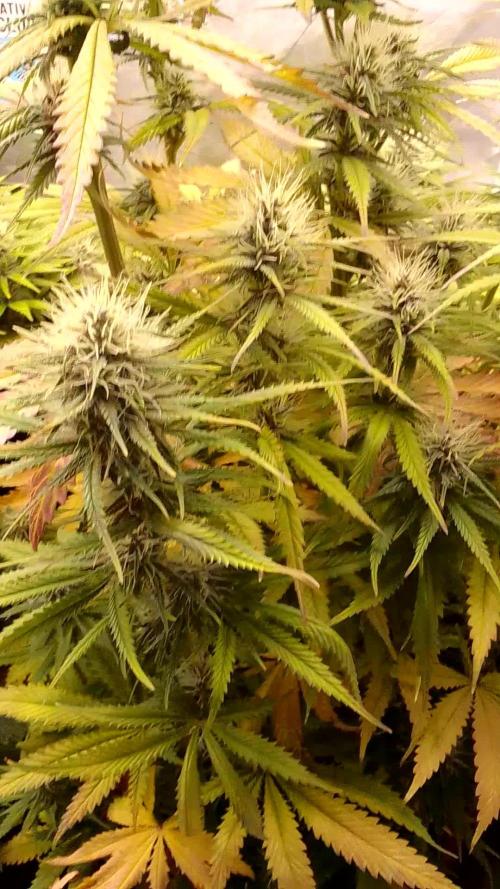
Hi :) it’s 10th week in my happy grow :) girls looks lovely, Smell is awesome I think terminator does it’s job :)generally I’m so proud of my girls, of course it was not without mistakes but it is my second indoor experience so still learning from mistakes :) this way we will come to perfection :) new project from fastbuds is on the way! check what’s coming! :) happy Sunday for everyone, peace!
Day 66 update resulting decision of defoliation. I treated them well but in my opinion they can catch a big breath now :)
Likes
17
Share


@Ton_Trichomen
Follow
ruce Banner#3
See of green project
By #originalSensibleSeeds
Day 21 08:00
Now it looks like a starting S.O.G
I think i give them 1-2 more days 18/6 than i switch over to flowering
Checked all leafs and soil yesterday and all was more than good ph and salts just perfect
See you tomorrow again
Day 22 08:15
Good morning
I kicked them into flowering this morning
all so i gave Plagron Terra Bloom 60% of there normal dosis also pure zym and power roots also Plagron full dosis ...
My baby are 30cm now i count with a 150-200% stretch but i think i handle that baby ...
I dominate my Amnesia grow to, so Hulk who are you .... show me ..... 😉
Day 23 13.20
After i send them into flower feed them with nutes all is good no sighns of stress to much nutes or some else, air temp and humidity are controled so thats fine to 😉
Se ya back tomorrow
Day 25 07.10
So they do realy grow like i want them to grow thats cool
Now on 12/12 since 3 days the strech is really smooth till now and it seems its true what i heard about Bruce not to much till no leafs on the bottem of the plant know i wait till the flowering will start think mid of next week
Day 26 07.30
I see here and there starting of flowering little white hairs are comming feed them today with the full dosis of nutes but still under the limit of plagron less is more
Bruce looks really healthy at all so far
Day 27 07.30
I cleand up my room🙃 no no worrys some plants were a bit smaler some a bit higher so i switched the long ones in the back the smaler ones in the front now it looks a bit weird but that will be fixxed up in 2 days ..
But all in all are very fine and healthy
See ya tomorrow again
Temp: 27.5 lights on
19.5 °C when lights out
Humidity: 60%
Ph : 5.92
Ppm: 850
Water: 25l 23°C
CO²: No Mercy Tabs
Plagron: Terra bloom 100ml
Plagron: Pure Zym 25 ml
Plagron: Power Roots 25 ml
Light distance: 50cm
3x MarsHydro eco 120 total 675w
Air Van: 809m³ Prima Klima
AKF : 800m³ prima klima
3 l water cooling airco Diamant...
3.3l humidifier
1.8l Airdryer
Humidity control: Inkbird IHC-200
Temp control cooler - heater: Inkbird ITC-308
1.5x1.5m² Custom Grow Room
All seeds comes out #originalsensibleseeds
so they have 100% of 100%
Bruce Banner the 3. hits the ground and i really hope he gets angry as fuck and shows me the green big guy sleeping inside him ...
S.O.G.
☠️☠️☠️🌶️🌶️☠️☠️☠️
Thx to Linda Seeds, BTB Grow Supplies & Zamnesia for supporting this grow.
Zamnesia unconsciously because they sent me my seeds 2 times but I'm very grateful for that

Likes
38
Share


@DomanAtrik
Follow
I've caught various carnivorous critters and released them in my garden. They seem happy here. Just began using overdrive. Cant wait for next weeks pictures.

Likes
11
Share


@YehGreen420
Follow
Grande descoberta esta poundcake, entrou no top 10 das fastbuds 😍

Sour Jealousy Auto · Fast Buds
Pound Cake Auto · Fast Buds
Papaya Cookies Auto · Fast Buds
Orange Sherbet Auto · Fast Buds
Amnesia Haze Auto · Fast Buds
Wedding Cheesecake Auto · Fast Buds
Moby Dick Auto · Fast Buds
Gorilla Cookies Auto · Fast Buds
Lemon AK Auto · Fast Buds

Auto Pineapple Glue · Advanced Seeds
Likes
1
Share

@GermanGrow182
Follow
Nach anfänglichen Schwierigkeiten geht's jetzt gut voran. Die verbliebene fat banana wächst schnell nach dem fimming und hat nun 8 haupttriebe. Die zwei tropicana Cookies purple Auto links kommen kaum hinterher. Die zwei Special Queen Auto rechts machen sich gut. Die tropicana Mitte oben, wächst nun in normaler Geschwindigkeit. Es läuft 👍 bis nächste Woche ✌️

Likes
37
Share


@RFarm21
Follow
11/9 - Flush 4L de água para cada. pH 6.5.
17/9 - começo das 48h de escuridão
19/9 - HARVEST DAY!
Likes
15
Share


@SweetheartOG
Follow
Girls are doing well with the LST. Kosher cake was topped last week and now has what looks like 8 heads.
3rd of June have given the girls living soil veg.
Processing
Likes
29
Share


@CANNASIM
Follow
—SETUP—
.BOSSLED LED 1800W full spectrum, real power consumption is +-250W.
.Grow space 60X100X200(a simple shower box.
.AN nutes and other simple additives.
.Grow medium is 60% peat, 30% perlite, 10% organic correction(worm castings), 5 gallon fabric pots(18l).
—BRIEF—
Hi there, I have tried already done this genetic outdoors, in poor lighting and a general purpose nute from Neudorff, yielded 25g dry, in 3gallon pots same medium.
So this is a good experiment, lets see indoors how she will compare.
—GERMINATION—
My germination process always start by scarifying the seeds, i created a little tool for that. I just a little container with sandpaper walls. Shake gently for about 60 secs+, this allows for the water to penetrate better in the seed shell, once you soak. Then i soak overnight from 12 to 20 hours max.
From there i either plant straight or use the paper towel method to see the tap root before. If you are a bit on the impatient side seen the tap root is advisable so you see some movement before planting. Lol!
—ROYAL QUEEN SEEDS . QUICK ONE . INFO —
Chose this strain because is basic and I have to travel for a month soon, and someone else is going to take care for this time. :)
Quick One is a fast-growing autoflowering strain. This was one of the first autoflowering strains developed. When it was first released, it was one of the quickest growing strains on the planet.
THC: 13%
CBD: Low
Yield Indoor : 275 - 325 gr/m2
Yield Outdoor: 100 - 150 gr/plant
Height Indoor: 50 - 60 cm
Height Outdoor: 60 - 100 cm
Flowering: 5 - 6 Weeks
Harvest month: 8-9 weeks after sprouting
Genetic Background: Strong Indica x Ruderalis
Type: Sa 10% In 60% Ru 30%
Effect: Physical
Climate: Mild
—RQS QUICK ONE GERMINATION UPDATE—
My mood said to me to plant straight, so scarify > soak 18 hours +- > plant straight.
Seedlings look a bit odd, with a yellow center, let's give her some days in and see what happens next.


Likes
8
Share


@Merulix
Follow
The drain-EC was too high / EC 3.2, Lower leaves started curling and dropping. i had to flush a bit.


Likes
6
Share

@SkullRipper
Follow
Flushed all week with RO water at 6.2
Humungous big fat bitches are falling all over the place!
Will be harvesting next week.
TTfn Skully

Likes
3
Share


@Aerogrower1104
Follow
I am browsing this in an ottoman as a stealth grow it only smells when I open the top and even when I do it doesn’t smell up the whole room. Plenty of growth. I had a little root rot and cleared it with peroxide and water method. Hopefully harvesting next month

Likes
37
Share


@iMpulsive_Grow
Follow
Day 71!
Moving along!!
Day 72!
Gonna start heavy defoliation at day 21 of flowering
Day 73!
Added some microbes for better uptake.
The buds on this is going to be fire 🔥 🙏🏼😅
Day 74! There’s another one In the back same size as the big one.
Ps- sorry for the crappy picture. I was in a rush ...
Day 77!
This concludes this week lmao

Likes
1
Share

@Franco123
Follow
the plant is fine and has a strong cheese-like smell, it is growing and like all the crosses that were made with the inverted cutting of domina tangy
Likes
3
Share


@Earthsower
Follow
She is doing well with a lick of 300ml of nutrients the fuel dog is holding up so far with no leaf burn and healthy green leaves she stands at about 35cm

Processing
Likes
4
Share


@fezzollas
Follow
That was the most difficult week. It was very cold and rainy, the humidity of the air reached 90% at most, but without sequels, thank God. On day 63, I defoliated and she is strong, fat and definitely smells like cheese.
Processing
Likes
10
Share


@MichaelMan
Follow
Plants are very healthy
They didn’t drink as much as I expected this week
Trying to build doors for this closet
