


Likes
Comments
Share


@CrazyRussian
Follow
Two of my daughters are ready to harvest, so I'll harvest them first, and my retarded daughter will get another week or two, but unfortunately her buds are not growing very well, something went wrong with her from the beginning. I think I've messed up the nutrients once, and I gave her Green Sensation when she was just starting flowering. This could cause nutrient lockout. The strange fact about her is that she looks ugly, but she smells incredibly intensively. From now on I am only flushing her. In the worst case she will be perfect material for some top quality cannabutter. :)

Likes
10
Share

@D4D3DHOMMIES
Follow
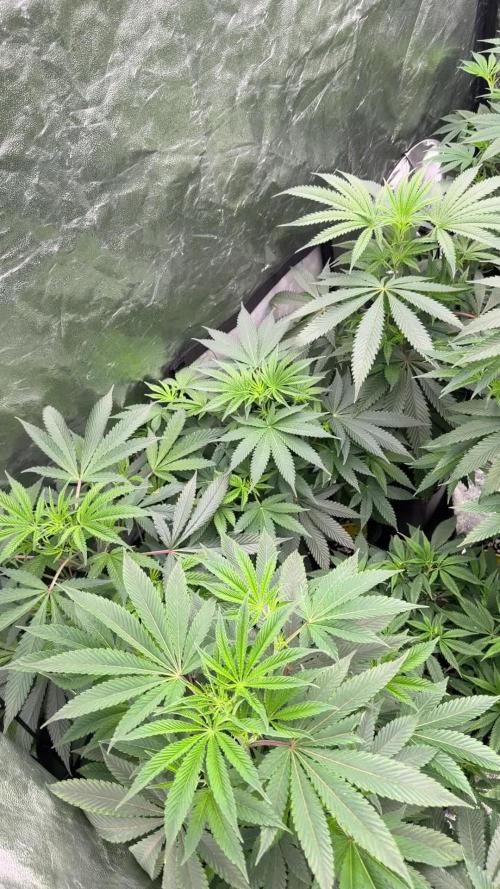
This week I finished the last clones, hoping to see some great phenotypes. I plan to keep the best ones, make a selection, and keep the best ones, then plant more to select the best and discard the rest. Next week, for flowering, I've raised my light to its maximum height (I don't use a filter inside the grow tent; I have the whole room under one filter) and to 50% power to give them a little extra boost these last few weeks and improve their growth. I love having the information on my phone to know what's happening with my babies at all times.

Likes
26
Share


@ledgrowers
Follow
one-two more week til chop. just started flushing. easy first grow. looks dank. smells dank. very anxious to smoke

Likes
8
Share


@Rinna
Follow
Overal I’m very happy. The weight’s looking insane. Obviously imma update you after drying and curing. Can’t say to much at this point, apart from the fact that everything is looking very nice!

Processing
Likes
33
Share


@Ferenc
Follow
Day 50: Water intake is 150ml per plant, light schedule 18/6. Humidity is approx 50%. Fertilization continues the same way Monday, Wednesday, Friday Biobizz family, Tuesday, Thursday, Saturday bat guano and Epsom salt. Flowers are developing nicely and getting thicker. Plants love the new 600W Viperspectra:) All good so far! They are all approx 30-35 cm.
Day 53: Smell is getting stronger, really nice mix one.
Day 55: Nice smell comes out from this tent. Plants are nice buds are getting dense and the smell is getting stronger and stronger. All of them do well, some more some with less bud development but they all look happy.


Likes
4
Share


@Crusty_Juggler
Follow
60x60 cm tent in a 1920's peek-in-closet
Oversized vent for silence
High power DIY LED
True SoG 12/12 from seed with 15 plants in 2L pots
Watering all plants in bottom tray with 30% of total pot size (10L)
WEEK 1
DAY 1 - Germinated in paper towel
DAY 3 - Planted into pots + Lights ON at 125w
DAY 5 - All plants have broken soil
DAY 7 - Slight stretch - Light at 185w
WEEK 2
Two of the Iced Out are lagging behind, others are on point - I'm trying to push light and nutes to the max.
Extraction fan (AC infinity Cloudline T6) on level 2.
DAY 13 - First full watering (10L) with 20 ml Canna Terra Vega
DAY 14 - Circulation fan turned on (low) during lights on
WEEK 3
Good growth, two Iced Out still lagging
DAY 18 - Light at 225w, Extraction fan on level 3 during lights on
DAY 20 - 2nd watering, 8L with 30ml Vega + Light at 250w
DAY 21 - On point, mostly :) Could've pushed nutes a bit more from the go
WEEK 4
DAY 24 - So far this week I'm just kicking back and watching them do their thing. The two lagging Iced Outs are trying to catch up.
DAY 26 - Watering 10L with 50 ml Vega (one day too late...) + light on 300w (max)
DAY 28 - 4 weeks from popping the seeds, looking good except for the two Iced Outs, one of them is trying to get with the program, the other... Well, some plants are just pricks.
WEEK 5
I think this is the week we'll see them take off :)
DAY 29 - Plants are starting to show sex, removed 2 Urkle Mints males, the other two are females, the rest are fems so we're down to 13 female plants total with only a single weakling
DAY 29 - Watering 8L with 50ml Vega (shouldn't have been later than today!)
DAY 33 - plants exploded over the last 4 days and most are stretching and starting to flower
DAY 33 - Watering 10L with 60ml Vega (feeding Vega once or twice more then we switch to Flora)
DAY 35 - Just cruisin' 😎

Likes
6
Share

@Aeromatics
Follow
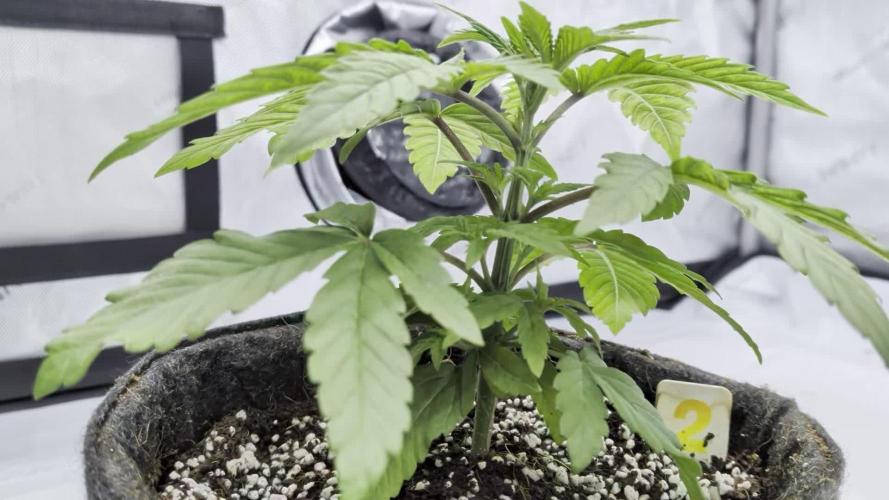
Clementine Slush #2: A bit lighter fan leaves this week, not sure why but also not too worried, as her nodes are looking beautiful. She got a top on day 27 (see video above) and is really developing a nice structure. As all 5 of Clementine Slush start to develop, I am increasingly happy that I had 5 empty autopots ready to take them all.
She took to the top wonderfully, and I hope the ease of this strain will continue through late veg.
Tent-wide update: This week was very relaxing in the tent, as we prepare for the major transplant into their final 5-gallon autopot home!
I did a major water to runoff, which they absolutely loved!
The recipe was, for 2 gallons of water:
2 Gallons RO Water
1 ml Ventana Plant Science Structure
4 ml Ventana Plant Science Grow
12 ml Ventana Plant Science Support
ec .89 ph 5.7
Additionally, on day 25, I moved to 300 PPFD since the plants looked ready for an increase in light. The responded great, and the rest of week 4 has been devoted to topping plants when ready, and preparing for that big transplant.
I also realized I've been a bit slack on my mixing order for Ventana Plant Science, which could be a reason for some of my cloudy reservoir issues when my autopots are on, so I will be very diligent about the proper and recommended order moving forward:
Liquid Line Mixing Order
Structure (first)
FlaVUH
Grow / Flower
Expand
Support (last)
It's going well thus far, though I think this may be my longest grow yet!

Likes
53
Share


@SativaSteve88
Follow
Struggling to get good pictures for my diary at the min when the lights on my pictures are all blurred from the light and i dont like to go in there when its lights out time for them, i had to move the 3 mimosa and 3 tropicana from 1 tent to another and i think the light change stunted the growth for 5/6 although the 5 that got stunted have now bounced back nicely there just way behind in size to the 1 mimosa that took to the change of conditions fine, had a slight nutrient defeciency i developed inbetween weeks 2-3 and they looked worse for wear had me worried to be honest but everything looks nice and healthy now and all growing strong, PS the other 4 decent sized plants are liberty haze i need to edit the diary and add the strain in its also barneys farm, will try to get better pics and videos over the next couple of weeks as i approach switching to flower

Likes
14
Share


@AndrewC
Follow
So this is the Tear Down week. The timing of it makes it so i will need to the harvest flag in a few days when I can weight and test the plants.
I have included the Cleaning, and Cutting and some Root Porn.
I will make the harvest post in about 4-5 days, when I can trim these plants. There is a lot of Plant here. I got way more than I was expecting. I don't have a scale that measure this amount of plant, without taking like 10 measurements and then adding them together. So I will just be posting the dry weight. I will post the wet weight as dry weight * 1.65.
Autopots: Wow, what a great product. I have been blown away by how well and how easy it was to work with them. They really did solve the watering issues. Excellent product. If you are a beginner, start with Autopots.
-= Lessons Learnt =-
- Overdrive the air to your Autopots. In my control plant, I used a small rectangle air stone (instead of a standard air dome). This lead to root rot and some other issues, it also put significantly less air into the water. The root rot, give the material for the Brown Algae to grow. Using a huge Air-disc-Air-Stone would be an excellent combo to mix in with the air dome itself. Something like this: https://www.amazon.ca/Pawfly-Diffuser-Suction-Hydroponics-Aquarium/dp/B01MY3AQ33 at the bottom and the air-dome on top of it, will be what I do with my next experiment.
- Air stone in the reservoir. I had two instances where algae grew into the res. An air stone would have helped. It would have also helped my control plant get less root rot. Given the amount that the air-domes and air sources got engulfed, having the water have more o2 in it would have only been beneficial.
- Don't grow 6 plants in a 4x4. Since my control plant was about 1/8th the size of the others, I think I could have grown 5 in the shape of a 5 (on a 6 sided dice)⚄ This placement would give a much more spaced canopy for airflow and more importantly light. The sides of some of the plants were lighter green and produced larf due to lack of light penetration.
- This tent was on 19-5 schedule. This worked out very well for this strain. After every lights on, they were in the praying position, so this strain was able to recover in that 5hrs off. If I had more seeds, I would run these again, and try 20-4. I think this strain could handle it. All for all, I think I'm going to 19-5 as my default timing. This kept up a solid DLI.
- Staring at .9EC (really .7 EC cause my water here is .2 EC) Then bumping up at .1 a week, until 1.6EC worked out VERY well. I experimented on this crop all the way up to 1.9EC, which burnt the tips of this plant. I think if I did this strain again, I would do 1.6EC until 3-4 weeks left then crank it to 1.9. It did plump them up when I went to 1.9, however it left them looking rough. Bulk was added though.
- Sticking to 6.0PH for all of veg, and 2 weeks into flower worked great. The plant had solid and consistent color and leaf shape . The plant's did get hurt, due to some issues (as noted on the weeks). I switched to 6.5 PH in the last 3-4 weeks and it helped them recover, and plump up noticeably.
-VPD. The #1 thing I focused on was VPD. I keep it .9kpa range, as best as humanly possible. It was honestly, HUGELY noticeable compared to my other grows. I know truly understand the value of properly dialed in VPD. This is the one lesson that will stick with me forever.
- Super-cropping: On the plants I give the chiropractic treatment too, had much thicker stems as much larger channel internally. I did this treatment to 4 of the 6, and the 4 that had it done has larger buds and recovered from defoliation faster.
TLDR; VPD is king. Super-cropping is worth the time. Keeping PH and EC dialed in were all wins. Autopots kick ass.
Likes
9
Share


@newenglandgrowers
Follow
Cut the plants down on the 24th of April, drying room levels are 72°F and around 60%RH, I'm currently on Day #14 of drying and the buds don't feel fully dry yet, the main tops feel crunchy and dry but the lower smaller buds are still quite moist and smell like chlorophyll, I think I may harvest the main tops so I don't overdry and leave the rest in the tent for another few days, either that or put the rest of the buds in a brown paper bag to finish drying. Finished dry trimming the plant ended up with 200 grams dry weight not including trim there's another 2 ounces of trim which if you want to include that would bring the total weight from this 250W LED to 256 grams. I'm super happy with the result of this especially for my first grow and from one autoflower, it can only get better from here on out. FYI Not sure why I can't edit the lights I used but the bloomgro 600W LED is PULLING AN ACTUAL 250W FROM THE WALL so the gram/watt should be .8g/W

Processing
Likes
2
Share


@Canadian_Bud
Follow
Day 85 25-4 the buds are now really starting to take off, i just added Power to Bloom to the nutritional balance and is being gobbled up and exploding out in buds and sites😎 I think i should have allocated a little more room for these Monsters.😎

Likes
1
Share


@El_gordito99
Follow
- VEGETATIVA -
•Prima settimana•
Passati i 7 giorni di germinazione procediamo con il conteggio delle settimane di vegetativa.
Le piante reagiscono bene, tenere sotto controllo con analisi visiva le foglie e il terreno, controllare ed essere precisi con il PH dell’acqua a 6.5 (solo dopo abbiamo scoperto l’importanza) inizialmente fino alla 4 settimana di vegetativa non l’abbiamo controllato e infatti più avanti noterete delle piccole carenze, tutto molto risolvibile comunque.
Mantenere un’irrigazione costante, solitamente ogni 3/4 giorni circa 2/300 ml.
Ovviamente sta a voi capire quanta ne serve, sempre meglio aspettare un giorno in più (foglie cadenti) piuttosto che irrigare troppo spesso (causerebbe problemi maggiori l’irrigazione eccessiva).


Likes
76
Share


@Roberts
Follow
Purple Ryder auto is growing great in the Agrogardens nutrition, under the Medic Grow Mini Sun-2. Her colas are starting to form as she stretches for the light. She got her solution changed today and a selective defoliation as well. I also trimmed out some lower parts so she can focus on the canopy. Everything is looking great at the moment. Thank you Agrogardens, Medic Grow, and Doctor's Choice. 🤜🏻🤛🏻🌱🌱🌱
Thank you grow diaries community for the 👇likes👇, follows, comments, and subscriptions on my YouTube channel👇. ❄️🌱🍻
Happy Growing 🌱🌱🌱
https://youtube.com/channel/UCAhN7yRzWLpcaRHhMIQ7X4g

Likes
3
Share


Likes
108
Share


@420DeepGrow
Follow
Gracias al equipo de Sweet Seeds y a Marshydro, sin ellos esto no seria posible.
Excelente hibridación de dos de nuestros mejores clones élite de genéticas procedentes de USA. En el cruce interviene un clon seleccionado de San Fernando Valley OG Kush, caracterizado por un agradable y complejo aroma con fuerte presencia de limón procedente de la Lemon Thai que interviene en el cruce original de las OG Kush. El otro clon élite que interviene en el cruce es una Kosher Kush, otra genética OG Kush muy apreciada en la zona de Los Angeles y alrededores (California).
De aroma muy agradable y penetrante, con tonos originales OG Kush muy alimonados y tonos de disolvente, pinceladas de especias, maderas y ciprés azul. El aspecto de las plantas es de híbrido índico-sativo con predominancia sativa. Estas variedades americanas con fuerte presencia del terpeno limoneno son muy apreciadas en USA para la realización de extracciones cannábicas.
🌻 🚀 Consigue aquí tus semillas:
https://sweetseeds.es/es/semillas-fotodependientes/2345-san-fernando-lemon-kush.html
💡 Mars Hydro TS 3000, como la lámpara de cultivo LED más grande de la serie TS, ofrece suficiente cobertura para un área de 4 × 4 pies con un precio asequible y rendimientos de calidad; a cambio, se puede aplicar tanto al cultivo doméstico como al cultivo comercial.
Potencia - 450w
Cobertura Vegetal – 5×5 pies
Cobertura de flores - 4 × 4 pies
La opción abrumadora para la mayoría de los productores que la aplican en tiendas de campaña.
Consigue aqui tu lámpara:
https://marshydro.eu/products/mars-hydro-ts-3000-led-grow-light/
📆 Semana 8:
Finalizando la etapa de engorde, esto va que vuela 😍, la resina esta cada vez mas presente ❄️ , los cogollos comienzan a madurar
Esta semana estará el TS-3000 de MarshHydro al 100% y 30cm de distancia.
Se estan desarrollando mejor que nunca, con una floracion mucho mas rapida, noto una gran mejoria gracias al Marshydro TS-3000.
Continuo con defoliaciones
Estoy impresionado con esta planta 😍🔥😎
Aplico una solución con nutrientes EC 1500 y otra con agua del grifo reposada y PH 6.6


Likes
22
Share


@Damonkey
Follow
Really love the smell, one plant yielded about 5oz the other about 3. As far as I can tell the herb from either is as good. Yeah an award winner for sure. Wow what a taste✌️🏻🤤✌️🏻
Update. 2 plants grown, 1 was better but both very good. From the better plant, 5 people to date who I have let sample excellent quality dried and cured buds of Zombie Kush have all reported to me that it’s the best herb they’ve ever tried😉😂😍😍😍😍😍😍 I was smoking it outside a Wailers concert this week also and about 3 people there couldn’t help but compliment on the smell. This stuff really is top quality and I could truly smoke it 24/7
Likes
13
Share


@DieselKush
Follow
Oct.29 - We transplanted the girls into soil since they are moving into vegetation phase
Nov.4 - Watered each plant 250mL, 0.25mL of each nutrient for each girl
Likes
25
Share


@pifflestikkz
Follow
Day 106
14/10/24 Monday
Her colours are really coming through now 🤩
Nearing her end now, possibly another week after this ✌️💚
Picture and video update 📸💚
Day 108
16/10/24 Wednesday
Light watering, she isn't drinking anything, trichomes only just starting to turn amber. I'll leave her now till I chop
Day 109
17/10/24 Thursday
She is starting to dry from 1" now.
Putting her in 24hrs dark 🌑 now.
Will harvest Tomorrow
