Likes
Comments
Share
@THC123
Follow
Day 71 (August 26th): Watered the ladies again today, everything is still looking great. Pheno 1 is starting to get yellow leaves, still diagnosing the issue. Day 73: The soil is drying out super fast. The roots are coming up through the soil now. These girls are root bound for sure. Next grow will be 20 gallon pots for sure. Day 74: I’ve got a nitrogen deficiency on one of my phenos. Added a bit more Power Bloom 2-8-4. It’s a bit too early for these girls to be starving for nitrogen. A couple more weeks and I’ll let it fly. Day 77: That’s a wrap on week 5 of flower. 3-4 weeks until harvest!
Likes
82
Share
Hello growmies! Welcome to week six of An Epsilon Adventure! Massive thanks to both Shogun and Royal Queen Seeds for sponsoring this grow! So here we are at week six and every one of these girls are at a slightly different stage, it is quite fascinating to watch them develop one after the other. Today I made the last adjustment to the light possible. I removed the adjustable hangers and affixed a carabiner which I tightly tied to the top of the tent bar. There is about 1.5 inches of space between the top of the shade and the tallest part of the roof of the tent. Plant 1 is already taller than this, and it looks like plant 6 and maybe even plant 5 are going to join it. It's a madness. I am sure you have already looked at the photos but just in case you do what I do and read the diary first... Here is my assessment at the beginning of week 6: Plant 1: Height: 1st (137cm) - what can I say about this ridiculous plant? Day 36... 137cm tall. I have had to raise the light to as high as it is physically possibly to raise it and it's still not high enough. She is done stretching now, she may add 3-5cm over the next week or so but I don't expect more than that, so her top of her main cola going to have to develop above the level of the light. Nothing I can really do, nothing wise anyway. What a monster plant. Maturation: 4th - early into flower - bud sites developing, pistils just starting to explode. Plant 2: Height: 4th (111cm) - this plant has been there or there abouts as the tallest plant for most of the grow, but she has topped out at 111cm. She will gain some during flower but not much more than a few centimetres. Very impressive plant, loads of bud sites, really big strong secondary branches. This one is going to be colas galore. Maturation: 3rd - well into flower - all white pistils Plant 3: Height: 6th (95cm) For some brief days the tallest plant in the room, she peaked early and is now the "shortest" at "only" 95cm for this "50-70cm" strain. She is utterly dwarfed by four of her five sisters in just about every department, being quite a bit smaller even than plant 4 (although I have removed the most lower nodes from this plant). Compared with her sisters she is almost a runt... except that she is 25cm taller than the strain top-end average and matches the maximal height of the previous tallest Epsilon F1 plant I am aware of. It's not that she is small, actually she's pretty big for an Epsilon F1, it's just that the rest of the girls are on another level altogether. Plants 1, 5 and 6 are all absolute beasts. Maturation: 1st - well into flower - first shades of brown in some pistils. Plant 4: Height: 5th (98cm) although only 3cm taller than plant 3, overall she is a much larger plant. Her secondary nodes are the same height as plant 3. Maturation: 2nd - well into flower - all white pistils Plant 5: Height: 3rd (113cm) - one of the two thick/short girls who have grown at a similar pace all along - she is further ahead than plant 6 but not by much and I think she will probably exceed 120cm this week, though I do not think she will outgrow plant 1 or 6. Maturation: 5th - early into flower - bud sites developing. Plant 6: Height: 2nd (120cm) - my predictions were correct about this girl and her continued growth. I now think she might actually outgrow plant 1, which is quite worrying. Maturation: 6th - early into flower - bud sites forming - by far the least mature plant of the six. ### Week 6 Day 2 23:00 30/7 Photographed. Raised the light. Rotated the plants. Inspected, measured and reported on each plant. ### Week 6 Day 3 23:00 31/7 It has not escaped my attention that the plants that are more advanced into flower have darkened and have some burnt tips. I need to flush them and lay off the base nutes a bit. These plants are just growing and maturing so quickly that I cannot keep up. ### Week 6 Day 5 02:30 2/8 Fertigated 3l of nutrient mix, without either COCO A or B. ### Week 6 Day 6 01:30 3/8 photographed --- Thanks for reading growmies! 👊 ========== Tent: 120cm x 120cm x 180cm Light: 600w HID Elite Dual Spectrum HPS + Angel Wing Reflector Air: 5" duct fan system with carbon filter ~300 m3/hour + RAM 9" floor fan + 4" intake fan Pots: Air Pruner Fabric Pots 30l - UGro XL Coco + horticultural grade perlite (~20%) Seeds supplied by Royal Queen Seeds https://www.royalqueenseeds.com Nutrients supplied by Shogun Fertilisers https://www.shogunfertilisers.com/en ==========
Likes
95
Share
@Canna96
Follow
This week was phenomenal. She is starting to grow vigorously, and I am really hoping she grows 8 tall, fat ass mains. Cream Mandarin XL auto from Sweet Seeds is already on my list to run again, excellent Auto to build a manifold. I did the least amount of LST on her that I have done on any of my 2 previous auto manifolds, so I'm hoping she grows tall and then I will see what this new Mars Hydro FC 3000 can do. I decided to start running a time lapse last week, so I posted one weeks worth of growth, but I will keep running it for at least a few more weeks. She's only a foot tall at day 35, but I'm done messing with her and hoping for a monster stretch in the next 15 days or so. Thanks for stopping by, be safe, and have a great weekend!
Likes
16
Share
Top dressed all @ 2tsp/gl 70/30 mix of 3-9-4 and 4-4-4, PP and WW doing fantastic! Shout out to @dutchpassionofficial , defoliated all the crappy looking shade leaves on the GSD. Dropped nighttime temp's to 60F and PH @ 6.3
Likes
43
Share
After last week crazy heat wave that stop the growth....everything is back growing almost 2” per day...Thc #1 is now standing at 87”( yes 7’ and 4” ( what a beauty) #2 is at 74 “ ...but the pests and pest are on my girls( mealy bugs ,lots of aphids and fews inch worm) ,the soap did not work so add to take drastic measures “pesticide “ I used end-all with a very fine mist and I remove lots of leaf to give more lighting inside ( even not been a fan of defoliation sometimes you need to do ) now still see fews little aphids under leafs but nothing crazy ( so I spent lots of time everyday checking new growth and under leafs to squeeze thems and I put bunch of glue stick for bugs hoping this will held me little more) .looked like the have started flowering so I’ll do one more veg fertilizer but I’ll cut in half the strength and won’t put rapid stater as I want her to started thinking flowers and next week onto flower juice😃... Bombseeds you guys have amazing genetics 😍
Likes
16
Share
Likes
10
Share
Day 78 🌱🌱🌱🌱🌱🌱🌱🌱 BBlue dream went faster then orange, buds are fattest and looks to be ready in max 1 week. Keep giving ph controlled water, 2 lt every 3 days, water looks really cleaner. Let’s seee!!!! 🌱🌱🌱
Likes
15
Share
@Lazuli
Follow
These smell very strong now, Final week, she gets ripen already for 2 days now, so next week harvest Not the biggest buds but rockhard and super frostyyyyyy
Likes
61
Share
Smooth sailing. It's crowded so it's a challenge to take pictures. These plants have just kept going and going. It's a good grow to me. I forgot to change it, but the lights have been on 12/12 for 2 weeks. Dehumidifier and other decisions have helped me to have a pest and plague free grow (knock knock).
Likes
20
Share
Lots of growth this week. Grew 6 inches this week. Turned over to 12/12 light cycle and began flowering on Friday.
Likes
5
Share
@Jankky
Follow
Raising the structure brick by brick and looks like I'll need to add more. Brewing our own banana / lactic acid flowering serum to use in the upcoming weeks.
Likes
29
Share
@Darox
Follow
They seem to be doing ok, apart from the one at the back right which is developing red spots on upper leaves, think its a deficiency rather than bugs. Have been trying to water down nutes a bit more so its more like the above amounts split between 2 litres instead of 1 litre. Not sure I should up the amount at this point.
Likes
4
Share
The stretch phase is officially over, and now the plant is shifting its energy toward trichome production!🌱 I’ve started noticing a light scent developing, though it’s still not very intense yet. I expect that to change in the coming weeks. I did a light defoliation to improve airflow and light penetration, and I plan to do another round in about two weeks. Interestingly, the fan leaves are starting to take on a slight reddish hue—curious to see how that develops! 💪😊 So far, everything is looking great, and I’m excited to watch the buds bulk up in the next phase!
Likes
16
Share
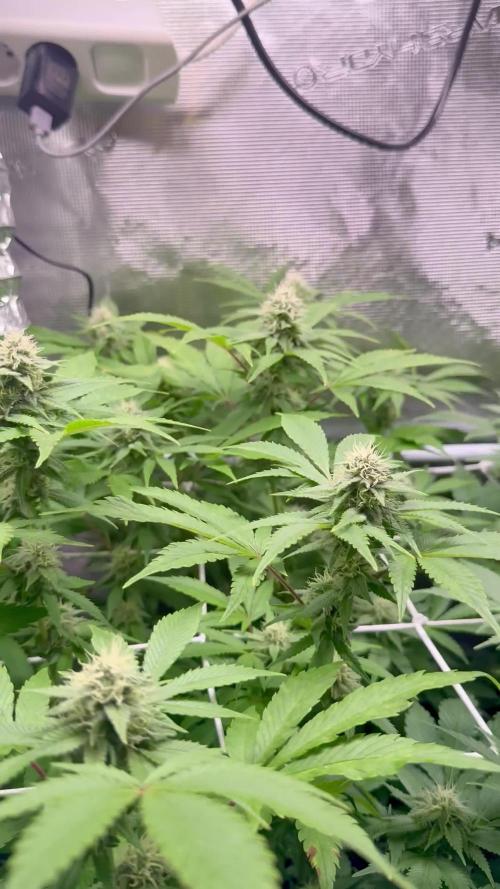
🌱 Lemon Cherry Gelato — Week 9 From Seed (Week 5 Flower) We move forward with our Lemon Cherry Gelato, now entering what we call Week 5 of flower (Week 9 from seed, 12/12 from start). This week brings something special — not one, but two expressions of the same genetic, grown side by side, each telling a slightly different story. The first Lemon Cherry Gelato remains untouched. No defoliation. Just observation, light guidance, and studio time. She stands full, natural, and honestly… stunning. The second Lemon Cherry Gelato took a different path — what started as a light clean-up turned into something closer to an “army-style haircut.” A full defoliation to open space, improve airflow, and allow light to penetrate deeper into the canopy. Two plants. Same genetics. Two approaches. Same goal — let them express. --- ### 🌿 How We Got Here This is a 12/12 from seed run, meaning these autoflower plants never experienced a traditional vegetative phase. From the start, they grew with the signal that time is limited — and that shows in their structure. Instead of wide, heavily branched vegetative growth, they focused early on vertical development and flower initiation. Now, in Week 5, we see the result: dense bud sites forming across a compact but highly productive structure. --- ### ✂️ Why We Defoliate (And Why We Didn’t — Yet) The room is getting full. Really full. The decision to defoliate the second plant came from necessity: • Improve airflow • Reduce humidity pockets • Increase light penetration • Redirect energy toward flower sites On the first plant, we chose patience. Sometimes doing nothing is also a decision. Next week, she may follow the same path — but for now, she shows us what happens when we simply let her be. --- ### 🌸 About Those White Hairs (Pistils) What you’re seeing across all those bud shots — those bright white hairs — are pistils. They are part of the female reproductive system of the plant. Their natural purpose is to catch pollen. But in our case, there is no pollination. So what happens? The plant continues producing more and more pistils, trying to fulfill that biological mission. At the same time, it increases resin production as a protective mechanism. This is exactly what we want. More pistils → more potential bud sites → more resin → better final expression. --- ### Feeding Strategy (Why This Mix Works) We keep the nutrition consistent and intentional: • Terra Bloom → Base nutrients for flowering • Green Sensation → PK booster + metabolic support • Power Buds → Encourages flower initiation and structure • Sugar Royal → Supports terpene and sugar production • Pure Zym → Enzyme activity, root zone health • CalMag → Stability under LED conditions Nothing excessive. Nothing random. Just a balanced system supporting what the plant is already trying to do. --- ### 🌡️ Environment & Plant Feedback Room conditions: • Temperature: ~28°C • Humidity: ~65% • CO₂: ~1000 ppm On paper, some might question these numbers. But we don’t grow on paper — we grow by reading the plant. We follow leaf behavior, transpiration, and overall response (leaf VPD in practice, not just charts). The plants are drinking ~1.5L per day, standing around 1.2m tall, and showing strong metabolic activity. That tells us everything we need to know. --- ### 🍃 Small Imperfections We noticed minor leaf burn from under-canopy LED exposure. Nothing serious — and most of it was naturally removed during defoliation on the second plant. A reminder: Not everything needs correction. Some things just need understanding. --- ### 🎭 Meet Mr. Baggy This week also marks the official arrival of Mr. Baggy. You may have seen him around already… but now he joins the journey properly. Part observer, part assistant, part silent chaos. Welcome to the crew. --- ### 🔮 What to Expect Next Week • Continued bud stacking • Increased density and structure • Possible defoliation of the first plant • Early signs of terpene development becoming more noticeable We are entering the phase where everything starts to connect. --- ### 🤝 Gratitude To everyone who passes by — The long-time supporters, the new ones, the curious minds, the silent observers. To the platform. To the partners. To those who love it and those who question it. All of you are part of this. We grow together 📡 DELETED @ 1K Please stay tuned.we never quit https://www.youtube.com/@thedogdoctorofficial NEW 🙏 Thank you for your patience and continued support. FOR DISCOUNT CODES AND MORE JUST FOLLOW THE LINK https://website.beacons.ai/dogdoctorofficial 📲 Don’t forget to Subscribe and follow me on Instagram and YouTube @DogDoctorOfficial for exclusive content, real-time updates, and behind-the-scenes magic. We’ve got so much more coming, including transplanting and all the amazing techniques that go along with it. You won’t want to miss it. GrowDiaries Journal: https://growdiaries.com/grower/dogdoctorofficial Instagram: https://www.instagram.com/dogdoctorofficial/ YouTube: https://www.youtube.com/@dogdoctorofficial Deleted by Youtube Vimeo : https://vimeo.com/dogdoctorofficial Under construction stay tuned ⸻ Explore the Gear that Powers My Grow If you’re curious about the tech I’m using, check out these links: 🔆 Lighting & Environmental Control • Future of Grow — Advanced LED lighting technology https://www.futureofgrow.com/ DISCOUNT CODE: DOG20 • Lumiflora — Under-canopy LED lighting https://lumiflorade.com/ • TrollMaster — Environmental controllers and automation gear (past collaboration) ⸻ Genetics • Zamnesia Seeds — Genetics used in this project https://www.zamnesia.com/ ⸻ 🌱 Soil, Substrates, Boosters & Root Support • Plagron — Substrates, bio mixes, and supportive products https://plagron.com/en/ ⸻ 🎒 Storage, Curing & Preservation • Grove Bags — Curing and storage solutions https://grovebags.com/ ⸻ 📸 Photography Equipment & Tools (Not sponsors, but part of my creative toolkit) • Sony A6700 • Sony full-frame macro lens + few more • Stacking photography workflow - learning • iPhone (for behind-the-scenes shots) We’ve got much more coming as we move through the grow cycles. Trust me, you won’t want to miss the next steps, let’s push the boundaries of indoor horticulture together! As always, this is shared for educational purposes, aiming to spread understanding and appreciation for this plant. Let’s celebrate it responsibly and continue to learn and grow together. With true love comes happiness. Always believe in yourself, and always do things expecting nothing and with an open heart. Be a giver, and the universe will give back in ways you could never imagine. 💚 Growers love to all 💚 📸 P.S. – The Eye Behind the Lens All photos in this diary (for now — except for the ones showing the camera, which I took with an iPhone) are taken with a Sony A6700 paired with a Sony full-frame macro lens and a few more. Photography is part of the story — it’s how we share the fine textures, the glow, and the quiet details that words can’t always capture. I’ve also started experimenting with photo stacking — a technique where multiple images, each taken at a slightly different focus point, are layered together to create one perfectly sharp image from front to back. It’s not digital enhancement or AI; it’s pure photography — a way to reveal the plant’s beauty in microscopic depth, from trichome to petal. You’ll even see a few shots of "ghost me" capturing the shots — camera, lens, setup — because every grow deserves not just to be cultivated, but documented like art. FOR DISCOUNT CODES AND MORE JUST FOLLOW THE LINK https://website.beacons.ai/dogdoctorofficial NEW DISCORD - Official Server Invite Link : https://discord.gg/ksjAkA5T74
Likes
34
Share
We chopped down the plants. Now they hang out to dry in the tent. The Trichs looked very good. Some milky, some amber, hardly any clear. Just the way I want it. The popcorn buds were rather milky. So we have more of a couchlock effect on the head buds and the maximum THC on the popcorns. I'm really looking forward to the taste💚
Likes
5
Share
Week5 The week is over and all looks fine. Both ladies are preparing to bloom and are growing. Orange Sherbet is now 28 cm tall. Bruce Banner has caught up a lot this week and is at 25 cm. For 1 liter of water there was 0.5 ml of silicate;; 0.5 ml of Calmag;; 2 ml of BioNova BN-Zym, 2 ml of BioNova TheMissingLink;; 2 ml of BioNova Auto complete fertilizer and 1 ml of 100% organic algae juice. Ph 6.0-6.3 23°C
Likes
3
Share
@Xebediah
Follow
Finally got the RDWC system complete and the girls are in and under the LEDs. Started with the LED light elevated higher than recommended; didn't want to cause light burn. About mid week I bumped the TDS up to 350 and lowered the light elevation to 18 inches and they responded very well.
Likes
2
Share
Set up an evaporative cooler to act as an intake and to cool the temp through evaporation. It I was able to get the average temperature down to an average of 77°. Relative Humidity increased to an average of 55%. ~~~~~~~~~~~~~~~~~~~~~~ Evaporative Cooler: The evaporative cooler was way bigger than I thought and blowing all the air into the tent would be overkill and would throw off my ventilation given that I only have a 4inch exhaust fan blowing air out. So I had to rig an air duct onto the front to channel some, but not all, of the air coming from the evaporative cooler. I cut a hole in a plastic brownie box and zip tied right angle plate that I had leftover from an ikea furniture. Then I put velcro tape to easily attach and remove the air duct from the cooler for future maintentance and cleaning. I left the room where my tent is closed one day and the humidity went up to 84% which also increased the temperature to 90° but I found that simply leaving the room door open gives the cooler enough air circulation in order to function properly and averaged out at 55% RH and 77° F. ~~~~~~~~~~~~~~~~~~~~~~ Defoliated some ugly fan leaves that were shading a lot of lower buds.
Likes
26
Share
@Haoss
Follow
A new plant was born, thanks to the seeds of Zamnesia, I hope the best girl will grow up