


Likes
12
Share


@thonhash
Follow
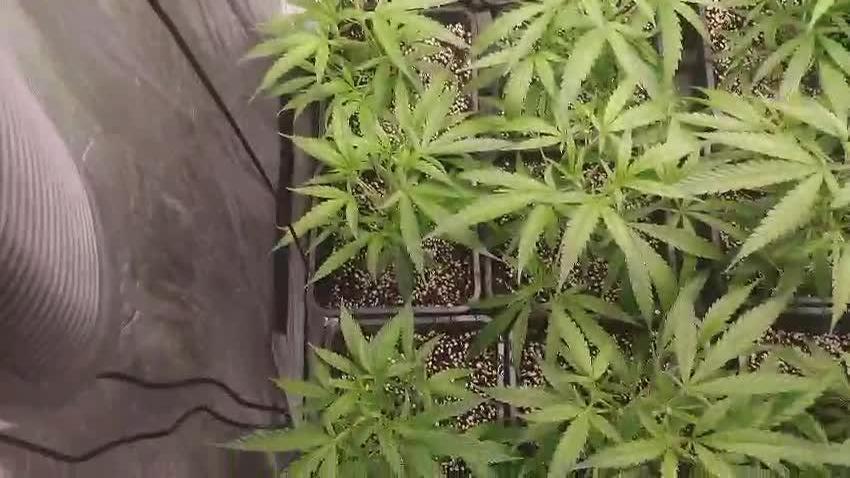
Sobre esta cepa no hay que comentar mucho,bastante contento con esta regular.

Likes
41
Share


@Ganjagrandaddy
Follow
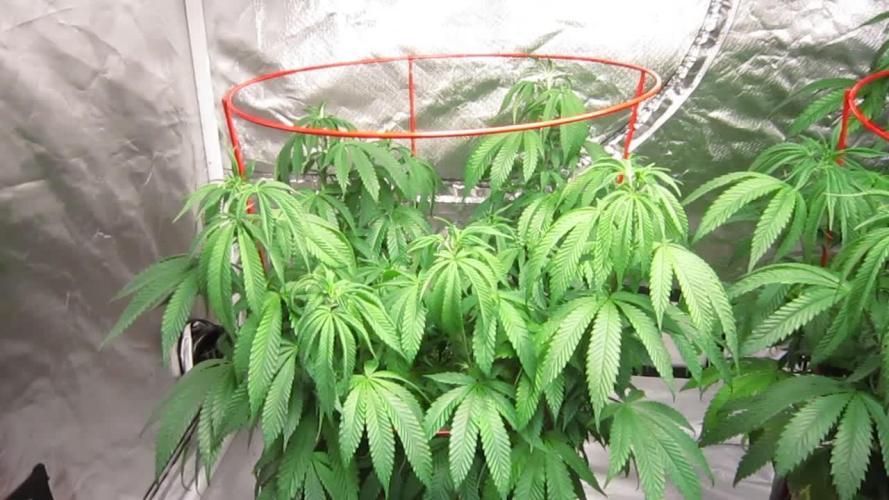
DAY 28 : Hi all , hope your past week has been a positive one with lots of love and affection.
I am at the point now where flowering should be starting to show throughout the plants usually. Their are many tiny white pistil hairs showing their female genetics across the bracts of them all now so it looks like flowering has begun !!!!
The FC3000 has really given them plenty of light on their perfect spectrum to develop those nice fat fan leaves and now will no doubt take them through a great flowering period. It doesnt produce much heat at all and you can touch it for a while and still not feel too much heat. Ideal for stealthy gardens..
The Tip Spreading has been continued up to this point and it is clear to see how it works on keeping the heights down. By using additional l.s.t that wont slow growth down like the leaf tucking and threading the growing tips above the larger fan leaves that are still being used like solar factories producing copious amounts of food for the developing growth tips. The stems on the majority are nice and thick from the close stacking of the nodes and their is very little popcorn to remove from lower down. I will be keeping them all as open as I can now that we are going into the stretch periods pre flower. The potential is there now to create very chunky bud stacks but I think the Strawberry Pie have ideas of bursting out more . !
They are certainly all a lot more happy than the bonsai Mexican that has emerged in #1. Still very short and half the size ( or less!) than her sister in the next bed. She looks happy and healthy now but her initial shock at the soils make up had a negative impact very early on.
Overall it has been a good week for their tip spreading l.s.t and setting them up for flowering and I hope that our next update will be the bud porn early stages. Be well and prosperous growmies

Likes
19
Share


Likes
4
Share


Likes
11
Share


@BruceBlack
Follow
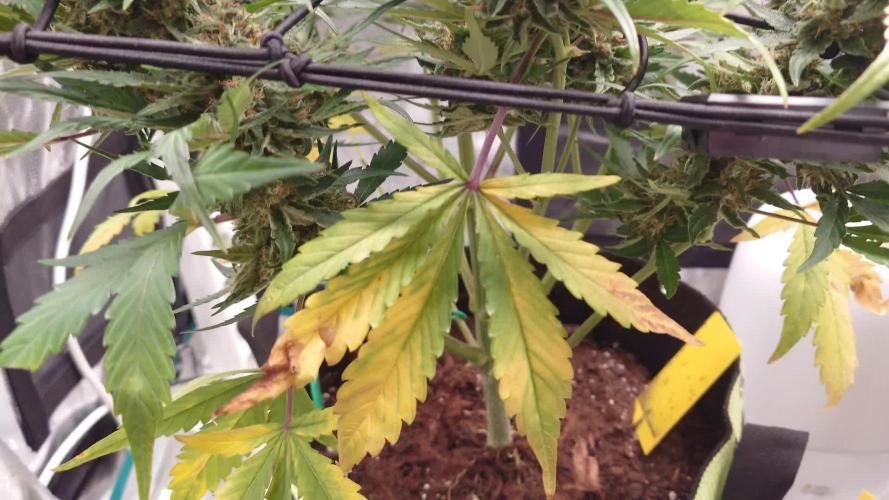
Well , so I started the week having some over-fertilization problems and some of the leaves were getting curly , also green was too intense.
Due to some great advice from more experienced growers I decided to give'em just water for this past week which I guess was great, you can see color of the leaves in the last video I posted, look more natural overall
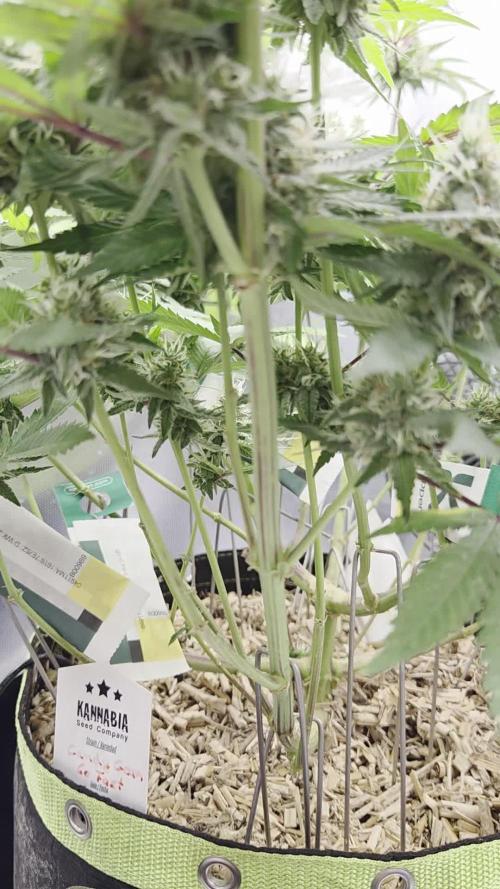
Today I decided to gently break the main stem from my tallest girl in order to see if it ill grow better in horizontal position and will start fattening buds soon, I've used the same technique in another one was growing too tall and now its fattening properly, that was one week ago tho
Overall everything went fine , had some problems with water, I guess I will feed 'em more often , maybe every 3-4 days with 2-3 days just water and then my organic nutrients cocktail.
I'm very happy to see my tent almost full of white hairs (pistils) everywhere yeahh! I've found out as well that every of them its female so can't complaint.
From next week I'll try to show how that plant I've bent over is doing , and also will start applying nutrients together with the water, also need to put the net higher and show a real SOG
I'm using some baking soda and vinegar in order to create CO2 but I guess the reaction finishes quite fast
About defoliation I don't feed very confident since I think flowers need as much energy leaves can absorb in order to be big plus the leaves of my plants are huge and I love that, never sees bigger leaves, ofc I know I'm new in the game but would like to see things myself as well
Thanks for every advice and I hope we keep on growing together and learning from each other
Have a good one everybody!!


Processing
Likes
5
Share


@GaiaGreenGiant
Follow
New weekly uploads for a glimpse of what’s happening in the Cabbage Patch!
She’s loving life!
Day 38 - Wanted to rid her of some lower growth so I decided to make a lil video. Cheers 🍻

Likes
3
Share


@Mr_nugs_lover_David
Follow
Beautiful strain so far, hope she was gonna grow a little bigger but she's did get very big,she's starting to produce a very nice smell. Let's see what happens guys.


Likes
50
Share


@DogDoctorOfficial
Follow
Week 5: Transplant Time & Root Power!
Oh man, this was one of those weeks! We transplanted all five phenos into bigger pots, and let me tell you, they’re thriving! (Check out the complete video episode for all the details 😉).
The girls are looking amazing, all pretty much the same size for now, so I don’t have any favorites yet—but let’s see what the future holds!
For photos, I used both my Nikon P900 and Sony A6000, with a bunch of lenses and filters to preserve the true colors—these LEDs are powerful!
Current Setup & Conditions
This week, they’re still chilling with their sisters in the big tent, but in about a week, they’ll be moving into the TrolMaster ecosystem for even better environmental control.
Watering: pH 6.06, EC 0.96
Temperature: A bit cold , but it is what it is. We’re facing some freezing outdoor temps (as shown last week in the frosty veggie garden pics!), yet these Runtz are holding strong like true champions. 💪❄️
Nutrition: Still on the Aptus Clean Program, with:
Regulator
System Clean
RO Water Conditioner
All-in-One Liquid
Root Development: The Real MVP!
Let’s go deep on roots! The mycorrhizae in the Pro-Mix soil has been working its magic, and I’m still boosting them further with a touch of Aptus Holland Mycor Mix. The root development on this transplant was insane—super white, healthy, and ready to explode with growth.
What Are Mycorrhizae?
The word “mycorrhiza” comes from Greek:
• Myco- meaning fungus
• Rhiza- meaning root
Mycorrhizae are a type of beneficial fungi that form a symbiotic (mutually beneficial) relationship with plant roots. These fungi extend far beyond the root zone, creating an underground network that helps plants absorb water, nutrients, and improve overall health.
This is not a single species but rather a whole category of fungi, mainly divided into:
1. Ectomycorrhizae – Live on the outside of plant roots, forming a sheath around them. Common in trees like pines and oaks.
2. Endomycorrhizae (Arbuscular Mycorrhizae, AMF) – The most beneficial for most crops and cannabis. These penetrate root cells, forming structures inside the roots that exchange nutrients.
Where Are Mycorrhizae Found in Nature?
Mycorrhizae naturally occur in forests, grasslands, and undisturbed soils worldwide. They play a crucial role in maintaining ecosystem balance by helping plants access nutrients from the soil.
In a natural environment, plants are constantly forming relationships with these fungi. However, in modern agriculture, excessive tilling, chemical fertilizers, and fungicides have reduced their populations, making supplementation necessary in many cases.
How Do Mycorrhizae Work?
Once mycorrhizae colonize a plant’s roots, they start forming an underground fungal network called the mycelium. This network extends the plant’s reach into the soil, acting as a second root system.
Benefits of Mycorrhizae:
✅ Enhanced Nutrient Uptake – Mycorrhizae help plants absorb phosphorus, nitrogen, and micronutrients that would otherwise be unavailable.
✅ Improved Water Absorption – The fungal network can reach deeper into the soil than roots alone, helping plants survive drought conditions.
✅ Stronger, Healthier Roots – They promote thicker, more robust root systems, reducing transplant shock.
✅ Better Soil Structure – They produce glomalin, a protein that improves soil aggregation and helps retain moisture.
✅ Natural Pest & Disease Resistance – Healthy plants with strong mycorrhizal relationships tend to be more resistant to soil-borne pathogens.
How Mycorrhizae Help in Cannabis & Gardening
In controlled growing environments, using mycorrhizae is a game-changer. Since cannabis relies heavily on phosphorus, the enhanced nutrient uptake provided by mycorrhizae is especially beneficial.
Best ways to apply mycorrhizae:
• At transplant – Dust roots with mycorrhizae powder or mix into soil.
• As a soil drench – Some liquid formulations allow fungi to colonize even after planting.
• Mix into your growing medium – Using pre-amended soil like Pro-Mix HP Mycorrhizae ensures roots have early access.
Pro Tip: Mycorrhizae need living roots to survive! Avoid using synthetic fungicides or excessive chemical fertilizers, as they can kill the fungi.
Think of mycorrhizae as a natural root booster. They’ve been around for hundreds of millions of years, helping plants thrive in all conditions. By using them in cultivation, you’re mimicking nature, ensuring your plants grow stronger, healthier, and more resilient.
When used correctly, mycorrhizae can increase yields, improve plant health, and reduce the need for synthetic inputs—making them a must-have for any serious grower!
Can’t wait to see how they’ll look in the next transplant!
I made a few changes to my improvised photo studio, including a pink background for now—because why not? Let’s keep things fun and full of color! 🌸📸
Massive gratitude to all our sponsors and of course, a special shoutout to Zamnesia, Plagron, and Grow Diaries for making this amazing cup happen. 🙌
And to the community—followers, supporters, lovers, haters—I love you all! ❤️ Let’s keep pushing forward, learning, and making this grow legendary!
Stay Tuned for More!
Next week, i may be moving them into bigger pots and getting them into their final environment. You won’t want to miss this next stage!
See you all next week—stay tuned, keep growing, good luck to all and let’s make history together! 🚀🌱
Genetics - Runtz https://www.zamnesia.com/6000-zamnesia-seeds-runtz-feminized.html
Nutrients - Plagron https://plagron.com/en/hobby
- Aptus Holland https://aptus-holland.com/
Controls - Trol MAster https://www.trolmaster.eu/
LED - https://www.futureofgrow.com/en
LED - https://www.thinkgrowled.com
Soil - https://www.promixgardening.com/en
Germination - Cannakan https://cannakan.com/?srsltid=AfmBOopXr-inLXajXu3QFgKXCXXos4F1oEvScjMKIB5MR5dk8-GJ-F49
DOGDOCTOR 15% off
Smoking Papers - https://ziggioriginal.com/
Terpene saver - https://grovebags.com/
As always thank you all for stopping by, for the love and for it all , this journey of mine wold just not be the same without you guys, the love and support is very much appreciloved and i fell honored with you all in my life
With true love comes happiness Always believe in your self and always do things expecting nothing and with an open heart , be a giver and the universe will give back to you in ways you could not even imagine so
As always, this is shared for educational purposes, aiming to spread understanding and appreciation for this plant. The journey with nature is one of discovery, creativity, and respect. Let’s celebrate it responsibly and continue to learn and grow together!
Growers Love To you All 💚
#EternityGrowCup #RuntzHunt #GrowersLove #CannabisCommunity #AptusHolland #ProMixSoil #TrolMaster #Zamnesia #Plagron #ZiggiPapers #Grovebags

Likes
10
Share


@Chitown_grower
Follow
This was quite the grow y'all. The blumat soaker hose was a great addition... once I figured out why it kept getting stopped up. I can't wait to get another living soil grow going cause that was a lot of fun!

Likes
57
Share


@Silverback_Guerilla
Follow
1/4:
Moved a few other plants out of the closet, now they've got a little elbow room.
Both Zenzations are fattening and frosting up very nicely. The Gorilla Girls have finally stopped stretching and are budding up nicely now. Their lowers are as all as the tops.
The Black Jacks look great, too.
1/7:
Fed today and gave them all a sniff test...killer stink from the Zenzations.😵
I added a dose of endoboost in their feed today...kinda worried about the monstrous size of my plants considering that they are only in 3 gallon pots..

Likes
2
Share

@Chucky324
Follow
Hello. This is the end of week 12 and the beginning of week 13 of veg.
Did a harvest of my grow room because I had found a 3 small pocket of mites, so I thought I was being smart and put my clones in here before they get the mites.... Didn't notice the 3 clones that had mites on them.... now they have been in here 5 days, and I've see the mites and wonder if I've infected the tent... so I bought some Persimilis, predatory mites, and I will get them in a couple of days to release in here.
The plants look good and are doing well except for the mites......
OK. Be Great.
Chuck..
Likes
21
Share


@Budhunter
Follow
P.punch is going to complete 3 weeks flowering soon and the others 1 week flowering. Happy with thw results so far
Feeding them 2.4lt water mixed with fertilizers.
Im really liking this line of advanced nutrients ph balanced, ladies are loving it and no signs of any deficiency 👌🏼👊🏼🚀🔥
Likes
65
Share


@DudeGrowsWeed
Follow
Blue Dream'Matic growing strong. Defoliated her this week and she bushed right back out again in a couple of days. Lightly fed some Espoma Organic Grow this week.
She seems to be in a friendly competition with the Auto Lemon, they have been battling back and forth to see who's taller. Fight all you want girls, I'll be the winner in the end. 👍
Likes
12
Share

@Gewaltmann
Follow
Wie auch bei der Runtz, es wird Zeit regelmäßig trichome zu checken. Auch das massive pistillhärchen meer fängt langsam an sich bräunlich zu verfärben.
Auch hier schätze ich noch die ein bis zwei Wochen also werden alle beiden Damen zusammen niedergemacht.
Ansonsten lasse ich hier noch das Video für sich sprechen.
Und wer noch mehr von der Guava Sundae sehen will - Ab 03.04. - Guava Sundae auf YouTube suchen 😘
Likes
29
Share


@nijuana
Follow
I'm flushing it since 1 week , HERE WE ARE ENDLY 💚 !!!!! the 3 latest day i increase the water that I'm giving to it and the latest day I'm flushing with terra aquatica flush (3ml/l) I'm so impressed by this queen 👑 , so heavy , so powerful !!!
From the beginning to the end this is a phenomenal strain , total love !

Likes
9
Share


@Skinnytalls420
Follow
Day 16-27/12/21 doing well!!! Day 20-31/12/21 plant is looking good!!!! Waiting to move half of them to another tent!!!!


