Likes
Comments
Share
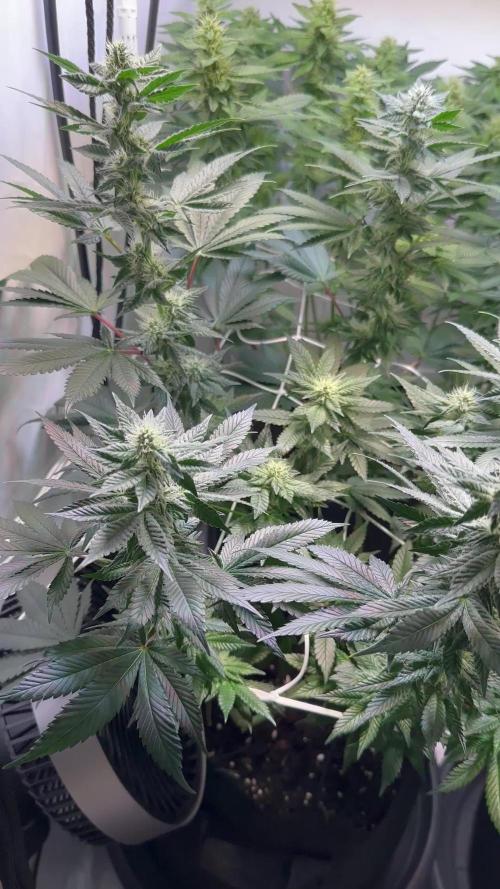
What’s going on lady’s an gentleman. We got the GSC going into week 3 of flower an she is amazing looking full of bud sites an smells like GSC already very strong smell. I currently have the SF2000 light dialed in at 80% @ 16in away will be moving it closer as she grows up towards it. Not to sure is she going to stretch anymore but from the looks of it the bud stacking is going. Her soil ph is stable at 6.4 just adding water to the living soil. Not to sure if ima be defoliating or letting her ride lmk in comments below what you think. Thank you for viewing an happy growing!
Likes
33
Share
@AshBrand
Follow
4/1/21 - Both plants were transplanted into 5 gallon fabric pots with Ocean Forest soil by Fox Farm Nutrients. I will be using plain water for the next two weeks to allow the plants to get acclimated. (See video) 4/2/21 - Watered both plants with water (ph 6) noticed the grow room is a little humid throughout parts of the day but I will be installing the fan today. Both plants seem to be adjusting well. 4/3/21 - Plants are doing good. Watered them with ph 6 water. Noticing some yellow on the bottom leaves. 4/4/21 - The ends of the leaves are turning a light yellow from nutrient burn as a result of the ocean forest soil. Started low stress training today, added two clips per plant (see photo) 4/5/21 - The soil is still moist from yesterday, I’m not going to water today. They are still in the low stress training clips. You can really see the nutrient burn today. (See video) 4/6/21 - I watered the plants today with water (ph 6). Not much change in appearance from yesterday. 4/7/21 - Plants are looking great, the nutrient burn is starting to fade a little. I will be starting a new week tomorrow. (Continuing with water, and low stress training)
Likes
4
Share
04 - 07 May 2023 - Germination Week 08 - 14 May 2023 - Veg week 1 15 - 21 May 2023 - Veg week 2 22 - 28 May 2023 - Veg week 3 29 - 04 June 2023 - Veg week 4 05 - 11 June 2023 - Veg week 5 12 - 18 June 2023 - Flower weel 1
Likes
8
Share
@Kindbudz
Follow
This is the last week of flower. These genetics are beautiful. Saliva dominant, I couldn’t wait to smoke this beautiful strain. Will be growing again.
Likes
6
Share
@Discepolo
Follow
For me was just a dream. An exacting journey that I just loved sharing on Growdiares with every one...feeling finally free to share my passion and learn from other great growers. Next grow will be outdoor, and can't wait to try it out with my fast buds Gelato seeds.
Likes
Comments
Share
@Lushgaia
Follow
I’ve watered them plain water for the entire grow.
Likes
38
Share
Utopia Haze is a rare heavily sativa dominant hybrid (90% sativa/10% indica) strain created through back crossing Brazilian Sativa strains. This tasty little bud took home 1st Place for Best Sativa in the 2008 High Times’ Cannabis Cup and for good reason – with its potent 18-22% average THC level and long lasting cerebral effects, Utopia Haze is one powerhouse smoke. The Utopia Haze high comes on soon after you finish your first toke, hitting you with a strong cerebral lift that infuses you with a sense of hazy relaxation. Type: Feminised/Photoperiod Cultivation: Indoor/Outdoor Flowering Time (days): 70-75 Indoor Yield (g): Up to 650 Feminised Outdoor Harvest Month: October Feminised Outdoor Harvest Month Week: 3rd-4th week Aroma: Citrus, Woody, Pungent, Mint Effect: Cerebral Lift, Hazy Relaxation, Sleepy Welcome Everyone to the Final Entry of my Utopia Haze Grow ! There is so much to discuss ! I have been extremely busy as of late trying to get this Harvest together, but i am happy to have it here for you now ! I Seriously under estimated the amount of time, help from others, and my own necessary skills to pull this off.. and i still kind of screwed it up lol ! But its worth noting i have never actually done this before and trying to document it during....was extremely hard. It is next to impossible to work an iPhone with rubber gloves on ! First I want to discuss everything step by step so before you jump straight into the comments on how the end product is so small in "quantity" Rest assured i am happy with its"quality"...and thats all that matters to me because Life is a journey not a destination! and i have learned so much from this grow that I couldn't be any happy even if i messed some things up :) But at the very least I hope you read through this entry in its entirety with an open mind and focus more on the process, rather than just the outcome! I ran out of Ice & i was only able to wash three times..(normally I've heard you should go sometimes 5-6 washes) Preparation is Key & things will be much better next round :) Photos 1-22 These are pretty self explanatory but for those of you just tuning in now.. this is what happens to a very happy plant when you don't have the necessary tools to monitor key components of growing cannabis.. Ph, as well as EC levels play a very key role in the outcome of your grow lol that being said I was just able to save this plant by purchasing both tools but that doesn't mean the plant didn't suffer because of the prior events.. This was a Huge reason behind me choosing to turn this harvest into what i would consider "Solventless Hash Rosin" from "Ice water extracted Bubble hash". Pictures 23 The idea here is the process of using "fresh Frozen Cannabis" this has been discussed many a time online on such sites as instagram and here on grow diaries as well.. I personally have Never tried the process so i decided to try it out and make a judgement for myself.. Video 24 The Cannabis has now been in the freezer for 72 hours making it very well frozen.. as you can tell i struggled getting it all into the 25u Screen Wash Bag. One thing of note i would do differently is i will de-stem my next batch as i also believe this played a part in the amount of plant matter that escaped through the sieves. Photo/Video's 25-28 The idea here is "ice water Seiving" & especially with the bags that I am using here that are only have screen material on the bottom portion of the bag it is very important to have spaces in-between the screens to allow the water to pass directly through the screens into the bottom bucket with the least amount of resistance.. because the hash is so extremely temperature dependant if it gets warm on the side of the bag.. it will stick there and not make it to the bottom to become use able product.. 29 You do not need to use as much Ice as i used here lol... the idea is to keep everything very cold..i certainly achieved that but at the sacrifice of using so much that i ended up grinding product and producing "contaminants" but in the end they are just plant matter that i would be smoking when i rolled up my joint either way so.. I'm not super disappointed.. But it should be noted that what you want to achieve here is a Layering effect where you have the wash bag between two small layers of ice while the "water current" washes the Trichomes away allowing them to be separated by the screens setup below :) Before Starting the machine you should allow some time (i.e.;10-12minutes pre soak to allow the product to become saturated) before the first cycle. By video 32 I have just ran out of ice lol.. Video 33-34 Here I have a tip for you.. to separate the screens that you sieve through.. cut 5 gallon buckets to stretch them across nice and tight.. it'll make scooping your Bubble that much easier ! i learned this from the many "Frenchy" videos I have watched :) Picture 35 Here in lays the problem for most people.. drying your hash without loosing vast amounts of "Terpenes" whilst also stay ever vigilant against mold ! Thanks to all those videos I've watched on youtube.. id like to think this was one of my most successful parts of this process.. Things to Note; Terpenes start to seriously evaporate at temperatures 68F or 20C you need to stay as cold as possible whilst bringing the Relative Humidity in the space down into the 40-30% to stay away from that nasty mold ! I used my cold storage room in the basement.. with a dehumidifier running to keep the space at 45% RH & staying at a constant 15c. All while spreading the hash as thin as possible across parchment paper, on top of the white screens with a fan moving air across both sides of the paper. Pictures 36-38 These are some macros i took in the middle of my drying session I fell in love with the colour. Yes i know the black spots are plant material but they will get caught when i bag the hash & squish the oil out. Thing to Note; at this stage it is important to ensure you 'micro plane" the hash down as fine as you can whilst staying weary of the temperature... any "chunks" will hold pockets of moisture.. that lead to potential problems..ie; mold ... Picture/Video 39-41 Successfully planed bubble hash ready to be bagged and Squished ! Picture 42 Ive decided to follow Pedro.. from Pedros Grow Room and double bag to be on the safe side so i don't have any blow outs. So thats One 25u bag inside one 160u bag ! :) Pictures 43 This is almost 3 grams of the bubble hash from above, already melting in the bag.. this is where i ran into trouble again lol things started getting to warm in the house and i was only able to get one of the three squish's i did on video :( things started getting sticky. Picture 44 This is basically just a photo of the equipment I'm using; 3x5 LowTemp Cage in the frame I built myself, with a 20Ton bottle jack. Something to note here is this is an older Lowtemp model with only a single heating zone which is which i have it closed here heating Both sides of the press :) As well as the importance of having adequate pressure on your plates.. my rig is very overkill for the size of hash bags..lol Video 45 Here is the lovely press video.. its didn't quite work the way i wanted either lol my directional folding wasn't quite tight enough for a big "drip" :) &the Press was set to 65°c Photo's 46-50 are pretty self explanatory :) I had a blow out.. but still managed to pull an 80% return from the hash once squished...& yes it tasted amazing :) Was it worth it in the end... that could be debated.. for some..i understand..its not your thing, but for those of us that are interested in making our own concentrates.. free from Solvents... I wouldn't make it any other way :) If even ONE of you reading this diary finds it helpful to reference for ANYTHING.....even if its "what not to do" ill consider it a success ! Thanks again for tagging along on this garden adventure.. its been one heck of a journey ! Much Love from B.C. Canada, Until Next time, Cariboo
Likes
4
Share
Agua base 256ppm. 20ml de bloom y 10ml de candy en 10 litros de agua. 800ppm final al riego. Las plantas resultantes de la cruza resultaron ser todas fotoperiodicas y muy similares las 9 plantas. Tuvieron 70 días de vegetativo con poco cuidado pero llevan 30 días con cuidado extremo sin controlar clima ya que su luz es el sol de invierno argentino
Likes
92
Share
Harvest Notes ✂️ • Harvest Timing: Papaya Zoap was harvested at day 63, with select buds taken earlier at day 56 due to mold concerns. • Drying: After careful trimming, the buds were dried for 12 days. The quality and aroma during drying hinted at the stellar smoke to come. • Density & Yield: Buds were rock-solid, delivering an excellent yield with perfect density for storage and enjoyment. Terpene Profile & Aromas 🍋 • Primary Aromas: A tropical explosion with sweet papaya upfront, complemented by creamy, soapy undertones that make her truly unique. • Complexity: As the buds cure, a hint of citrus zest and exotic fruit emerges, creating a full-bodied terpene profile that’s simply irresistible. Cultivation Experience 💡 • Highlights: Her uniform growth, heavy trichome production, and response to super cropping made her a delight to grow. She thrived under careful spectrum adjustments and defoliation, showcasing her adaptability and vigor. • Challenges: The dense bud structure made her more prone to mold, especially in a high-humidity environment. However, proactive monitoring and swift action mitigated the spread. Verdict: 🌟🌟🌟🌟🌟🌟🌟🌟🌟🌟 (9.8/10) Papaya Zoap is a strain that commands attention with her beauty, aroma, and unstoppable growth. While her susceptibility to mold required extra care, her overall performance, yield, and quality were nothing short of exceptional. A grower’s dream and a frosty masterpiece! Stay tuned for their individual harvest reports, smoke reviews, and more as we wrap up this epic series! Discount Codes so you can save big on your next check out 💚💚💚 Kannabia - DOGDOCTOR 30% off SeedsmanSeeds - DOGDOCTOR 10% off CannaKan- DOGDOCTOR 15% off terpyz.eu - DOCTOR 15% off The Neutralizer - PORKIT5-DOG 15% off Fast Buds - DOGDOCT 15% off As always thank you all for stopping by, for the love and for it all , this journey of mine wold just not be the same without you guys, the love and support is very much appreciated and i fell honored and so joyful with you all in my life 🙏
 With true love comes happiness 💚🙏 Always believe in your self and always do things expecting nothing and with an open heart , be a giver and the universe will give back to you in ways you could not even imagine so 💚 Friendly reminder all you see here is pure research and for educational purposes only Growers Love to you all 💚💚💚
Likes
Comments
Share
@Kardo
Follow
Das Zelt ist voll und sieht super aus
Likes
15
Share
@Uwish
Follow
Hello guys, Here I am again to present you a new run, still with the best leds of the market nevertheless as I changed my growing space from 120x120 to 150x150. So I had to update the material inside... I will run with 3 EVO 5-150 lamps of 320W or 960W with Bluetooth dimmers. For the Hydro system, it will be the V-SYSTEM from Alienhydroponics. In fertilizers I am always with Advanced Nutrients. I work with osmosis water. Currently, 4 clones took on 4. Once the roots are ready, I will transfer the cuttings from the propagator to the V-SYSTEM. ------------------------ since the 16/08, when I transplanted the plants in the RDWC system, I noticed some points that I will mention below and correct next time. 1. The cuttings are too small, allow enough time so that I can completely fill my pots with clay balls. 2. Cut out the bottom of the pots from the cuttings. 3. 3/4 of the cuttings are touching the water, so one is late. Next time when transplanting, add more water, up to the basket in order to immerse all the plants and not to create a difference between each one, consequence now I have 3 that are ready to explode and one that will struggle behind, problem corrected today by increasing the volume of water. 4. The b-52 is a real pain in the ass in RDWC, you have to clean the 2 filters almost every day, with this new soup I'm testing without and I think I'll continue like this just with the base sensi grow A and B, as I use Root rot X, I won't use voodoo juice since all the bacteria would be killed. 5. Use of Voodoo Juice is useless if using Root Rot X which will kill the bacteria. I don't know why but when I transplanted in the RDWC, I put my set up in growth mode, except that the plants were not ready for it, moreover, I made a FIM on each. So I lost some days, these last days I went back to a ppdf of 150, now that my roots touch the water, I declare growth 0 on 22/08, I will do between 21 and 28 days of growth. And as my roots are doing well and touching the water I'll go to a PPFD of 300 ++
Processing
Likes
11
Share
@BlumenBot
Follow
1/4 - fed 1gal distilled water, 6.0pH. Starting RAW nutes next feeding. 1/6 - first RAW feeding. Came out rather low ppm so I may double my feeding chart for flower. Everything else is looking good. 72.7*F 5.8pH 818 ppm 4g BLOOM 0.7g Phosphorus 0.75g Kelp 0.55g Cal/Mag 0.5g ominA 2g Microbes Bloom Stage 1.25g Amino Acids 0.25g Enzymes 1/7 - dropped the AC Infinity controller to level 2 as an experiment overnight to see how temps will rise in both compartments. Light is at about 900ppfd a few inches below the lowest tops 1/9 - no issues with fan speed at 2! RAW feeding tonight. 70.5*F 6.1pH 1390 ppm 8g BLOOM 0.96 Potassium 1.5g Kelp 0.25g Cal/Mag 4.2g Microbes Bloom Stage 1.25g Amino Acids 0.25g Enzymes Also found a new way to mix my RAW nutrients without having them stick to the bottom...small landscaping pond pump! It gets the water moving nicely and I just drop the dry nutes in, mixes it for me and I can easily fine tune PH and test PPM without having to shake and take samples! Huge win. 1/10 - She's getting fatttttt!!! Long time to go but just sayin...my lady in veg needs at least 3 weeks so hopefully I'm not stepping on myself here soon!
Likes
1
Share
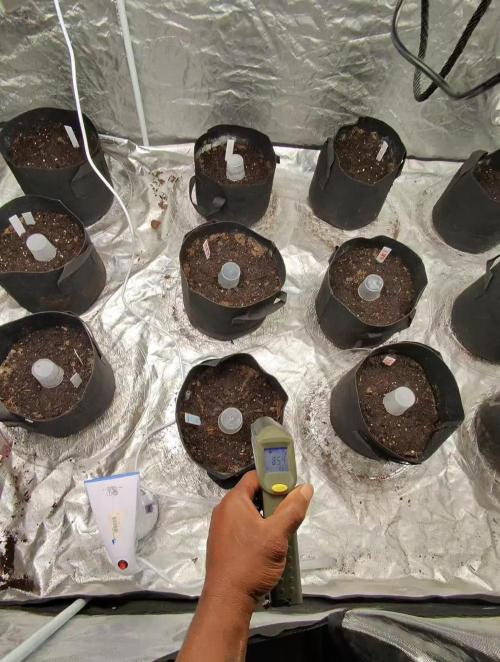
I soaked 3 Laughing Buddha seeds - 2 developed a taproot - 1 bad I soaked 3 Acapulco Gold seeds - 2 developed a taproot - 1 bad I soaked 3 Amnesia Lemon - All 3 were bad and did NOT develop a taproot I also tried the paper towel method on 2 Amnesia Lemon - Both were bad and did NOT develop a taproot Seeds were soaked by using 75F degree water, water was kept warm using a heating pad over night, cups were covered to prevent light leaks Seeds were sown on wet paper towels inside of a plastic baggy, covered and placed on heating pad for warmth at 75% water PH level 6.4 4 seeds that developed at taproot were placed in 78F grow tent, 80% humidity, 16 hour light cycle, lights 24 inches away, light meter reads around 250 with the plants moved off slightly to the side of a 4x2 tent 5 foot tall. Carbon filter not used as it was taking the temperature and humidity down too much. I DO NO RECOMMEND BARNEYS SEEDS - THEY DO NOT STAND BEHIND THEIR PRODUCTS I was offered a 30% off coupon on a future purchase, but I was not compensated for their out of date seeds. worth of garbage seeds, one strain would not germinate and the other two strains did not fully germinate. Customer service was condesending and rude.
Likes
99
Share
~_~_~_~_~_~_~_~_~_~_~_~_~_~_~_~_~_~_~_~_~_~_~_~_~_~_~_~_~_~_~_~_~_~_~_~_~_~_~_~_~_~_~_~_~_~_~_~_~_~_~_~_~_~_~_~_~_~_~_~_~_~_~_~_~_~_~_~_~_~_~_~_~_~_~_~_~_~_~_~_~_~_ ❤️💡🌱😽💨 Quick update..we're making more changes to the grow room this week.. we got some shots under the glass and the trichome density is great for both Kannabia strains ❤️🌱 ~_~_~_~_~_~_~_~_~_~_~_~_~_~_~_~_~_~_~_~_~_~_~_~_~_~_~_~_~_~_~_~_~_~_~_~_~_~_~_~_~_~_~_~_~_~_~_~_~_~_~_~_~_~_~_~_~_~_~_~_~_~_~_~_~_~_~_~_~_~_~_~_~_~_~_~_~_~_~_~_~_~
Processing
Likes
26
Share
@timbarin
Follow
The plant is very bushy and seem to be quite slow reaching flowering stage. Maybe next week will be the week for her. At the moment she is fine, happy and fed with booster and top dressing
Likes
2
Share
@Xabii
Follow
Plant is doing OK? for 21 days? I am a little unsure because she is simply not stretching but growing good on the side notes. After some discussion on /r/Mephheads I came to the conclusion that I will try to lower the DLI so that the plant stretches because for now there are way to many nodes way to close together. Received my predator mites and added them (the pouch). Increased EC at the end of the week with Universol (high in P) and added some water to the reservoir. Heatwave is coming so next week will be hot in the tent, no way around that. Values are average of the day. DATE - EC(us/cm) 20250607 1317 20250608 1329 20250609 1321 20250610 1306 20250611 1319 20250612 1397 20250613 1483 DATE - PH 20250607 5.99 20250608 5.97 20250609 6.05 20250610 6.13 20250611 6.13 20250612 6.09 20250613 5.95 DATE - ORP (mV) 20250607 110 20250608 113 20250609 93 20250610 83 20250611 75 20250612 61 20250613 60 DATE - °C - RH% (Tent Temp/RH) 20250607 24.8 60 20250608 24.8 60 20250609 24.3 59 20250610 24.8 60 20250611 25.1 59 20250612 24.7 53 20250613 25.3 62 DATE - °C (Reservoir) 20250607 22.0 20250608 21.9 20250609 22.2 20250610 22.4 20250611 22.6 20250612 21.5 20250613 24.2 DATE - CF 20250607 13.17 20250608 13.29 20250609 13.21 20250610 13.06 20250611 13.19 20250612 13.97 20250613 14.84
Likes
9
Share
This is the last week of edge then it's time to flip
Likes
6
Share
@Mannabis
Follow
Time for the stretch! Lots of flowering growth happening now. I can see where the bud spots will be so I’m going to have to stop moving the branching around in the Scrog, also the branches are getting thick and less pliable.