


Likes
Comments
Share


@Proto420
Follow
These babies are as happy as can be, for real. I feel like since my first grow was ten plants all at once, that everything seems easier because of that. Cuz these girls look phenomenal.

Likes
28
Share


@Master_weeda
Follow
Bonjour à tous les padawans et maîtres jedis
Pour la germination j'utilise la technique du sopalin
Pour faire germer vos graines dans du sopalin, vous aurez besoin :
Un Tupperware avec couvercle
Du Sopalin, ou autre quel papier de cuisine qui soit épais et qui retienne l’eau
Un verre d’eau
Si c’est l’hiver, vous placerez le Tupperware près d’une Box ou d’un Modem pour donner un peu de chaleur
Étapes de la germination:
faire germer vos graines de cannabis dans du sopalin
La première chose à faire est de tapisser le fond du Tupperware avec du sopalin, 2-3 feuilles suffiront. Si vous ne mettez qu’une feuille, elle captera peu d’eau et pourra sécher, vous mettrez donc plus de feuilles que pas assez.
Une fois les feuilles placées, versez l’eau du verre dessus, mais pas trop, juste de quoi imbiber toute la surface couverte par les feuilles. Vous aurez ainsi l’eau suffisante pour faire germer les graines sans avoir besoin d’essorer la feuille de papier.
Une fois les feuilles humidifiées, mettez vos graines par-dessus, et recouvrez le tout avec une autre couche de quelques serviettes. Une fois en place, humidifiez cette nouvelle couche.
faire germer vos graines de cannabis dans du sopalin
Lorsque vous graines seront placées entre les 2 couvertures de feuilles, fermez le Tupperware hermétiquement pour que l’eau reste bien dedans et que l’ensemble ne sèche pas malgré la chaleur.
Si vous êtes en hiver lorsque vous mettrez vos graines à germer, ou que les températures sont inférieures à 20°C, vous placerez le Tupperware sur votre Box ou modem jusqu’à germination, mais toujours en évitant le contact avec la lumière. Si vous êtes dans une zone au climat tempéré ou chaud, vous n’aurez qu’à placer le récipient avec les graines à l’ombre dans une armoire ou une caisse de rangement. Toutes les 24h, vous devrez vérifier l’état d’avancement de la germination. Si quelques-unes sont sorties mais pas d’autres, prenez celles qui ont germé pour les planter, laissez les autres dans le Tupperware et vérifier de nouveau le lendemain.


Likes
62
Share


@Wicked_Stix
Follow
These have been under the new XS2000 from viparspectra for about a week now. I really love the style of the XS series lights! Hard to beat the LM301B diodes. Check out their black friday deals here https://www.viparspectra.com/?aff=Wicked_Stix&utm_source=affiliate
The gutter hoe grow show is going pretty smooth. It is very unusual to watch these plants grow without them being topped. They seem small compared to plants that I top, but they all look pretty healthy. I had an issue with the organic calmag clogging all of my feed lines. This is one of the reasons I usually avoid organics in hydroponics. The organic was all I could get locally so I tried it and it was a fail. I have calimagic on the way though so they will get a dose in a couple days. I see a few signs of mag deficiency but nothing to worry about yet. They have been on 12 12 lighting for over a week but not seeing signs of them maturing enough to flower. I think it will start happening before the end of next week.

Likes
37
Share


@Hawkbo
Follow
Shes one of the stand outs, shes different from the first pheno already in terms of leaf structure everything seems a bit thicker. The buds on the first one are skinny kinda heavy torpedoes I love them it's a crowd favroite. My ph meter broke and Hannah Instruments sent me a new probe. When I got it and checked run off everything was fucked up so I did a heavy flush on everything and a light feed. Found some shit called Gnatrol on Ebay for the fungus gnats larvae added to the mixidk if it will work tho. Pictures were taken on Day 7 of Bloom



Likes
7
Share


@Mousse
Follow
Lampe bei so 90%
Terps werden immer mehr und es bildet sich immer mehr Blütenmasse,
Mann kann täglich einen unterschied erkennen.
Am Ende der Woche noch
-das Netz entfernt
-Außerdem habe ich noch ein letztes Mal entlaubt.
Likes
6
Share


@underfunded
Follow
gave my last feed day 66. flushing from day 68 through the end! thinking shell be down on day 75

Likes
16
Share


@TerpTurtle
Follow
Okay, well imma be here for awhile longer than I did expect to. I was out of town, getting lost till I was rescued.. Now I'm in the clouds, come down when I run out of jet fuel
I will never run out of jet fuel
🐢⛽️🚀

Likes
31
Share


@Sweetie420
Follow
So we start a week of flush 😁 but only for two plants.The other two i need to cut it before. One of the plant, all of buds were dry af 🤯 i dont know whats happend. The second one has only the one bud on the top dry. Anyway what I saw and what i felt when i smoked those dry buds i can only say that I'm high AF 😂😂😂😂😂
Guys this strain is totally amazing, takes you to another dimension, to the moon 😂🤩
About the weight:
HULKBERRY PLANT N1:
240G WET WEIGHT
HULKBERRY PLANT N2:
560G WET WEIGHT
Rest i will update next week because now i going to the moon 🤪👌

Likes
3
Share

@Franci5
Follow
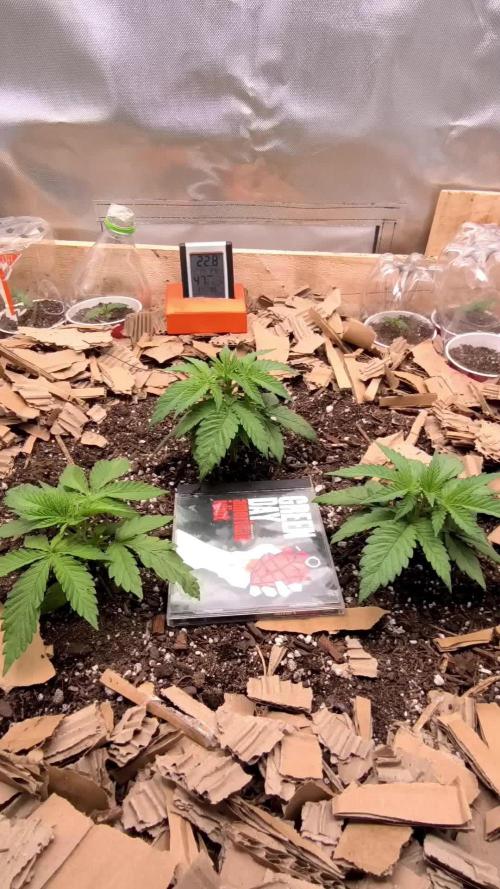
Despite the problem with my humidifier stopping working, the genetics adapted well to these conditions; only one of the plants showed signs of stress which were corrected in the new growth, I don't have the money for a new one, so I'm going to continue growing it this way. I hope everything turns out alright.


Likes
19
Share


@RDWCGrowing
Follow
7/27/2023- Prep
Tent and system are cleaned and ready to go from my last grow. I have submitted my Journa for the Diary of the Month Competition here is to hopeing for good resutls.
7/28/2023- Germination Day 0- Seed initiation
Well lets get this new Grow started.. So My Dad Sent me a custom Landrace Strain that he wanted me to grow out and Breed for him. The Strain is Called Black African Magic:
Black African Magic, Alson known as BAM, is a Sativa pure land race strain, It's classified under the Cannabis Sative species and its genetics come from Africa-the Ituri Forest in the Dmocratic Repoublic of Congo. The Effects are said to be Very Psychedelic, used for Stress managment and for better sleep and rest. This is my frist Land Race so we, will see how this goes together..
RO Water Used
Added Hydrogen Peroxided
8/1/2023- Germination Achieved G-Day1
Popped her head above the root riot today to say hello.. Woot first challenge when dealing with an unknown seed and a new Strain is getting the seed to pop and the lady to show life.
8/2/2023- Germination Day 2
Took the root riot out today and it was soaked not good plant drowing again. I am still having a hard time finding the right blance for where the water should be to keep the root riot moist and not soaked. I had to drain some of the water out of the root riot plug to help give a little oxygen. I also removed some of the water.
8/3/2023- Germination Day 3
Looking good stretching her leaves out to let in the lights
8/4/2023- Germination Day 4
Looking good a few days until I put them into the RDWC System and get this thing rocking and rolling.
8/5/2023- Germinaiton Day 5
Looking good will probably plant tomorrow if the roots are still looking good.
8/6/2023- Plant Day- Germination Day 6
Planted into the RDWC System today. Joy when they go into the system as long as we dial that in right this will now be a great grow.. Survived the hard part..
8/7/2023- Germination Day 7
Everything looks like it is going good, she is showing some damage on the lower leaves from the over watering in the cloning machine but right now I don't see any new damage.
8/8/2023- Germination Day 8
Added the first Nutes today, to help support root growth and to help give there first jump to growth.
TPS SILICA GOLD-.5mil/Gal
Root Drip- 1mil/Gal
GH FLoraMicro-1mil/Gal
GH FlroaGro-1mil/Gal
GH FLroaBloom-1Mil/Gal
ORCA-.5mil/Gal
8/9/2023 - Germination Day 9
Everything is looking good new growth looks like it is praying and they are looking happy. I will take off the damage leaves probably tomorrow.
8/10/2023- Germination Day 10
She looks like she is on track the roots are starting to come out of the basket very small but starting.
8/11/2023- Germination Day 11
Cleaned up the dead leaves... Day 1 VEG tomorrow.. Water Change Day and first real meal...
Processing
Likes
6
Share


@w00tGrow
Follow
I got rid of bigger leaves, did little bit of stretching. The plant was healthy, let's see how much it will grow in a month before turning lights.
Likes
7
Share


@StoneyMelony
Follow
Overview of my grow:
Tent: Secret Jardin DS120 4 x 4 (120 cm by 120 cm)
Lights: 2 x 120 Watt CTlite c4 clusterled
Climat: Trotec Dehumidifyer 240 watt- 10L/24h
Filter: Prima Klima carbon filter PK2600
fan: 2 x Secret Jardin 20watt osc. fan
Pots: Gronest 4 x 11 liter airpots
Water : automated water system
PH: bluelab
Nutrients: Plagron cocos A + B
Plagron PK 13/14
ATA cal/mag
Epsom salt
no rights to music in the videos
Week 9. Frosty, frosty and strong smell. Very nice, watermouthing nice. It looks like trichome city on top of those buds. trichome clusters, maybe another week, get the fat lady. Fat and Frosty. Thanks for checking 😋

Likes
Comments
Share


@Dankmark420
Follow
We cut her early due to a block off in the autopot system.. but she was frosty as a mofo for being cut way to early and the taste was surprisingly very sweet with a piney/spicy kind off aroma and taste


Likes
13
Share


@cookingwithninja
Follow
Day 12 pushing hard like the last 4 grows. I’m very impressed so far. Maybe a little calcium that’s about it


Likes
7
Share


@Bam91
Follow
Le piante hanno un bel aspetto, le foto non gli rendono giustizia.
Questa è stata l'ultima settimana di fertilizzanti, grazie Plagron i vostri prodotti hanno velocizzato la crescita in modo sano senza problemi eccetto per il fenotipo B3 che ha avuto qualche accenno di bruciatura, ma niente di rilevante.
Per il resto tutte e 4 hanno dei profumi diversi molto fruttati e dolci🤤🤤.

Likes
15
Share

@Kominest
Follow
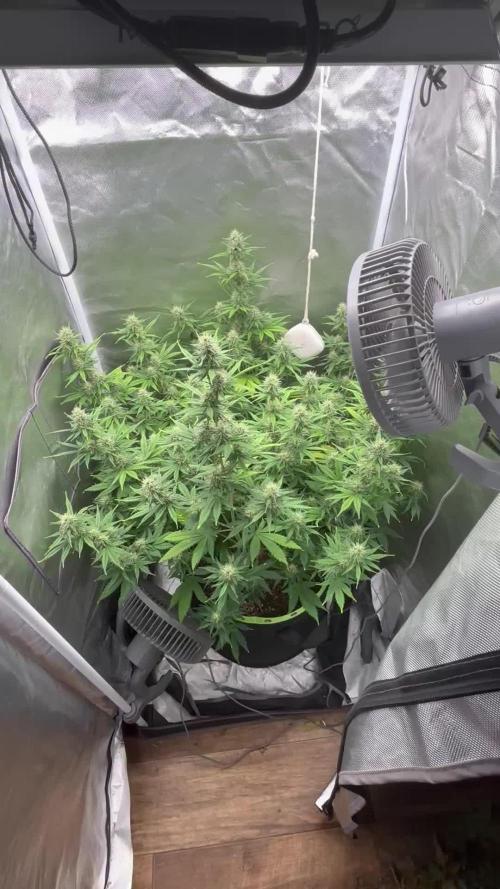
.just watering with monomagnesium and starting flowerbooster . She’s starting to yellow up from the down to upper parts . It’s getting hot like 26-28 degrees that’s not optimal and leafes are hanging a bit on the lower parts . Overall she’s still doing great . Added a 2nd mars hydro fan to the lower part of the tent.
Should’ve listened to my bro @laxx who said it ain’t that smart growing in the tent at this time of the year . He was unfortunately right . But we keep going let’s see if the weather gets better or if she’s fighting through it or not :D
Every day is a learning :D