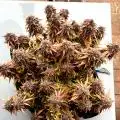
Likes
2
Share
ERROR UPLOADS PHOTOS ALL THE TIME PLEASE HELP 8 DAYS ALREADY ERROR PHOTOS
Likes
13
Share
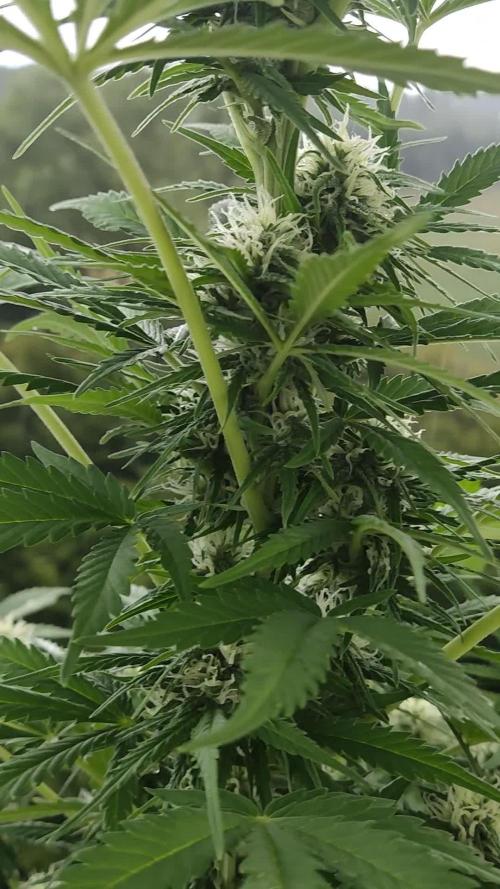
7/20 Went over this morning to plants soaking wet and heavy rain. Went back around 4pm and plants actually look really good. The rain has stopped for a bit and the girls looked great. Apart from some septoria leaves I needed to defoliate on the first plant I treated. I also noticed a few others on other plants so it's spreading albeit slowly. I treated the three in the middle with their second dose of Plant Doctor at 3tsp/1gal. One gallon administered to each plant via root drench. I think I may treat the other plant showing signs with a diy Dr. Zymes using citric acid as the active ingredient. That way I Gould start treatment right away without having to rely fully on plant doctor. Plus it would kill any pests. Ive seen damage but the birds do a number on them. I dont want to spray my plants with a bunch of chemicals if I don't have too. I shouldve replaced the pallets and cleaned the cage better. I think I did a good job sanitizing as I have no wpm. Just this septoria I probably got when the lady mowing the lawn cut all tjis fucking grass and blew it in my pen, throwing bird seed and I'm sure tons of disease into my grow bags. I literally had to harvest a bunch if fucking sunflowers. It looked like my plants had been mulched. Just with small disease carrying shrubs. At some point some of this stuff has to be on purpose. You CAN'T be that stupid. A couple kushes in the back look hungry. I think I may need to up my feed. I've written to much. I'll keep this updated. Thanks if you made it this far. 7/21 I guess it rained last night. Oh well. It was blue skies for hours before dark. It must've rained late/early morning. I'm sure the app of plant doctor will be fine. Like I said I'm considering using citric acid as a foliar spray to help with the septoria and clean up any pests. I don't have enough pests to warrant spraying. I just don't want to put all my eggs in the plant doctor basket. Today is overcast and windy. The wind has really assisted in spreading this virus. I remove anything I see infected immediately and since these plants are reveges they have plenty of leaves. Plants are really stretching. I know I talk about the septoria a lot but realistically if someone looked through my garden they'd have a hard time spotting it. I don't want to exaggerate the problem but I don't like dealing with ANY fungus or molds. 7/22 It was 55° this morning when I went over. I defoliated some septoria leaves and a few that were fading or damaged. I saw almost a whole leaf eaten so it's probably a good idea to move forward with citric acid. I can add that to the plants I've already treated with plant doctor. This is the first year it's been so noticeable. It's the reveg 10th planet that started this off. Oh well. I've dealt with MUCH worse. Plants LOOK good (other than septoria leaves (on bottom of plant). Today is water day for me but it's been raining and it's a lot cooler today. Bags still had weight to them. I want them to have a proper wet dry cycle. Temps top out at 75° so I'll monitor during the day and if something NEEDS WATER I'll give it to it. I'm suprised I have ZERO WPM. The septoria is much more identifiable but pm is usual present in these conditions bur I don't have a spot of it. I may do some defoliation today. I also need to add supports for flowering but one thing at a time. EDIT: Went over around noon. 70°. Bags seem to be holding weight (it was easier to tell as ONE plant was substantially lighter than the rest) so I decided to hold off on watering. At least until tonight. There are three plants (at least that are going to NEED water). They look phenomenal now though and we've had lots of rain. Plan is to go over later and get the light ones and mix the water for the others so I can administer it in the morning quickly. I have an early doctor's appointment but I don't to overwater or water unnecessarily just because. But when you grow alone sometimes you need to do things when your able. I have people there that would help if I asked. And I have before but its late . I'm very grateful. I defoliated quite a few septoria leaves. They were all from the bottom of the plant. A couole wete bottom interior. I know there are worse things to contend with but still a pain. EDIT #2 WENT BACK AT FOUR AND PLANTS LOOKED FANTASTIC AND STILL HELD WEIGHT. THE REVEG MK ULTRA IN EARLY FLOWER "MAY" HAVE STARTED TO DROOP AND "SEEMED" LIGHT. THE LARGE SPECIAL KUSH FUETHEST IN FLOWER BY THE DOOR WAS ALSO EXRRENELY LIGHT. I HAVE AN EARLY DOCTORS APPOINTMENT BUT DONT WANT TO OVER WATER MY PLANTS JUST BECAUSE IM IN A HURRY. ITS COOLER THIS WEEK. 70 TODAY AND HIGH OF 80 TOMORROW BUT DAD SAID THATS NOT UNTIL THE AFTERNOON. I MIXED UP ENOUGH WATER TO WATER EVERYTHING IN THE MORNING IF IT NEEDS IT. I HAVE AN IMPORTANT DOCTORS APPOINTMENT EARLY THAT WILL TAKE ME AWAY AND IM FEELING A LITTLE ILL SO I WANTED TO GET DONE WHAT I COULD TODAY.
Likes
2
Share
เป็นสายพันธุ์ที่ดีครับ
Likes
4
Share
Likes
25
Share
@Kakui
Follow
Veg22, riego con 3.0 EC y pH 5.9, drenaje promedio de 5.8 pH y 2.6 EC(muy bien), primer riego con Sensizym para limpiar un poco las raíces, y este será el último riego de vegetación con Voodoo Juice, Tarantula y Piranha. Se hizo una pequeña defoliación de las hojas abanico más bajas y se volvió a ajustar el LST, ya van tomando la forma final. Veg23, creciendo bien. Veg24, se mide la temperatura de las hojas 22°C y se compara con la temperatura del indoor 23°C, con una humedad de 50% RH, la calculadora arroja un valor de VPD=1.24 kpa, lo que está dentro del rango óptimo. Veg25, hoy toca una pequeña defoliación y probaré también hacer un último apical en 2 o 3 plantas a modo de prueba. Al final, tomé un gran riesgo, y hice varios apicales extra y una defoliación más grande de lo que tenía en mente, tengo fe que resultará bien 😎👌 Veg27, riego con 0.8 EC y pH 6.0, drenaje de 6.0 pH y EC 2.0, se están alimentando y creciendo bien, quedan casi 2 semanas para pasar el fotoperiodo a 12/12, espero que crezcan suficiente para esa fecha. Veg28, un par de hojas de 2 plantas presentan mordidas tipo oruga, revise y no encontré nada, aplique spray insecticida, espero no siga pasando. A parte de eso siguen creciendo bien, quedan un poco más de 10 días para el paso a 12/12.
Likes
3
Share
This week shows a lot of stem growth as well as the presence of some clones! Too excited about how big the girls are getting have a feeling they are going to be getting bigger at a fast rate at this point. I am still keeping them on the same nutrient and light schedule at the moment. I have a lot more pictures and videos this week because lets be honest I am still getting the hang of this thang!
Likes
27
Share
Smells on this bud are amazing! Very piney with hints of berries 😋 Not the biggest harvest, but that was expected seeing as this plant was grown in a 1 gal pot. None the less, I am happy with the results 😁
Likes
3
Share
@BearBuds
Follow
We have made it to the end of Week 6. Conditions in the tent have improved DRAMATICALLY. The heat wave has finally passed and the temperature has finally leveled out. Not only that, the super weird monsoon weather that we were having has also passed and now the humidity is not rising above 60%. This turn for the best is really showing and also fixing the pH problem I had also probably helped a lot. Going to push the PPM a little more this week, between 750-850 The color of the buds is really coming through now, especially in the pineapple express and zkittles. The melonsicle seems to be growing much more like a traditional sativa. I feel it's about a week behind schedule with the rest of the plants. It seems to be on a true 9 or 10 week tract at this point. I think the blue gelato is going to be a bust in terms of yield. It just got heavily over shadowed by the other three plants from the beginning. It has stayed quite small and I am not sure it will yield heavily. Hopefully the smoke is quality and I will be impressed enough with my first Barney's Farm experience to try again.
Processing
Likes
8
Share
day 55: 2 of the plants are finally turning purple! I always have to remove some leaves for the lights to reach the lower buds, other than that I just feed and love them. :-) day 57: those 2 plants are getting more purple every day now! Unfortunately the camera cannot let u see what I see, but the colors are bright pink and almost pearlescent like. I will try and make more pics in natural light, but it's really tricky to get them out of the tent as they're pretty big now ..:P
Likes
34
Share
Week 5 Flower — Sundae Driver Five weeks from seed, Week 5 of flower. The girls are tall, frosty, and carrying real weight. Supercrop results are showing: the knuckle site on the main top is packing beautifully and producing extra fruit around the bend. Photo sessions continue while they’re still mobile, but they’re quickly approaching the point where moving them will be risky. ⸻ From seed to here — short recap • Very short veg, early flip (11/13) to encourage a quick transition. • Strong genetics: both phenos established great branching early and then stretched in flower. • Early training: leaf-tucking and one deliberate supercrop on Pheno #2 to control a “moon-shot” top, the plant has recovered and is producing strong bud sites. • Feed strategy evolved from light steering (low solution EC) while relying on the active living soil, to a slightly stronger, targeted push now that the plants are bulk-building. ⸻ This week’s snapshot (numbers you gave) • Solution EC: ~1.78 mS/cm (after adding All-in-One Liquid) • Solution pH: ~5.87 • Water temperature: ~19.6 °C • Substrate EC (measured): ~5.75 mS/cm • Plants: ~heavy, visibly bulking, good frost and early trichome coverage; leaves lush and green. ⸻ Nutrition this week — what you added and why You’ve blended the Aptus baseline with the Plagron bloom stack and added the All-in-One Liquid this week to “boost things up a little.” The working recipe (as you’ve been using it) is: • Plagron Power Buds / Power products — PK and bloom stimulators to push flower initiation and fruit set. • Plagron Green Sensation — complex bloom stimulator (PK, micros, and biostimulants) to compact and feed flowers. • Plagron Sugar (Sugar Royal / Sugar Oil) — carbohydrate/amino support to feed microbes, aid terpene/aroma production and increase bud sugar availability. • Aptus Regulator — stress resistance, cell wall strength, improved uptake. • Aptus CalMag Boost — to prevent Ca/Mg shortages under heavier uptake. • Aptus All-in-One Liquid (added this week) — a balanced liquid feed to raise available macros and micros slightly and bring the solution EC up to ~1.78. Why this mix now: the plants are in active “bulk and stack” mode. The living soil is still providing a heavy base (substrate EC is high at ~5.75), so the water feed is being used as a steering input rather than the sole nutrient source. The Plagron items are targeted to maximize flower growth and aroma development while Aptus products protect tissue integrity and uptake efficiency under higher demand. ⸻ Soil & EC notes — some important observations • Substrate EC 5.75 is high. If the plants are clean (no tip-burn, no slowed uptake, good turgor), and runoff/pH are stable, you can continue carefully. The living soil is likely holding a lot of available ions. • Solution EC 1.78 is a meaningful step up from the earlier very-low steering feeds. Because the substrate is already rich, keep monitoring plant response closely. • Actionable checks: measure runoff EC and pH after a couple of normal waterings. If runoff EC is very high and plants start showing nutrient burn/leaf edge bronzing, consider: • reducing solution EC, and/or • performing a controlled flush with target pH water to bring substrate salts down, then back to a gentler feed. • If plants remain clean and uptake is quick, the current regime is probably supporting their needs as they bulk. ⸻ Watering & environment (practical reminders) • Keep using your moisture cues (weight or probe). Don’t overwater — allow the root zone to breathe between feeds so the microbiome stays active. • Heavy bud development brings higher transpiration and nutrient demand. Expect faster run-to-run uptake. • Support heavy colas: start planning stakes, soft ties or a light trellis now. Buds are forming weight quickly and the supercropped area can benefit from light support as it fattens. ⸻ Supercrop update — why it worked and what you saw • The deliberate bend on Pheno #2 created the classic healing “knuckle” and redirected auxins to many lateral sites. • Response: a fast curve-up, faster side-site development, and an especially productive top where the bend is located. • Recovery timeline you reported: the branch started to re-orient and carry load in just days — this is ideal. • Keep an eye on the knuckle site for any signs of localized stress or moisture build-up, but good airflow and light will reduce issues. ⸻ What to expect next (and what not to expect) Expect: • Continued bulking and calyx swelling over the next 1–3 weeks. Flower stacking accelerates as plants move past the stretch. • Increased trichome production and stronger terpenes/aroma as sugars and PK feed the resin pathway. • Faster water uptake and higher potassium/magnesium demand under heavy LEDs. • Need for physical support as colas get heavy. Don’t expect (yet): • Final resin peak or full density — that usually shows from mid to late flower (weeks 6–9+ depending on strain). • Large changes overnight — bud density and terpene maturation are gradual. • No problems automatically — a high substrate EC means vigilance; problems show first in lower leaves. ⸻ Practical tips & checklist for Week 6 planning • Measure runoff EC & pH. Log changes. If runoff EC substrate EC and plant symptoms appear, step in with a mild flush and a gentler feed after. • Keep airflow and RH optimized around flowers: small increases in RH can invite mold as buds thicken. Adjust RH downward stepwise if stacking accelerates. • Maintain CalMag and Regulator levels; they’re supporting strong cell walls and uptake under heat/light stress. • Prepare support (stakes/trellis) this week so you can gently secure colas when weight increases. • Continue light, selective defoliation only if it opens important bud sites — avoid heavy stripping now. ⸻ Thanks, community and sponsors Thank you to everyone following the diary, commenting, and sharing energy with these girls. Special nods to the brands and gear that helped make this possible — your tent ecosystem, lighting, nutrients and monitoring tools are all part of the outcome. Grateful for every like, read and watch that keeps the GrowDiaries momentum going. ⸻ Closing — a short reflection Week 5 is where “shape” becomes “substance.” The plants have carried themselves through stretch and are now filling hard. The supercrop paid off: more usable sites, better light distribution, and a stronger, fuller canopy. With a measured push in solution EC and continued respect for the living soil beneath them, these Sundae Drivers are on a clear path to a heavy, fragrant finish. 📲 Don’t forget to Subscribe and follow me on Instagram and YouTube @DogDoctorOfficial for exclusive content, real-time updates, and behind-the-scenes magic. We’ve got so much more coming, including transplanting and all the amazing techniques that go along with it. You won’t want to miss it. • GrowDiaries Journal: https://growdiaries.com/grower/dogdoctorofficial • Instagram: https://www.instagram.com/dogdoctorofficial/ • YouTube: https://www.youtube.com/@dogdoctorofficial ⸻ Explore the Gear that Powers My Grow If you’re curious about the tech I’m using, check out these links: • Genetics, gear, nutrients, and more – Zamnesia: https://www.zamnesia.com/ • Environmental control & automation – TrolMaster: https://www.trolmaster.eu/ • Advanced LED lighting – Future of Grow: https://www.futureofgrow.com/ • Root and growth nutrition – Aptus Holland: https://aptus-holland.com/ • Nutrient systems & boosters – Plagron: https://plagron.com/en/ • Soil & substrate excellence – PRO-MIX BX: https://www.pthorticulture.com/en-us/products/pro-mix-bx-mycorrhizae • Curing and storage – Grove Bags: https://grovebags.com/ ⸻ We’ve got much more coming as we move through the grow cycles. Trust me, you won’t want to miss the next steps, let’s push the boundaries of indoor horticulture together! As always, this is shared for educational purposes, aiming to spread understanding and appreciation for this plant. Let’s celebrate it responsibly and continue to learn and grow together. With true love comes happiness. Always believe in yourself, and always do things expecting nothing and with an open heart. Be a giver, and the universe will give back in ways you could never imagine. 💚 Growers love to all 💚
Likes
36
Share
Bene amici growers come potete vedere la fioritura procede senza molti problemi. Ho innaffiato le piante per la prima volta con una soluzione adatta alla fioritura e ora staremo a vedere come pian piano cominceranno a gonfiarsi i nostri amati fiori. Le piante iniziano ad emanare un profumo inebriante, le Durban posion stanno già assumendo un colore violaceo mentre le critical sembrano un po' più in dietro. Vi ringrazio anticipatamente nel caso lasciate un like!!
Likes
2
Share
@Autower
Follow
Unknown 1 has come to it’s end going a total wet weight of 288.44g with stems see what the end result is same as the other had a haircut then will tidy up once dry want to dry a slow as possible thanks for viewing.
Likes
97
Share
~_~_~_~_~_~_~_~_~_~_~_~_~_~_~_~_~_~_~_~_~_~_~_~_~_~_~_~_~_~_~_~_~_~_~_~_~_~_~_~_~_~_~_~_~_~_~_~_~_~_~_~_~_~_~_~_~_~_~_~_~_~_~_~_~_~_~_~_~_~_~_~_~_~_~_~_~_~_~_~_~_~_~_ ❤️💡🌱😽💨 Week 4! We're about 1/3rd the way through flower..these girls are getting really frosty for their age. There's still some yellowing from almost killing them 1.5weeks ago but they've almost full recovered from our neglect. Nodes have a great distance, its growing similar to our White Widow under the SP-3000..I suspect long 6 long colas on each plant a couple with some side growth we decided to keep. Not too much else to report, we're still babying these girls after our blunder but they seem to be on track now..Thanks for dropping by and happy harvests everyone!! ⚡Mars Hydro/SP-3000⚡ Specifications ⚙️: Diodes: Samsung LM301B / Osram 660nm (960 total!) Driver: Meanwell 300watt 🔌 (300W±5% @AC120V-277V) PPF: 824umol/S ☢️ PPE: 2.8 µmol/j 〰️〰️ Lifespan: 50k+ hrs ⌛ Weight: 10.1 lbs (4.6kg) Veg Coverage: 3 x 5 ft 🌱 Flowering Coverage: 2 x 4 ft 🌼 -The SP-3000 uses an aluminum heatsink (no fan) and the driver can be placed outside the tent 🌡️⬇️ -IP65 waterproof ratings, tolerant to high humidity grow environments 💦 .. -Up to 15 can be daisy-chained together and all controlled from a single light! 💡~💡~💡~💡~💡 ~_~_~_~_~_~_~_~_~_~_~_~_~_~_~_~_~_~_~_~_~_~_~_~_~_~_~_~_~_~_~_~_~_~_~_~_~_~_~_~_~_~_~_~_~_~_~_~_~_~_~_~_~_~_~_~_~_~_~_~_~_~_~_~_~_~_~_~_~_~_~_~_~_~_~_~_~_~_~_~_~_~_~_
Likes
17
Share
@Hoodoo
Follow
2020-07-27 Waited all week to post. Haven't changed nutrient levels at all. The plants are drinking at a normal rate and sit around 700 ppm and 6.0 pH on the regular. They've actually become more much stable, they are starting to get so sticky and smelly already. I can't remove them from the tent anymore to change water so I just put a water pump in there, drain it as much as I can, then flush with tap water, drain that, refill. I think the UC Roots and Great White will keep it healthy. The roots did not get out of hand at all on this grow but the upper plant absolutely did. It's right up to the top of the tent, I keep having to smack it down and bend it down... I have noticed there are pure white tipped buds forming on plant 1. Supposedly this is a good sign: https://www.leafly.com/news/growing/white-tips-on-cannabis-buds I feel like the buds aren't as fat as other people by week 5 of flower but I accidentally have so many growth tips, I think some of the growth is misguided right now. They are thickening up but not as fast as I expected. Looking forward to harvesting in 4-6 weeks!
Likes
19
Share
@unknown23
Follow
See you next week with harvest And smoke report od Blueberry Bliss
Likes
56
Share
Bonjour à tous les padawans et maîtres jedis Jour84 arrosage avec 2 litres d'eau ph6.3 Jour86 arrosage avec 2. 5litres d'eau ph6.3 Jour89 arrosage avec 2 litres d'eau ph6.3 LE MEILLEUR MOMENT POUR RINCER SON CANNABIS Le rinçage commence en général deux semaines avant la récolte. Si le plant a une période de floraison de huit semaines, le rinçage doit commencer six semaines après le début de la période de floraison. Il est préférable de regarder de près les trichomes sur le plant pour déterminer quand votre cannabis est prêt à être récolter. Si les petits trichomes commencent juste à passer d’une couleur transparente à une teinte laiteuse et blanche, c’est une bonne indication que les plants peuvent commencer à être rincés. Il faut s’arranger pour que la majorité des trichomes aient changé vers la couleur désirée pour la récolte après deux semaines – ça devient plus facile à faire avec l’expérience, alors accrochez-vous ! Le rinçage peut également être un bon moyen de remettre à zéro la terre quand un plant est toujours en phase de croissance végétative. Parfois, un cultivateur suralimente par accident son cannabis, ce qui provoque un changement de couleur et un flétrissement du bout des feuilles. Ceci est appelé une « brûlure par nutriments ». Rincer la terre peut éliminer les nutriments excédentaires, ce qui aide à résoudre le problème. Cependant, c’est une mesure drastique à ce stade de la culture, alors assurez-vous que le problème soit bien une brûlure par nutriments et non quelque chose d’autre. Le rinçage ne concerne pas que le moment de la récolte. Cette technique peut aussi être mise en place durant la phase de croissance afin de débarrasser le sol des nutriments. Bien évidemment, les nutriments permettent à votre plante de rester en bonne santé et vous assurent des rendements maximaux, mais une trop grande quantité peut causer une accumulation et un état statique durant lequel la plante ne peut plus y accéder. Le blocage des nutriments peut être causé par une accumulation saline ou des niveaux de pH incorrects. Ces deux causes peuvent être résolues par un rinçage de votre plante à l’eau claire. Les fluides viendront pousser les nutriments en dehors du substrat et le débarrasseront de l’accumulation, permettant ainsi aux racines de pouvoir accéder à nouveau aux nutriments. EMPÊCHER LE BLOCAGE D'ABSORPTION DES NUTRIMENTS AVANT QU’IL NE POSE PROBLÈME Au mieux, le blocage des nutriments peut être un problème, au pire, il peut être un vrai désastre. Comme le dit l’adage, il vaut mieux prévenir que guérir. Il vaut mieux prendre de l’avant pour empêcher le blocage des nutriments plutôt que de s’y atteler lorsque c’est trop tard. Empêcher le blocage des nutriments peut se faire par le biais d’un rinçage de routine. En rinçant vos plantes une fois avant la floraison et une fois au milieu de cette dernière, vous minimiserez l’accumulation de nutriments. LES ENZYMES À LA RESCOUSSE Après le rinçage pour contrer l’accumulation ou le blocage des nutriments, vous remarquerez peut-être que vos plantes ont une apparence vert foncé, c’est le signe d’un excès de nutriments. Dans ce cas, certains cultivateurs choisissent d’ajouter une formule riche en enzymes à leur substrat. Au cas où vous auriez oublié vos cours de biologie, les enzymes sont des protéines qui catalysent les réactions. Elles aident à rincer le substrat en décomposant l’amidon, les glucides et les nutriments. Il existe sur le marché toute une variété de produits qui contiennent des formules d’enzymes très efficaces. Si l’eau ne suffit pas à vos plantes, ces petites protéines ne feront qu’une bouchée de l’accumulation de nutriments ! COMMENT BIEN RINCER SON CANNABIS Rincer votre plant de cannabis est un processus simple. À chaque fois que vous apporteriez normalement des nutriments, vous rincez à la place. De l’eau du robinet non traitée est tout ce dont vous avez besoin pour rincer, assurez-vous juste que son pH est sans danger pour le cannabis. La plupart de l’eau de puits a un pH sain et ne nécessite pas de traitement, mais s’il est nécessaire de traiter l’eau de rinçage pour avoir un pH adapté, faites-le. Les ajustements du pH seront donc la seule chose à considérer. Inonder la terre avec autant d’eau fraîche qu’elle puisse contenir. Laissez l’eau durant quelques minutes pour qu’elle puisse absorber les nutriments, puis inondez la terre encore pour rincer les nutriments loin du plant. Si vous cultivez en intérieur dans des pots, notez la couleur de l’eau qui s’échappe du fond des pots. Elle sera tâchée et aura une couleur sale. C’est à cette étape qu’un appareil de mesure des TDS (Total des Solides Dissous) est utile. Si vous récupérez et mesurez le TDS de l’eau « évacuée », elle devrait avoir un taux de 1300ppm, ce qui est assez élevé. Il est important de rincer le plant jusqu’à ce que total baisse à un niveau de 50ppm, ou du moins qu’il s’approche du TDS de l’eau fraîche que vous utilisez pour rincer le plant. La couleur de l’eau d’évacuation va s’éclaircir et apparaîtra plus propre. Vous devez tirer autant que possible de minéraux dissous du plant. Comment et Quand Rincer les Plants de Cannabis Rincer les plants de cannabis avant la récolte peut faire la différence entre les meilleurs têtes ou la plus rude pour la gorge. Cette petite tâche est simple et facile à faire. Ajoutez juste de l’eau ! Attention car le moment du rinçage joue un rôle critique. Le b.a.-ba du rinçage de ses plants de cannabis. Sommaire: 1. Qu’est-ce que le rinçage ? 2. Le meilleur moment pour rincer son cannabis 3. Empêcher le blocage d'absorption des nutriments avant qu’il ne pose problème 4. Les enzymes à la rescousse 5. Comment bien rincer son cannabis 6. Comment rincer ses plantes en hydroponie 7. Les résultats du rinçage de son cannabis 8. Quand éviter de rincer son cannabis Vous avez enfin fini vos cultures et vous vous retrouvez avec un magnifique plant couvert de super têtes, maintenant sèches, vous avez fait le curing et vous êtes prêt à fumer – et pourtant quelque chose ne va pas. La weed semble ne pas vouloir se consumer et quand vous tirez une bouffée, c’est comme si on vous avait donné un coup de poing dans les poumons et vous toussez en craignant pour votre vie ! Le goût est rude et décevant. Si c’est une situation que vous avez vécue, il y a des chances pour que vos plants n’aient pas été rincés correctement avant la récolte. Cette fumée bien loin d’être agréable est provoquée par la présence dans le plant des nutriments et minéraux utilisés lors de la culture, ce qui altère la façon dont le plant se consume. Rincer le plant élimine ces nutriments restants, ce qui améliore la qualité des sensations. Heureusement, le rinçage des plants de cannabis se fait facilement et sans effort, et cela vous permet de produire des têtes douces et délicieuses en un rien de temps. ARTICLE LIÉ Comment Utiliser les Nutriments pour Cannabis QU’EST-CE QUE LE RINÇAGE ? L’acte de rincer un plant implique d’utiliser de l’eau pour éliminer tout nutriment présent dans la terre. Une grande quantité d’eau est passée à travers la terre et drainée sur une base régulière. Tous les minéraux et nutriments présents dans la terre sont rincés avec le temps avec l’eau, ce qui laisse une terre propre. Mais pourquoi vouloir éliminer tous les minéraux de la terre ? N’est-ce pas mauvais pour la récolte ? En fait, cela aide à la récolte de manière significative. Quand les nutriments sont éliminés de la terre, ceci force le plant de cannabis à utiliser tous les nutriments toujours présents dans le plant. C’est comme pour le corps humain. Quand on consomme beaucoup d’aliments, ce que nous n’utilisons pas est transformé en graisses. Dans les situations extrêmes où la nourriture est rare, le corps s’appuie sur cette graisse stockée pour tirer de l’énergie. Comme rincer force le cannabis à utiliser tous les nutriments restants dans le plant, aucun ne devrait rester et altérer les têtes récoltées. Cependant, si vous le faites trop tôt, cela peut nuire à la santé du plant, le moment est donc clé. LE MEILLEUR MOMENT POUR RINCER SON CANNABIS Le rinçage commence en général deux semaines avant la récolte. Si le plant a une période de floraison de huit semaines, le rinçage doit commencer six semaines après le début de la période de floraison. Il est préférable de regarder de près les trichomes sur le plant pour déterminer quand votre cannabis est prêt à être récolter. Si les petits trichomes commencent juste à passer d’une couleur transparente à une teinte laiteuse et blanche, c’est une bonne indication que les plants peuvent commencer à être rincés. Il faut s’arranger pour que la majorité des trichomes aient changé vers la couleur désirée pour la récolte après deux semaines – ça devient plus facile à faire avec l’expérience, alors accrochez-vous ! Le rinçage peut également être un bon moyen de remettre à zéro la terre quand un plant est toujours en phase de croissance végétative. Parfois, un cultivateur suralimente par accident son cannabis, ce qui provoque un changement de couleur et un flétrissement du bout des feuilles. Ceci est appelé une « brûlure par nutriments ». Rincer la terre peut éliminer les nutriments excédentaires, ce qui aide à résoudre le problème. Cependant, c’est une mesure drastique à ce stade de la culture, alors assurez-vous que le problème soit bien une brûlure par nutriments et non quelque chose d’autre. Flushing Le rinçage ne concerne pas que le moment de la récolte. Cette technique peut aussi être mise en place durant la phase de croissance afin de débarrasser le sol des nutriments. Bien évidemment, les nutriments permettent à votre plante de rester en bonne santé et vous assurent des rendements maximaux, mais une trop grande quantité peut causer une accumulation et un état statique durant lequel la plante ne peut plus y accéder. Le blocage des nutriments peut être causé par une accumulation saline ou des niveaux de pH incorrects. Ces deux causes peuvent être résolues par un rinçage de votre plante à l’eau claire. Les fluides viendront pousser les nutriments en dehors du substrat et le débarrasseront de l’accumulation, permettant ainsi aux racines de pouvoir accéder à nouveau aux nutriments. EMPÊCHER LE BLOCAGE D'ABSORPTION DES NUTRIMENTS AVANT QU’IL NE POSE PROBLÈME Au mieux, le blocage des nutriments peut être un problème, au pire, il peut être un vrai désastre. Comme le dit l’adage, il vaut mieux prévenir que guérir. Il vaut mieux prendre de l’avant pour empêcher le blocage des nutriments plutôt que de s’y atteler lorsque c’est trop tard. Empêcher le blocage des nutriments peut se faire par le biais d’un rinçage de routine. En rinçant vos plantes une fois avant la floraison et une fois au milieu de cette dernière, vous minimiserez l’accumulation de nutriments. LES ENZYMES À LA RESCOUSSE Après le rinçage pour contrer l’accumulation ou le blocage des nutriments, vous remarquerez peut-être que vos plantes ont une apparence vert foncé, c’est le signe d’un excès de nutriments. Dans ce cas, certains cultivateurs choisissent d’ajouter une formule riche en enzymes à leur substrat. Au cas où vous auriez oublié vos cours de biologie, les enzymes sont des protéines qui catalysent les réactions. Elles aident à rincer le substrat en décomposant l’amidon, les glucides et les nutriments. Il existe sur le marché toute une variété de produits qui contiennent des formules d’enzymes très efficaces. Si l’eau ne suffit pas à vos plantes, ces petites protéines ne feront qu’une bouchée de l’accumulation de nutriments ! Comment et Quand Rincer les Plants de Cannabis COMMENT BIEN RINCER SON CANNABIS Rincer votre plant de cannabis est un processus simple. À chaque fois que vous apporteriez normalement des nutriments, vous rincez à la place. De l’eau du robinet non traitée est tout ce dont vous avez besoin pour rincer, assurez-vous juste que son pH est sans danger pour le cannabis. La plupart de l’eau de puits a un pH sain et ne nécessite pas de traitement, mais s’il est nécessaire de traiter l’eau de rinçage pour avoir un pH adapté, faites-le. Les ajustements du pH seront donc la seule chose à considérer. Inonder la terre avec autant d’eau fraîche qu’elle puisse contenir. Laissez l’eau durant quelques minutes pour qu’elle puisse absorber les nutriments, puis inondez la terre encore pour rincer les nutriments loin du plant. Si vous cultivez en intérieur dans des pots, notez la couleur de l’eau qui s’échappe du fond des pots. Elle sera tâchée et aura une couleur sale. C’est à cette étape qu’un appareil de mesure des TDS (Total des Solides Dissous) est utile. Si vous récupérez et mesurez le TDS de l’eau « évacuée », elle devrait avoir un taux de 1300ppm, ce qui est assez élevé. Il est important de rincer le plant jusqu’à ce que total baisse à un niveau de 50ppm, ou du moins qu’il s’approche du TDS de l’eau fraîche que vous utilisez pour rincer le plant. La couleur de l’eau d’évacuation va s’éclaircir et apparaîtra plus propre. Vous devez tirer autant que possible de minéraux dissous du plant. COMMENT RINCER SES PLANTES EN HYDROPONIE Le rinçage des plantes en hydroponie est bien plus simple que de se débarrasser des nutriments en terre. Les cultivateurs en hydroponie pourront simplement drainer leur système et le remplacer par une eau au pH neutre. Le rinçage des plantes en hydroponie est aussi un processus bien plus court. Une fois que la réserve d’eau aura été modifiée, les plantes en hydro n’auront pas accès aux nutriments externes. Pour cette raison, un rinçage de deux jours suffira. LES RÉSULTATS DU RINÇAGE DE SON CANNABIS Après la récolte des têtes, prenez du temps pour bien faire le curing pour atteindre le potentiel le plus élevé. Un affinage correct par curing permet de réduire encore plus le côté rude des têtes, en éliminant des choses comme un excès de chlorophylle. Vous serez étonné de voir la différence que ce petite effort peut avoir sur votre produit. Tout votre travail se sentira dans la première bouffée de cette weed douce comme de la soie, qui caresse la gorge comme du miel. Le plus doux de la nature. Vous pouvez donc améliorer la qualité de votre cannabis en ajoutant juste de l’eau ! QUAND ÉVITER DE RINCER SES PLANTES Le seul moment où nous recommandons d’éviter le rinçage de son cannabis est lorsque l’on travaille avec une terre biologique amendée ou un super soil. Ces substrats ont été développés avec précaution afin d’héberger des micro-organismes bienfaisants tels que des bactéries ou des champignons. Cette délicate biodiversité pourrait être éliminée et endommagée par le rinçage. Une fois de plus, l’absence de rinçage ne devrait pas poser de soucis, car aucun nutriment externe ou synthétique n’aura été ajouté au substrat. À la place, les plantes comptent sur les micro-organismes pour décomposer la matière organique et la livrer aux racines. May the force be with you 💪
Likes
18
Share
@Dunk_Junk
Follow
18cm growth this week. She got bushier too. Doing her own thing.
Likes
19
Share
23/04 - Changed solution waiting for the flush In the Week End (26/04) Added MICRO Trio and Diamond Black - EC is now 1,5 and it will stay between 1.5 - 1.6 Maybe I will boost to 1.8 - 2.0 after the flush near the flowering stage. We'll see... 👍👍👍👍👍👍👍👍👍👍👍👍👍👍👍👍👍👍 Lesson Learned: LST AND DEFOLATION WORK GOOD BUT EVALUATE TOPPING OR SCROG ADD SOME HOOKS ON THE POT COVER TO ATTACH THE BRANCHES REFLECT ON THE FLUSHES 👍👍👍👍👍👍👍👍👍👍👍👍👍👍👍👍👍👍 25/04 - Made Defoliation and LST 25/04 - 20:00 Flushing New RES with 14 l of tap water and 30 ml of FloraKleen and PH- EC : 0,66 PH: 6,1 it will run 24h until monday evening 26/04 19:00 new reservoir prepared for the flowering stage liters: 10 EC : 1.28 PH: 6,3 28/04 00:10 Updated res: added seaweed 30 ml - micro 1 ml - bloom 2ml EC: 1,2 PH 5,8 29/04 00:10 Updated res: added - micro 1 ml - bloom 4ml - grow 1ml - calmag 1ml - probloom 0,3ml EC: 1,2 PH 5,8