


Likes
2
Share

@CeeJayy420
Follow
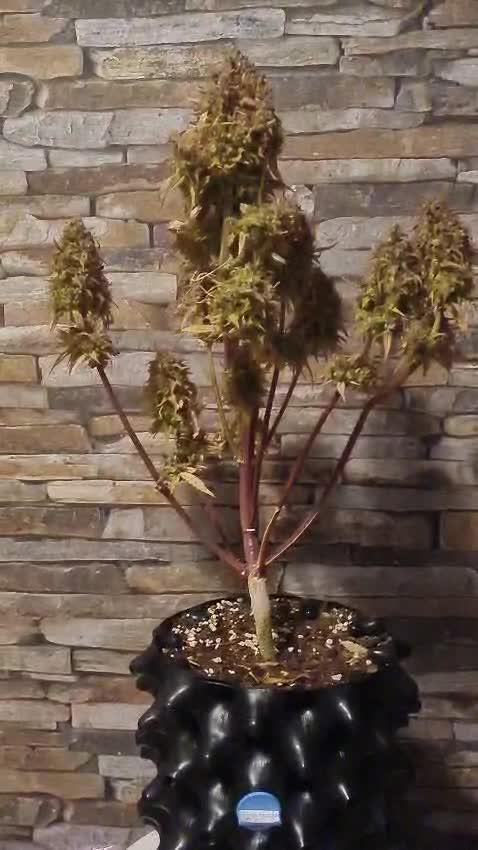
The plant was harvested and trimmed, yielding a total of 112 grams. Buds are notably dense, pleasantly heavy, and visually striking. Their surface exhibits a green velvet-like shimmer, which may indicate optimal trichome density and light-reflective resin coverage. This supports the hypothesis that late-stage environmental conditions—such as controlled humidity and light spectrum—contributed positively to resin production and bud structure. Further analysis during curing will help validate terpene retention and overall potency. Initial results suggest a successful harvest.

Likes
1
Share

@CranedriverDan
Follow
Holky jsou na začátku 7 týdne květu. Začínají silně vonět a palice jsou krásně pocukrované . Trichomi většina ještě průhledná.

Likes
28
Share


@Growbody
Follow
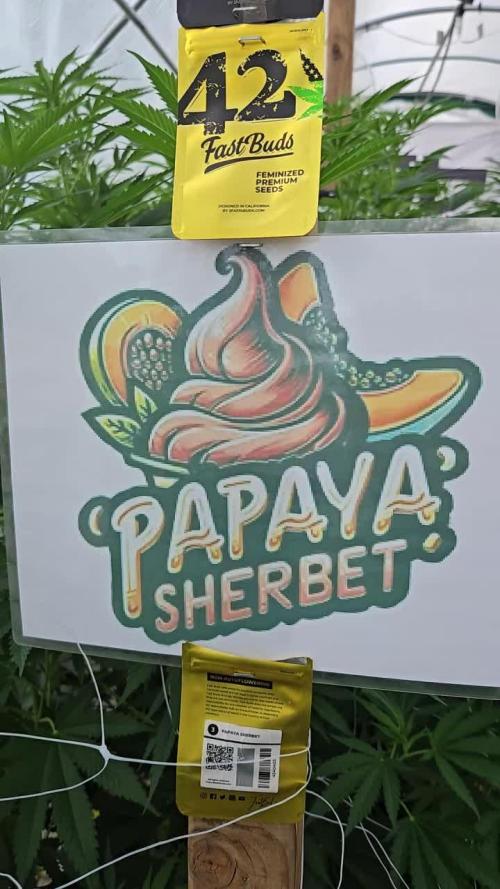
Herzlich Willkommen zu meinem neuen Grow mit der Frostbanger Auto F3 von 2Fast4Buds. Die "Eltern" sind (GG4 Auto F6 x Bruce Banner Auto F5) x Sour Diesel Auto F5 und das ergibt eine F3 feminisierte dreifache Polyhybrid Autoflower. Klingt schonmal heftig. Der Strain ist beim Autoflowerworldcup 2025 zur stärksten Autoflower gewählt worden. Mit dem Versprechen, süsse, cremige Aromen zu produzieren, muss ich diese Pflanze testen.
Die 20 Liter AirPots 7th gen., die Sonnenerde Bio Hanferde, BioBizz Wurmhumus, Sonnenerde Bio Faser, BIONOVA x zamnesia MonsterBud Mix Living Soil, zamnesias SmartStart und Plagrons Seedbooster Plus werden bei diesem Grow wieder verwendet.
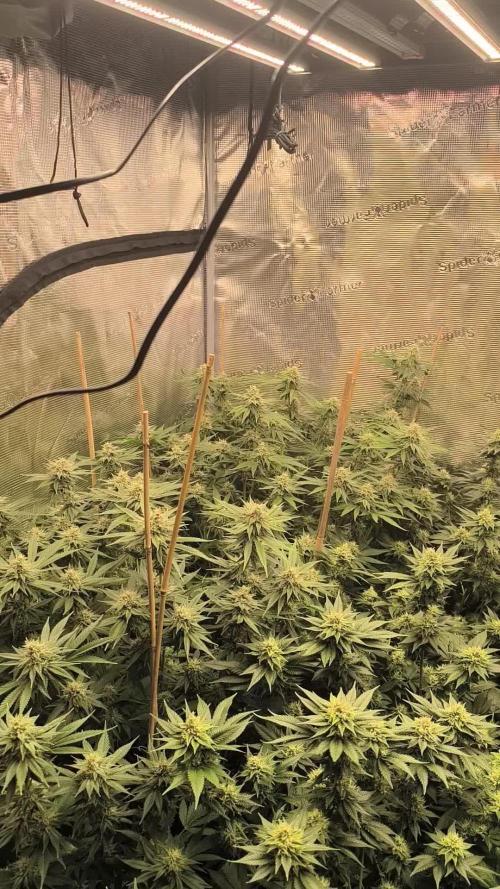
Tag 72: 0,50 Liter Wasser. Die Buds der Frostbanger Auto F3 von 2Fast4Buds haben im unteren Bereich noch zuwachs, oben sind die Blüten bereits erntereif. Ich muss es einfach nochmal schreiben, so dick sind die wenigsten Canabissorten zur Ernte.
Tag 74: 0,75 Liter Wasser.
Tag 77: 0,75 Liter Wasser.
Schön, dass du dich für meinen Grow interessierst. Freut mich, wenn du wieder reinschaust 👋😎

Likes
1
Share

@SolitudeCorners
Follow
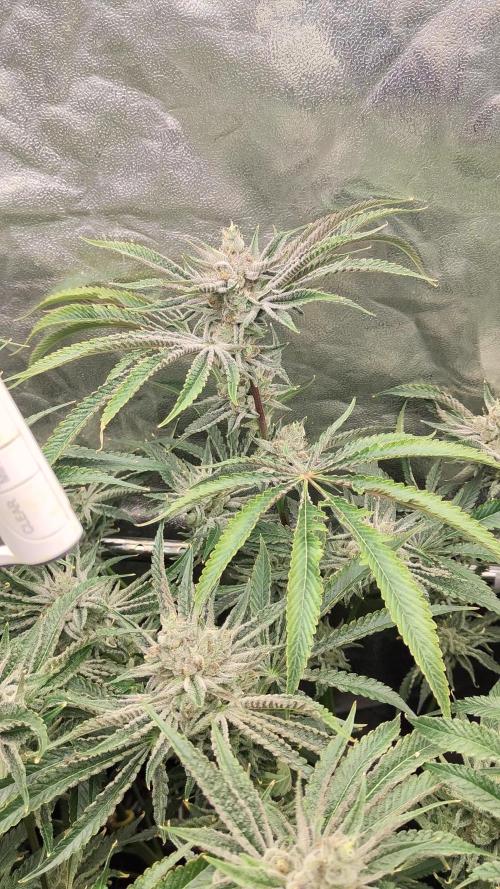
Overall Development
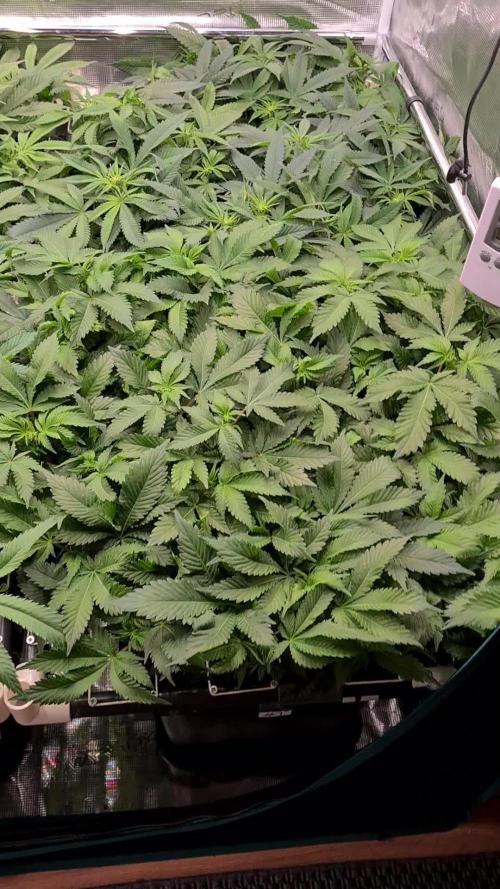
Week 4 marks the transition into mid-flower. Stretch has mostly stopped, and the plants are now directing energy into bud formation. The canopy remains uneven, with some taller, thinner phenotypes and others more compact and structured.
Bud sites are clearly established across all main branches. Flower stacking is progressing steadily, and early cluster formation is visible on the tops.
Plant Health & Observations
• Significant yellowing on older fan leaves, especially mid-to-lower canopy.
• Some plants appear pale green overall, indicating high nutrient demand during bulk transition.
• One or two phenotypes remain darker green and structurally stronger.
• Lower interior growth is lighter and less vigorous.
• Selective removal of old yellow leaves was continued to improve airflow and light penetration.
Despite visible leaf fade, bud development continues actively.
Bud Development
• Flower clusters are expanding and beginning to connect along the stems.
• Pistil production is strong and consistent.
• Buds are not yet dense but are clearly transitioning into the bulk phase.
• Resin production is beginning to increase.
This week represents the start of the main swelling period.
Environmental Adjustments
• Temperature reduced slightly (~1°C) to stabilize the flowering environment.
• Airflow maintained across canopy level.
• Canopy density moderately thinned to prevent moisture buildup.
• Light coverage remains strong across the upper layer.
Current Focus (Entering Week 5)
• Support nutrient demand during bulk phase.
• Prevent excessive early leaf loss.
• Maintain stable humidity to protect developing flowers.
• Monitor weaker phenotypes closely for further decline or nutrient imbalance.
Overall, the crop is entering the critical mid-flower stage. The next two weeks will determine final bud density and structure.
Likes
16
Share


@Dunk_Junk
Follow
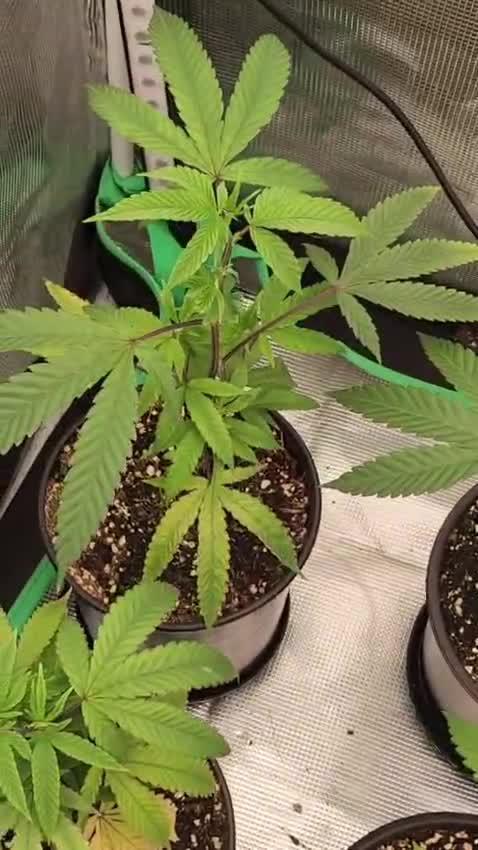
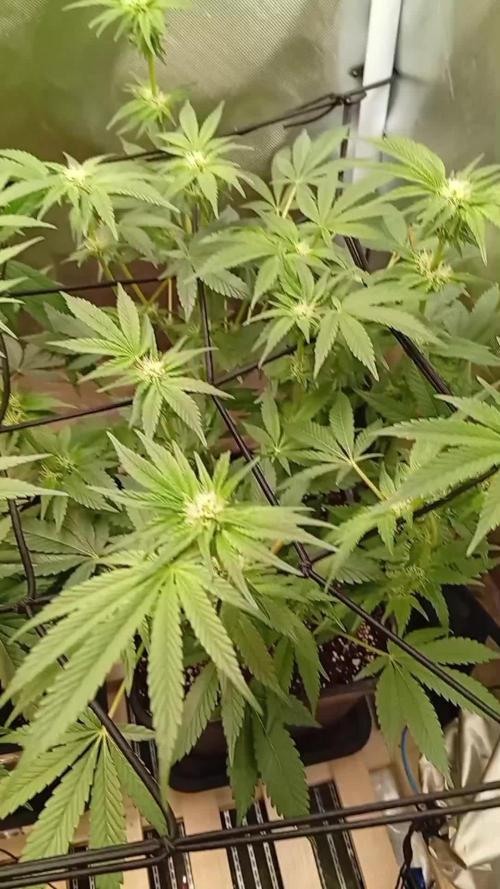
Wow she's grown loads this week.
22cm vertical growth.
Flowering going full steam ahead!! 😎 💪
Likes
3
Share

@Hren_Morjovii
Follow
43 день.
Угольный фильтр не справляется с запахом. Вокруг бокса запах сладкого молока, а внутри бокса запах приобретает еще и ягодно фруктовый аромат.
ЕС стока периодически поднимается до 1.8-2. Стараюсь держать около 1.6. Растиха стала заметно меньше пить.
43-49 день

Likes
14
Share


@aalpi
Follow
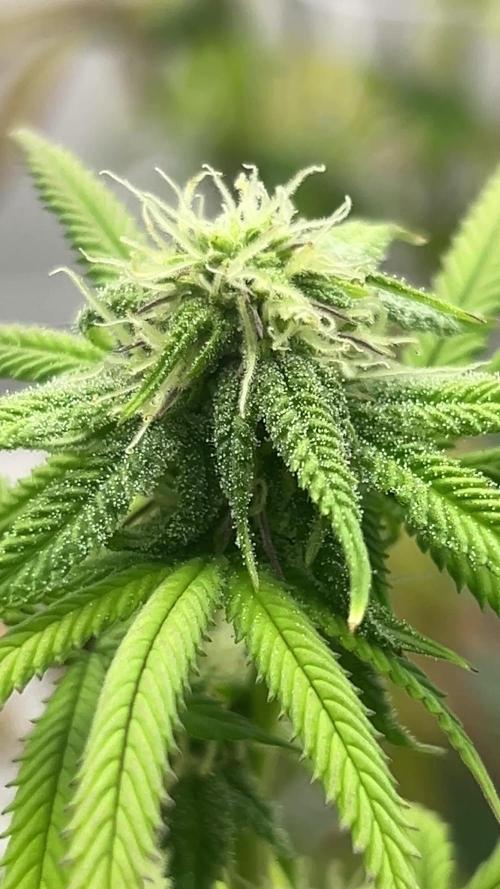
My microscope finally got delivered, so I can add some photos of that. The smell increased. The Buds got thicker this week and browning pistel appeared

Likes
2
Share

@Oldwied
Follow
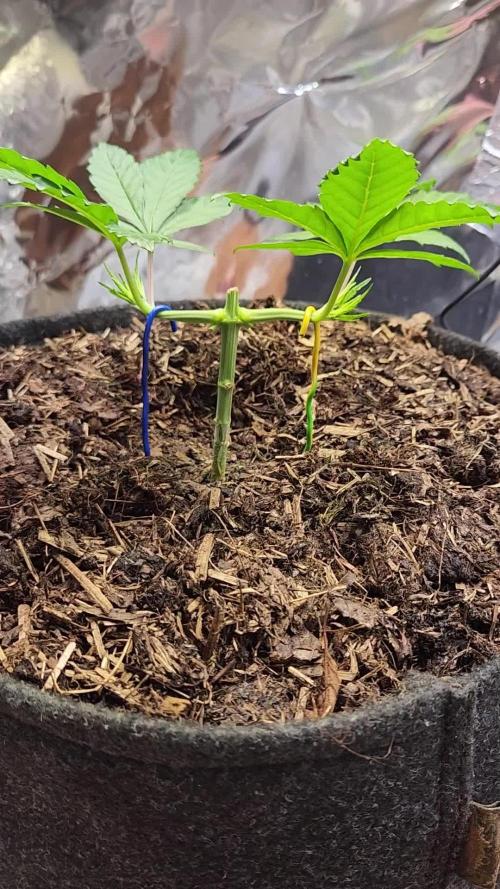
Time for second Topping in the middle of the week.
This gene has vigorous growth.
Light Power: 60%
Day 28
Photoshooting
Topping
LST
Day 30
Photoshooting
Likes
31
Share


@TheHighentist
Follow
I changed the light cycle 11/6, directly to 12/12 by prolonging the sleep period.
They got their first bloom nutrients 13/6
Humidity im slowly dropping, as they have not bloomed yet.
12/6
-Temps 24-28day/21-23 night
-Humidity 69% (+-4)
13/6 Water day*
-Upped the water intake, from 750ml last watering, to 850ml and change in nutrients.
Changed nutrients from Biobizz Grow(2ml/L) + Biobizz Fish-mix(2ml/L)
to Biobizz Topmax, Bio heaven, and Bloom (1ml/L) (((biobizz grow every other feed)))
-Temps 24-28/22-23
-Humidity 65% (+-3)
14/6 They look healthy and happy. 47 Cm in height.
-Temps 24-28/22-23
-Humidity 65% (+-3)
15/6 Look just fine, not any huge growth but no signs of mistreatment
-Temps 24-28/22-23
-Humidity 64% (+-3)
16/6
13/6 Water day* and grow tent cleaning.
-850ml
Biobizz Topmax, Bio heaven, and Bloom (1ml/L) (((biobizz grow 1ml/L every other feed)))
-Temps 24-28/22-23
-Humidity 63% (+-3)
17/6 Looking good
-Temps 24-28day/21-23 night
-Humidity 63% (+-3)
18/6 was away all day
-Temps 24-28day/21-23 night
-Humidity 63% (+-3)

Likes
134
Share


@ZariRat_Grow
Follow
Semana 7 de floración ❄️🌸
Entramos ya en la recta final. Esta semana bajamos el foco al 80% después de notar un poco de foxtailing y algún signo leve de re-vege en las SB. Preferimos mantener la calidad y proteger bien los tricomas antes que seguir apretando con luz.
También hemos ajustado el clima para simular un final de otoño más frío: 22-23°C con luces encendidas y 18-19°C durante la noche. La idea es conservar al máximo los terpenos de la Z 2.0 y la BC.
Seguimos revisando tricomas a diario. Estamos esperando ver alrededor de un 10% ámbar antes de empezar el lavado de raíces y pensar en el corte.
Humedad siempre por debajo del 50% para evitar problemas en esta fase final.
La resina está increíble, cada día más brillante, y el aroma del cultivo ya es una locura 🍓
Saludos amigos y buenas vibras!! 🐭💚


Likes
14
Share


@GodZilla_Owner
Follow
Week 12+13 Update – Final Harvest & Reflections 🌱✂️
First off, sorry for the late update—super busy at the moment!
This will likely be my last report for now. I’ll still share the final results, but after that, I’m taking a break.
BioBizz#1 – BT59
Harvested, and as expected, a disappointing yield—typical for BioBizz.
Final weight: 71.88g
AN#4 – BT65
As expected, the biggest plant in the grow! This grow confirmed that I’d stick with Advanced Nutrients in the future.
Final weight: 163.88g
AN#3 – BT64
This grow was an experiment in 60x60x120cm, and let’s just say—not recommended!
Zero height control, only 2cm clearance from the LED.
Somehow, she survived. Now I’m super curious about the final yield!
Final Thoughts
Advanced Nutrients proved superior, and BioBizz didn’t impress me.
Stay tuned for the final numbers from AN#3! 😏
Likes
16
Share

@Chubbs
Follow
Weekly update for these lovely ladies. They've grown and grown since the last update so much I had to raise the greenhouse. Cinder blocks under the frame gave me an extra 16in. They're growing probably a foot of week and still reaching for the stars. I did switch to Athena's Bloom A & B and P&K booster this week giving 5-10ml per gallon. I really couldn't be happier with how they've grown up to this point.
All in all Happy Growing.
Likes
20
Share

@valiotoro
Follow
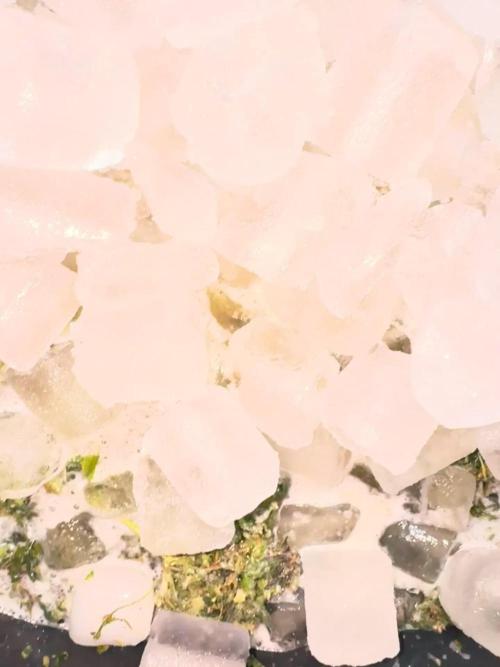
If you’ve got a bit of time and some ice, it’s really a fun thing to do. It’s also a great way to make use of every part of the plant
Likes
13
Share

@GREENPHOENIX6262
Follow
03/15 - (M) - Mom is doing great - pre-flowered without any issues and now is in week 1 flower - still running the 8 line drip emitters with offsetting feeds - did some defoliation underneath the canopy - dropped the light down to 75%
03/15 (C) - Clones are rocking amazingly - side shoots are coming in nicely - temps are high and humidity as well - adding Raw npk silica to the feed mix this week to assist with cell wall structure.
03/18 (C) - They are on recovery mode at the moment, got a little reckless with their PH/PPM/EC😑😑😑 - Gave them a hard flush and will only feed clean water for the next week or so - they are bouncing back😎😎😎😎😎

Likes
11
Share


@Foggedaboudit
Follow
Day 10 and 11 flowering, canopy filling up nice! No real stretch yet! Hopefully in the next days! Day 12: very light defoliation.
Likes
11
Share

@BLAZED
Follow
Week 10 (31-3 to 6-4)
31-3
Temps: 19.4 to 23.7 degrees
Humidity: 61% to 69%
The leaves are praying.
Light set from 50% to 60% strength.
1-4
Temps: 18.4 to 23.1 degrees
Humidity: 56% to 75%
Watering: Both 1000 ml. EC: 1.3
2-4
Temps: 19.1 to 23.2 degrees
Humidity: 58% to 70%
Watering: Both 1000 ml. EC: 0.4
3-4
Temps: 19.6 to 23.8 degrees
Humidity: 56% to 70%
4-4
Temps: 19 to 23.4 degrees
Humidity: 54% to 62%
Watering: Both 1000 ml. EC: 1.3
5-4
Temps: 18.2 to 23 degrees
Humidity: 52% to 62%
6-4
Temps: 18.7 to 23.1 degrees
Humidity: 49% to 63%
Watering: Both 1000 ml. EC: 0.4
Around 10 days after switching to 12/12 i see that the bud development has started, so i count next week as week 1 flower.


Likes
22
Share


@dillande3
Follow
Hello, Day 40 and day 42, Flower Phase , PGK, After Nute Burn problem, i did a good flush as a solution and its works, Edges burn seems stops. Now after 10 Days I am going to use new correct NPK dose (0.6-3-3), Hope everything is gona ok Thanks Guys
Day 40 - 13/12/22
Day 42 - 15/12/22

Likes
22
Share

@Brotanical
Follow
Und das nächste Giesswasser steht bereit 🌊
Hesi Schema auf 10L💧
Supervit💥
Hesi PZ 20ml🍃
Hesi Bloom 35ml
Hesi Phosphor 15ml🌳
Plagron CalMag Pro 10ml
Ph angepasst direkt beim gießen mit lemon🍋 kick
Wächst super und bin gespannt auf Bud Entwicklung bei den unterschiedlichen LEDs🔮
Es geht entspannt weiter und es gibt bereits markante Unterschiede zwischen den LEDs dazu mehr wenn der Grow sich dem Ende nähert 🤚

Likes
21
Share


@ChitownCannaChica
Follow
One plant and 40.5 grams. Super drenched in trichomes. Dense, sticky, and cookie flavor! Amazing buds! They are completely white with trics