ProperGator This is my first grow. I will be growing Pineapple Chunk by Barney's Farm from seed. I plan to copy LBH's famous ScrOG Tutorial.
13/10/18 - Planted 5 seeds in Root It propagation sponges. The sponges were planted straight into 1L air pots into a 50/50 coco/perlite mix which was watered with 0.5 EC, pH 5.9 water. Professor's Nutrients has a starter soak with an EC of 0.5. Instead of buying the started soak I mixed up a solution of other Professor's Nutrients products to the same EC. I have read different opinions on whether or not to provide any nutrients in the first couple of weeks. I decided to give them a weak nutrient solution, tune in to find out how it goes.
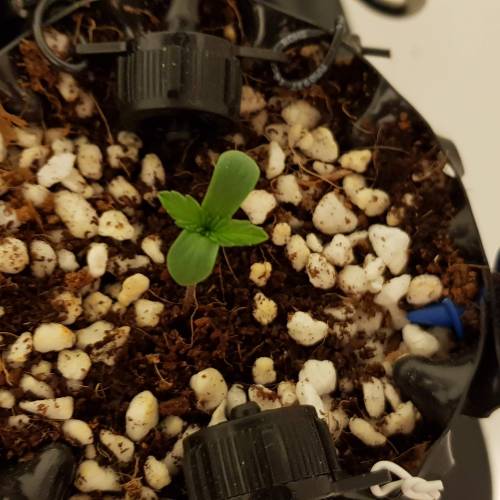
17/10/18 - Day 1 - All seeds have sprouted. One of the seeds (plant 3) is lagging behind the other 4. See day 1 photos above.
19/10/18 - Day 3 - 4 out of 5 seedlings have their first set of true leaves. Plant 3 is still lagging behind.
My setup consists of the following:
Grow Room
The grow room is a total of 2.1m (7 ft) x 1.5m (5 ft). The grow space measures 1.2m (4 ft) x 1.5m (5 ft). The room has been painted matte white.
Lighting
4 lighting fixtures, each with 2 x QB288 v2 3000K quantum boards. Each lighting fixture is capable of producing 275 watts. I am currently running 2 of the lighting fixtures at 125 watts each. I will monitor how the seedlings are reacting to the light and adjust the distance between the light and the canopy accordingly.
Ventilation
I am running a 150mm (6") Can Fan Iso-Max silenced fan with a carbon filter.
Water Tank
I have a 200L water tank. I mixed up 50L of solution to start with. I have an aquarium pump set up inside the tank. The pump is plumbed up with 19mm irrigation hose and controlled with a digital timer. I am running the pump for 3 mintues per feeding using 2 x 8L/hr drippers per small air pot. I will use hydro halos for the larger pots.
Waste Water
A platform has been installed approximately 250mm (10") off the floor to allow the installation of waste water tanks. All pots are sitting on Rhisostands which have been plumbed into 2 x 80L low profile plastic storage containers. I plumbed some irrigation hose with a tap and a 12mm snap on hose fitting into the tanks so they can be manually drained when required.
Pots
I will be using 1L (0.3 gallon) air pots for the first 2 weeks before transplanting into 9.2L (2.4 gallon) air pots. I am growing 5 seeds. At 2 weeks old I will choose the 4 best seedlings to transplant into the larger pots.
Grow Medium/Method
I will be using 50/50 coco/perlitefor the 1L pots and 70/30 coco/perlite for the 9.2L pots. I will be watering until 20% of the water drains to waste.
8 likes
3 comments
Share
2
Week 2. Vegetation
8y ago
1/16
6 cm
Height
18 hrs
Light Schedule
29 °C
Day Air Temp
6.1
pH
No Smell
Smell
500 PPM
TDS
25 °C
Solution Temp
9.3 l
Pot Size
45 cm
Lamp Distance
Nutrients 2
Go Green
0.5 mll
Go Roots
0.06 mll
ProperGator 26/10/18
We are coming into summer here so I've made the decision to change the lights on time from 5am - 11pm to 3:30pm - 9:30am to avoid having the lights on in the heat of the day. To make the transition I am going to keep the lights on an extra 10.5hrs.
28/10/18
I have increased the strength of the nutrient solution from 1/4 strength to 1/2 strength (day 12 since sprouting).
30/10/18
Just before switching the lights I did a bit of research and made the decision not to change the lights. The temperature of the room with the lights on at night would still have been colder than the temperature during the day with the lights off. This seemed contrary to nature (hot during the day, cold at night) so I decided to keep the lights the way they were.
30/10/18
All plants have been re-potted to their final pot size; 9.3L air-pots. I saw roots coming out of the bottom of my 1L air pots which is what triggered the move to re-pot them all. I expected to see a few more roots when I pulled the plants out of their 1L pots. Their was still a fair amount of roots (see photo) but I think I may have re-potted them a day or two early. All 4 lights are now being used. They are running at 140w each.
3 likes
2 comments
Share
3
Week 3. Vegetation
8y ago
1/13
18 hrs
Light Schedule
33 °C
Day Air Temp
6.2
pH
No Smell
Smell
500 PPM
TDS
28 °C
Solution Temp
9.3 l
Pot Size
45 cm
Lamp Distance
Nutrients 2
Go Green
2 mll
Go Roots
0.25 mll
ProperGator I got the nutrients wrong slightly this week which resulted in some minor magnesium and calcium deficiency showing up. I'm pretty sure that's what the yellow patches, brown spots and brown tips are caused by.
The plants were all topped above the 4th node at 17 days from sprout.
likes
comments
Share
4
Week 4. Vegetation
8y ago
1/16
18 hrs
Light Schedule
33 °C
Day Air Temp
5.8
pH
No Smell
Smell
500 PPM
TDS
28 °C
Solution Temp
9.3 l
Pot Size
45 cm
Lamp Distance
Nutrients 4
Go Green
2 mll
Go Roots
0.25 mll
Professors Original Nutrient Part A and B
0.2 mll
ProperGator The plants were LST'ed at day 22. I used wire bent into a 'U' shape to bend each growing tip horizontally. Each plant had 2 grow tips at the 2nd node, 2 at the 3rd node and 2 at the 4th node where the plants were topped 4 days earlier. I topped plant 5 too early and it resulting in it being fimmed. At least I'll be able to compare the pros and cons of fimming v topping first hand.
These plants are super short and super bushy! They are looking a lot better since I fixed their nutrients last week. They are doing especially well considering we have had nearly a week of daytime temperatures around 35 C (95F) and no air con in the grow room.
I was away for 3 days and came back on day 27 to find plant 2 showing signs of a what I think is a worsening calcium deficiency. It's had signs of a deficiency since the start of week 3 which I thought were caused by a once-of mistake with the nutrient dosage. I don't know why it's only effecting one of the plants and not the others. I've flushed the plants with 20L each of pH 6.0 tap water, moved the lights up by 2" to try give the plant a chance to recover and upped the nutrients to 100% strength (from 50%, as recommended on the bottle). All plants had their 6 main growth tips topped on day 27. Not sure if I should have topped plant 2 as it's a bit sick, we'll soon find out!
hey man, def tagging along for this. gotta say someone else said this was the best first grow theyve seen id have to agree. i love your setup. personally im using the 135W HLG QB288 V2 paired with a King Plus 1000w, and the king just pales in compassion, eventually id like to add some more qbs, im running a 3000k but would like a few 4000k for veg alone. keep it up man impressive stuff!!
@FoxyLoxy, Thanks man. I go away for work for 2 or 3 days at a time and am always surprised by how well they are doing when I get home. I don't have anything to compare the QB's to but I'm pretty happy so far. They're super efficient lights and easily adjustable. I knew I wanted to do a SCrOG so it made sense to go with the QB's and spread them out so that the light is evenly distributed.
Boss, no other way to say it. Boss, you are a BOSS! I’ve never read about a setup that was so well documented as yours. If you are this fierce out the gate, I fear for the rest of us. Bravo.
@MadMama, Thanks. I did a lot of research and had it all planned out before even starting. I won't be able to blame the setup if everything turns to shit!
Hi!
I always love DIY light setup :)
I was thinking about the samsung LT-Q series, but I went for bridgelux cobs (with reflectors) for heat managment. I put the heatsink part and the power supply on the outside part of the roof of the grow room.
I sacrificed a bit of light uniformity in change for that... but is summer was a bit better.
Both have pro and cons!
I recon that 3000k was the best too ;)
You will not be disappointed with the results!
PS: Just in case you did not know: there is a limit of the number of power supply you can put on the same main house differential magnetothermal switch. You may need to check that if you want to expand.