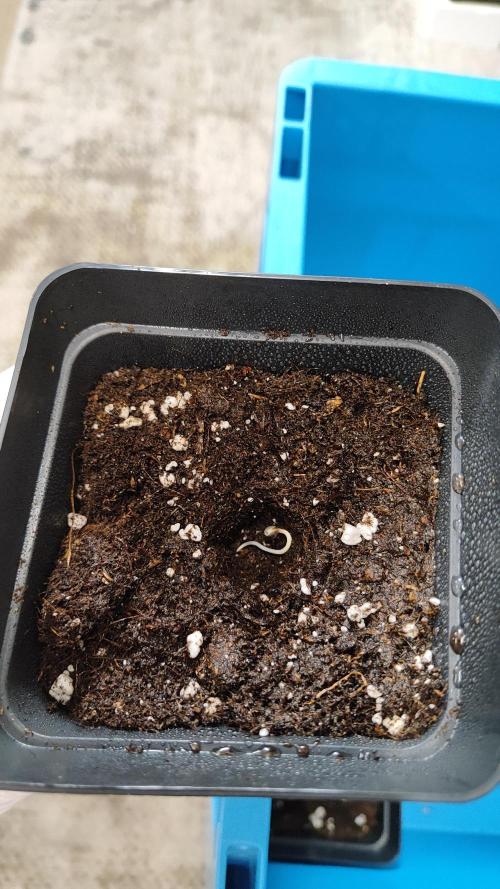
TheListBunker Beginning my very first (!) indoor grow in the "List" bunker:💚🌱 TheListBunker is my own private label for my grow & photo documentation. Since this was my first grow, I just went with the flow and tried to make the best of it. The motivation & ambitions were high. I got tips & tricks from my best friend. Months in advance, I acquired some basic knowledge from the book Cannabis Cultivation - The Easiest Way to Your Own Homegrow by LL Lizerman. Accordingly, I checked on my SQ#1 every day during the first few days.
5 likes
2 comments
Share
Used method
Paper Towel
Germination Method
1
Week 1. Vegetation
1y ago
1/17
5 cm
Height
18 hrs
Light Schedule
22 °C
Day Air Temp
58 %
Air Humidity
20 °C
Substrate Temp
16 °C
Night Air Temp
1 liters
Pot Size
0.1 liters
Watering Volume
30 cm
Lamp Distance
TheListBunker Initially, the environmental and climate conditions were documented, and depending on the need, the tent openings were used to adjust them, primarily to get a feel for the whole growing process. At this point, purchasing a humidifier was not an option since the RH in my grow room is usually around 60%, and I had other purchases in mind first. For the most part, I was still using a spray bottle for watering. Initially, local rainwater was used. The first signs of CALMAG deficiencies became noticeable, which I did not recognize at that time. I wasn't worried yet and attributed the beginning problem, in the form of bronze-colored spots on the leaves, to the not-so-perfect climate conditions. At times, the RH dropped to 41%, which is definitely too low for this stage of growth!
5 likes
comments
Share
2
Week 2. Vegetation
1y ago
1/5
10 cm
Height
18 hrs
Light Schedule
20 °C
Day Air Temp
No Smell
Smell
43 %
Air Humidity
18 °C
Solution Temp
19 °C
Substrate Temp
16 °C
Night Air Temp
11 liters
Pot Size
0.5 liters
Watering Volume
30 cm
Lamp Distance
Nutrients 1
Orgatrex
1.321 mll
TheListBunker This week was the final repotting! For this, I used LightMix from BioBizz. The final pot size was 11 liters. As fertilizer, I decided on the BioTabsNL scheme, as my grow buddy and my trusted grow shop recommended it to me. I’m really convinced by the whole BioTabsNL fertilizer line and completely satisfied. For this, the following fertilizers were used per plant/pot:
50g Startrex
5g Mycrotrex
1g Bactrex
1ml Orgatrex
2 Tabs BioTabs
My best friend helped me with the first repotting since I had no experience with repotting cannabis until now.
4 likes
4 comments
Share
Used techniques
Transplantation
Technique
3
Week 3. Vegetation
1y ago
1/6
15 cm
Height
18 hrs
Light Schedule
21 °C
Day Air Temp
Weak
Smell
50 %
Air Humidity
18 °C
Solution Temp
19 °C
Substrate Temp
16 °C
Night Air Temp
11 liters
Pot Size
0.5 liters
Watering Volume
60 cm
Lamp Distance
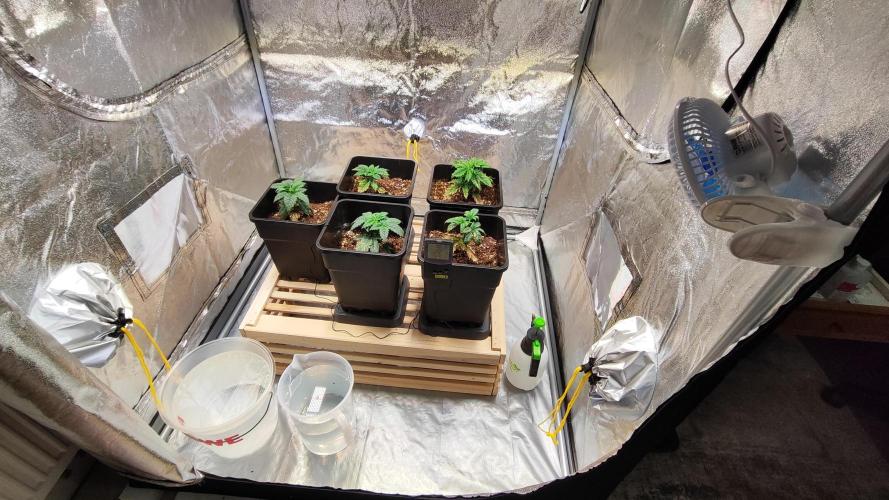
TheListBunker This week, a few adjustments were mainly made to the tent setup. Among other things, the 15W clip fan was mounted in the front right corner of the tent at about 80-100 cm height. The timer interval was set to 2x 15 minutes of runtime per hour during the light period and 1x 15 minutes of runtime per hour during the dark phase. Unfortunately, the negative pressure from the exhaust kept adjusting the clip fan. It wasn't until weeks later that I bought and installed additional tent poles to counteract the problem. Additionally, the measuring cups and the water bucket were placed inside the tent to increase the RH through evaporation. Over the coming days, the RH rose to an average of 50%. Thus, the tip from the RQS blog post about adjusting the climate conditions in the grow tent proved to be useful. Furthermore, my grandma had two wooden structures with originally attached wheels, which were removed and then turned upside down in the tent. The pots were placed on top for better air circulation.
As can be easily seen, CalMag deficiencies slowly but surely began to form in the form of necrosis on the lower leaves of all the plants. In hindsight, I should have sought help and advice directly from the grow shop I trust. Additionally, the RH should have been significantly higher and certainly contributed to the problems. At that time, I studied all possible blog posts from Royal Queen Seeds, memorized them, and saved them for repeated reading. As is well known, you never stop learning! I considered many possibilities, ranging from fresh air supply to pH measurements to plant diseases. Ultimately, I didn't get a concrete answer to my direct problem. My best buddy couldn't explain it either. About 2 weeks later, I was finally informed about the CalMag issue. Until then, I tried not to drive myself crazy and keep a clear head.
2 likes
3 comments
Share
4
Week 4. Vegetation
1y ago
1/7
20 cm
Height
18 hrs
Light Schedule
21 °C
Day Air Temp
Weak
Smell
55 %
Air Humidity
18 °C
Solution Temp
19 °C
Substrate Temp
16 °C
Night Air Temp
11 liters
Pot Size
0.5 liters
Watering Volume
60 cm
Lamp Distance
TheListBunker This week, the plants made a decent leap in terms of growth. At the same time, the CalMag problem worsened, and some of the leaves looked catastrophic! Throughout the week, I considered removing the completely damaged leaves. Additionally, I bought myself a new toy in the form of a watering aid.
I stumbled upon this thing online and was immediately thrilled! Saw it, bought it, and tried it out. Since the pressure spray bottle has a capacity of "only" 450ml, my watering behavior adjusted automatically. Until now, I had been watering 750ml to 1250ml of water per plant by feel. Of course, depending on the need and the moisture of the substrate.
My watering process now looks like this: The substrate is moistened with a spray bottle, then each plant gets 450ml of water, meaning one pressure bottle. By hand watering, it usually took exactly 15 minutes to water all 5 plants one after the other. After that, I followed up with the next pressure bottle with another 450ml of water. Since I roughly used 5 liters of water every two days per watering session, I usually distributed the remaining 500ml of the 5 liters among all 5 plants at the end.
The climate conditions were okay, so I made slight adjustments. Sometimes I opened the tent openings a bit, sometimes I set the ventilation to level 2 to try it out. You know, just trying everything at the beginning without much experience. 😅 Since the RH rose to 60-70%, I spaced the plants out a bit towards the end of the week to ensure better air circulation.
likes
comments
Share
5
Week 5. Vegetation
1y ago
1/6
30 cm
Height
18 hrs
Light Schedule
22 °C
Day Air Temp
Weak
Smell
57 %
Air Humidity
18 °C
Solution Temp
20 °C
Substrate Temp
17 °C
Night Air Temp
11 liters
Pot Size
0.5 liters
Watering Volume
60 cm
Lamp Distance
TheListBunker This week, I put into action the idea of removing the damaged leaves! Unfortunately, I accidentally caused overwatering in all the plants. In hindsight, I would call it a classic beginner's mistake. As usual, I took my documentation pictures and a few days later, I finally consulted with my trusted grow shop. Both colleagues independently mentioned the keyword CalMag within seconds. In short, I picked up the recommended product from BioBizz. Next week, I gave the first CalMag dose, and with it, the long-awaited improvements!
The climate conditions were still fine, so I didn't make any major changes to the setup.
1 like
1 comment
Share
6
Week 6. Vegetation
1y ago
1/9
40 cm
Height
18 hrs
Light Schedule
22 °C
Day Air Temp
Weak
Smell
57 %
Air Humidity
18 °C
Solution Temp
20 °C
Substrate Temp
17 °C
Night Air Temp
11 liters
Pot Size
0.5 liters
Watering Volume
60 cm
Lamp Distance
Nutrients 1
Calmag
0.132 mll
TheListBunker After weeks of despair due to the unrecognized CalMag issues, I had to be a little more patient until the first improvements became visible. However, the problem didn't worsen any further, which reassured me at the time. Towards the end of the week, there was the second CalMag application. At times, I had a bit of drainage while watering, which was compensated for. As a result, the plants were still slightly overwatered, something I would approach differently in hindsight. A typical beginner's mistake. However, the CalMag deficiencies got "better" and the plants kept growing bigger.
2 likes
1 comment
Share
7
Week 7. Vegetation
1y ago
1/10
50 cm
Height
18 hrs
Light Schedule
22 °C
Day Air Temp
Weak
Smell
65 %
Air Humidity
20 °C
Solution Temp
20 °C
Substrate Temp
17 °C
Night Air Temp
11 liters
Pot Size
0.6 liters
Watering Volume
50 cm
Lamp Distance
Nutrients 1
Calmag
0.5 mll
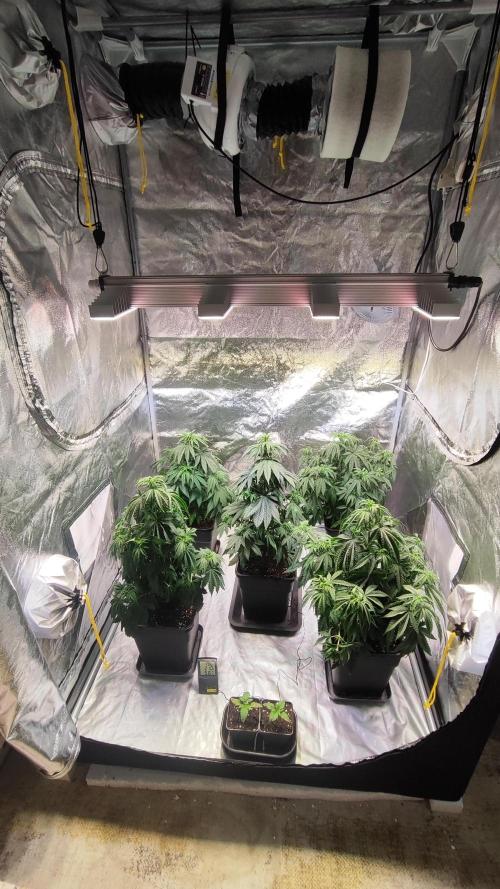
TheListBunker This week, further adjustments were made to the grow tent:
- 4 additional tent poles were purchased and installed at about half the height of the tent. Primarily, these should reduce the inward pressure on the tent walls. Furthermore, having a tidy workspace is important to me, so I used the new tent poles for proper cable management.
- The Hygrometer Pro was hung at about plant canopy height.
- A clip fan was temporarily attached to the lower back tent pole.
Additionally, there was another CalMag feeding from BioBizz.
Overall, the humidity increased due to the growth of the plants and the better climate conditions. The CalMag feedings have temporarily contained the nutrient issues, and the plants have gratefully accepted the improved watering, plus more equipment is always good for the grow heart 😏.
I wanted to transition into the flowering phase soon, but I wanted to do this only when the plants have nearly fully recovered. At that time, I didn't know better, yet it was the right decision then and even in hindsight. I continued to inform myself through various grow blogs and textbooks and acquired more theoretical knowledge. Waiting and maintaining patience has proven to be worthwhile.
@Schnabeldino, thank you so much for your feedback! 😊 Yeah, back then I really enjoyed diving into the topic, but the CalMag issues caused me quite a bit of worry🙈 but little spoiler: I managed to get the problems under control during the grow🌱🤘🏻
heyy, I wish you lots of success with your first grow.
I can't help but share a few tips with you.
"less is more" - when it comes to cannabis.
It's easy to overdo it with water, nutrients, and light on the little plants.
So always remember - nutrient schedules are just guidelines.
I'm sure your grow buddies are keeping an eye on things -
the plant has a few "lessons" ready for everyone - be open to mistakes (lessons)
and stay patient.
happy growing
@Mr_Juice, thanks for your comment. It was explained to me over time as well. However, this problem occurs more often under LED lights. My best buddy has no CalMag issues despite using LED and the same nutrients. Unfortunately, I used CalMag from BioBizz in combination with BioTabs for almost a year, which according to my sources doesn't mix well. Still, it helped me over the past grows and mitigated my CalMag problems.
P.S. the tabs should be about 10 cm deep in the soil - and definitely shouldn't be sticking out - the seedling doesn't need the nutrients yet, only when it’s bigger, then it will get them with the roots
I think you pushed them in later? ----- if so, please ignore
@Mia_BIOTABS, thanks for your comment and your tips! As mentioned, this was my first grow from last year! Since then, I've gathered a lot of experience and knowledge and have made several adjustments and improvements over the past year! :) With your nutrient schedule, I've really got the hang of it now and I'm still sticking with you! And of course, I've pressed the tabs in! The pictures were just for representation/documentation. ;)