


Zamnesia Runtz Auto





VEG
Ionframe EVO 4 Light Emitting Diodes/300W
FLO
Ionframe EVO 4 Light Emitting Diodes/300W




Contr
AI+

Bio Terra Plus Soil


Indoor
Room Type
LST
weeks 1, 3
Defoliation
weeks 3, 7
19 liters
Pot Size
1.7 liters
Watering
Start at Harvest
G
Germination1y ago


Nutrients 2

Bio Vega
0.75 mll

BioRHIZOTONIC
2 mll
Alvareas Background on this grow:
Unlike my last grow, I've changed quite a bit about my setup. New tech has been added, and the fertilizer and soil are new as well. Therefore, I mainly want to test the new equipment in this grow. Additionally, this grow shouldn't take too long, as I have vacations scheduled in June and August, and I don't want to grow throughout the entire summer. My tent is located in a converted attic, and during the peak summer, temperatures rise significantly above 30 degrees. That's why I decided to go with an auto for this run. I know many believe that autos don't make sense indoors because they consume more electricity and take as long as photos. I don't care about the electricity consumption, and whether the breeder's claims from seed to harvest are bullshit, I'll see in this run. I'm also aware of the opinions about Zamnesia. However, I got the seeds for free at some point, and since I don't have any other autos in my stash, these are suitable for testing.
About my new equipment:
The AC Infinity Iongrid S22 has been replaced by an AC Infinity Ionframe Evo 4 300W. This means a jump from a maximum of 115W to a maximum of 300W. The Iongrid S22 delivered decent results, but the light distribution wasn't outstanding, nor was the penetration into the lower layers. This led to the head buds being quite nice, but then the buds became pretty loose and airy. I couldn't reach the suggested DLI values in flowering for photos either. I'm aware that the EVO 4 is an absolute overkill for my 60x60 tent and that I'll never fully utilize the 300W. However, since the lamp just fits in my tent, with only a few cm of space on the sides, I have perfect lighting for my area. The recommended DLI values shouldn't be a problem.
With the switch to the AI+ controller, I'm expecting dynamic regulation of my AC hardware. The Controller 69 Pro worked with triggers, within which exhaust and humidifier were controlled. However, the power levels didn't adjust dynamically within those triggers. AC promotes the AI+ controller exactly for this reason, and I can already confirm after the first week that this is indeed the case. It maintains the VPD value I set almost perfectly.
I acquired the Ecowitt soil moisture sensor because I want to work with a SCROG net in the next grow. Until now, I've determined the plant's water needs by regularly lifting the pot to assess weight loss. This won't be possible with the SCROG net, so I'm testing the soil moisture sensor.
The grow:
On April 5th, 3 seeds went into a damp paper towel to germinate. I put this in a ZIP bag to keep it moist. The sealed ZIP bag goes into a mini greenhouse that sits on a heating mat at 25 degrees. 24 hours later, all 3 seeds had visible taproots. They then moved into 0.5L seedling pots filled with BB Lightmix. As always in my runs, I focus on just one plant, so I also start the autos in seedling pots and don't go straight to the final pot. The seedling pots are in a mini greenhouse where I keep the humidity high. The lamp was set to level 1 and adjusted in height so that I have 12 DLI. It has been running from the start because I want the seedlings to receive light as soon as they emerge from the soil. By April 8th, all 3 seedlings had already stretched their heads toward the light. Before the seeds moved into the seedling pots, I thoroughly moistened the soil. Therefore, there was no need to water again until transplanting into the final pot. On April 14th, I transplanted into the final pot. As always, I chose the seedling that showed the fastest and most beautiful growth. The intention behind the quick transplanting is to avoid the roots hitting the boundaries of the small pots as they spread out. Instead, they can expand seamlessly. I transplanted into a 19L fabric pot. I filled this one day prior with Bio Terra Plus. The soil was moistened beforehand with 2L. Canna recommends adding Bio Vega and Bio Rhizotonic to the watering from the first week in low dosage. Canna also recommends regulating the pH value if the source water has a pH higher than 7.5. Since my water has a pH of 7.6 after standing for 24 hours, I adjusted it to 6.5. I will maintain this throughout the entire grow.
2 likes
comments
Share
Used method
Paper Towel
Germination Method
1
Week 1. Vegetation1y ago


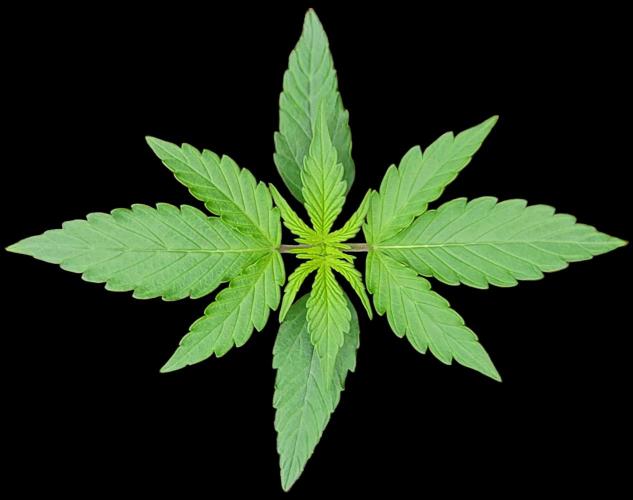
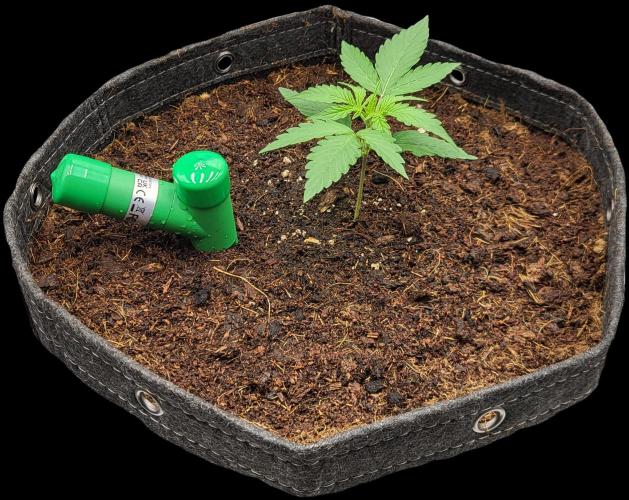

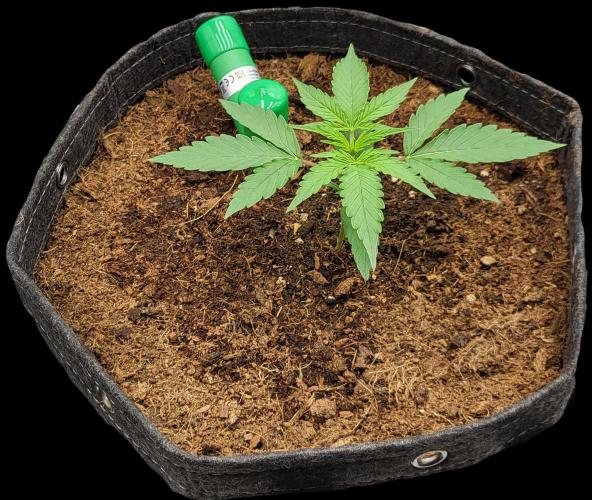


11 cm
Height
18 hrs
Light Schedule
25 °C
Day Air Temp
6.5
pH
No Smell
Smell
62 %
Air Humidity
23 °C
Night Air Temp
19 liters
Pot Size
0.64 liters
Watering Volume
40 cm
Lamp Distance
Nutrients 2
Bio Vega
2 mll
BioRHIZOTONIC
2 mll
Alvareas The Grow:
The plan behind the early repotting worked out, the plant had no growth stop and happily continued to grow.
After the plant had reached about 10 cm in height and started to diligently form shoots at the nodes, it became clear that the shoots at the first node were growing significantly slower than those at the second node.
Therefore, I removed the first shoot so that the plant wouldn't waste energy on developing these shoots.
On the penultimate day of the week, I started with LST.
At this point, the main stem is still quite flexible and can be bent almost 90 degrees.
For the LST, I use thick rubberized plant wire.
With one wire, I counter the main stem, and with the second wire, I bend the plant in the desired direction.
I secure the wire ends with foldback clips to the edge of the pot.
After bending, I removed the shoot and the sun leaf at the first node that was pointing towards the ground.
The sun leaf was lying on the ground, which I don't want, as it makes watering difficult and poses a risk of mold.
I removed the shoot because it would have to grow around the plant first and therefore wouldn't reach the same height as the other shoots.
The main stem will now be bent daily.
For this, I simply pull the wire a little further.
As soon as new nodes have formed and are strong enough, the wire will be placed one node higher on the main stem.
In doing so, I turn the main stem 90 degrees so that new shoots lie horizontally to the ground and grow evenly upwards.
With the LST, I want to ensure that all shoots receive the same amount of light and have approximately the same distance from the lamp.
The DLI was increased from 12 to 20 this week.
For this, I reduced the distance of the lamp to the plant.
I will keep it this way.
The lamp's power will only be increased when I have to keep the distance under 40 cm from the plant.
The plant was watered 3 times this week.
I started with 1 liter, then I water directly around the plant with 0.5 liters, and the rest is distributed throughout the pot.
With each watering, I increased the amount by 0.5 liters.
While I water 0.5 liters directly around the plant each time and distribute the rest in the pot.
With this, I want to ensure that the plant has direct access to water, but to reach the rest, it needs to spread its roots.
I adjusted the watering water to a pH value of 6.5.
The Canna feeding schedule gives a min and max range.
I stick to the lowest value.
Bio Vega 2ml per liter
Bio Rhizotonic 2ml per liter
The average soil moisture was at 34% this week.
In retrospect, I had to realize that I placed the soil moisture sensor incorrectly.
The sensor tip has a length of 15 cm.
Thus, I only measure the moisture in the upper 15 cm of the soil.
It would have been better if I had made a small hole in the side of the pot in the lower area and inserted the probe into the soil there.
Therefore, I am currently checking the weight of the pot and the moisture level displayed by the sensor to ensure that too much moisture does not accumulate in the lower pot area, which the plant cannot yet use.
I do not want to change the position of the sensor anymore, as I do not want to damage any roots.
3 likes
comments
Share
Used techniques
LST
Technique
2
Week 2. Vegetation1y ago


15 cm
Height
18 hrs
Light Schedule
25 °C
Day Air Temp
6.5
pH
No Smell
Smell
61 %
Air Humidity
22 °C
Night Air Temp
19 liters
Pot Size
0.71 liters
Watering Volume
40 cm
Lamp Distance
Nutrients 2
Bio Vega
2 mll
BioRHIZOTONIC
2 mll
Alvareas Week 3 / Veg Week 2
The Grow:
The plant has grown significantly this week. Thanks to the LST, strong shoots have formed in almost every node, growing nicely upwards, and by daily tying down the main stem, they're almost at its level. However, the main stem remains clearly the dominant shoot. I won't be able to change this even without topping. However, I don't want to top it. By the end of the week, I forced the shoots in the direction I wanted with LST clips. I want to continue spreading the plant out.
I kept the DLI at 20 this week.
The plant was watered twice this week with 2.5 liters each time. The water was adjusted to a pH of 6.5. I added the following supplements to the water, just like the previous week:
Bio Vega 2ml per liter
Bio Rhizotonic 2ml per liter
The parameters in week 3:
Average daytime temperature: 25 degrees
Average nighttime temperature: 22 degrees
Average daytime humidity: 64%
Average nighttime humidity: 59%
LED power: 10% = 70 watts
Lighting duration: 18 hours
DLI: 20
Controller setting: Advanced AI VPD 1.2
Average VPD: 1.14
Air circulation: Level 2 oscillating
Average soil moisture: 33%
5 likes
comments
Share
3
Week 3. Vegetation1y ago


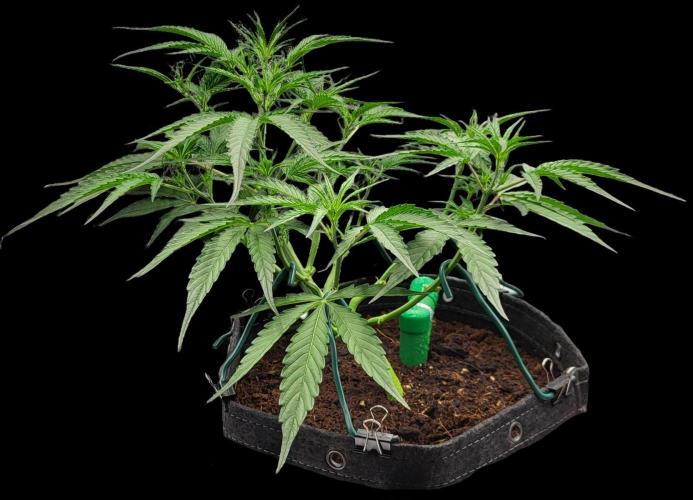


45 cm
Height
18 hrs
Light Schedule
27 °C
Day Air Temp
6.5
pH
Weak
Smell
63 %
Air Humidity
23 °C
Night Air Temp
19 liters
Pot Size
1.3 liters
Watering Volume
40 cm
Lamp Distance
Nutrients 3
Bio Vega
2 mll
BioRHIZOTONIC
2 mll

BioBOOST
2 mll
Alvareas Week 4 / Veg Week 3
The Grow:
The plant has developed well this week and built up a decent amount of leaf mass. Many of the sun leaves were much larger than my hand. Due to the LST, which I adjusted daily, many of the leaves overlapped and laid on top of each other. This created a lot of condensation between them. Since this can lead to mold, I decided to defoliate the plant by the middle of the week. I removed all the leaves where condensation had formed. After that, the plant looked a bit naked, but it didn't seem to mind. It continued to grow as if nothing had happened. I removed the LST clips before the stems got too thick. I then pulled the branches further in the desired direction with wire. I kept adding new LST clips throughout the week to new branches to let them grow in the desired direction. After 2-3 days, the clip was removed and replaced with wire. By the end of the week, the plant had reached the desired shape, and since then, it's been all about letting it grow. The first signs of pre-flowering were already visible by the end of the week.
I increased the DLI to 30 this week.
I watered a total of 3 times this week, each time with 3 liters. The pH of the water was adjusted to 6.5. The first and second time, the following additives were added:
Bio Vega 2ml per liter
Bio Rhizotonic 2ml per liter
For the last watering this week and upon recognizing the pre-flowering, the additives were adjusted as follows:
Bio Vega 2.5ml per liter
Bio Rhizotonic 0.5ml per liter
Bio Boost 2ml per liter
The parameters in week 4:
Average daytime temperature: 27 degrees
Average nighttime temperature: 23 degrees
Average daytime humidity: 67%
Average nighttime humidity: 59%
LED power: 30% = 120 watts
Lighting duration: 18 hours
DLI: 30
Controller setting: Advanced AI VPD 1.2
Average VPD: 1.16
Air circulation: Level 2 oscillating
Average soil moisture: 37%
3 likes
comments
Share
Used techniques
LST
Technique
Defoliation
Technique
4
Week 4. Vegetation1y ago


90 cm
Height
18 hrs
Light Schedule
27 °C
Day Air Temp
6.5
pH
Weak
Smell
58 %
Air Humidity
22 °C
Night Air Temp
19 liters
Pot Size
1.7 liters
Watering Volume
40 cm
Lamp Distance
Nutrients 3

Bio Flores
4 mll
BioBOOST
2 mll
BioRHIZOTONIC
0.5 mll
Alvareas The Grow:
This week the plant completely escalated.
The main stem stretched 45 cm and the branches around it have nicely followed suit.
By the end of the week, the plant was 90 cm tall, without the pot.
My light is now at maximum height and is still 20 cm away from the top of the plant.
I hope the stretch ends soon and that I won't have to possibly remove fans and the carbon filter from the tent to hang the LED a bit higher.
My LST is complete.
The plant has grown nice and wide and open.
By the middle of the week, flowering also began.
I increased the DLI to 40 this week.
I watered a total of 3 times this week, each time with 4 liters.
The pH of the water was adjusted to 6.5.
The first and second time, the following additives were added:
Bio Vega 2.5ml per liter
Bio Rhizotonic 0.5ml per liter
Bio Boost 2ml per liter
During the last watering, flowering had begun.
Therefore, I switched the nutrient schedule to flowering.
The following additives were added:
Bio Flores 4ml per liter
Bio Rhizotonic 0.5ml per liter
Bio Boost 2ml per liter
The parameters in week 4:
Average daytime temperature: 27 degrees
Average nighttime temperature: 22 degrees
Average daytime humidity: 63%
Average nighttime humidity: 54%
LED power: 40% = 150 watts
Lighting duration: 18 hours
DLI: 40
Controller setting: Advanced AI VPD 1.3
Average VPD: 1.23
Air circulation: Level 2 oscillating
Average soil moisture: 38%
5 likes
comments
Share
5
Week 5. Flowering1y ago


105 cm
Height
18 hrs
Light Schedule
25 °C
Day Air Temp
6.5
pH
Normal
Smell
58 %
Air Humidity
22 °C
Night Air Temp
19 liters
Pot Size
2.2 liters
Watering Volume
15 cm
Lamp Distance
Nutrients 4

Calmag
0.5 mll
Bio Flores
3 mll
BioRHIZOTONIC
0.5 mll
Alvareas Week 6 / Flowering Week 1
The Grow:
The plant is doing quite well.
The buds are developing, and it has also gained a good bit of height.
By the end of the week, the plant was 105 cm without the pot.
So, in the 7 days, it has grown 15 cm.
My LED is now hanging just above the fan.
If the plant gets much bigger now, I would have to remove the fan from the tent.
But I think the stretch is over now, as it has already slowed down significantly in the last days of the week.
Unfortunately, the first signs of magnesium deficiency have appeared.
On some of the upper leaves of the main stem, rusty spots have formed between the leaf veins.
I wanted to see if the Canna soil and nutrients were sufficient without additives, but unfortunately, they are not.
So, I added some Calmag from BB during the last watering of the week.
Since then, no new spots have appeared.
I have increased the DLI to 45.
This week, I watered a total of 3 times with 5 liters each time.
The pH of the water was adjusted to 6.5.
The following additives were added:
Bio Flores 3ml per liter
Bio Rhizotonic 0.5ml per liter
Bio Boost 2ml per liter
BioBizz Calmag 0.5ml per liter 1x
The parameters in week 6:
Average daytime temperature: 25 degrees
Average nighttime temperature: 22 degrees
Average daytime humidity: 61%
Average nighttime humidity: 55%
LED power: 50% = 170 watts
Lighting duration: 18 hours
DLI: 45
Controller setting: Advanced AI VPD 1.3
Average VPD: 1.23
Air circulation: Level 2 oscillating
Average soil moisture: 40%
3 likes
comments
Share
6
Week 6. Flowering1y ago




105 cm
Height
18 hrs
Light Schedule
26 °C
Day Air Temp
6.3
pH
Normal
Smell
55 %
Air Humidity
23 °C
Night Air Temp
19 liters
Pot Size
3.4 liters
Watering Volume
10 cm
Lamp Distance
Nutrients 3
Bio Flores
3 mll
BioRHIZOTONIC
0.5 mll
BioBOOST
2 mll
Alvareas Week 7 / Flowering Week 2
The Grow:
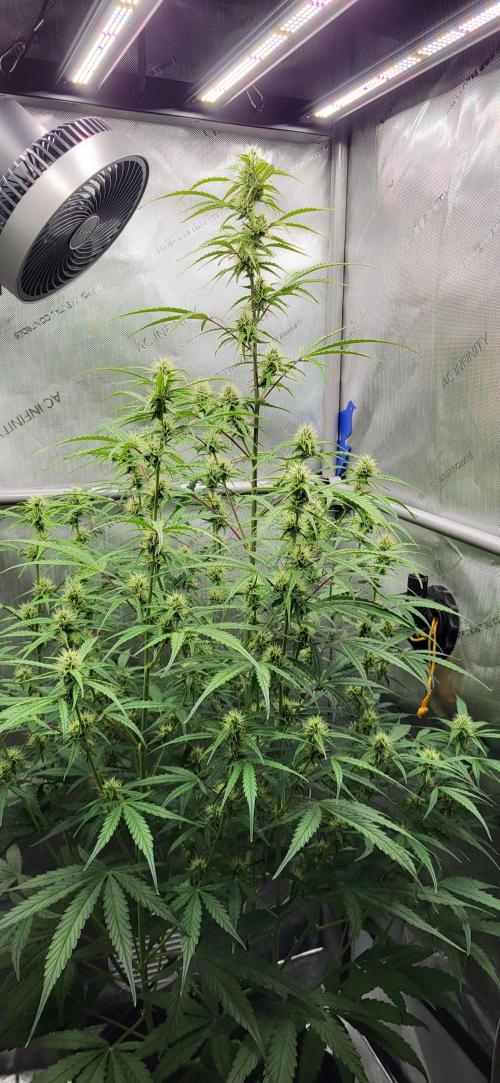
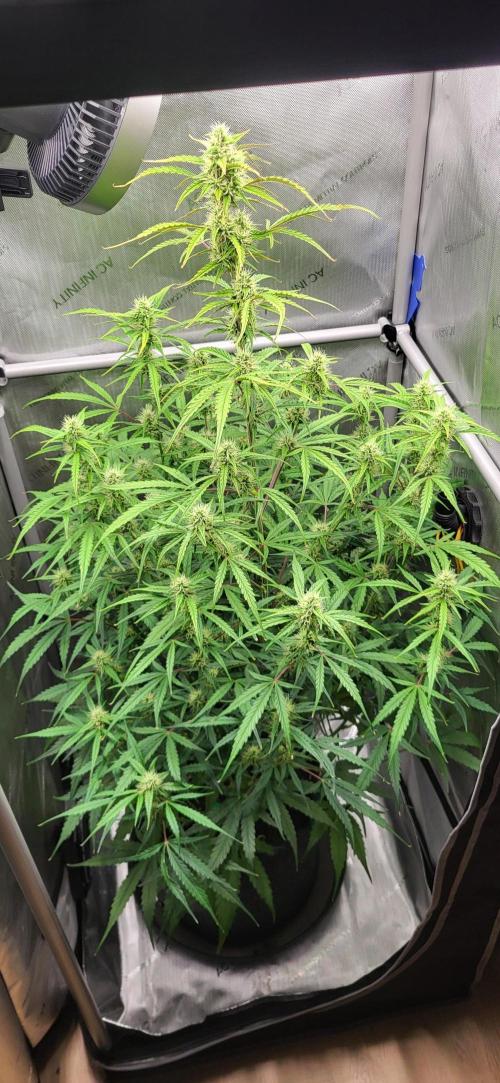
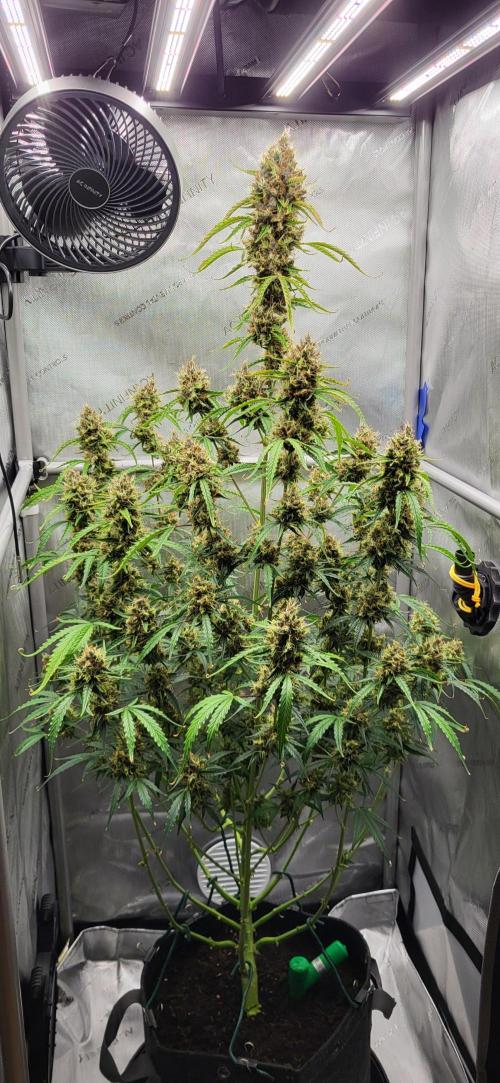
The flowering stretch is over.
The plant has stopped growing in height at 105 cm without the pot.
The LED is now still 10 cm away from the main bud.
I will leave it like this, as I don't feel like taking my entire exhaust out of the tent.
I'm taking the risk that the tip of the main bud might get burned.
So far, everything still looks good.
The buds are growing nicely in length.
I watered this week with 6 liters per watering, when the sensor showed 27% soil moisture.
This was the case every other day.
At 27%, I watered the entire run so far, but with less water.
With 6 liters, there was a slight drain, about 0.5 liters, which I sucked out of the saucer.
By the end of the week, significantly burned leaf tips appeared.
I rule out over-fertilization, as I am at the lower end of the feeding schedule and the lower leaves show a nice green.
However, the upper leaves are noticeably lighter.
Therefore, I suspect that the 6 liters were simply too much and I overwatered the plant.
That's why I will let the soil dry out further in the coming week and only water with 5 liters.
The watering water was adjusted to a pH of 6.3 this week, with the following additives.
Bio Flores 3ml per liter
Bio Rhizotonic 0.5ml per liter
Bio Boost 2ml per liter
The parameters in week 7:
I raised the VPD to 1.4.
Average daytime temperature: 26 degrees
Average nighttime temperature: 23 degrees
Average daytime humidity: 59%
Average nighttime humidity: 52%
LED power: 50% = 170 watts
Lighting duration: 18 hours
DLI: 45
Controller setting: Advanced AI VPD 1.4
Average VPD: 1.36
Air circulation: Level 2 oscillating
Average soil moisture: 46%
2 likes
comments
Share
7
Week 7. Flowering1y ago


105 cm
Height
18 hrs
Light Schedule
28 °C
Day Air Temp
6.3
pH
Normal
Smell
57 %
Air Humidity
25 °C
Night Air Temp
19 liters
Pot Size
1.4 liters
Watering Volume
10 cm
Lamp Distance
Nutrients 3
Bio Flores
3 mll
BioRHIZOTONIC
4 mll
BioBOOST
3 mll
Alvareas Week 8 / Flowering Week 3
The Grow:
The buds have grown quite a bit over the week and are developing nicely. The smell is getting stronger, but I can't detect anything fruity, as described by Zamnesia. The smell isn't bad, but it just smells like average weed. Let's see if that changes, but I doubt it. According to Zamnesia, the grow should be done in 2 weeks, which will definitely not be the case. I'm guessing more like 4-5 weeks. This debunks the myth that autos are faster than photos for me. The upper leaves are looking less nice due to a combination of CalMag deficiency, overwatering, and what I suspect is a slight potassium deficiency. There are some strong necroses. However, this shouldn't be a problem until the end of the grow. Throughout the week, I've been removing a few leaves from the middle of the plant to allow light to penetrate deeper and improve ventilation. The leaves in the middle part of the plant were quite dense. In the lower third, the plant has self-defoliated. A large portion of the big fan leaves have been drained by the plant and have fallen off. The plant was only watered twice this week with 5 liters each time. Since I probably had the plant too wet the week before, I let it dry out quite a bit. The pH was adjusted back to 6.3. Since I suspected a slight potassium deficiency, I adjusted the nutrient amounts. I increased Bio Flores to the maximum amount of 4ml per liter and Bio Boost to the medium amount of 3ml per liter.
Bio Flores 4ml per liter
Bio Rhizotonic 0.5ml per liter
Bio Boost 3ml per liter
Interim Conclusion on the AI+ Controller
The controller is a great advancement. I can't say anything about the beginner mode since I haven't used it. In the advanced mode, which I use, the controller can be set to regulate based on temperature or humidity, both together, or by VPD. The controller then dynamically regulates the connected devices to achieve the set values, which works very well. At first, I controlled the controller by VPD. The VPD values I set are maintained perfectly by the controller 98% of the time. However, with rising outside temperatures, the controller starts to have problems in this mode. It becomes clear that VPD control, without the ability to regulate outside temperature, is not possible. To illustrate, I want to show the following example. At a temperature of 25 degrees in my grow room, it reaches 27-28 degrees in the tent when the LED is running. The controller then tries to increase the humidity with the humidifier to reach the VPD value of 1.4 that I set. The humidifier keeps turning on, and the exhaust is throttled to 10%. As a result, the humidity fluctuates between 60-70%. That's fine in veg and early bloom, but not in the flowering stage I'm currently in. Because the exhaust is throttled to maintain humidity, the temperature in the tent keeps rising due to the low air exchange, which also increases the humidity. If you remove the humidifier from the automatic control, the controller tries to regulate the VPD only with the exhaust. However, you then have the same problems. The controller throttles the exhaust so much that the temperatures in the tent keep rising. Since there were already a few days this week with 30 degrees in the grow room and 34 degrees in the tent, I changed the regulation from VPD to humidity. Currently, the humidity is set to 55%. The exhaust runs almost continuously at 50%, sometimes a bit more and sometimes a bit less. But there is always enough air exchange so that the temperature in the tent doesn't rise too much.
Therefore, VPD control without air conditioning is possible in the fall and winter months, but definitely not in the summer months.
The controller does bring a nice feature compared to the Controller 69. With the Controller 69, if you worked on the open tent, you had to manually turn off all automations and turn them back on when you were done. With the AI+, there is a work mode. In this mode, the LED, exhaust, and circulation are throttled to 10% for 15 minutes. The humidifier is completely turned off. After 15 minutes, everything goes back to the original settings, or you can activate another 15 minutes of throttling. With the Controller 69, it happened to me a few times that I forgot to turn the automations back on, which can no longer happen now.
The parameters in week 8:
I changed the VPD control to humidity control by the end of the week. Humidity is set to 55%.
Average daytime temperature: 28 degrees
Average nighttime temperature: 25 degrees
Average daytime humidity: 60%
Average nighttime humidity: 54%
LED power: 50% = 170 watts
Lighting duration: 18 hours
DLI: 45
Controller setting: Advanced AI humidity 55%
Average VPD: 1.48
Circulation: Level 3 oscillating
Average soil moisture: 35%
2 likes
comments
Share
Used techniques
Defoliation
Technique
8
Week 8. Flowering1y ago


105 cm
Height
18 hrs
Light Schedule
27 °C
Day Air Temp
6.3
pH
Strong
Smell
56 %
Air Humidity
24 °C
Night Air Temp
19 liters
Pot Size
2.2 liters
Watering Volume
10 cm
Lamp Distance
Nutrients 3
Bio Flores
3 mll
BioRHIZOTONIC
0.5 mll
BioBOOST
3 mll
Alvareas Week 9 / Flowering Week 4
The Grow:
The buds have gained nice volume this week and are getting heavier. The branches are starting to sway with every touch. According to Zamnesia, we are now on the home stretch, and looking at the trichomes, this could almost be true if we're going by completely milky trichomes. The trichomes are almost entirely milky. However, since I also prefer a certain amount of amber, it will definitely stay a while longer. The smell has intensified, but I still can't perceive any fruity undertone. The increase in nutrients is now showing its effect. The depletion of the lower leaves under the sunshade has stopped, and the upper leaves have darkened.
This week, I watered 4 times with 4 liters each time. The pH was adjusted back to 6.3. During one watering, I added CalMag to the water at 0.3ml/l. Otherwise, for each watering, the following additives were used:
Bio Flores 4ml per liter
Bio Rhizotonic 0.5ml per liter
Bio Boost 3ml per liter
The parameters in week 9:
Average daytime temperature: 27 degrees
Average nighttime temperature: 24 degrees
Average daytime humidity: 56%
Average nighttime humidity: 56%
LED power: 50% = 170 watts
Lighting duration: 18 hours
DLI: 45
Controller setting: Advanced AI humidity 55%
Average VPD: 1.4
Air circulation: Level 3 oscillating
Average soil moisture: 45%
3 likes
comments
Share
9
Week 9. Flowering1y ago


105 cm
Height
18 hrs
Light Schedule
28 °C
Day Air Temp
6.3
pH
Strong
Smell
55 %
Air Humidity
25 °C
Night Air Temp
19 liters
Pot Size
1.71 liters
Watering Volume
10 cm
Lamp Distance
Nutrients 3
Bio Flores
3 mll
BioRHIZOTONIC
0.5 mll
BioBOOST
3 mll
Alvareas Week 10 / Flowering Week 5
The Grow:
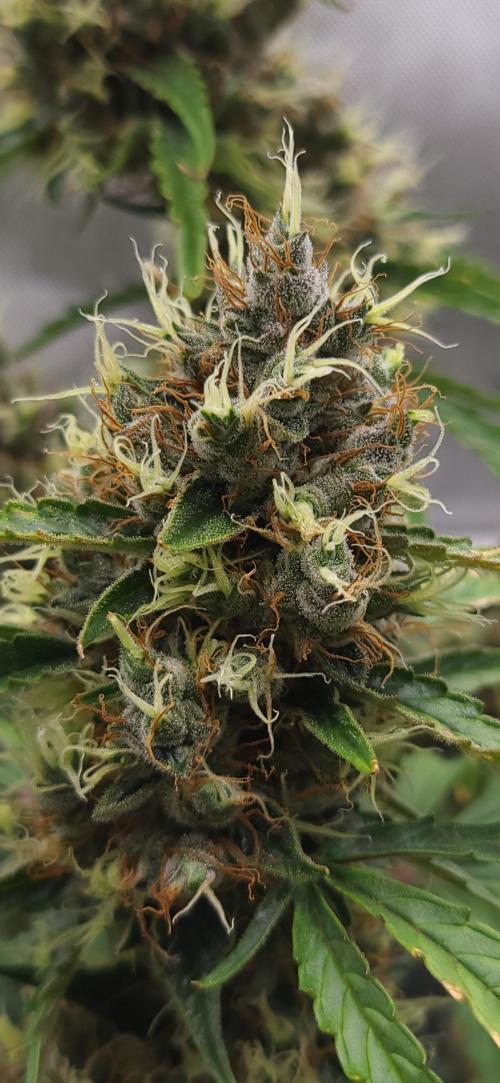
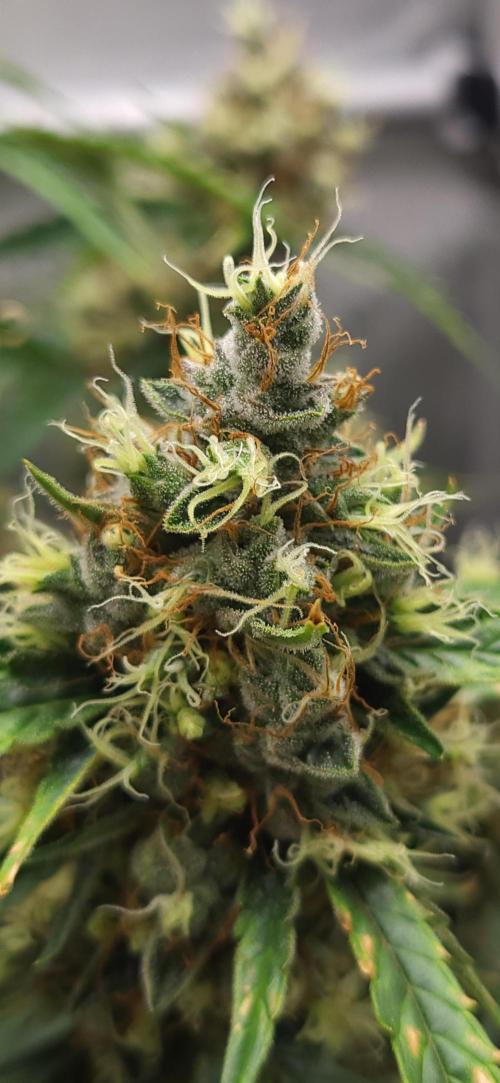
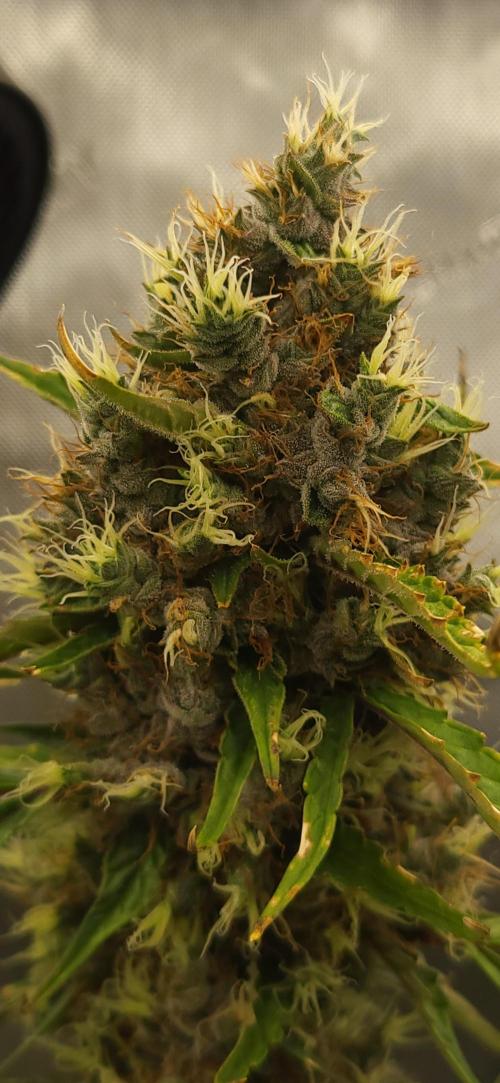
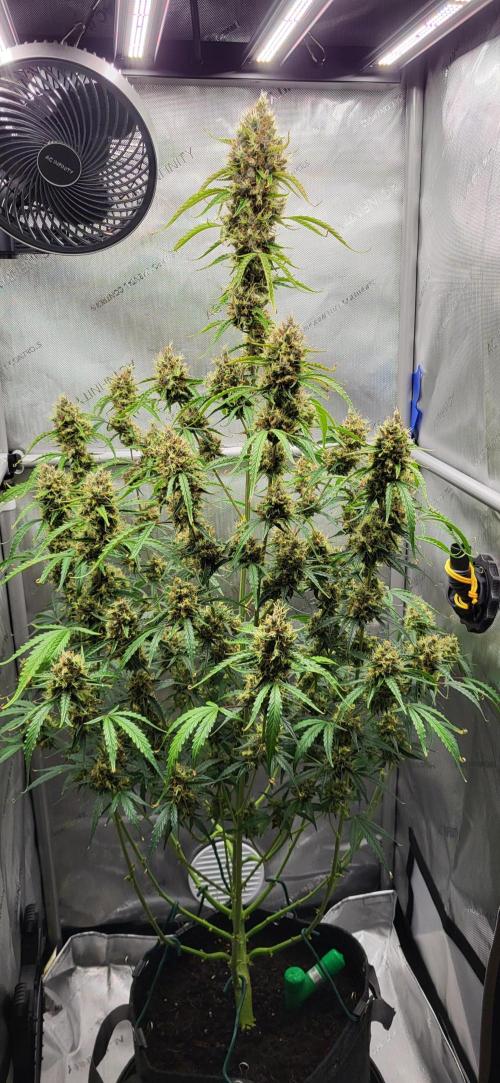
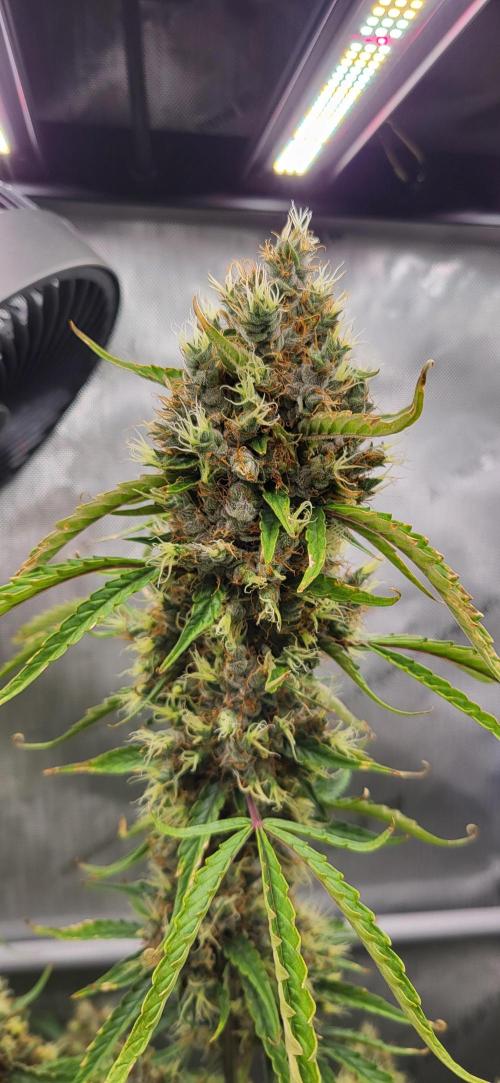
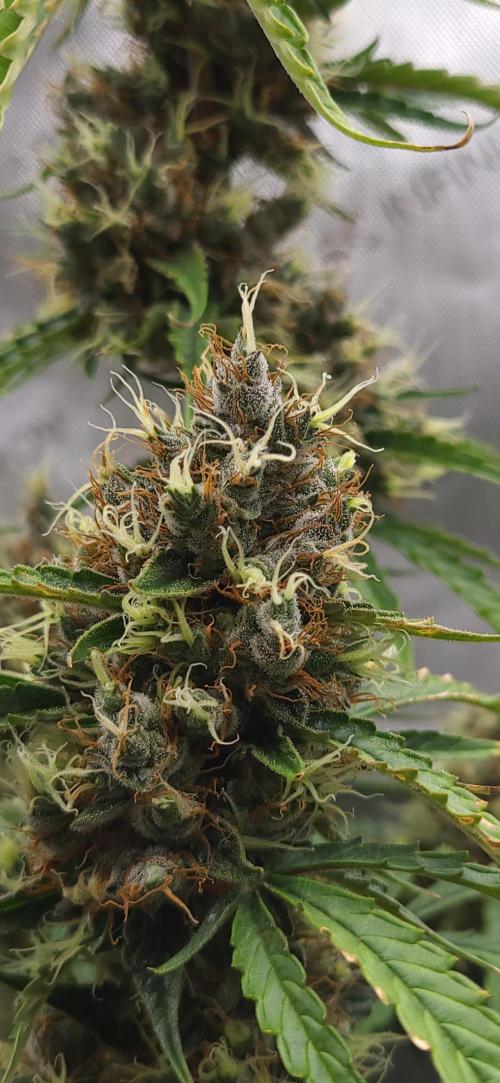
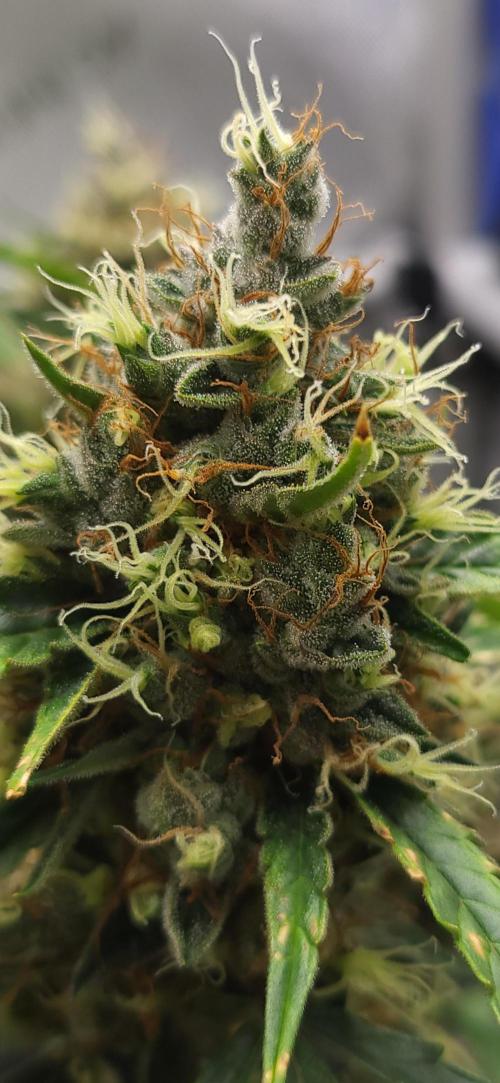
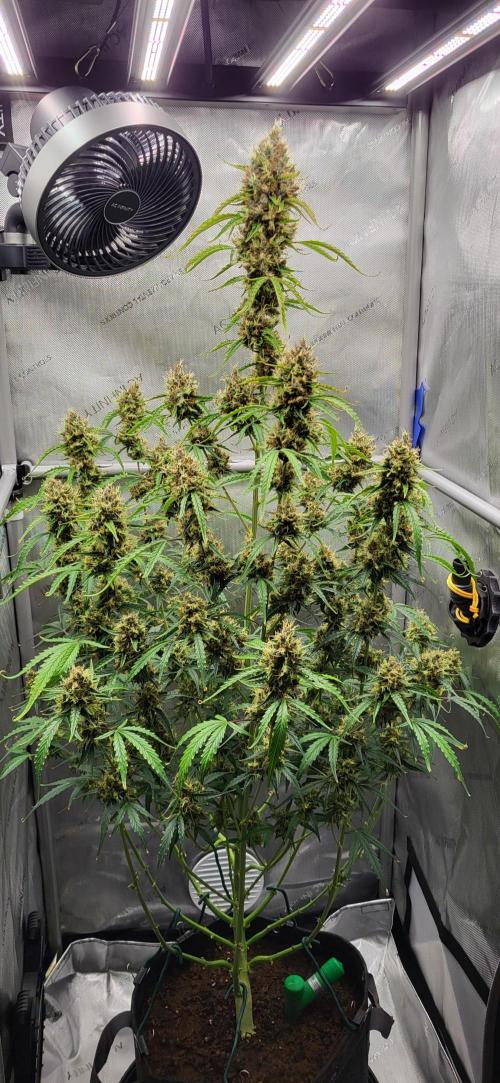
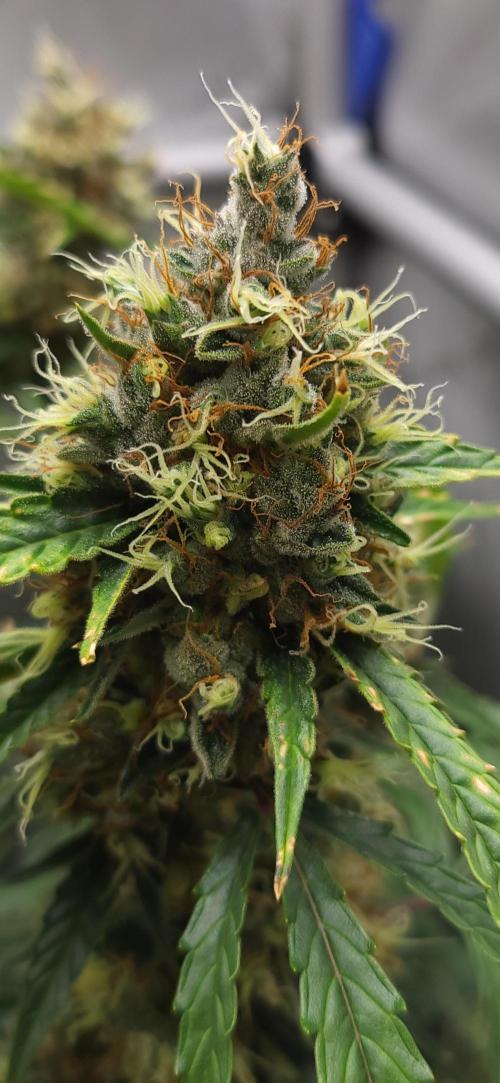
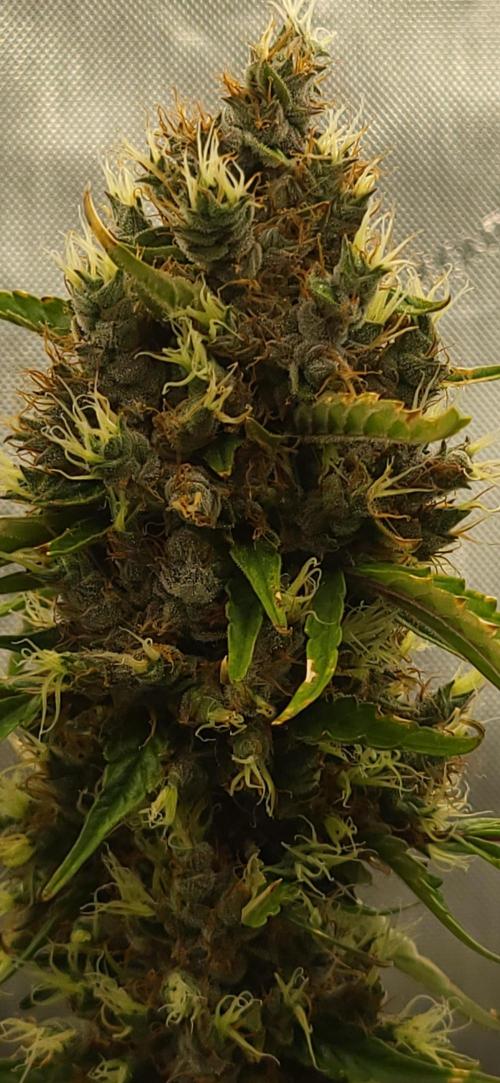
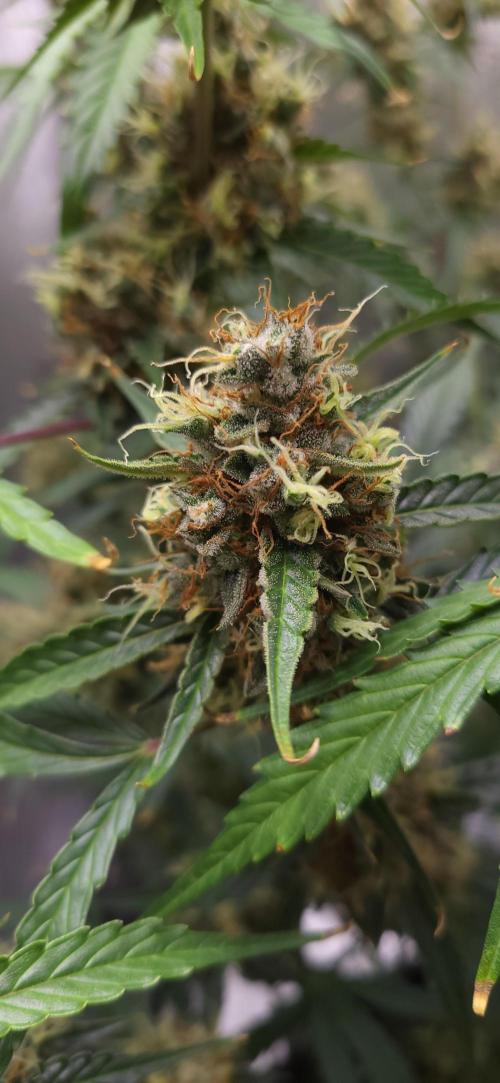
The buds are slowly maturing.
Some are shooting foxtails, which I mainly attribute to the rising temperatures.
According to Zamnesia, the grow should be finished by now.
But I think it still needs at least another 2 weeks.
The smell has significantly increased, which is also due to the higher temperatures.
I still can't make out any fruity notes.
This was the last week with nutrients; from now on, it's just water.
The soil should still have enough juice for the last 2 weeks.
This week, I watered 3 times with 4 liters each and the following additives.
During one watering, I added 2ml of Calmag from BB.
Bio Flores 3ml per liter
Bio Rhizotonic 0.5ml per liter
Bio Boost 3ml per liter
The parameters in week 10:
Average daytime temperature: 28 degrees
Average nighttime temperature: 26 degrees
Average daytime humidity: 55%
Average nighttime humidity: 55%
LED power: 50% = 170 watts
Lighting duration: 18 hours
DLI: 45
Controller setting: Advanced AI humidity 55%
Average VPD: 1.58
Air circulation: Level 3 oscillating
Average soil moisture: 40%
3 likes
comments
Share
10
Week 10. Flowering1y ago
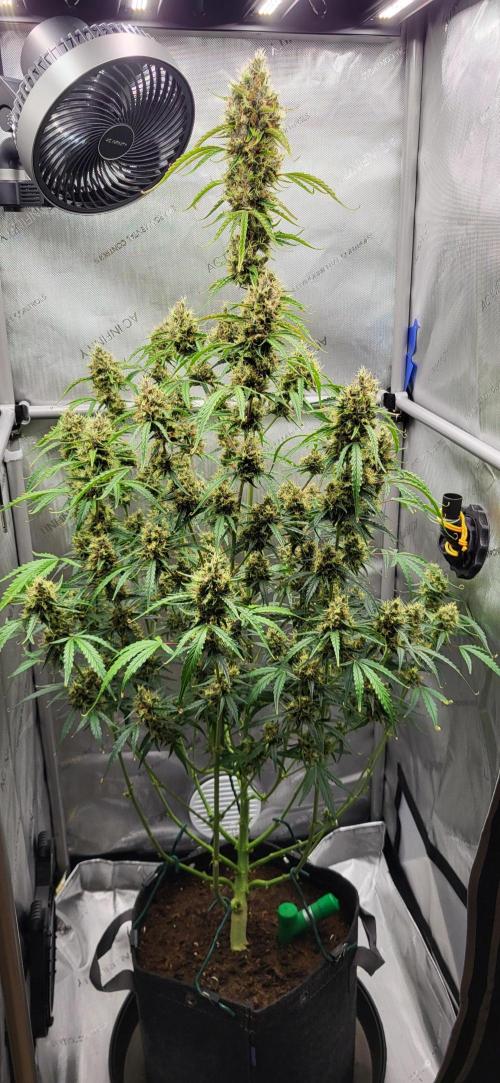


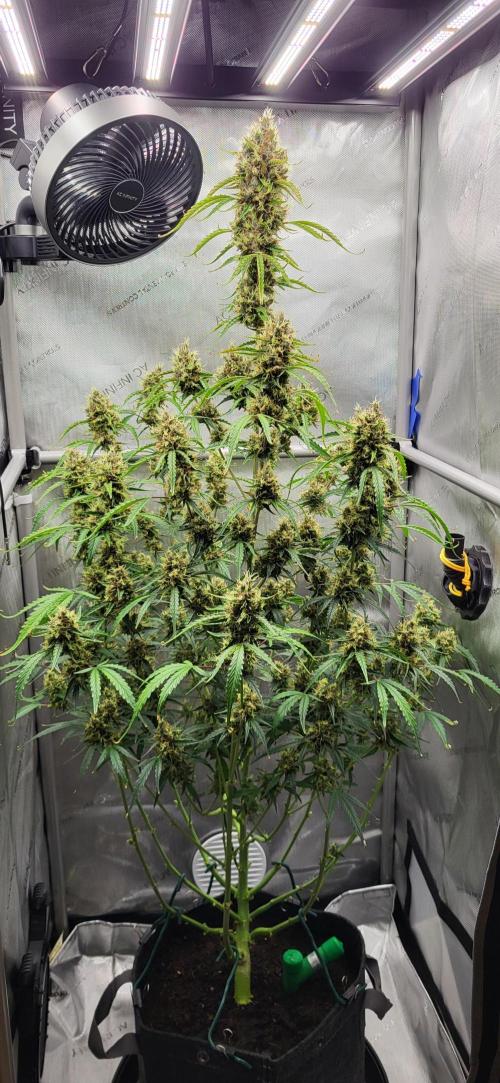



105 cm
Height
18 hrs
Light Schedule
29 °C
Day Air Temp
6.3
pH
Strong
Smell
54 %
Air Humidity
27 °C
Night Air Temp
19 liters
Pot Size
2.2 liters
Watering Volume
10 cm
Lamp Distance
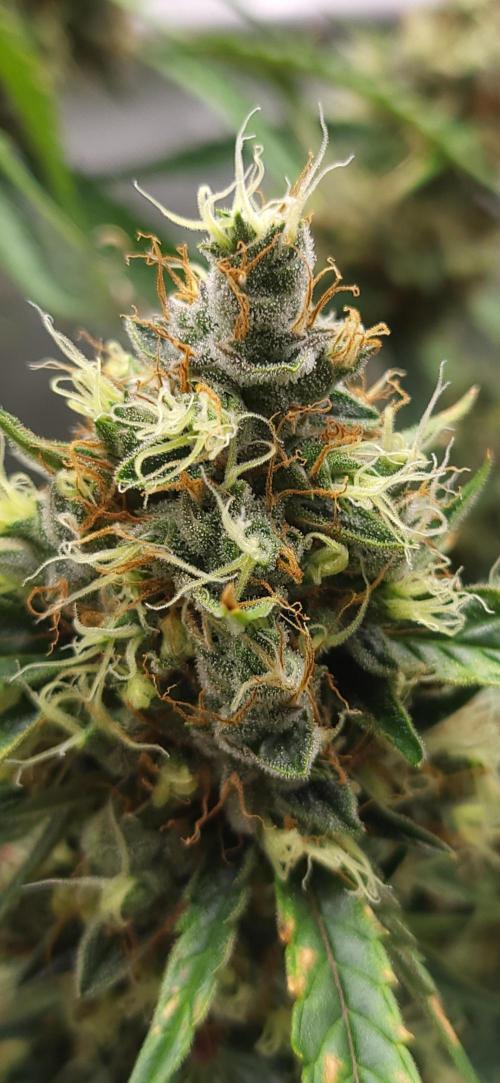
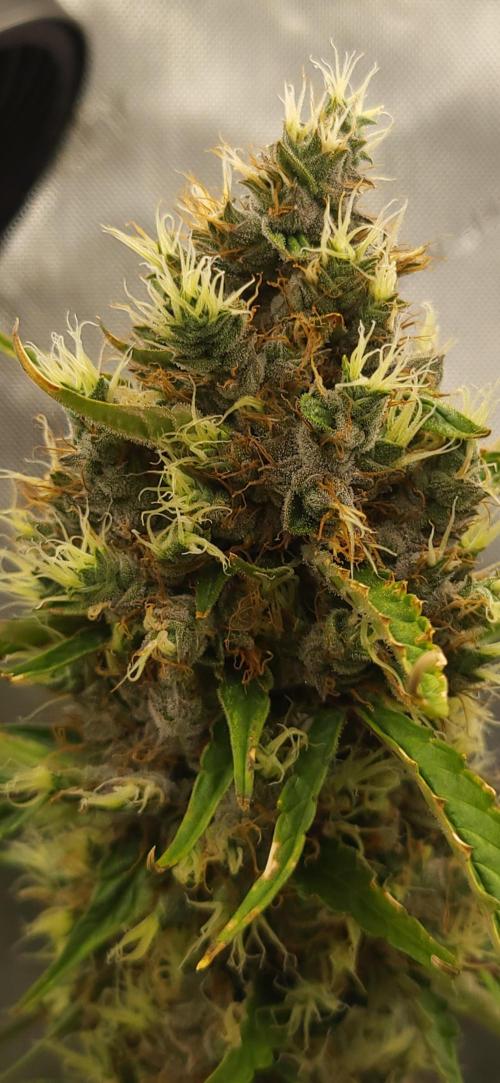
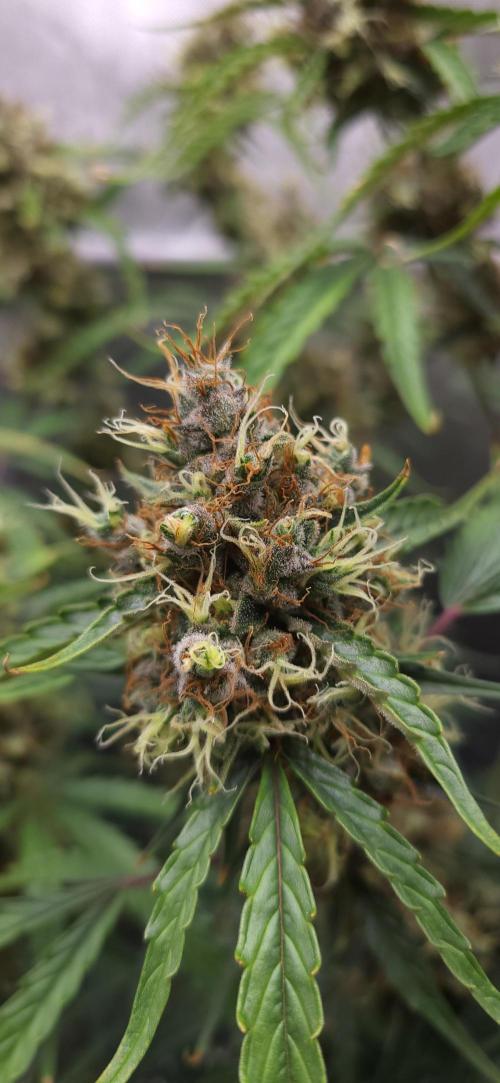
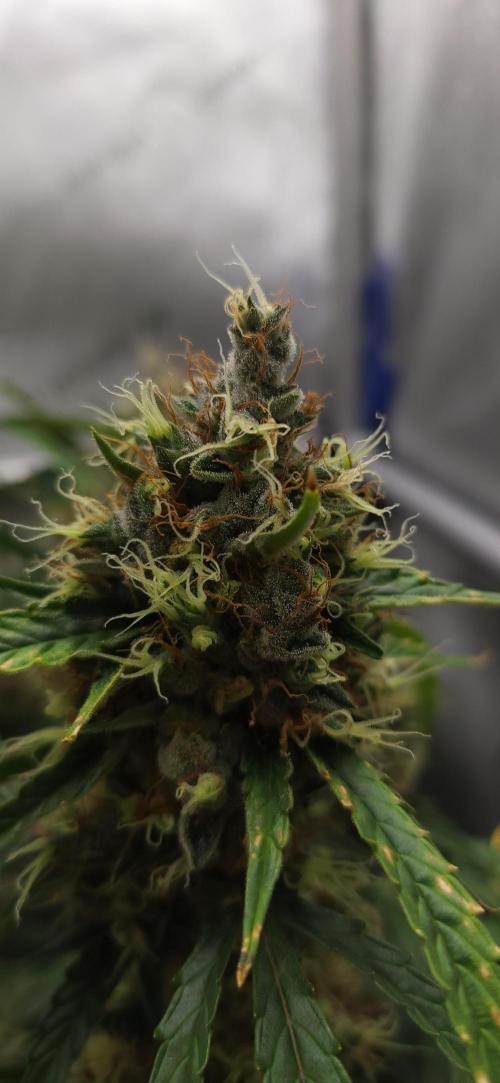
Alvareas Week 11 / Flowering Week 6
The Grow:
There's really not much more to say.
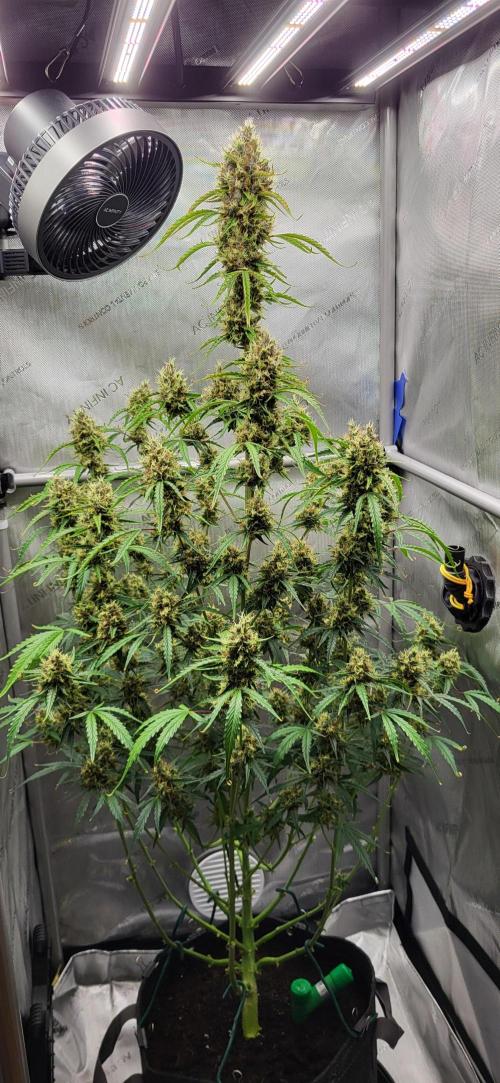
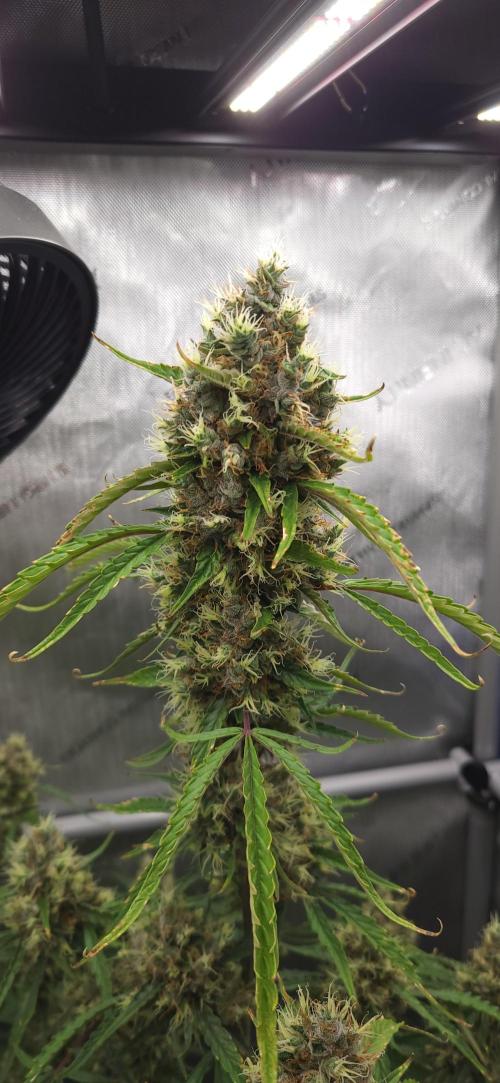
The buds are continuing to mature.
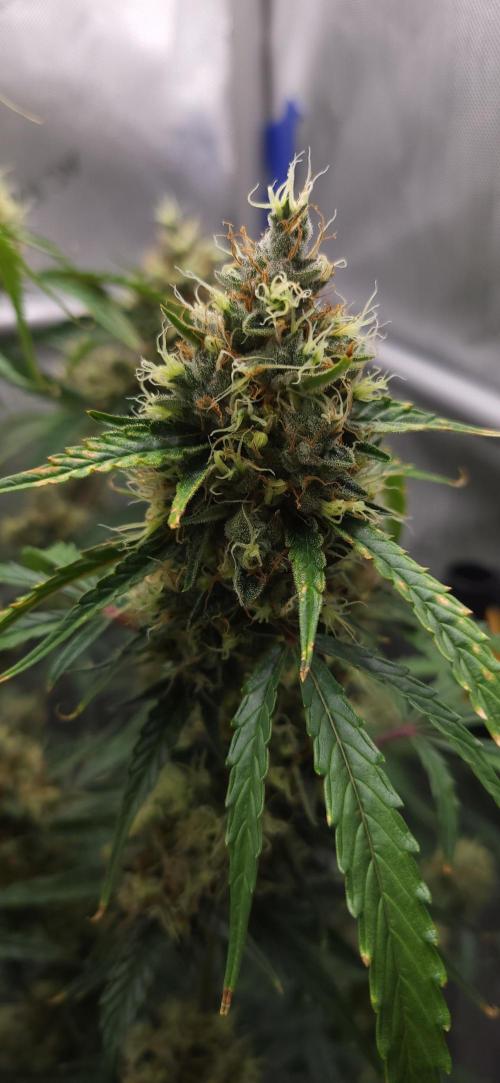
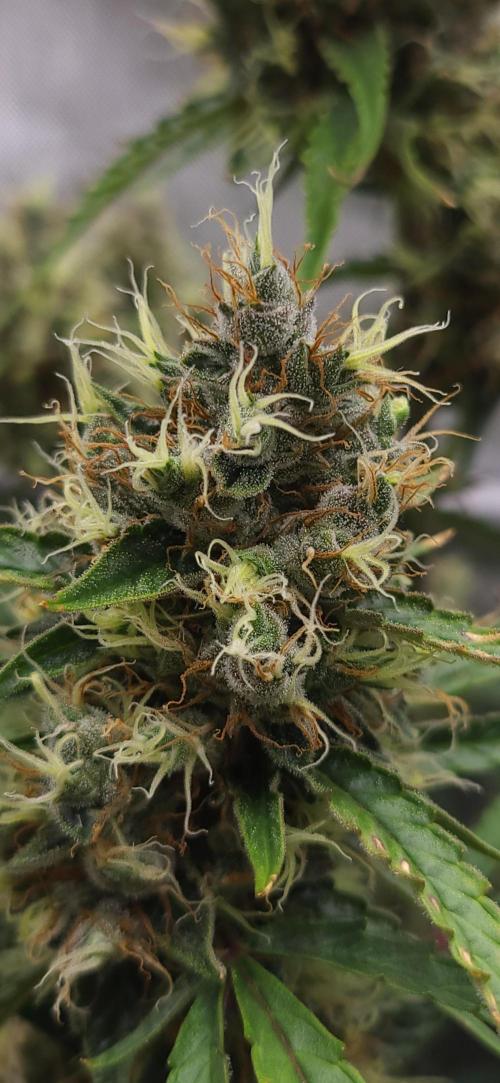
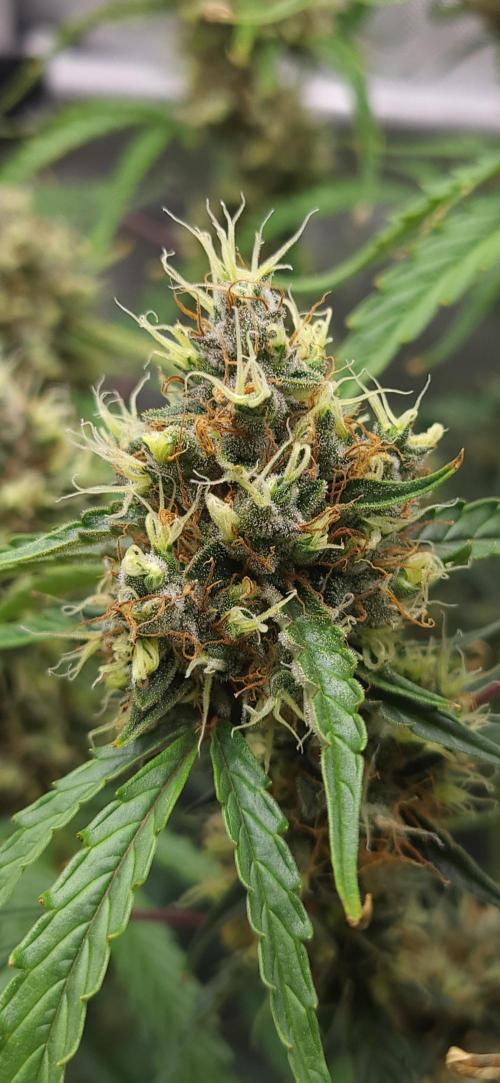
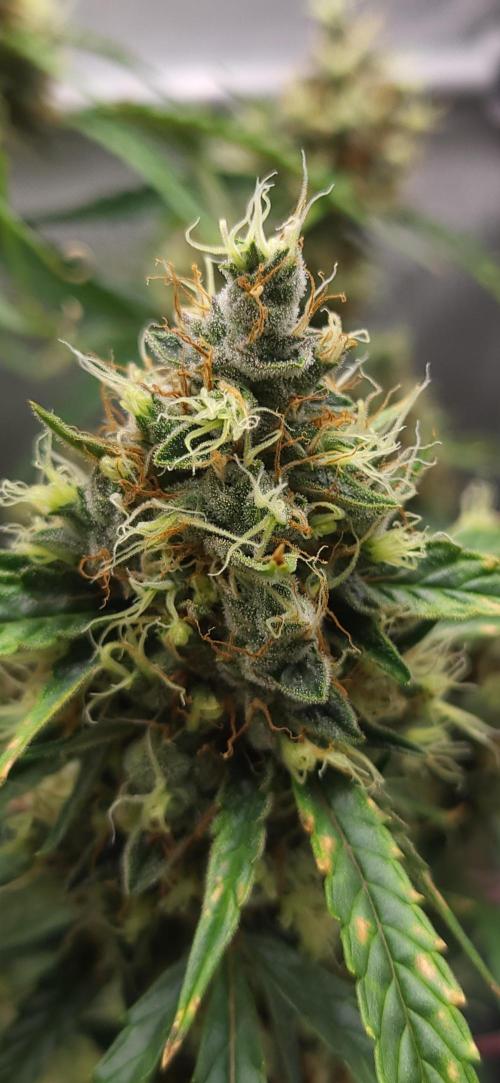
The foxtailing has increased further, which is normal given the temperatures.
At times, I had 32 degrees in the tent.
But that's something you can't prevent with temperatures around 30 degrees in the groom.
I just make sure it doesn't get too dry in the tent and that the humidity doesn't exceed 60%.
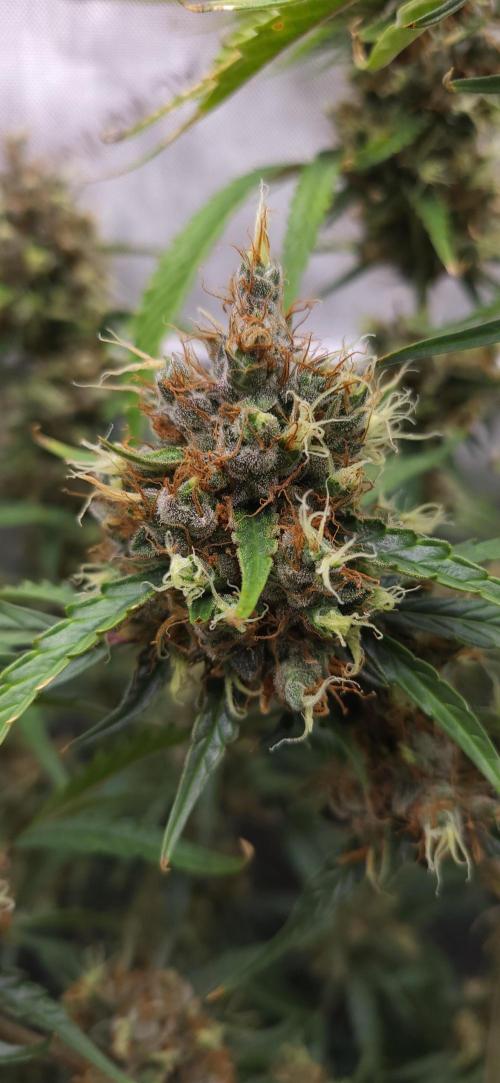
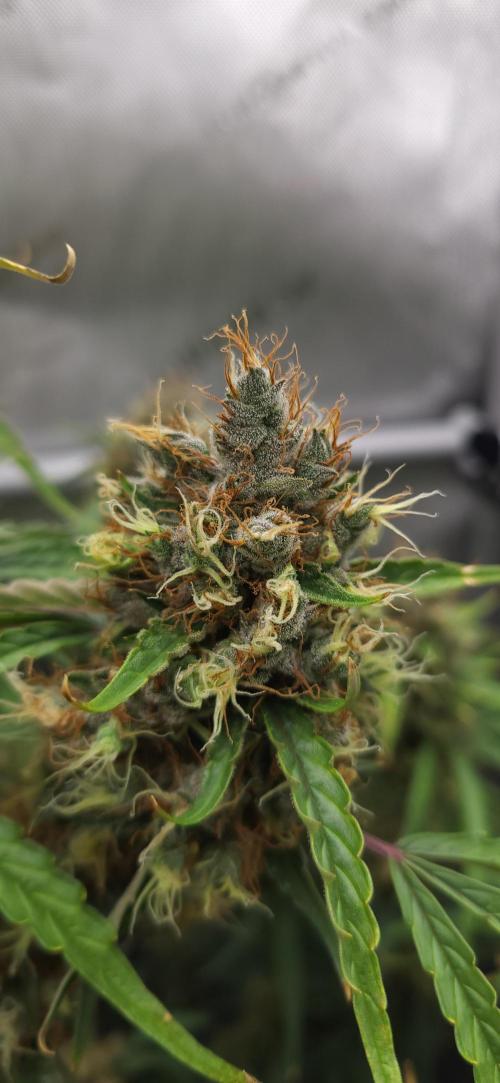
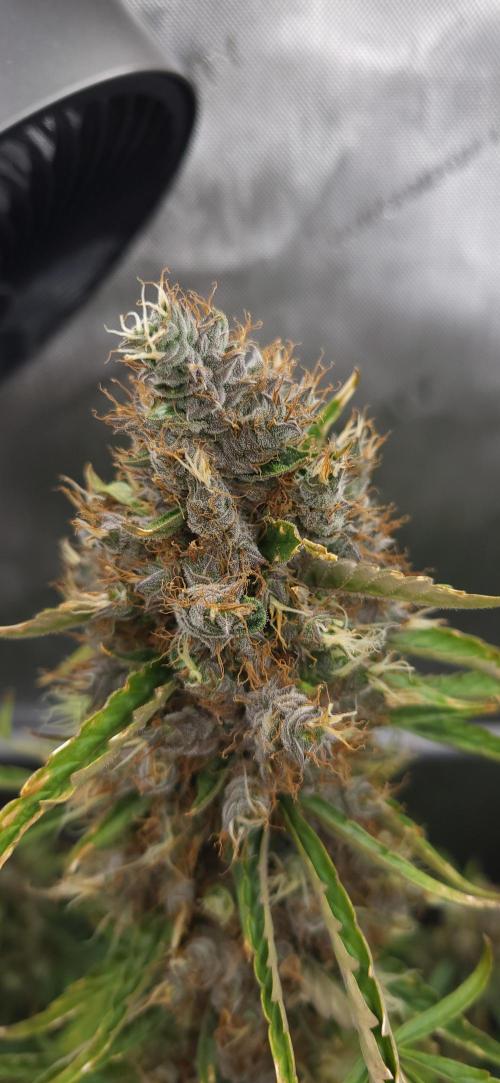
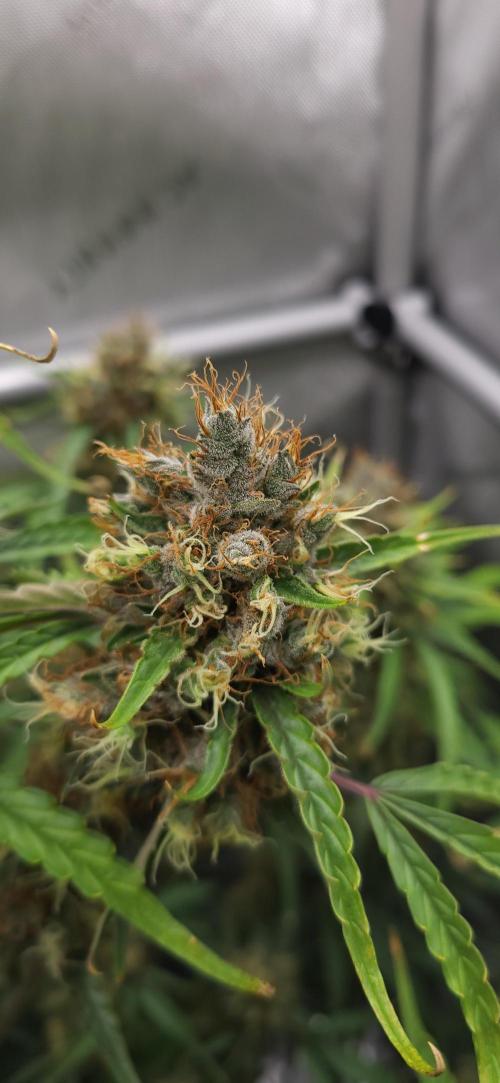
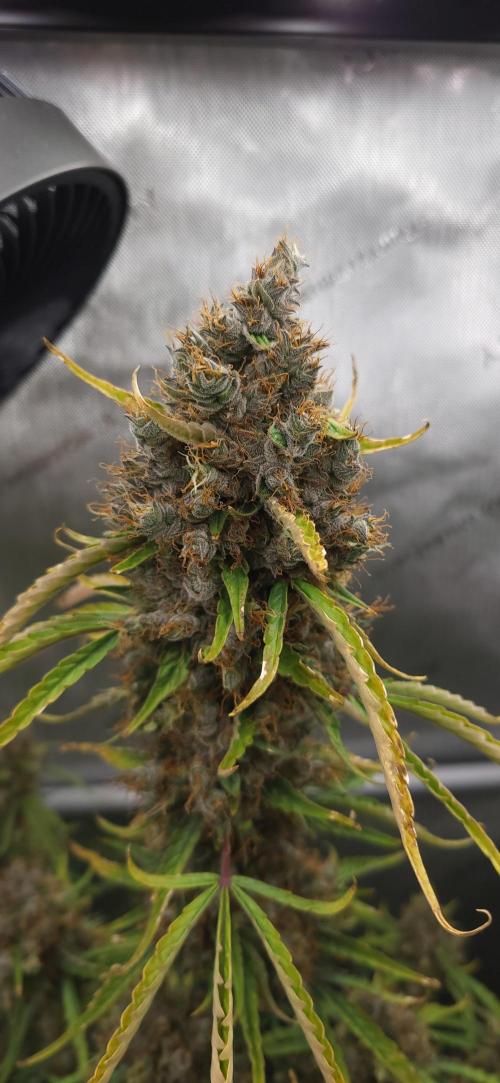
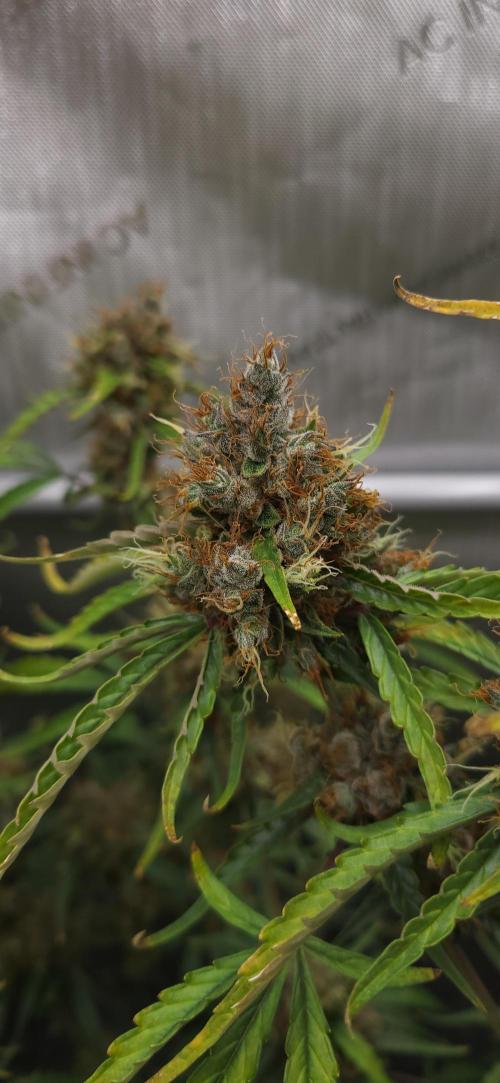
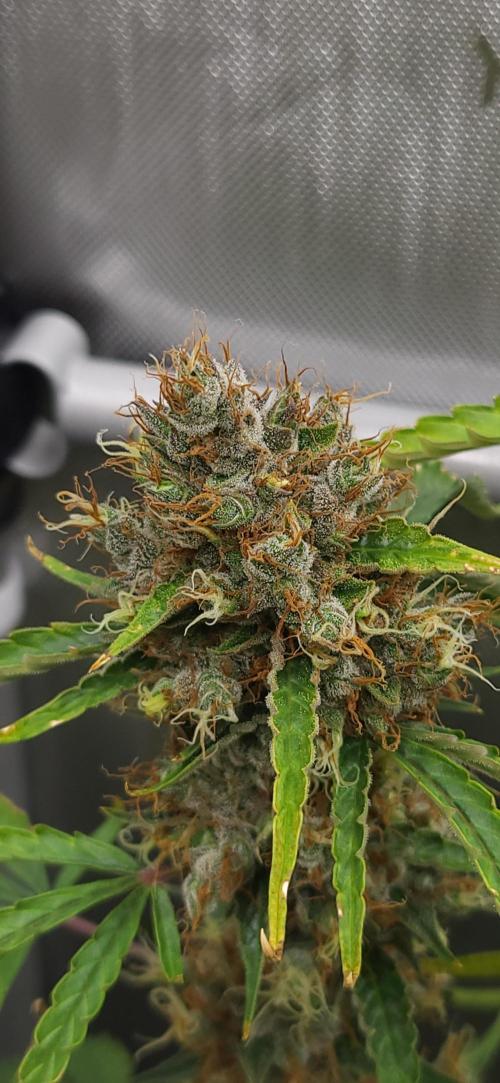
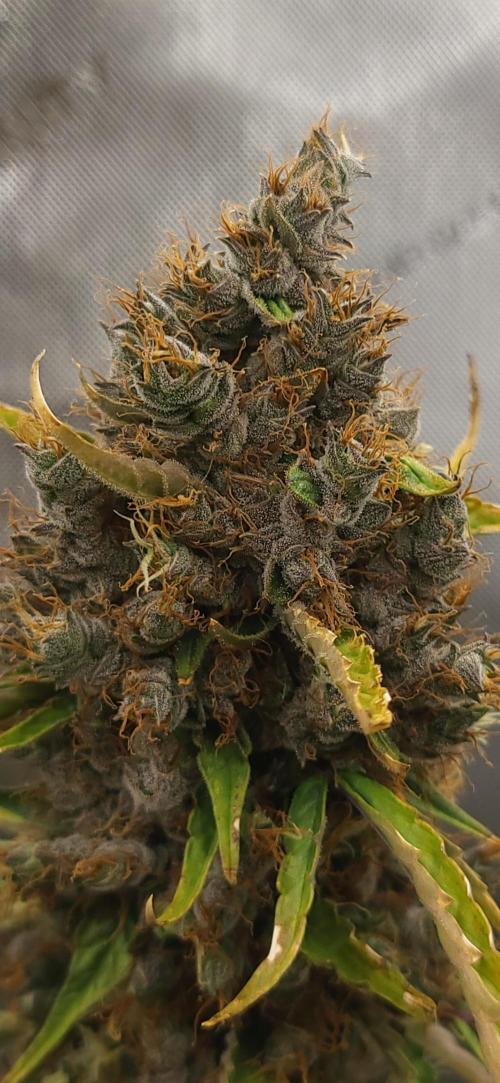
The trichomes have visually increased again this week.
But there are no amber ones visible yet, except on the sugar leaves.
So I think it will still take 1-2 weeks.
Since this week, there is no more fertilizer.
I watered 4 times this week, with 4 liters of pH-corrected water each time.
The parameters in week 11:
Average daytime temperature: 29 degrees
Average nighttime temperature: 27 degrees
Average daytime humidity: 54%
Average nighttime humidity: 53%
LED power: 50% = 170 watts
Lighting duration: 18 hours
DLI: 45
Controller setting: Advanced AI humidity 55%
Average VPD: 1.75
Air circulation: Level 3 oscillating
Average soil moisture: 42%
1 like
comments
Share
11
Week 11. Flowering1y ago



105 cm
Height
18 hrs
Light Schedule
30 °C
Day Air Temp
6.3
pH
Strong
Smell
55 %
Air Humidity
27 °C
Night Air Temp
19 liters
Pot Size
1.7 liters
Watering Volume
10 cm
Lamp Distance
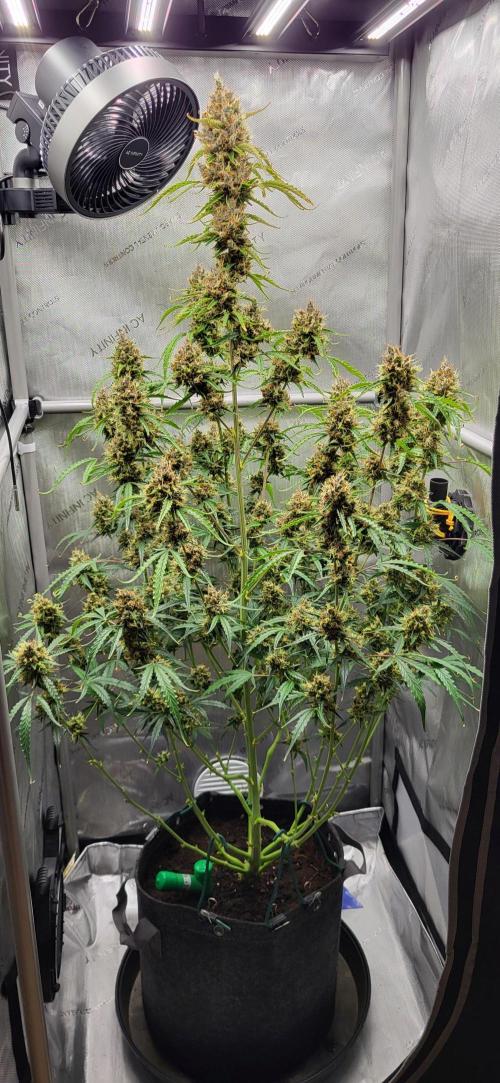
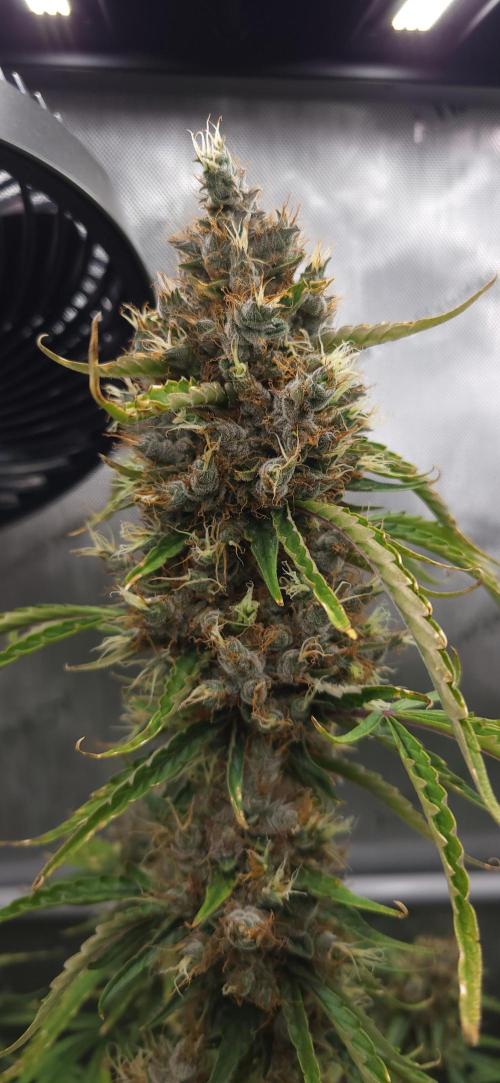
Alvareas Week 12 / Flowering Week 7
The Grow:
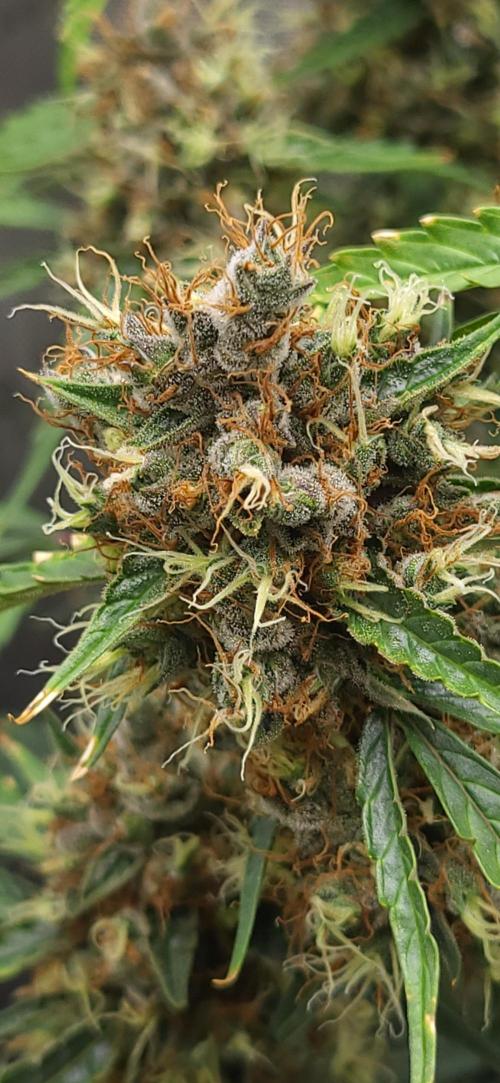
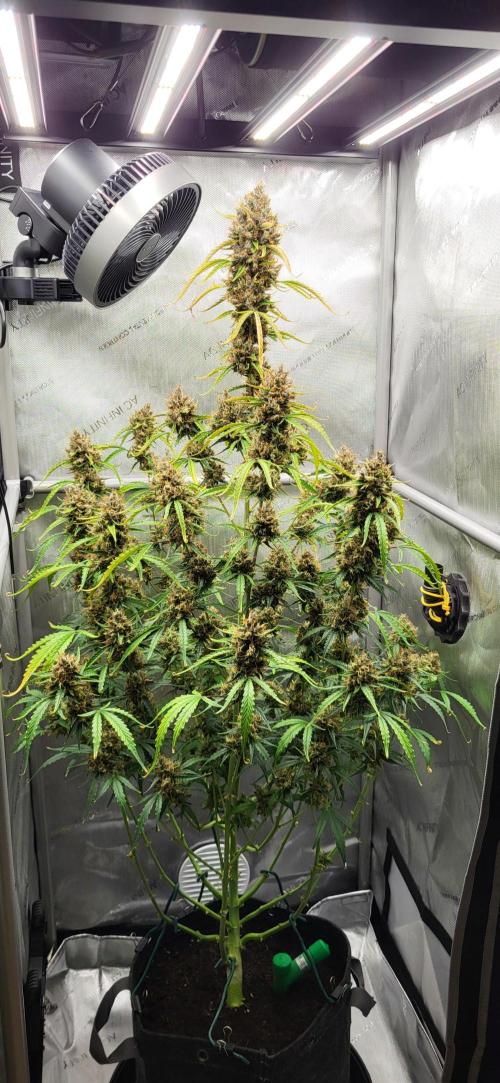
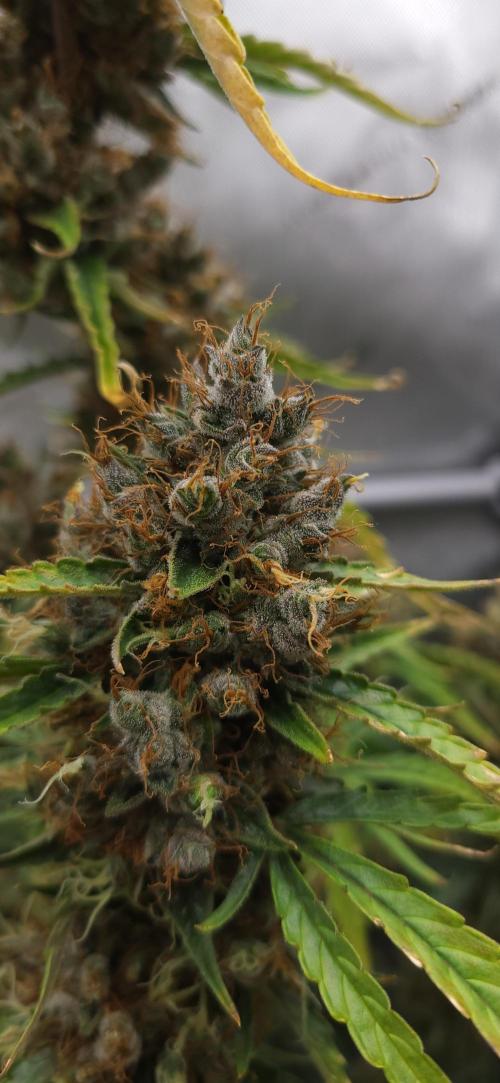
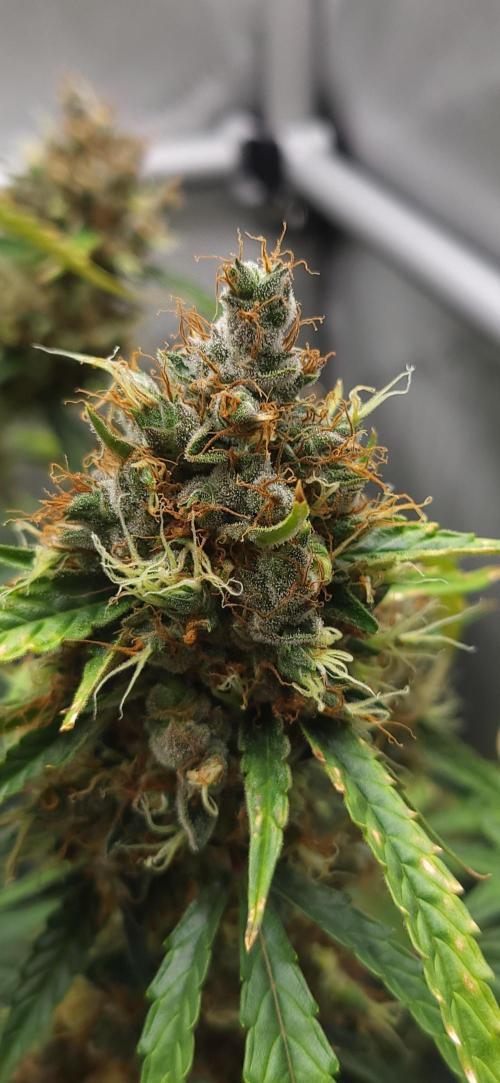
I'm basically just waiting for the buds to finish ripening.
Meanwhile, the trichomes on the flowers are slowly starting to turn amber.
I think I can harvest next week.
It's about time.
The average temperatures have risen again this week.
I would have preferred this to be different for the late flowering stage.
But you have to live with it when you're growing into the summer.
Unless you're willing to give your electricity bill a serious push with an air conditioner.
But that's definitely not an option for me.
This week, it was just water again, and I watered three times with 4 liters each time.
The yellowing of the leaves has begun, and the plant is heading into autumn.
This week, I gradually reduced the LED power from 50% to 30%.
More light is no longer necessary, and it also benefits the tent temperature.
The parameters in week 12:
Average daytime temperature: 30 degrees
Average nighttime temperature: 27 degrees
Average daytime humidity: 55%
Average nighttime humidity: 55%
LED power: 30% = 115 watts
Lighting duration: 18 hours
DLI: 30
Controller setting: Advanced AI humidity 55%
Average VPD: 1.77
Air circulation: Level 3 oscillating
Average soil moisture: 40%
4 likes
comments
Share
12
Week 12. Flowering1y ago




105 cm
Height
18 hrs
Light Schedule
30 °C
Day Air Temp
6.3
pH
Strong
Smell
55 %
Air Humidity
27 °C
Night Air Temp
19 liters
Pot Size
1.7 liters
Watering Volume
10 cm
Lamp Distance
Alvareas Week 13 / Flowering Week 8
The Grow:
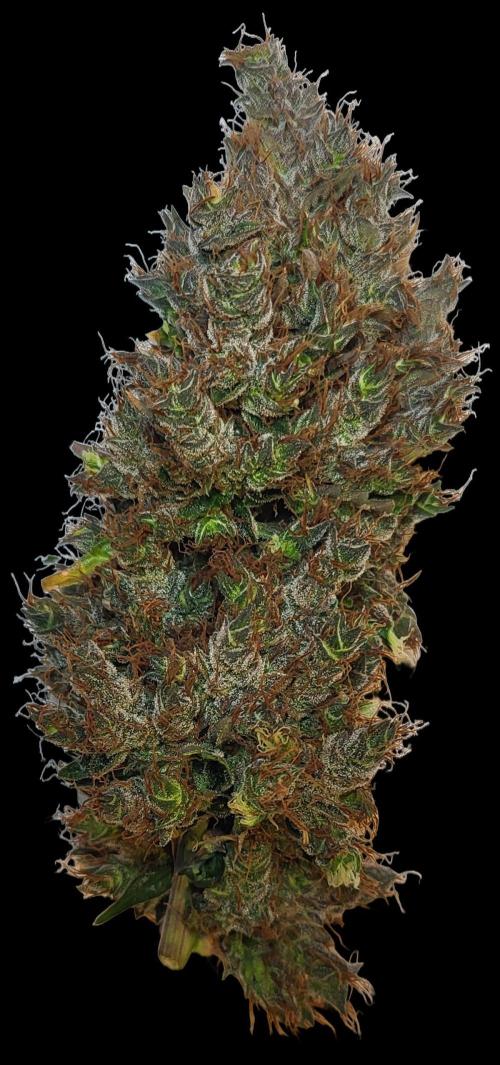
On July 4th, it was time, the trichomes looked right to me, and the plant was harvested.
Since I use a humidor to store my weed, this time I decided to dry part of it in the humidor and the rest traditionally in the tent.
However, I didn't want to just throw the buds in the humidor, so I got some Dryferm Bags.
In the humidor, I maintain a constant 16 degrees.
That's a temperature I can never reach in the tent without an air conditioner, which isn't an option for me.
The problem with the humidor is that it can't actively regulate humidity.
Keeping the humidity constant isn't an issue if you don't open it constantly.
But since the buds release moisture, the humidity would rise permanently through the Dryferm Bags, so I got a dehumidifier that extracts moisture from the air using a silica or salt pouch, not sure what's exactly inside.
That worked perfectly.
I just had to take the dehumidifier out of the humidor once a day for about an hour to prevent the humidity from dropping too much.
On average, the buds dry at 16 degrees and 60% humidity.
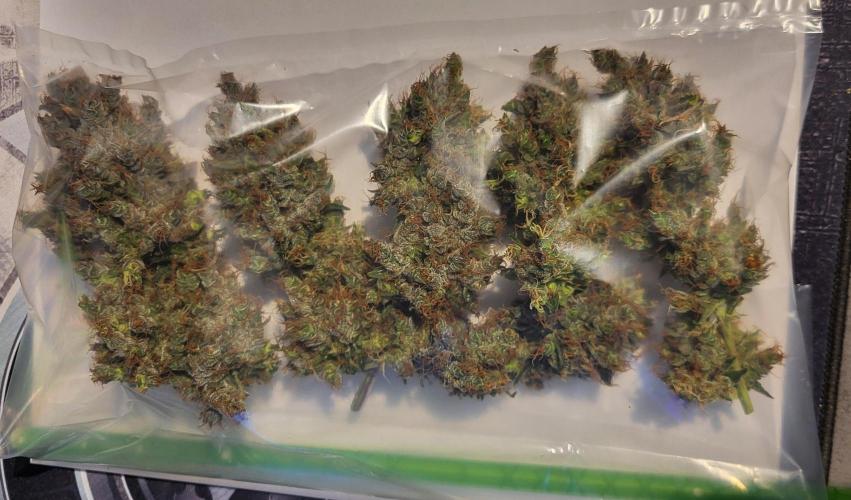
I put the main bud and half of the top buds in the Dryferm Bags.
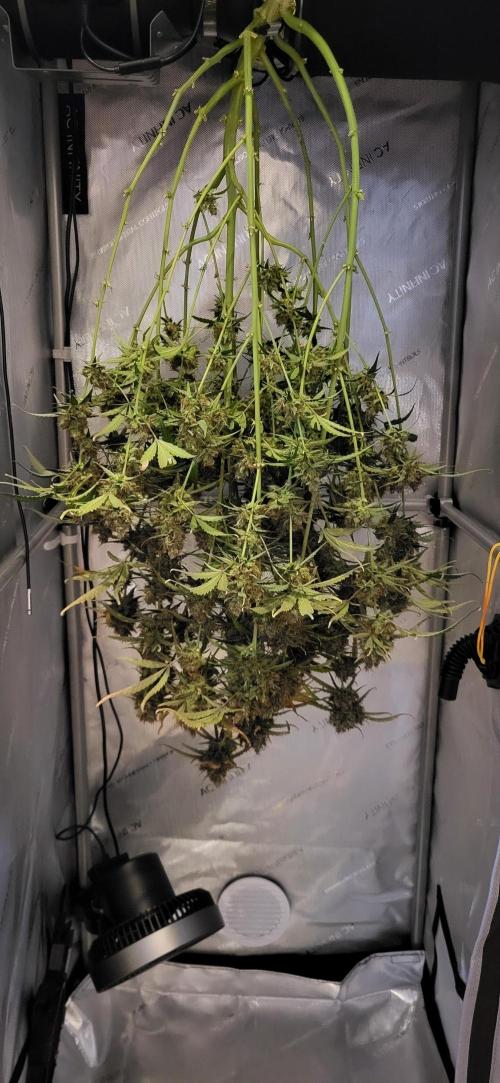
I hung the rest of the plant upside down in the tent.
The circulation fan is set to the lowest setting and directed at the ground, running continuously at 10%.
The exhaust is set to only kick in to maintain 60% humidity.
The drying in the tent was done after 7 days.
On average, I had 24 degrees and 60% humidity.
The drying in the humidor is still ongoing.
A conclusion and comparison will come in the next post.
8 likes
2 comments
Share
13
Week 13. Harvest1y ago
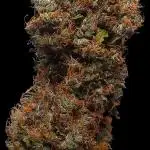
Happy Harvest Day!


4/10
Rated
Zamnesia describes the taste as Sweet, Earthy, Tropical, and Creamy.
For Earthy, I agree and I also taste a few Floral undertones.
But there is nothing sweet or fruity.
The effect is quite heady and I like it quite a bit.
However, it also fades away quickly again.
Show more
Original
Spent 86 days
Ger Veg Flo Har
580 g
Bud wet weight per plant
141 g
Bud dry weight per plant
1
Plants
0.36 m²
Grow Room size
Normal
Difficulty

Giggly
Positive effects

Earthy, Flowery
Taste
Height
Day air temperature
Air humidity
PH
Light schedule
Night air temperature
Pot size
Lamp distance
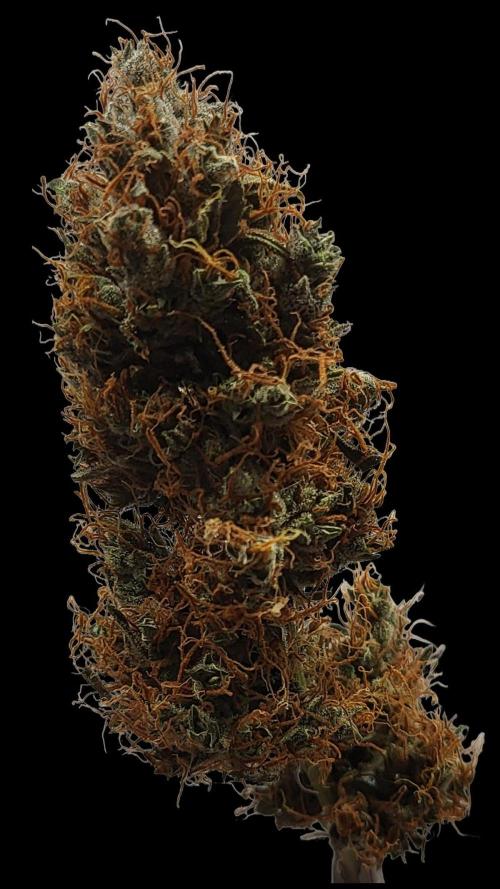


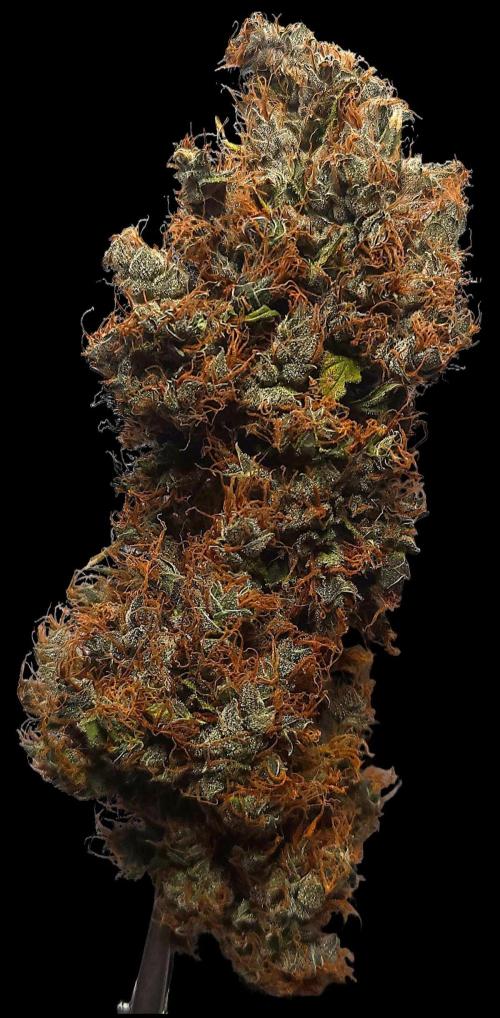
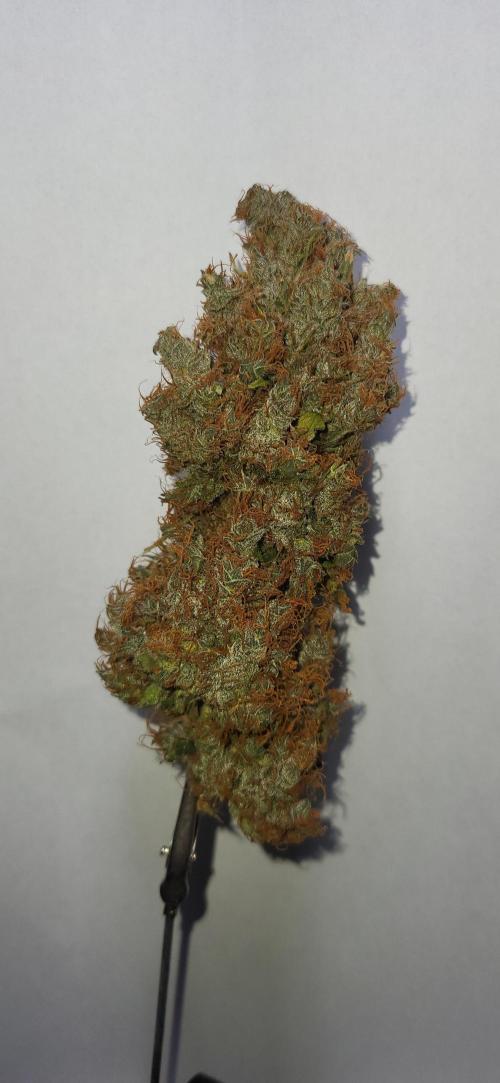

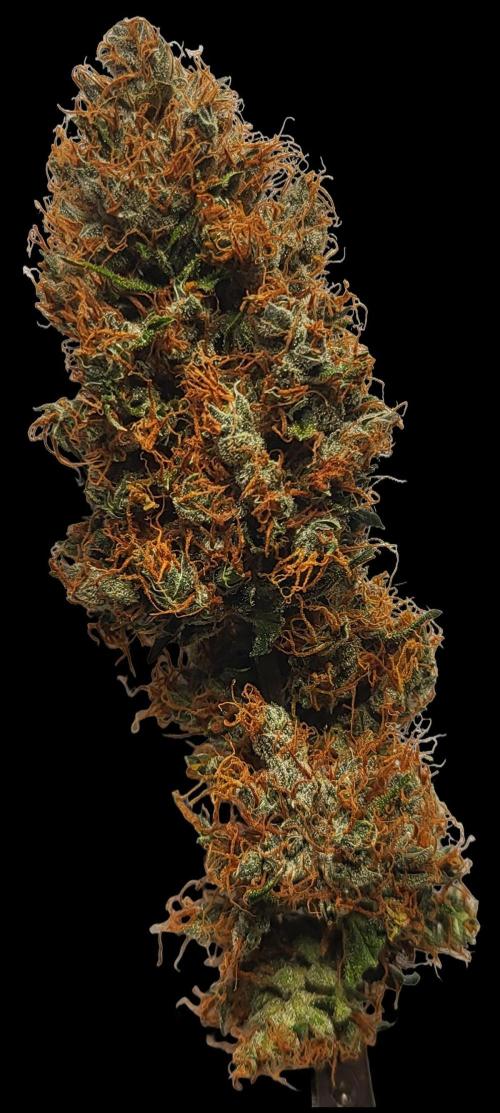
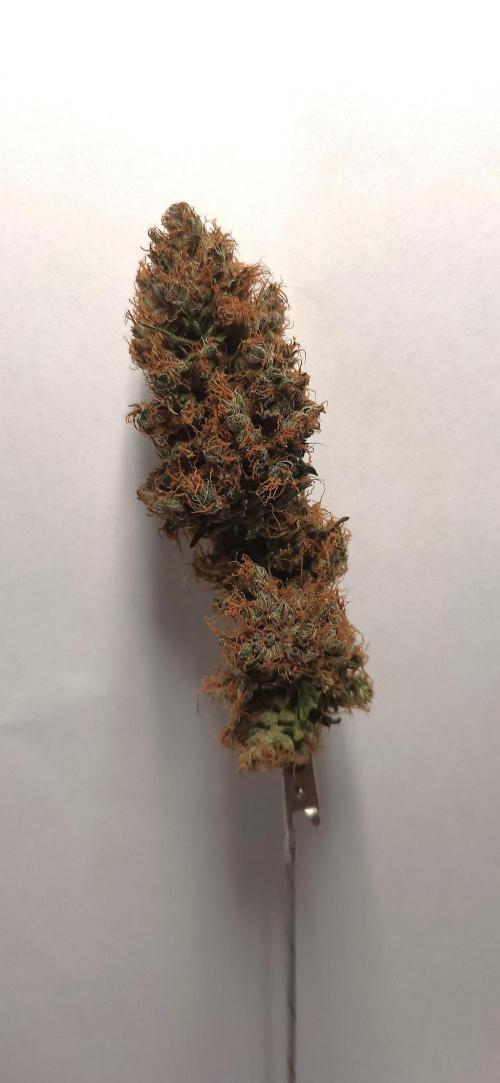

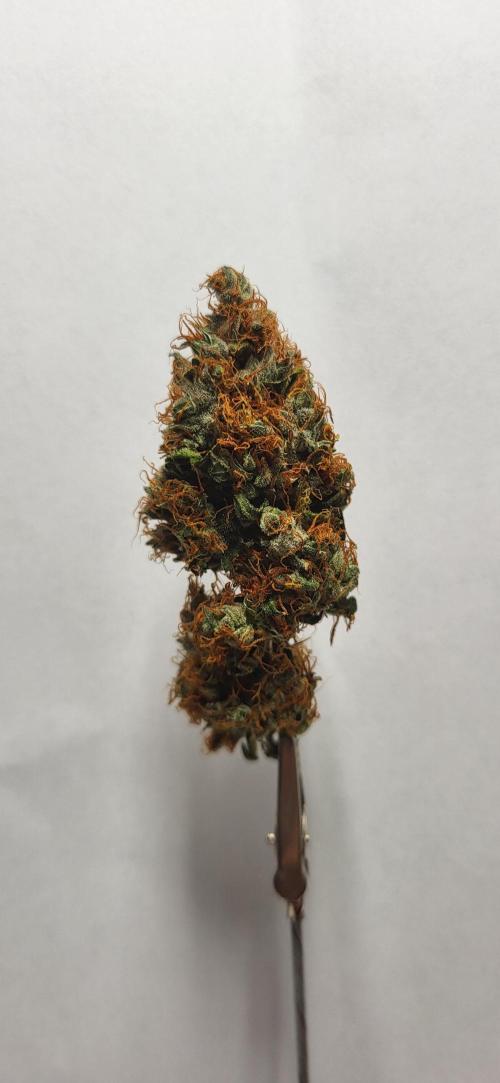
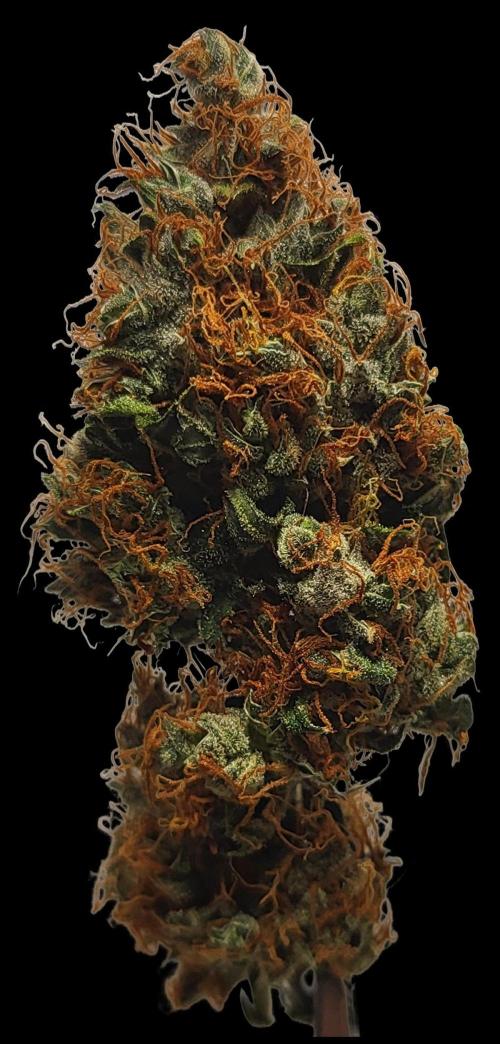
Alvareas My Conclusion
Equipment:
In this grow, I used the AI+ controller from AC for the first time and the soil moisture sensor from Ecowitt.
AI+
Compared to the Controller 69 Pro, the AI+ is a significant upgrade in my eyes. The dynamic control of AC components promised by AC works perfectly. I tested the Advanced Mode. The value I set for, for example, humidity, is perfectly maintained by the controller. With the Controller 69 Pro, you try to keep your values in the tent through triggers that you have to set up awkwardly. With the AI+, you simply set your value, and the controller does the rest on its own. I see great potential in this controller for the future. Unfortunately, many AC devices are currently unavailable in Germany, but that should change. Once that happens, there will be many options for control.
Ecowitt Soil Moisture Sensor
The setup and the app are a bit of a disaster. Unfortunately, it's very cumbersome and not user-friendly. The sensor measures soil moisture very reliably, but since you insert it from the top into the soil, it only measures the moisture in the top 15cm of the soil. You can only guess what it looks like below. This is suboptimal, as the top layers of soil dry out much faster than the rest. If I were to use the sensor again, I would insert it from the side into the lower third of the pot.
Nutrients and Substrate
In this run, I used Bio Terra Plus and the corresponding nutrient line for the first time. Previously, I was using BB Lightmix and BB nutrients. The Bio Terra Plus soil comes completely without perlite compared to the BB Lightmix. However, it remains quite fluffy throughout the grow and doesn't compact as much as the BB Lightmix. The water retention capacity is lower, though. With 19 liters, the Lightmix can easily take in 6 liters of water. With the Canna soil, it's only 5 liters. You have to rethink a bit here, but it's not a problem. I couldn't notice any differences in the nutrients compared to BB. However, Canna clearly has the edge for me. They focus on the essentials and don't try to convince you that you need x bottles of fairy pee. Unfortunately, I fell for BB's marketing when I started growing and bought the entire range. Now I can say that you're just wasting time and money here.
The Strain
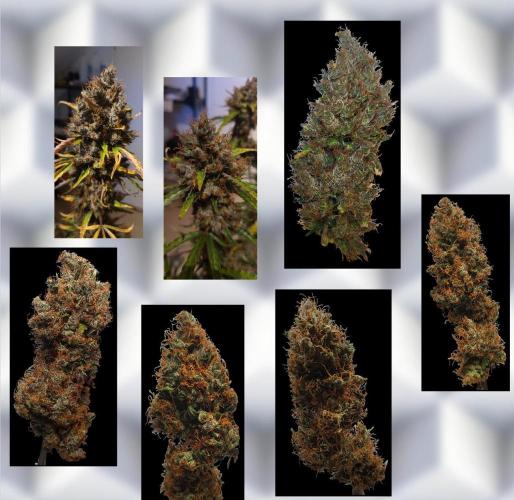
Would I grow it again? No, I wouldn't. Zamnesia describes the taste as sweet, earthy, tropical, and creamy. I agree with earthy, and I can taste a few floral undertones as well. But there's nothing sweet or fruity. The effect is rather head-heavy and I quite like it. However, it also fades away quite quickly. When I look at grow reports and pictures of this strain, you never really see the same plant. I understand that there are differences among plants from seeds, but it seems to me that Zamnesia just buys large quantities of seeds and sells them as strain XY. I'm glad these were free seeds, so I could form an opinion about Zamnesia.
Auto vs Photo
For me, photos clearly have the advantage here. I can't confirm the big advantage that autos are faster than photos. Compared to my last grow with the OMG from Ripper Seeds, the photo grow took 16 weeks from seed to harvest. The Runtz Auto took 13 weeks. However, since you decide when to flower with photos and I could have sent the OMG into flower 3 weeks earlier without any problems, the advantage of autos being faster doesn't hold for me. If you also consider the aspect of energy consumption, I have to agree with the opinion that autos don't make sense in the tent. Would I grow an auto in the tent again? Yes, I would, but only to compare the Zamnesia Auto with, for example, Fast Buds or Mephisto.
Drying Whole Plant vs Drying in Dryferm Bags and Humidor
Here, the humidor clearly has the advantage for me. Drying in the tent was done after 7 days. In the Dryferm Bags, it took 10 days. The buds from both methods went into Grovebags and were stored in the humidor for 2 weeks before tasting. The buds from the tent smell significantly sharper than those from the Dryferm Bags. In the Dryferm Bags, the smell is milder and rounder. This is also reflected in the taste. The earthy flavor stands out from the tent, while from the humidor, it is much rounder and a bit more complex. In the future, I will only dry my harvest in Dryferm Bags and the humidor. The humidor has the edge here in my view because I can dry at lower temperatures that I could never achieve in the tent. The Dryferm Bag only provides a constant release of moisture, and I don't mess up the humidor with the resinous buds. Would I use the Dryferm Bag for drying in the tent? No. I see no advantage here. The smell development is the same as without the Dryferm Bag, and it doesn't regulate the temperature either.
The Grow
I learned a lot again in this grow. The stretch surprised me and almost exceeded the limits. With LST, I should have tied down the main stem more aggressively. I did manage to get many branches through LST, but I couldn't break the dominance of the main stem. Thus, even lighting was unfortunately not possible. Due to the partly high temperatures during flowering and the frequent watering because of them, I should have adjusted the nutrient application. Fertilizing every second watering would have been sufficient.
In the end, the plant yielded 141g dry. This included 31g of A buds, nice and big and compact. 53g of B buds, small but compact, and 57g of C buds, small to medium but rather airy. I kept 25g of the A buds and 5g of the B buds. The rest was enjoyed by the compost.
Now it's time for a summer break. The next grow and report will come in September.
5 likes
6 comments
Share
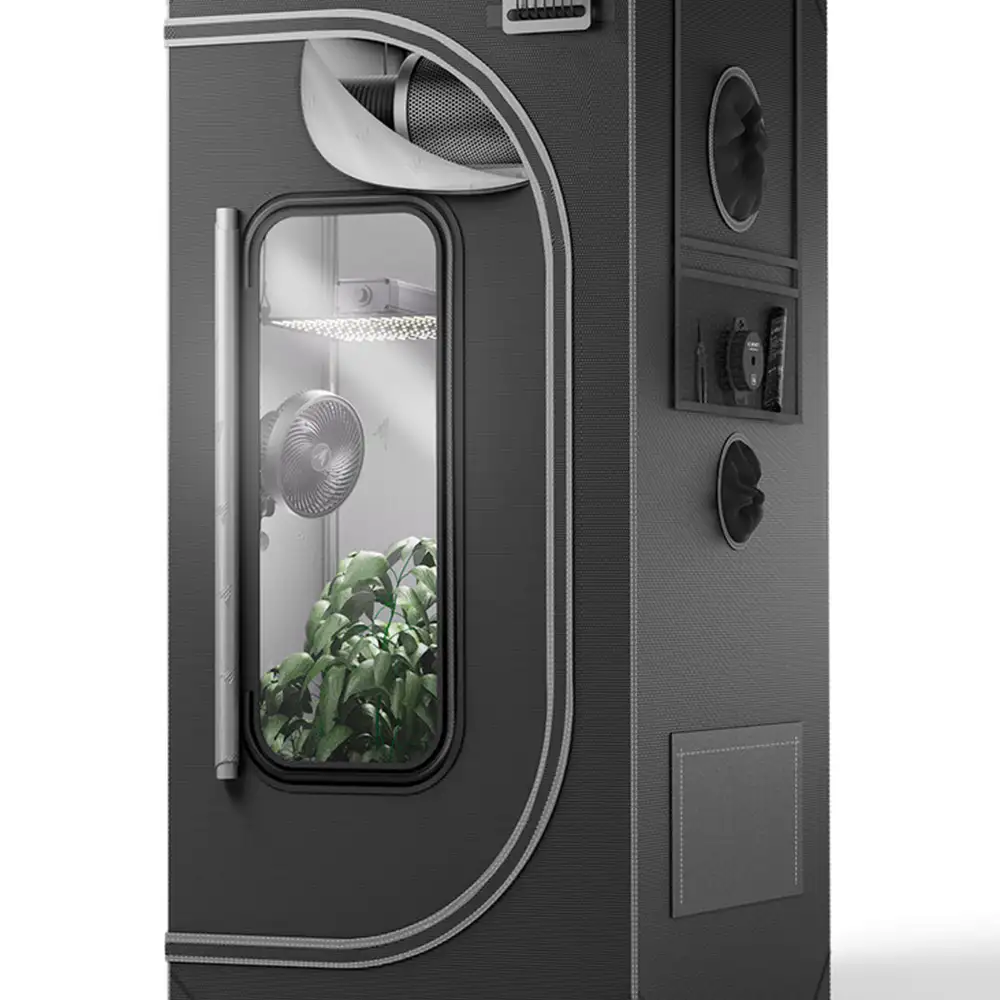
Equipment Reviews






8 comments
Sort by
popularity
popularity
newest
oldest

Alvareas commentedweek 121y ago
Thank you
like 1

AndroidElectricSheep commentedweek 131y ago
Super, thank you very much for the detailed report. I have a very similar setup. I also have the AI Controller and additionally the heater and the humidifier. You have been very successful working with Advanced AI and humidity as a target. Why not with temperature & humidity? Which devices did you have in the AI and which in the "normal" programming? By the way, unlike you, I want to do a winter grow in the attic. Thanks for your help! I'm looking forward to your next grow.
likes
Alvareas commented1y ago
@AndroidElectricSheep, Thanks, I'm glad you liked the report.
In the normal setup, I didn't use any of the devices for the entire grow.
All devices were in AI mode.
I didn't focus on temperature and humidity since at 30 degrees under the roof, without air conditioning, it doesn't make sense to want to control the temperature.
The exhaust just pulls the humidity out of the tent, and the humidifier has to work too hard.
About halfway through the veg stage, I completely turned off the humidifier.
From then on, the plant can maintain humidity really well through evaporation, and the exhaust only kicked in when the humidity got too high.
In your case, if the attic isn't heated, you're doing pretty well with the heating.
Here, I would control all devices via AI.
When your grow starts or if you have any questions, just reach out, I'm happy to help.
My new grow has already started, just leave a subscription so you don't miss any updates. 😉
likes
AndroidElectricSheep commented1y ago
@Alvareas, awesome, thank you very much. My grow won't start until around Christmas; before that, I'm traveling too much. The attic isn't heated, so it'll probably be between 10 and 15 degrees in winter. I'll aim to experiment with humidity and temperature then. I'm excited. Looking forward to your next grow ✌️
likes

Bread_n_Buds commentedweek 131y ago
Nice Job congratz for the placement!
likes
Alvareas commented1y ago
@Bread_n_Buds, Thank you😊
like 1

DrGruen commentedweek 121y ago
top harvest 👍 enjoy it 😎
likes

the end.
Enjoying this diary? Follow for more updates!
Prefer the old Diary view?
Go back to the old Diary view