
Apple Fritter [Auto #2]


Box
Cardboard Grow Box
Custom Made

Fan
Clip Fan PB-01
ProBreeze


Soil
Floragard

Perlite
Terra Exotica
Indoor
Room Type
LST
weeks 3-12
Topping
weeks 2-12
Defoliation
weeks 4-12
4 l
Pot Size
Start at Harvest
G
Germination1y ago
![Apple Fritter [Auto #2]. Week 0 - #2](https://bucket.growdiaries.com/static/post/photo/301291/11945325_515bfa54433b96885a38a75914525471_m.jpg)
![Apple Fritter [Auto #2]. Week 0 - #2 is the left one in the back row](https://bucket.growdiaries.com/static/post/photo/301291/11945335_6ecdea92743f3fb5fd25020fa7c58f53_m.jpg)
Muuuy Second grow now on the way with 3 plants this time!
We're planning on trying out different growing methods since we've got a pack of 3 seeds.
Germination took 3 days for all seeds.
This plant is #2/3.
Our plan with that one is topping her early on, training the branches by bending them and therefore shaping the plant to grow into a more bushy pattern. Compared to the #3, which is growing fully without any training, this growing pattern should result in a noticable higher amount of buds overall. This would also affect the final yield, so I think it's pretty interesting to compare these different growing techniques.
1 like
comments
Share
Used method
Directly In Substrate
Germination Method
1
Week 1. Vegetation1y ago
![Apple Fritter [Auto #2]. Week 1](https://bucket.growdiaries.com/static/post/photo/301291/11986725_87d3b7737dea8067808ddcc0bc1f97cf_m.jpg)
![Apple Fritter [Auto #2]. Week 1](https://bucket.growdiaries.com/static/post/photo/301291/11986729_9d5616b70baaabdfdbd8cf187d645d73_m.jpg)
![Apple Fritter [Auto #2]. Week 1](https://bucket.growdiaries.com/static/post/photo/301291/11986757_9097c0cb544b9685405b0847df6ec711_m.jpg)
8 cm
Height
18 hrs
Light Schedule
28 °C
Day Air Temp
No Smell
Smell
55 %
Air Humidity
20 °C
Solution Temp
25 °C
Night Air Temp
4.4 l
Pot Size
59 cm
Lamp Distance
Nutrients 1
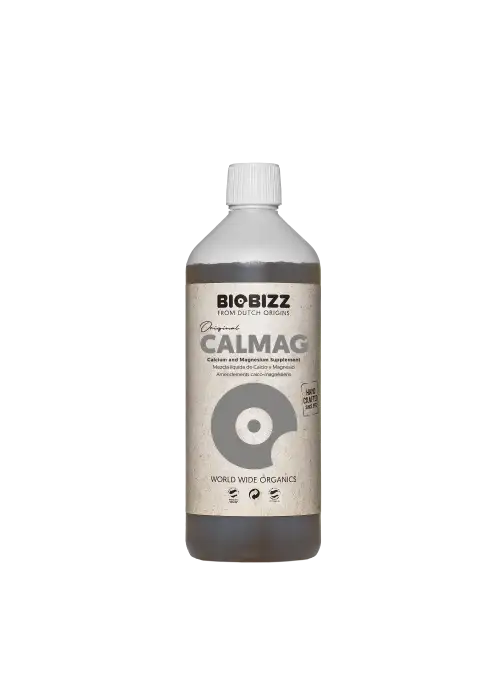
Calmag
1 mll
Muuuy Our little ones are growing rapidly!
We passed the first week and everything is looking pretty.
Included CalMag into every watering due to our osmosis system.
This is plant #2/3.
likes
comments
Share
2
Week 2. Vegetation1y ago
![Apple Fritter [Auto #2]. Week 2](https://bucket.growdiaries.com/static/post/photo/301291/12029573_98f25352797b11f0d35b2ba7fb1d4311_m.jpg)
![Apple Fritter [Auto #2]. Week 2](https://bucket.growdiaries.com/static/post/photo/301291/12029565_1c8a904f277118ec436c581a017d8f1c_m.jpg)
![Apple Fritter [Auto #2]. Week 2](https://bucket.growdiaries.com/static/post/photo/301291/12029577_97faa6cb92a16cb3e21968b809618c0e_m.jpg)
![Apple Fritter [Auto #2]. Week 2](https://bucket.growdiaries.com/static/post/photo/301291/12029569_e6143718c22db34b039433d750e7dd8f_m.jpg)
13 cm
Height
18 hrs
Light Schedule
28 °C
Day Air Temp
No Smell
Smell
55 %
Air Humidity
20 °C
Solution Temp
25 °C
Night Air Temp
4.4 l
Pot Size
53 cm
Lamp Distance
Nutrients 1
Calmag
1 mll
Muuuy Second week of our Apple Fritter Experiment!
Our Ladies are still growing strong, increasing in height every day. No problems occured so far, everything's going as planned.
We spotted an increase of red colouring inside of the petioles of plant #2 compared to the other ones! Might be the first indicator of a different phenotype?
This is plant #2/3.
We topped her earlier this week, now she's already growing new shoots beneath the cutting point.
likes
comments
Share
Used techniques
Topping
Technique
3
Week 3. Vegetation1y ago
![Apple Fritter [Auto #2]. Week 3](https://bucket.growdiaries.com/static/post/photo/301291/12074787_1142cecb77bf07259d6dced2a99a0d7e_m.jpg)
![Apple Fritter [Auto #2]. Week 3 - 01.09.2025](https://bucket.growdiaries.com/static/post/photo/301291/12074789_e09fe48f87a46597091cd74246a99c90_m.jpg)
![Apple Fritter [Auto #2]. Week 3 - 31.08.2025](https://bucket.growdiaries.com/static/post/photo/301291/12074791_8f2620a03e0bd1f6b86aee8f7ec76c7c_m.jpg)
![Apple Fritter [Auto #2]. Week 3 - 31.08.2025
Topped her at that exact spot](https://bucket.growdiaries.com/static/post/photo/301291/12074785_b04f83d89f1210205308c84ee38d4bd4_m.jpg)
18 cm
Height
18 hrs
Light Schedule
26 °C
Day Air Temp
No Smell
Smell
55 %
Air Humidity
20 °C
Solution Temp
22 °C
Night Air Temp
4.4 l
Pot Size
39 cm
Lamp Distance
Nutrients 3
Calmag
1 mll
Bio-Bloom
0.3 mll

Bio-Grow
0.5 mll
Muuuy Just look at these fine ladies!
All of them are growing nicely, even showing signs of early flower phase already.
#3 was getting a few yellow spots on the tips of the leaves, which indicated nutrient deficiency, so we included some in the watering for all plants; additional to the already provided CalMag.
We have to constantly monitor and adjust the lamp, so #3 doesn't grow too closely to it. Since the other two would be too far away from the light source, we made sure to place them in an elevated position.
This is plant #2/3.
We topped her once again and used some plastic stretchers in order to extend the plant over the whole pot.
1 like
comments
Share
Used techniques
Topping
Technique
LST
Technique
4
Week 4. Flowering10mo ago
![Apple Fritter [Auto #2]. Week 4](https://bucket.growdiaries.com/static/post/photo/301291/12116375_474516e71f19a321bd2b4bbc0f526e58_m.jpg)
![Apple Fritter [Auto #2]. Week 4](https://bucket.growdiaries.com/static/post/photo/301291/12116387_c1e0332057590a58feb7d50e2d8eb101_m.jpg)
![Apple Fritter [Auto #2]. Week 4](https://bucket.growdiaries.com/static/post/photo/301291/12116377_1f41a62278c5c85bfc37abcffb5a4f3e_m.jpg)
![Apple Fritter [Auto #2]. Week 4](https://bucket.growdiaries.com/static/post/photo/301291/12116383_f8178b34f88d6670dd3eaad2b30ade91_m.jpg)
![Apple Fritter [Auto #2]. Week 4 - Family-Pic!](https://bucket.growdiaries.com/static/post/photo/301291/12116381_2f0701169c240c839b19c20e12a44d05_m.jpg)
26 cm
Height
18 hrs
Light Schedule
25 °C
Day Air Temp
Weak
Smell
60 %
Air Humidity
20 °C
Solution Temp
22 °C
Night Air Temp
4.4 l
Pot Size
33 cm
Lamp Distance
Nutrients 4
Calmag
1.5 mll
Bio-Bloom
4 mll
Bio-Grow
1 mll
Muuuy Week 4 is flower-week!
All of our ladies showed signs of pre-flower last week, now there are already visible buds growing.
We had to adjust the height of #1 & #2 once again because #3 is just growing crazy. Can't go any higher than the current position without redesigning our whole setup so this will be the final adjustment (hopefully!).
#2 is obviously very different from the other ones, she's a little behind in growth. Though, she does have outstanding red colored petioles in comparison to her mostly just green sisters.
We increased the amount of nutrients for them since they'll need much more now.
This is plant #2/3.
Added additional plastic stretchers to further extend her. Removed some leaves that would get in the way of new growth, just like we did with plant #1 in the beginning.
Really excited on how her buds will differ from those of the other plants, and if they will at all!
likes
comments
Share
Used techniques
LST
Technique
Defoliation
Technique
Topping
Technique
5
Week 5. Flowering10mo ago
![Apple Fritter [Auto #2]. Week 5](https://bucket.growdiaries.com/static/post/photo/301291/12160312_9ae056e68e92befb91f6e2a65d57c799_m.jpg)
![Apple Fritter [Auto #2]. Week 5](https://bucket.growdiaries.com/static/post/photo/301291/12160272_98752d3de12c2bce03d09695530710ae_m.jpg)
![Apple Fritter [Auto #2]. Week 5](https://bucket.growdiaries.com/static/post/photo/301291/12160316_f072371a43a51273bb852b03d1402452_m.jpg)
![Apple Fritter [Auto #2]. Week 5](https://bucket.growdiaries.com/static/post/photo/301291/12160318_f7dfc3e645bcb9eb0e77c35e0b99f02a_m.jpg)
30 cm
Height
18 hrs
Light Schedule
23 °C
Day Air Temp
Weak
Smell
55 %
Air Humidity
20 °C
Solution Temp
20 °C
Night Air Temp
4.4 l
Pot Size
30 cm
Lamp Distance
Nutrients 4
Calmag
1.5 mll
Bio-Bloom
4 mll
Bio-Grow
1 mll
Muuuy Welcome to week 5!
#1 and #3 are developing the same red-coloring on their petioles like #2 did from the very beginning!
Buds are growing nicely, getting visibly bigger everyday. Smell went from a rather unpleasant sweet-sour aroma to an almost pure sour scent.
We set the humidity to 55% for all of our ladies to prevent budrot, since they are definitly in flower right now (big shoutout to our dehumidifier working his butt off). We noticed, that we need to water them more often; we just checked the pots and were greeted by a very dense rooting system. Being used to a big 20L pot we didn't expected that kind of thirstiness!
This is plant #2/3.
She's still behind in growth compared to the other ones, but she's getting there slowly! Apart from the other two, she doesn't show signs of nutrient deficiency, probably because she was a bit slower in her growth due to the induced stress of topping her early on.
likes
comments
Share
Used techniques
LST
Technique
Topping
Technique
Defoliation
Technique
6
Week 6. Flowering10mo ago
![Apple Fritter [Auto #2]. Week 6](https://bucket.growdiaries.com/static/post/photo/301291/12208518_8766b093447582a97a2ec82fc0c59b8a_m.jpg)
![Apple Fritter [Auto #2]. Week 6](https://bucket.growdiaries.com/static/post/photo/301291/12208520_6c44e2e6ff4b408af7a3ea7fc03603f5_m.jpg)
![Apple Fritter [Auto #2]. Week 6](https://bucket.growdiaries.com/static/post/photo/301291/12208516_9a7d8c72e0e7680ae802e795552918bf_m.jpg)
![Apple Fritter [Auto #2]. Week 6](https://bucket.growdiaries.com/static/post/photo/301291/12208514_61d466c90ac34c8a1d38351efe6360ce_m.jpg)
![Apple Fritter [Auto #2]. Week 6](https://bucket.growdiaries.com/static/post/photo/301291/12208512_d52080badd652aa4532c8c20fc708c7b_m.jpg)
![Apple Fritter [Auto #2]. Week 6 - Result of Defoliation of all 3 plants!](https://bucket.growdiaries.com/static/post/photo/301291/12208510_bfed0a96f15eb000fd843787603e160b_m.jpg)
38 cm
Height
18 hrs
Light Schedule
23 °C
Day Air Temp
Weak
Smell
55 %
Air Humidity
20 °C
Solution Temp
20 °C
Night Air Temp
4.4 l
Pot Size
31 cm
Lamp Distance
Nutrients 4
Calmag
1.5 mll
Bio-Bloom
4 mll
Bio-Grow
1 mll
Muuuy Week 6, still going/growing strong!
Yep, we raised the lamp again. We had to, because silly plant #3 just wouldn't stop growing directly into it, of course getting sunburned like crazy while doing so. #1 and #2 are now slowly starting to differentiate more and more. While #1 stopped growing in height at all, #2 almost grew 10cm this week. She's still, and will always be, lacking behind, though. The early induced stress was most likely the reason for that, could be a phenotypical thing as well.
Today we defoliated all of them a bit, removing old leaves and the ones, that would get in the way of the light hitting the buds underneath.
This is plant #2/3.
This is the only one of them showing no nutrient deficiency at all! (Probably because she was behind in growth so much, though)
likes
comments
Share
Used techniques
LST
Technique
Defoliation
Technique
Topping
Technique
7
Week 7. Flowering10mo ago
![Apple Fritter [Auto #2]. Week 7](https://bucket.growdiaries.com/static/post/photo/301291/12252158_ff7619fb12a3a40ee8028d304789c6d8_m.jpg)
![Apple Fritter [Auto #2]. Week 7](https://bucket.growdiaries.com/static/post/photo/301291/12252142_e3d8767cd5c21365e17cf8d70a22aa41_m.jpg)
![Apple Fritter [Auto #2]. Week 7](https://bucket.growdiaries.com/static/post/photo/301291/12252140_9cd81175dff6fe59cbf95e1268ce160c_m.jpg)
![Apple Fritter [Auto #2]. Week 7](https://bucket.growdiaries.com/static/post/photo/301291/12252148_1dff8e3c829502f0544d91777b5d5b9c_m.jpg)
40 cm
Height
18 hrs
Light Schedule
22 °C
Day Air Temp
Weak
Smell
55 %
Air Humidity
20 °C
Solution Temp
18 °C
Night Air Temp
4.4 l
Pot Size
29 cm
Lamp Distance
Nutrients 4
Calmag
1.5 mll
Bio-Bloom
4 mll
Bio-Grow
4 mll
Muuuy Already in week 7 of our little experiment!
They are all growing slower while prioritizing on thickening their buds. #3 is still and will for ever be a problem, though! But we have definitly learned a lot from our fine ladies so far.
The smell is getting better every week, mostly consisting of a sour-apple-ring-aroma, which is actually kinda delicious!
Adjusted nutrient intake by increasing the amount of Bio-Grow because #2 showed signs of deficiency by her leaves slowly turning pale.
Watering every two days due to them living in that small 4,4L pot and probably having an dense root system by now.
This is plant #2/3.
Still a few days behind her sisters, but growing like a queen! Her buds are significantly smaller and airier and she's definitly got fewer sugar leaves, but she is getting there. Her growth pattern looks great, though. Trying to maximize the bud amount by giving each branch enough space to develop big buds totally worked out there.
likes
comments
Share
Used techniques
LST
Technique
Defoliation
Technique
Topping
Technique
8
Week 8. Flowering10mo ago
![Apple Fritter [Auto #2]. Week 8](https://bucket.growdiaries.com/static/post/photo/301291/12284512_c4ff459ea63813ae02f1e8c75b751c97_m.jpg)
![Apple Fritter [Auto #2]. Week 8](https://bucket.growdiaries.com/static/post/photo/301291/12284508_efd40d9e6fde732b9b28af15d15cea32_m.jpg)
![Apple Fritter [Auto #2]. Week 8](https://bucket.growdiaries.com/static/post/photo/301291/12284510_6c9d018c8e354dc5bae2ebcb4c577929_m.jpg)
![Apple Fritter [Auto #2]. Week 8 - #1 on the right side, #2 on the left and #3 behind them.](https://bucket.growdiaries.com/static/post/photo/301291/12284514_4ae2957736f76a90ade9c7724f41c0bb_m.jpg)
40 cm
Height
18 hrs
Light Schedule
22 °C
Day Air Temp
Normal
Smell
50 %
Air Humidity
20 °C
Solution Temp
18 °C
Night Air Temp
4.4 l
Pot Size
29 cm
Lamp Distance
Nutrients 4
Calmag
1.5 mll
Bio-Bloom
4 mll
Bio-Grow
2 mll
Muuuy Welcome to fabulous week 8!
The ladies are looking fantastic, they have stopped growing in height and are focussing on thickening their buds. Definitly developing sugar leaves, especially #2 tried her best to catch up to her sisters and now she's actually the one with the most frosty looking leaves, which will also prove our thesis of her differentiating from the others due to genetics.
Smell intensified a bit, but didn't change much this time.
Reduced the amount of Bio-Grow again as they are looking pretty fine now!
This is plant #2/3.
What she lacks in the thickness of her buds she makes up for in having lots of frosty leaves. I bet she will look like a little diamond when she's ready for harvest! Really interesting to see how much variation there is in the genetic pool of that strain! Look-wise she is definitly my favorite so far!
2 likes
comments
Share
Used techniques
Topping
Technique
LST
Technique
Defoliation
Technique
9
Week 9. Flowering9mo ago
![Apple Fritter [Auto #2]. Week 9](https://bucket.growdiaries.com/static/post/photo/301291/12327490_c477b3d10ad51241ade23e27d0509a4b_m.jpg)
![Apple Fritter [Auto #2]. Week 9](https://bucket.growdiaries.com/static/post/photo/301291/12327496_82e92eb06c130c9c11bf6209537f0bba_m.jpg)
![Apple Fritter [Auto #2]. Week 9](https://bucket.growdiaries.com/static/post/photo/301291/12327506_ec6c6fb6d4514fb44fc30b27e35524ab_m.jpg)
![Apple Fritter [Auto #2]. Week 9](https://bucket.growdiaries.com/static/post/photo/301291/12327492_a66d79cca6360f32d88968847850ca0e_m.jpg)
![Apple Fritter [Auto #2]. Week 9](https://bucket.growdiaries.com/static/post/photo/301291/12327498_dbabc6532b66d4475c185fc1dc9596d8_m.jpg)
![Apple Fritter [Auto #2]. Week 9](https://bucket.growdiaries.com/static/post/photo/301291/12327510_04fdeddbdfce86e0bb7e76aeb3504610_m.jpg)
40 cm
Height
18 hrs
Light Schedule
22 °C
Day Air Temp
Normal
Smell
50 %
Air Humidity
20 °C
Solution Temp
18 °C
Night Air Temp
4.4 l
Pot Size
29 cm
Lamp Distance
Nutrients 4
Calmag
1.5 mll
Bio-Bloom
4 mll
Bio-Grow
2 mll
Muuuy Week 9 and still looking fine!
Not much happening right now, we don't expect them to grow in height anymore. We're just waiting for the buds to grow thicker and the trichomes to ripen until ~20% have an amber color. We took a look at them under our microscopic lens and estimated about 2-3 weeks until harvest, but we will constantly check them from now on.
Their smell is slowly growing stronger, mostly consisting of sour aromas.
This is plant #2/3.
She has definitly the most frosty leaves, which again proves our thesis of having a very different phenotype with that plant.
3 likes
comments
Share
Used techniques
LST
Technique
Topping
Technique
Defoliation
Technique
10
Week 10. Flowering9mo ago
![Apple Fritter [Auto #2]. Week 10](https://bucket.growdiaries.com/static/post/photo/301291/12372320_0d8a14f4e33c847b79281d6908b05878_m.jpg)
![Apple Fritter [Auto #2]. Week 10](https://bucket.growdiaries.com/static/post/photo/301291/12372316_b4f05a0aa5925e40e11c13d12f875267_m.jpg)
![Apple Fritter [Auto #2]. Week 10](https://bucket.growdiaries.com/static/post/photo/301291/12372318_043c28ec276215a2ad786a951e931655_m.jpg)
![Apple Fritter [Auto #2]. Week 10](https://bucket.growdiaries.com/static/post/photo/301291/12372322_fc677b91d7af8d889c65a1dc41aed9bf_m.jpg)
![Apple Fritter [Auto #2]. Week 10](https://bucket.growdiaries.com/static/post/photo/301291/12372324_1ab79b397b9df640b52bbc2ae63ae637_m.jpg)
![Apple Fritter [Auto #2]. Week 10](https://bucket.growdiaries.com/static/post/photo/301291/12372326_86533347c42f0ec98fd9fbe8a7bcbb31_m.jpg)
40 cm
Height
18 hrs
Light Schedule
22 °C
Day Air Temp
Normal
Smell
50 %
Air Humidity
20 °C
Solution Temp
18 °C
Night Air Temp
4.4 l
Pot Size
29 cm
Lamp Distance
Nutrients 4
Calmag
1.5 mll
Bio-Bloom
4 mll
Bio-Grow
1.5 mll
Muuuy Week 10, slowly getting there!
Buds are definitly thickening in every plant. When comparing the trichomes at each main bud you can clearly tell that #3 is ripening quicker, or at least the main bud is, which, in addition, is the closest one to the light. Pretty happy how they turned out so far.
Added some sticky traps to cope with our gnat fly infestation.
Adjusted the amount of Bio-Grow, as they won't grow much anymore and therefore won't need that much.
Personally I don't like the smell that much, it has a pretty sharp sour aroma and didn't change much in the last few weeks.
This is plant #2/3.
Nothing special to talk about her! She's just fine (:
3 likes
comments
Share
Used techniques
LST
Technique
Topping
Technique
Defoliation
Technique
11
Week 11. Flowering9mo ago
![Apple Fritter [Auto #2]. Week 11](https://bucket.growdiaries.com/static/post/photo/301291/12418434_b404b452c3d07c8005ad2aaf56edaf0b_m.jpg)
![Apple Fritter [Auto #2]. Week 11](https://bucket.growdiaries.com/static/post/photo/301291/12418424_5139d691d2edd08b2188778d0e3ce0dc_m.jpg)
![Apple Fritter [Auto #2]. Week 11](https://bucket.growdiaries.com/static/post/photo/301291/12418430_290bb010e89010417e8b8a92c5367cc8_m.jpg)
![Apple Fritter [Auto #2]. Week 11](https://bucket.growdiaries.com/static/post/photo/301291/12418416_7a4521a689d188f2e2f5cae46608a245_m.jpg)
![Apple Fritter [Auto #2]. Week 11](https://bucket.growdiaries.com/static/post/photo/301291/12418436_507dbb7d4456f74d4e1104a815e29b98_m.jpg)
![Apple Fritter [Auto #2]. Week 11](https://bucket.growdiaries.com/static/post/photo/301291/12418438_dd2060fdff5807519e69303966209eb4_m.jpg)
40 cm
Height
18 hrs
Light Schedule
22 °C
Day Air Temp
Normal
Smell
50 %
Air Humidity
20 °C
Solution Temp
18 °C
Night Air Temp
4.4 l
Pot Size
29 cm
Lamp Distance
Nutrients 4
Calmag
1 mll
Bio-Bloom
4 mll
Bio-Grow
0.75 mll
Muuuy Welcome to smelly Week 11!
And by smelly I really mean SMELLY. They are developing a very unpleasant sour aroma, although when handling them or just slightly touching the buds, it's not that bad anymore. Still rather stinky in my opinion, I would prefer something fresher.
Their buds are thickening even more and the trichomes are slowly ripening to the prefered stage.
Adjusted the amount of Bio-Grow even further now, also decreasing the amount of CalMag due to the results of a small water analysis we did earlier last week.
This is plant #2/3.
She is my absolute favorite of all of them! Growing some really thick buds right now along with super frosty leaves. Very excited on how big she'll grow until we harvest her.
2 likes
comments
Share
Used techniques
Defoliation
Technique
Topping
Technique
LST
Technique
12
Week 12. Flowering9mo ago
![Apple Fritter [Auto #2]. Week 12](https://bucket.growdiaries.com/static/post/photo/301291/12454406_6f5cc1f026e1d1ba2813b647b3c3acf9_m.jpg)
![Apple Fritter [Auto #2]. Week 12](https://bucket.growdiaries.com/static/post/photo/301291/12454412_5cecb6aaab23532d5ea47032ed3e4a97_m.jpg)
![Apple Fritter [Auto #2]. Week 12](https://bucket.growdiaries.com/static/post/photo/301291/12454402_8958a6a122913e3236982cfc7e39d254_m.jpg)
![Apple Fritter [Auto #2]. Week 12](https://bucket.growdiaries.com/static/post/photo/301291/12454404_f8fbac8874d1bd6999f10db9835bf463_m.jpg)
![Apple Fritter [Auto #2]. Week 12](https://bucket.growdiaries.com/static/post/photo/301291/12454408_e2e6db52908dbb0a0f7b267944d4f5cd_m.jpg)
![Apple Fritter [Auto #2]. Week 12](https://bucket.growdiaries.com/static/post/photo/301291/12454410_414074edc06a7ca18abb473a28b946f5_m.jpg)
![Apple Fritter [Auto #2]. Week 12](https://bucket.growdiaries.com/static/post/photo/301291/12454416_78a4c6ab3298ae4e938d32acbd85e318_m.jpg)
![Apple Fritter [Auto #2]. Week 12](https://bucket.growdiaries.com/static/post/photo/301291/12454420_8e71fda2c8e72d45afd69f0a5194173a_m.jpg)
40 cm
Height
18 hrs
Light Schedule
22 °C
Day Air Temp
Normal
Smell
50 %
Air Humidity
20 °C
Solution Temp
18 °C
Night Air Temp
4.4 l
Pot Size
29 cm
Lamp Distance
Nutrients 4
Calmag
1 mll
Bio-Bloom
4 mll
Bio-Grow
0.75 mll
Muuuy Week 12 and we're still not there yet!
However, the ladies are growing thicker every week. #2 & #3 are growing so thick, they can barely support the weight of their own buds. Really have to be careful when handling them, the risk of snapping a branch by accident is way too high right now. The reason for that is probably due to the crowded space in the growbox, in which there isn't much airflow despite having the little fan running nonstop when the light is on.
Looking at the trichomes they can all take a few more weeks, just have to be patient now!
This is plant #2/3.
She still got the thickest buds, which are also the most delicious smelling ones! They developed a really strong acidic aroma, very close to sour apples. Apart from that, she is still ripening up and needs a few more weeks, just like the other ones.
2 likes
comments
Share
Used techniques
Defoliation
Technique
Topping
Technique
LST
Technique
13
Week 13. Harvest8mo ago
Happy Harvest Day!


7/10
Rated
Growing her was okay, she definitly used a lot of nutrients early on, which was a bit hard to get used and adapt to. The smell was something weird, at the beginning of flower there was a rather citrussy aroma, definitly a bit sour as well. She then slowly began to smell a bit off, super sour and almost kind of unnatural, which stayed until harvest. In contrary to that, handling her was a whole different story, with aromas of sour apple rings ,that leave the fingertips sticky and smelly for a very long time! All of the plants weren't really beautiful, which is not only the fault of the nutrient deficiency turning the leaves brown and crispy, but also the overall colour of the buds and the plant in general. They just looked super healthy-green! :)
Show more
Translate
Spent 86 days
Ger Veg Flo Har
1
Plants
Normal
Difficulty
Height
Day air temperature
Air humidity
Light schedule
Solution temperature
Night air temperature
Pot size
Lamp distance
![Apple Fritter [Auto #2]. Week 13](https://bucket.growdiaries.com/static/post/photo/301291/12496890_b8dcf3a746379fa5686b7c48a0d3e81a_m.jpg)
![Apple Fritter [Auto #2]. Week 13](https://bucket.growdiaries.com/static/post/photo/301291/12496892_be4782a7e97131ff99d2266b51be5219_m.jpg)
![Apple Fritter [Auto #2]. Week 13](https://bucket.growdiaries.com/static/post/photo/301291/12496894_d65d23aaa313fc0ccbab329aa6d1bae7_m.jpg)
![Apple Fritter [Auto #2]. Week 13](https://bucket.growdiaries.com/static/post/photo/301291/12496900_4cc51b75917ebfe4932c5455536c2a1e_m.jpg)
![Apple Fritter [Auto #2]. Week 13](https://bucket.growdiaries.com/static/post/photo/301291/12496904_806f96c4075f48b2d56fe6efa37edc52_m.jpg)
![Apple Fritter [Auto #2]. Week 13](https://bucket.growdiaries.com/static/post/photo/301291/12496916_6d689db19fbf185b229616be419f3b79_m.jpg)
![Apple Fritter [Auto #2]. Week 13](https://bucket.growdiaries.com/static/post/photo/301291/12496918_dfcf5f430b51120a8b63fdcff4a36d53_m.jpg)
![Apple Fritter [Auto #2]. Week 13](https://bucket.growdiaries.com/static/post/photo/301291/12496920_d4676bf835e6d14a39465f78a94f2b3e_m.jpg)
Muuuy Beginning of week 13 was harvest time!
Checking the trichomes on their main buds led to the decision to harvest them. Almost all of them had already milky looking heads and some of them even turned amber. Their incredibly sour smell was barely tolerable as well.
Made the decision to harvest them all at once, so the grow room can be turned into a drying room for them. Since this is considered an experiment after all, we wanted to try out wet trimming as well to compare it to the dry trim we're used to.
So considering #3 had the least amount of effort due to the low amount of head buds overall, we choose that one to be wet trimmed. It surely was a very sticky and still time-consuming activity, but we're pretty happy with the result.
Can't wait to see and taste them when they're finally ready, dried properly and cured a bit!
This is plant #2.
She still remained my absolute favorite one of them, having the biggest and most beautiful looking main buds. Would've expected a bigger stretch at the start of flowering though, so her branches were still growing pretty close to each other, which isn't that bad but also wasn't really the desired look overall. Plant #2 is one of the dry trim ones. Just made sure to remove the biggest leaves that could prevent a good airflow between the buds when they're hung up.
3 likes
comments
Share
Equipment Reviews


the end.
Enjoying this diary? Follow for more updates!

![Apple Fritter [Auto #2]](https://bucket.growdiaries.com/static/report/photo/301291/facdcbe29986e33a55e84fa5635de608_150.webp)
Prefer the old Diary view?
Go back to the old Diary view