
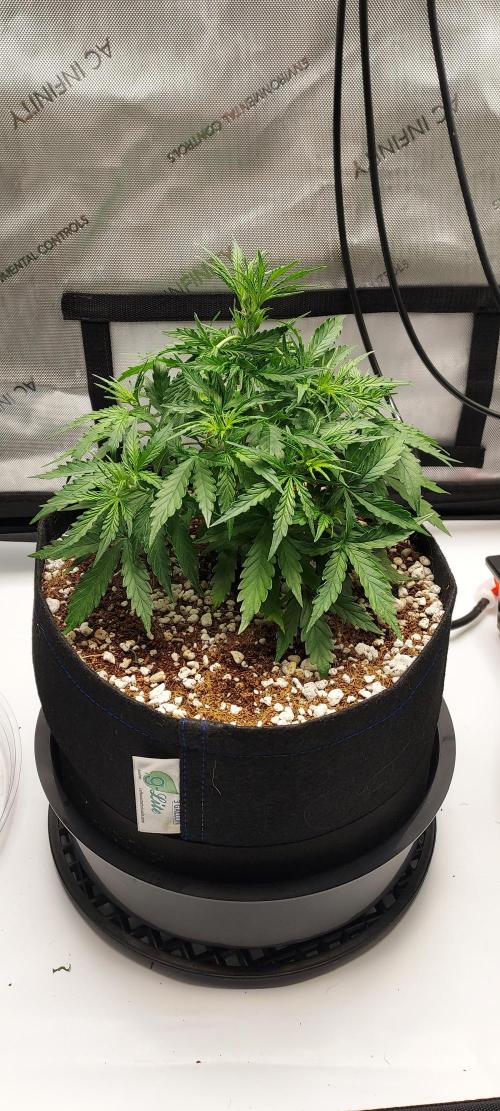
Northern Lights Auto - First Autopot Try


Coco Coir
Platonix

Perlite
Perlite
Indoor
Room Type
11 l
Pot Size
Start at Harvest
G
Germination1y ago


Nutrients 2
Original Microbial Inoculant
0.528 mll

Support 4-0-0
0.528 mll
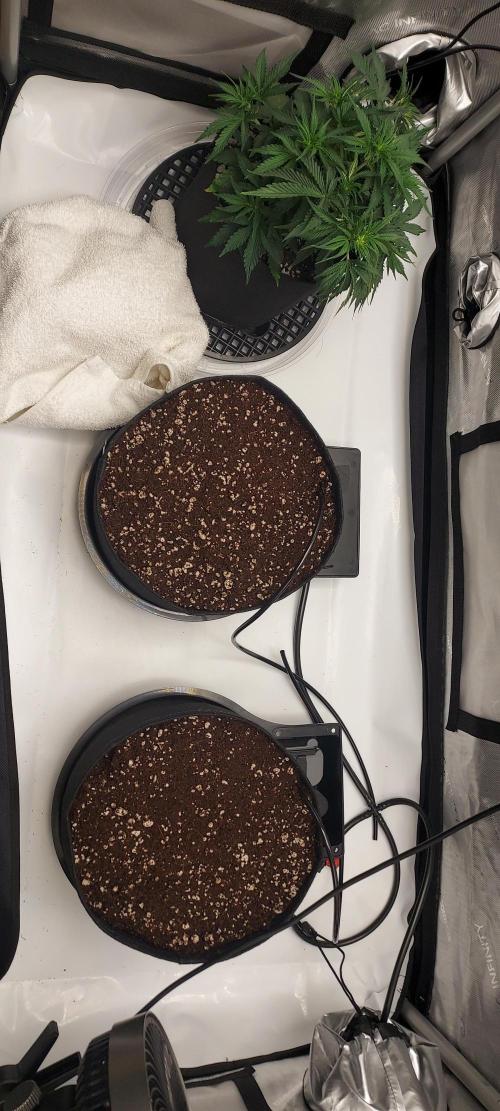
Aeromatics It’s time for my first run with both coco coir and the marvelous autopots! I’ve heard amazing things about autopots, and I’ve been wanting some self-watering integration in at least one of my two tents for ease and since I wanted to try some coco coir grows, it seems like a no brainer.
For this grow, I did a great amount of research, and I think I have it as dialed in as I can (in terms of gear and initial set-up) for a first run using the autopot system.
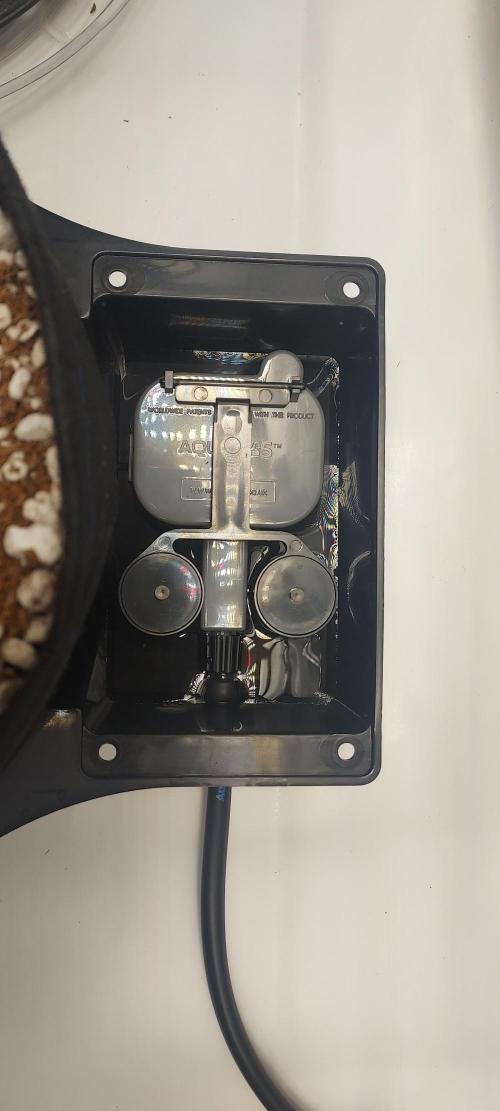
Autopots:
Here are my specifics for the autopots:
Autopot XL 3.9 Gallon Geopot System
3 Gallon Geopot Cloth Pots
Autopot Airdomes
12.4 Gallon Reservoir
HITOP Dual Outlet Air Pump
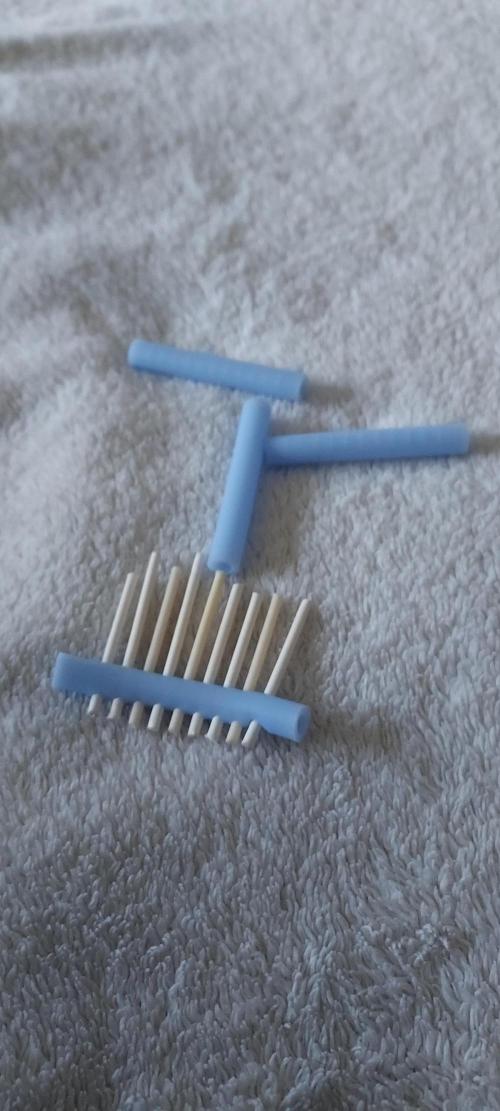
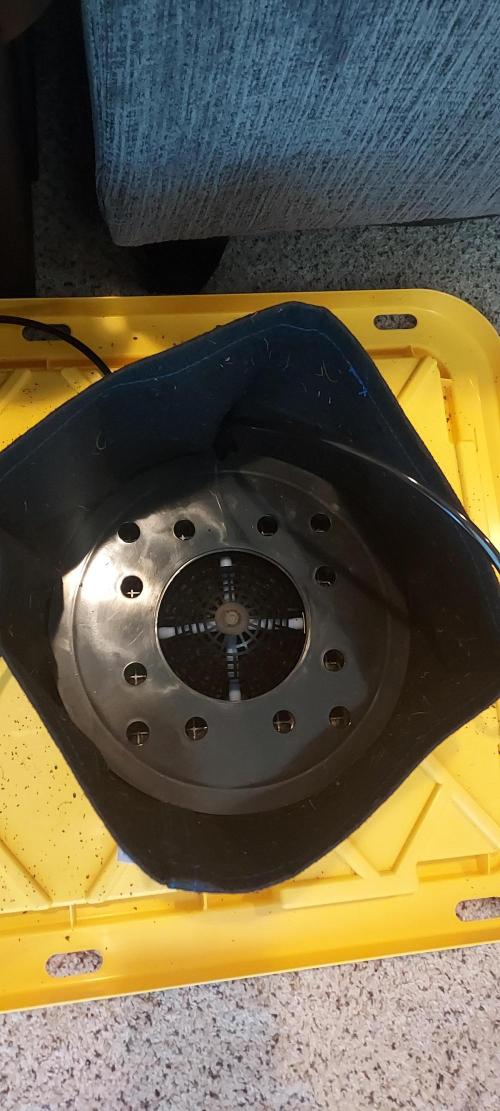
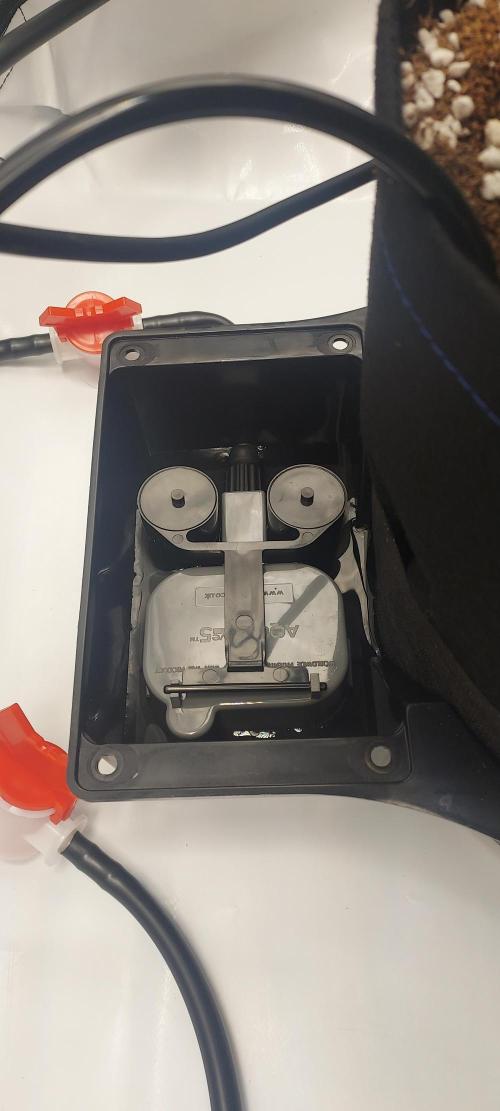
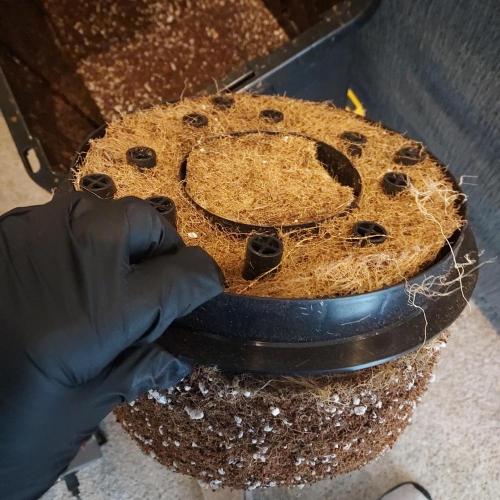
The system was super easy to set up and there are several videos out there on it, so I won’t waste any time for this journal. However, one thing I read about was doing a bit of preemptive work on opening up the air holes on the blue pipes of the air domes before installing them into the domes and then into the pots.
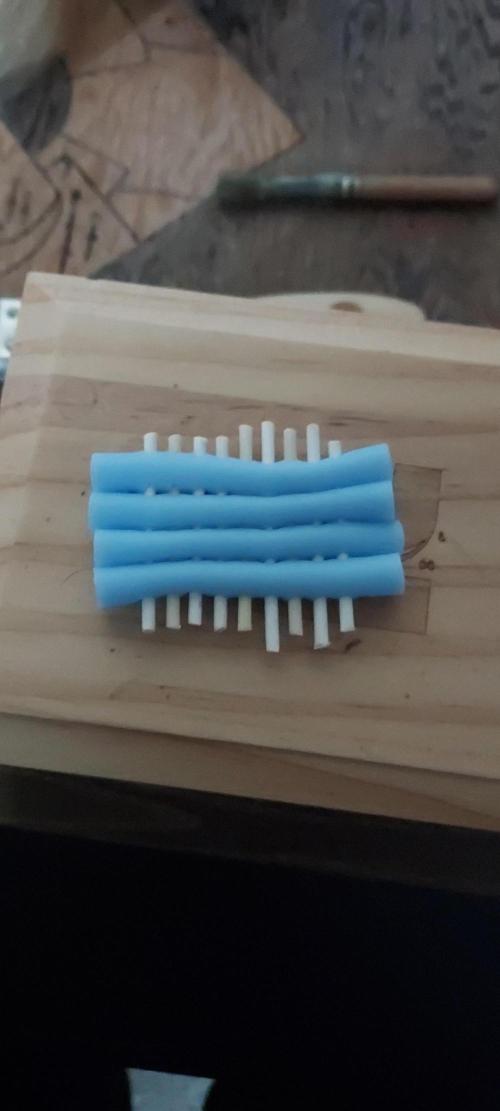
For this task, I took some q-tips and cut the cotton ends off of each side. They seemed like a nice fit to properly spread each hole. Once cut, I threaded each pipe through the q-tips and let it sit for 48-hours to ensure proper time to settle into shape. It worked great!
Once I let those sit, I installed them into the airdomes, connected them to their appropriate tubing for the air pump, and placed them under the airbases.
They were ready for coco!
Coco Coir Preparation Process:
This is my very FIRST time using Coco Coir in any capacity. I have always used soil, so this was quite the learning process for me. I did some solid reading and some good ol’ Youtube research on the whole process and came up with the plan of rinsing brick coco, mixing at about a 70/30 ratio with Perlite, and buffering in a CalMag soak twice to get it ready for potting.
The rinse went well. I used distilled water and rinsed around 20 gallons through the 5-ish gallons of coco that I will be using for this grow.
Once rinsed, I started the buffering process!
I buffered twice (both for 24 hours). Each time was a buffering solution composed of 9 gallons of distilled water.
For the water, I went with around .8 to 1 ec charge and a ph of 6.0.
My nutrients included:
4 to 5 ml Ventana Plant Science Support (test ec)
.5 to 1 ml Ventana Plant Science Grow (added in bits to ensure not going over 1)
After the first 24 hour soak, I fully drained it and resoaked in another batch of the same 9 gallon mixture to ensure proper CalMag buffering.
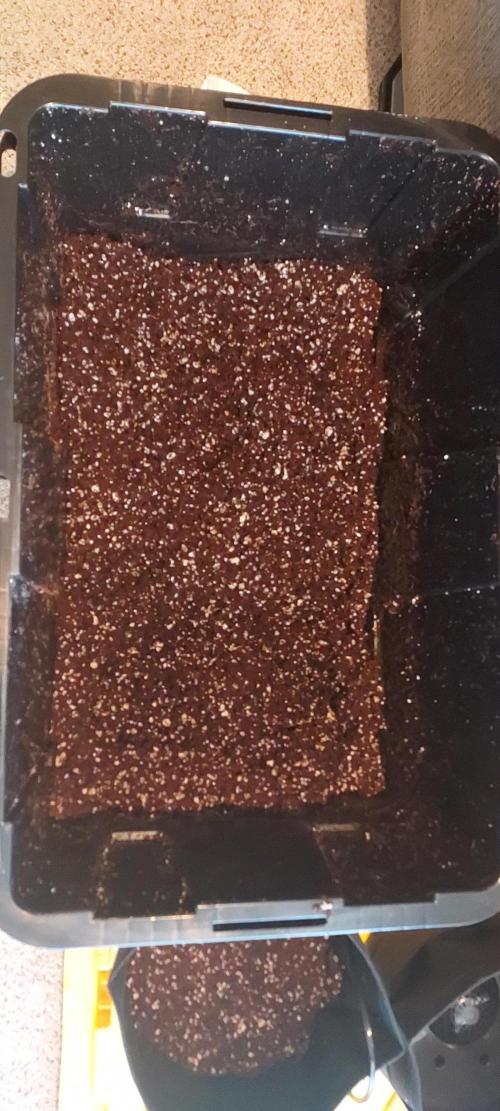
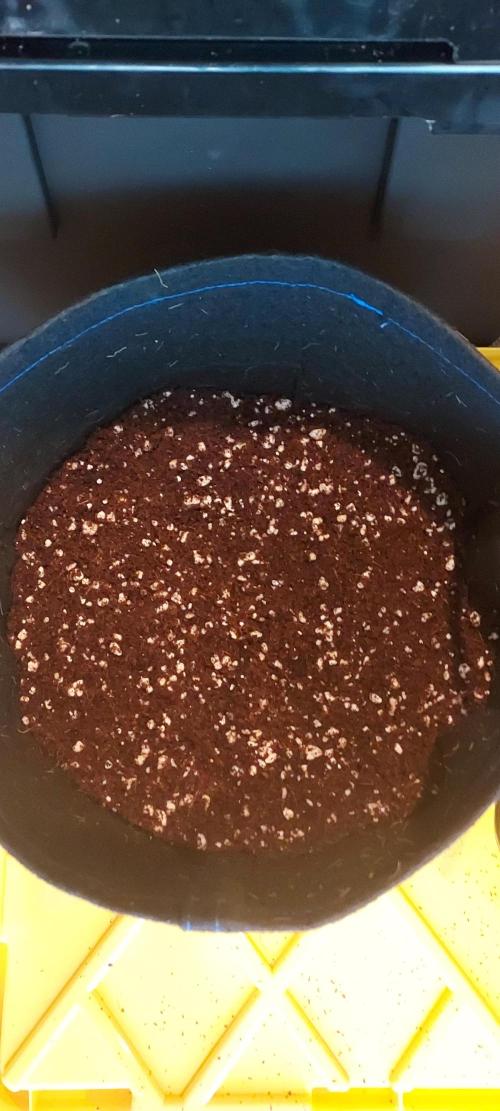
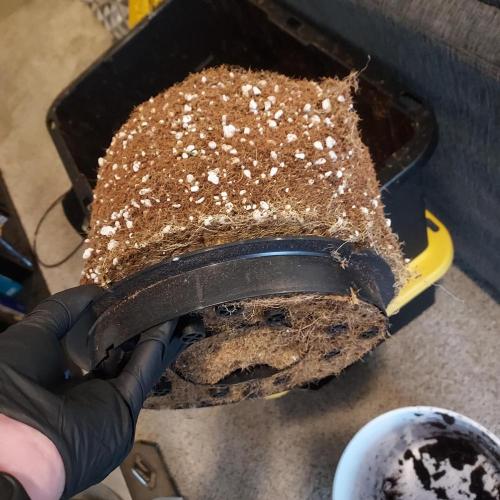
Once she was all buffered, I drained and potted them up!
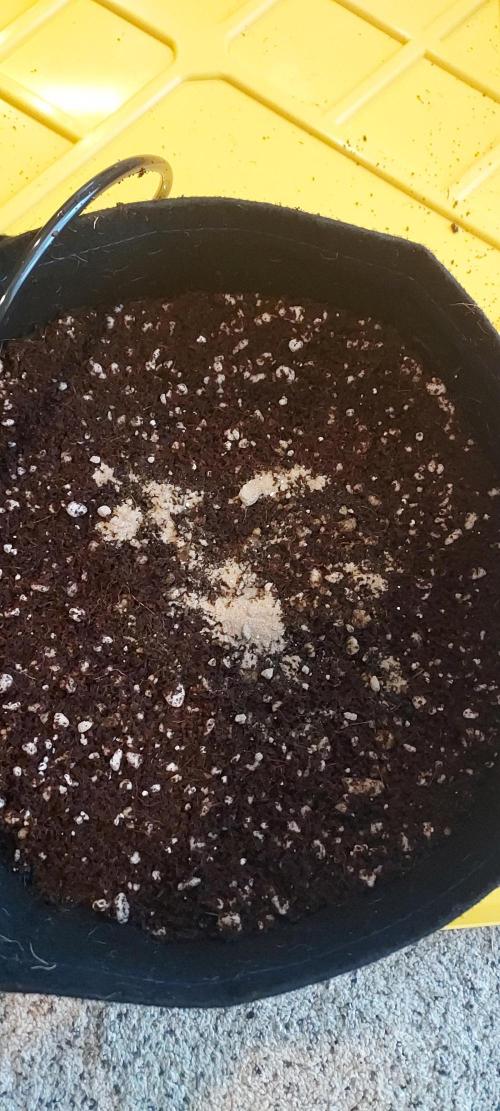
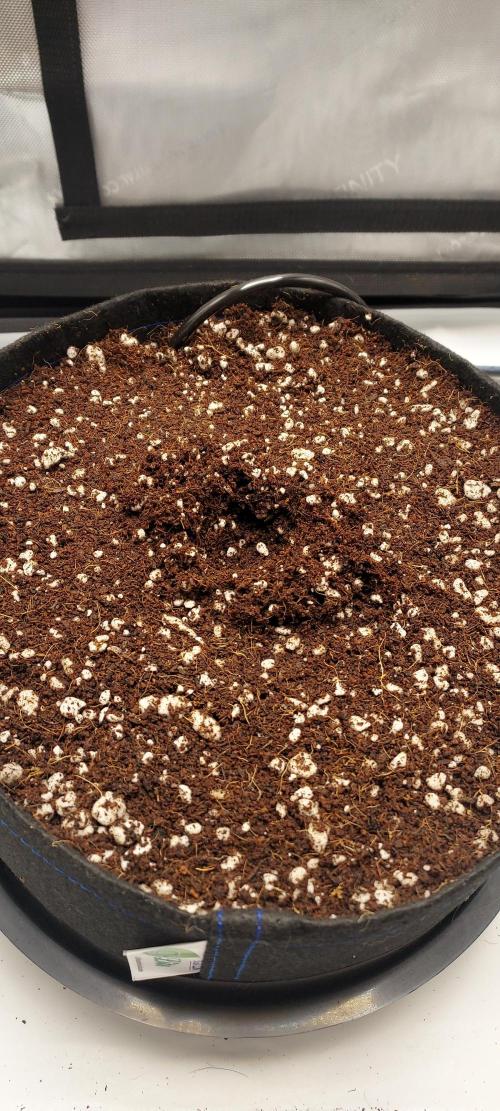
I put about 25 percent of the base coco into the Geopot, and then I added around 50 percent of the next layer of coco. In that 50% of coco, I mixed around 3 tsp of Stash Blend to pre-charge some nutrients into the coco and get some of the advantages of Stash Blend into the medium. Since I am using autopots, I don’t plant on doing any top feeding after I turn on the system/air domes. This seemed like the best way to get some of those benefits in, but we shall see!
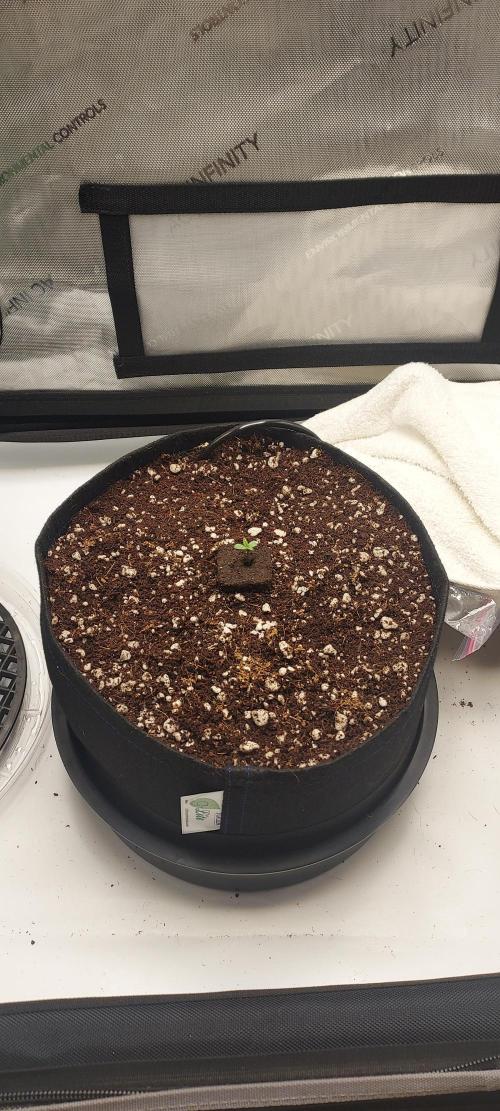
Once I thoroughly mixed in the Stash Blend, I topped the pots off as much as possible, and placed them into the autopot vestibules into the tent!
I still need to fit the main hose to the system, but I have a two weeks before I turn it on, so there’s some time.
All in all, it went well. Hopefully my first coco preparation was solid and we shall see the results!
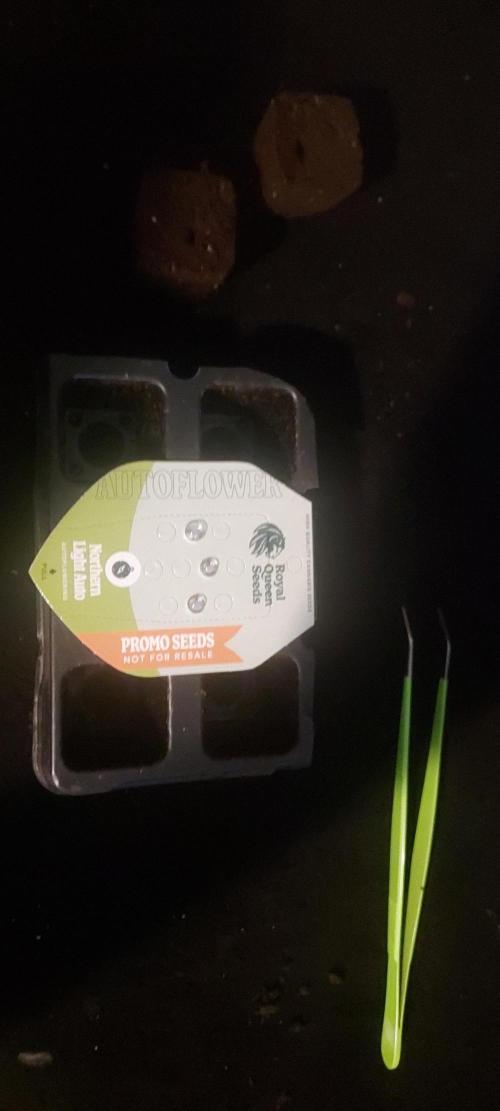
Germination:
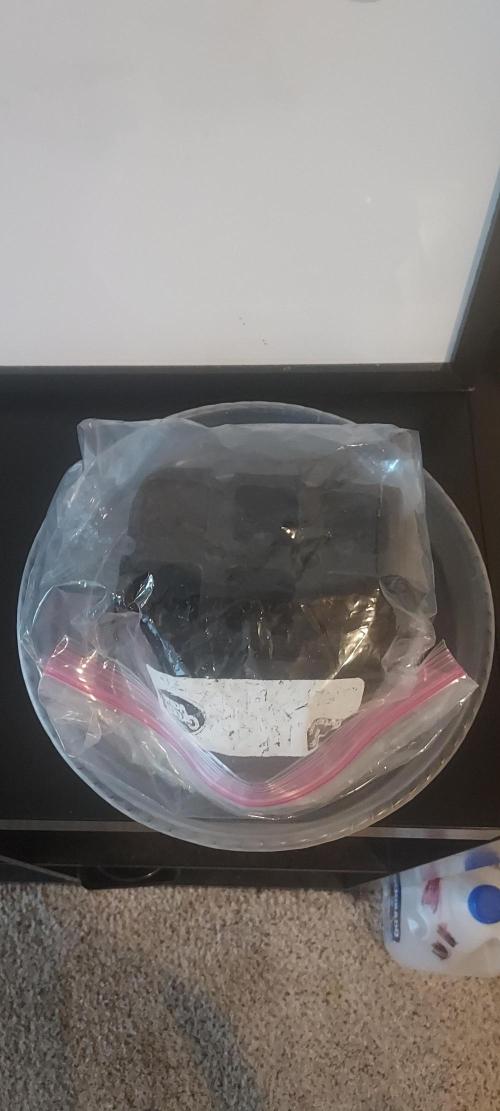
I’ve been using Organiplugs for all my germination for my last 20+ seeds, and I am not going back to any previous system. All you do is: insert the seed, place into a germination cube holder, place in a ziplock back, wrap it up in a towl, place it in a tent, and wait for her to sprout!
I don’t have to worry about anything really, and it almost protects the seed from any real concerns from the seedling/sprouting process.
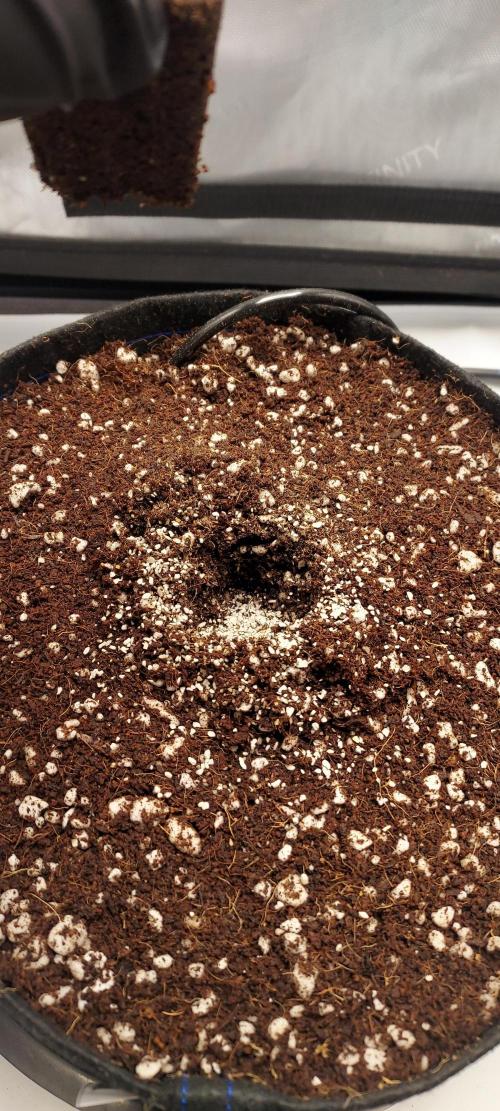
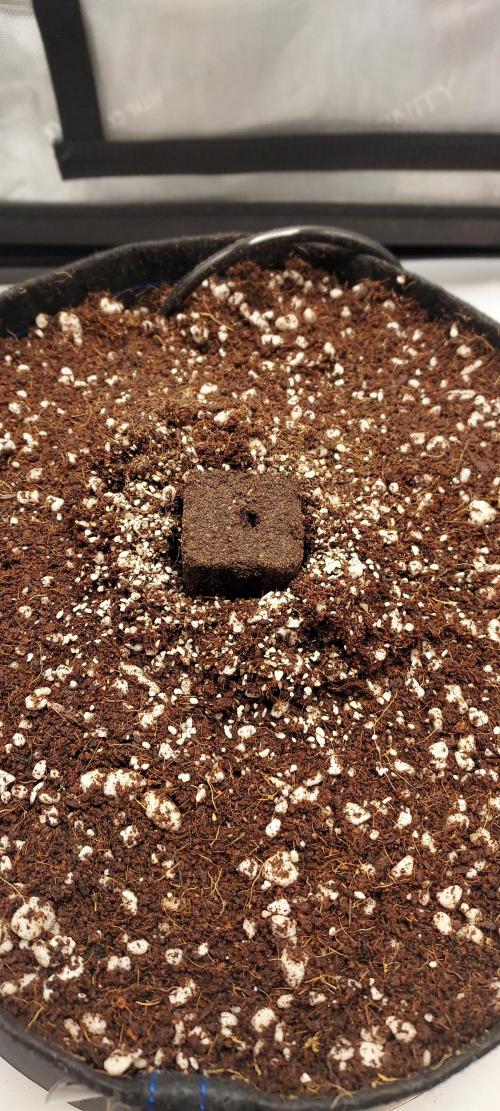
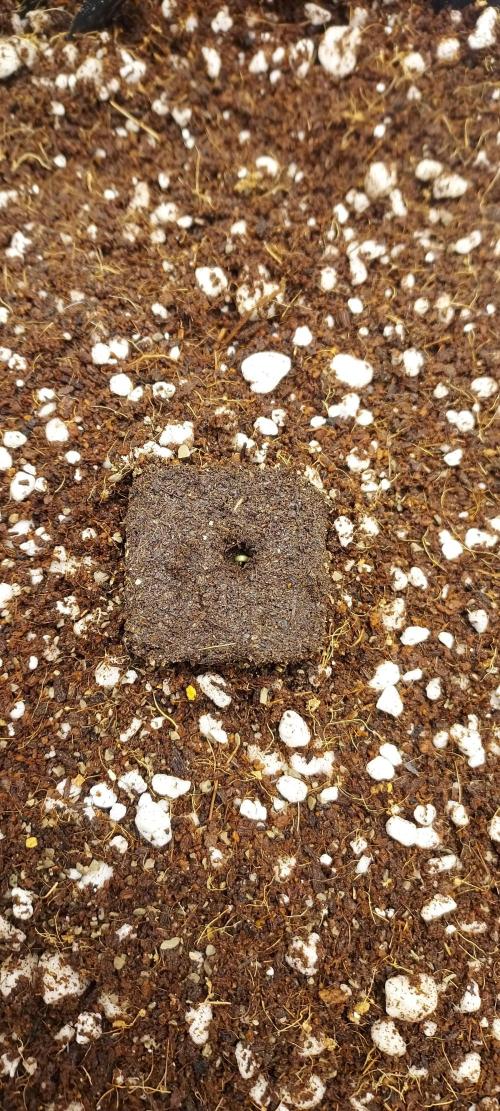
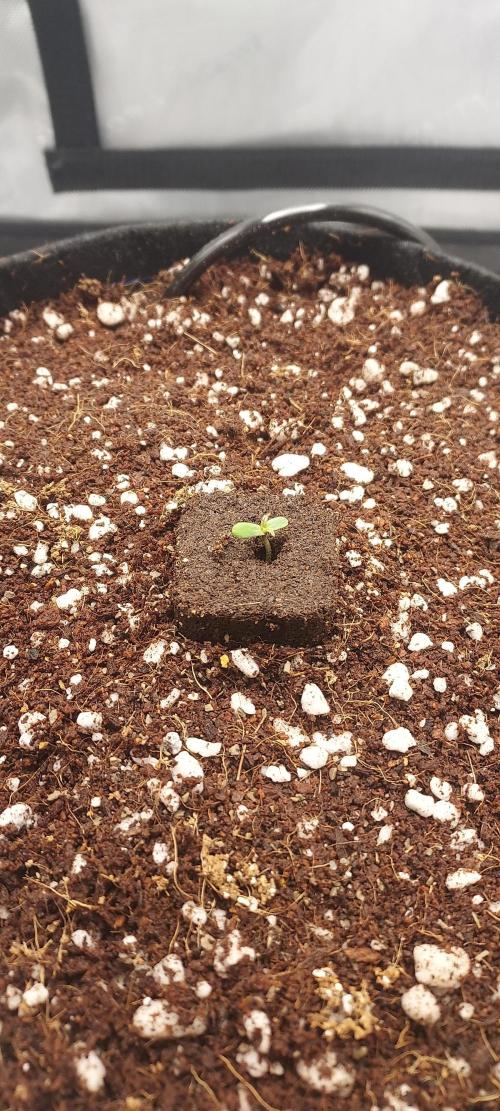
Once she is sprouted (either I see a taproot, or the sprout actually pops out of the hole, or both!), I placed her about ¾ of the way down into the coco.
In the coco hole, I added some Xtreme Mykos to encourage root development, one of my favorite reasons to use organiplugs!
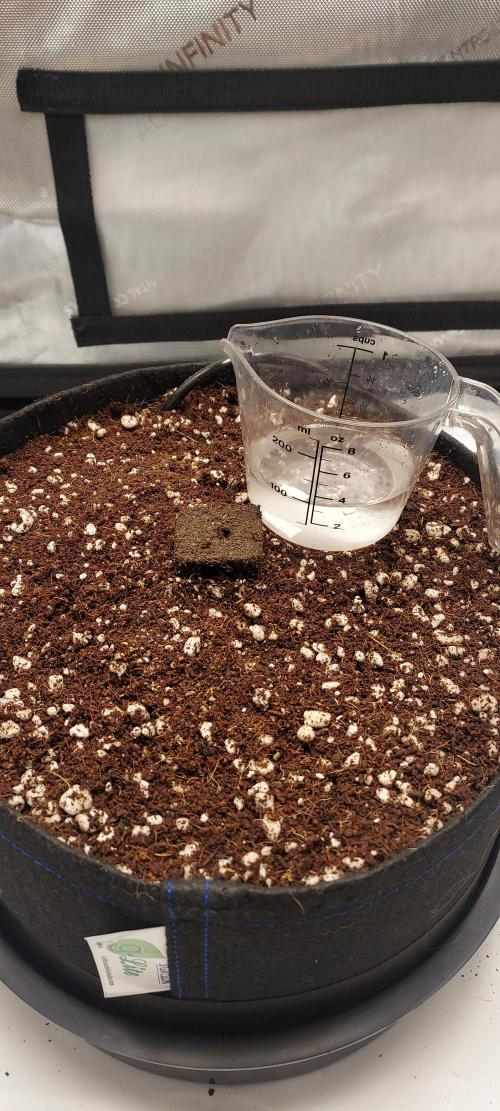
Then, I watered her in with 100 ml of distilled water mixed with 2 ml Ventana Plance Science Support and 1 ml Tribus. I honestly feel like I could have skipped the “watering in” step here, since the organiplug absorbed a fair bit of water from the coco, and I was a bit worried. However, I went with it anyway out of habit knowing that if I made a mistake, it is all good!
Sprouting:
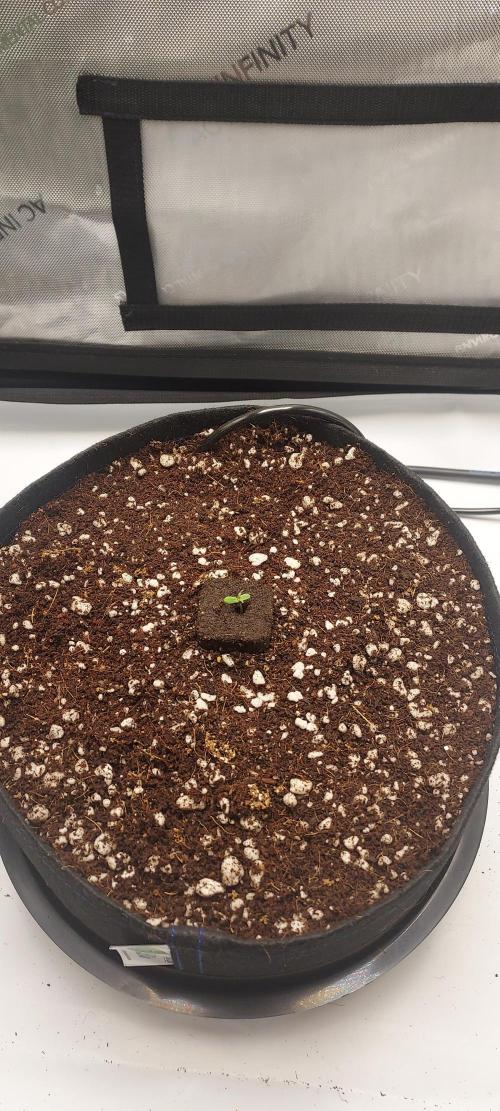
After one day, you could see the little girl ready to poke out!
She popped the next day (8/29)
I am going to count 8/30 as my official day 1!
Plan for the grow:
All autopots baby! I am going to stay fairly high with the ec, given the coco grow. For the first two weeks, I will hand water and keep her high with Ventana Plant Science support to balance out the use of distilled water. I will also use 2 ml/gallon of Tribus to get as many microbes in the coco as possible.
I’ll follow the nutrient line recommendation and see how she does!
This is all one big experiment and I am fully understanding that it will take a few runs in these autopots to get them dialed in, not to mention this is my first coco experience haha.
However, I am super excited and look forward to hearing from you all throughout this experience!
Please share any wisdom you have and I look forward to this one!
7 likes
10 comments
Share
Used method
Rockwool Cube
Germination Method
1
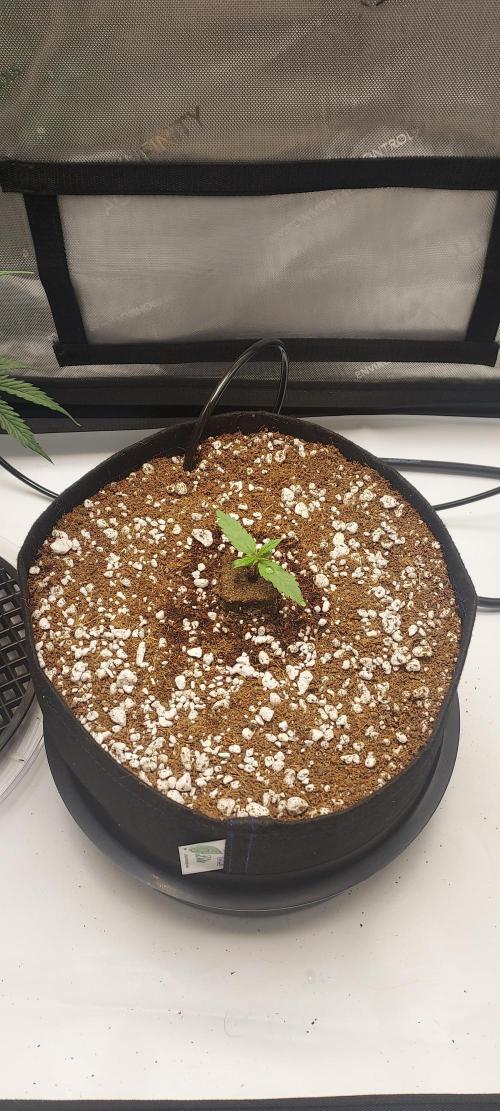
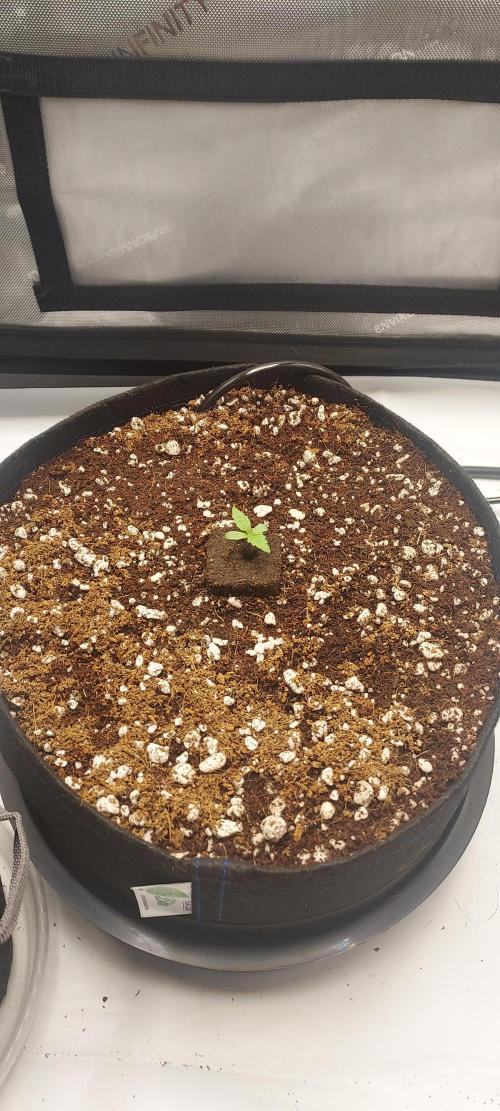
Week 1. Vegetation1y ago


5.08 cm
Height
26 °C
Day Air Temp
5.9
pH
250 PPM
TDS
11.36 l
Pot Size
121.92 cm
Lamp Distance
Nutrients 2
Original Microbial Inoculant
0.264 mll
Support 4-0-0
0.66 mll
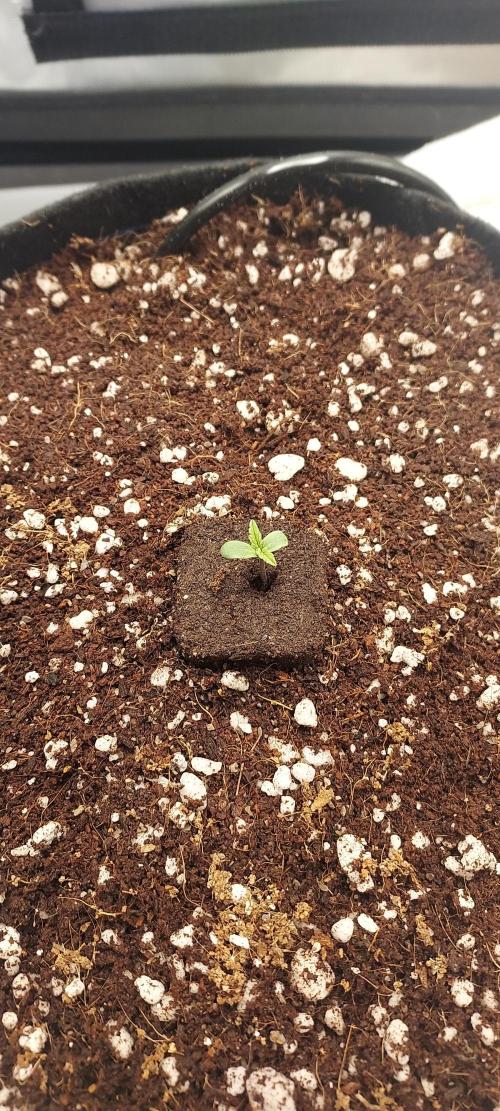
Aeromatics It's been a pretty easy going week!
I've been focused on letting the very moist, pre-buffered and charged coco do it's work and thus I have only watered twice. The water recipe is light for this week, but I will start to ramp it up for week two to prepare for when I activate the autopots and air domes.
Day 5 (9/4) - 100 ml water in a circle and 50 on Organiplug
Day 7 (9/6) - 150 in a circle 2 inches from plug and 50 on the plug itself
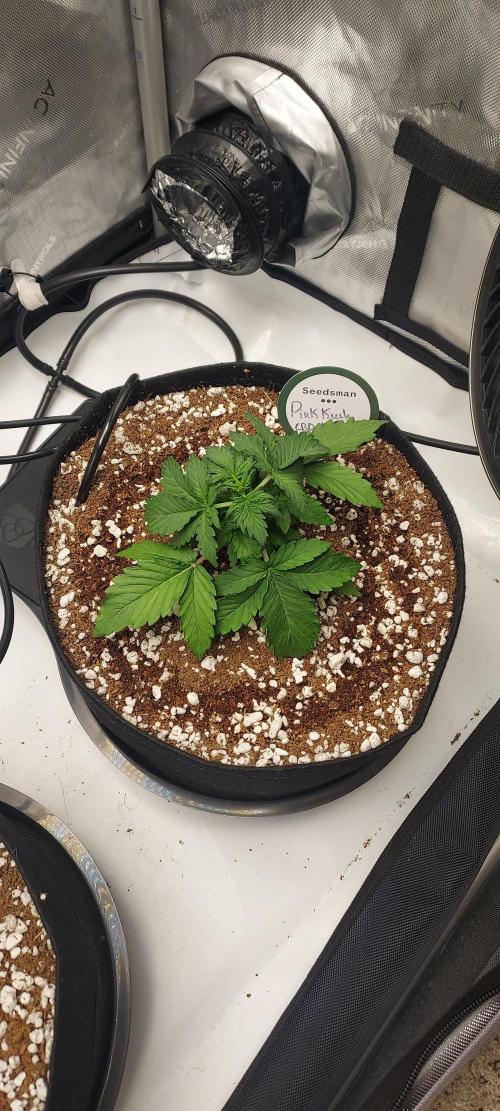
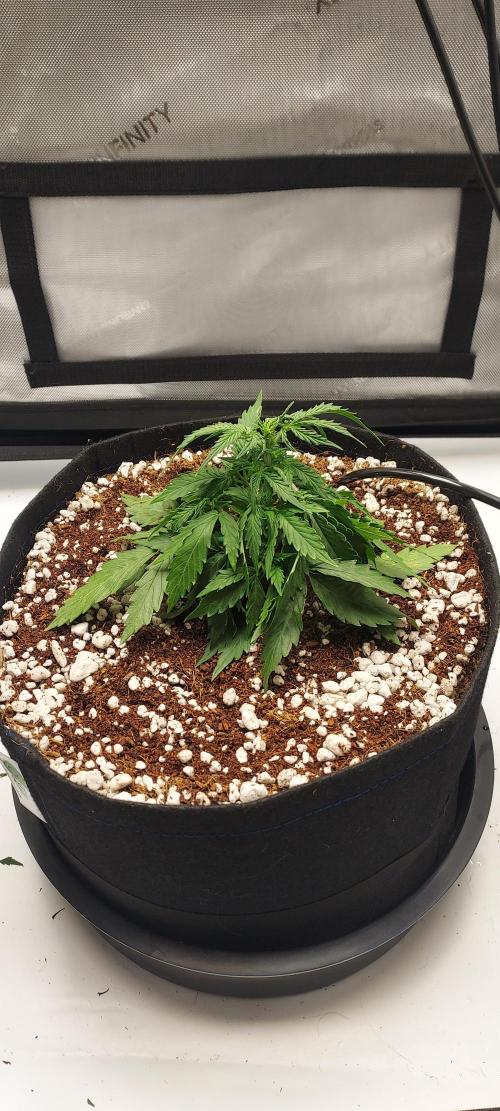
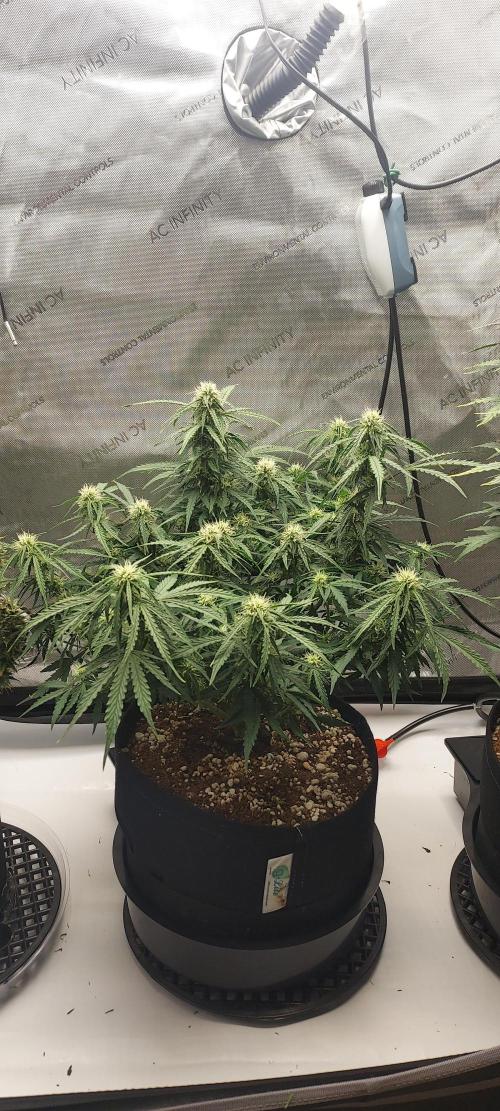
The coco has definitely dried back. We are dry to about 1.5 inches all around, but the plants look healthy (my Pink Kush CBD Auto from Seedsman that I might toss on a journal for too!).
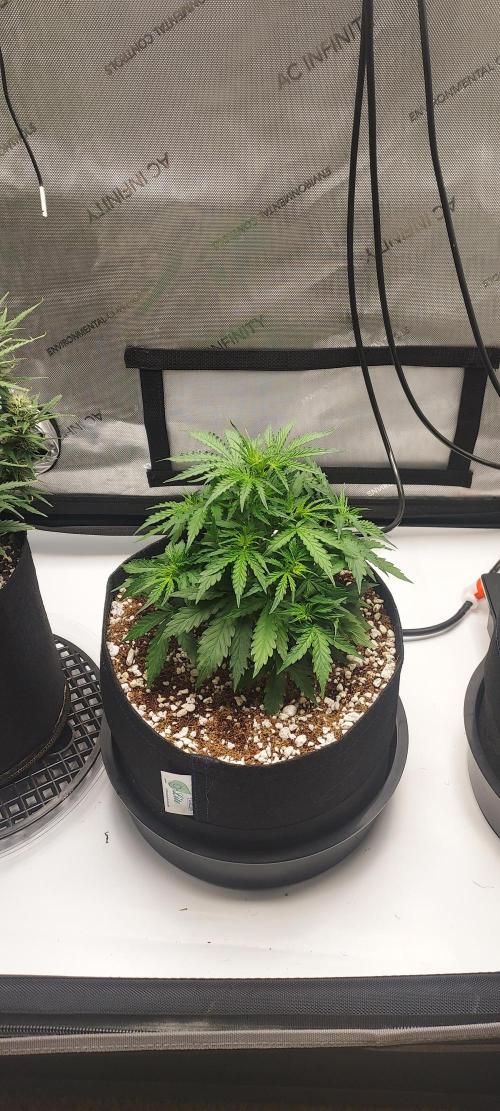
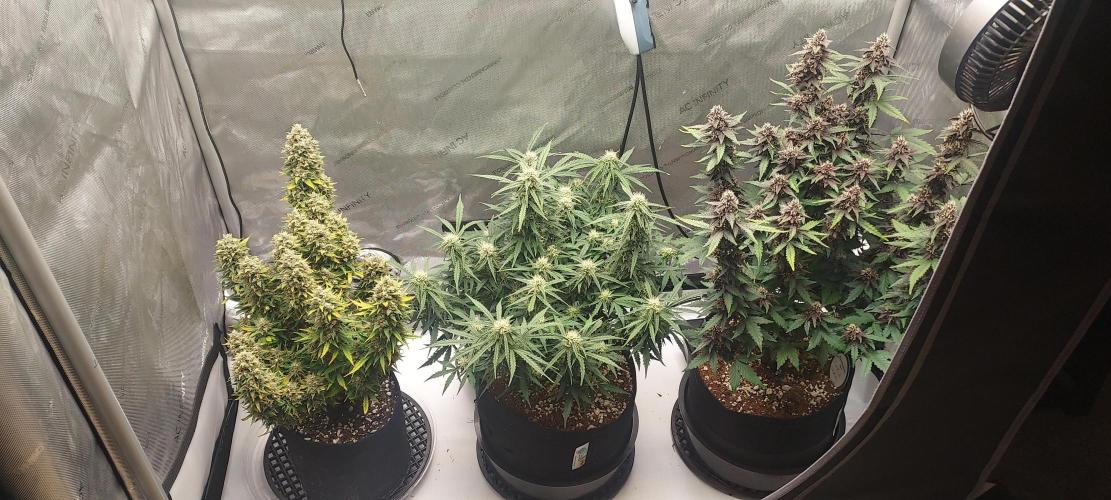
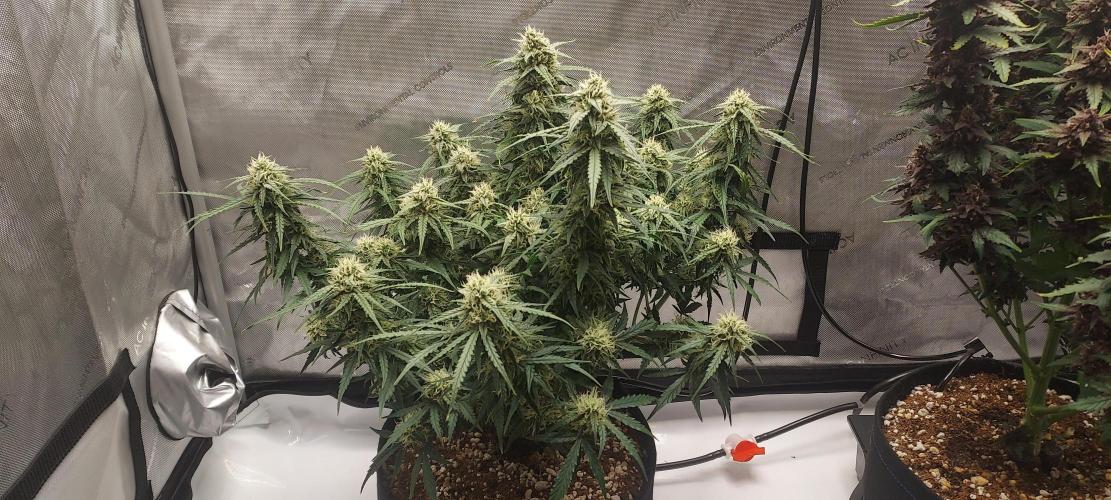
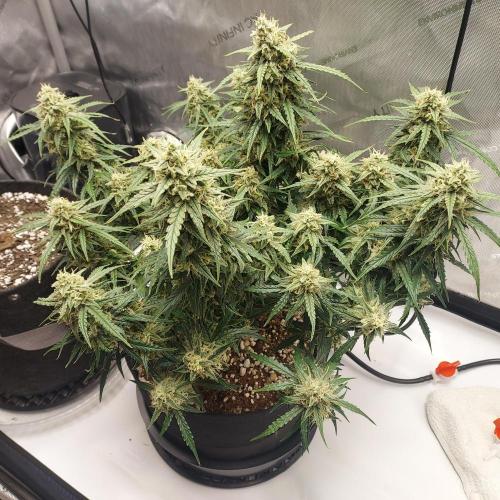
VPD is hovering at 1.2 as they are sharing a tent with my Z-Up Auto from Fast Buds (week 5 - looking good!), but I think we are doing well for week 1 in a completly new scenario haha.
4 likes
comments
Share
2
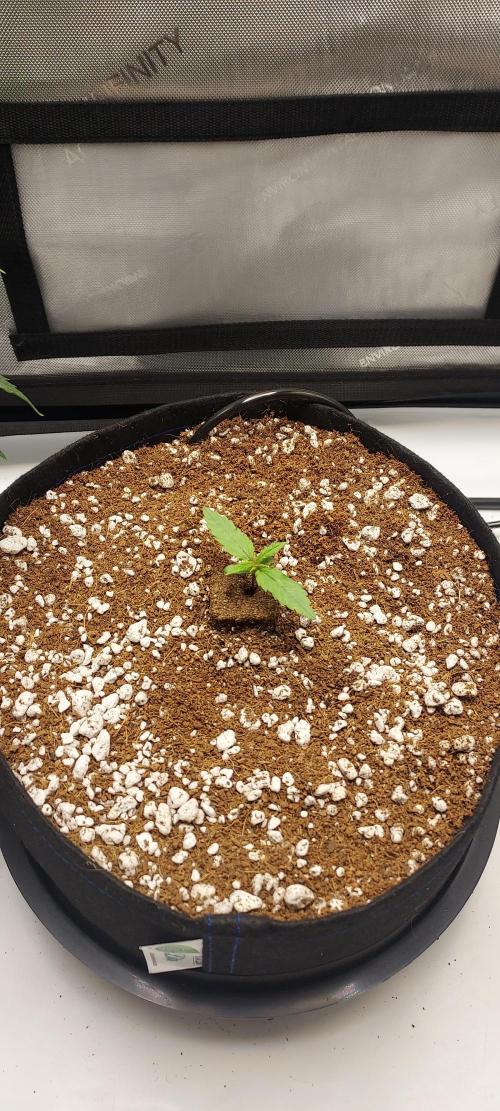
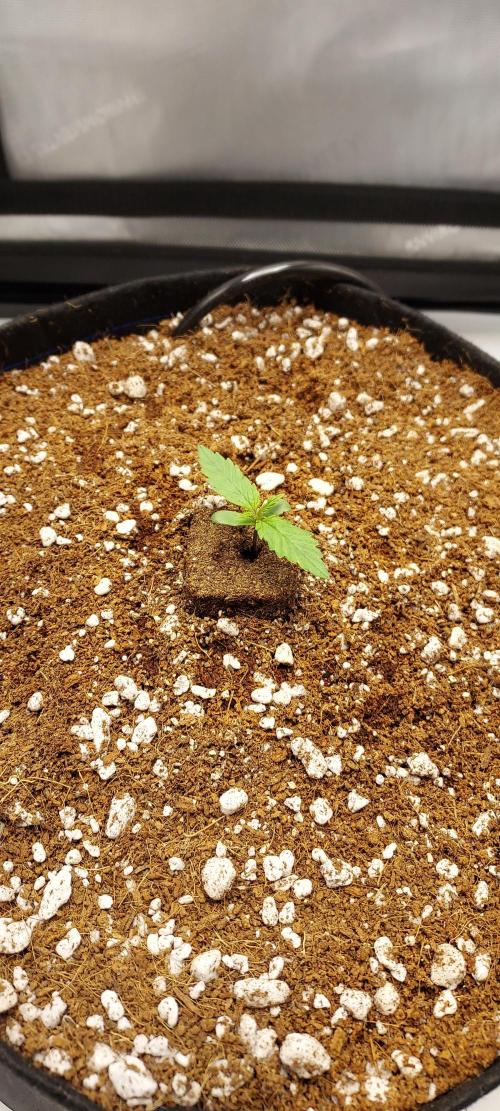
Week 2. Vegetation10mo ago


25.4 cm
Height
26 °C
Day Air Temp
5.9
pH
265 PPM
TDS
11.36 l
Pot Size
121.92 cm
Lamp Distance
Nutrients 3
Original Microbial Inoculant
0.264 mll
Support 4-0-0
0.793 mll

Grow 0-1.5-4
0.264 mll
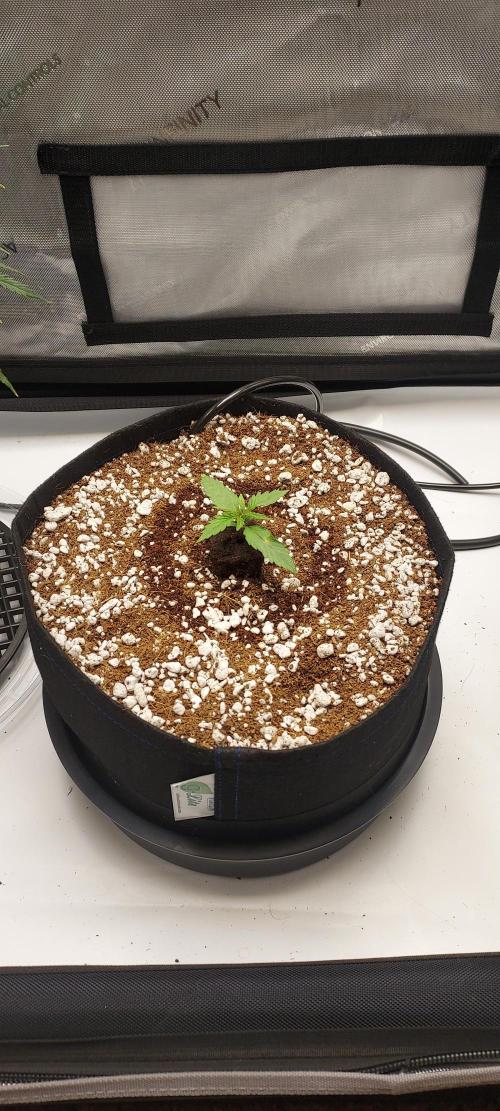
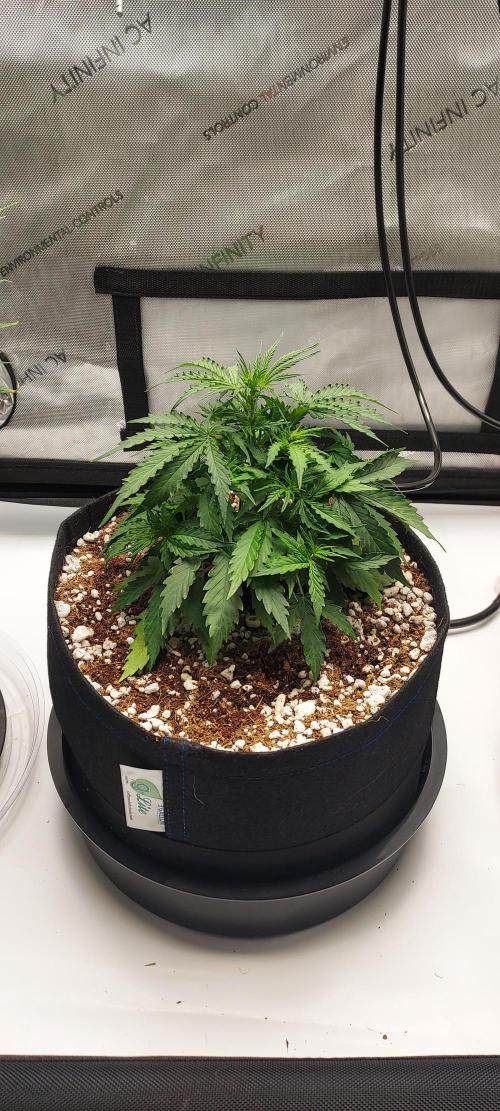
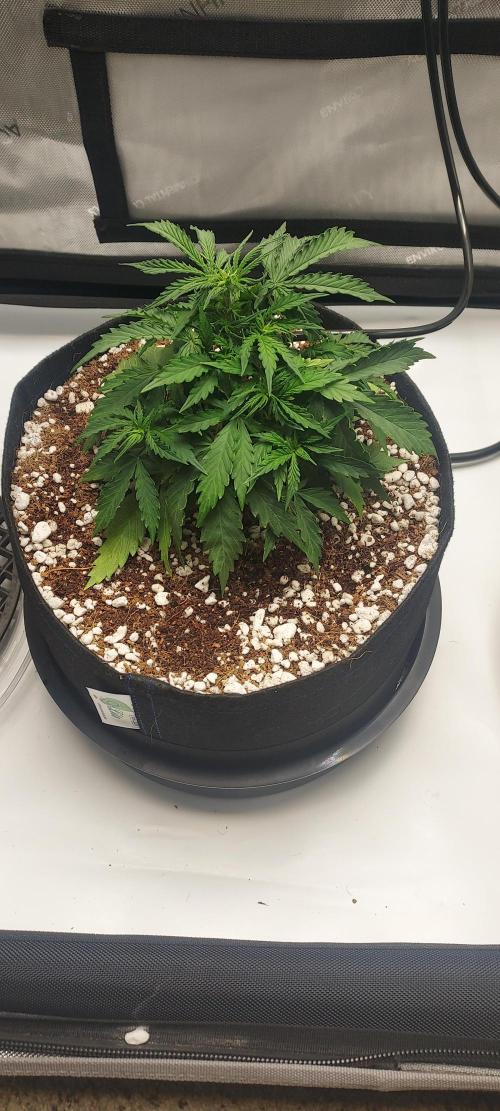
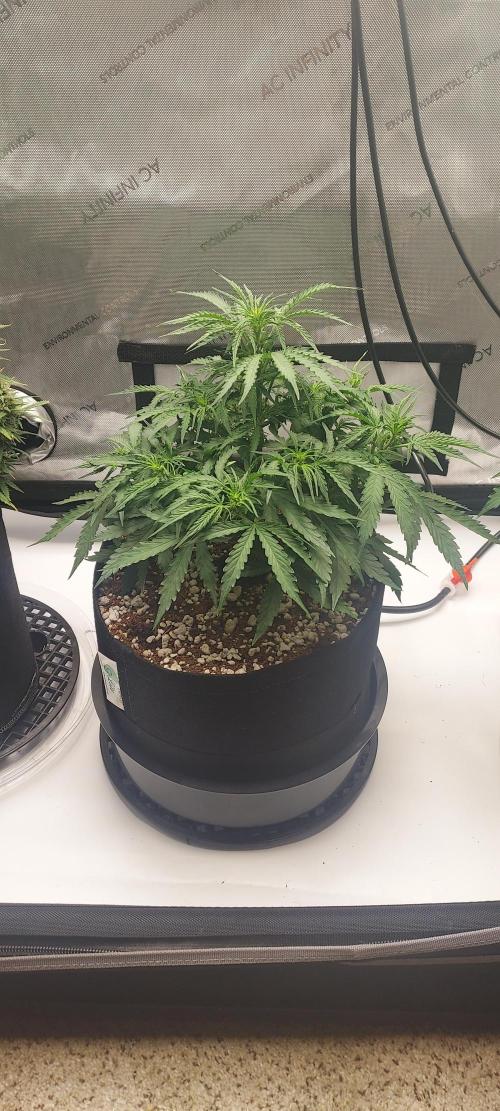
Aeromatics Week two (Days 7 to 17) have been going well! We have been working to establish the plant within the GeoPot so that we can turn on the Autopot system towards the end of this week, around day 21.
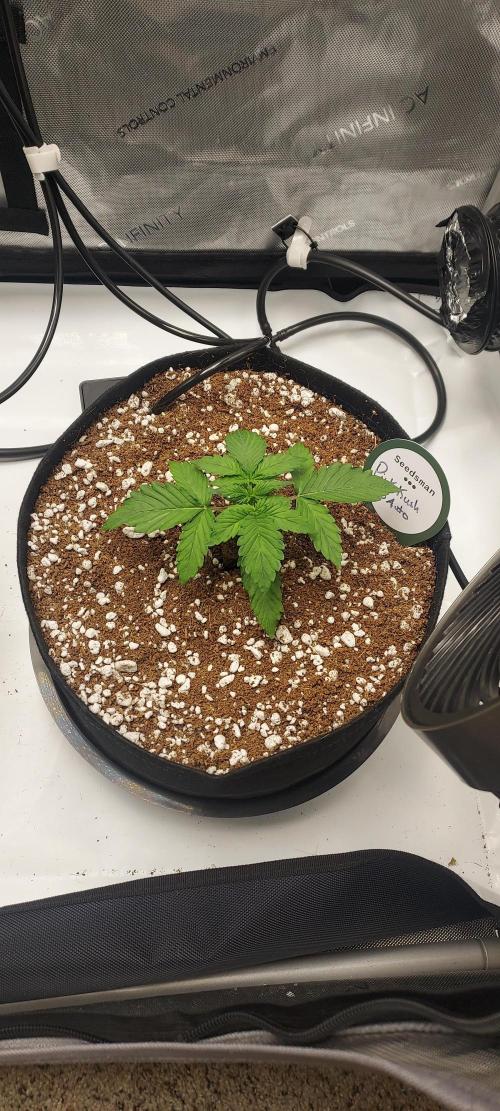
She has been drinking enough to the point where I am watering every two days, and in general, is looking healthy for my first buffered coco coir grow!
I watered the following days with a lighter recipie:
2.5 - 3 ml Ventana Plant Science Support
1 ml Ventana Plant Science Grow
1 ml Tribus
9/8: 50 ml on plug and 200 ml in circle
9/10: 50 ml on plug and upped to 500 ml in circle
9/12: 50 on plug and 500 ml in circle
9/14: 50 on plug and upped to 750 ml in circle
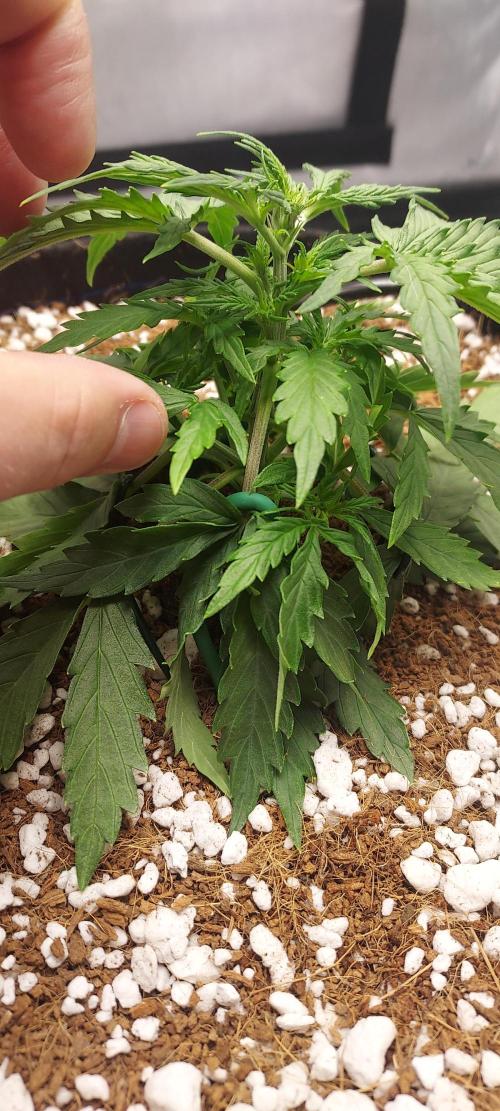
I did some minor staking of the larger fan leaves to try and expose stems to maximum growth, and she is looking good!
On day 19/20, I will give her a larger last hand water, likely 1 liter. Then I will turn on the system and see what happens haha! Hopefully we will see some explosive growth!
5 likes
comments
Share
3
Week 3. Vegetation10mo ago


38.1 cm
Height
26 °C
Day Air Temp
5.9
pH
355 PPM
TDS
60 %
Air Humidity
11.36 l
Pot Size
121.92 cm
Lamp Distance
Nutrients 4
Original Microbial Inoculant
0.264 mll
Support 4-0-0
1.057 mll
Grow 0-1.5-4
0.264 mll
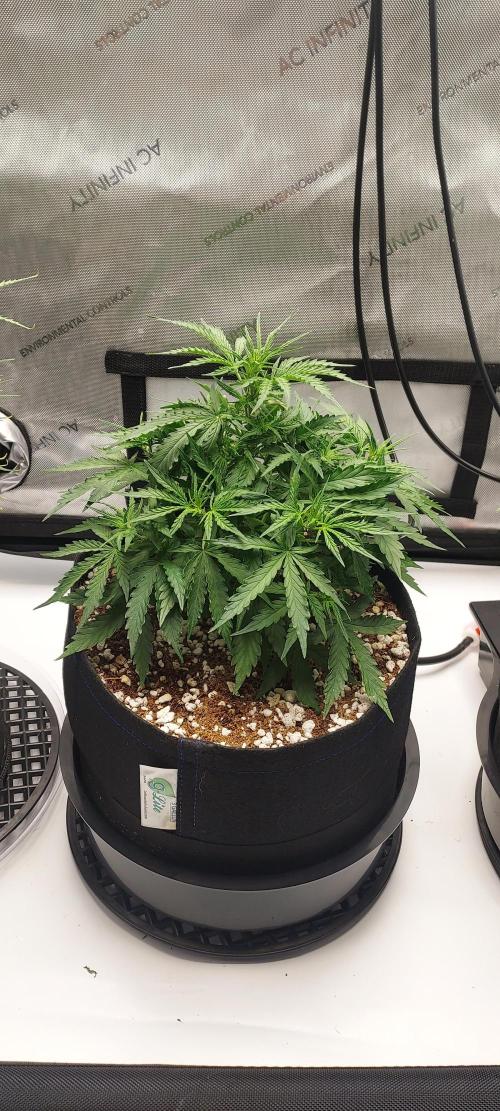
Aeromatics This week was spent on final hand watering and fully preparing to turn on my autopots!
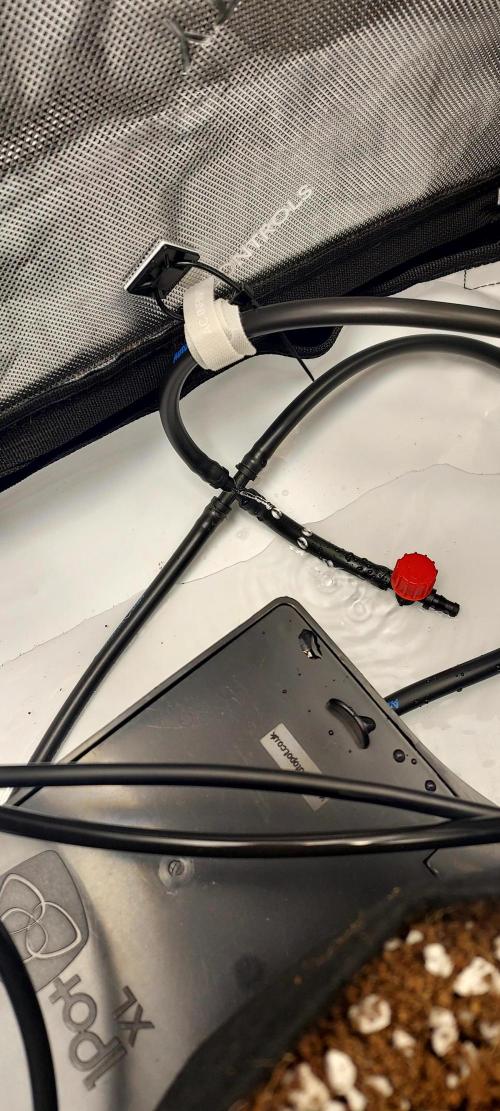
Heading into Day 17, I was eager to test out my system/pipes and wave maker, so I poured two gallons of untreated distilled water into my reservoir. I then....like a bit of a moron... attended a 30 minute work meeting without really thinking about what I had just done haha.
The result: Not only was there a COMPLETELY BROKEN X-JOINT connecting my reservoir to my autopots, but all of my shutoff valves were also WIDE OPEN. Not only did my tent completely flood with the distilled water, but both my Northern Lights and Pink Kush CBD completely soaked trhough with the untreated distilled water. WHOOPS!
Luckily I had pre-buffered the coco on the heavier side, and I made the decision to turn on my airdomes a bit early since the coco was fully saturated.
I was a bit worried about this accident, but the plant really showed no signs of worry. It was a very welcome relief!
I went ahead and fixed the system, added a few shutoff valves, and fixed a 6-gallon batch of my first reservoir water. The recipie for the 6-gallons was:
24 ml Ventana Plant Science Support
6 ml Ventana Plant Science Grow
3 ml Ventana Plant Science Expand
6 ml Tribus Original Microbial Inoculant
I turned the autopots on officially on day 21, and the plants have been LOVING IT!
I am really excited to wake up each morning to see the growth and given this is both my first run in coco as well as with the autopots, I am a happy man.
This week goes through day 24 to 31, we should be seeing some major growth and a big stretch. I'll be increasing the next feed closer to 1 ec, and will maintain a ph of 5.9.
Wish me luck and leave some comments for moral support haha!
6 likes
3 comments
Share
6
Week 6. Flowering10mo ago
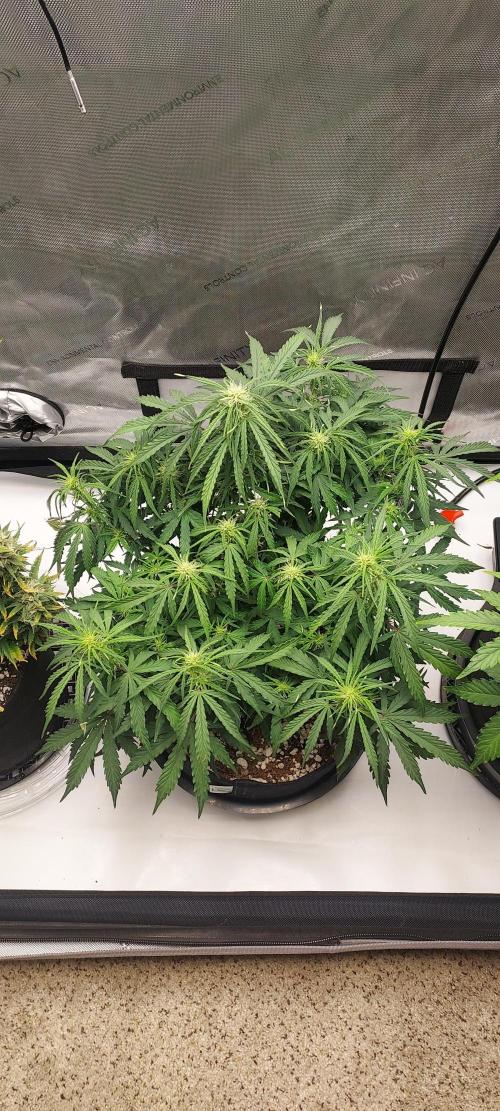
50.8 cm
Height
26 °C
Day Air Temp
5.9
pH
570 PPM
TDS
60 %
Air Humidity
11.36 l
Pot Size
121.92 cm
Lamp Distance
Nutrients 7
Original Microbial Inoculant
0.264 mll
Support 4-0-0
1.849 mll
Grow 0-1.5-4
0.66 mll
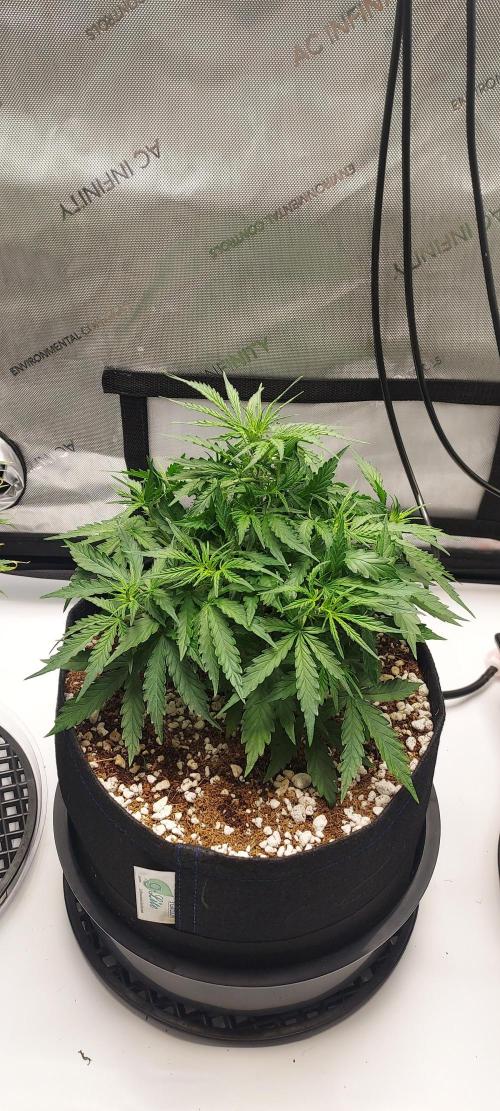
Aeromatics It's been two weeks since my last update! I've been busy traveling and hosting the in-laws, so I have only had the time to keep up with that, my kiddo, and taking care my many plants.
The good news is this is exactly what the autopots are for!
Before I went on vacation, I set up a 10-gallon mix of a pre-flower transition and get it added and set-up for my vacation time. The mix was added to the reservior on 9/29 with the following nutrients:
50 ml VPS Support
10 ml Grow
10 ml Structure
10 ml Expand
5 ml Flower
10 ml Tribus
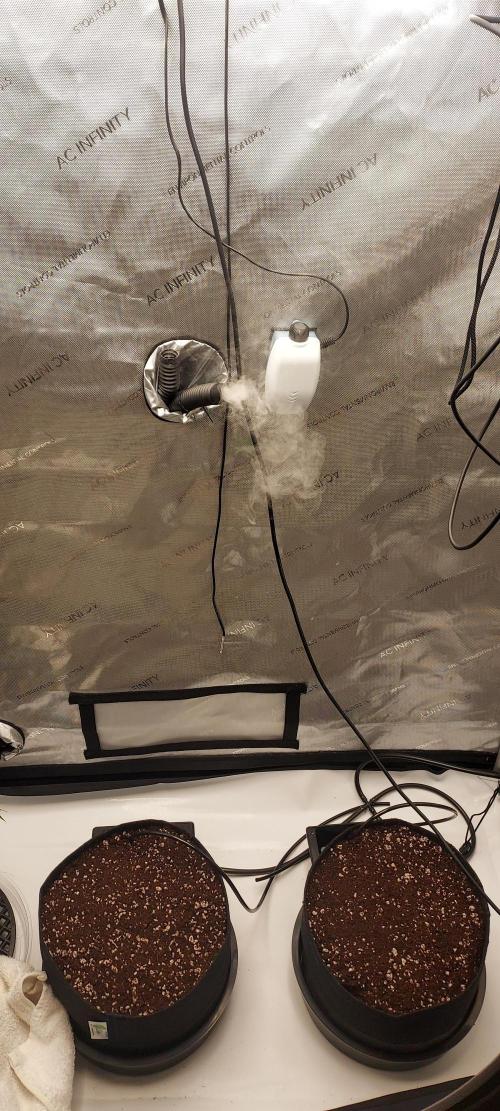
She, along with my Pink Kush Auto, are looking great! I can back from 4 days away with no issues except an empty humidifier.
I noticed a bit of slime possible algea forming in the reservoir, so I did a nice distilled vinegar/hydro peroxide clean of the entire system (hoses, reservoir, trays, and aqua valves) and mixed another batch of 6-gallons of more aggressive flower nutrients with a touch of pre-flower transitional help before I make the move next week to a full flower brew.
Here are the nutrients:
6 gallons distilled water:
40 ml VPS Support
15 ml Grow
10 ml Flower
7 ml Structure
7 ml Expand
3 ml FlaVUH
I also made a 500 ml mix of 5.9 ph distilled water and added /5 ml of Tribus. I watered the base stem of each plant with this to help bolster some microbes, it couldn't hurt!
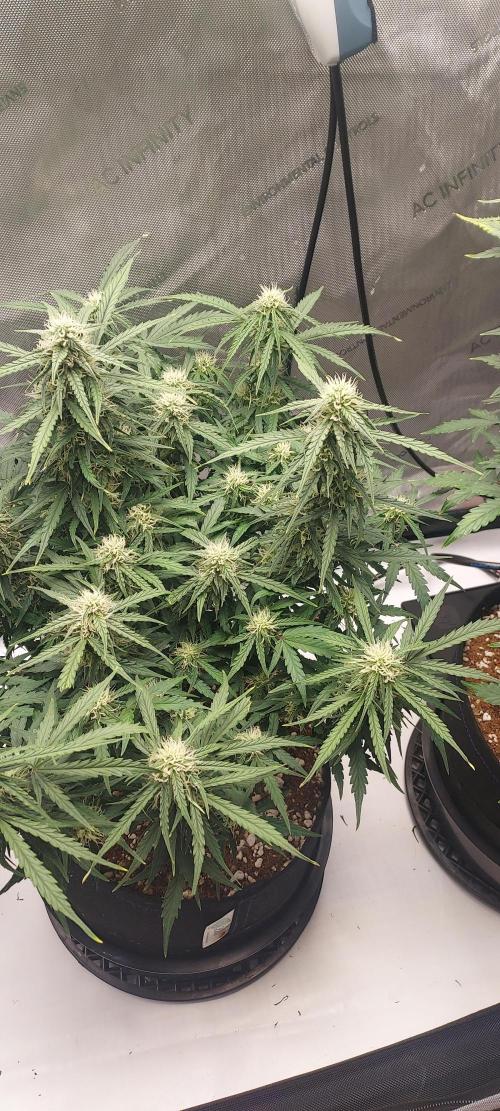
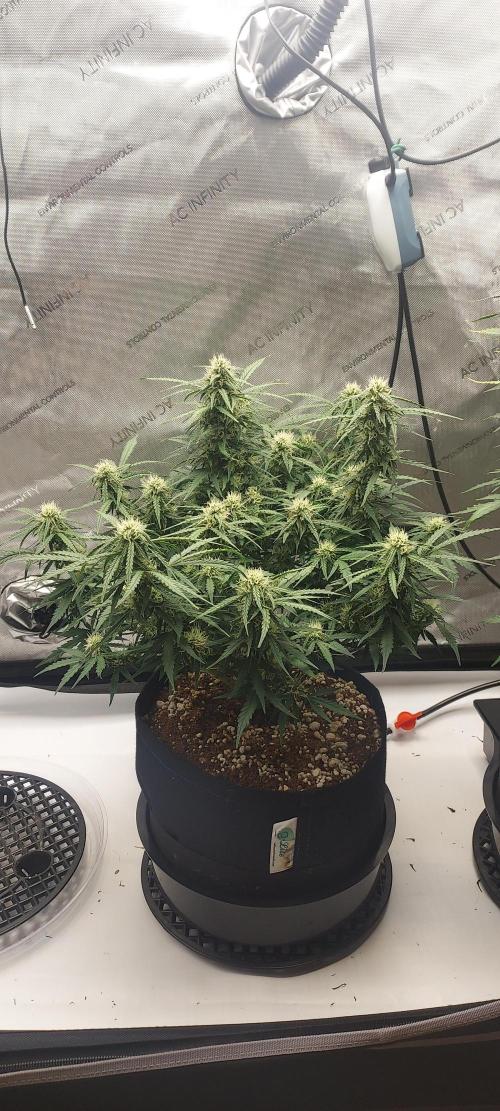
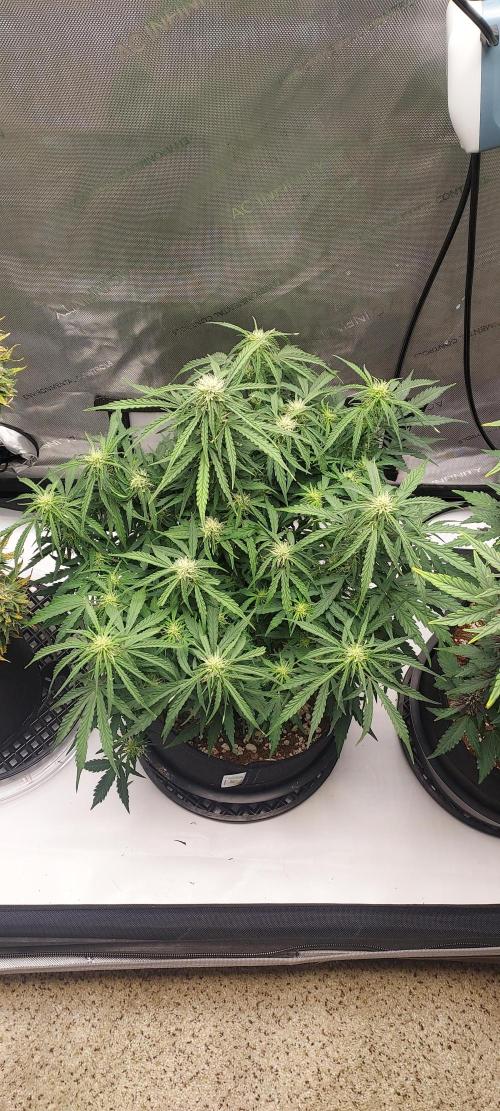
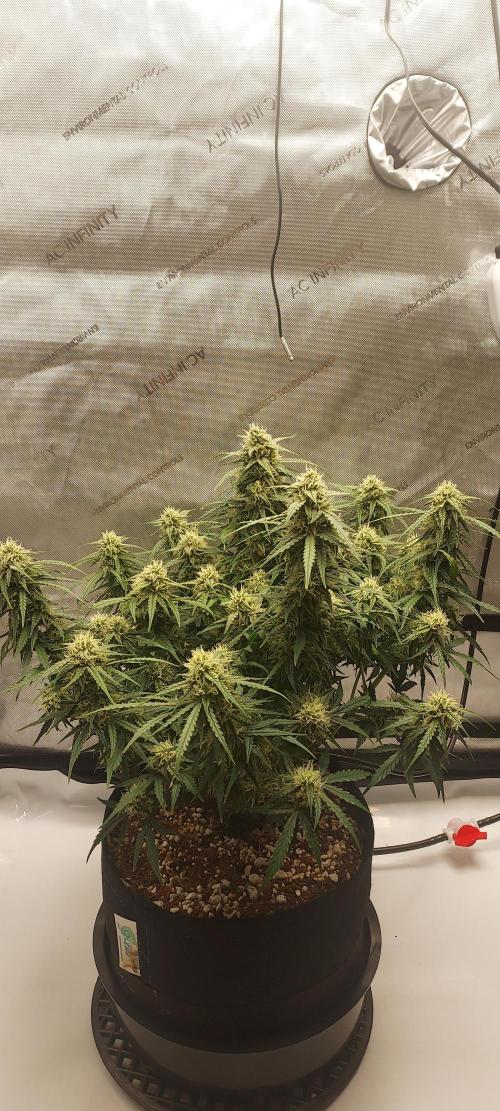
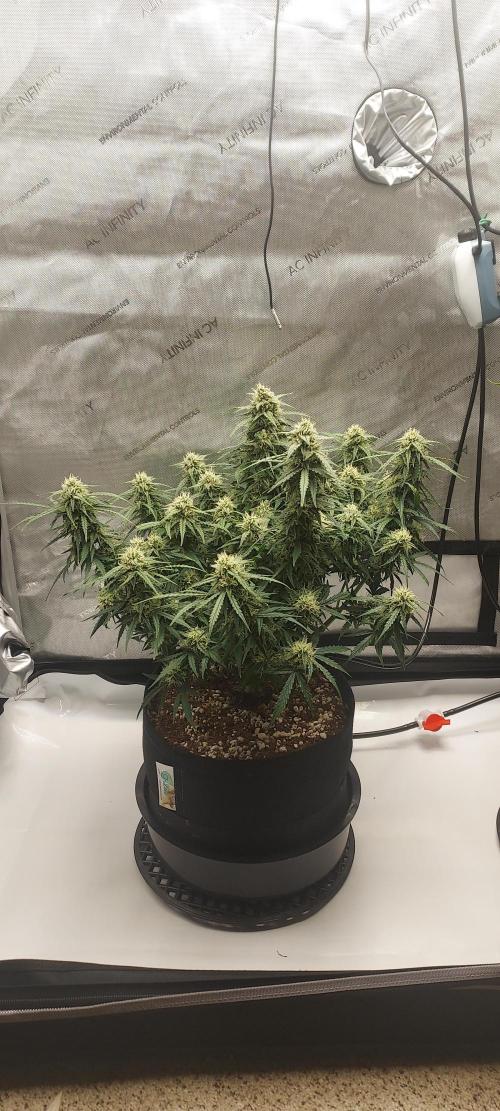
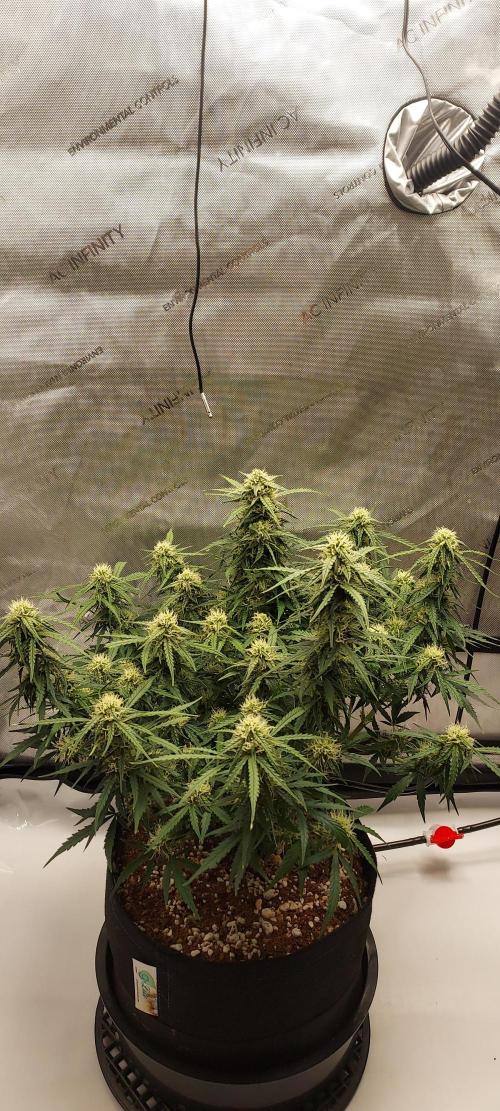
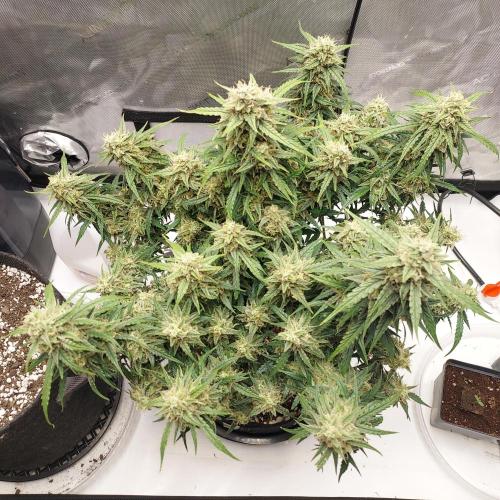
She is looking bushy and healthy! Maybe a bit droopy, but I figure that it because she is consistently getting the water she needs with th autopots.
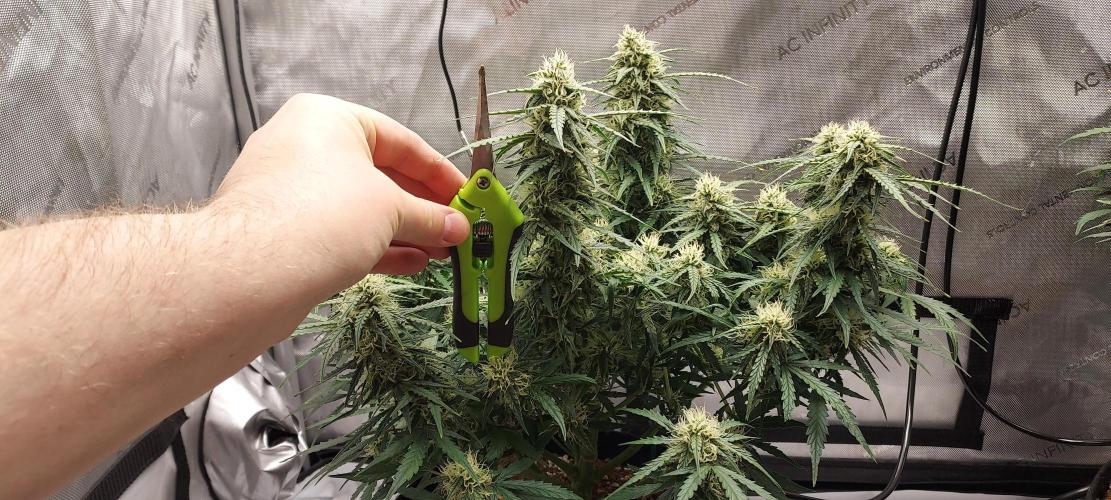
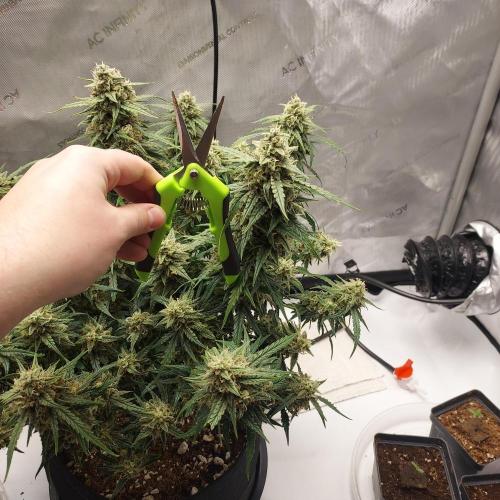
I am doing some slight defoliation here and there but and really trying to keep the stress down.
Super happy thus far with the autopots, let's keep it going!
5 likes
2 comments
Share
7
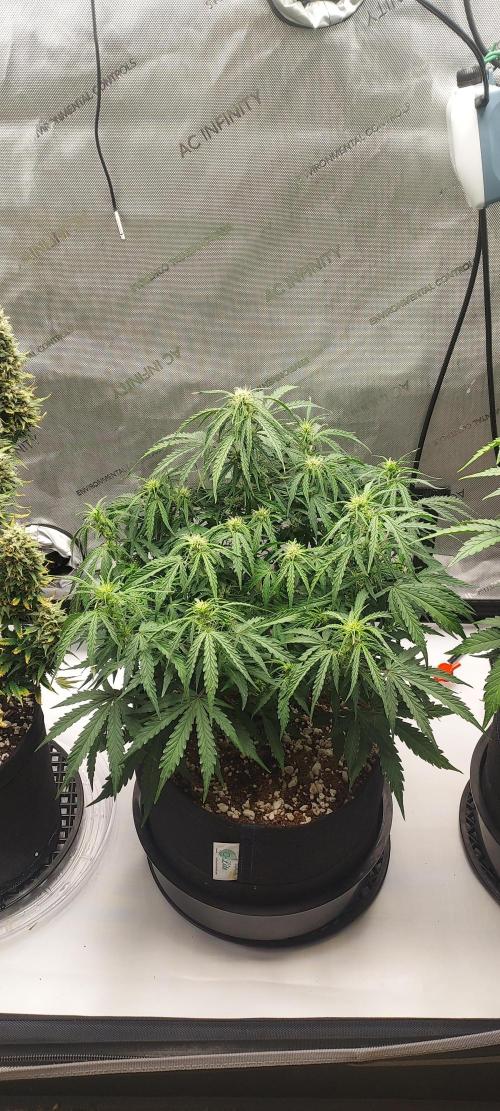
Week 7. Flowering9mo ago


50.8 cm
Height
26 °C
Day Air Temp
5.9
pH
Normal
Smell
550 PPM
TDS
50 %
Air Humidity
18 °C
Solution Temp
11.36 l
Pot Size
121.92 cm
Lamp Distance
Nutrients 7
Stash Blend
0.65 mll
Support 4-0-0
1.664 mll
Grow 0-1.5-4
0.343 mll
Aeromatics Things are going well, honestly I am SOLLLLLD on the autopots. I have never had an easier grow. I have really struggled over the last 10 or 15 plants finding the right balance between using distilled water, soil, watering frequency, and nutrients. I have had 0 of those issues using autopots.
I will be buying a set of 4 to use fr my 4 x 4 tent when I am finished with my next 4 x 4 grow!
There wasn't much going on over the last 12 days except a reservoir change and a nutrient shift to a full flower load out! I rinse the reservoir and added 6 gallons of distilled water mixed with:
38 ml Ventana Plant Science Support
8 ml Ventana Plant Science Grow
10 ml Ventana Plant Science Flower
6 ml Ventana Plant Science Expand
6 ml Ventana Plant Science Structure
4 ml Ventana Plant Science FlaVuh
I also experimented a bit with adding some Stash Blend to the reservoir for this one. Since it is a power with some larger possible solids, I wanted to pre-dilute it and strain it out before adding it to the reservoir.
In order to do this, I slightly warmed 1 cup of distilled water and added a tablespoon of Stash Blend, mixed it up a bit, strained out any solids, and added her into the reservoir. It worked great!
My final EC for this 6 gallons was 1.0 and I have been keeping my PH between 5.8 and 6.0, checking daily and bringing it down, as it usually tends to drift up throughout the day.
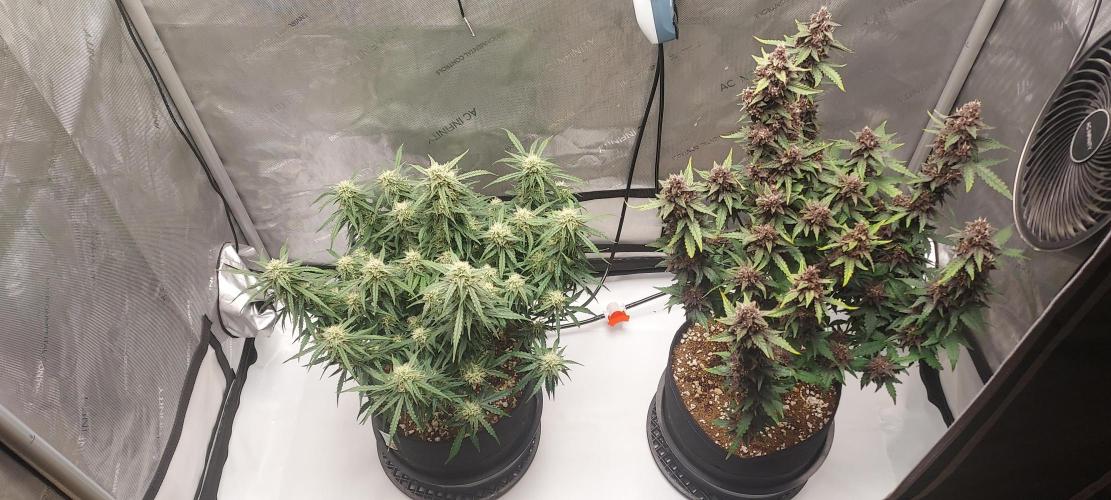
I think 1.0 to 1.1 is as high as I want to take this batch, since my Pink Kush CBD shows a bit** of burn on the tips. I could see how you would maybe want separate reservoirs if you are doing different plants in autopots as my Northern Lights could maybe tolerate another .1 or .2 EC, but I think things are looking great right now!
My next fill will be closer to 1.1 for a nice full flower push to ripen Pink Kush CBD, as I think she will finish first.
I don't want to jynx this one, but I am very happy thus far and am really becoming a believer in both coco as well as autopots when using these types of nutrients!!!
3 likes
1 comment
Share
8
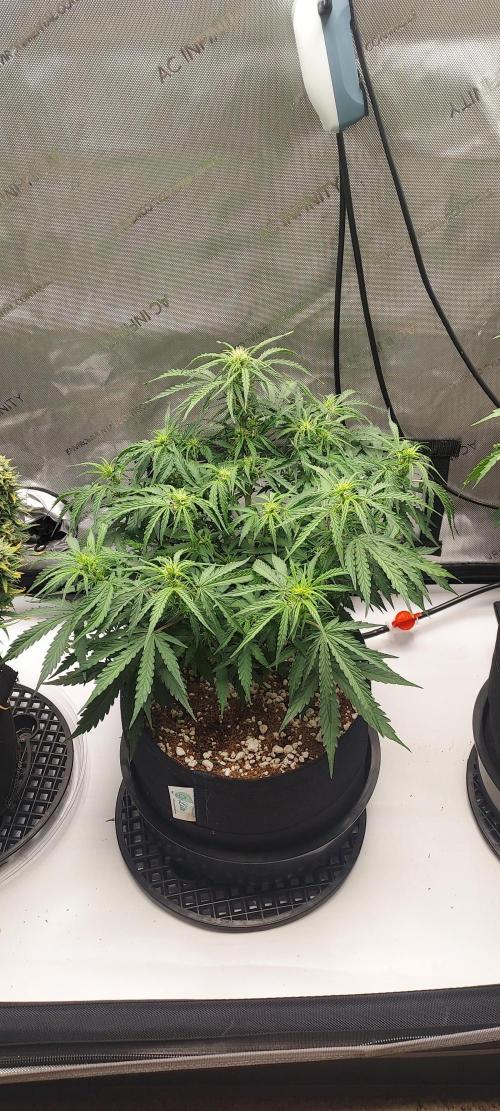
Week 8. Flowering9mo ago


50.8 cm
Height
26 °C
Day Air Temp
5.9
pH
Strong
Smell
550 PPM
TDS
50 %
Air Humidity
18 °C
Solution Temp
11.36 l
Pot Size
121.92 cm
Lamp Distance
Nutrients 6
Support 4-0-0
1.506 mll
Grow 0-1.5-4
0.185 mll

Expand 0-4-4
0.449 mll
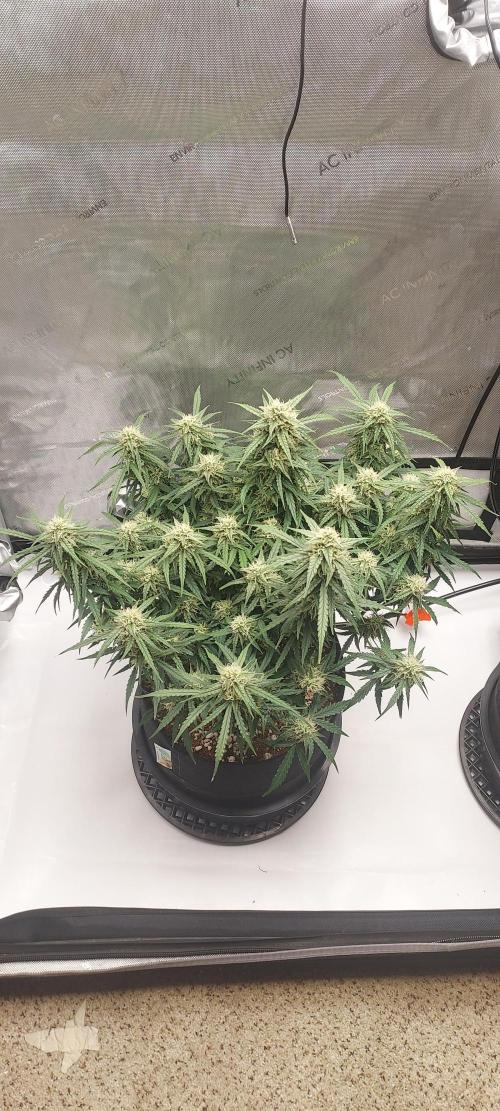
Aeromatics Great week thus far!
The autopots continue to not disappoint at all!
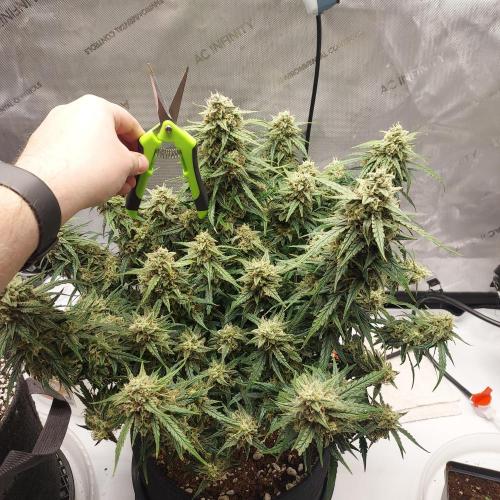
I've been defoliating a bit here and there on both the Northern Lights as well as the Pink Kush CBD (I officially added her to the grow diary, she looks too great to leave off).
My recipie for this weeks fill (Day 60) was for 7 gallons:
40 ml Ventana Plant Science Support
10 ml Ventana Plant Science Grow
12 ml Ventana Plant Science Expand
10 ml Ventana Plant Science Structure
30 ml Ventana Plant Science Flower
3 ml Ventana Plant Science FlaVuh
EC came out to 1.05 and I have been doing well at keeping ph at 5.8 with a daily check.
Pink Kush CBD is heading into the final two weeks I think, but I could be pulling her within a week if the trichomes take a turn towards amber! She smells so fruity it is insane!
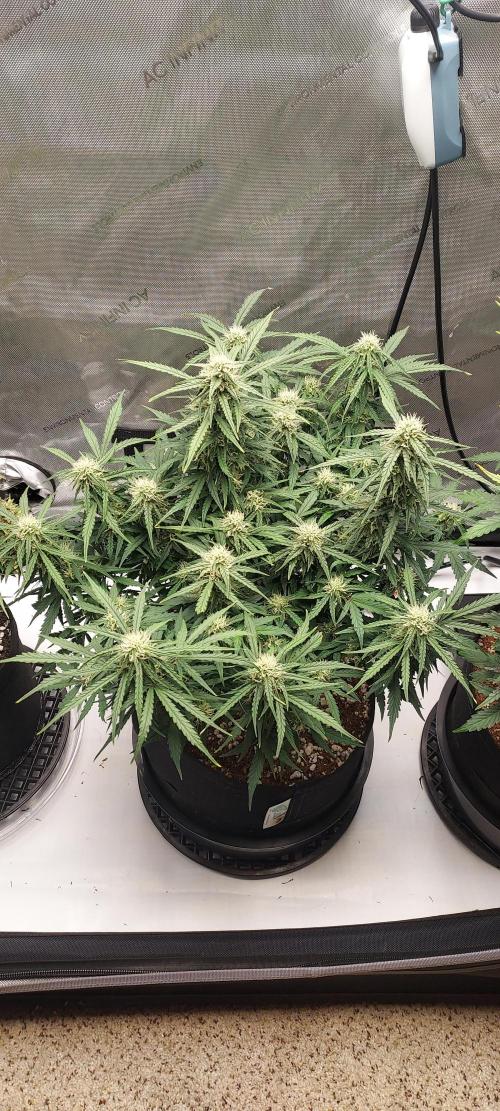
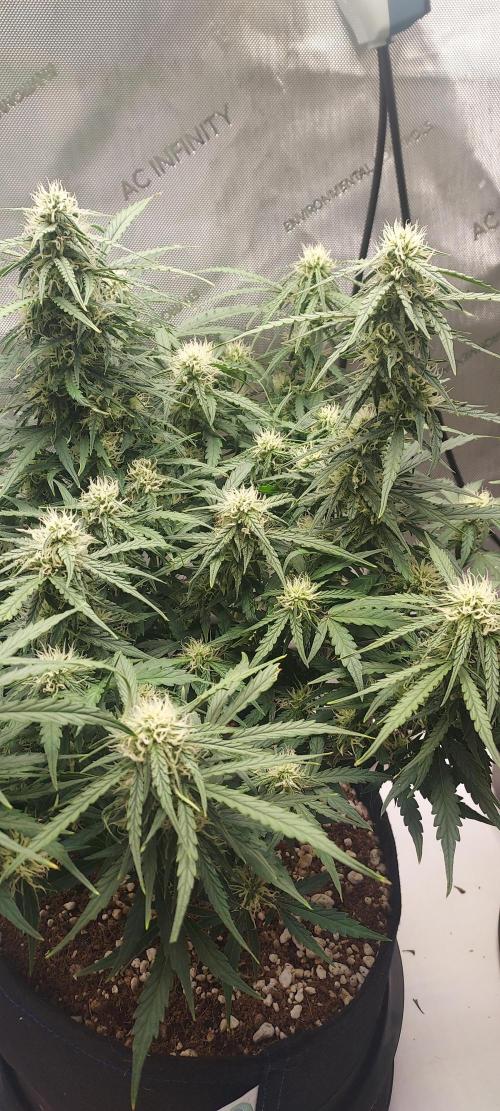
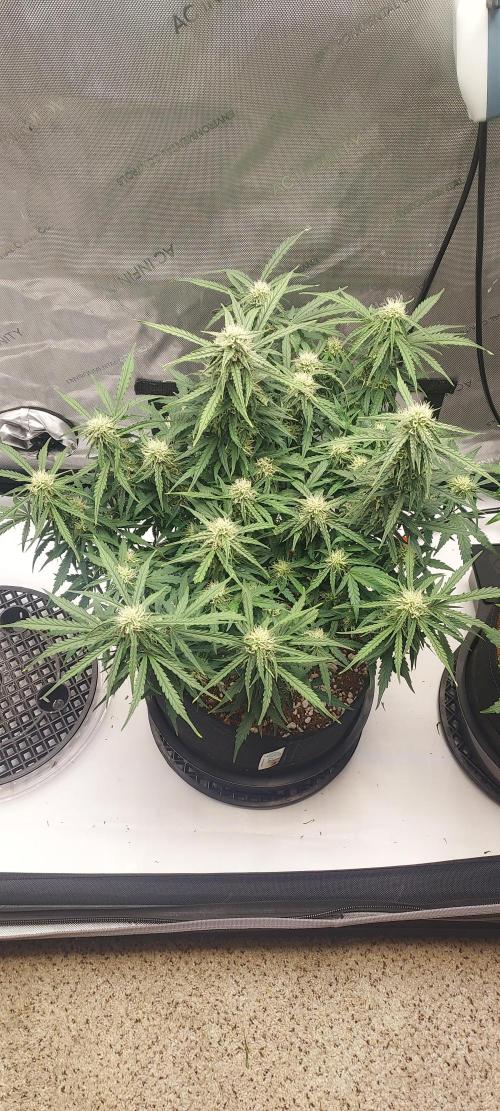
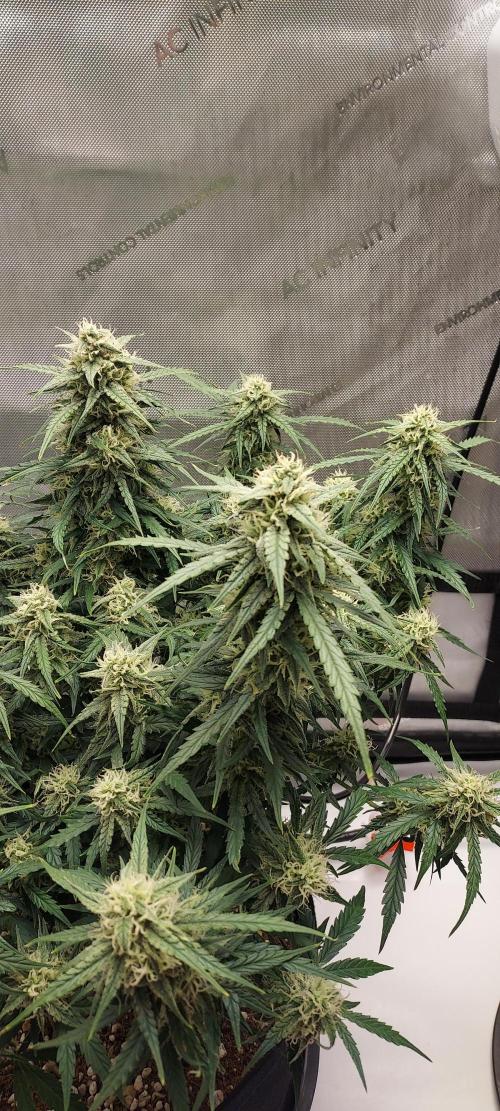
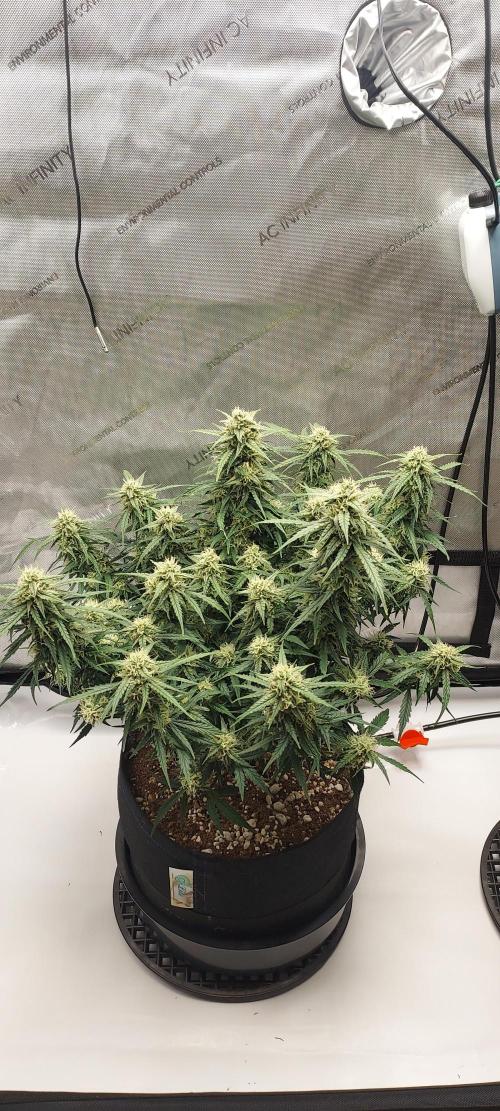
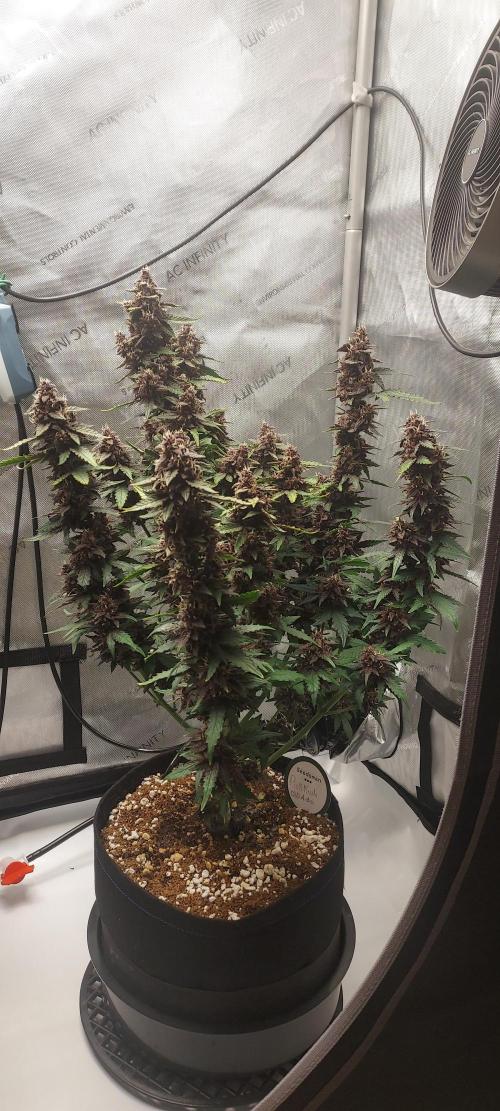
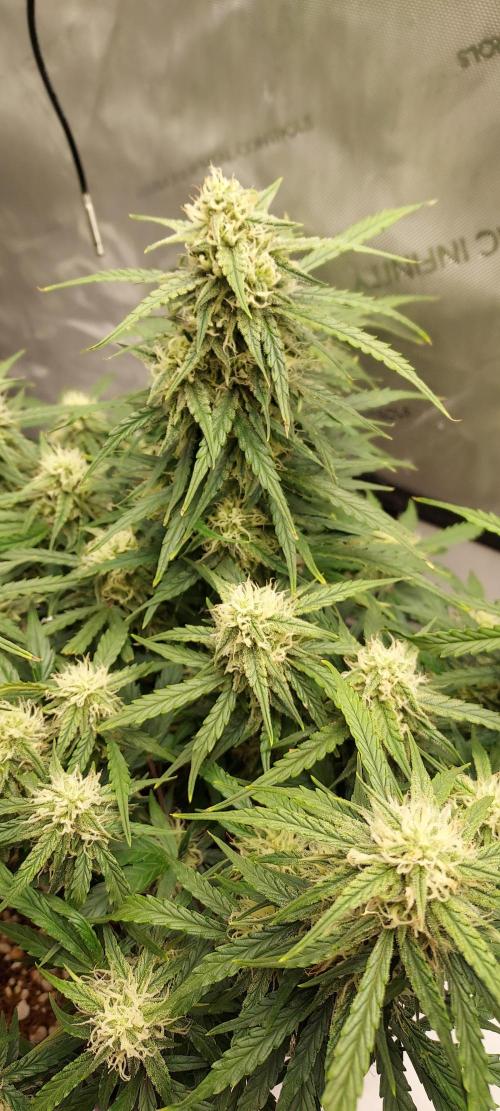
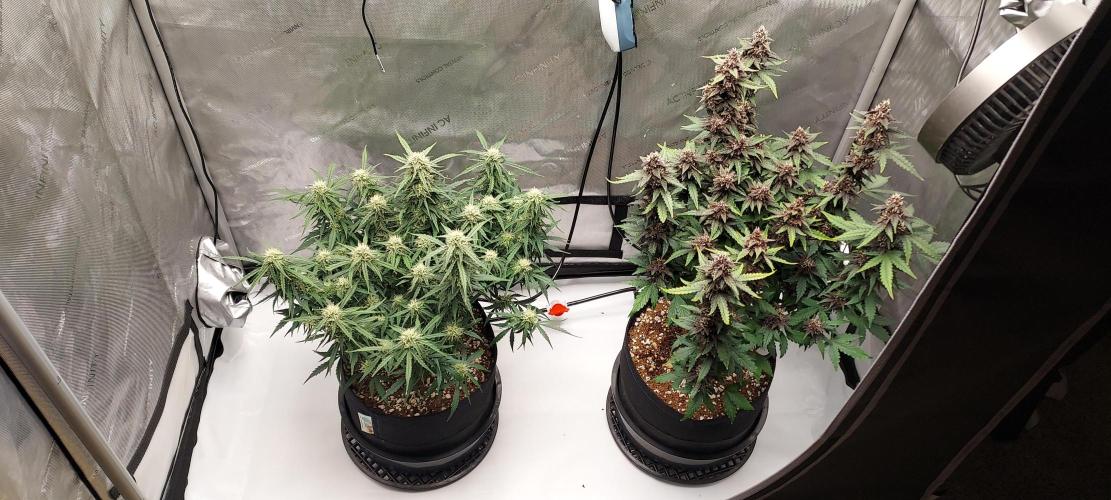
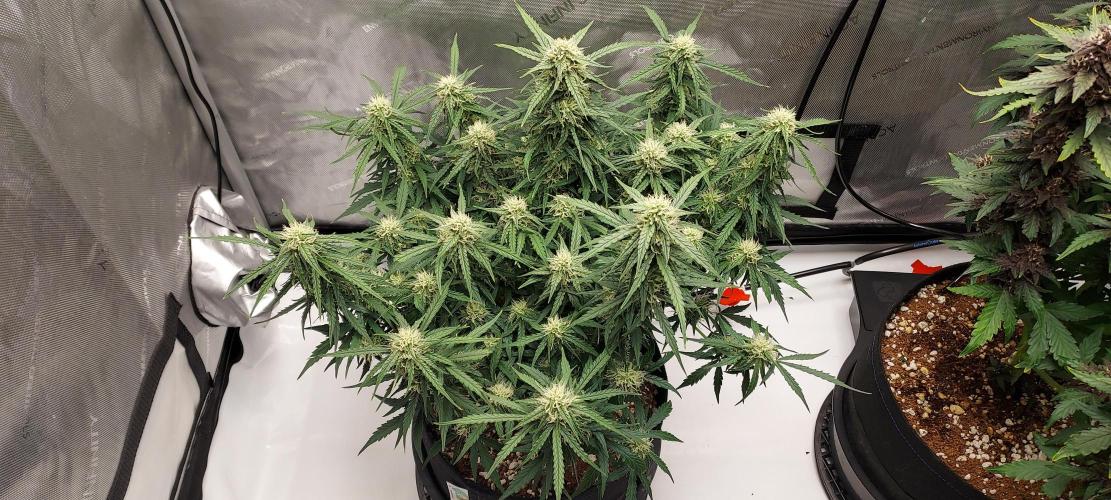
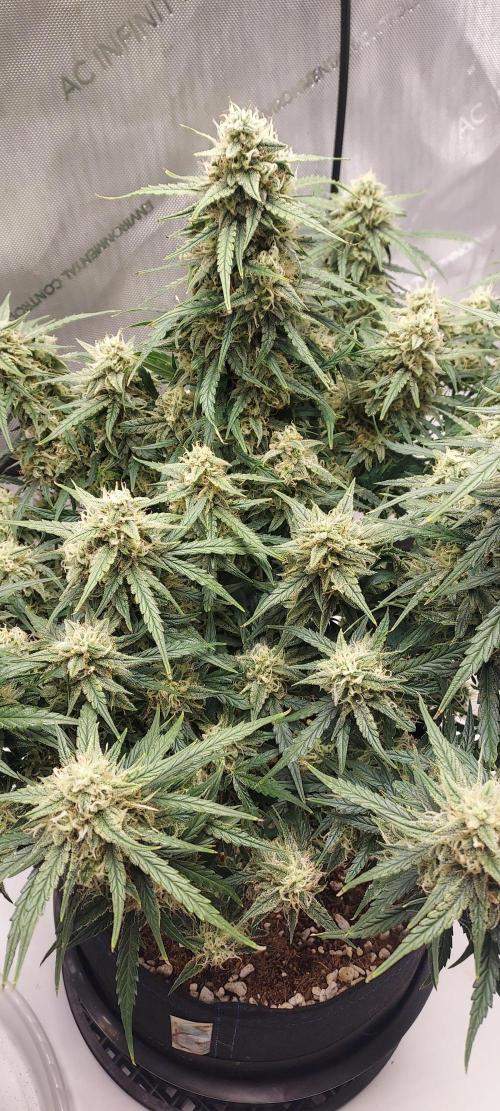
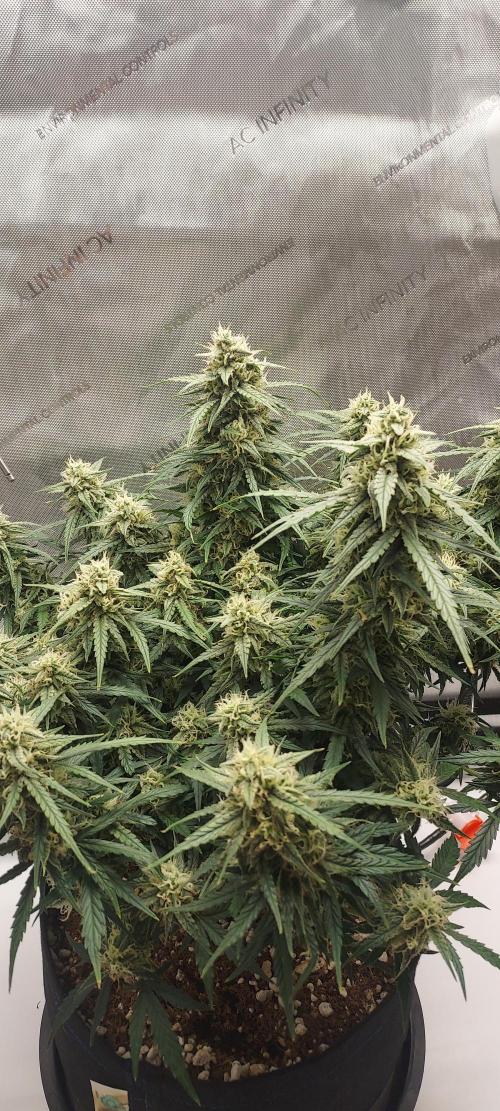
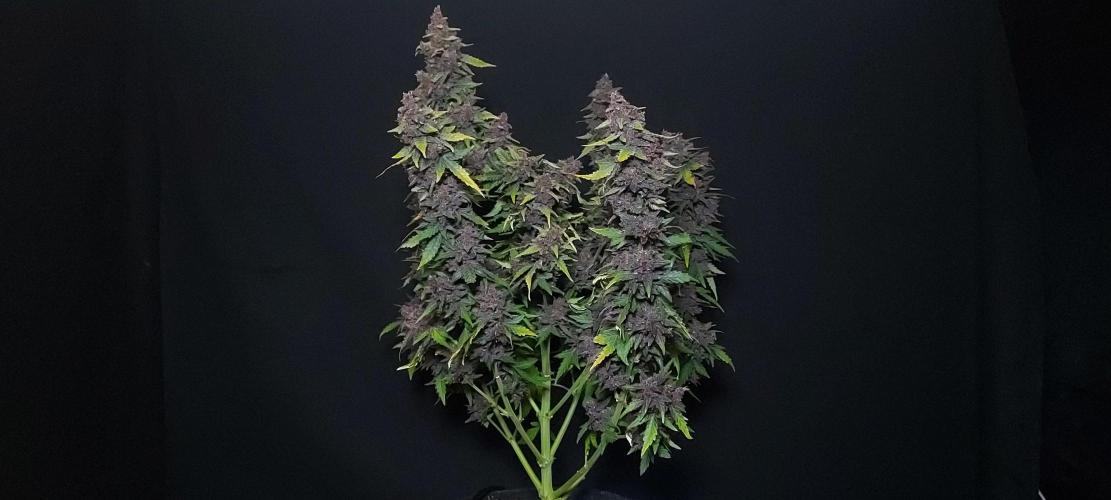
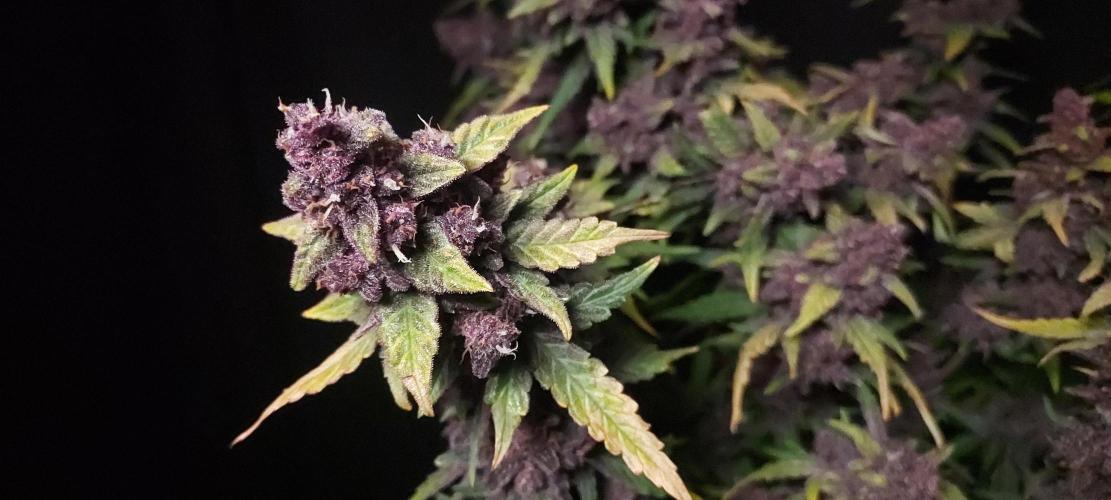
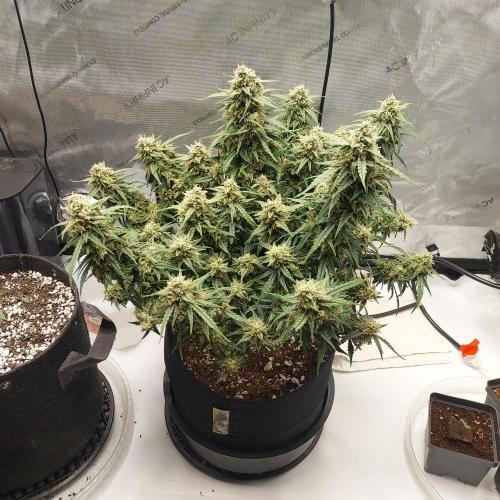
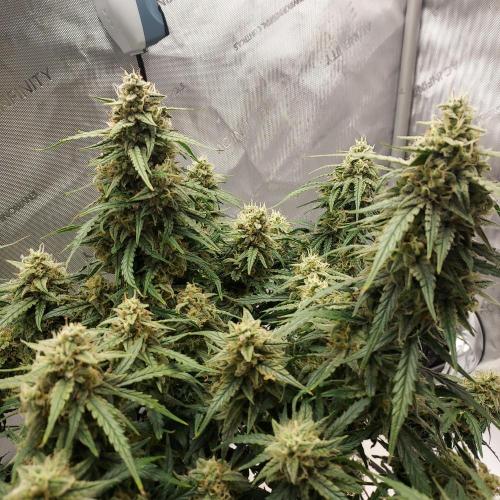
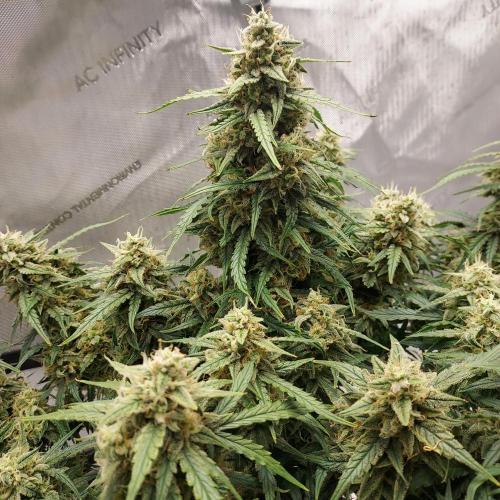
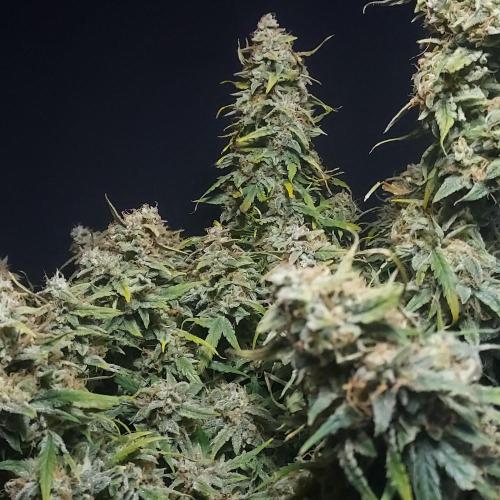
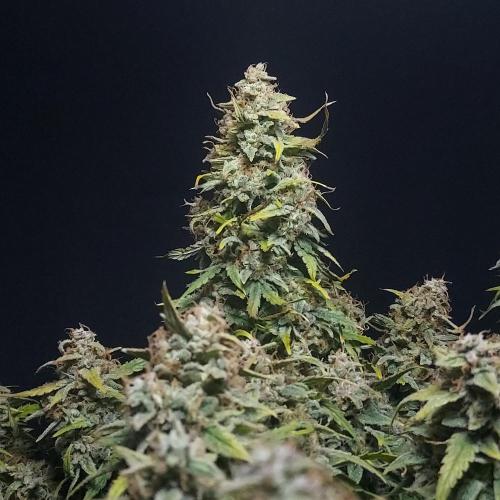
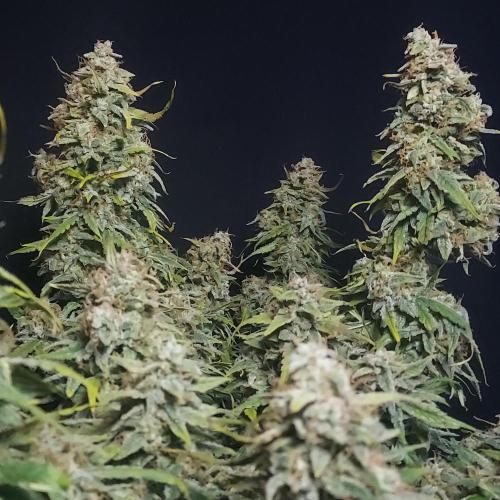
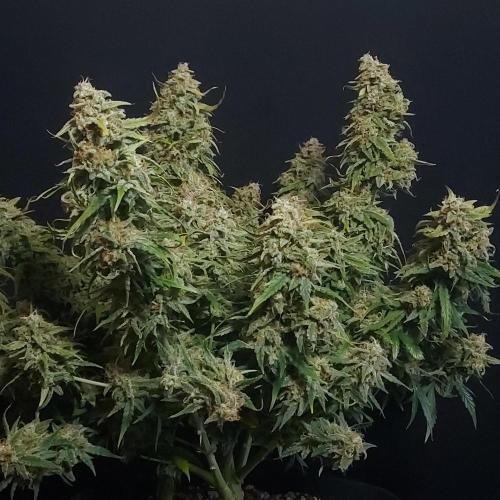
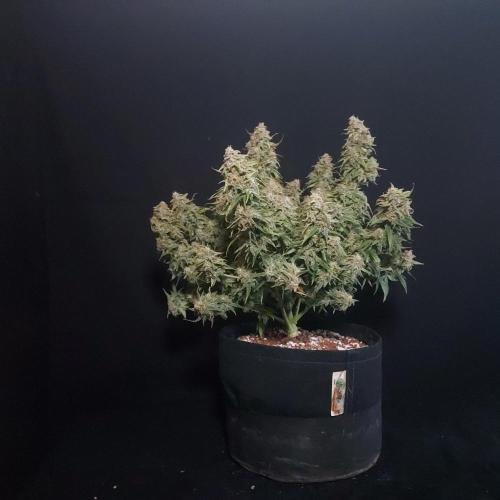
Northern Lights is definitely a few weeks away as her hairs are just now starting to turn brown. However, her buds are starting to stack and ripen, and wow is she going to be built thick. Whew I can't wait for her to finish!
9 likes
4 comments
Share
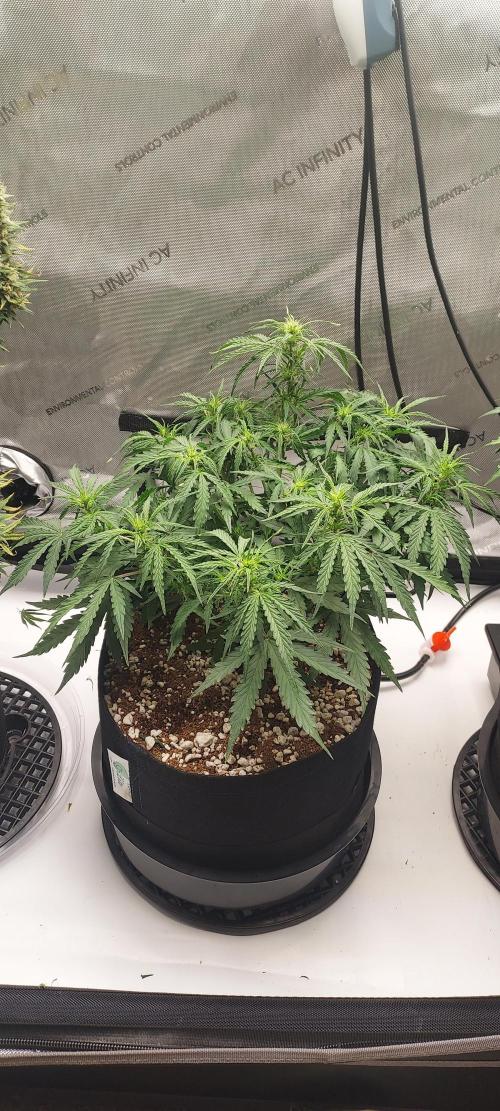
9
Week 9. Flowering9mo ago
50.8 cm
Height
26 °C
Day Air Temp
5.9
pH
Strong
Smell
575 PPM
TDS
50 %
Air Humidity
18 °C
Solution Temp
11.36 l
Pot Size
121.92 cm
Lamp Distance
Nutrients 6
Support 4-0-0
1.506 mll
Grow 0-1.5-4
0.185 mll
Expand 0-4-4
0.449 mll
Aeromatics We are still rocking the same nutrient loadout as the previous week. I did a 7 gallon fill but I cut off Pink Kush CBD the day after filling it up (Day 60).
That left Northern Lights with 6-ish gallons to drink and she has done her best, but the reservoir has started to turn a bit, and she has definitely slowed down her consumption as she hits late flower and her ripening stages.
Tomorrow (Day 69), I'll refill the autopot reservoir with a 3 gallon batch and I am thinking I'll taper down the ec to .9 or so and push some more ripening nutrients... It's my first go at this so I'll do a bit of research on it!
If I can get it right, I think I'll get a fat bit of Northern Lights!
4 likes
comments
Share
9
Week 9. Harvest9mo ago
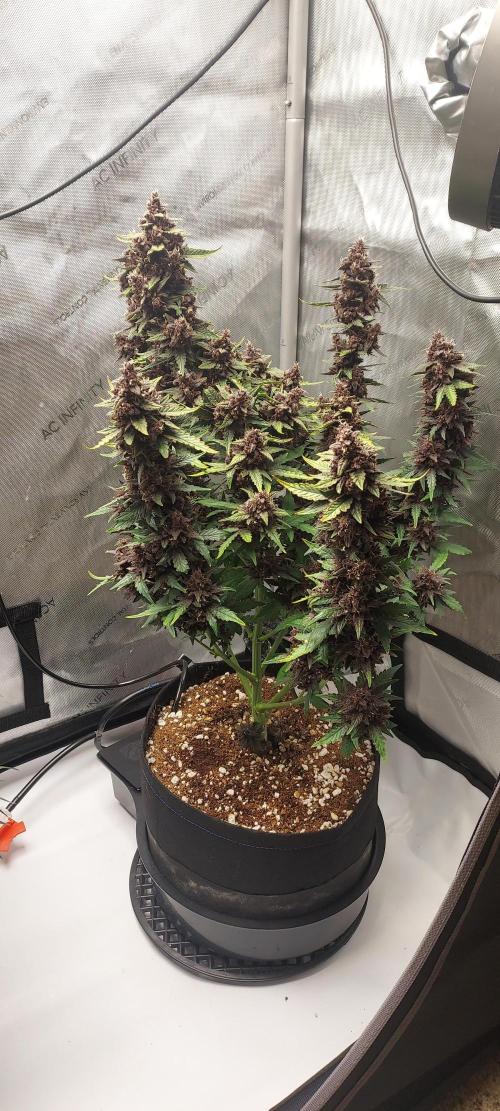
Happy Harvest Day!


10/10
Rated
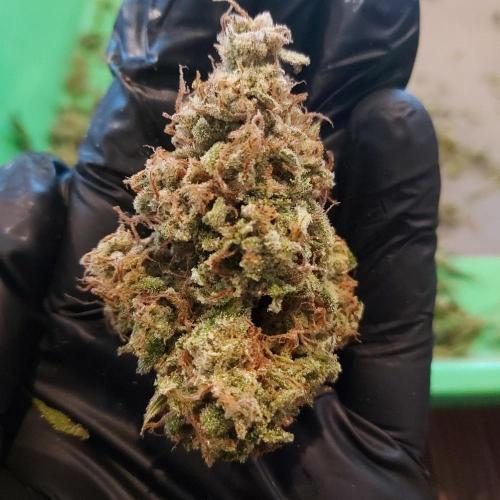
Absolutely stunning plant. Easy to grow and smells absolutely delicious. I never pushed above 1.1 ec, and when I did, she showed signs of a bit of burn, so that would be my recommended limit.
She did not disappoint and I can't wait for her to dry and cure. I have a feeling she is going to help my pain big time!
I'll be back with dry weight!
Show more
Translate
Spent 59 days
Ger Veg Flo Har
1
Plants
Easy
Difficulty
Height
Day air temperature
Air humidity
PPM
PH
Solution temperature
Pot size
Lamp distance

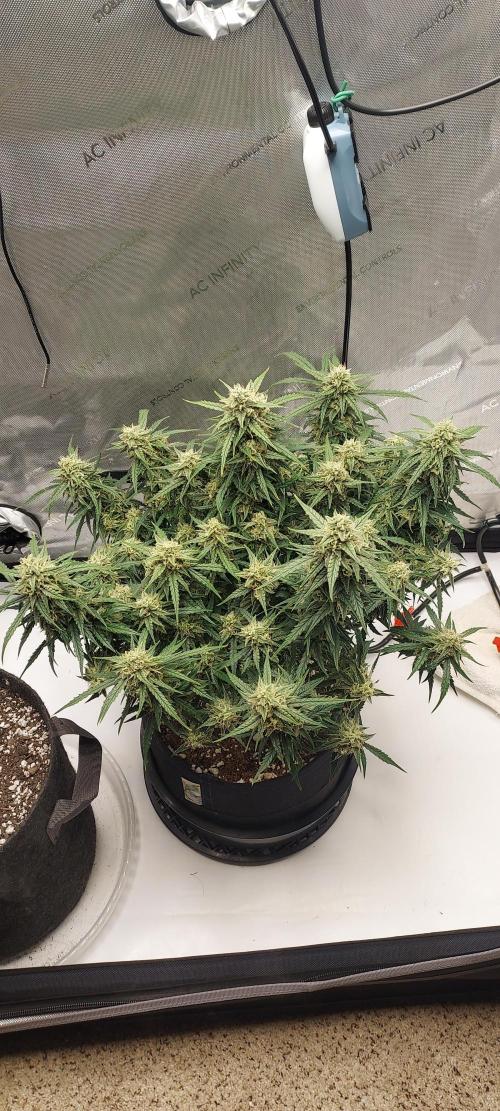
Aeromatics I just let her dry out between day 60 and day 66 with no water feeding into the coco. She fed on some of the top leaves and thickened up a bit heading into harvest. I could tell the smell was right when I took her out on day 66!
She will sit in a tent for 24 hours of darkness and then I will pull and hang dry her for as long as I can as a whole plant before breaking her down.
I'll be back with weight and some more pictures!
14 likes
7 comments
Share
Equipment Reviews


10
Week 10. Flowering8mo ago


50.8 cm
Height
23 °C
Day Air Temp
5.9
pH
Strong
Smell
550 PPM
TDS
50 %
Air Humidity
18 °C
Solution Temp
11.36 l
Pot Size
121.92 cm
Lamp Distance
Nutrients 6
Support 4-0-0
1.506 mll
Grow 0-1.5-4
0.185 mll
Expand 0-4-4
0.449 mll
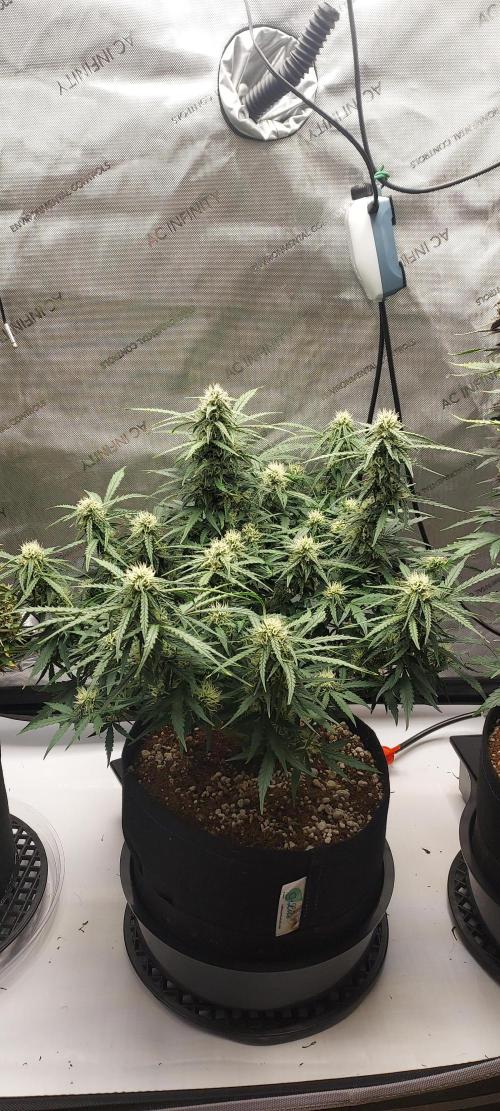
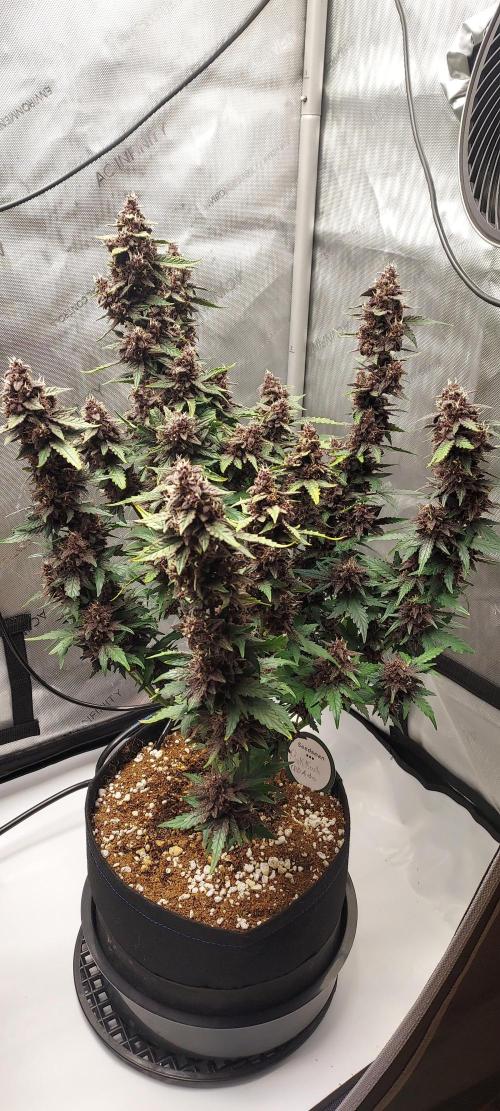
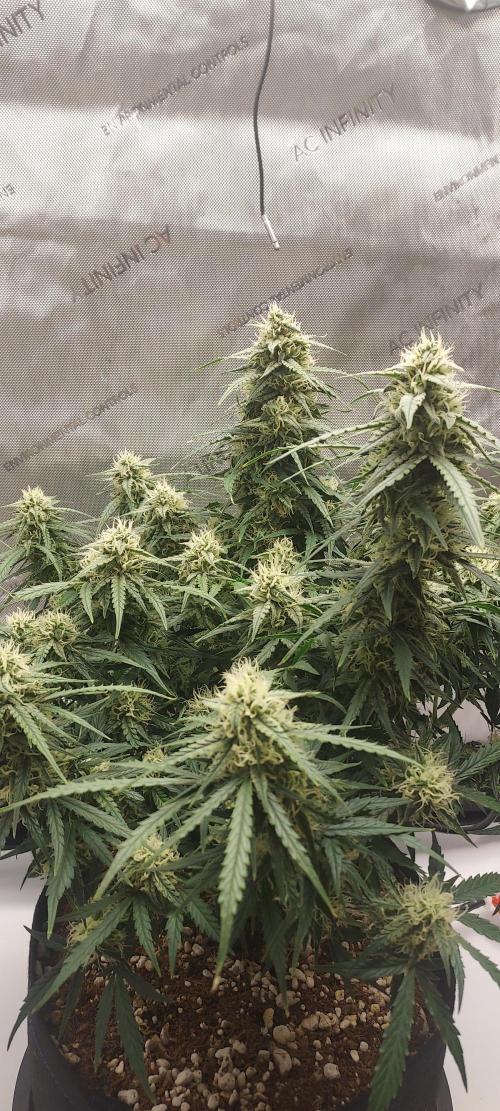
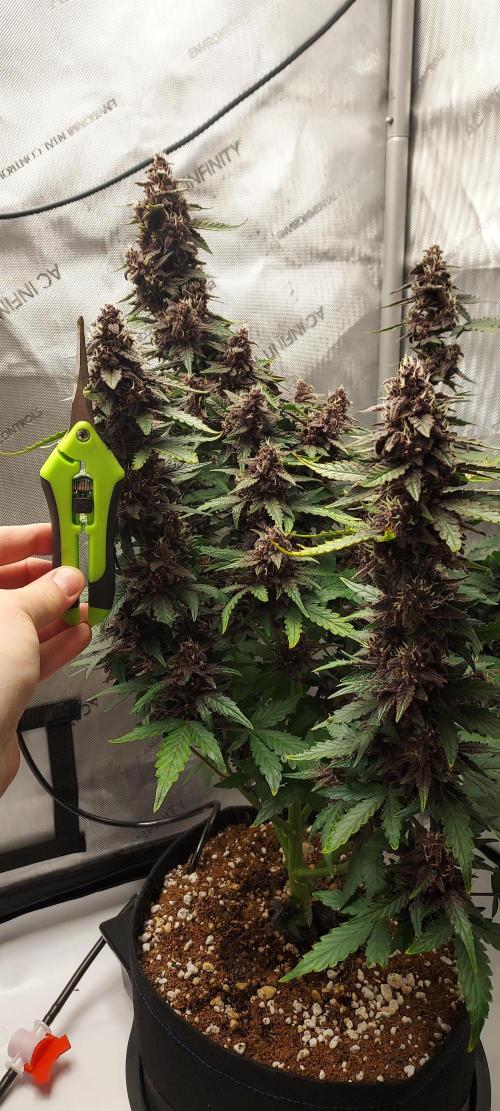
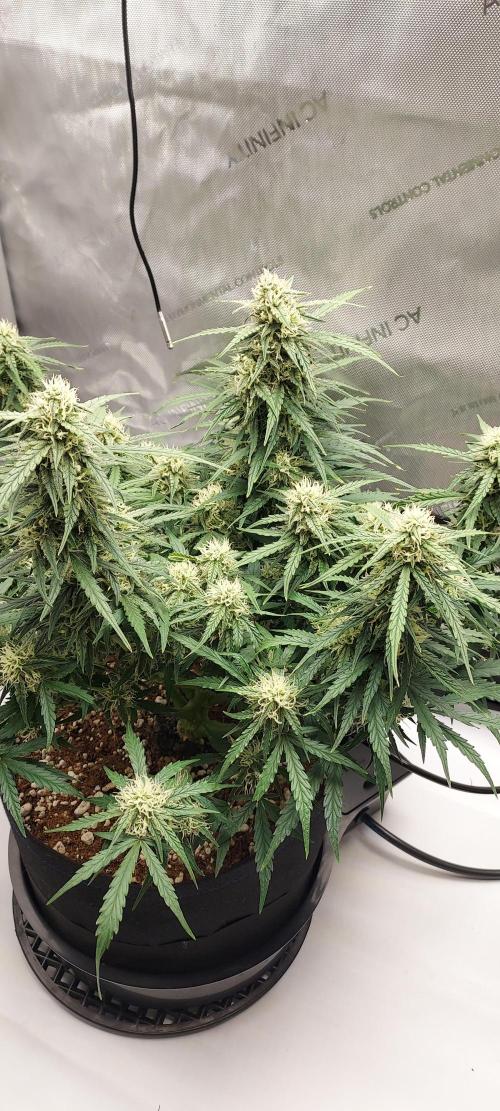
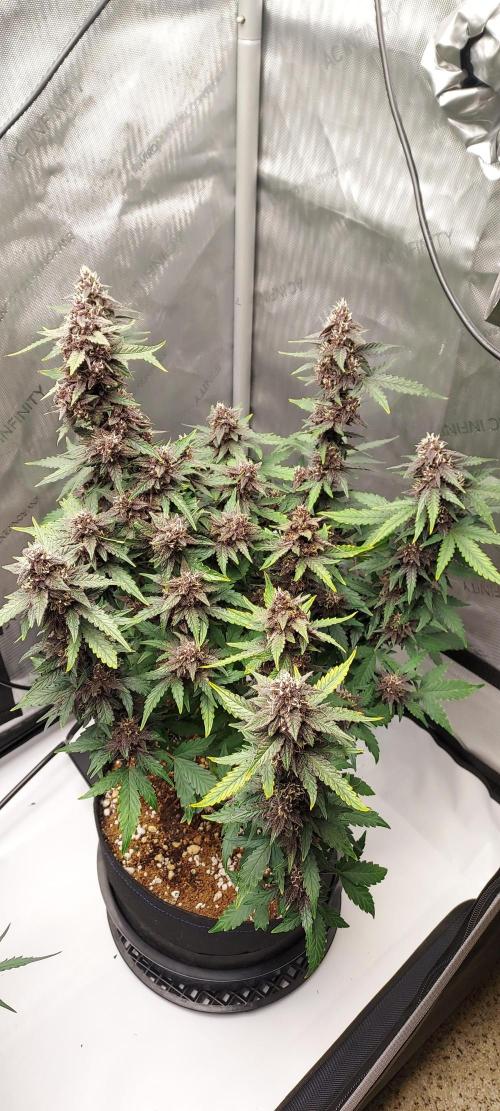
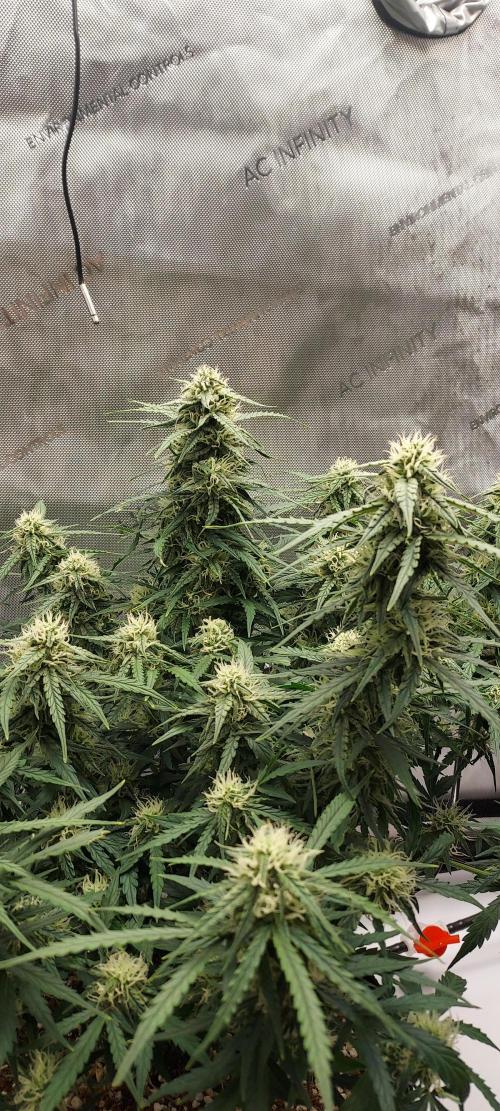
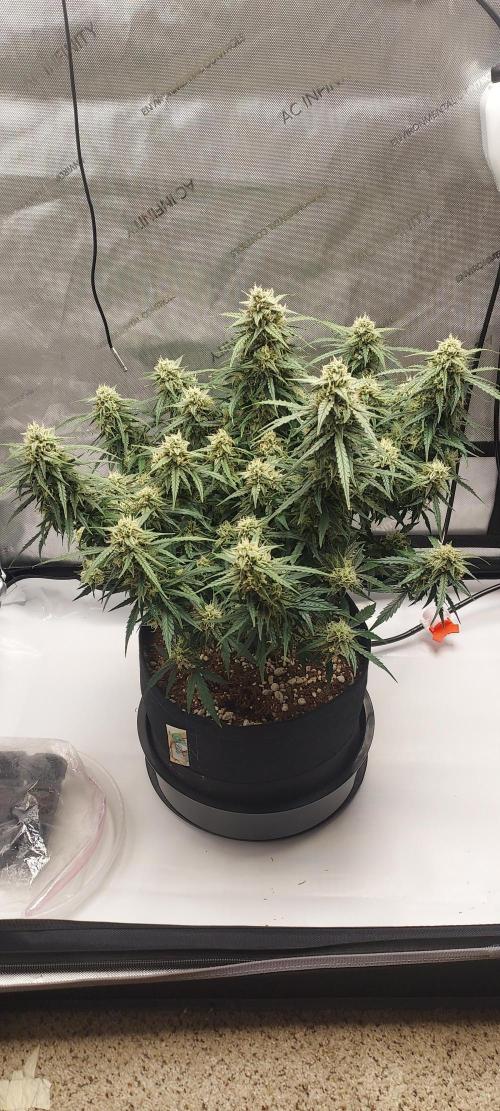
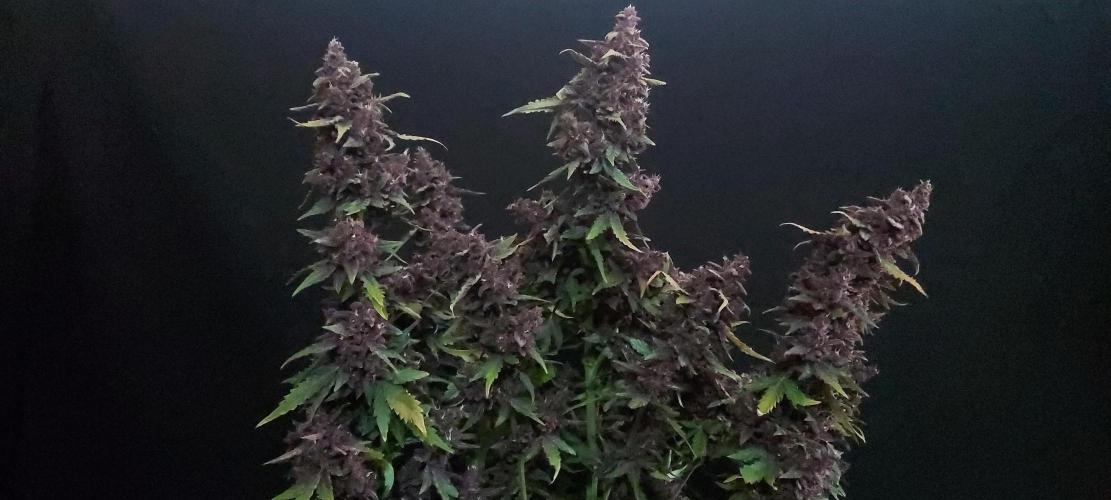
Aeromatics It's day 75, the reservoir has been shut off! She is looking ready!!
This week saw her continuing to drink from the same reservoir as before, her consumption has drastically decreased throughout the last week. It's pretty crazy to actually see, measurably, drinking slow to a crawl in the final days.
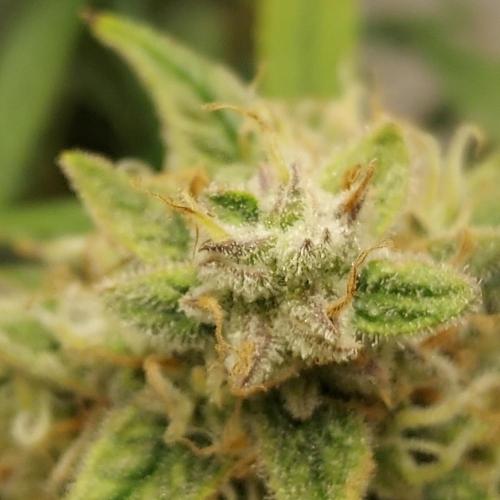
Her trichomes are beautifully cloudy and I saw around 1% amber as of day 73, so I let her go another day or two drinking from the reservoir before I made the decision to cut her off and let her pull the final nutrients from the coco and her amazing foliage.
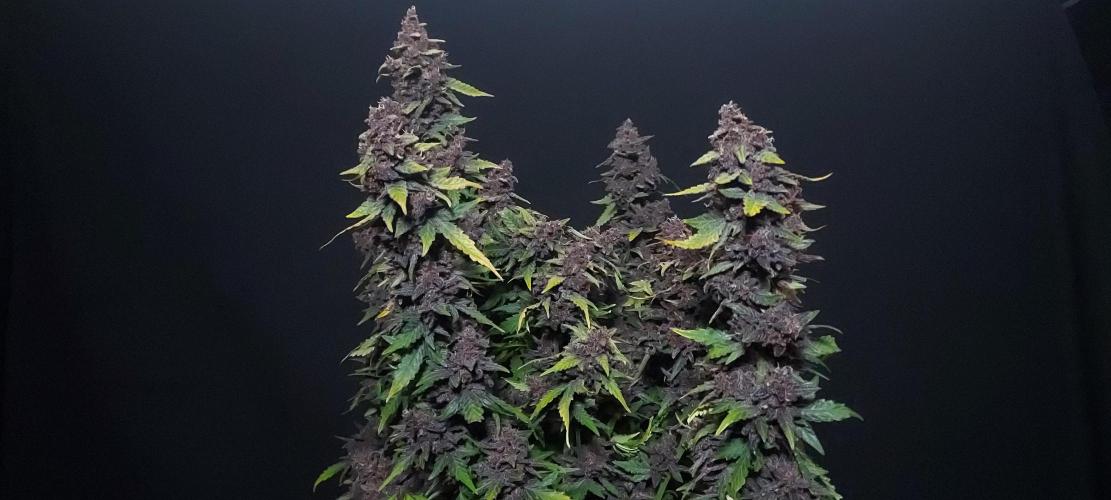
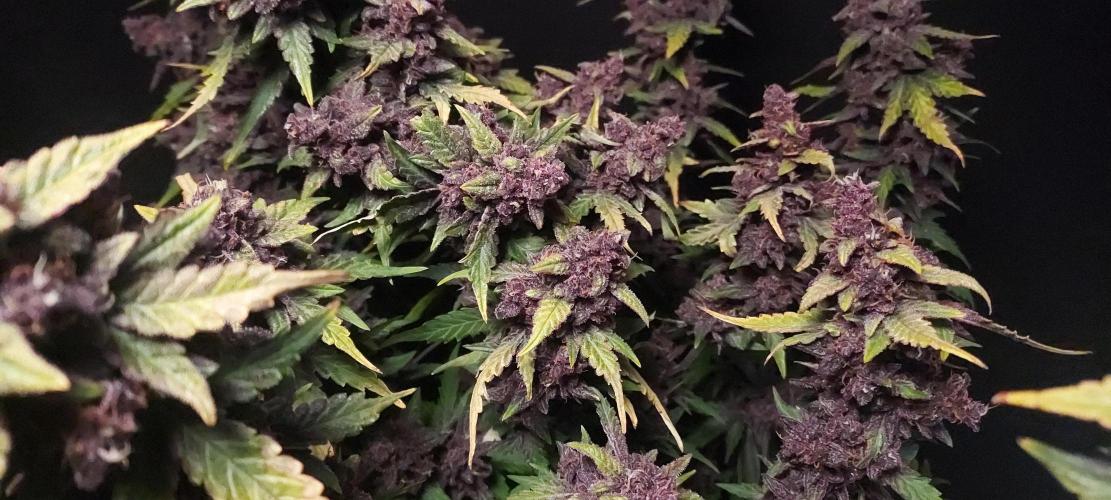
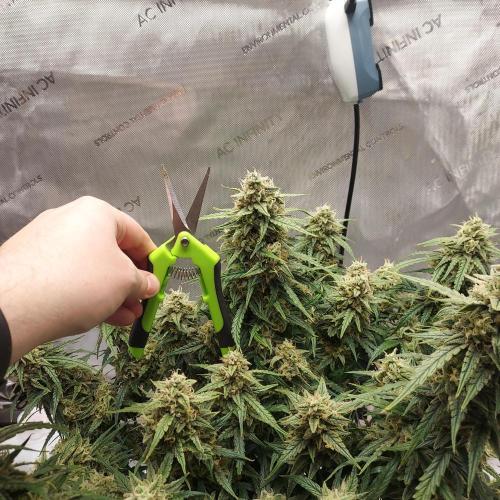
I can't wait to see how she ripens! The smells are amazing, and the colas are some of the fattest I have produced for autoflowers. I think I will be pulling her in the next 3 to 5 days and I can't wait to update you all with the results!
7 likes
comments
Share
11
Week 11. Harvest8mo ago
Happy Harvest Day!

10/10
Rated
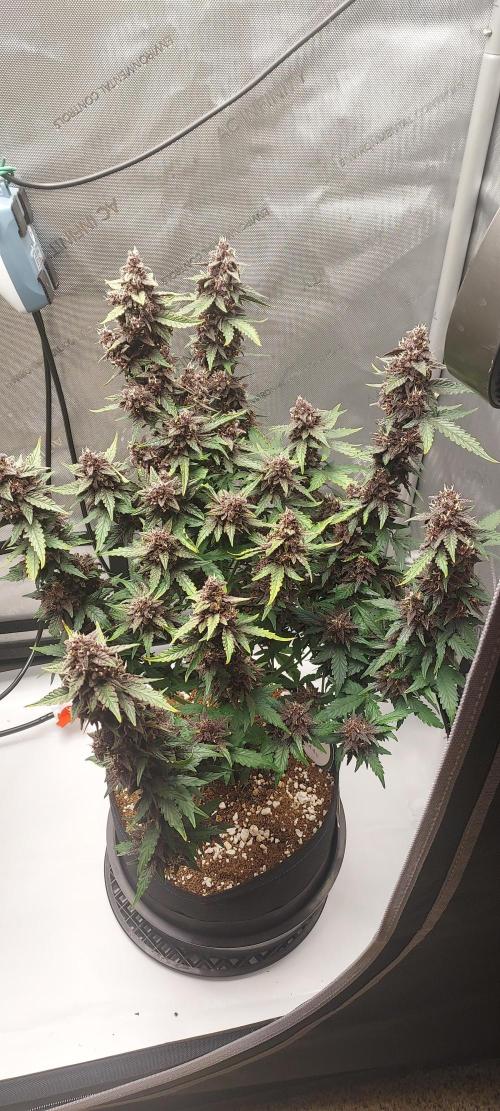
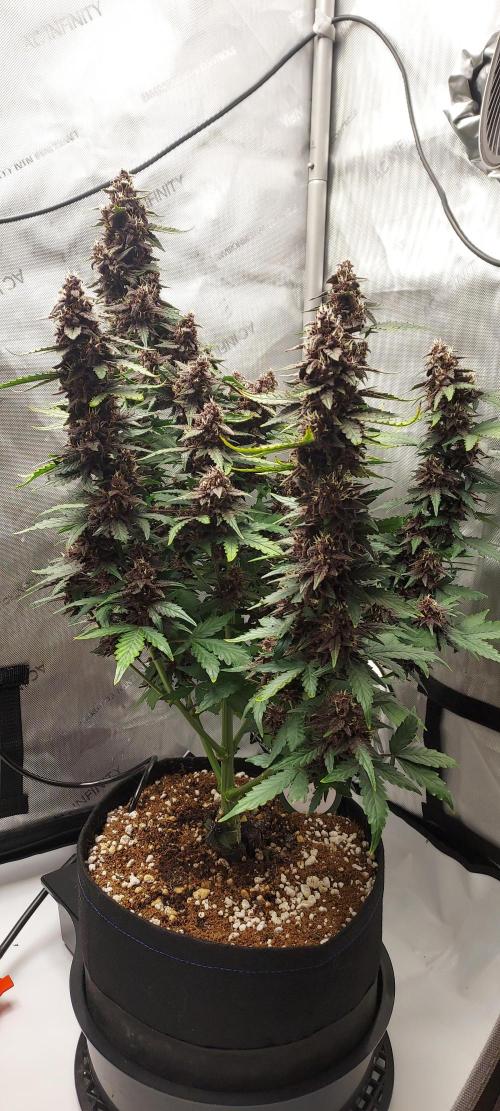
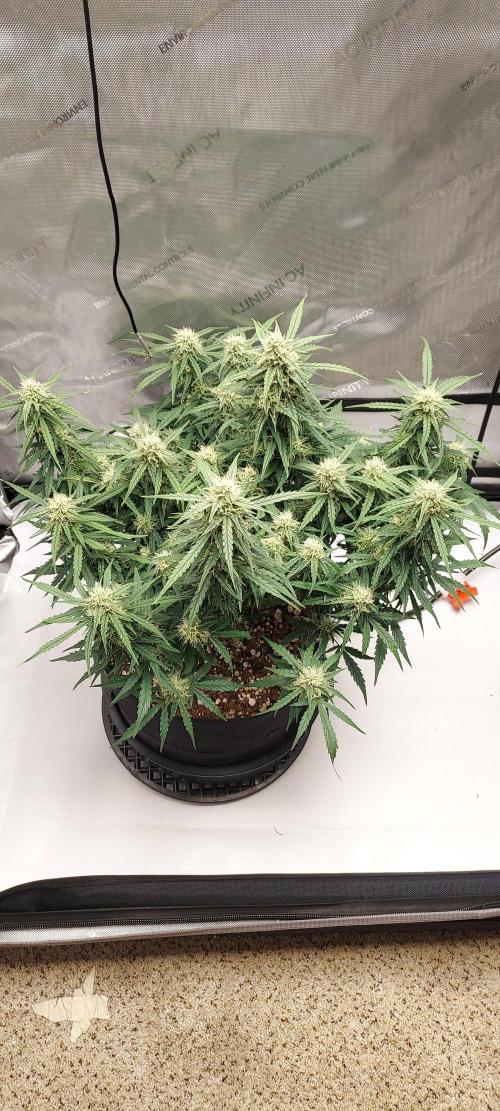
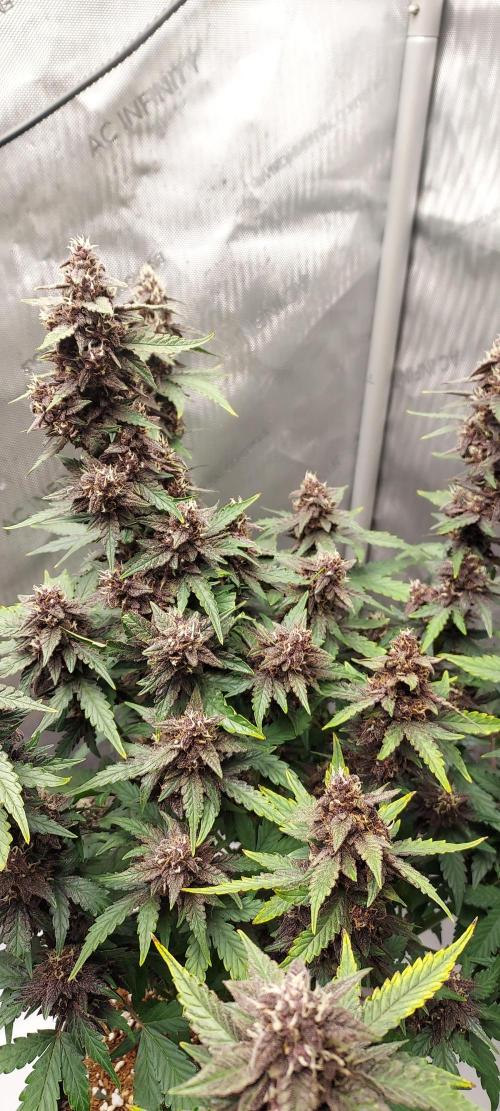
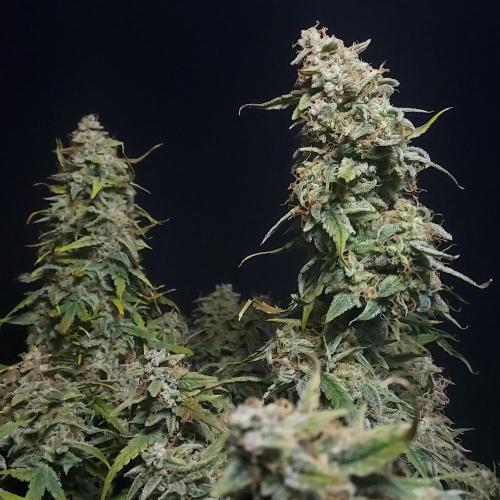
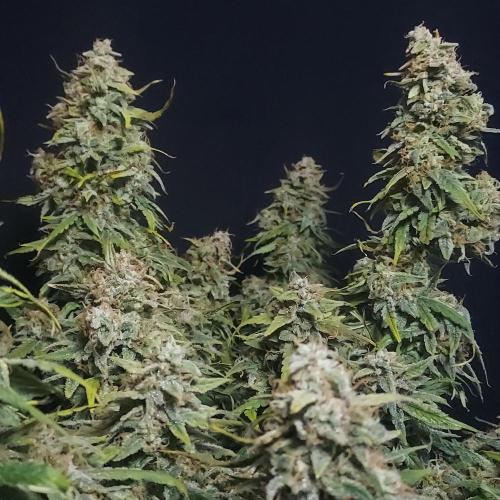
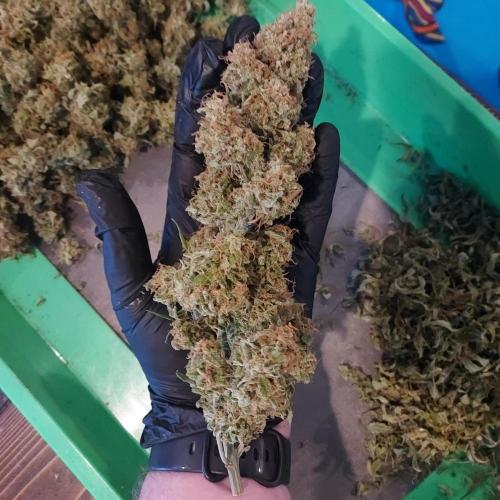
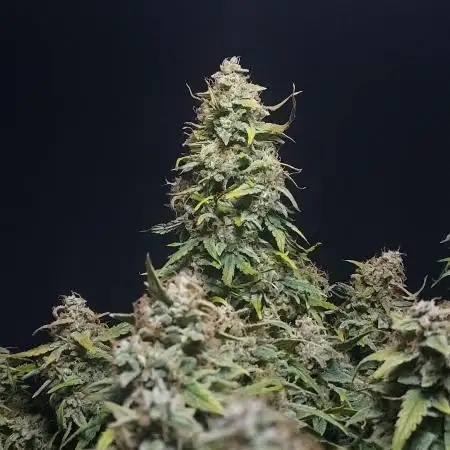
What a classic, what a beauty! There's a reason she's so popular.
Now this was my first autopot grow, but it could not have gone better. I rode a high of 1.1 ec, and was rewarded with a beautiful indica bush.
I'll be back in a week or so for a dry-weight report, but given her density, I may be headed towards an auto yield personal best!
Show more
Translate
Spent 59 days
Ger Veg Flo Har
99 g
Bud dry weight per plant
1
Plants
Easy
Difficulty

Relaxed, Sleepy
Positive effects

Pain, Anxiety
Medical effects

Herbs, Woody, Pine
Taste
Height
Day air temperature
Air humidity
PPM
PH
Solution temperature
Pot size
Lamp distance

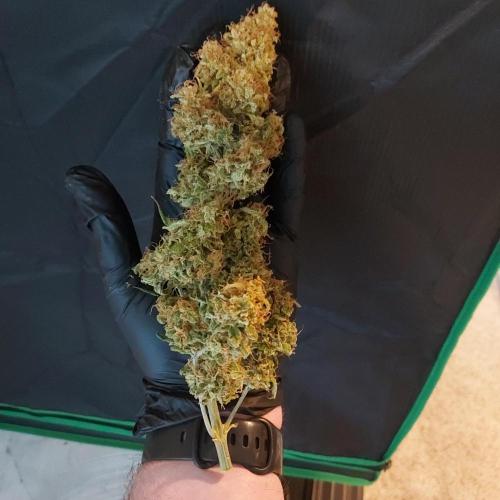
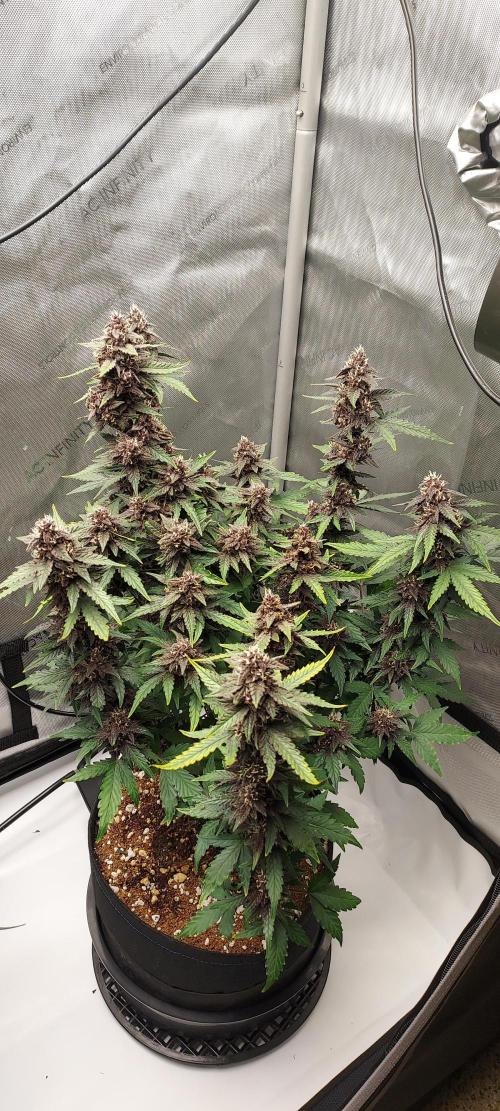
Aeromatics An easy week of just letting her pull nutrients from the coco coir and a few days of pulling the final nutrients from the leaves and stems. On day 79, I pulled her from the tent and placed her in a dark tent for 24 hours. Her official pull date was day 80!
This grow went so well that I purchased 4 6.6 gallon autopots for my next grow, which I will feature as 4 different journals starting soon!
16 likes
9 comments
Share
Equipment Reviews
36 comments
Sort by
popularity
popularity
newest
oldest

Natrona commentedweek 01y ago
Gl 🍀🤞with auto pots. What's pic 1?
likes 4
Aeromatics commented1y ago
@Natrona, Thank you! It should be a fun one! Those are the blue "pipes" from the air domes of the autopots. The air domes go under the coco and lie within the root systems. They connect to an air pump and pump fresh oxygen into the roots!, super cool!!
They are filled with little holes but part of the preparation is to spread or pull apart to holes so that air can easily flow through them. I read that some people poke them open a bit with tooth picks, but I thought I could train them open a bit so I used some q-tips and poked them through the holes and let them sit for 24+ hours. The air was flowing nicely once they settled!
likes 4

Kirsten commentedweek 01y ago
Awesome, best of luck. Mine turned into a beast 😁🌱🤞💚✌️
likes 3
Aeromatics commented1y ago
@Kirsten, thank you! I hope for a beast on this one!
likes 2
DutchBarnacle commentedweek 01y ago
Holy moly that's nothing short of a complete laboratory set-up! Naturally, imma follow the heck out of this diary and I'm curious to see how the distilled water works out, I'm rooting for you!
likes 3
Aeromatics commented1y ago
@DutchBarnacle, thank you, good sir! It definitely took some preparation, research, and reading haha. But it is such a fun and different way to grow from what I have been doing with soil.
I am about to start 9 new autos in my 4 x 4 and I feel like I have a good grasp on that process, so this will keep the brain active!
likes 3

BelSun_420 commentedweek 01y ago
Good luck mate 🤛🏻💚
likes 3

James  commentedweek 01y ago
Goood luck and happy growing!! 🌱
likes 2
Natrona commentedweek 01y ago
You are ambitious! Taking on many new techniques.
likes 2
DutchBarnacle commentedweek 118mo ago
Great work and happy harvest growmie!!! 🎉❤️
like 1
DutchBarnacle commented8mo ago
@Aeromatics, been a while (9 days) and I haven't checked whether you've posted the dry yield yet, but I'd say around 70grams at least!
Edit after checking: Wew! 99 grams! I'd say that's a solid 100grams with a minor measuring error - congratulations!
like 1
Aeromatics commented8mo ago
@DutchBarnacle, I got 99g, and a bunch of shake that I dry sifted into some delicious kief!
It's a personal best for autos for me, so I'm excited and it's quite a delicious poof!! Onward to the next ones, which I have already started haha!!
like 1
DutchBarnacle commented8mo ago
@Aeromatics, I trust you're full autopots currently?
likes
Show More (1)
Natrona commentedweek 99mo ago
Happy harvest 🎉 . Very beautiful 💜🤩💪
like 1
Aeromatics commented9mo ago
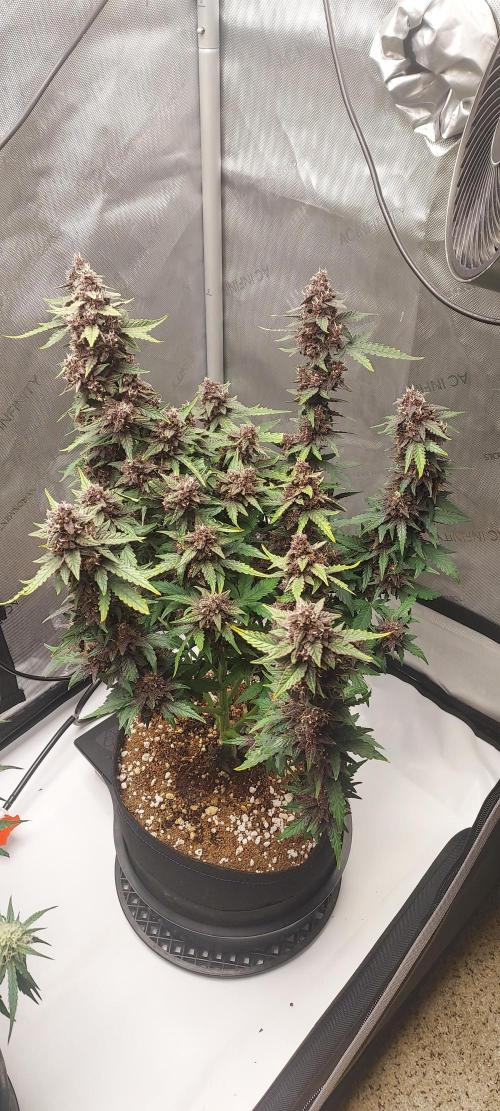
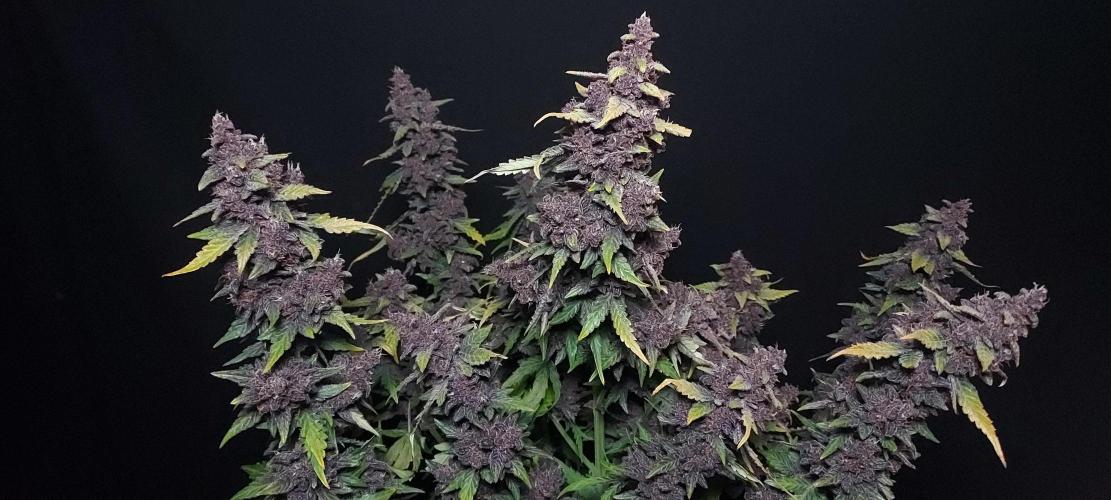
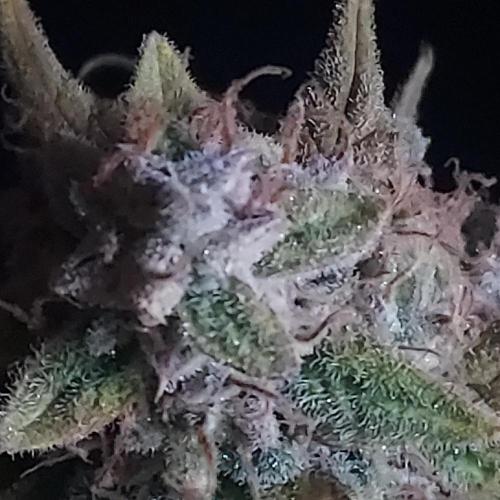
@Natrona, thank you! Something about that purple/green combo that is simply entrancing!
like 1
Natrona commented9mo ago
@Aeromatics, Yes, I know, those were my daughter's bedroom colors 😂
like 1
Aeromatics commented9mo ago
@Natrona, I love that haha! What a lucky gal, surrounded by beauty!
like 1

leo__bulero commentedweek 118mo ago
very nice, congrats
like 1
Aeromatics commented8mo ago
@leo__bulero, Thank you! Super happy with this one. Feel great to have a successful grow along with the Pink Kush CBD.
likes

Cauli commentedweek 118mo ago
What a beauty! Congratulations on your harvest 💚💚
like 1
Aeromatics commented8mo ago
@Cauli, Thank you! She smells amazing! Can't wait to trim her up.
like 1
DutchBarnacle commentedweek 99mo ago
My god the pink kush is stunning!!
like 1
Aeromatics commented9mo ago
@DutchBarnacle, thank you! The smell coming off of her is insane. So fruity, I can't wait for the post-cure sniffs haha!!
likes

HuskyHouse commentedweek 69mo ago
The gravity fed auto pots are amazing, if you travel a lot it def worth it! Looks great!
like 1
Aeromatics commented9mo ago
@HuskyHouse, I know I am only halfway through this one, but if this Northern Lights and her companion Pink Kush CBD keep rocking and growing well, I'll be getting a set of 4 for my 4 x 4 haha. It's been a breeze compared to my last few soil grows!
likes

GERGrowDesigns commentedweek 310mo ago
Good Luck Growmie ⭐ Great Work so Far 🌱
like 1
Aeromatics commented10mo ago
@GERGrowDesigns, thank you! Feeling good thus far!
likes
DutchBarnacle commentedweek 79mo ago
Looking great! Especially appreciate the trio-picture of with the Z-up next to it, gives a good sense of the size of the plants. Are you planning on harvesting around the suggested 10 weeks or are you planning on something else?
like 1
Kirsten commentedweek 310mo ago
Looking good 👍💚👌
like 1

sellem commentedweek 89mo ago
beautiful colors!
likes
Aeromatics commented9mo ago
@sellem, Thank you! So happy thus far, looking forward to my next update in the next few days. The buds are starting to fill out big time and a layer of frost is forming. Absolutely loving this grow!
like 1

Pot_Portraits commentedweek 89mo ago
Looking great !
likes
Aeromatics commented9mo ago
@Pot_Portraits, Thank you! The Pink Kush CBD is absolutely stunning right now. I am simply happy overall!
likes
DCG-cbd commentedweek 94mo ago
Very nice strain . )
likes

the end.
Enjoying this diary? Follow for more updates!


Prefer the old Diary view?
Go back to the old Diary view