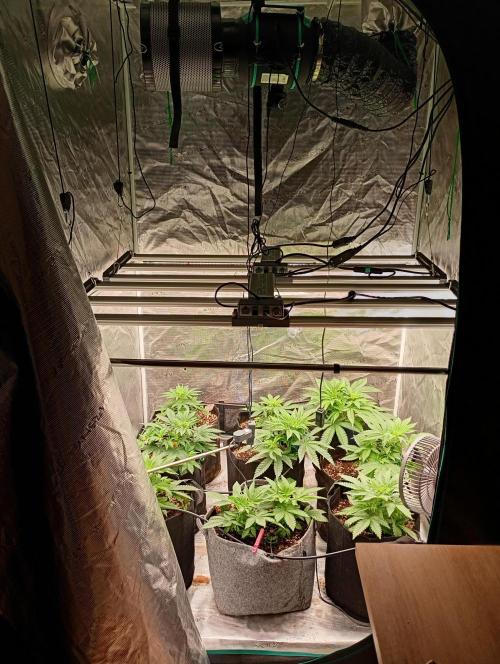
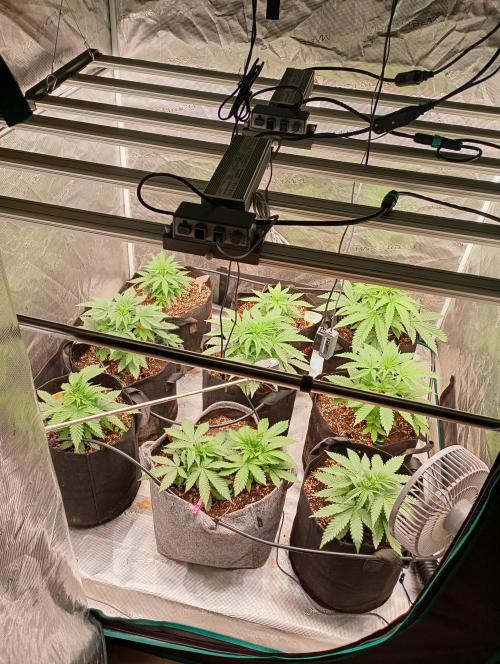
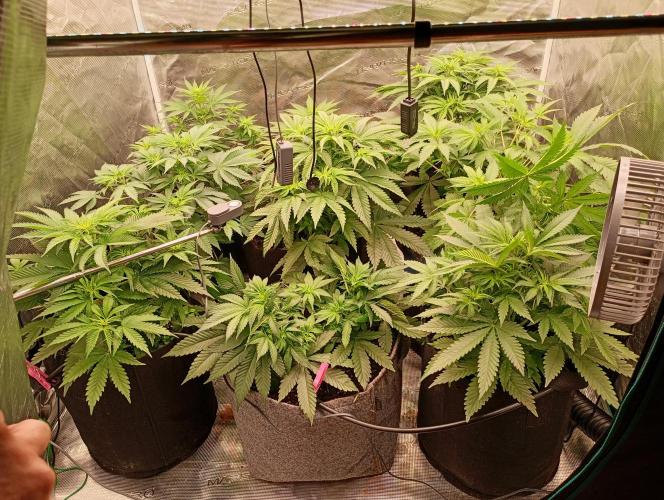
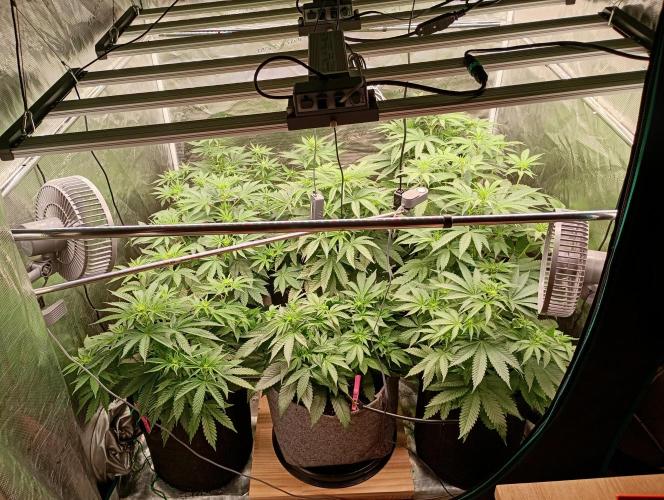
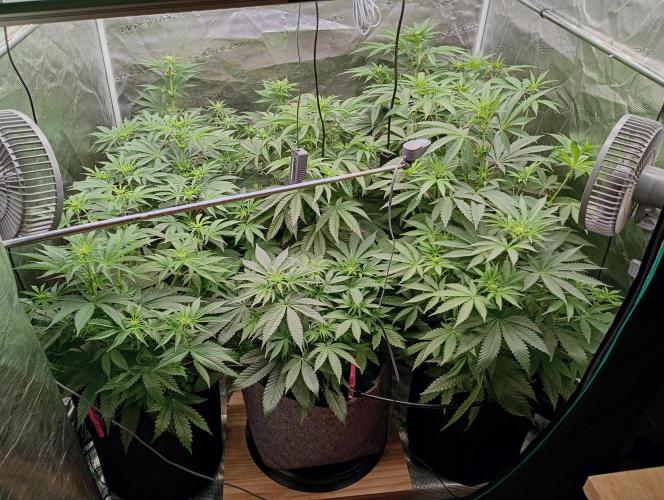
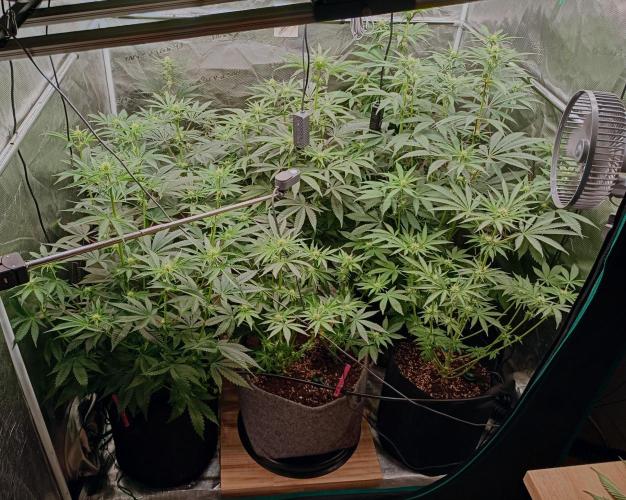
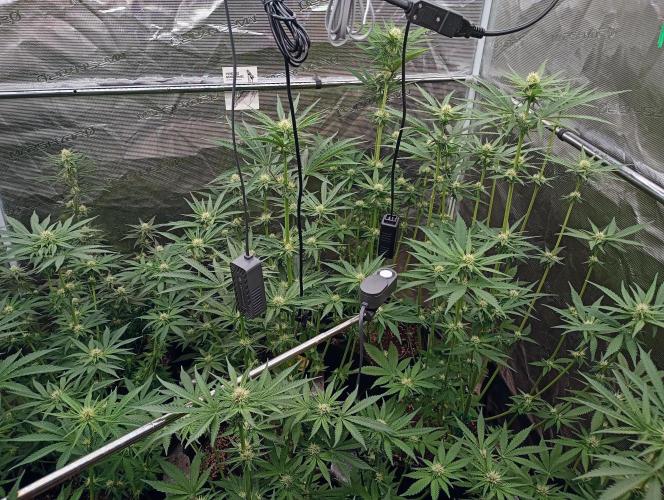
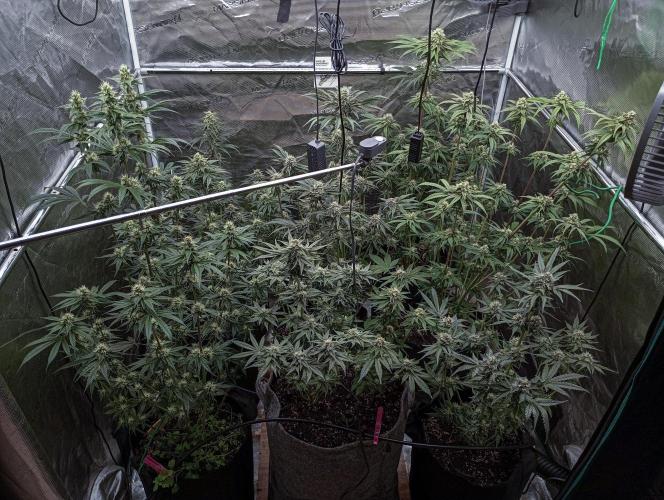
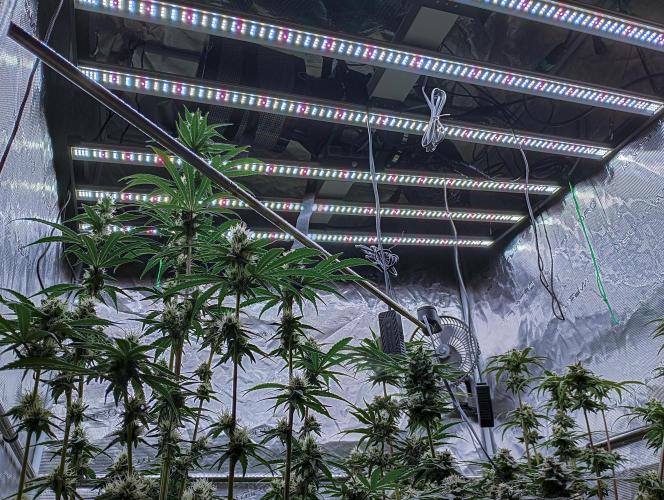
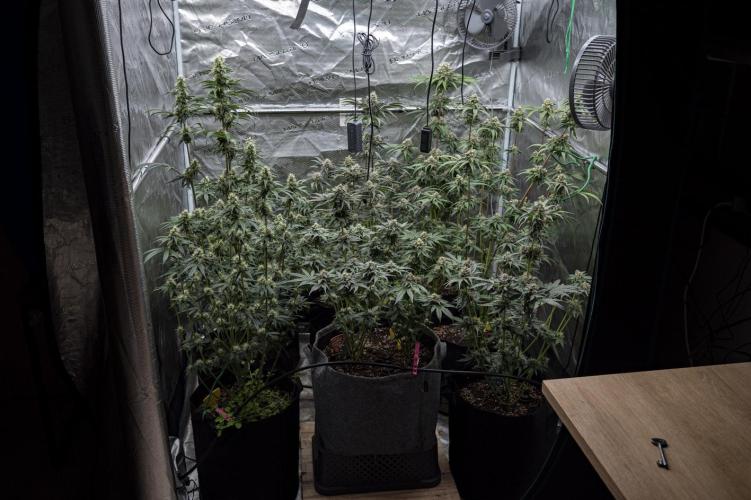
SWITCH420 Because I’m short on time for this run (I’m moving to a new home in January), I flipped to flower after about four weeks of veg instead of my usual two months. The plan is to keep this cycle to roughly three months in total. I also do not top the plants this time, it would arm them to long ... So, I’m running two Mars Hydro LED FC4000 EVO fixtures, delivering a solid 640W in the tent with beautifully even light across the canopy. As always, I’m using my living super soil—now on its fifth cycle—and it just keeps getting better. Pure gold at this point.
I also invested in a precise PAR meter this round, which makes managing modern LEDs so much simpler and more consistent. The soil is supported with dry, organic amendments, and I refresh the biology periodically with compost tea preparations. So far, everything looks incredibly healthy—vibrant growth, strong structure, and no issues to report.
For plant training, I’m using a gentle low-stress approach that opens up the structure and maximizes light exposure without removing healthy leaves. It keeps photosynthesis efficient and helps the plants express their full potential.
6 likes
comments
Share
Used techniques
LST
Technique
5
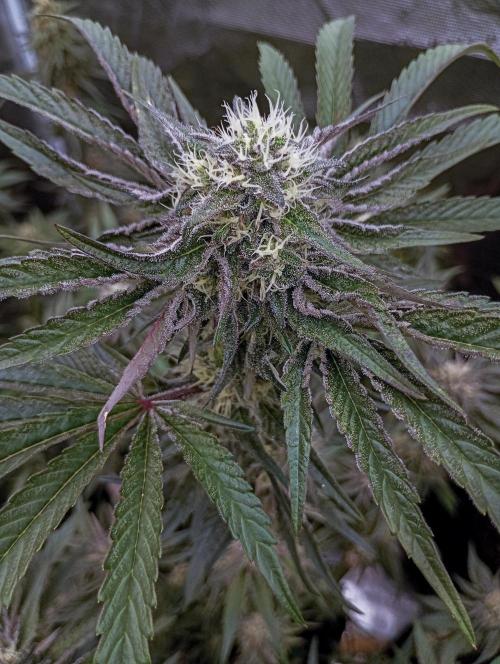
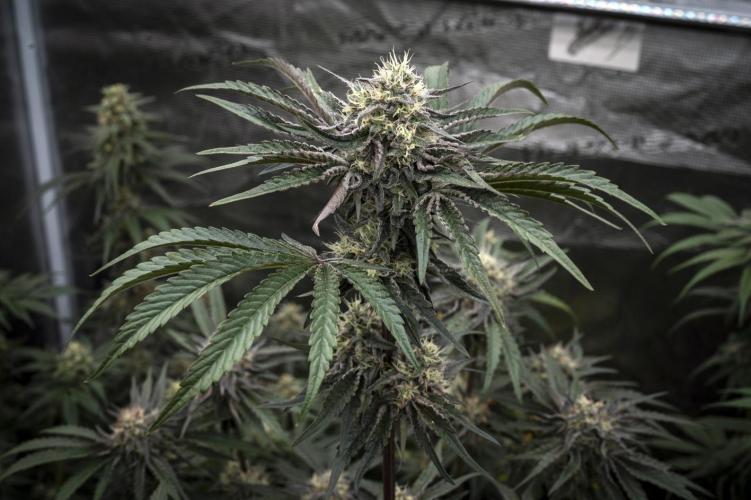
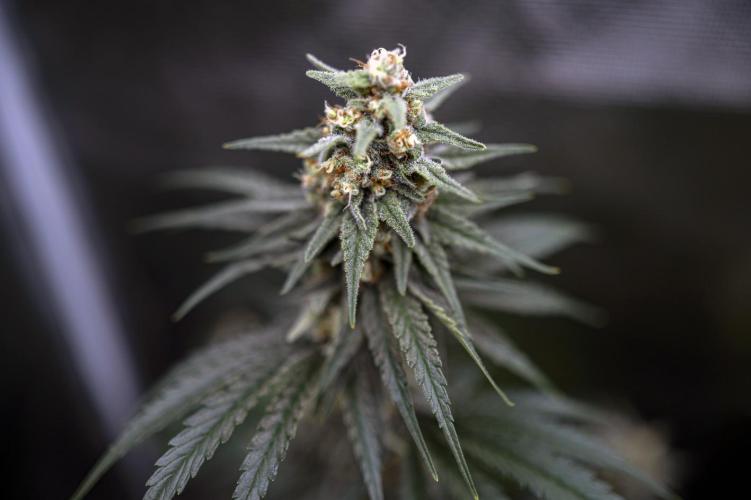
Week 5. Flowering
2mo ago
1/6
12 hrs
Light Schedule
25 °C
Day Air Temp
No Smell
Smell
65 %
Air Humidity
21 °C
Night Air Temp
18 liters
Pot Size
45 cm
Lamp Distance
Nutrients 1
0.528 mll
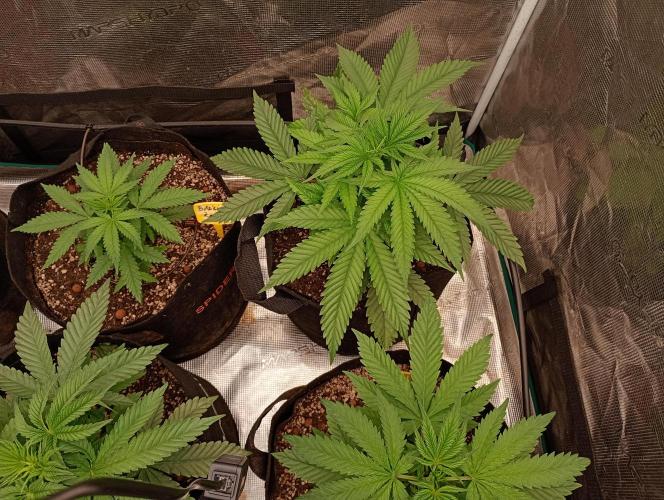
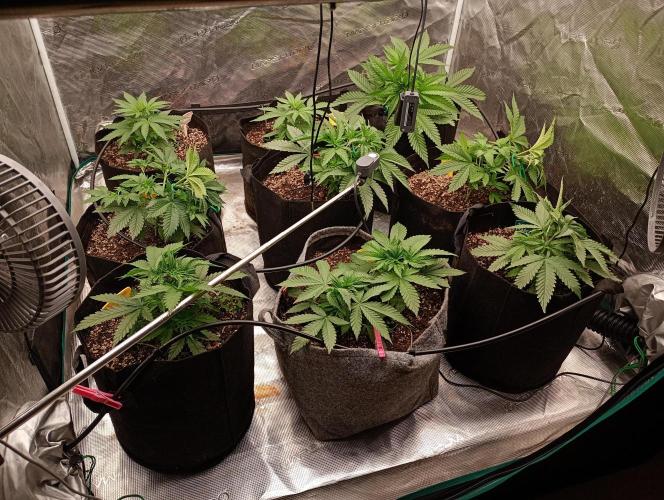
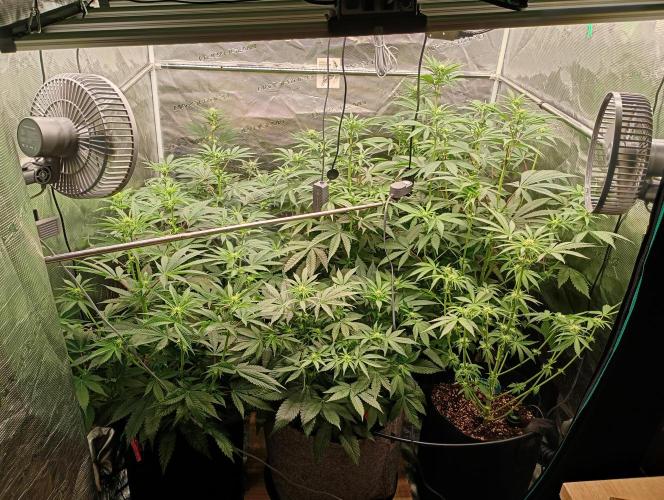
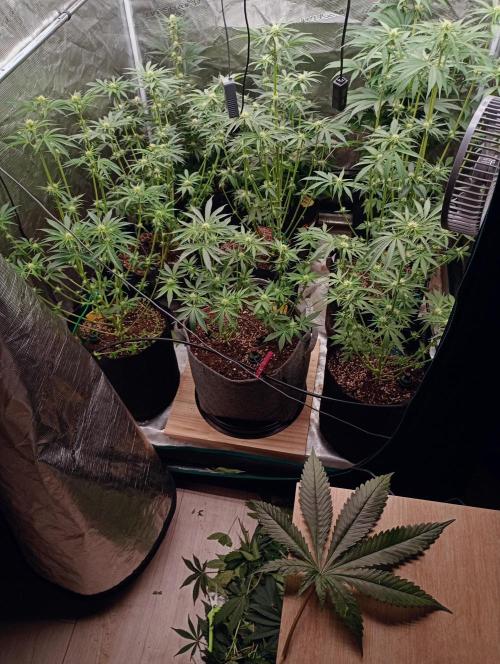
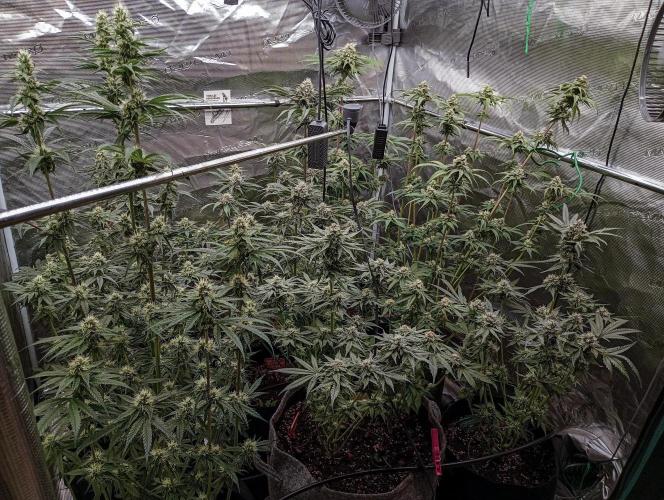
SWITCH420 Just after flipping into flower, the stretch has already begun. In only a week, the growth has exploded and the canopy is almost completely filled. The organic soil—energized with oxygenated compost preparations—comes alive during this phase, and you can clearly see how much the plants respond when the whole environment is dialed in.
Working with living soil is incredibly rewarding. You’re essentially becoming the caretaker of an entire microscopic ecosystem—billions of beneficial fungi and bacteria working together in harmony. It truly feels like you’re pouring love straight into the soil. Going organic is such a beautiful journey. 🌱
A small insight from my experience: supporting soil biology with diverse microbes and natural extracts can make a real difference. Gentle watering, mindful soil care, and letting the system regulate itself helps maintain that balance. When everything aligns, you often see the plants respond quickly—leaves lifting, colors brightening, and an overall boost in vitality. It’s a wonderful transformation to witness.
And beyond the visual growth, there’s something special about fully organic cultivation: the flavors, aromas, and overall experience often feel elevated in a very natural, expressive way. Another huge benefit is sustainability—you can reuse the same soil run after run, improving it each cycle as the living ecosystem matures. I’m on my fifth run with this soil, and I can genuinely feel the difference.
7 likes
comments
Share
6
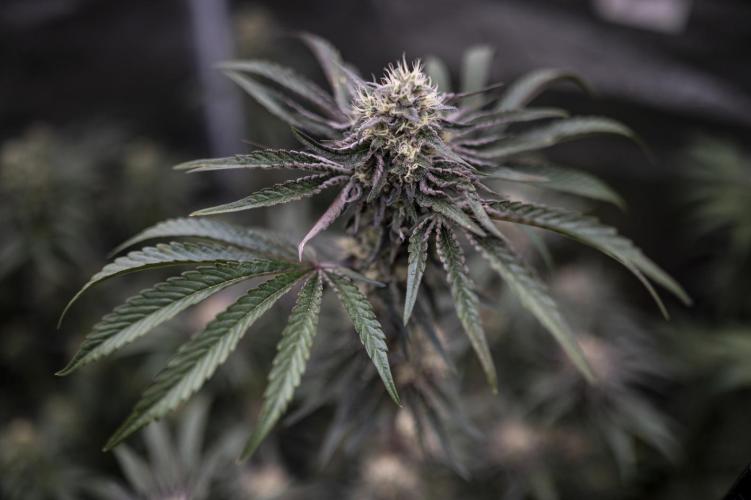
Week 6. Flowering
1mo ago
1/4
12 hrs
Light Schedule
26 °C
Day Air Temp
No Smell
Smell
65 %
Air Humidity
21 °C
Night Air Temp
18 liters
Pot Size
40 cm
Lamp Distance
Nutrients 1
0.528 mll
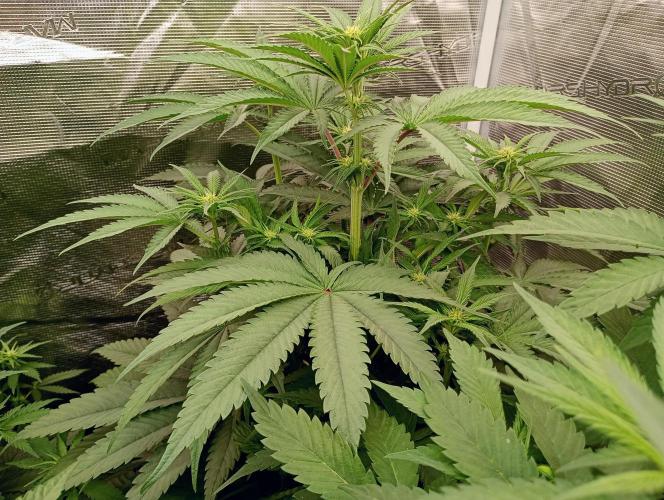
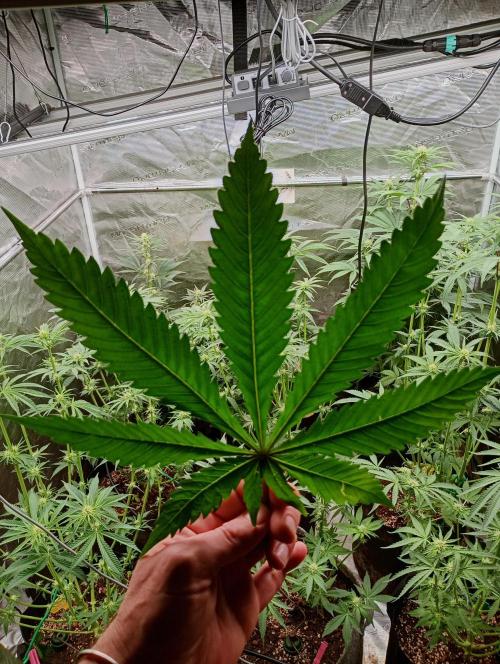
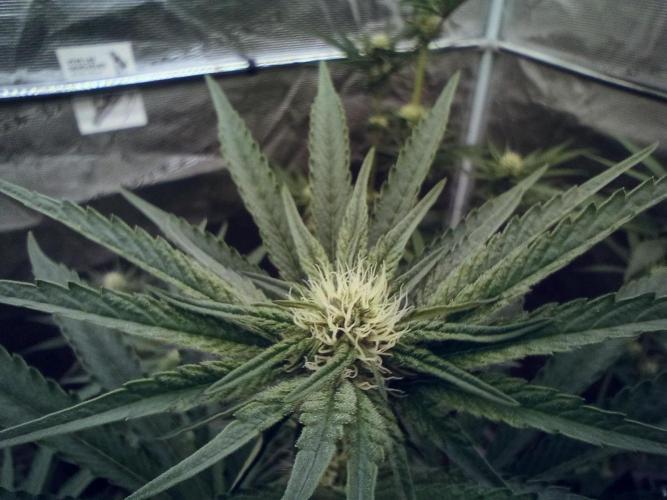
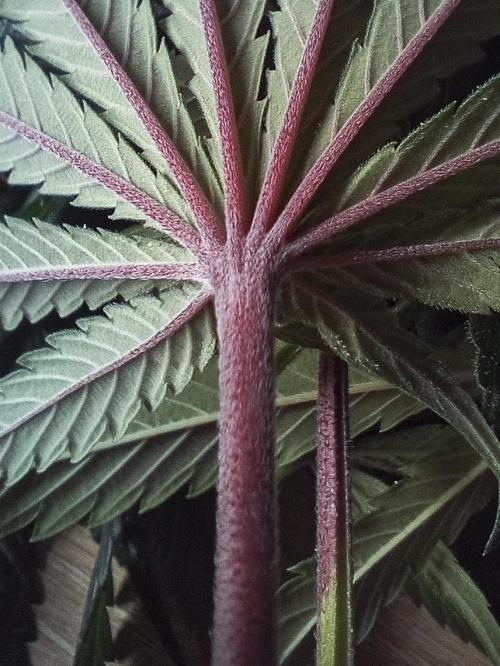
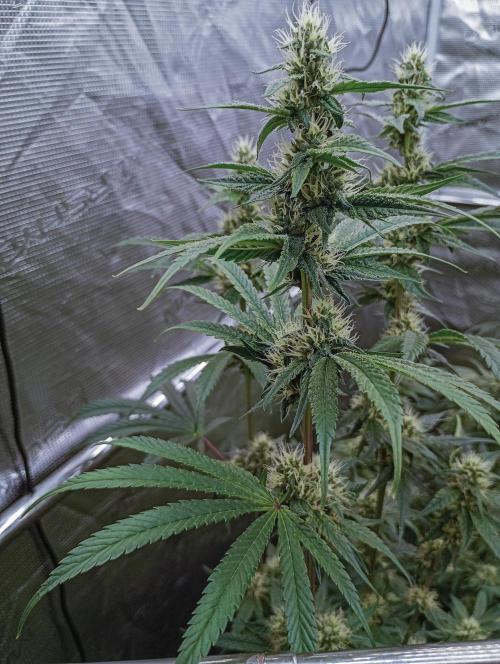
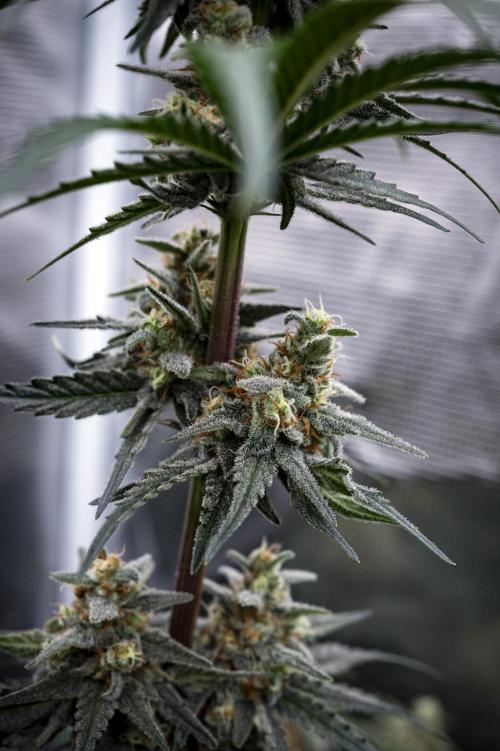
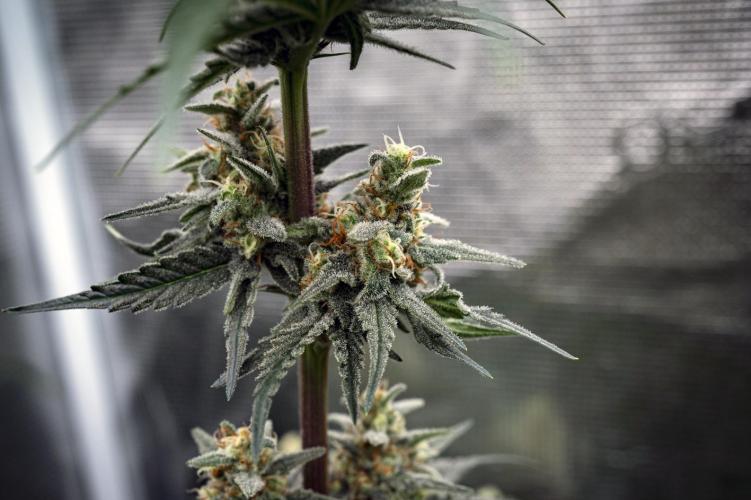
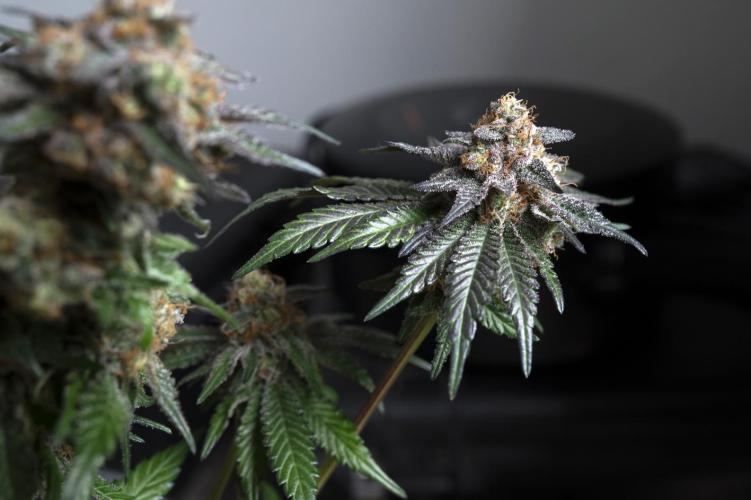
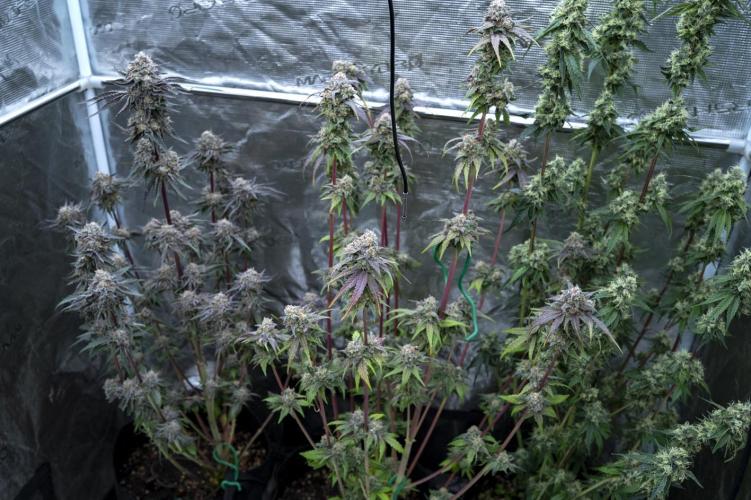
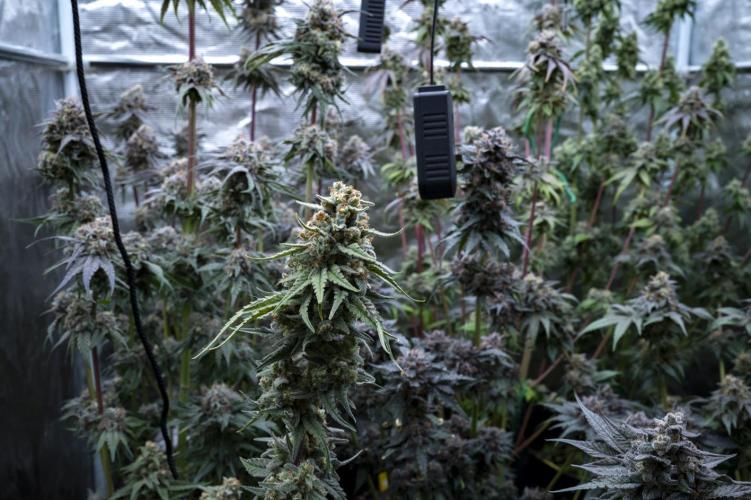
SWITCH420 This week consists in adjusting the stretch / lamp distance to canopy / replacing fans, sensors, managing PPFD. The compost tea of last week absolutely blast the stretch. Flowers are coming... One of the Aladdin's Skunk already frost even on big fan leaves... That's impressive after being flipped in flo for a little bit more than a week.
5 likes
comments
Share
7
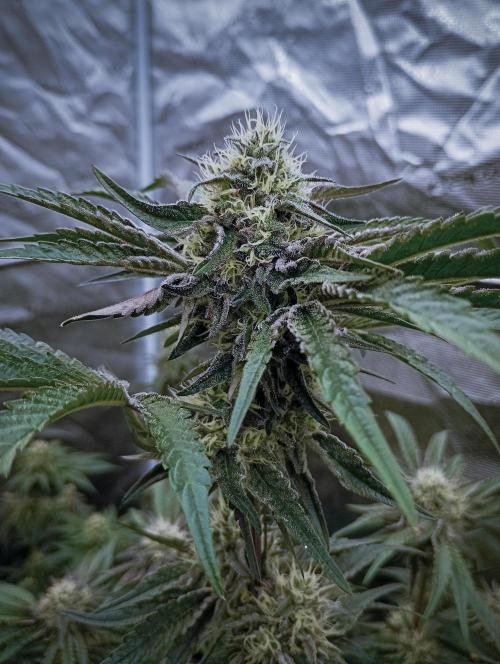
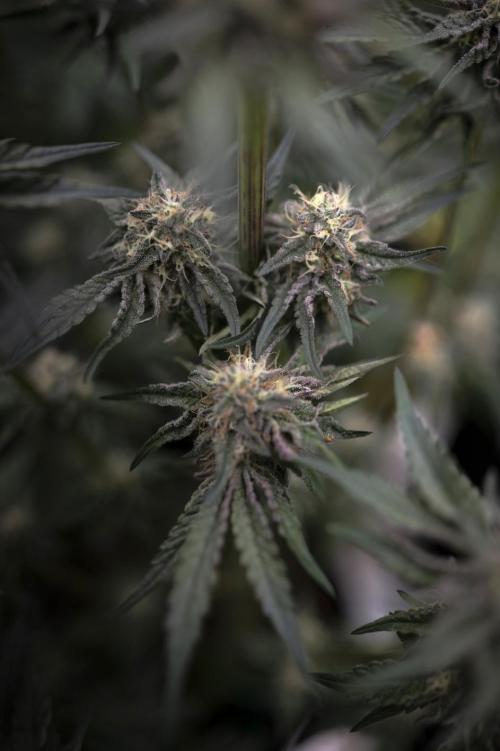
Week 7. Flowering
1mo ago
1/8
12 hrs
Light Schedule
26 °C
Day Air Temp
No Smell
Smell
65 %
Air Humidity
21 °C
Night Air Temp
18 liters
Pot Size
40 cm
Lamp Distance
Nutrients 2
Humici Fulvic acid
2 mll
OCT (Oxygenated Compost Tea)
150 mll
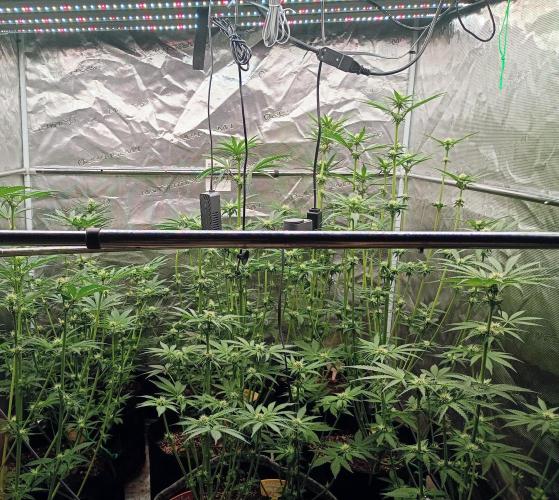
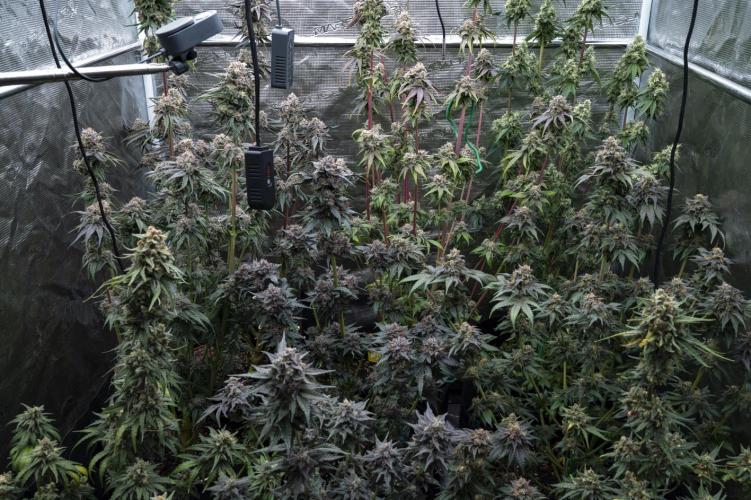
SWITCH420 At the end of this week, I’ll defoliate and lollipop all the plants in order to focus on flowering. To see how they respond to the environment I’ve lollipop and defoliate the first lady in the right corner — the Sunset Martini from LIT. I’ll watch how she adapts, and if it’s too hard on her, I’ll take more time with the others. I prefer doing it gradually, so I don’t shock them too much.
For this run, timing is extremely tight, and I want to optimize every action and avoid any mistakes. So with everything I do, every change, I’m adjusting gradually — and so far, it’s working like a charm!
Stretch is continuing, some plants gain 10 cm in a night ! Everything is vivid & alive !
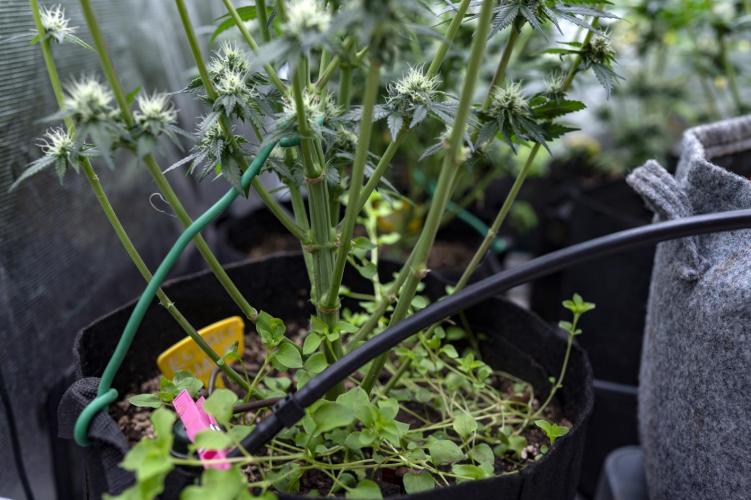
Update DAY 21 / end of week 3 : Defoliation is done. It wasn’t the easiest task since I couldn’t fully open the tent, and taking the plants out wasn’t an option because they’re all connected to the Blumat gravity watering system… but it’s done! Haha.
About 24 hours before finishing the defoliation, I brewed an oxygenated compost tea to enrich the soil with natural microorganisms and fungi, giving the plants the support they need to get through this heavy fan-leaf removal.
One thing I’ve learned over time: when I’m working on the plants at the back, I have to be really mindful of my movements. If I’m not careful, my arms or a clumsy gesture can easily damage fresh bud sites on the plants in front, since I have to reach over them to get to the ones behind. And once those new sites are crushed… well, there’s no bringing them back.
7 likes
comments
Share
Used techniques
Defoliation
Technique
Lollipopping
Technique
8
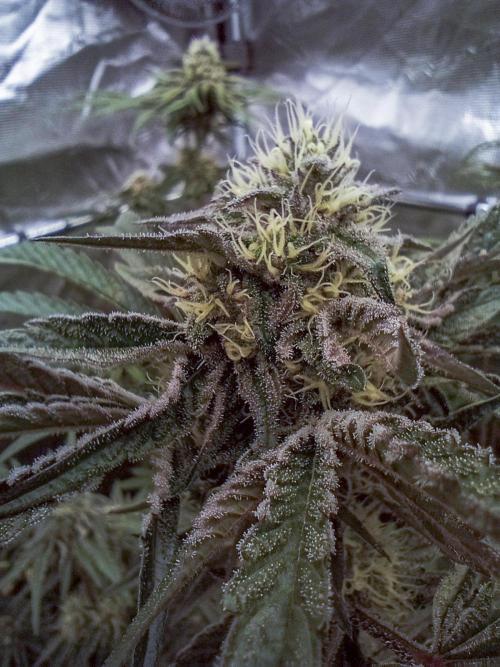
Week 8. Flowering
1mo ago
1/6
12 hrs
Light Schedule
26 °C
Day Air Temp
No Smell
Smell
65 %
Air Humidity
21 °C
Night Air Temp
18 liters
Pot Size
40 cm
Lamp Distance
Nutrients 2
Humici Fulvic acid
2 mll
OCT (Oxygenated Compost Tea)
150 mll
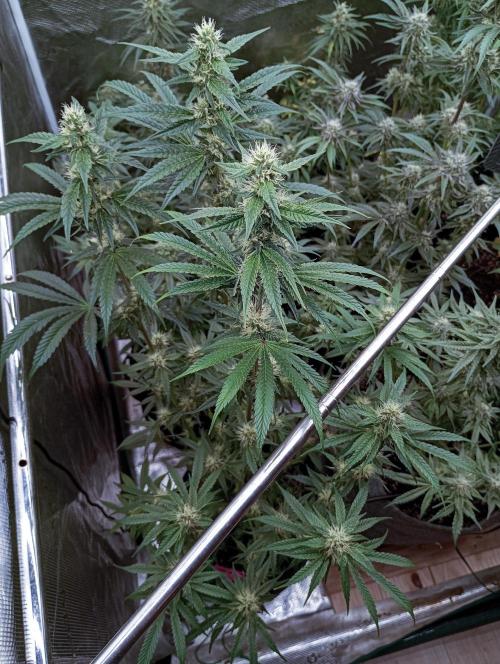
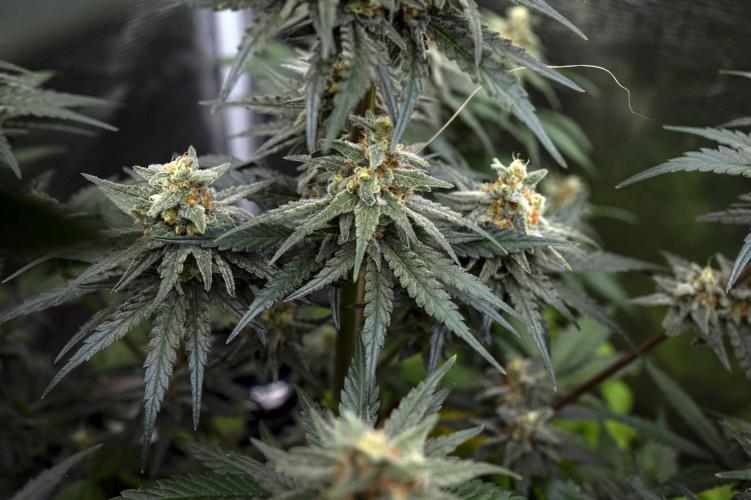
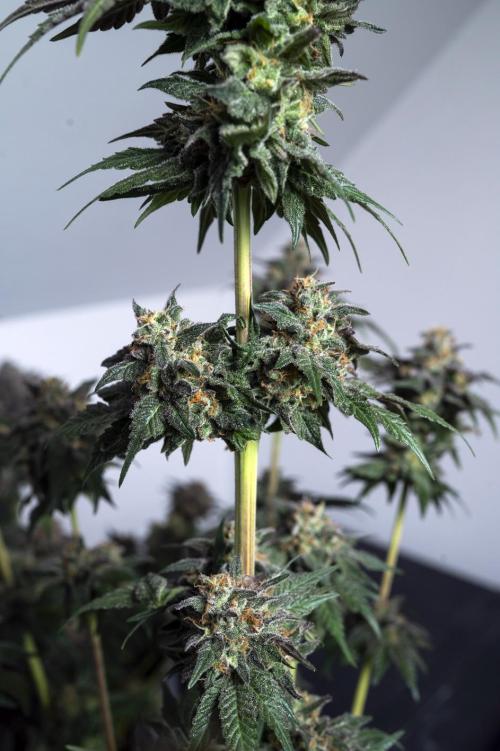
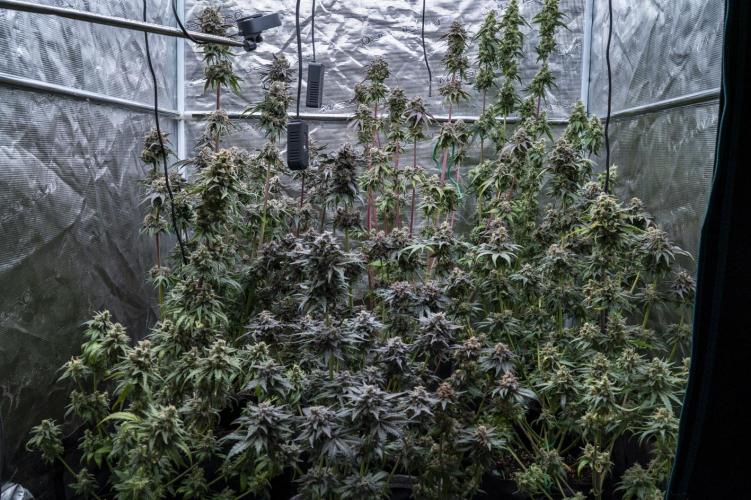
SWITCH420 So here we are, entering the full flowering phase. I always enjoy checking on the garden about 24 hours after a major defoliation, as it’s a significant shift for the plants and they often need a moment to recover. The purpose of this pruning step is simply to open up the canopy, improve light penetration, and help the plant direct more of its energy toward flower development.
I usually perform this cleanup once the stretch phase is essentially complete—around the third week of flowering. Before doing so, I prepare an oxygenated compost tea to support the soil right after the stress event. Along with that, I refresh the substrate with natural, slow-release amendments that provide what the plant needs during bloom. In addition to classic worm castings, I like using marine-derived inputs rich in phosphorus and potassium, such as fish- and kelp-based products, as well as nutrient-dense algae like spirulina.
At this stage, it’s also the final time I introduce certain beneficial microorganisms, including mycorrhizae and bacillus strains, to strengthen the root zone. I make one last addition of magnesium-rich supplements (I use Epsom Salt) to support photosynthesis and keep the foliage vibrant.
Following the defoliation, the compost tea offers an immediate boost, helping the plant transition smoothly through the stress. The amendments then sustain it for the rest of the flowering cycle. From here on, I continue applying compost tea weekly, along with humic and fulvic acids and a bit of molasses to nourish the beneficial microbes and fungi that keep the soil ecosystem thriving.
If everything has been handled properly up to this point, the rest of the cycle should feel almost like cruise control. Just a few routine checks, minimal adjustments, and you’re good to go.
7 likes
comments
Share
9
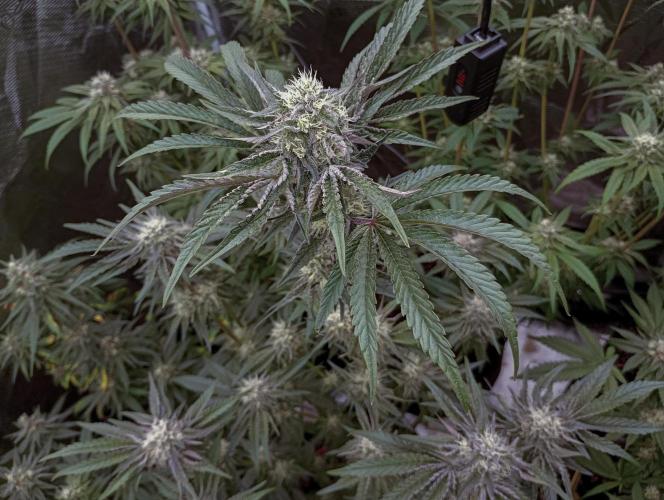
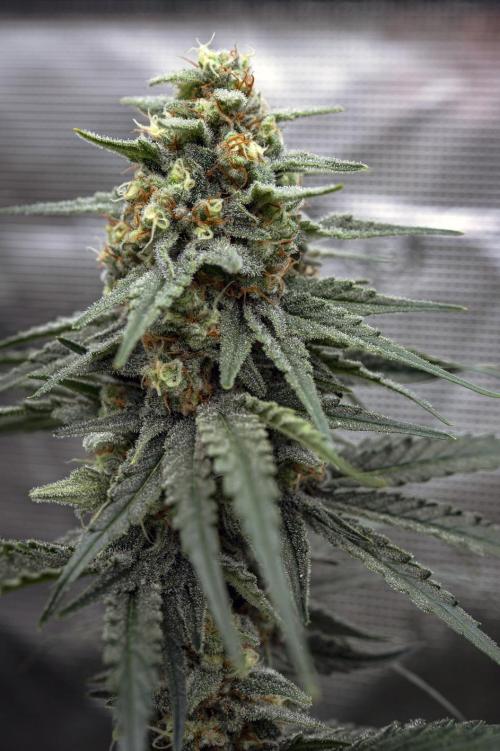
Week 9. Flowering
1mo ago
1/13
12 hrs
Light Schedule
26 °C
Day Air Temp
Normal
Smell
65 %
Air Humidity
21 °C
Night Air Temp
18 liters
Pot Size
40 cm
Lamp Distance
Nutrients 4
Humici Fulvic acid
2 mll
OCT (Oxygenated Compost Tea)
150 mll
epsom salt
2 mll
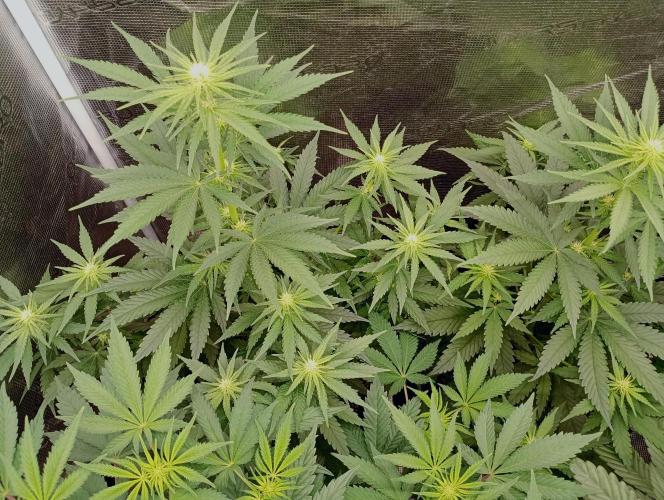
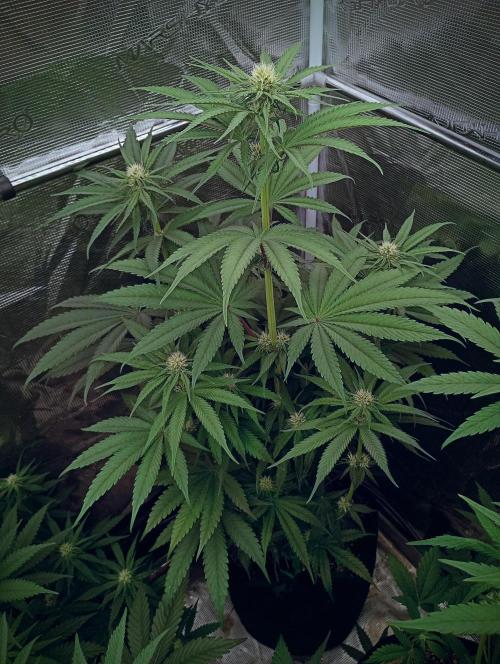
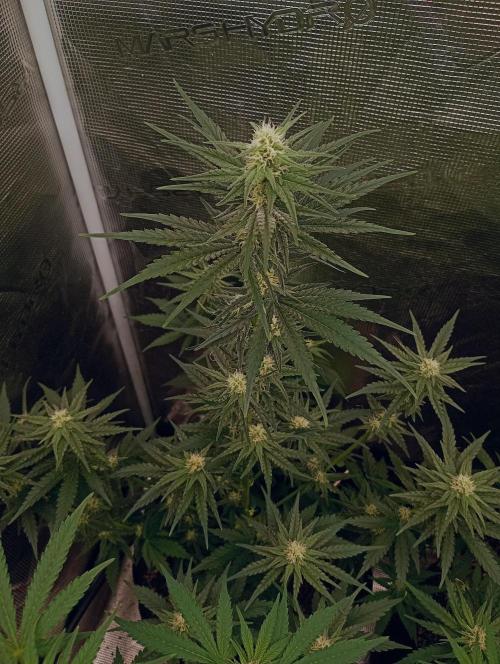
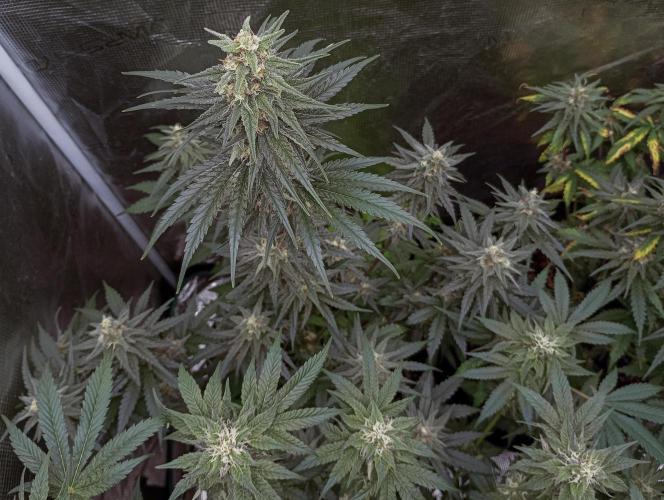
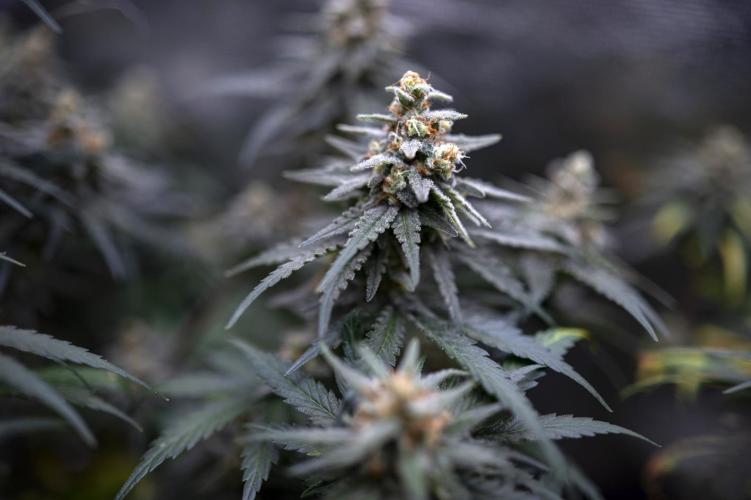
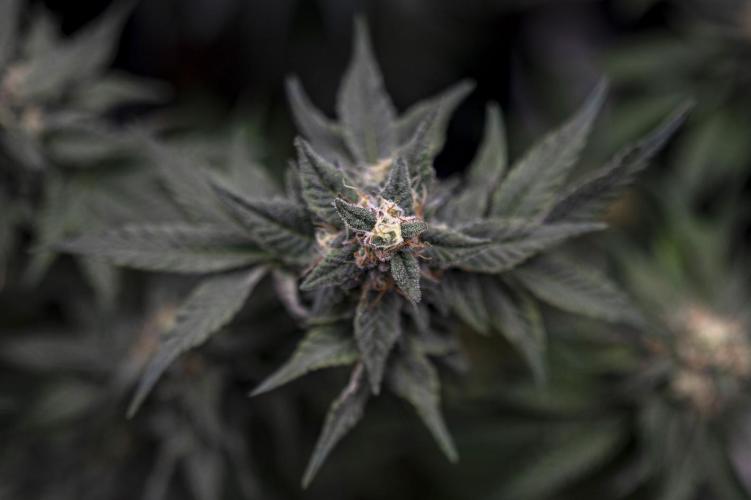
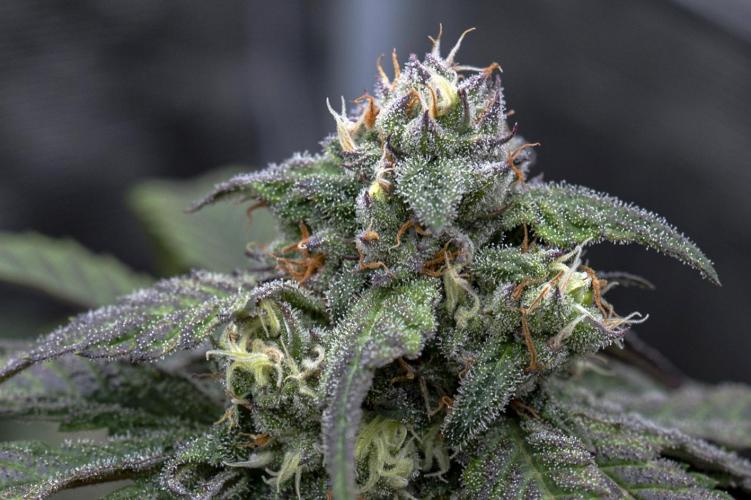
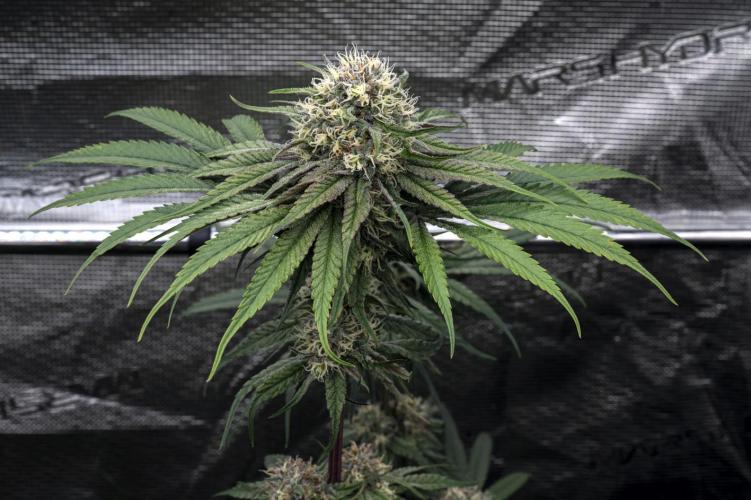
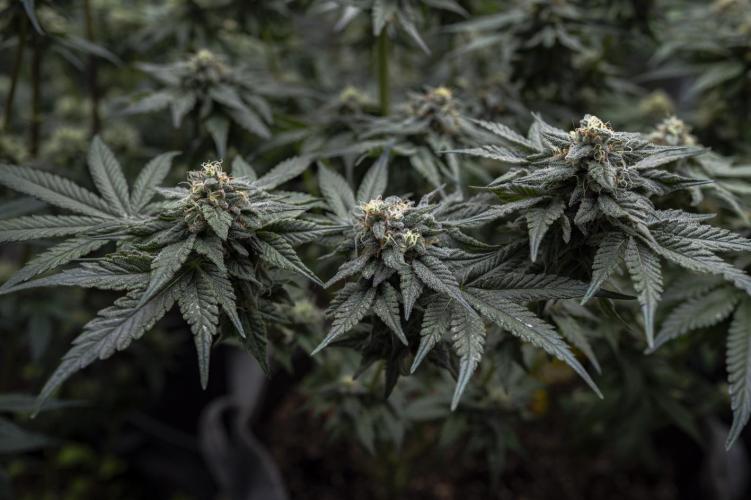
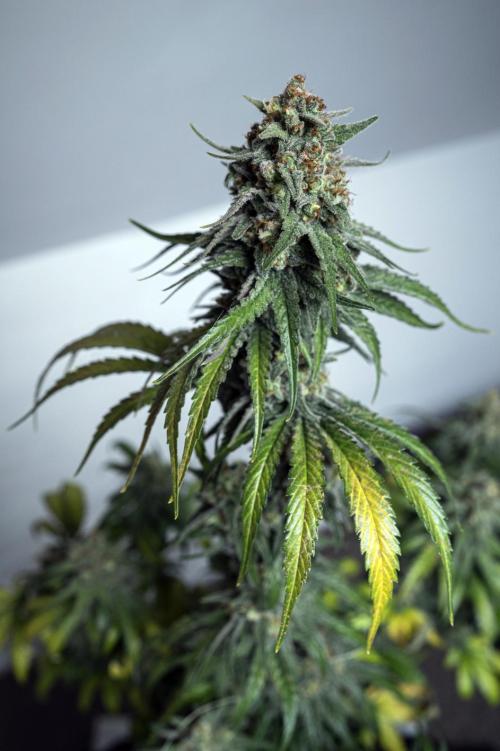
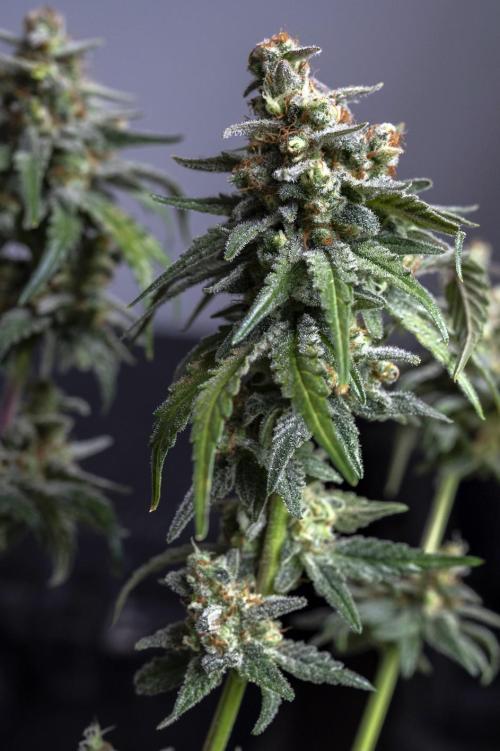
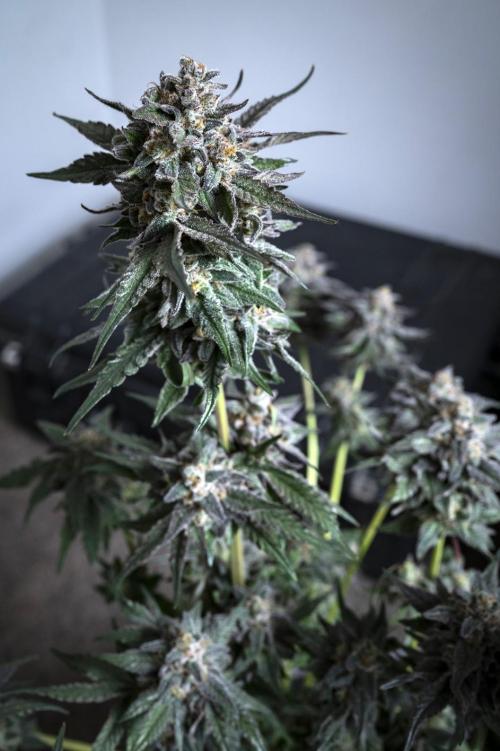
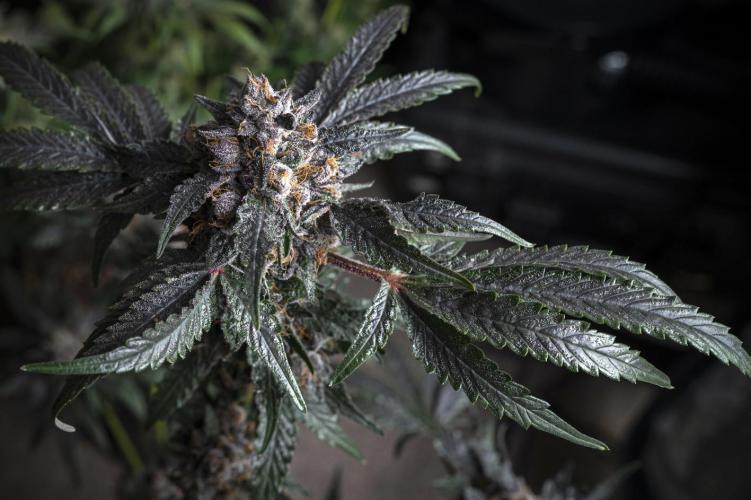
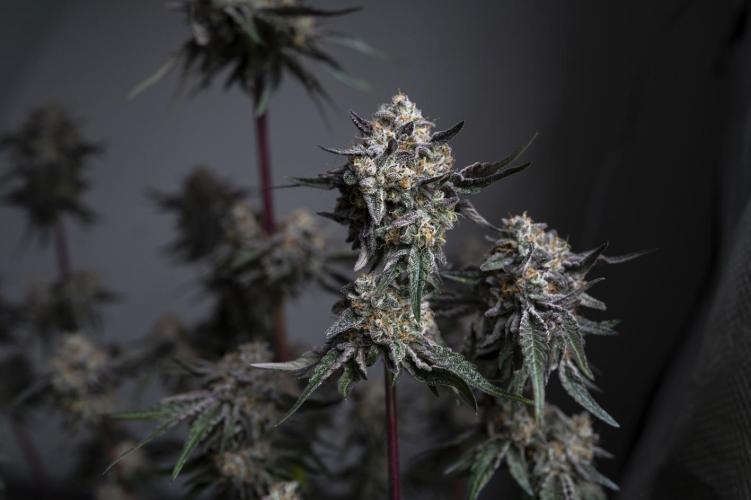
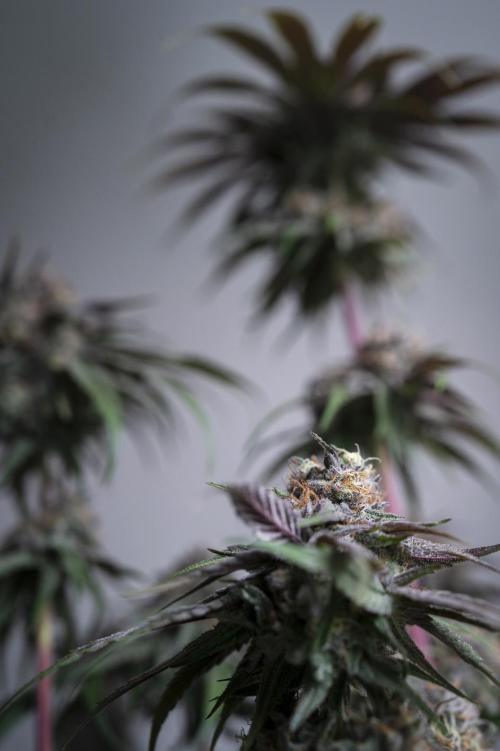
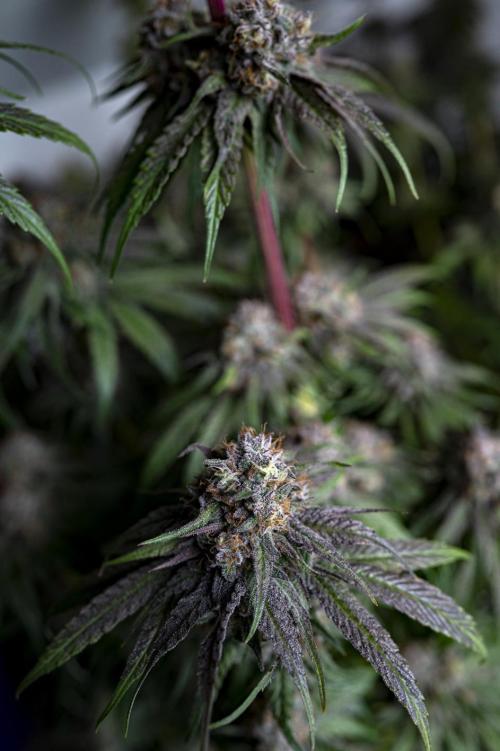
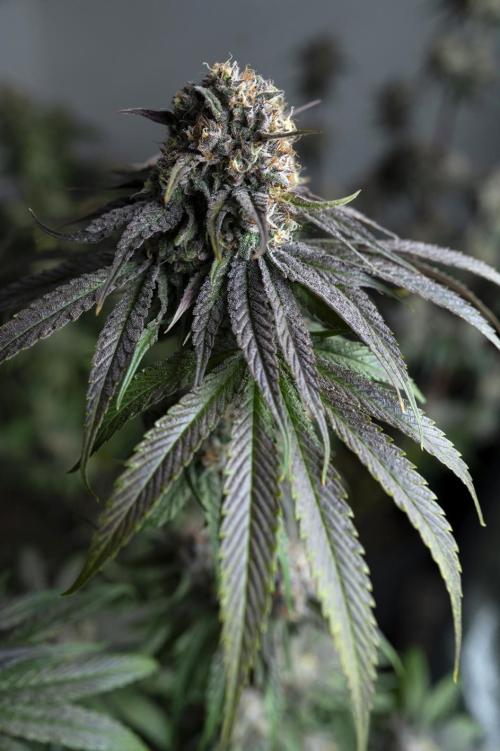
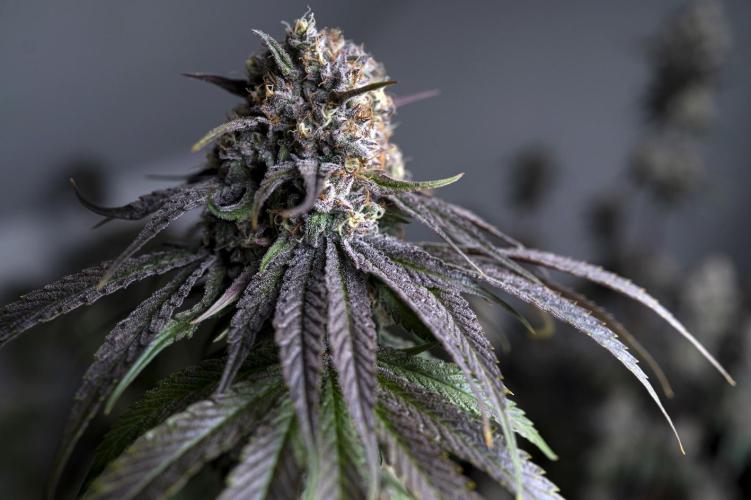
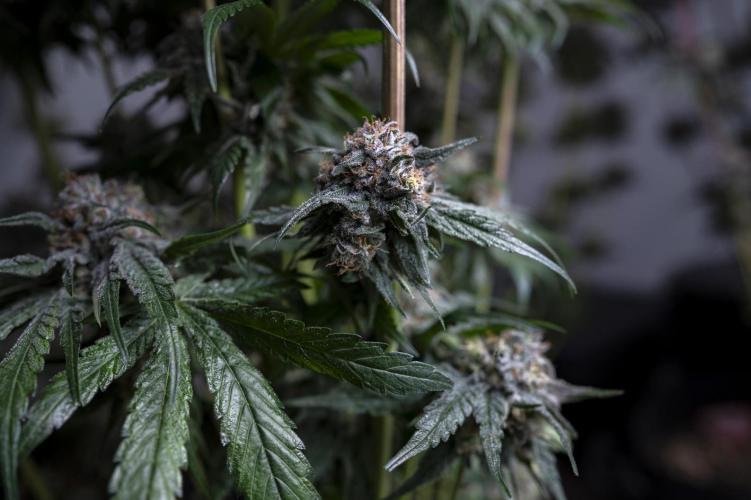
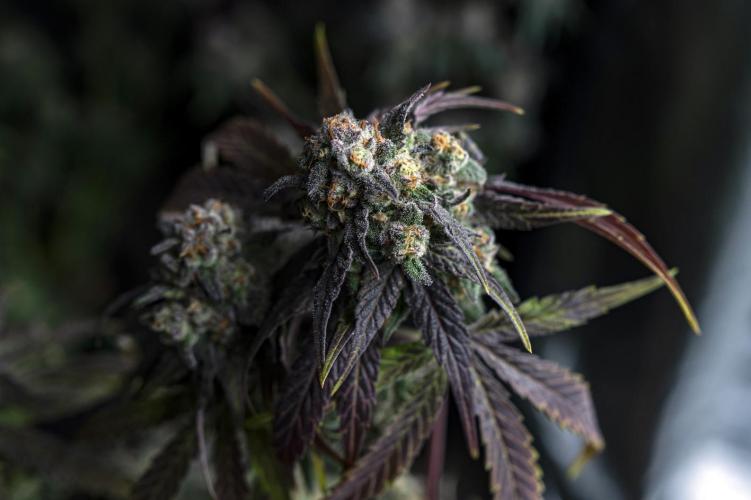
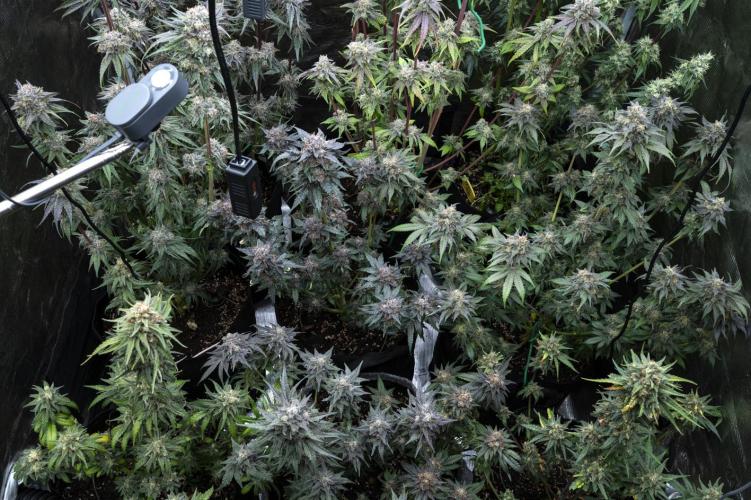
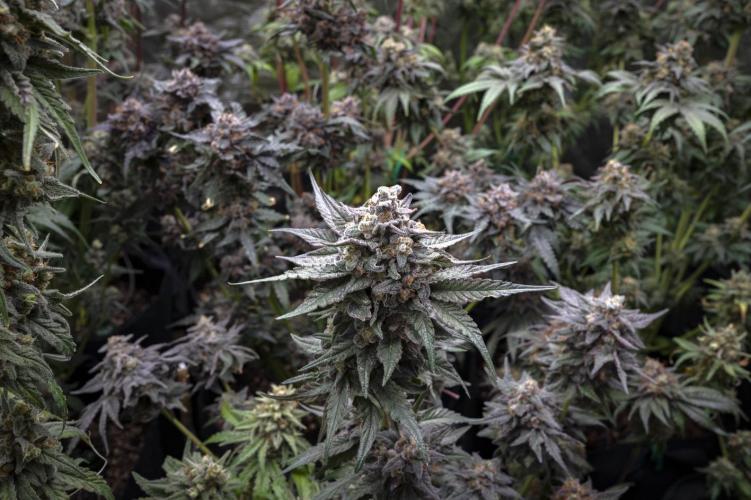
SWITCH420 This week follows the first major defoliation, and the plants are now channeling their energy straight into bud development. Every cultivar in the tent has started producing beautiful resin — trichomes are even appearing on the fan leaves for most of them. Some plants are developing a sticky resin, others a more oily one, and the terpene profiles are starting to differentiate nicely.
I watered them with my “magic” solution, designed to bring the soil’s life back to its full potential. It’s a three-part mix: molasses, humic & fulvic acids, and Epsom salt. This blend boosts microbial activity in the soil, supplies magnesium, and enhances photosynthesis. Epsom salt is especially valuable here as a chelating agent — it increases the solubility and availability of key compounds (like molasses, humic and fulvic acids, neem oil, or spirulina) and also helps sequester heavy metals, keeping the soil environment healthier.
6 likes
2 comments
Share
10
Week 10. Flowering
1mo ago
1/17
12 hrs
Light Schedule
26 °C
Day Air Temp
Normal
Smell
65 %
Air Humidity
21 °C
Night Air Temp
18 liters
Pot Size
40 cm
Lamp Distance
Nutrients 4
Humici Fulvic acid
2 mll
OCT (Oxygenated Compost Tea)
150 mll
epsom salt
2 mll
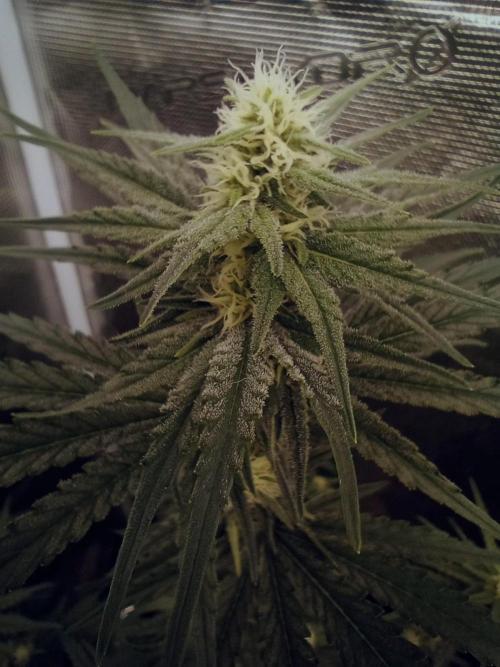
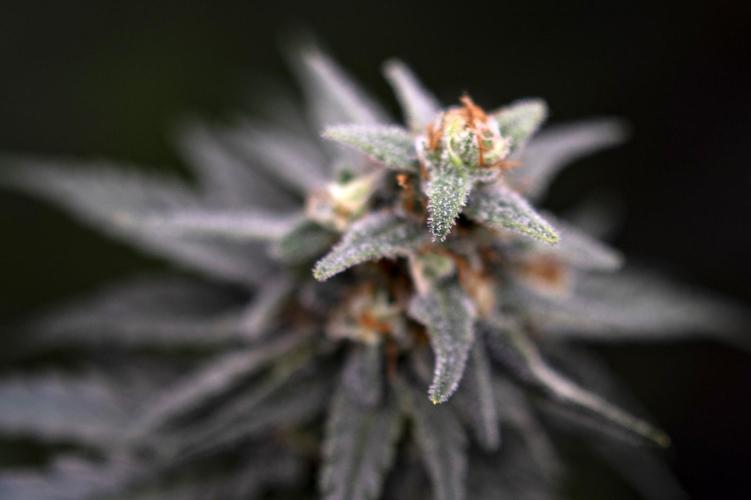
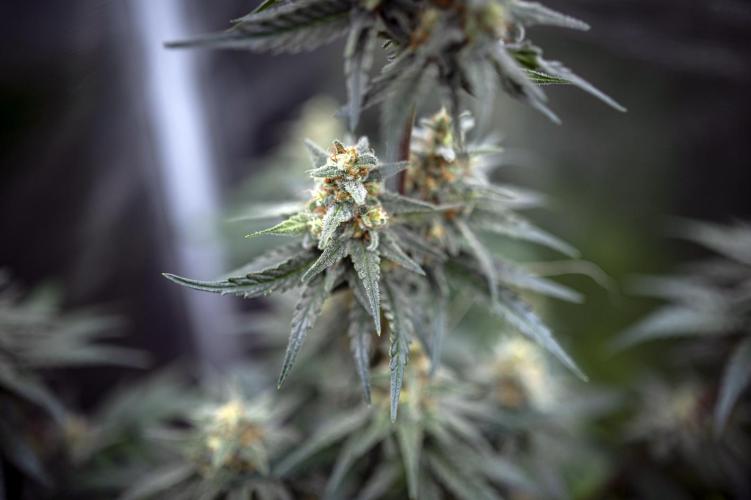
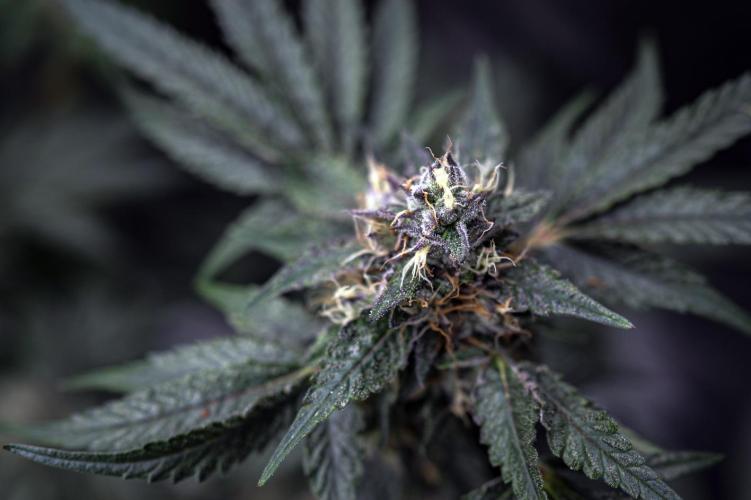
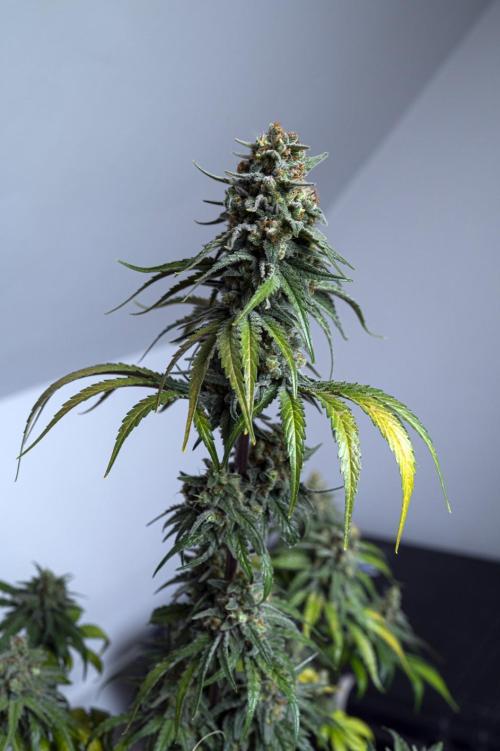
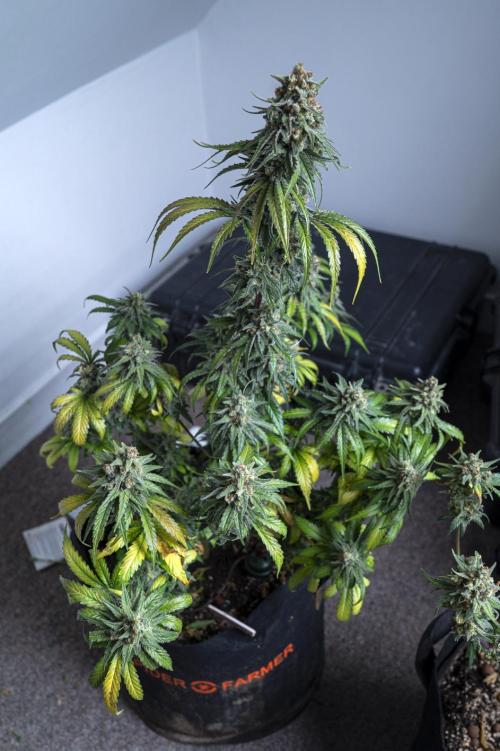
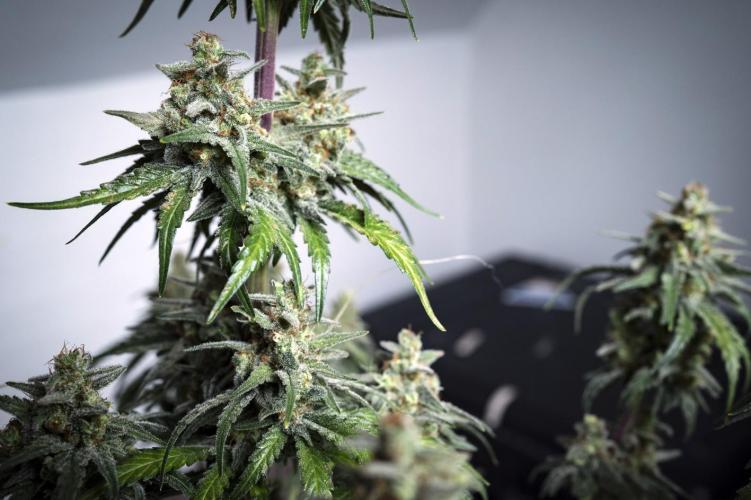
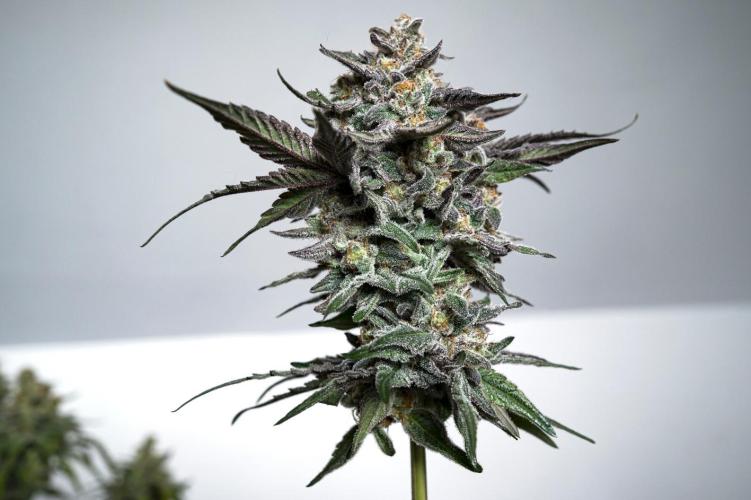
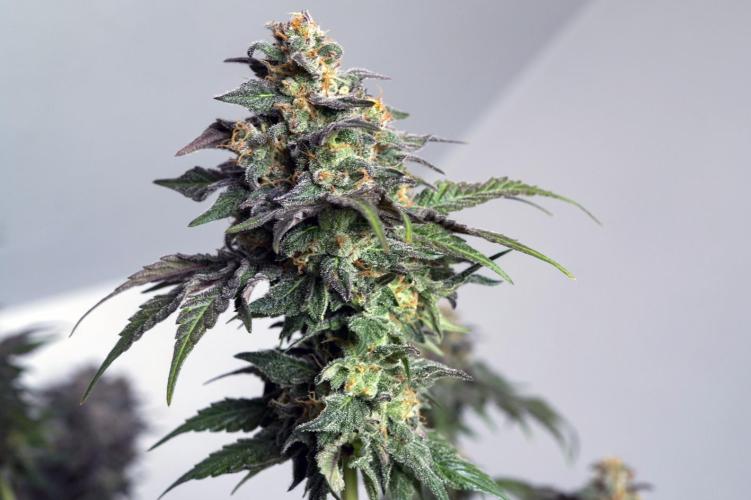
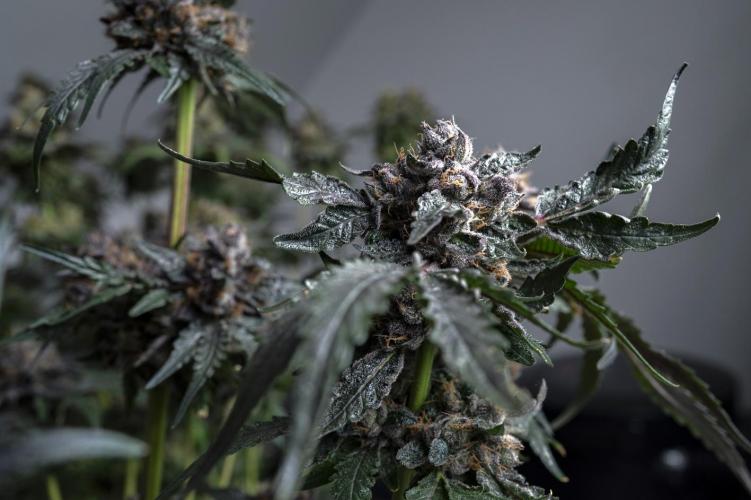
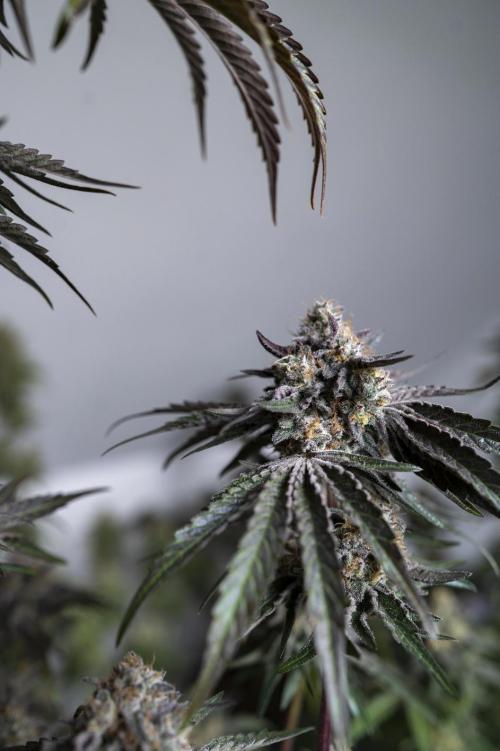
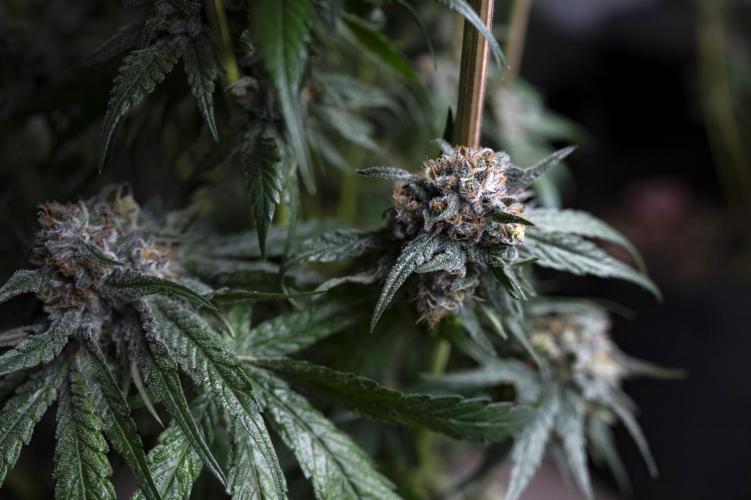
SWITCH420 The buds are now throwing resin everywhere — every strain in this tent start to frost up. All of them are performing amazingly… except one.
Unfortunately, the Baked Apple Cherries from Elev8 Seeds turned out to be a disappointment. It started throwing herms. I carefully removed all the pollen sacs with twizzers, hoping none of them opened or spread. Luckily, it’s the smallest plant in the tent and it sits right at the front, which made the job easier.
Still, I’m pretty bummed. I bought two packs of three seeds from Elev8. For this run, I popped one full pack: two seeds didn’t even germinate, and the only one that did ended up herming and staying ridiculously small. Honestly, I didn’t expect that at all — Elev8 has a solid reputation in the game. I should chop it of to avoid any risks... sure, but ... I really want to keep those buds for a smoke test just to know if I run this strain again and try to bring it where the breeder described on the package... (I am a Cherry Pie strain lover and I know this cultivar as the original clone in its DNA...).
This experience also pushes me toward running regular seeds instead of fems. They’re generally less prone to hermaphroditism, and I already have a nice stash from excellent breeders, including ACE seeds, Bodhi, who focuses on creating genetics meant to thrive in living soil. With regulars, you can also start making your own seeds: select your favorite females, run a batch of males, collect pollen, make your own crosses… grab a book about cannabis breeding — and boom, you’ve just stepped into the next level of the passion.
I can’t wait for the next round. This run is a bit messy, even though the plants themselves are doing incredibly well. The ratio of “poor setup vs. great results” is honestly more than satisfying. Huge thanks to my soil, my amendments, and those humble gears 🙏
On the next run, I’ll be moving to a new place, setting up a proper grow space, and finally starting to breed my own genetics (starting a few projects from Landraces too...). I’m getting closer to what I’ve always dreamed of — and I’m excited to share that journey with you all.
Next week, as the colors start changing and fading kicks in, I’ll grab my Nikon camera and try to get some proper shots of this grow. They’ll definitely be a step up from these smartphone pics.
Thanks a lot for following, buddies 🤘
8 likes
comments
Share
11
Week 11. Flowering
21d ago
1/28
12 hrs
Light Schedule
26 °C
Day Air Temp
Strong
Smell
65 %
Air Humidity
21 °C
Night Air Temp
18 liters
Pot Size
40 cm
Lamp Distance
Nutrients 3
Humici Fulvic acid
2 mll
OCT (Oxygenated Compost Tea)
150 mll
molasses
2 mll
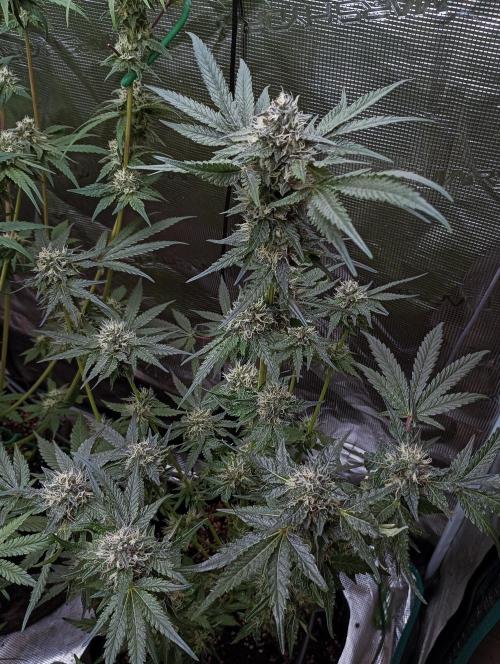
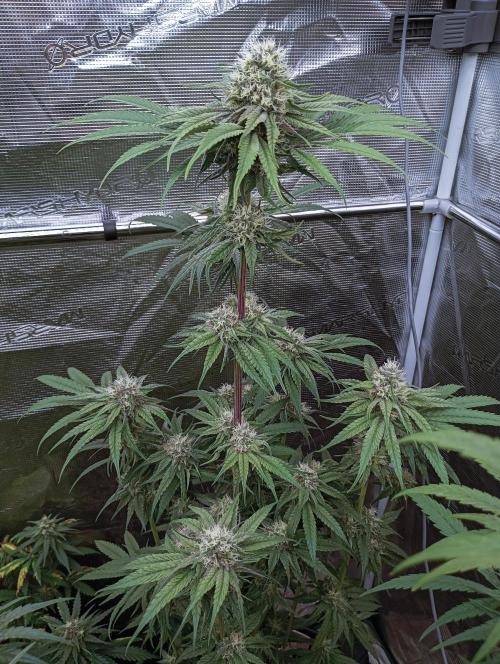
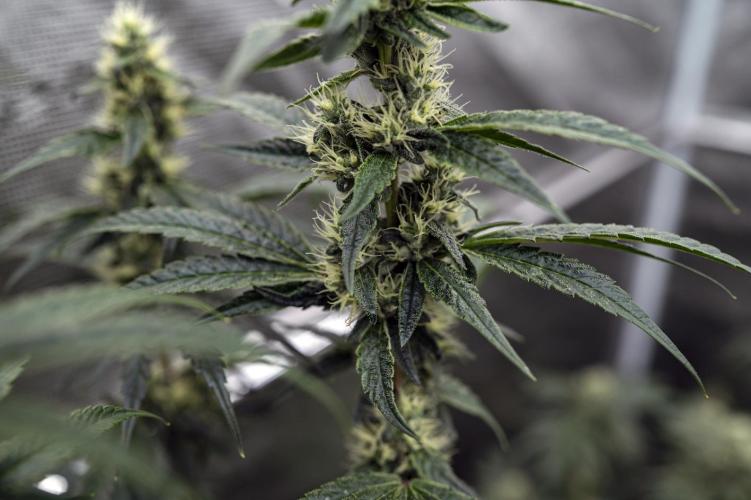
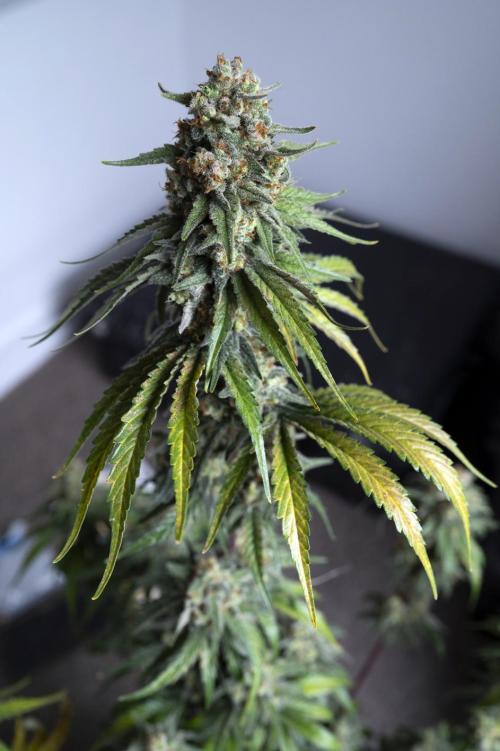
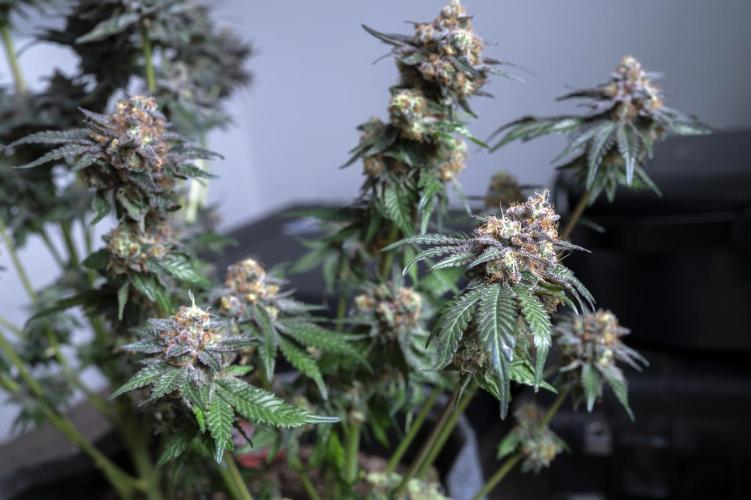
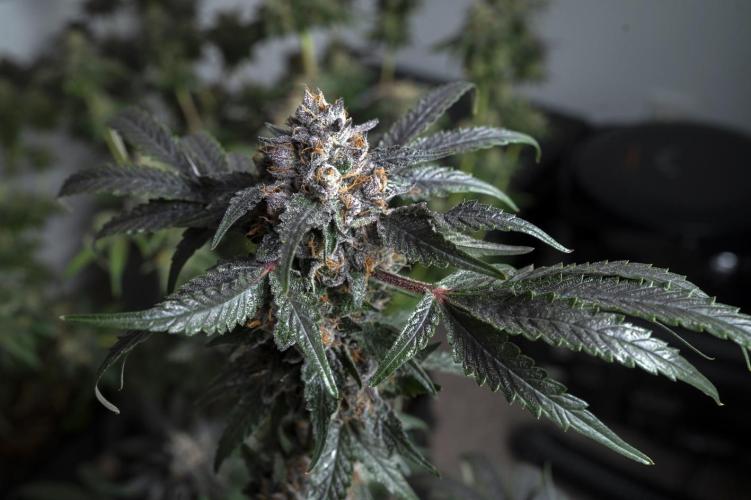
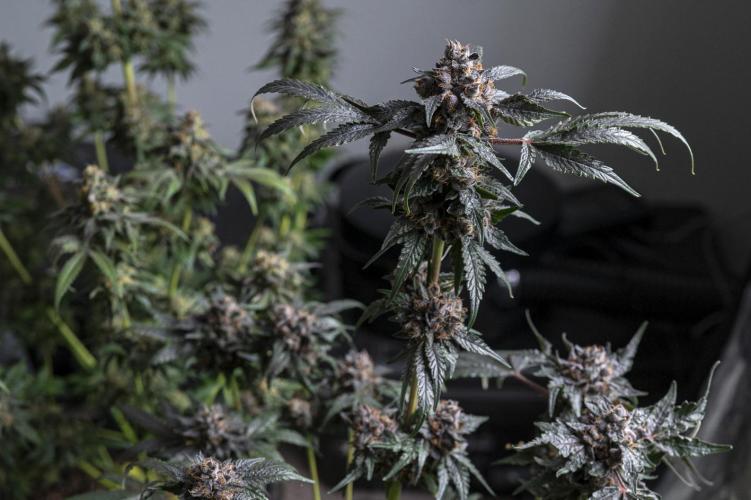
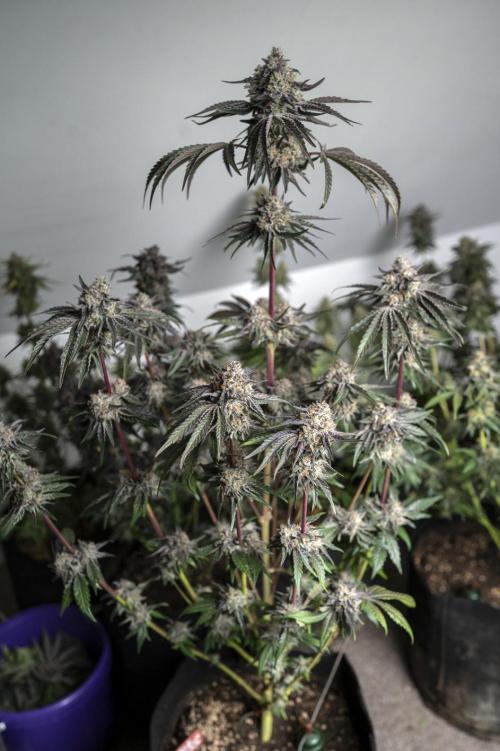
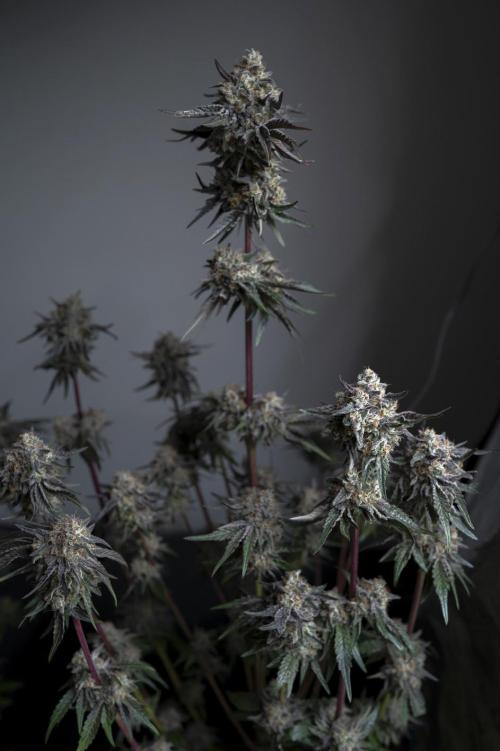
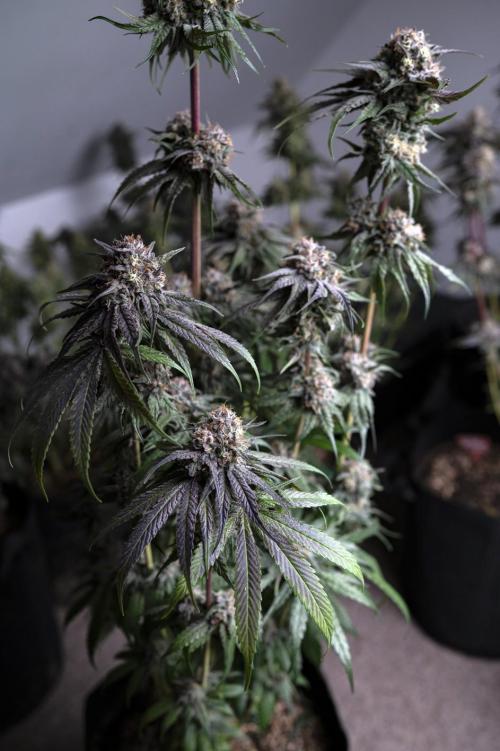
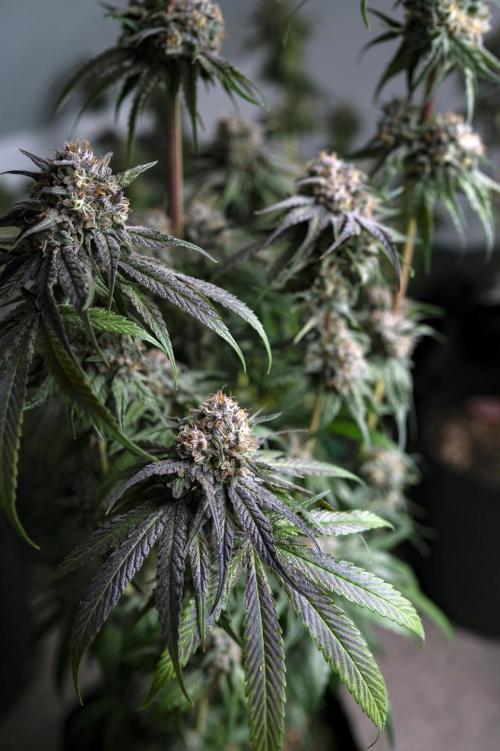
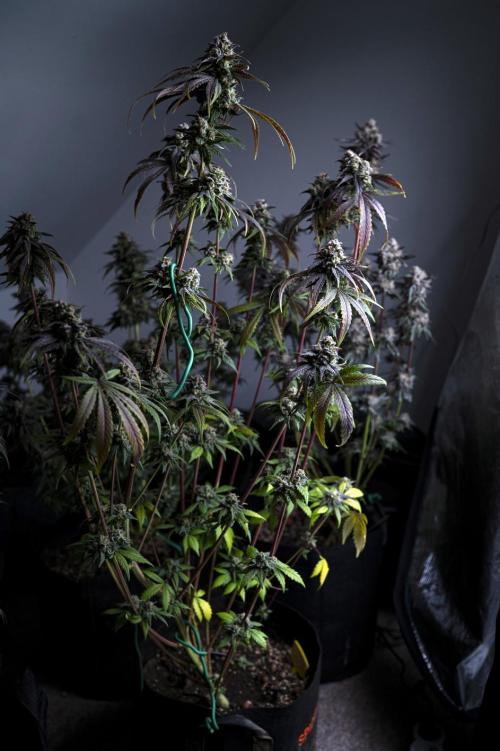
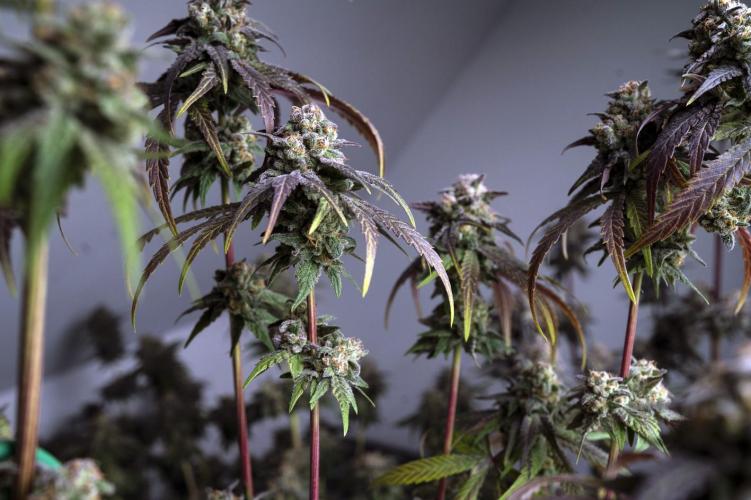
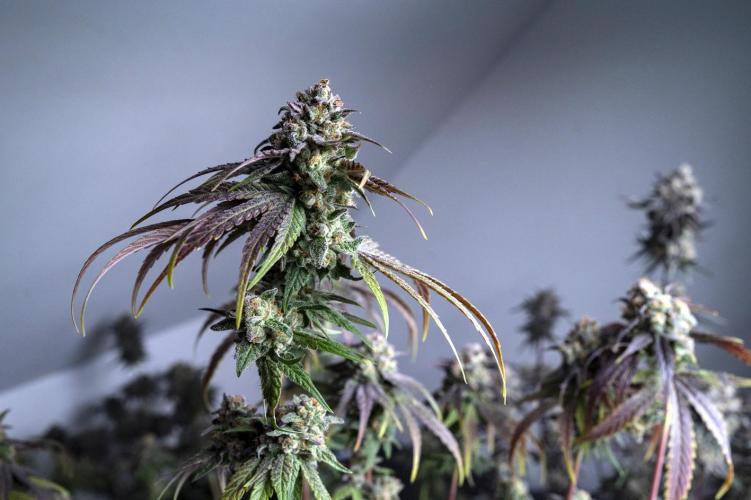
SWITCH420 This week is about stacking, monitoring humidity, watering, and maintaining VPD around 145–150.
Next week, I’ll lower humidity to 40% for the last weeks - sooner for some (Aladdin’s Skunk seems to be an early bird! Just waiting for the fade phase…) ; later for others like El Vale Haze, which has a pure haze look. I really like having different finishers — it means different effects, different tastes, and different textures. Always nice to have a decent, blissful range to choose from 😉 I already know this haze will be delicious and firmly on the uplifting sativa side, a powerful, clear mental buzz without sedation!
Week 7 is when buds are really forming. At this point, they’re all slowly expressing their final terpene profiles, and I can already tell it’s going to be fire.
Not the run I dreamed of, but honestly, I’m growing for myself, so let’s not be too harsh ;-) I’ll soon have some dank in my stash jar… 🌴❤️
6 likes
comments
Share
12
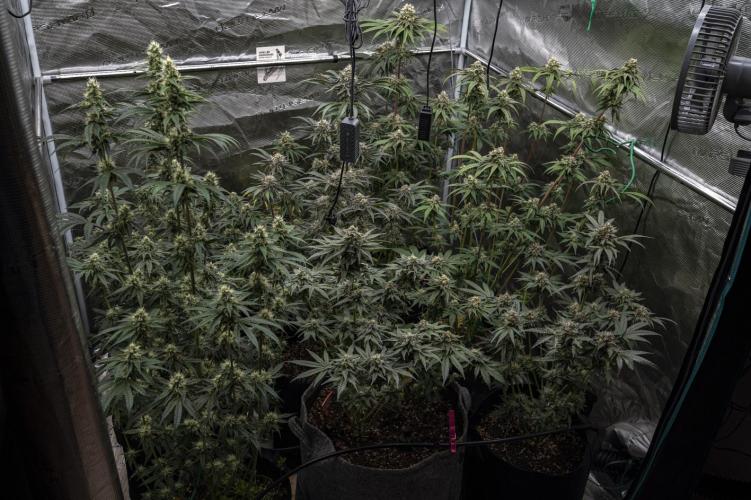
Week 12. Flowering
4d ago
1/47
12 hrs
Light Schedule
24 °C
Day Air Temp
Strong
Smell
65 %
Air Humidity
19 °C
Night Air Temp
18 liters
Pot Size
40 cm
Lamp Distance
Nutrients 1
Clear water
264.172 mll
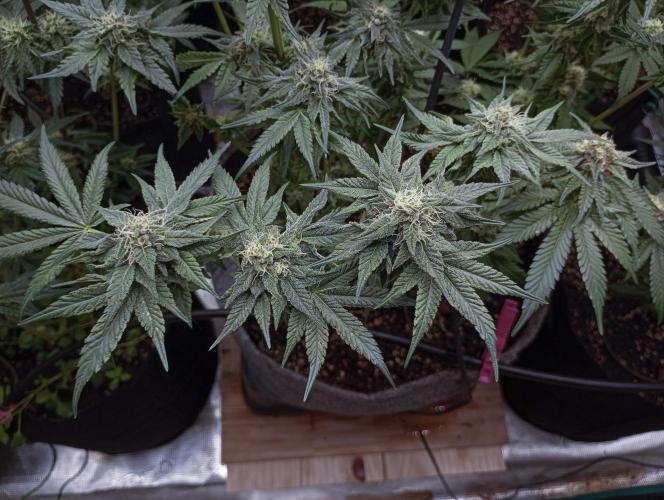
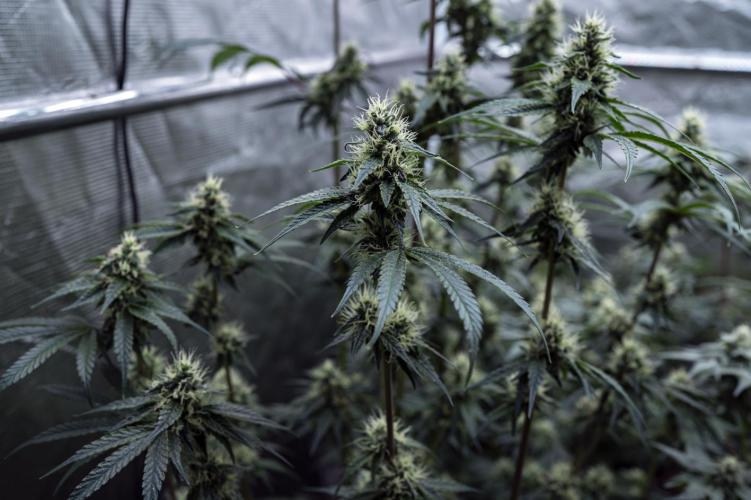
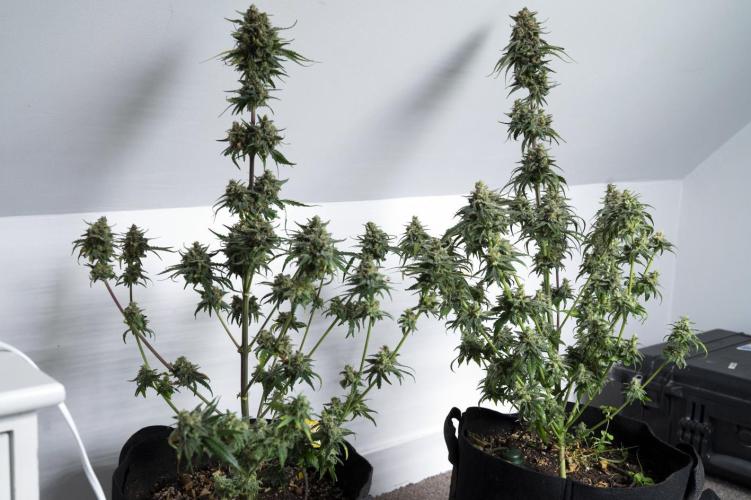
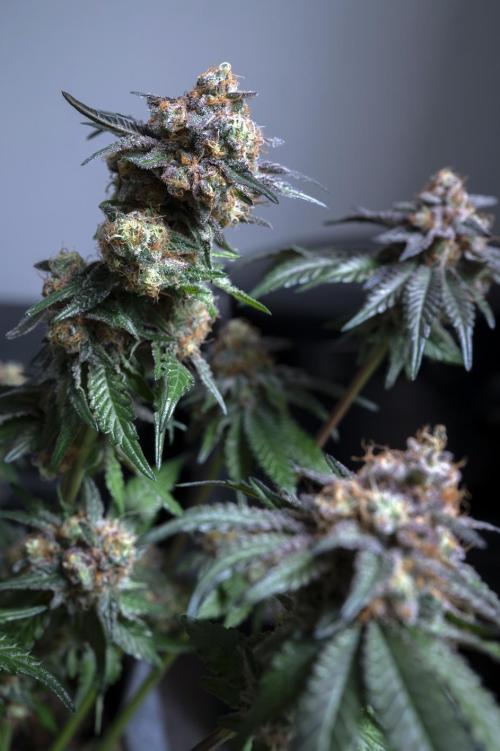
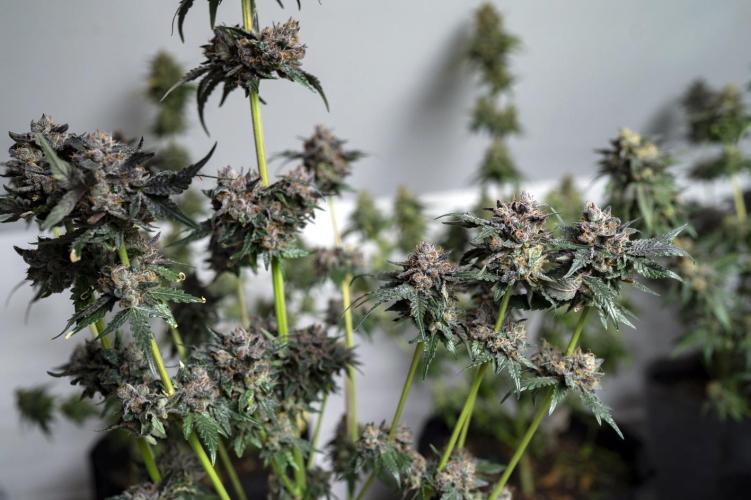
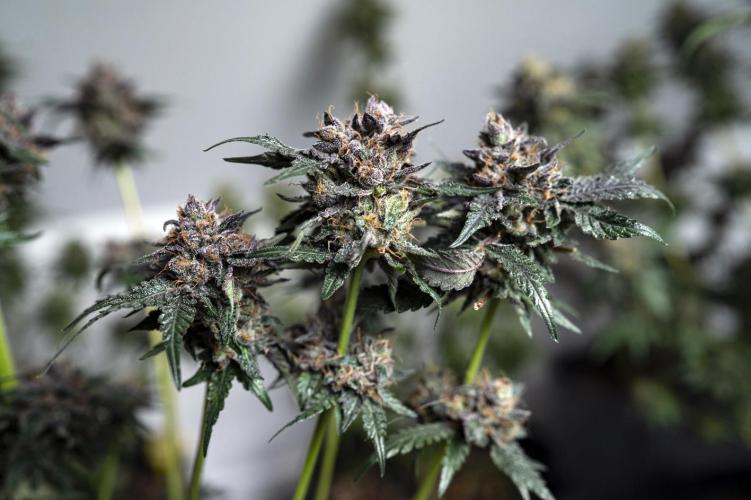
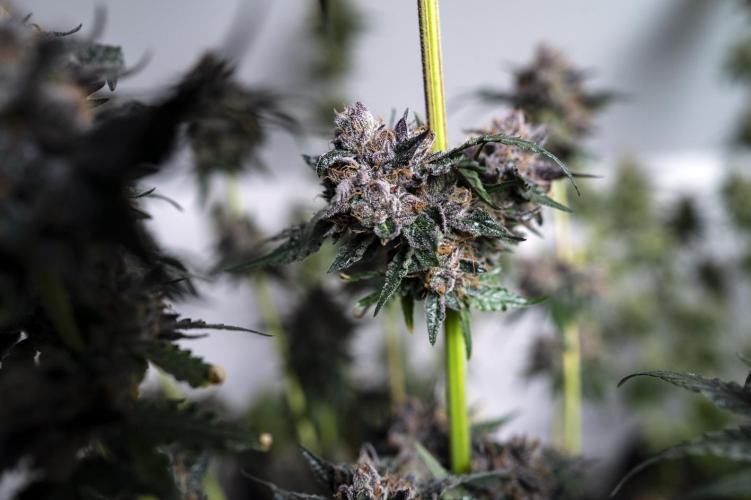
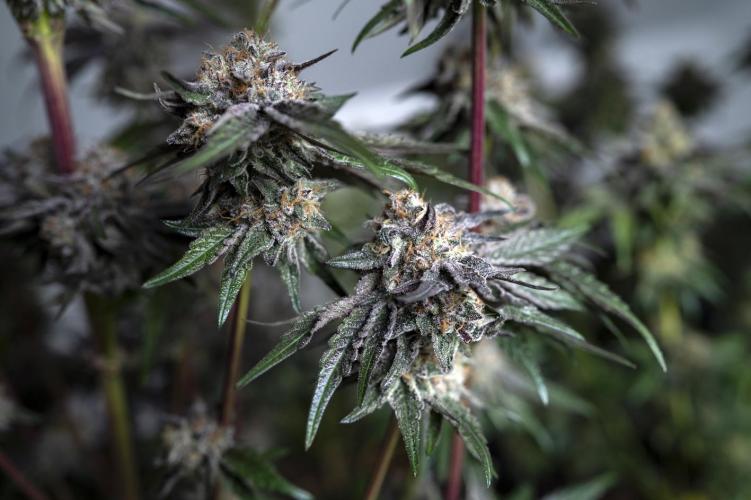
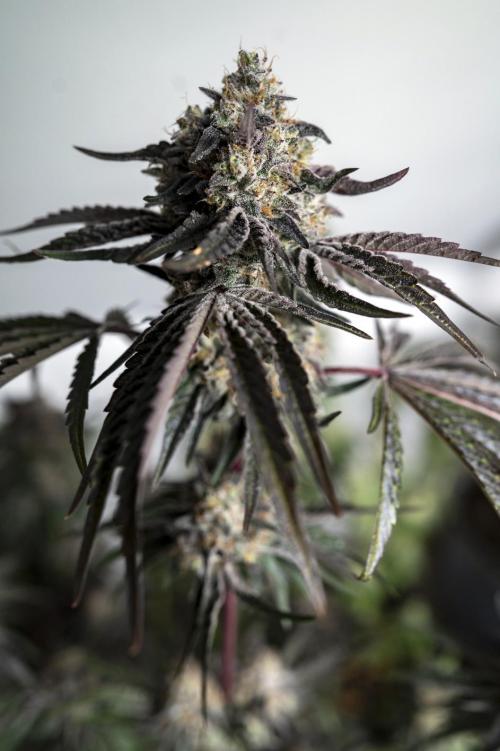
SWITCH420 From now on, I think I’ll cut a few strains in the coming days (one more week ?). Most of the trichomes are looking milky, except for the Haze from Compound, which I think will need another two to three weeks. Considering the amazing aroma she’s producing, she’s definitely worth the wait!
What you don’t see between last week and this one is that I moved house. It was quite an adventure managing all that chaos… but in the end, everything was set up in time, and the plants didn’t really complain about the transport, even in the cold winter weather. Allelujah!
The positive side of this move was being able to check each plant carefully, one by one, and defoliate them properly before the final sprint. Doing all of this while the pots are connected to the Blumat drip system is really challenging in a packed 4×4.
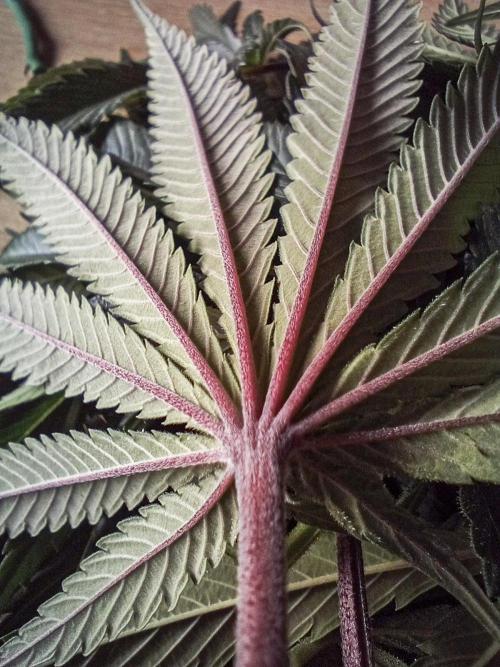
I also had the pleasure of taking some photos during that time — sweet moments. It was quite a sticky operation though!
With living soil, there’s no need to flush, but giving clear water every three days creates a light drough stress, which is perfect during the last week or so of flowering. Next week, I’ll start to cover the harvest and the drying process.
Thank you all for following this run with me ;-)
Happy grow, guys 🍀
*Totally forgot to shoot the “El Valle Haze” from Compound. I’ll add some pics soon. She still has some time before harvest.
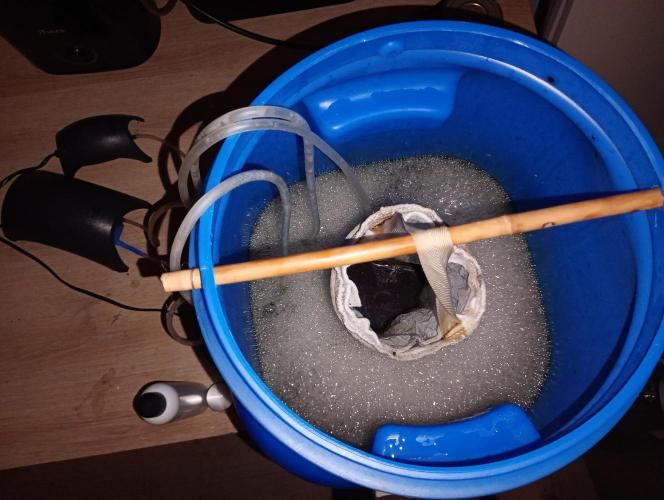
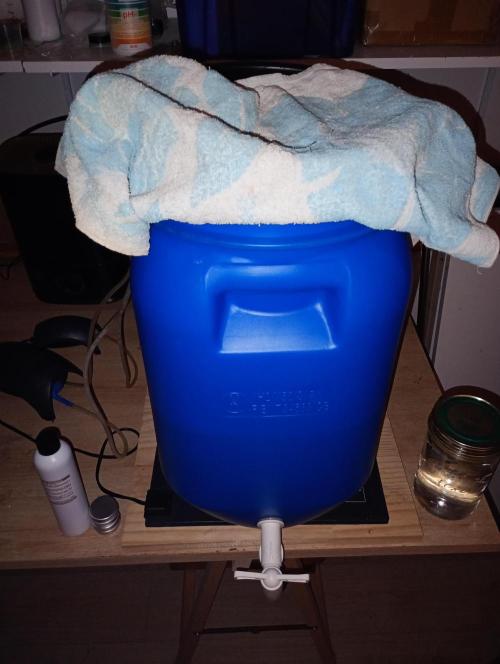
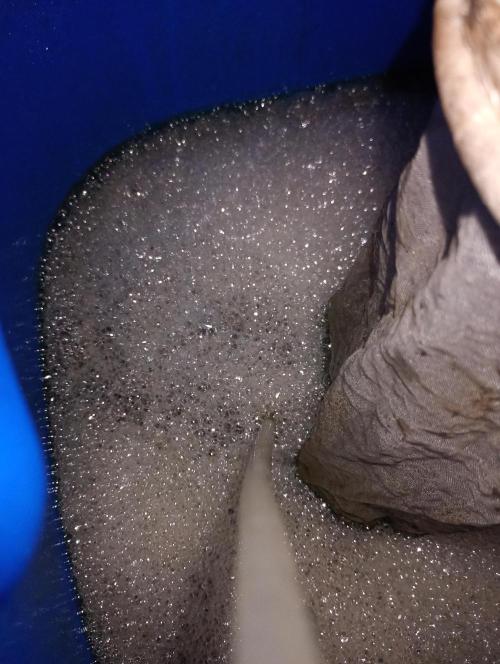
@cultivars, Hi. Blumats are really impressive. I use them for my indoor garden, for my tomatoes in the greenhouse during summer. It's quiet easy to set with the different videos on Blumat website. If you use larger pots, you should consider drippers !
Yes I top dress around them. I had no issue so far but it makes carrots pretty dirty (I think you can find something to protect your system... it's like a plastic ring that you fix on the top of your blumat's carrots and drippers. When you top dress, just rince with water carefully and it's all fine. I only pull carrots out if I have a doubt... plant wilting or else ... And all this works with gravity, zero power. I love them. Hum, I have much to say about them, but I need to get to work ! 😀 If you have other questions... Do not hesitate. All the best !


")