
Strawberry Banana Auto


Filt
Duct Carbon Filter 6-Inch


Coco Coir
Platonix

Perlite
Perlite
Indoor
Room Type
LST
weeks 5
Defoliation
weeks 5
25 l
Pot Size
Start at Harvest
G
Germination8mo ago
Aeromatics Goals for this grow: Taking my autopot experience to the next level!
My first round with 3.9 gallon Geopot autopots went great! My Northern Lights Auto from RQS and Pink Kush CBD yielded 99 g (personal Auto record!) and 92 g each, so I went ahead and purchased a 4 x 4 Autopot XL 6.6 Gallon system for my 4 x 4 tent… why not hahah!
This Autoflower run will consist of 4 different diaries, each run independently as their own journals. I learned from the last one that I liked having separate journals for each strain as each plant might need little adjustments here and there and will inevitably have different harvest dates, so it simply feels natural to have separate diaries!
They will share the same tent and same Autopot reservoir, once I turn it on around day 21-28, depending on group growth.
For this diary, I will focus on Strawberry Banana Auto from Fastbuds!
Let’s have a look at my general set-up and coco preparation, as it was a bit evolved from my previous grow. I am trying something a bit different!
Autopot Set-up:
Here are my specifics for the autopots:
Autopot XL 6.6 Gallon System
Autopot Airdomes
Autopot Airbases
12.4 Gallon Reservoir
HITOP 10W Powerful Aquarium Air Pump: 4-Outlets 320GPH
To ensure proper airflow through the airdomes, and as I did last time I set up my autopots, I took some q-tips and cut the cotton ends off of each side.. Once cut, I threaded each pipe through the q-tips and let it sit for 48-hours to ensure proper time to settle into shape. It works great!
Once I let those sit, I installed them into the airdomes, connected them to their appropriate tubing for the air pump, and placed them under the airbases.
Coco Coir Preparation Process:
For this autoflower autopot round, I am going to experiment a bit and up my ratio of coco/perlite from 70/30 to 90/10! I feel like the extra coco in there is going to help maximize size and yield for these 6.6 gallon pots. I am hoping for monsters here!
I ordered a a new set of 3 bricks of Platonix Coco Coir from Amazon and rehydrated them in Reverse Osmosis water.
Reverse Osmosis water do you say….?
That’s right! I made a huge upgrade to my grow set-up and officially switched from distilled to RO water. I got a RO Buddy and added a water line to my grow space, it simply needed to happen with the switch to Autopots.I figure that I will need close to 30 gallons a week during prime stretch/flower time between both tents, and it would be impossible and incredibly expensive to try and distill that amount. So I decided to work smart, not hard!
The RO system already came in handy during the rinse and x 2 buffer stage of my coco coir preparation. This stage, I believe, was KEY to my success in my first Autopot experience, as the buffered state allowed for an early thriving microbial environment for my root development and early plant growth.
This new recipe I created (see below) will hopefully increase the powerful root growth I had by building even more early root development potential in the 6.6 gallon pots. We shall see!
Once I double rinsed my coco with around 10 gallons of RO water, I started the buffering process!
Coco Buffering:
I had to break the batches of coco into two large yellow lid/black containers (costco!) since we are working with around 13 gallons of coco per container! They were heavy haha! This is, by far, this most arduous part of the Autopot process, but I do not mind at all!
I buffered twice (both for 24 hours). Each time was a buffering solution composed of 8 gallons of RO water.
For my first buffer, I went with around 1 ec charge and a ph of 5.75 for each 8 gallons
My nutrients included:
52 ml Ventana Plant Science Support
10 ml Ventana Plant Science Expand
1.5 tsp Stash Blend
4 ml Ventana Plant Science Grow
After the first 24 hour soak, I fully drained it and resoaked the two bins in another batch of the same 8 gallons of buffered liquid, this time bringing the buffer up to 1.2 ec, a bit higher than I did for my previous run. I hear some people even start their ec closer to 2.0, but I am not ready for that haha. I’ll try and work my way up to there!
My second buffer nutrients included:
65 ml Ventana Plant Science Support
10 ml Ventana Plant Science Expand
1.5 tsp Stash Blend
4 ml Ventana Plant Science Grow
I waited another 24 hours, drained the coco, and we were all ready to pot!
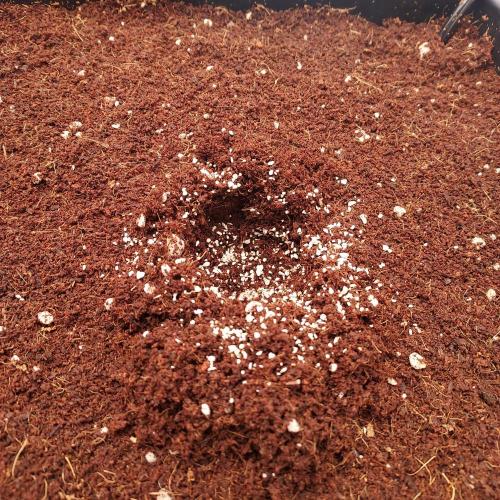
Potting Process:
I placed the Airbased and Airdomes in the bottom of the 6.6 gallon Autopots and added the buffered coco to fill around ⅓ of the container. I tamped it down, and at that point at sprinkled about a tablespoon of Xtreme Mykos around the entire layer. The goal of this was to give a layer of microbes to help explode root growth once my taproot and initial roots hit that layer around day 7/10. Plus, it column’t hurt… haha!
Then I added the rest of the coco to fill the 6.6 gallon pots, tamping down a few times to ensure I had some nice even compaction without overdoing it. I left around an inch or so at the top of the pot, and we were all set for the germinated seeding!
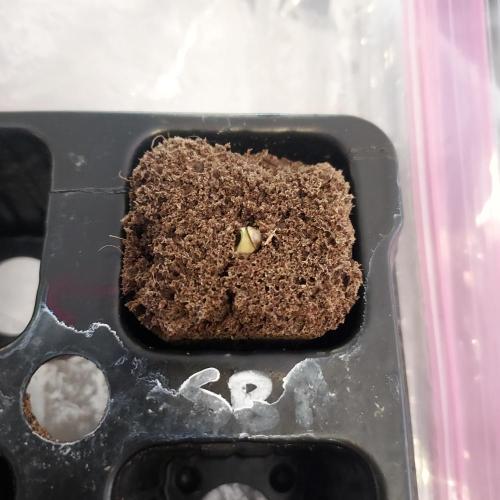
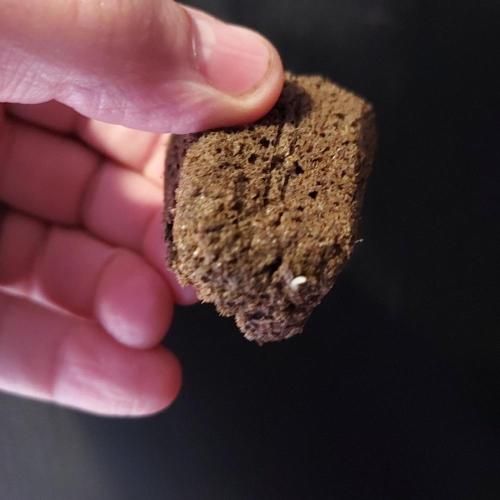
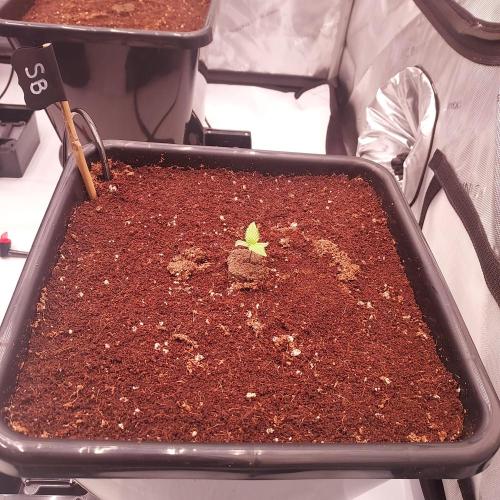
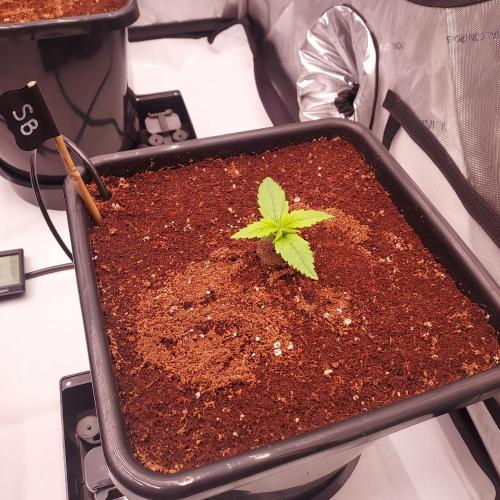
Germination:
I’ve been using Organiplugs for all my germination for my last 20+ seeds, and I am not going back to any previous system. All you do is: insert the seed, place into a germination cube holder, place in a ziplock back, wrap it up in a towel, place it in a tent, and wait for her to sprout!
I don’t have to worry about anything really, and it almost protects the seed from any real concerns from the seedling/sprouting process.
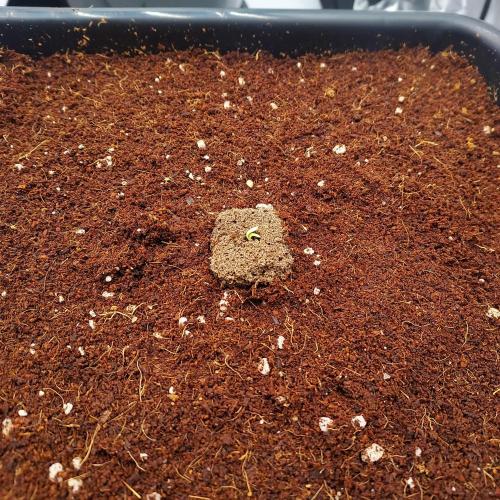
Once she sprouted (either I see a taproot, or the sprout actually pops out of the hole, or both!), I placed her about ¾ of the way down into the coco.
In the coco hole, I added some Xtreme Mykos to encourage root development, one of my favorite reasons to use organiplugs!
I didn’t need to “water her in’ to the coco, as the coco was still very moist from the buffering process. I was actually worried it was a bit too moist, but I went with it anyway.
Lighting Set Up
I’ll be using the wonderful Grower’s Choice ROI-FF 650W for this grow. I have it pulled to the top of the tent, and this will be the first grow where I actually play with some settings and DLI/PPFD a bit as opposed to simply setting it at max and hoping for the best. It’s a fun experiment!
For this first week, I am going to go for a DLI of 21 and a PPFD of 220 for the 24 hour cycle.
Everything has gone great for the first week!
7 likes
1 comment
Share
Used method
Rockwool Cube
Germination Method
1
Week 1. Vegetation8mo ago
7.62 cm
Height
27 °C
Day Air Temp
5.9
pH
No Smell
Smell
600 PPM
TDS
60 %
Air Humidity
24.98 l
Pot Size
152.4 cm
Lamp Distance
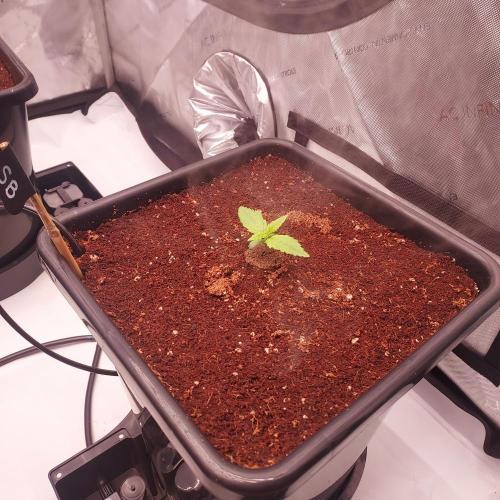
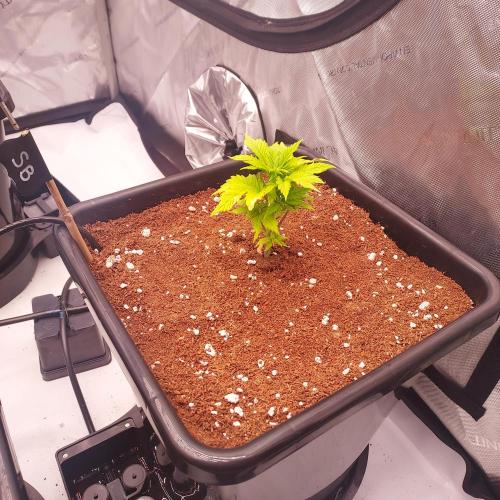
Aeromatics Same tent as my other 3 Autos; just light adjustments!
Great first 10 days, I did nothing at all but adjust the light potency. This is actually the first time I have done this for any of my grows, but I thought it would be cool to try something new for this one, along with the larger autopots.
I started them at 60% with my Growers Choice ROI-FF 650W set at max tent height. My DLI came in at 21 and a PPFD at 220.
After 7 days, I moved it to 70% with a DLI of 24 and a ppfd of 29, growth was good with minimal stretching.
Day 10 came with a bigger move to 90%, with a larger bump to a DLI of 29 and a ppfd of 350.
In a few days, once I see some larger stretching, I think I'll make the move to support the big stretch and max out strength.
I am planning on turning the autopots and airdomes on around day 30 for these, but we will see. They are still pretty heavy from the initial coco buffering and I really don't plan on watering them at all until they dry back significantly. They don't look like they are hating life at all, maybe a little light green? But then again, I have made the mistake of too much nitrogen many times in soil, so I think I am all good, to be honest. Hey, what do I know, ha!
I am really excited to see week the next two weeks in action. Stay tuned!
9 likes
1 comment
Share
2
Week 2. Vegetation7mo ago
15.24 cm
Height
27 °C
Day Air Temp
5.9
pH
No Smell
Smell
600 PPM
TDS
60 %
Air Humidity
24.98 l
Pot Size
152.4 cm
Lamp Distance
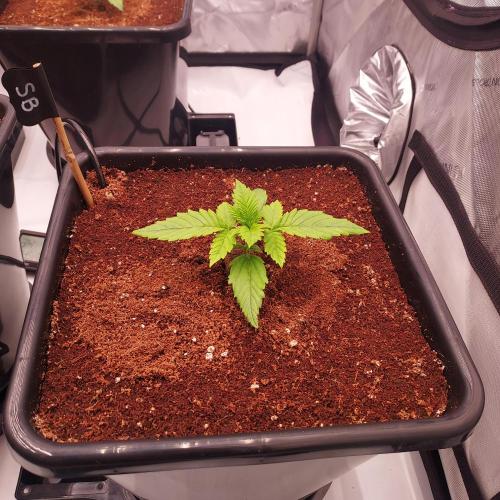
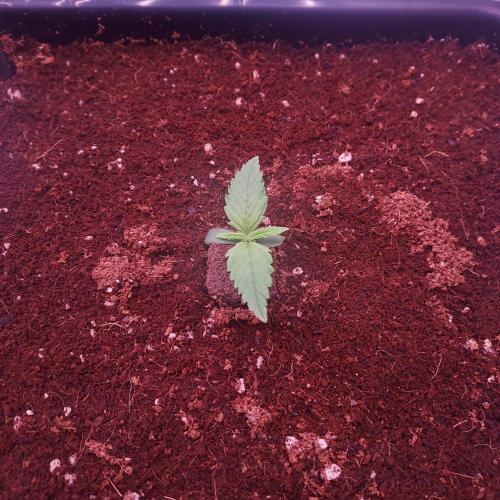
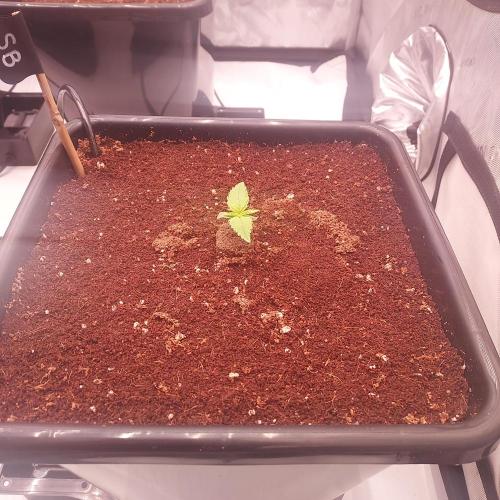
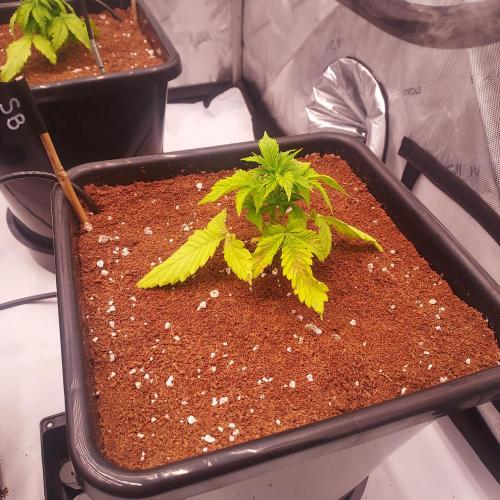
Aeromatics She is sharing my tent with my 3 other autopots. I hope all is going well!
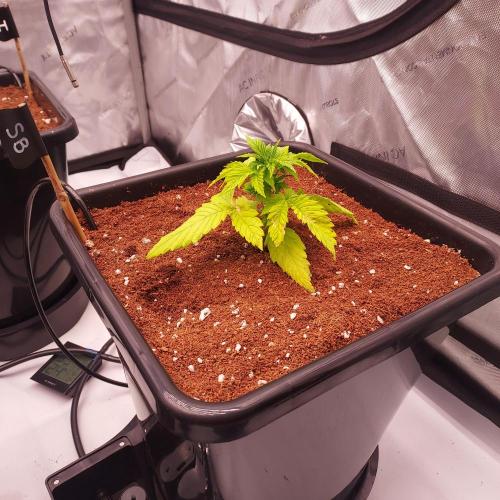
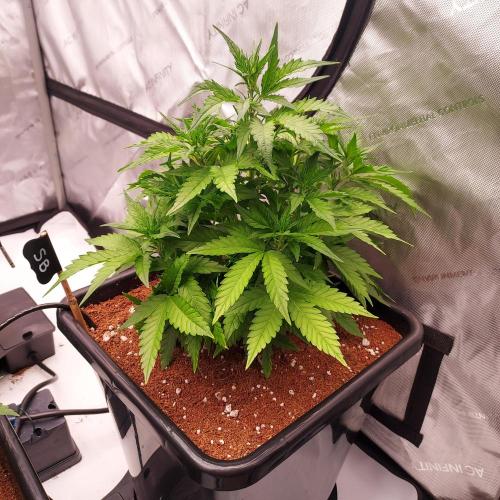
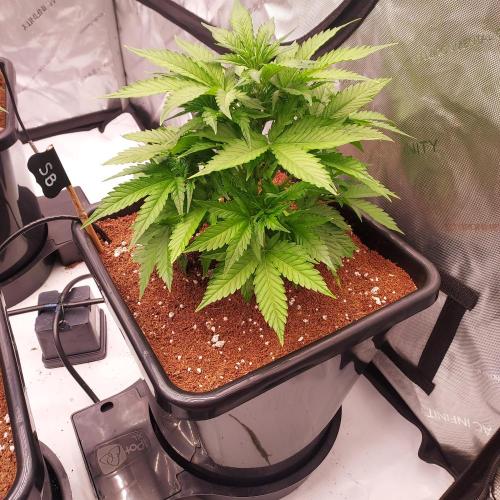
I really don't know for a first run with 6.6 gallons. I know they are working on growing roots and are likely to be smaller until they explore the pot a bit more and I get ready to turn on the airdomes and autopots, but they are looking lighter than my normal grows, and maybe it's the pots but the feel small. I have 6 nodes though, so I am being patient!
I can't water really.
Maybe my coco was a bit wet when I potted?
or maybe everything is great and we are just playing the waiting game until the system takes off in a few days when I switch it on.
The pots are getting a bit lighter each day, so hopefully we are getting there!
Today is day 17, hopefully next update the autopots are on and rocking a massive boom!
5 likes
comments
Share
3
Week 3. Vegetation7mo ago
17.78 cm
Height
27 °C
Day Air Temp
5.9
pH
No Smell
Smell
440 PPM
TDS
60 %
Air Humidity
24.98 l
Pot Size
152.4 cm
Lamp Distance
Nutrients 4

Support 4-0-0
1.585 mll

Grow 0-1.5-4
0.793 mll

Structure (Silica)
0.211 mll
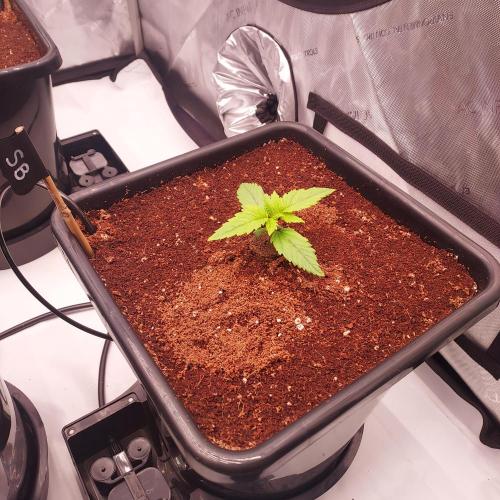
Aeromatics Days 14 to 21 - Big Week - Autopots Turned on Day 20!
Forgive my delay in updates. I caught Flu A this past week... BRUTAL!
I have spent most of this early run worried... I had not grow in these large pots before, and with only one autopot run under my belt, I am by no mean a veteran Autopot grower. I dug into forums and books and research and everything told me it was all about under the coco root development, and not about what was going on above the coco.
I saw tiny plants with a bit of chlorosis, but I also saw some great, TIGHT node development, and no real signs of any deficiencies. The coco bufferings were working away, and I told myself to be a HAND IN POCKETS growers here. I have the benefits of some successful runs and I can be experimental with these.
Key Events:
I turned the Airdomes On on day 18. I wanted to get oxygen in and get some root stimulation in there before turning on the autopots. I did the same with my previous autopot run, and it seemed fitting in the plastic pots. The plants liked the treatment and lighted up a bit before the big day... day 20!
Day 20 - AUTOPOTS ON!
I love this day.... this day is my Favorite day. This day shows success and proves patience is the best haha.
I mixed 12 gallons of RO water with the following recipe with my absolute favorite Ventana Plant Science Nutrients:
Ventana Plant Science Support: 60 ml
Ventana Plant Science Grow: 36 ml
Ventana Plant Science Structure: 10 ml
Ventana Plant Science Expand: 10 ml
The 4 autopots immediately drank up around 3 gallons of this mixture, which is proof that their root systems had reached the bottom of the airbases and were craving some feed. SUCCESS!
I, now, had to remain patient as the root systems were no doubt going to continue to develop from week three to week 4, with the big boom eventually showing above the coco.
3 likes
comments
Share
4
Week 4. Vegetation7mo ago
35.56 cm
Height
27 °C
Day Air Temp
5.9
pH
No Smell
Smell
440 PPM
TDS
60 %
Air Humidity
24.98 l
Pot Size
152.4 cm
Lamp Distance
Nutrients 4
Support 4-0-0
1.585 mll
Grow 0-1.5-4
0.793 mll
Structure (Silica)
0.211 mll
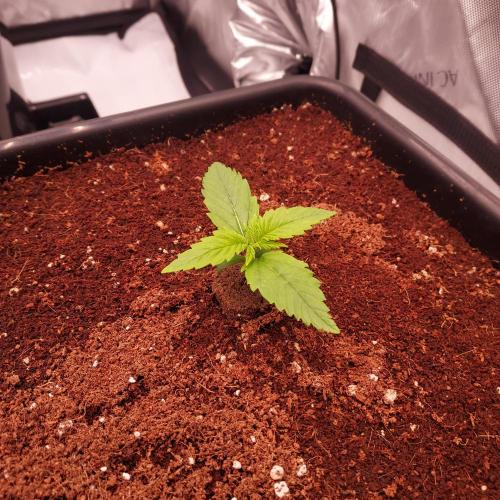
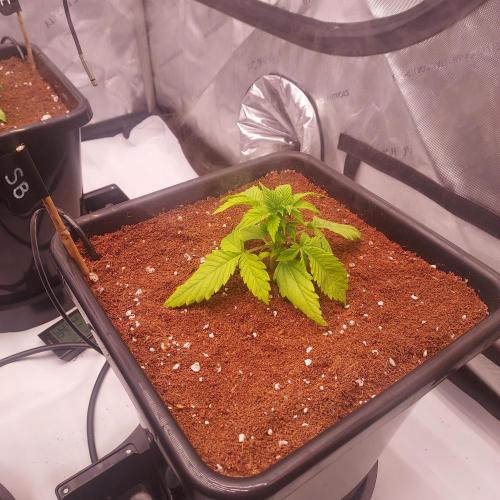
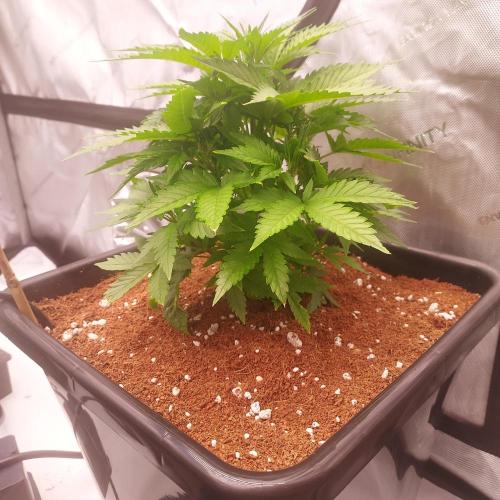
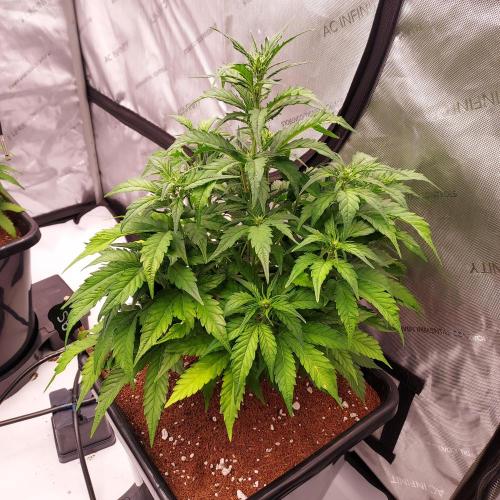
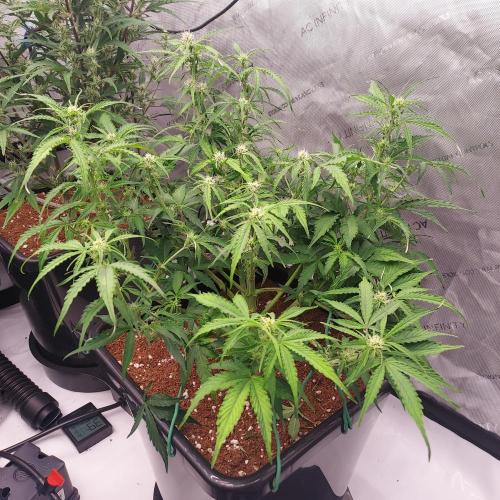
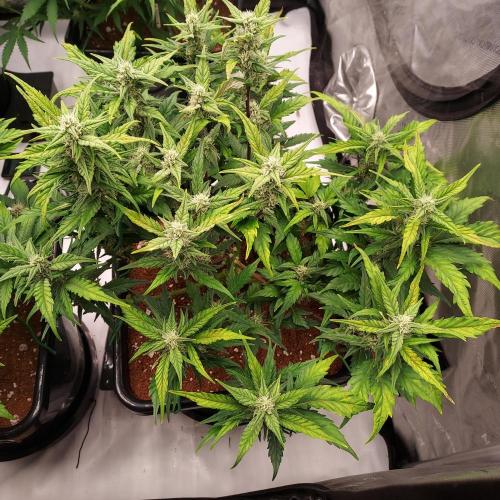
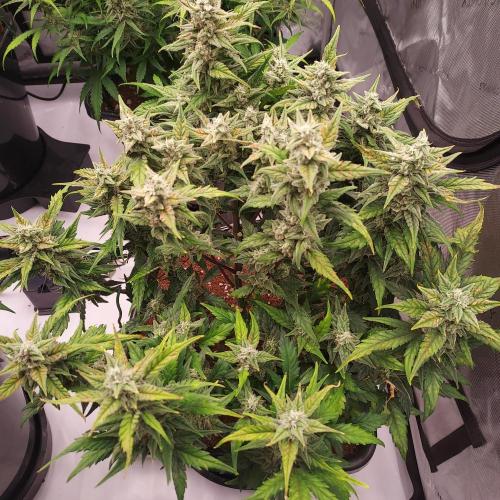
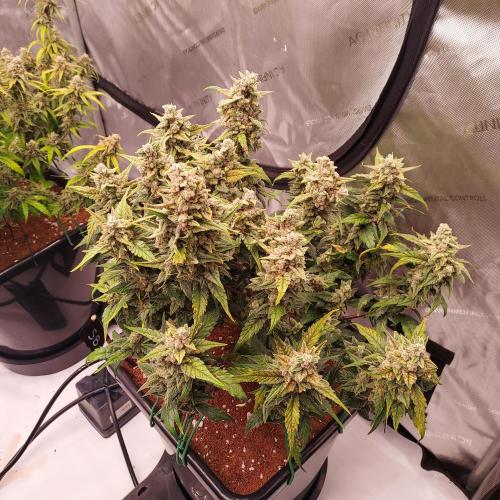
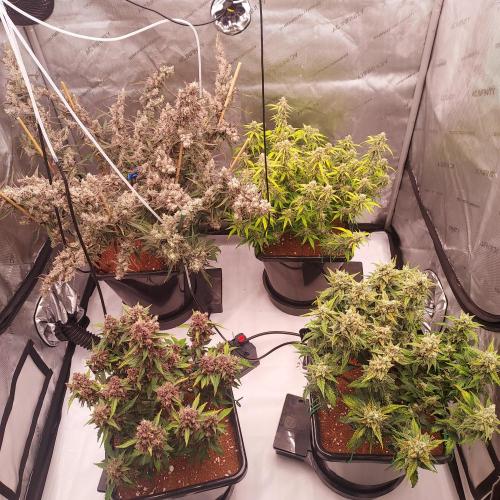
Aeromatics She is sharing my 4 x 4 with three other autopots, and they went on last week and..............
Wow, what a boom!! If you take a look at my "Day 20" picture from the previous week, I dare say she has, along with my other 3 in the 6.6 gal autopots, have 5x in size from Week 3 to Week 4.
Unfortunately I wasn't able to photo document this growth due to Flu A, but a nice side by side clear 7 day difference with the autopots on and working is a visual here.
I am super happy with the growth and I foresee (Elrond Vibes) even more development from week 4 to 5 as this is going to be where the root development really kicks in with the "big stretch"! I am going to keep all training to a minimum here with some LST after stretch possible as I read what the plant does over the next two weeks.
I'll also look to move from 9 to 10 with light strength for full tent power!!
She is still drinking from the previous reservoir feed, but a refil is due and will likely be the same recipe before switching to a pre-flower PK boost.
She is dense, node-full, and I think set-up for a beautiful pre-flower period of development!
7 likes
2 comments
Share
5
Week 5. Flowering7mo ago


60.96 cm
Height
27 °C
Day Air Temp
5.9
pH
Weak
Smell
440 PPM
TDS
60 %
Air Humidity
24.98 l
Pot Size
152.4 cm
Lamp Distance
Nutrients 4
Support 4-0-0
1.585 mll
Grow 0-1.5-4
0.793 mll
Structure (Silica)
0.211 mll
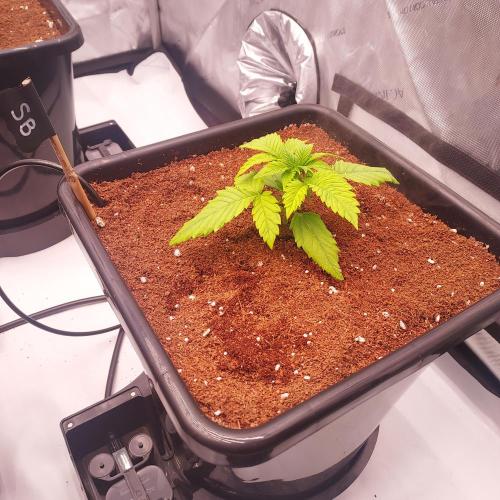
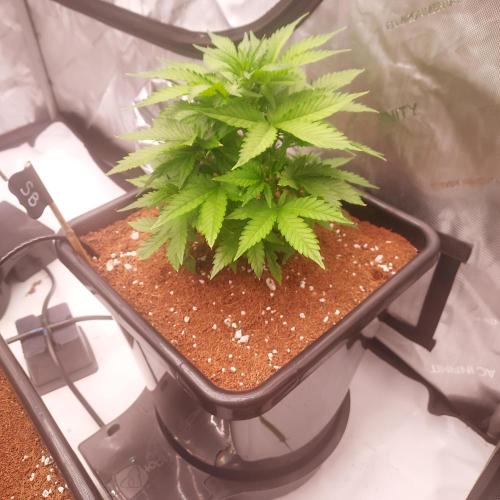
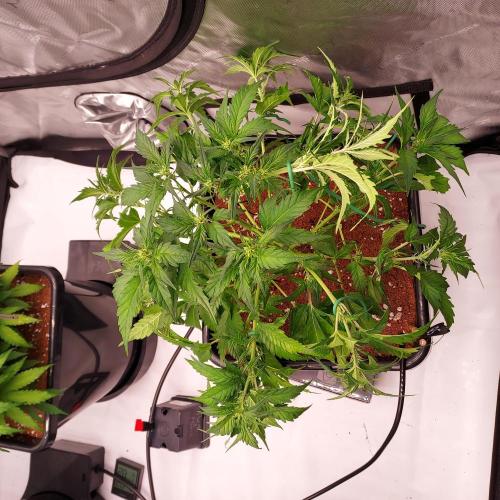
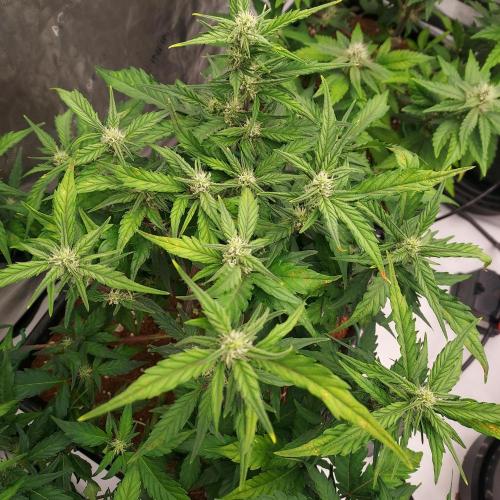
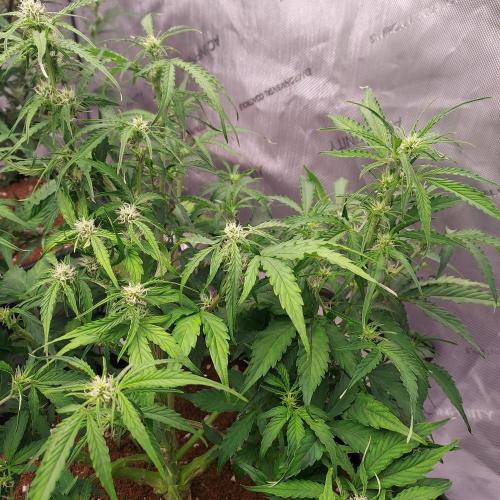
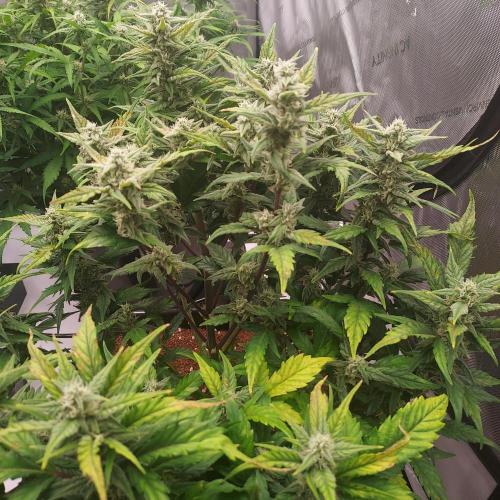
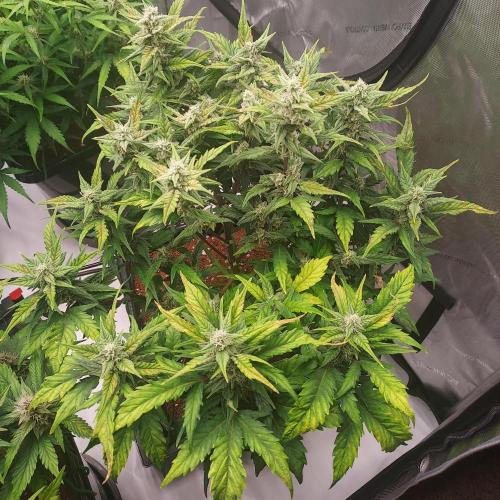
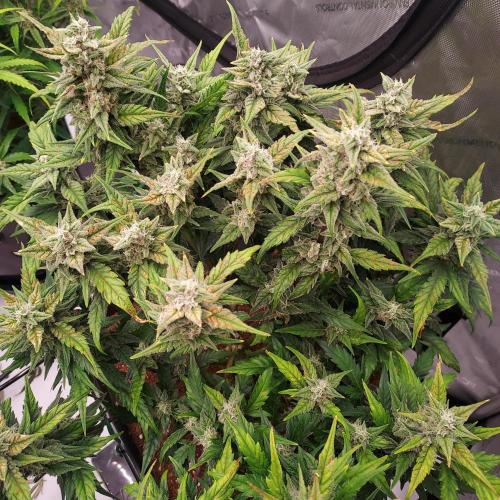
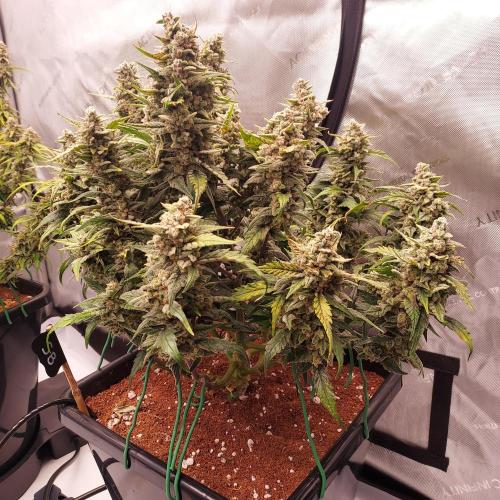
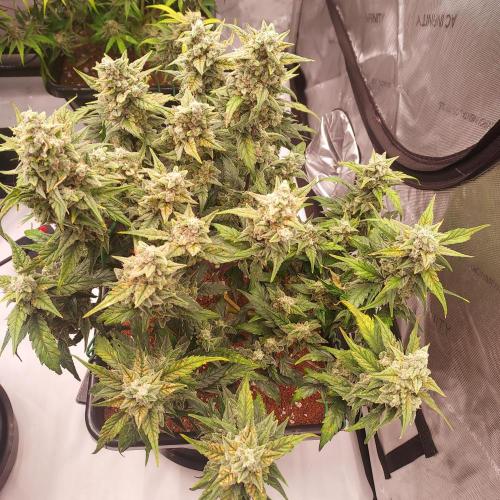
Aeromatics Individual Update: Strawberry Banana is grooving nicely! I fluffed and trained her officially on Day 35, after a good stretch and right before pre-flower. This is when I have normally worked on my autoflowers when growing in soil as I usually try to do as little as possible on them during the first 4 to 5 weeks to avoid any stress impact. She looked ready, but I am also a bit nervous that I might have stalled any additional stretch momentum given my move to larger autopots. It's all a big experiment!
She took to the fluff well and has several beautiful and strong stems! I trimmed up a good amount of the lower material and a few key larger leaves fan leaves shadowing some node/nug development.
This is the only major defoliation I'll be doing for this gal and hopefully she takes well to it! Let's see how this week goes!
General (Tent-Wide) Update: Great week for the 4 x 4 in general! The 4 plants are all in different stages:
Critical Mass CBD is in full flower
Lemon Cherry Cookies and Strawberry Banana are transitioning out of stretch and into pre-flower
Hyperion F-1 is just entering stretch
This means my reservoir recipe will have to account for all of these stages, which is the most difficult part of x 4 autopots pulling from one reservoir. However, I kept this weeks refill the same recipie as my previous one. It ticked all of the boxes minus some PK for early flower. Critical Mass doesn't seem to mind, but we will need to step it up for a likely day 37/38 fill.
I elected to do some defoliation and training on Lemon Cherry Cookies and Strawberry Banana on day 35, and will do the same for Hyperion F-1 heading closer to day 38/40, depending on stretch. They needed it, in my opinion, for light utilization.
All in all, I am happy and will hopefully get some solid development in pre-flower!
9 likes
3 comments
Share
Used techniques
LST
Technique
Defoliation
Technique
6
Week 6. Flowering7mo ago


66.04 cm
Height
27 °C
Day Air Temp
5.8
pH
Normal
Smell
512 PPM
TDS
60 %
Air Humidity
24.98 l
Pot Size
Nutrients 6
Support 4-0-0
1.532 mll
Grow 0-1.5-4
0.549 mll
Structure (Silica)
0.264 mll
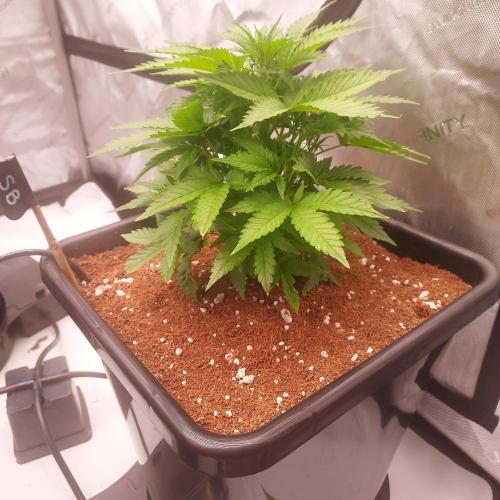
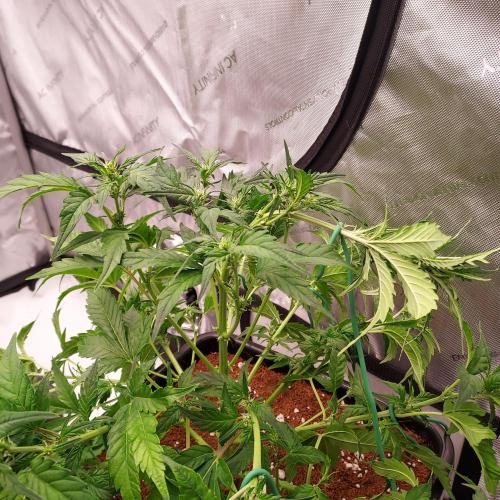
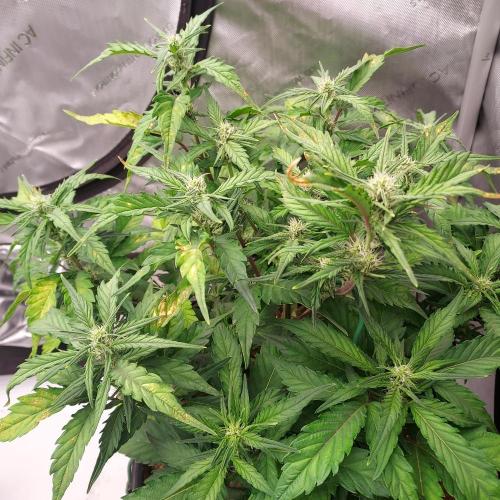
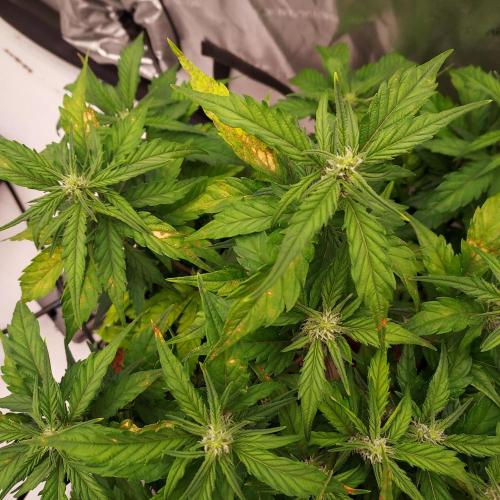
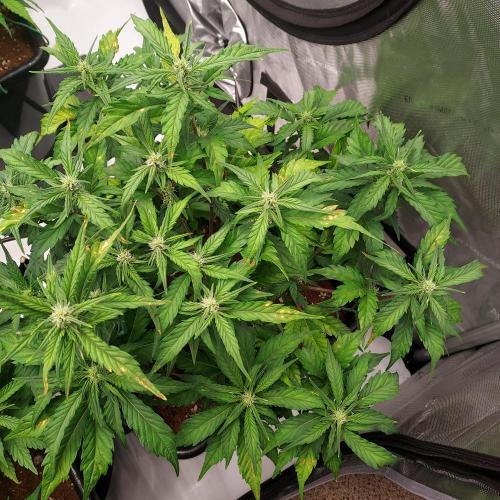
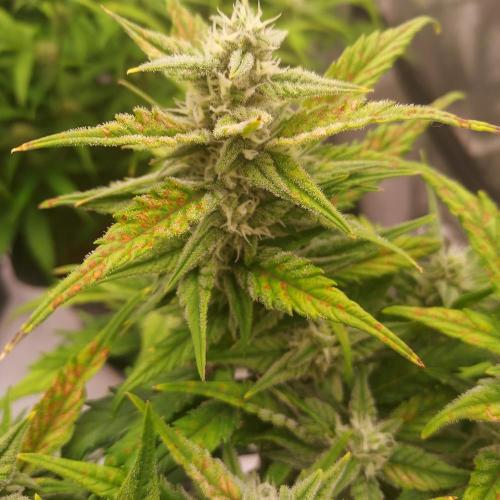
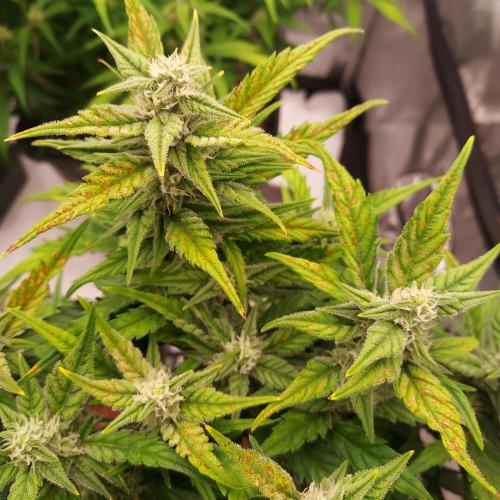
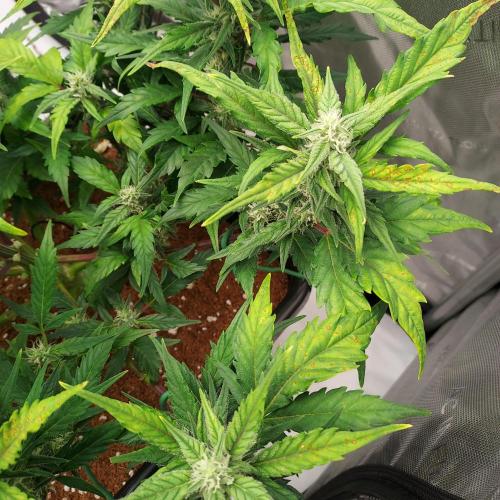
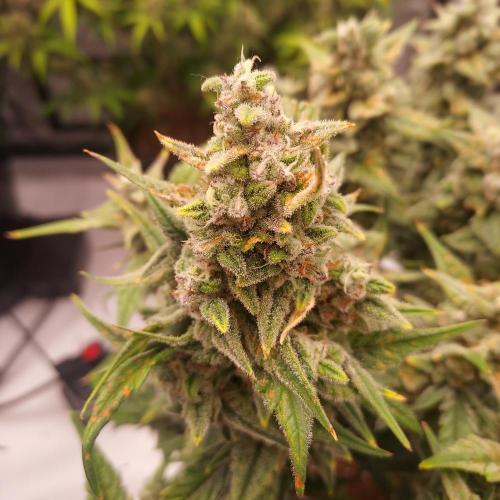
Aeromatics Individual Updates: Strawberry Banana was hit hard by either the PH fluctuations and me being out still recovering by the Flu A for a few days, where my reservoir rose to 6.5 for at least 2 days without being managed. The other 3 gals survived unscathed, but poor Strawberry Banana showed some definite signs of stress (see pictures from Day 38 and Day 40).
Burnt tips, copper spots, and some yellowing leaves were all signs of stress, but they have seemed to stopped progress, and on day 41 to 42, I observed praying leaves and hopefully a return to regular health. She also might have responded negatively to the training, it all sort of happened at the same time!
Hopefully now that she is settled, and that I am feeling better.... We have all recovered and can let the buds stack and finish strong! I'll continue to monitor and hope for the best.
General (Tent-wide) Updates: We made the switch to pre-flower and early flower nutrients this week! They burned through 1 12 gallon reservoir within 1 week, they are drinking like crazy!
My day 36 recipe was:
12 Gallons RO Water
Ventana Plant Science Support 60 ml
Ventana Plant Science Grow 25 ml
Ventana Plant Science Flower 20 ml
Ventana Plant Science Expand 12 ml
Ventana Plant Science Structure 12 ml
Ventana Plant Science FlaVUH 6 ml
PH: 5.8
EC: 1.024
They drank this reservoir steadily over days 36 to 41. PH drifted up towards 6.5 almost daily, so I adjusted it down with daily checks back to between 5.7 and 5.8. I missed one two day period and it drifted a bit higher for a bit longer, and poor Strawberry Banana suffered, but more about that in her individual report. The rest of the tent tolerated it just fine, but I think the tent-wide EC ceiling is going to be MAX 1.1 for this run.
On day 41, I had maybe 1/2 gallon left, so I tilted the reservoir a bit so it could be fully drained, and planned a day 42 refill. They most likely dried back a bit overnight, and on day 42 (the start of week 7), I filled her up!
My day 42 recipe was similar with a touch more Ventana Plant Science Support, likely due to my adding a bit more water to the reservoir than the previous fill.
12 Gallons RO Water
Ventana Plant Science Support 70 ml (up from 60)
Ventana Plant Science Grow 25 ml
Ventana Plant Science Flower 20 ml
Ventana Plant Science Expand 12 ml
Ventana Plant Science Structure 12 ml
Ventana Plant Science FlaVUH 6 ml
Heading into Week 7, I plan on fully switching to full Flower nutrients and moving away from Grow completely. It's tough to navigate 4 plants in seemingly different stages, with Hyperion being almost 10 days behind where Critical Mass CBD is, but all drawing from the same nutrient pool. However, I can say I am pretty happy with the tent-wide performance!
The next week I hope to see some great bud stac
9 likes
comments
Share
7
Week 7. Flowering6mo ago
76.2 cm
Height
27 °C
Day Air Temp
5.7
pH
Normal
Smell
525 PPM
TDS
60 %
Air Humidity
24.98 l
Pot Size
101.6 cm
Lamp Distance
Nutrients 6
Support 4-0-0
1.717 mll

Flower 0-3-4
0.872 mll
Grow 0-1.5-4
0.211 mll
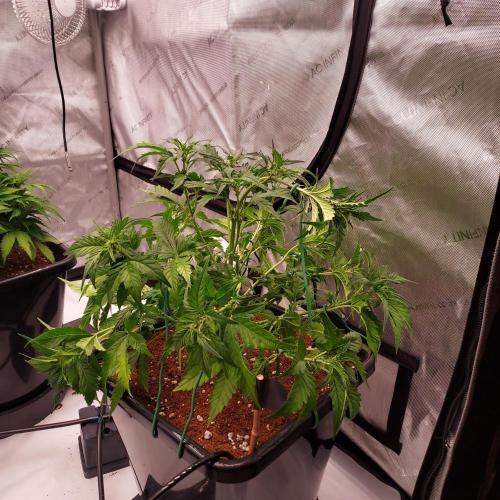
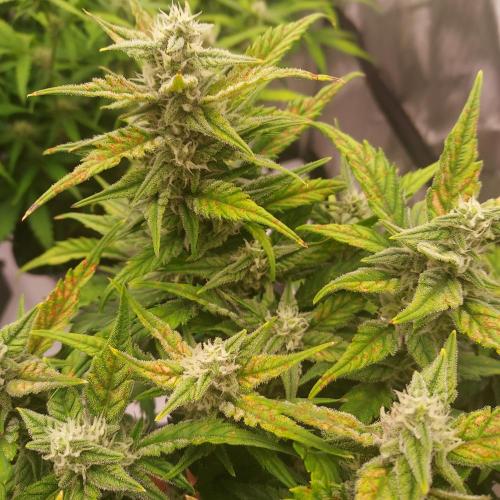
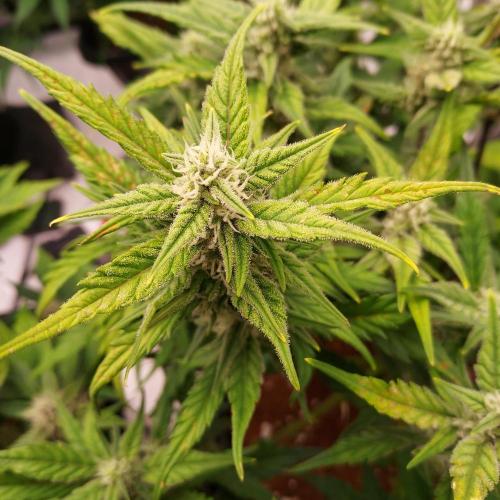
Aeromatics Strawberry Banana: Poor girl was hit the hardest of the four in tent from the ph swings and hygienic issues. Her uptake struggles were most evident in CalMag as notable chlorosis and classic copper spotting showed hard before the full system cleanse.
I was able to stop additional stress and damage after cleaning up my trays and hoses, and she is showing continued resilience and is making a comeback, stacking nugs and getting a beautiful layer of frost! From here on out, I plan on taking a leaf or two a day, strategically, but I really want to keep her stress down.
I think we still have some solid possibilities here for a solid yield, but I have learned much from this gal, and will reward her with continued care!
Tent-Wide Update: Aftermath of Flu-A Strikes the Tent...and a Hard Lesson Learned! Hygiene...Duh!
If you have been following this 4 x 4 run, you may know I got hit by the brutal Flu A and was out for a majority of a month. This scenario, along with my severe chronic pain and nerve disorders is why I went with the autopots... and I am so appreciative of them!
Yet, I have yet to do one of the most important things for the autopot system... hygiene and system maintenance! With my x 2 system (Northern Lights and Pink Kush), it was easy to do a once a week, maybe once every two week breakdown and clean, but I have been hesitant to really get in there with this 4 x 4 system. This was a mistake that I will not make again!
I've been dealing with some chlorosis, and what I identified as CalMag issues in my Strawberry Banana Auto (see diary if interested), but my CalMag in recipe has been steady. Additionally, my PH in my daily reservoir tests was swinging all over the place. One morning it was 5.4, next it was 6.5... bad news. I was used to a slow rise from 5.8 to 6.2 each day and a small adjustment.... but to swing high and low made me think there was something new and different going on for me...
Once I realized that, I thought.... You haven't cleaned the system once you lazy ass! I was a bit easier on myself haha... but still.
So I lifted my pots and there it was, a few spots of algae, biofilm, sledge, all things that would consume some nutrients, swing PH, and lead to some root issues that would cause damage, stress, and uptake problems... Poor Strawberry Banana. The others fared alright, but she definitely took a hit.
The system was deep cleaned, a bit easier than I thought it would be, and we were back in action!
Lesson learned for future grows: Minimum Every Two Weeks: System Clean!
On day 52, I filled a Full Flower new reservoir and I think we are past the majority of the harm... I hope!
Here is the recipe:
12 Gallons Reverse Osmosis Water
Ventana Plant Science Support 75 ml
Ventana Plant Science Flower 40 ml
Ventana Plant Science Grow 10 ml
Ventana Plant Science Structure 12 ml
Ventana Plant Science Expand 12 ml
Ventana Plant Science FlaVUH 6 ml
EC 1.05
PH 5.65
Heading into Week 8, I really hope to recover from all of those hygienic issues, maintain a consistent PH, and stack some buds, especially in Critical Mass CBD Auto, where I think we can get some massive yields!
7 likes
comments
Share
8
Week 8. Flowering6mo ago

76.2 cm
Height
27 °C
Day Air Temp
5.7
pH
Strong
Smell
540 PPM
TDS
60 %
Air Humidity
24.98 l
Pot Size
101.6 cm
Lamp Distance
Nutrients 7

Mammoth P
0.053 mll
Support 4-0-0
1.717 mll
Flower 0-3-4
0.872 mll
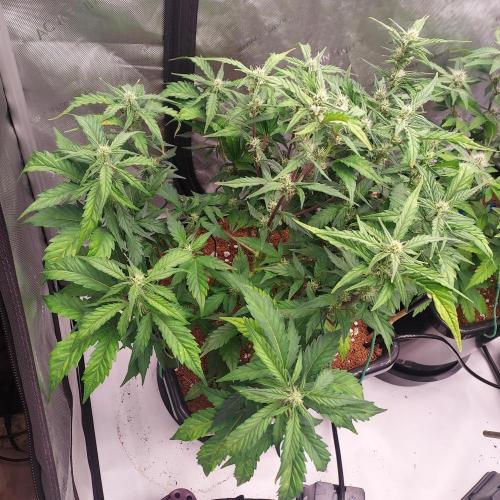
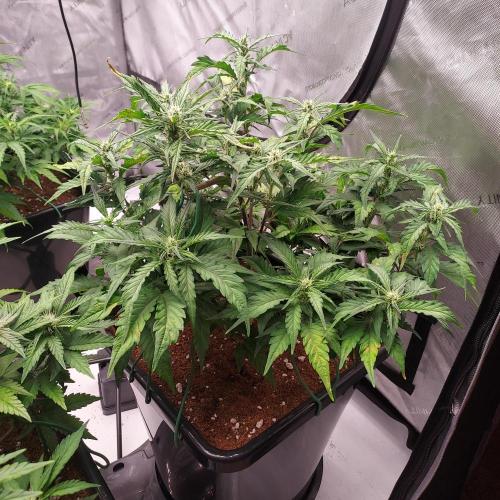
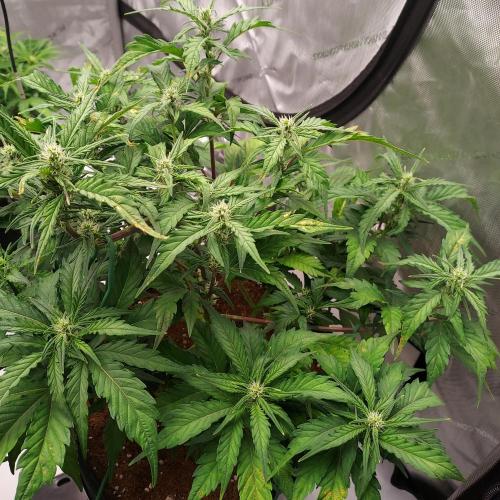
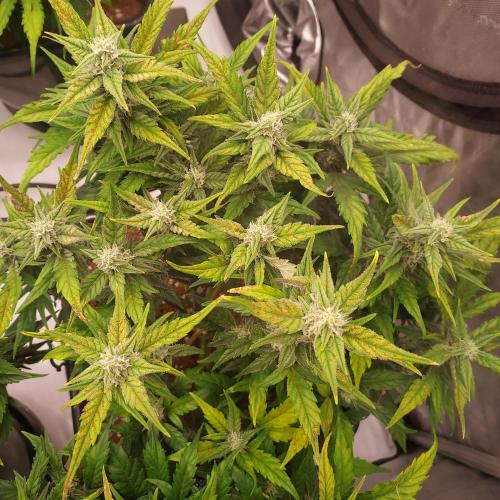
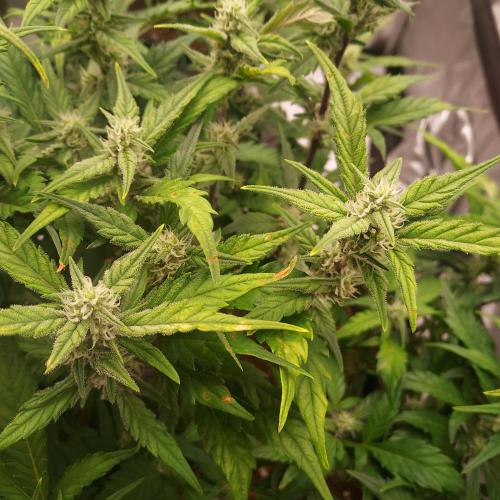
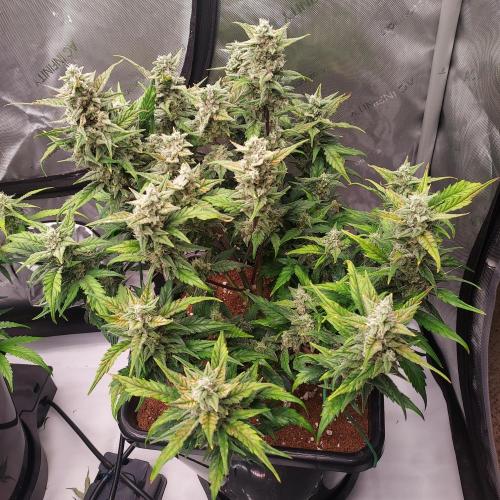
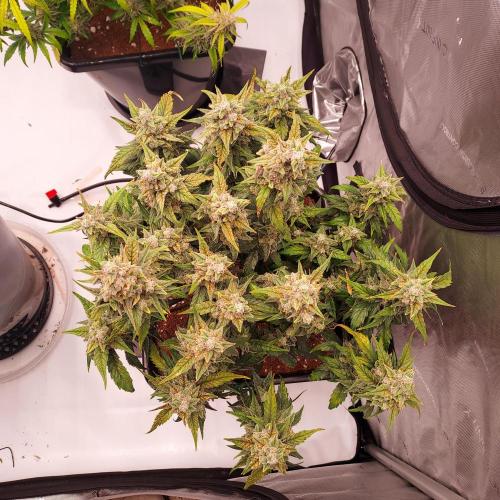
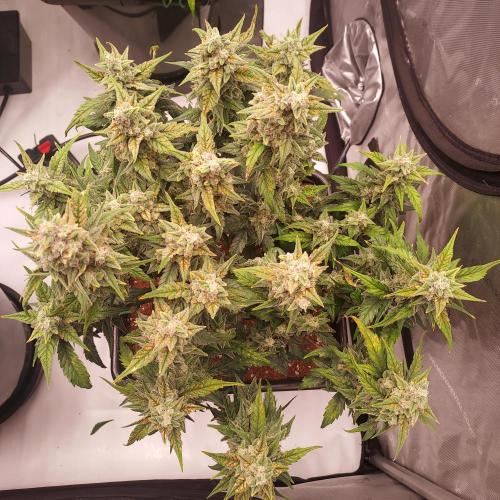
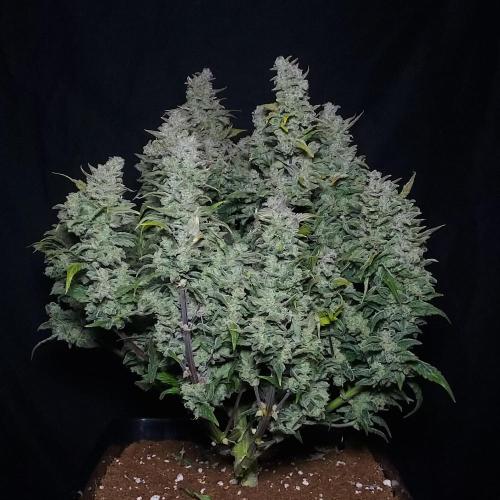
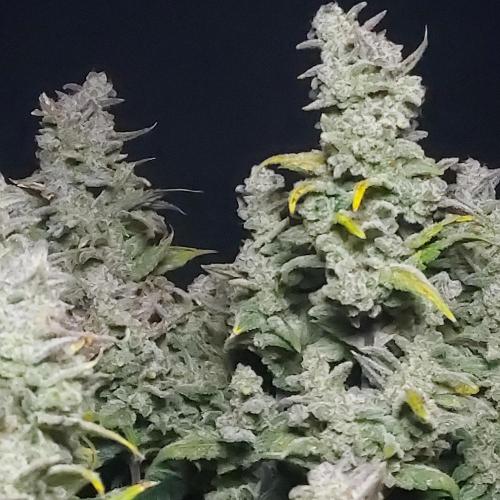
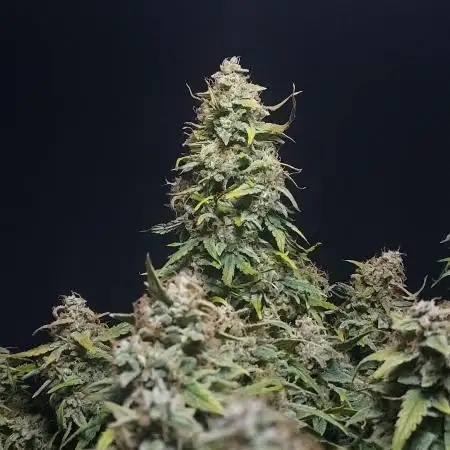
Aeromatics Day 59 - Strawberry Banana Auto: I think we have recovery! Her damage is definitely cosmetic, but from what I can see and smell, we have cleared the danger zone of ph imbalance and uptake issues, and she is drinking well and hopefully loving life!
We have a nice frost across the board and her main cola training has resulted in a very interesting, almost "bouquet" of center flowers. I am getting the feeling that her and Hyperion will be late finishers, maybe for bulk, but also maybe for ripening and terp development, and I am in no rush.
Day 59 - Tent-Wide Update: I got a new delivery of some exciting additives that I hope to incorporate in my grows moving forward!
I used to use Tribus in my coco to help with microbial life stimulation, but I recently discovered Mammoth P Active Microbials, and I can’t wait to see the magic of what it can do for my root health! This week was my first addition and I added 1 ml of Mammoth P to the remaining 5 Gallons of my previous reservoir to get it into the roots ASAP.
Adding microbes to the reservoir swung my PH a bit for 2 days, first dropping it to 5.4 and then raising it up to the low 6s, but I as always, I checked and adjusted each day to maintain 5.7 to 5.9 ph levels. I am especially diligent with this given the ph swings from my lack of hygienic maintenance.
Speaking of hygienic maintenance, the plant, while visibly damaged (especially Strawberry Banana and it’s Calmag uptake issue…poor gal) have ceased progressive declination and look strong! They are all drinking well!
I filled a new reservoir batch on Day 57 of a clean, full flower mix:
12 Gallons RO Water
Ventana Plant Science Support 75 ml
Ventana Plant Science Flower 40 ml
Ventana Plant Science Grow 10 ml
Ventana Plant Science Structure 12 ml
Ventana Plant Science Expand 12 ml
Ventana Plant Science FlaVUH 6 ml
Ec 1.08
Ph 5.7
In my next fill, I hope to include an exciting next part of my recent delivery: Stash Bloom! Stash recently released a 3 part nutrient enhancement system. I already use Stash Blend, but Base and Bloom are new. I am past the point of using Base for this grow, but I’ll incorporate Bloom in my next reservoir fill to boost flowers, terps and maximize buds!
6 likes
comments
Share
10
Week 10. Flowering6mo ago

76.2 cm
Height
25 °C
Day Air Temp
5.7
pH
Strong
Smell
500 PPM
TDS
56 %
Air Humidity
24.98 l
Pot Size
101.6 cm
Lamp Distance
Nutrients 5
Support 4-0-0
1.532 mll
Flower 0-3-4
0.991 mll
Structure (Silica)
0.211 mll
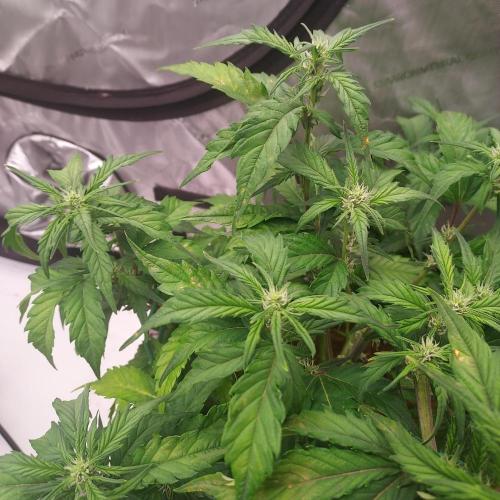
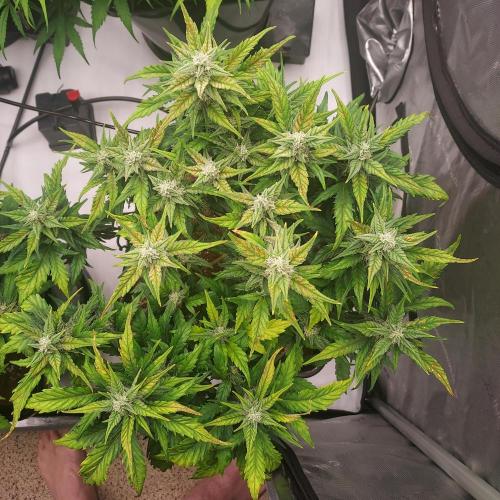
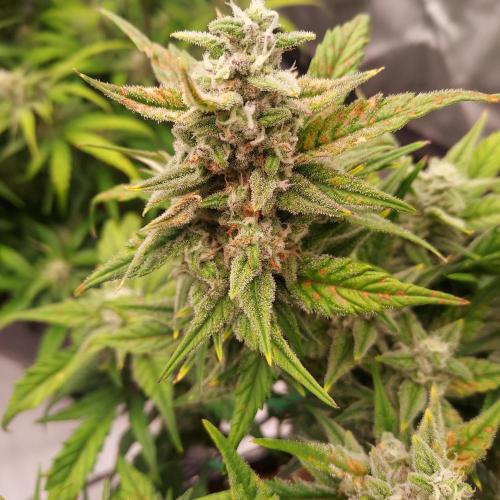
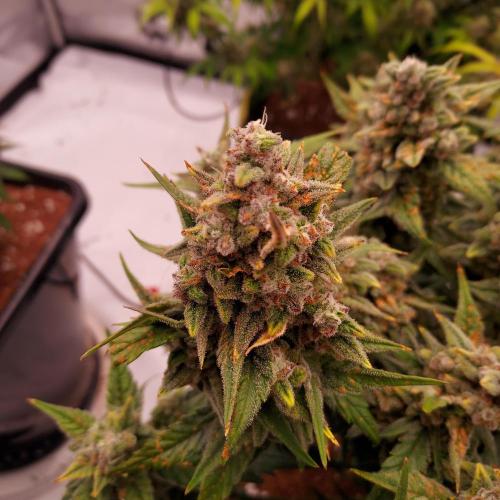
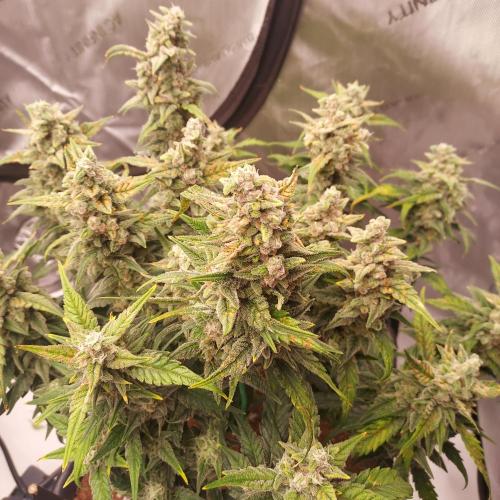
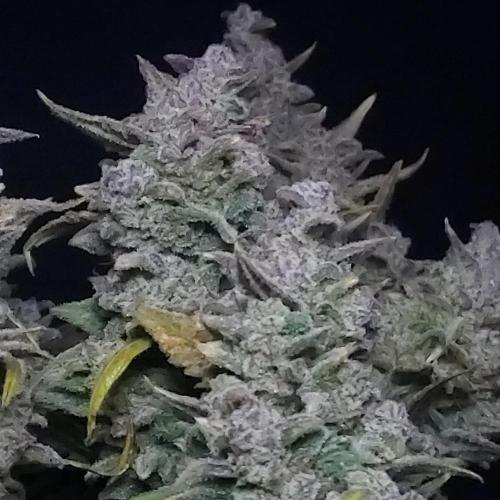
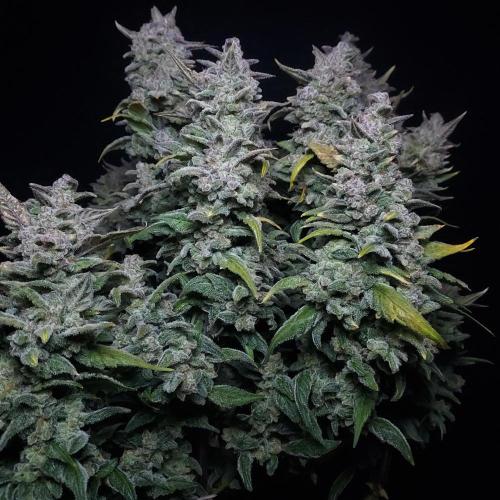
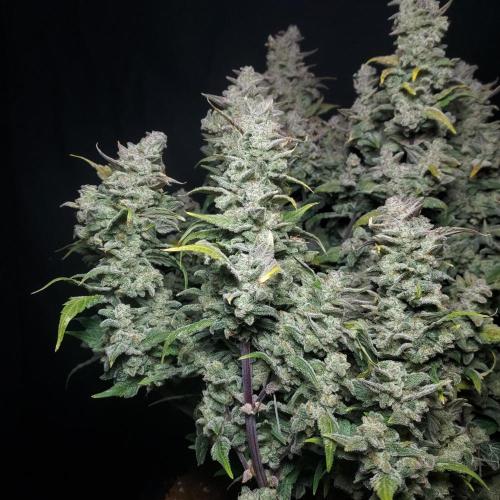
Aeromatics Strawberry Banana: She is getting ripe like a delicious plantain haha!
I am starting to see some elements of red and purple coming through, so I absolutely see why she has earned her title of Strawberry Banana, and she is producing an absolutely beautiful array of dense nuggets. She is frosty, but still looks like she is ripening and building, so I have continued to keep her on the reservoir and I am not quite sure when I will cut her off to finish on what is remaining on the coco and her roots/ foliage.
She does have some of that superficial damage from those early PH swings, but that's alright, she is a glowing beauty and is going to give some sweet smoking when she is finished!
Tent Updates: We have been in the finishing stages across the board!
I have been filling a final flower recipe with the addition of a beautiful new mix from Stash called Stash Bloom. I just got it in the mail, so I've only been able to add it to my final two reservoir fills, but as a finisher, the plants have been absolutely loving it. I'm excited to work in all three new products in my next 4 x 4 grow.
Reservoir Recipe:
12 Gallons R/O Water
Ventana Plant Science Support 70 ml
Ventana Plant Science Flower 45 ml
Ventana Plant Science Structure 10 ml
Ventana Plant Science Expand 10 ml
Ventana Plant Science FlaVUH 8 ml
Stash Bloom (New Addition!) 3 g mixed in separately in a cup of RO water and then added to the 12 gallons
I pulled out my Critical Mass CBD on day 72, so there's a bit more room in the tent now.
We are in finishing stages across the board and I'm excited!
12 likes
comments
Share
11
Week 11. Harvest5mo ago
Happy Harvest Day!


10/10
Rated
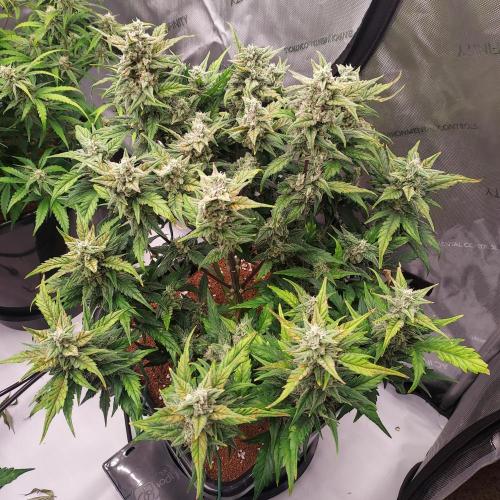
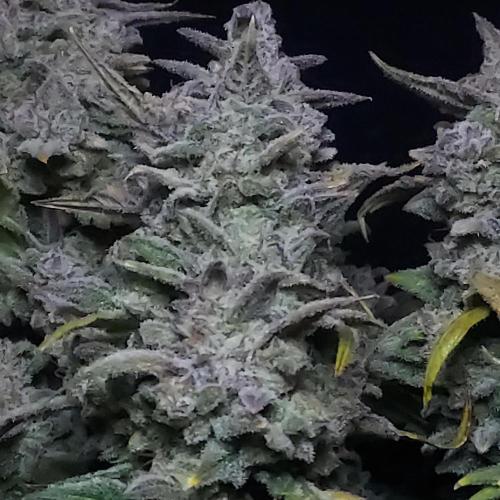
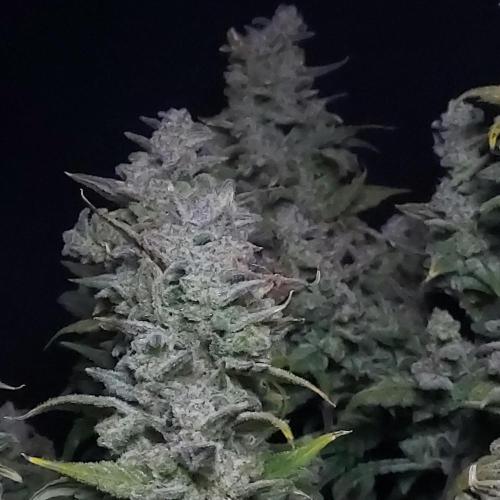
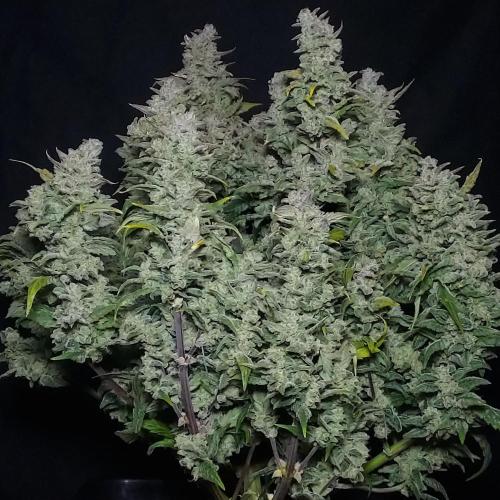
If I had to say anything about Strawberry Banana Auto, it would be this... She is the Beast Who Held Her Own.
What a beautiful, classic strain who was able to ensure some classic human error and circumstantial torture, recover, and still produce absolutely delicious and dense colas across her entire canopy. She suffered most from a lack of hygiene in my system, but was able to recover and produce pink and green buds perfectly reminiscent of a ripe strawberry.
She is resilient, covered is beautiful cloudy trichomes, and I'll be back for a dry weight and smoke report. I simply cannot wait.
Show more
Translate
Spent 65 days
Ger Veg Flo Har
105 g
Bud dry weight per plant
1
Plants
Normal
Difficulty

Creative, Hungry, Uplifted
Positive effects

Pain
Medical effects

Fruity, Berries, Flowery
Taste
Height
Day air temperature
Air humidity
PPM
PH
Pot size
Lamp distance
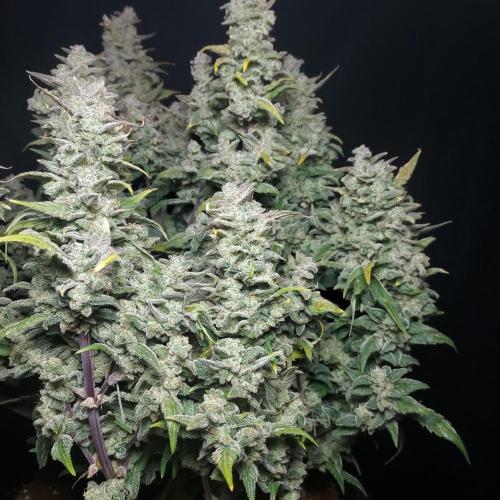
Aeromatics I pulled her airdome on day 73 and let her soak up a bit more nutrient solution until I finally removed her from her reservoir on day 74.
I then let her dry out for 5 days before moving her to my dark tent.
I cut her officially down on day 80, and I will be sure to return for a dry weight and smoke report. She is massive, dense, and smells absolutely fruity.
21 likes
8 comments
Share
Equipment Reviews


15 comments
Sort by
popularity
popularity
newest
oldest

Cannabeast40 commentedweek 57mo ago
Looks amazing 😊 Best of luck with the rest of the grow 🌱
likes 2
Aeromatics commented7mo ago
@Cannabeast40, thank you! She might be my biggest yielding gal in the tent, we shall see!
likes 2
Cannabeast40 commented7mo ago
@Aeromatics, i´ll cross my fingers for sure 😊
likes 2

cangrowz commentedweek 47mo ago
nice report !!💪
likes 2
Aeromatics commented7mo ago
@cangrowz, Thank you! Strawberry Banana sounds like it will produce some amazing terpines for my volcano bags after a good cure. My goal is just to not mess her up haha!
like 1

Natrona commentedweek 08mo ago
Happy growing 🌱 💚 💫
likes 2
DutchBarnacle commentedweek 115mo ago
Long time no see, and look at you steadily growing still! Congratulations with the harvest, it's been 19 days since harvest so I'm wondering what the end result was, I reckon about a dry yield of 25gr? How were the terpenes and smoke?
like 1
Aeromatics commented5mo ago
@DutchBarnacle, Hey there, it's been awhile!! It got a dry yield of 104.9 for this gal, and she is sweet and absolutely delicious as in a vaporizer!
likes

Fast_Buds  commentedweek 115mo ago
Hi there, thank you for running this diary. Happy Harvest!!! 🌱🌱 😃
like 1
Aeromatics commented5mo ago
@Fast_Buds, thank you! She's a beauty!
likes

Cauli commentedweek 115mo ago
This little Lady just looks like one big bud – nice one! 💚
like 1
Aeromatics commented5mo ago
@Cauli, hah, I didn't see that perspective before but absolutely, she looks like a giant nug!!!
likes

Kruqkruq commentedweek 115mo ago
Looks beautiful ❤️
like 1
Aeromatics commented5mo ago
@Kruqkruq, Thank you! Can't wait for the dry and cure. Happy Growing!
like 1

GERGrowDesigns commentedweek 18mo ago
Good Luck growing 🌱⭐
like 1

the end.
Enjoying this diary? Follow for more updates!


Prefer the old Diary view?
Go back to the old Diary view