Theia One of my first grows was a 16 cola triple cheese mainline. I was very green back then and did it from guides and help from the community. 5 years on and I'm gonna revisit this wonderful strain. By far my favourite cheese strain. The blueberry hits with deep moorish cheese skunk taste is so fucking delicious.
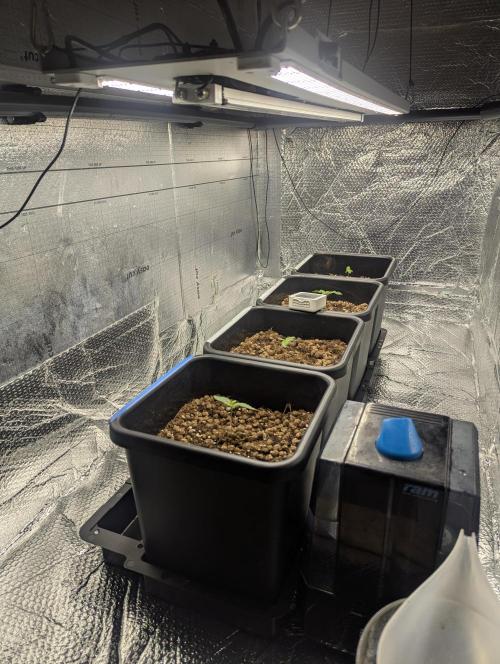
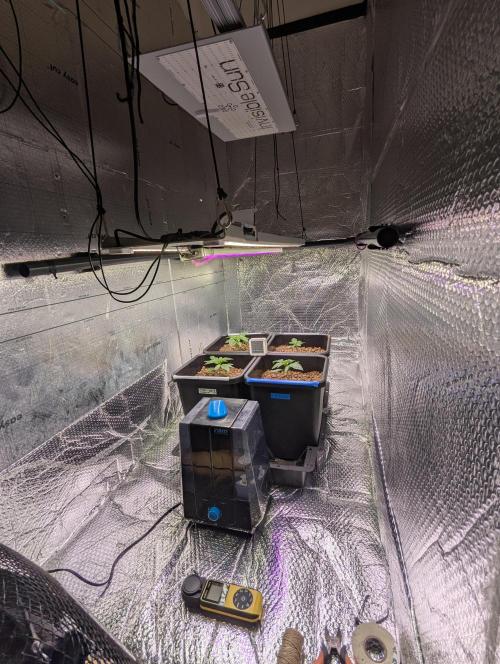
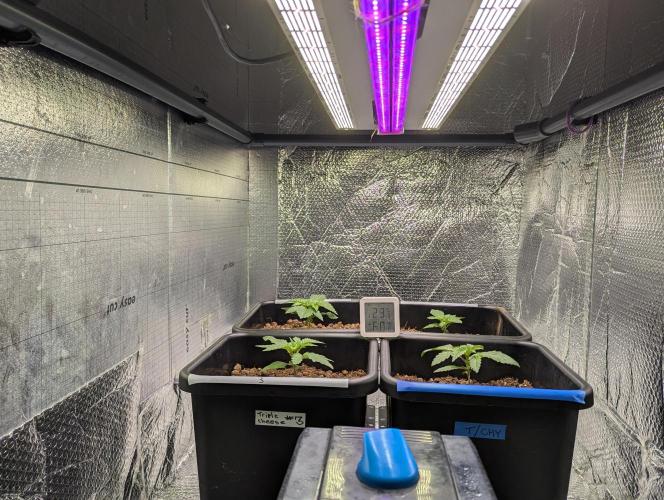
This time around I have a collaboration with @biotabs. So we will do 3 of the ladies in my AV5 Autopot system. It's an 8 way kit but I'm going to use just 4 pots . This is the cheat code growmies. Biotabs water only method and Autopots. It is so ridiculously easy
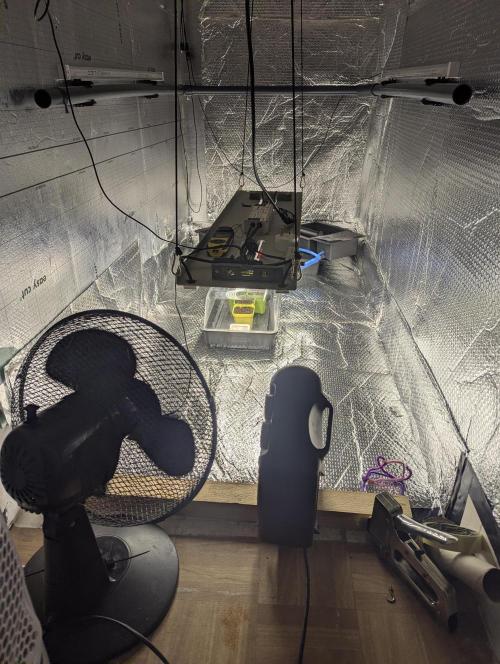
I have a a full environment automation setup I made a few years back . This grow I will try to be a bit more consistent with my updates and information.
I have the ability to log energy draw per device so I will try and give a chart of the power used during the grow for each component I use. Humidifier,heater, extractor,fans etc.
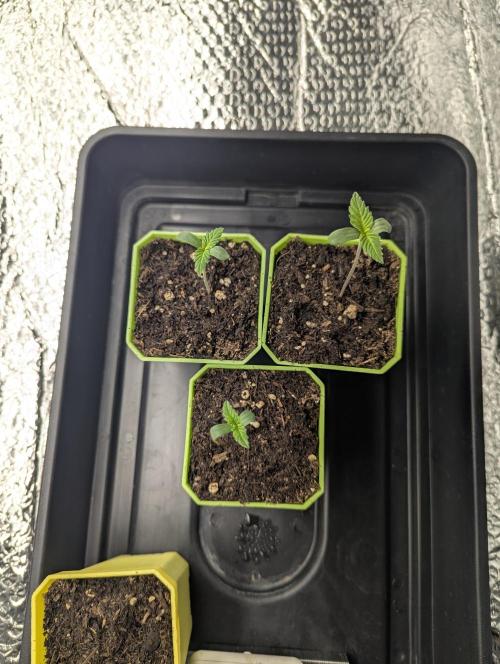
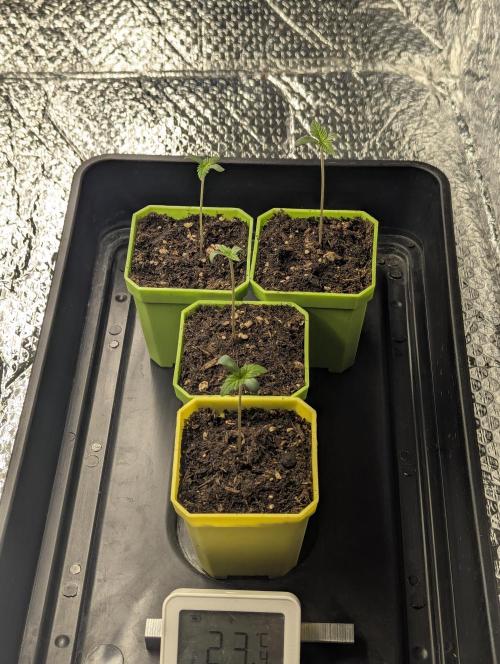
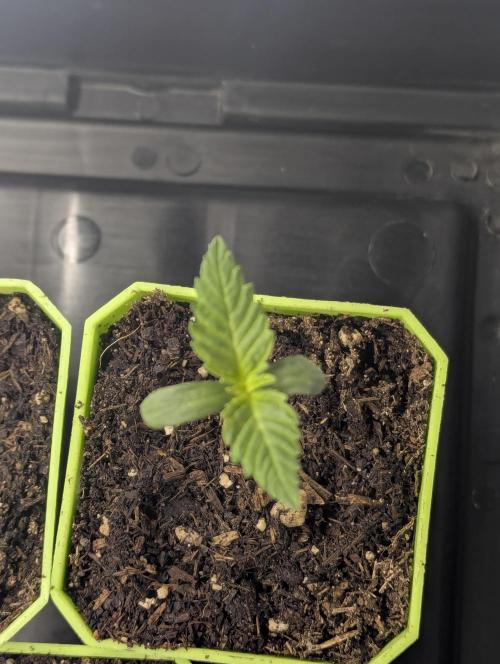
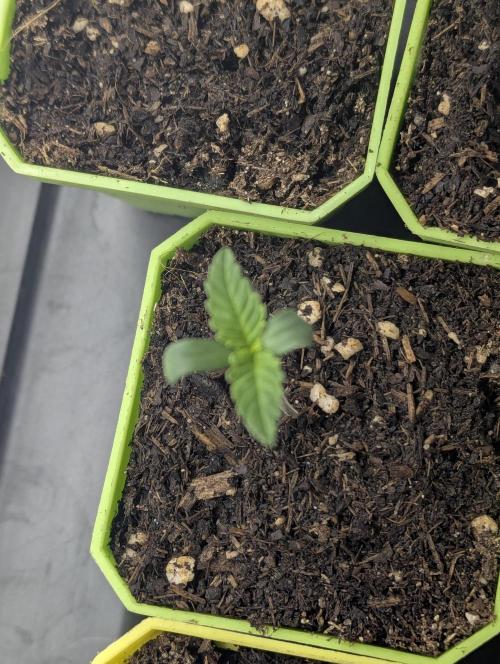
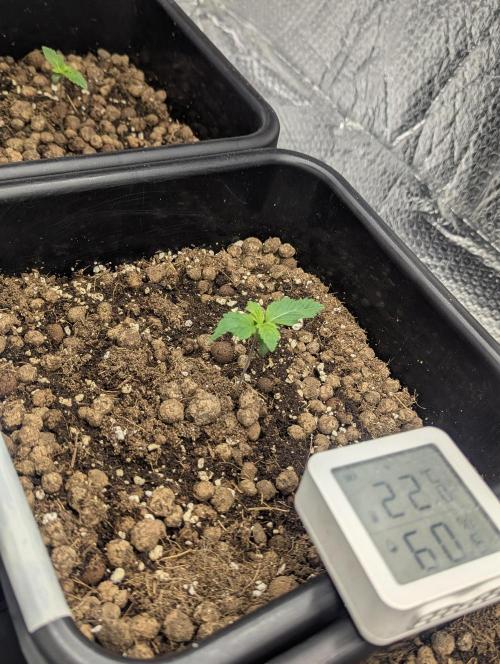
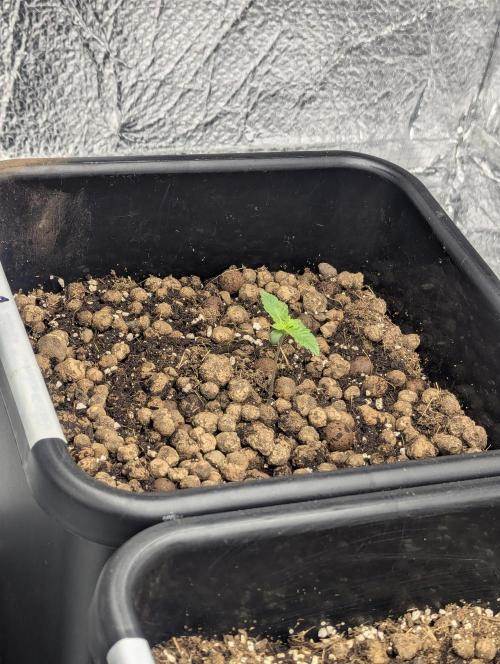
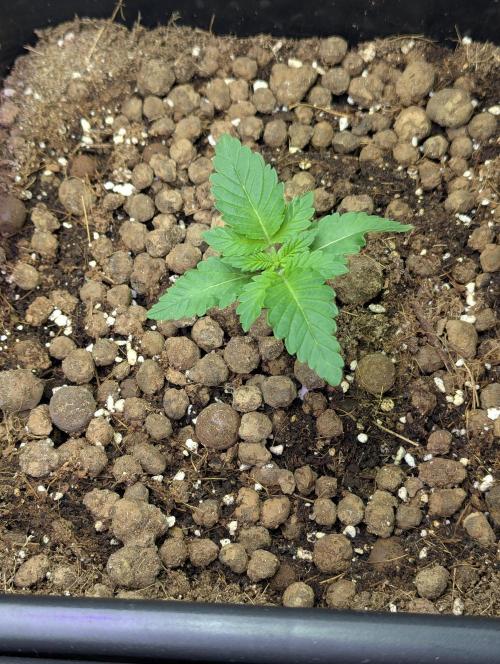
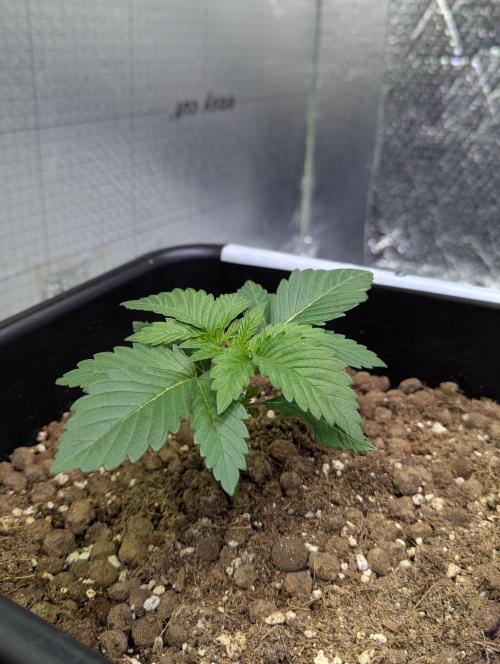
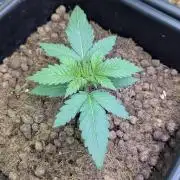
The seeds were soaked in a glass of water for 12 hours with a touch of fulvic and humic acid. After this I popped them into a paper towel that was damp....not wet. Damp. This then was sealed in a plastic tub for 24hrs. This was ample time for these fresh strong beans to make a 1cm taproot. I then popped them into jiffy plugs that had been soaked in a solution of 24c water and 1ml of humic acid where they soaked for 30 mins. Into this I put each seed and 20 hours later we have the images above. They will get some low level light a nice dome to keep RH up and I will maintain a temp of 25c. It's gonna cost me a few quid with winter here. Oh well. One of the plugs has a very eager lady who looks like she may grow out the plug and topple over. I am toying with putting them into my small 300ml pots with a bit of Coco. I shall see what happens once I give some decent light.
I need to wait 2 weeks for root establishment before we can use the Autopots so the plan is as soon as the have roots preaching the plug they will get potted into the 15l Autopots filled with all the good stuff from biotabs.and I will hand water for a couple of weeks while the roots settle .
I am genuinely looking forward to this one.
🌿💚🌿🇬🇧
7 likes
2 comments
Share
Used method
Paper Towel
Germination Method
1
Week 1. Vegetation
9d ago
1/21
5 cm
Height
18 hrs
Light Schedule
24 °C
Day Air Temp
6.2
pH
280 PPM
TDS
68 %
Air Humidity
20 °C
Solution Temp
20 °C
Substrate Temp
22 °C
Night Air Temp
15 liters
Pot Size
0.1 liters
Watering Volume
45 cm
Lamp Distance
440 PPM
CO₂ Level
Nutrients 5
Startrex
5 mll
Silicium Flash
5 mll
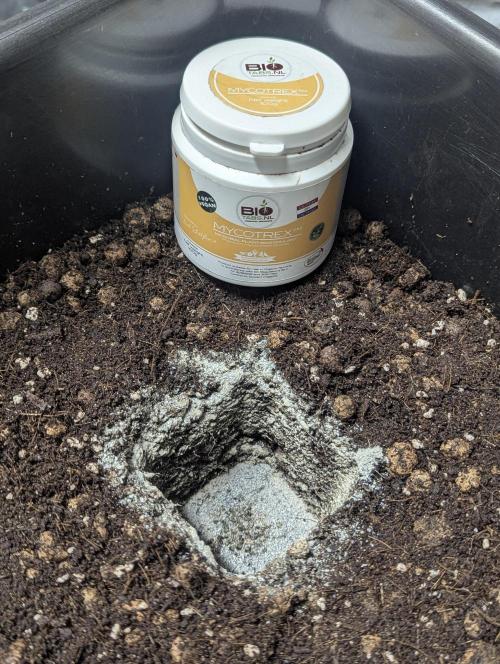
Mycotrex
1 mll
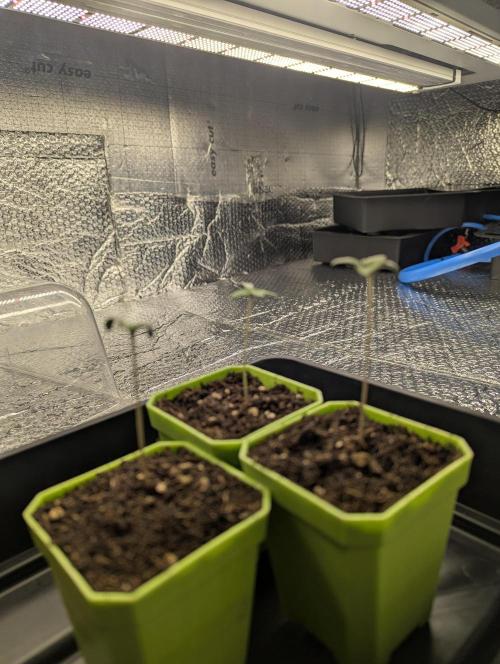
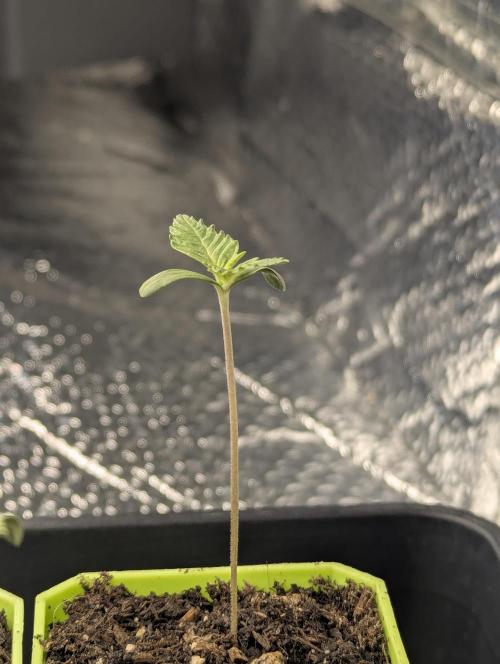
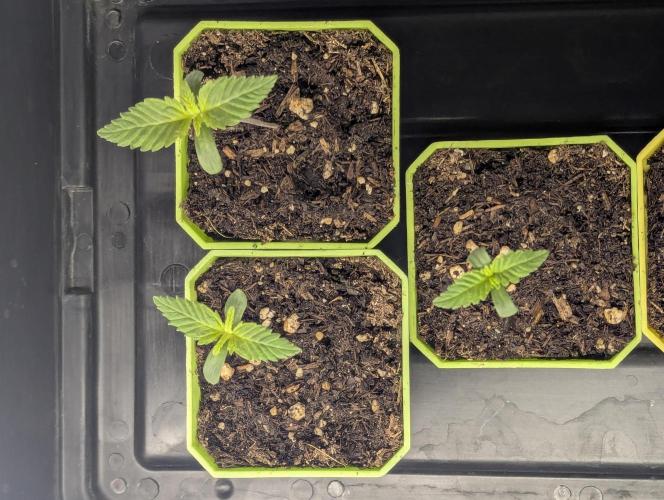
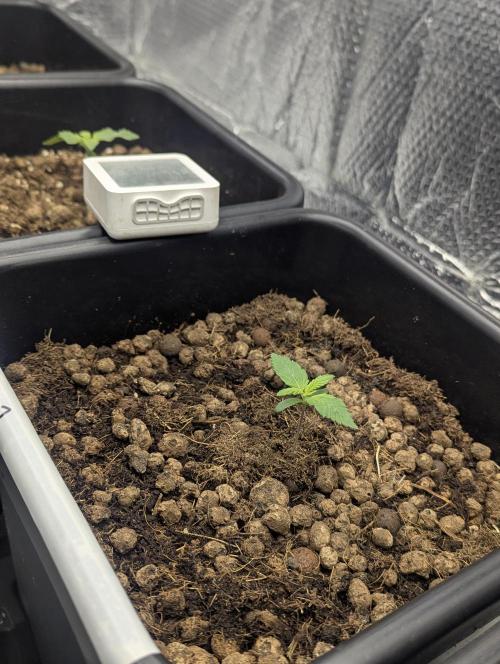
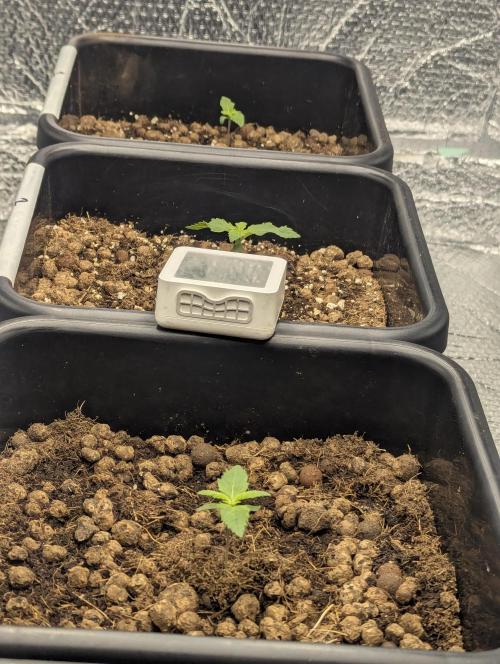
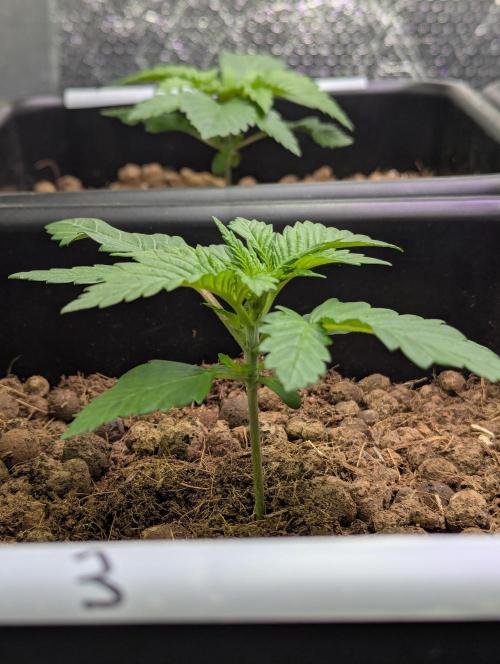
Theia It's been a busy week. After a day the shoots had exploded from their Coco plugs and where going to fall over so I potted the plugs into my little 100ml nursery pots in a mix of biobiz peat free light mix and a bit of Biotabs startrex. I guess I used a teaspoon in the 100ml.
I left the 3 triple cheese under a lamp giving 100umols on a 24hr cycle for 2 days. .I maintained a temp of 25c for the first 3 days to give the best start. However this was voting a fair bit in electricity and I was using 5 kWh a day on just heat.
However with the dome maintaing rh in the high 60s low 70s the little shoots exploded and I was able to transplant again on day 6.
Day 6.
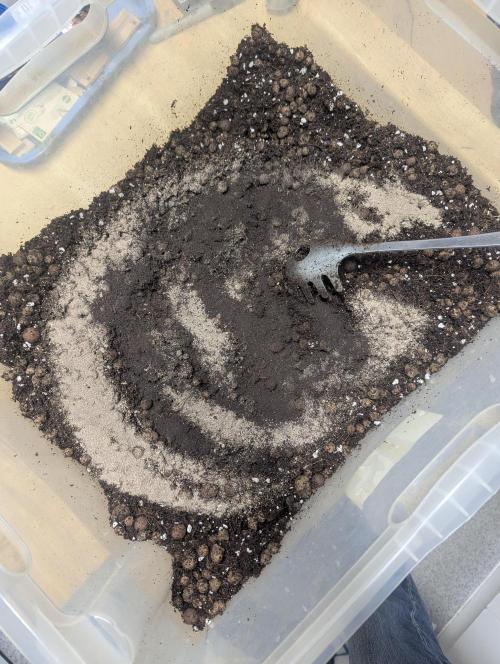
I mixed 10l of Coco/clay pebbles mixed to 40/60. More pebbles than Coco. I also mixed in 3 paddles of perlite. I guess around 500ml just to add so airation to this already very airy mix.
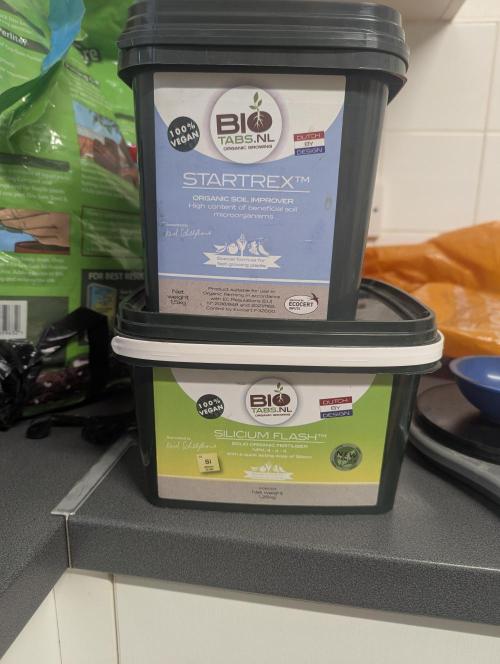
Startrex. 50g for my 10l of substrate.
Silicium Flash. 50g for my 10l of substrate
2 Biotabs tablets are buried at about 5cm recommended. I went to about 7cm.
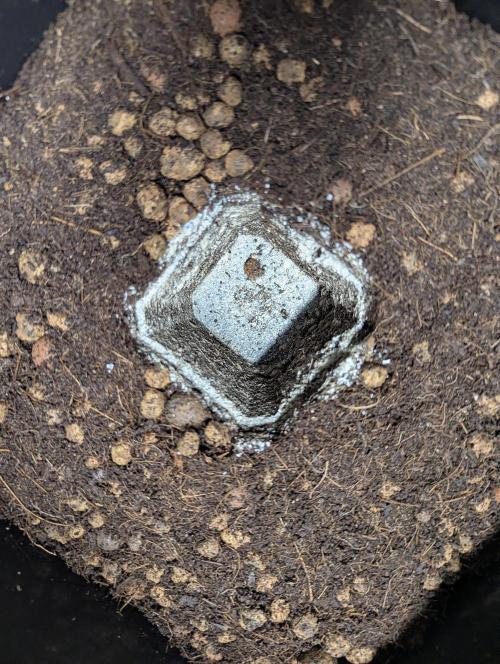
A hole is made for the nursery pots and a teaspoon of Mycrotrex is sprinkled into the hole. And then the shoot gets transplanted to this.
Bactrex. 1g mixed into 1l of water is then fed .
I will top feed water until I have a root system established in the new 15l Autopots at which point I will deploy the res and the plumbing and let it run itself.
I will be growing from this point with just tap water using the Biotabs "Just add water" method.
Lights are now up to 250umols ppfd on a 18hr cycle.. this is taking 94w and is at about 40% on the dimmer.
Next week I will add royal blue to the spectrum to promote some nice growth.
I have reduced the temperature max to 23c and mine 21c. It is to save on a bit of money on heating but if I need to I will return to 25c for the love of the ladies.
That's all this week.
🌿🤙🏼
9 likes
2 comments
Share
2
Week 2. Vegetation
21h ago
1/19
11 cm
Height
18 hrs
Light Schedule
24 °C
Day Air Temp
6.2
pH
280 PPM
TDS
68 %
Air Humidity
20 °C
Solution Temp
20 °C
Substrate Temp
19 °C
Night Air Temp
15 liters
Pot Size
0.1 liters
Watering Volume
45 cm
Lamp Distance
440 PPM
CO₂ Level
Nutrients 5
Startrex
5 mll
Silicium Flash
5 mll
Mycotrex
1 mll
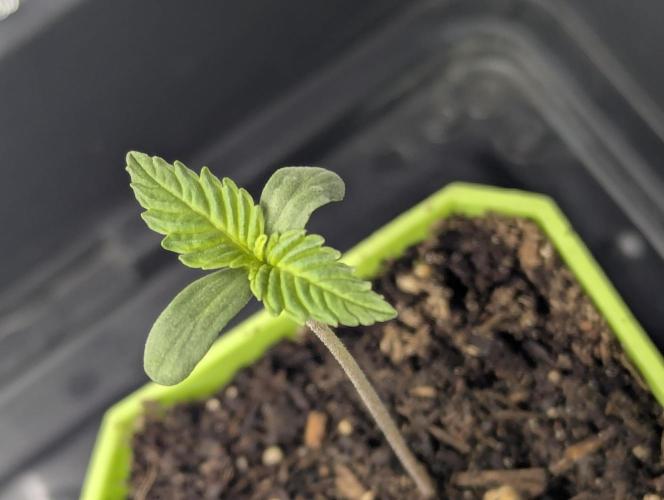
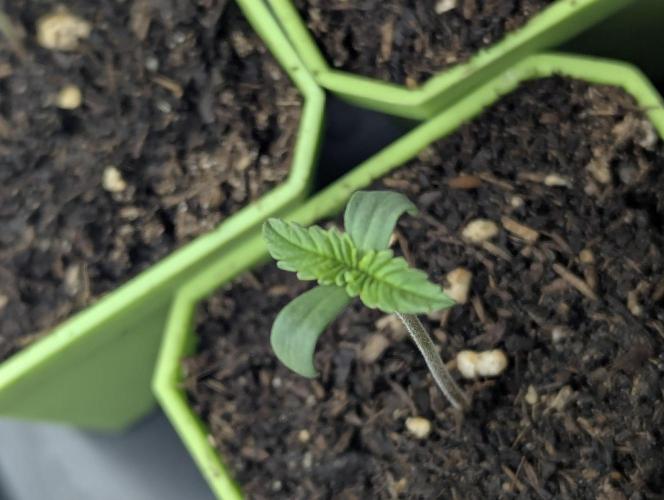
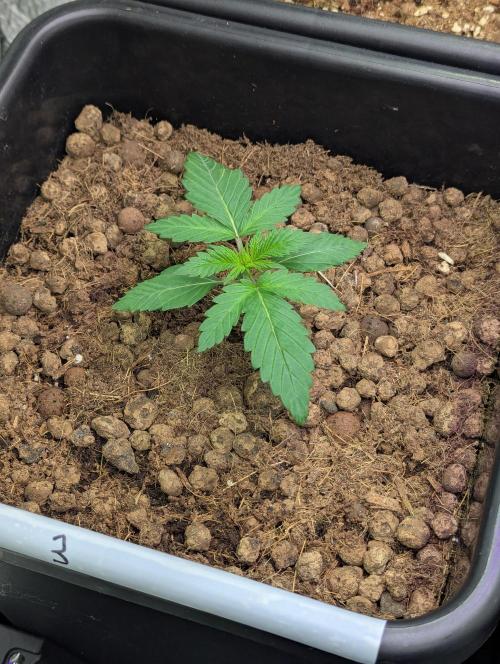
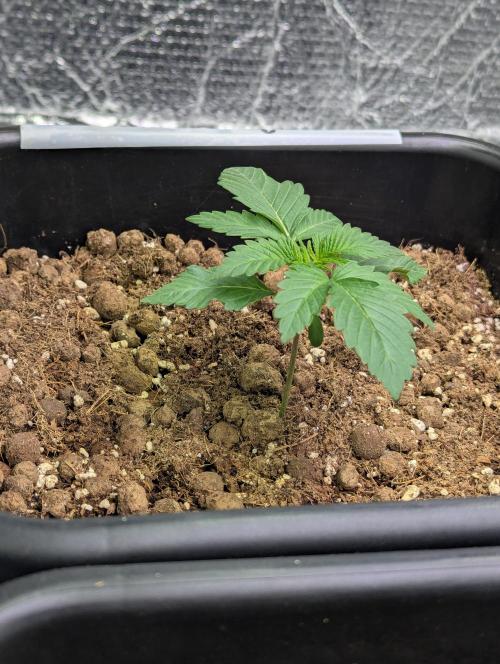
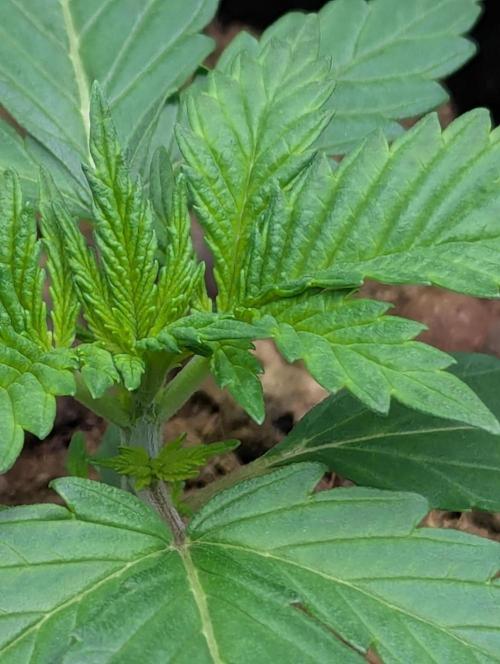
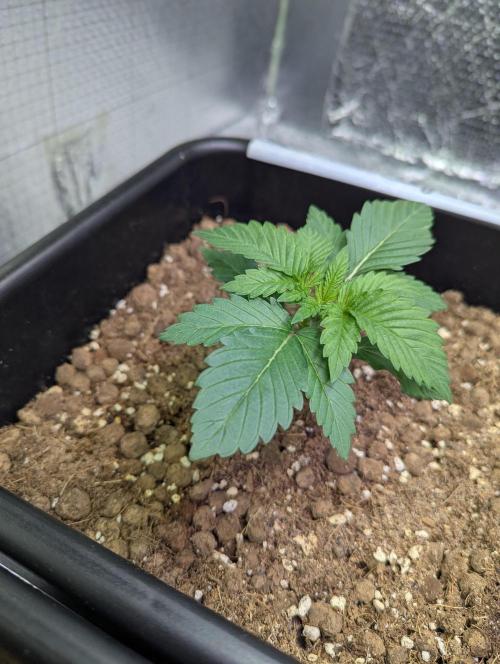
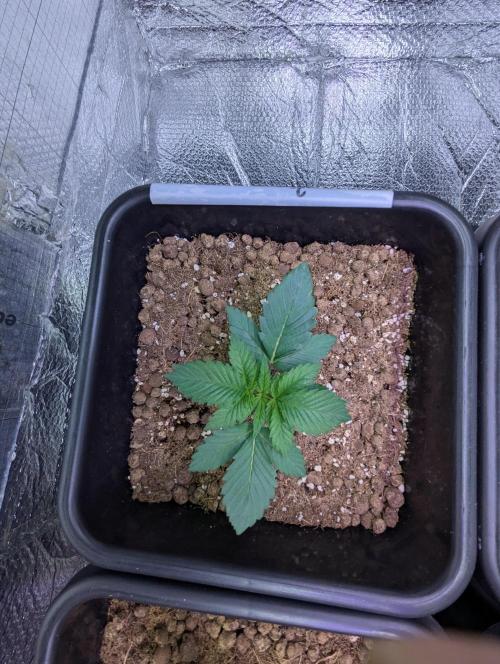
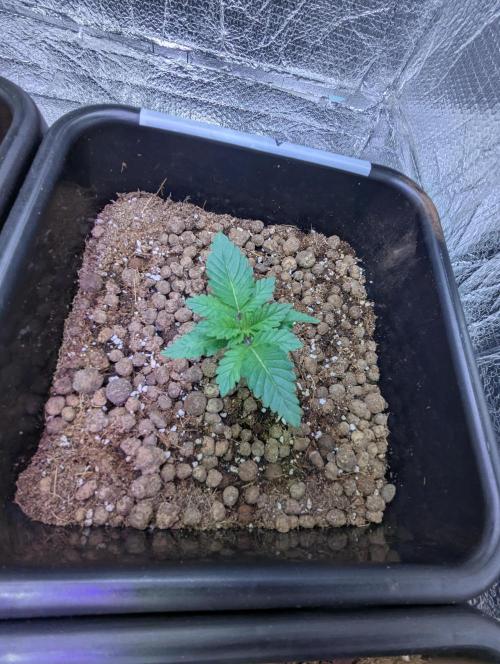
Theia The thre triple cheese are all doing very well. Of the 3 phenos i have 2 show very good potential and the third is a little smaller and seems to be struggling a bit in comparison to her 2 sisters.
They are showing the first 2 nodes and i plan to top the third. Not really needed any fluids after the litre of water and Bactrex last week. Just a dibble to keep things moist.
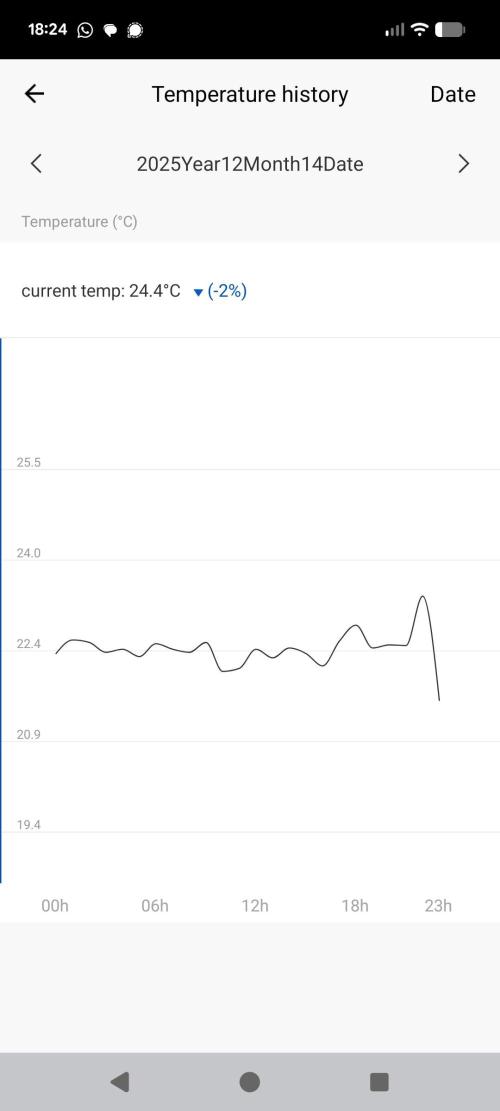
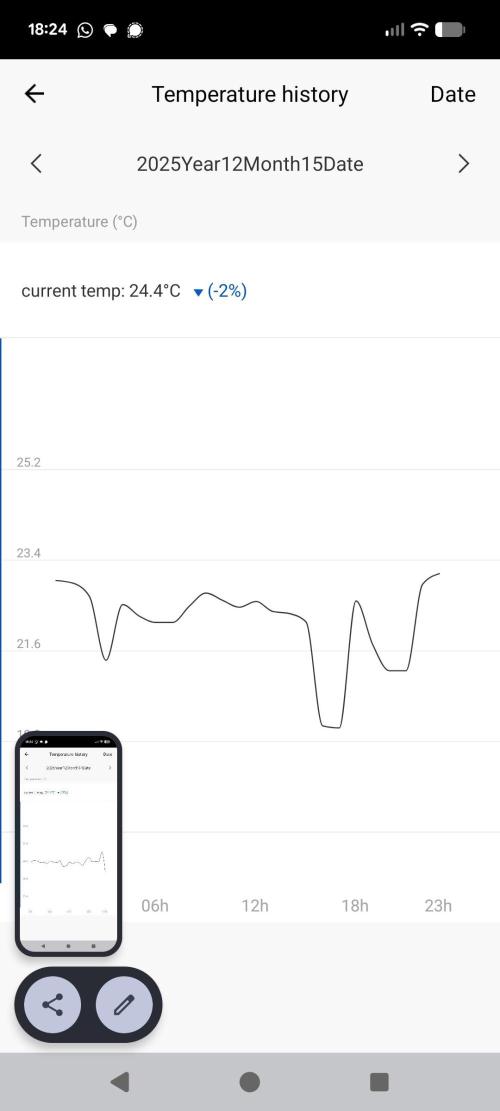
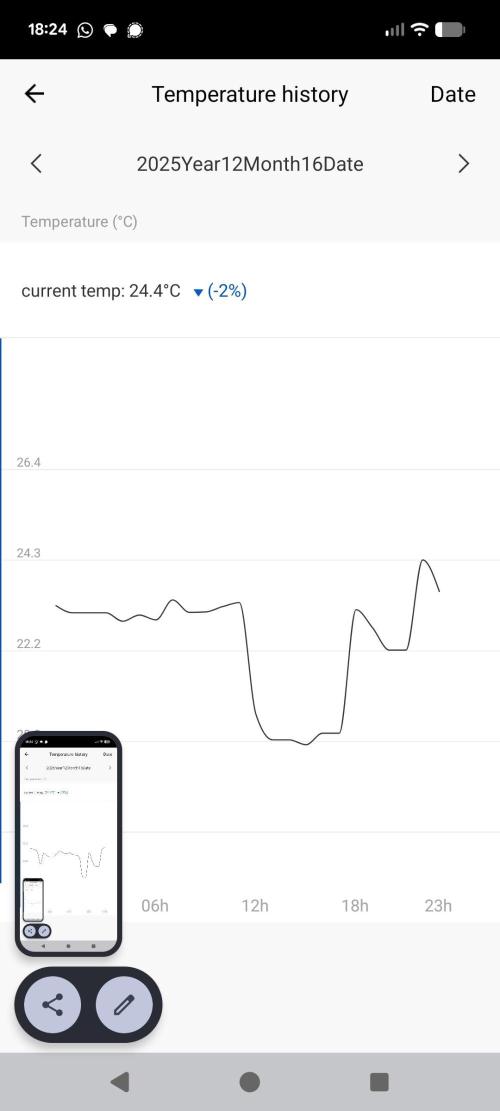
As there has been less attenstion needed on the plants them selves i have had time to look at my automation and i realised last week i had not set a night setting for temprature and my room was staying at the target day setting of 24,5c. This wa just a waste of money for me as i was using about 12p a day on heating that was not needed. The pics show the sensor readings starting fvrom the 14th when i realised the issue. Then the 15th as i was getting things dialled in as to how mucgh humdity adjustments were needed to maintain the 19c. but bu the 16th it is all dialed in and i get a nice drop from 24 to 19 for the 6 hours of lights off. Its also a nice progressive drop and rebuild much like nature would be.
Chasing a vpd of 0.9-1.1 for lights on.
On the lighting front i have added in my deep red 660nm and royal blue 450nm strips to adjudt the spectrum.
Here are the specific benefits of that Deep Red (660nm) and Royal Blue (450nm) combination:
1. Extreme Vegetative Control (The Blue Benefit)
Royal Blue is the primary signal for photomorphogenesis (how a plant develops its shape).
Anti-Stretch: High levels of Royal Blue suppress the hormone gibberellin. This keeps your my plant squat with very short internodal spacing.
Leaf Thickness: It encourages the development of more stomata (breathing pores) and thicker leaves, making the plant more efficient at gas exchange and more resilient to dry air.
Root Signal: Blue light helps signal the plant to build a robust root system early on, which is vital for the heavy feeding they’ll do in flower.
2. Maximum Photosynthetic Efficiency (The Red Benefit)
Deep Red (660nm) is the "sweet spot" for photosynthesis.
Chlorophyll Absorption: 660nm is the wavelength where Chlorophyll a (the primary pigment for energy production) has its highest absorption peak.
Energy Savings: Red photons are "cheaper" for the plant to process than blue or green ones. By adding dedicated red bars, i am increasing the total energy available for growth without significantly increasing the heat load or power draw of the fixture.
Biomass Production: While blue builds the "frame" of the plant, Deep Red builds the "bulk." It drives the expansion of leaf surface area so the plant can catch even more light.
I have measured and my target is 280 PPFD and will increase upto about 350 umol/m2/s by the end of week 3. At the moment it is taking 148.4W from the wall.
by the end of this week i will also have added in my Far red strips which will give a 730nm go to sleep signal to my plants thanks to the Emerson effect. I will go over this more next week once i have it installed.