
32% THC | -30 °C winter balcony indoor


VEG
HPS High-Intensity Discharge/400W
Phillips
FLO
Rooster 240 Light Emitting Diodes/240W
BigCock Design

Box
60*60*130 cm
HoneyBluntProd

Fan
108 m3h Profit 4 - in
Era
Fan
190 m3h - Profit5 - out
Era

Filt
m350
Klever

Contr
RT-820m temp relay
EKF

CO2
BAG
CO2BAG

Coco Coir
Simplex
Indoor
Room Type
LST
weeks 6-9
Topping
weeks 8
Defoliation
weeks 8
15 l
Pot Size
0.6 l
Watering
Start at Harvest
G
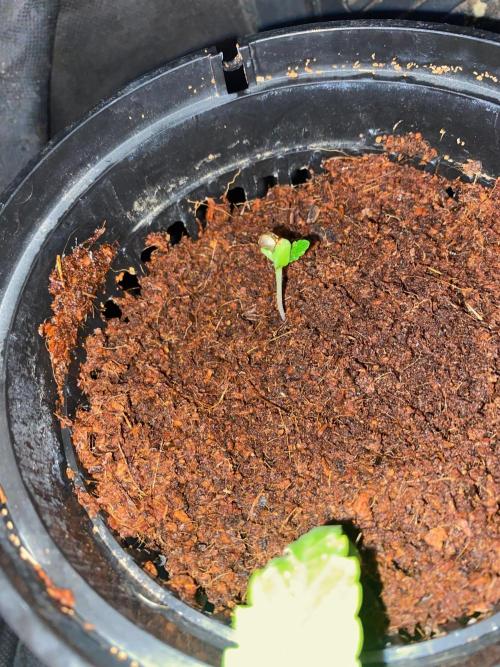
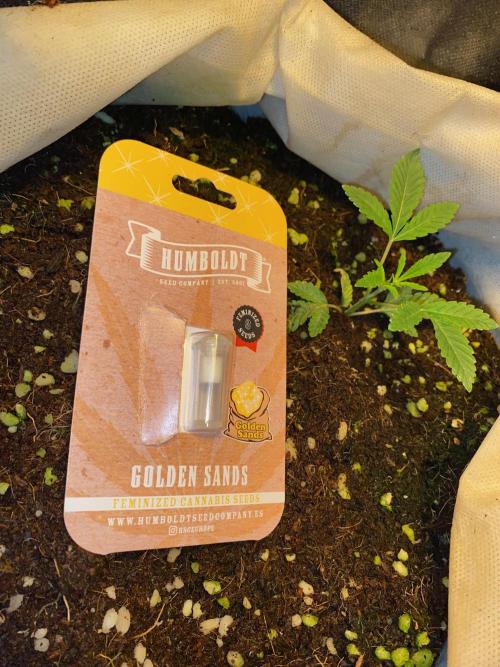
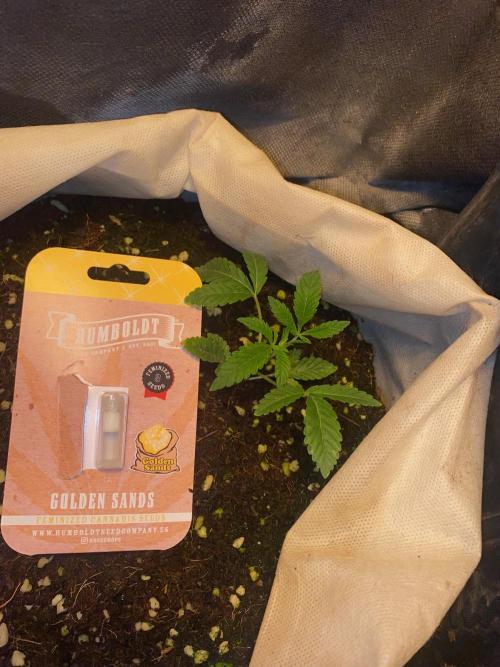
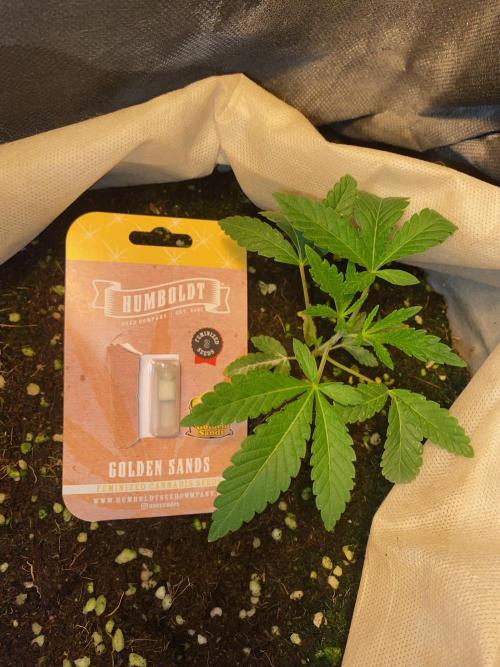
Germination6mo ago
Nutrients 1
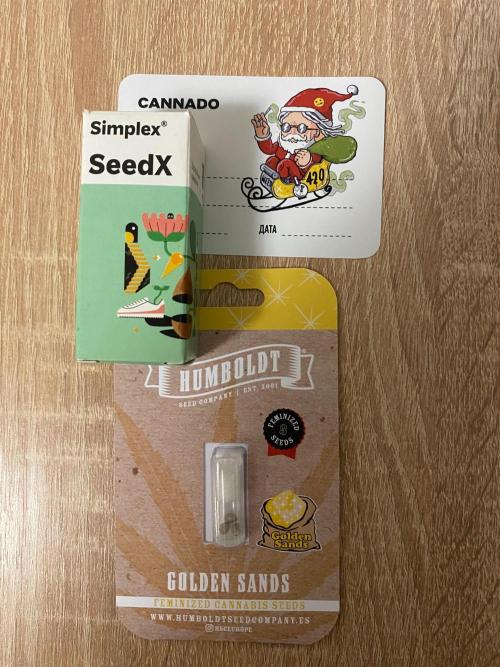
SeedX
2 mll
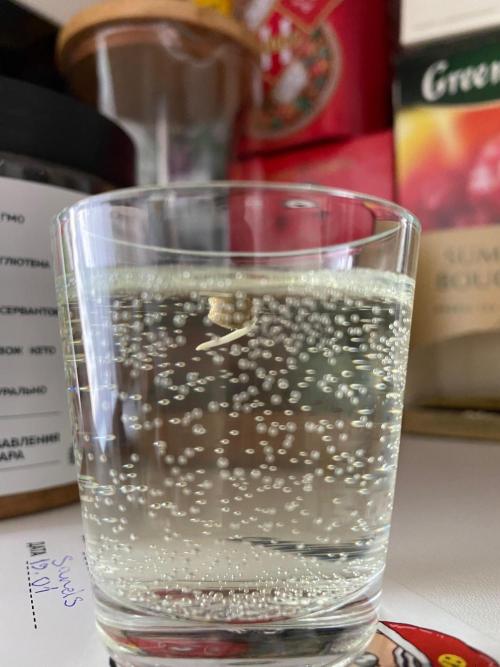
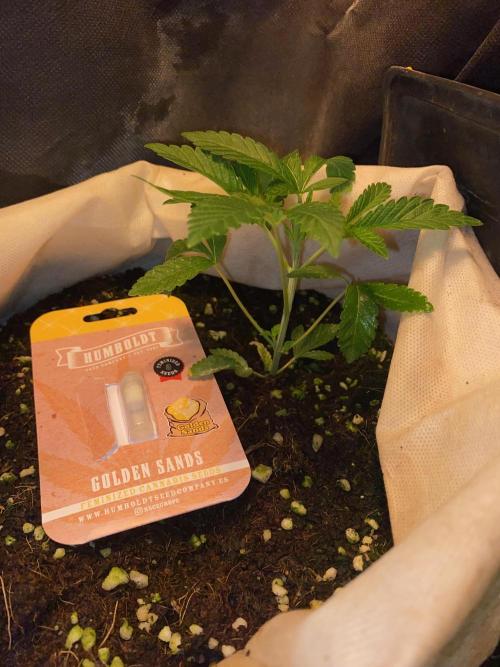
HoneyBlunt42 Soaked one seed in a shot glass with Simplex SeedX
Day 3
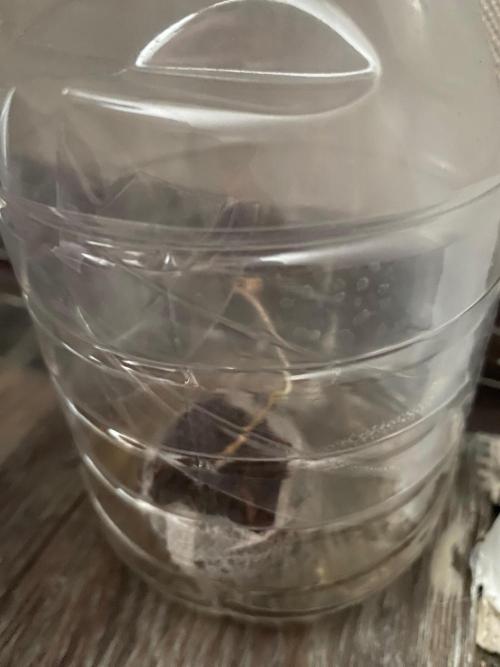
The seed sprouted a 5mm taproot. Soaked a Simplex Coco Plug with RO water mixed with 2 drops of Simplex SeedX. Used tweezers to place the seed in the center. Put it in a greenhouse made from a 1.5L plastic bottle. Made a hole in the cap for air circulation, placed it near the radiator at home in a dark, warm spot. Soaked another seed.
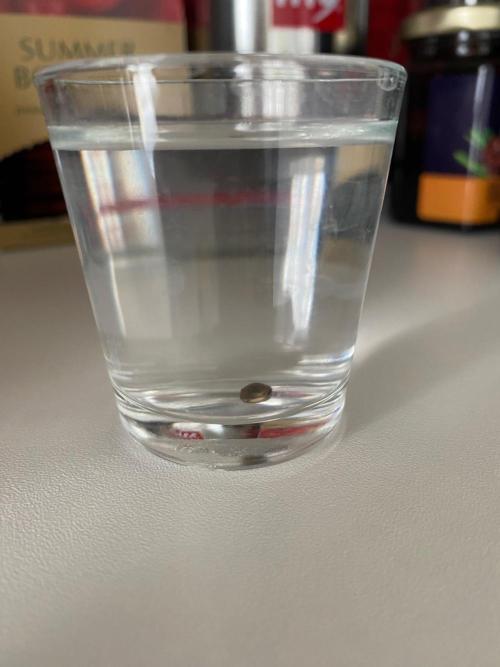
Day 4
The second seed bit off its own 2mm tail, which is now at the bottom of the glass. Most likely won't germinate.
Day 5
Soaked a third seed.
Day 6
The third one pushed out a 1mm taproot. The first one rose 4cm in the plug. Haven't shed the shell yet, bringing it inside to warmth at night so the young sprout doesn't freeze. The seed that bit off its tail isn't growing any further.
1 like
comments
Share
Used method
Glass Of Water
Germination Method
1
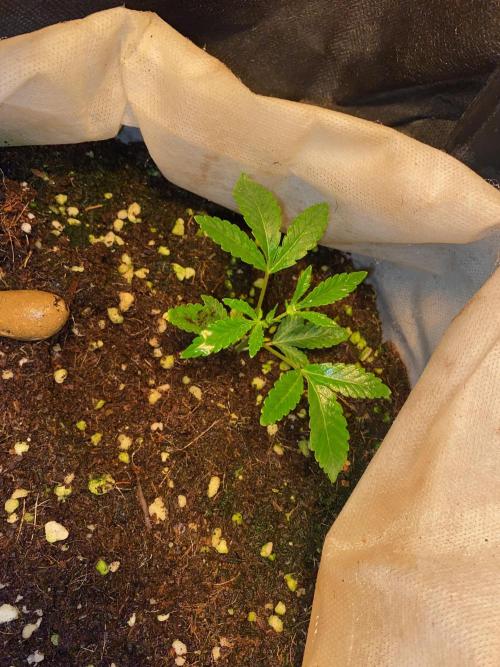
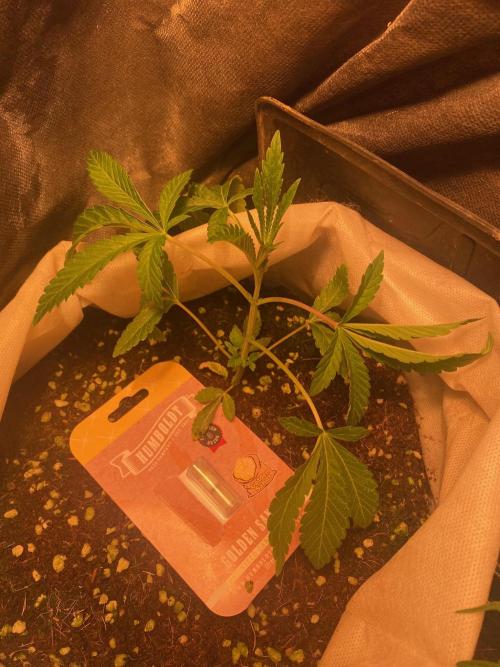
Week 1. Vegetation6mo ago
2 cm
Height
18 hrs
Light Schedule
27 °C
Day Air Temp
70 %
Air Humidity
27 °C
Solution Temp
24 °C
Night Air Temp
1 l
Pot Size
0.1 l
Watering Volume
50 cm
Lamp Distance
Nutrients 1
SeedX
2 mll
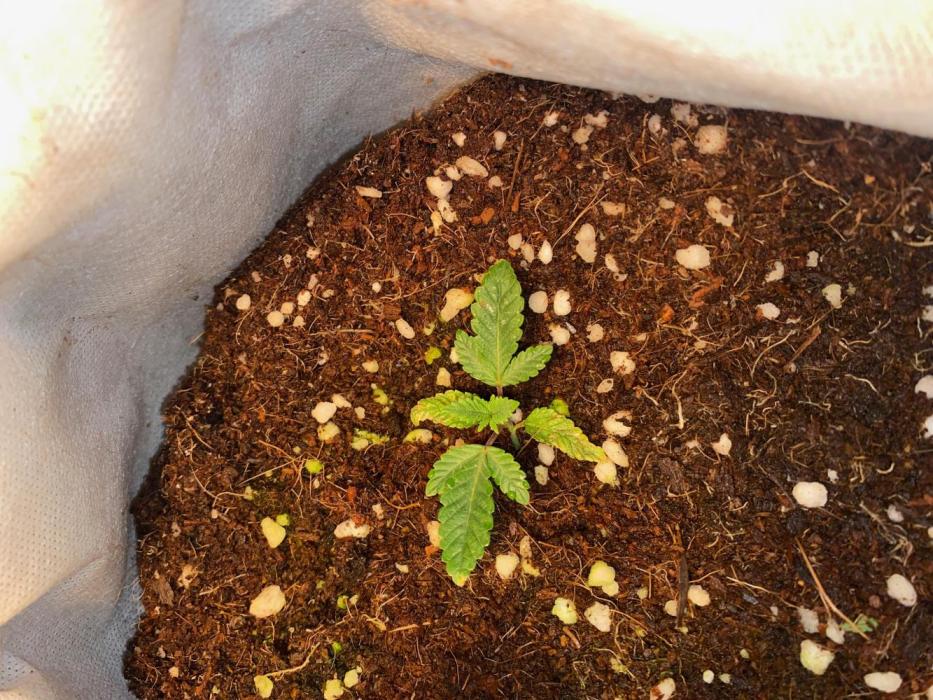
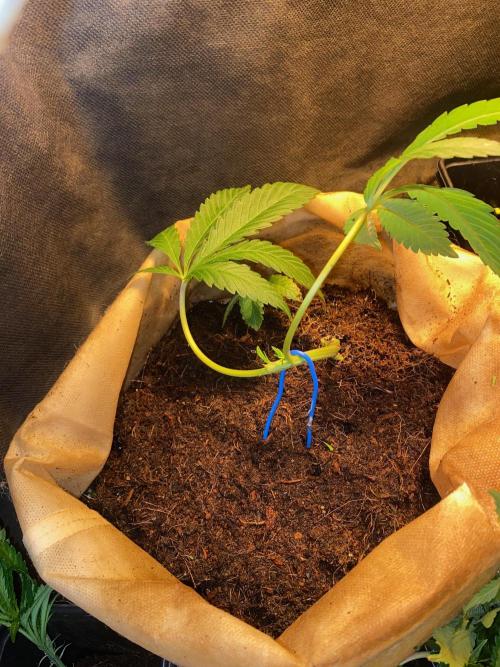
HoneyBlunt42 Day 10
Yesterday, on day 9, transplanted into a 1-liter basket with coco substrate (buffered with CalMag, flushed with Simplex Coco A+B mineral salt solution at 1ml/l).
The sprout stretched 2cm and shed its shell. The sprout is stunted because I didn't keep a close eye and the taproot escaped from the coco plug. It was wasting energy trying to grip and lift the stem. Now it's sitting in 1L of coco under a greenhouse dome - a cup with holes in the lid. Below, the reservoir bubbles with solution during the day.
Overall, I'm glad it survived. The two other siblings died. One bit off its own taproot 24 hours after soaking. The second showed a 1mm taproot after 24 hours and froze. These hybrids of unprecedented strength are noticeably weaker than established strains like Sour Diesel or Durban Poison, which I grew before.
I hope to raise this sprout, take some clones. Let the genetics live with me forever. Really looking forward to a strong monster with 30-35% THC.
1 like
comments
Share
2
Week 2. Vegetation5mo ago
2 cm
Height
18 hrs
Light Schedule
32 °C
Day Air Temp
5.6
pH
No Smell
Smell
450 PPM
TDS
35 %
Air Humidity
27 °C
Solution Temp
17 °C
Night Air Temp
4 l
Pot Size
0.2 l
Watering Volume
50 cm
Lamp Distance
Nutrients 3
CalMag
1 mll
pH Down
0.1 mll

BioGrow
3 mll
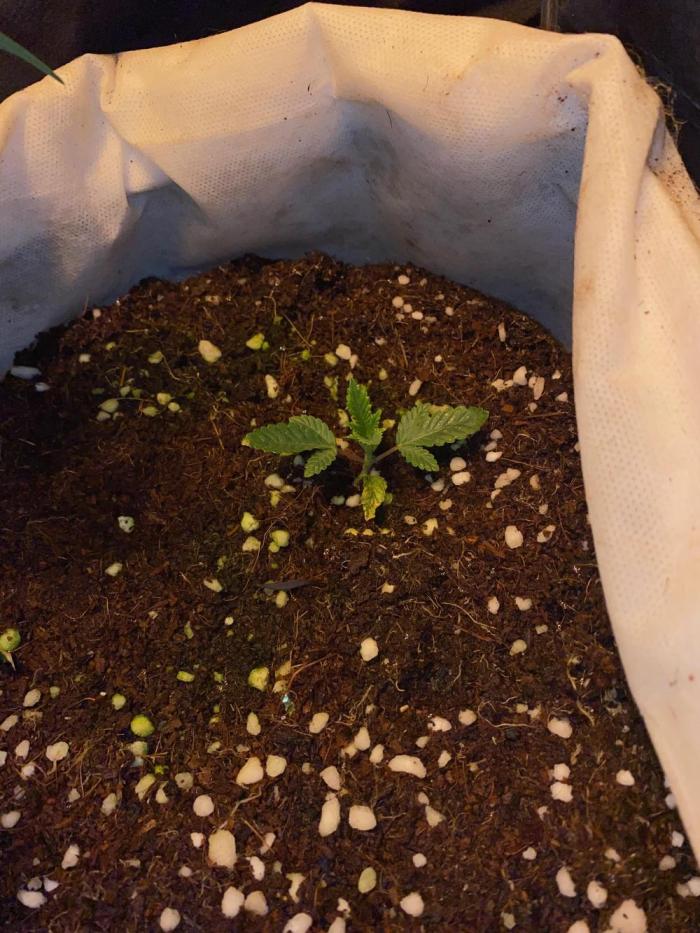
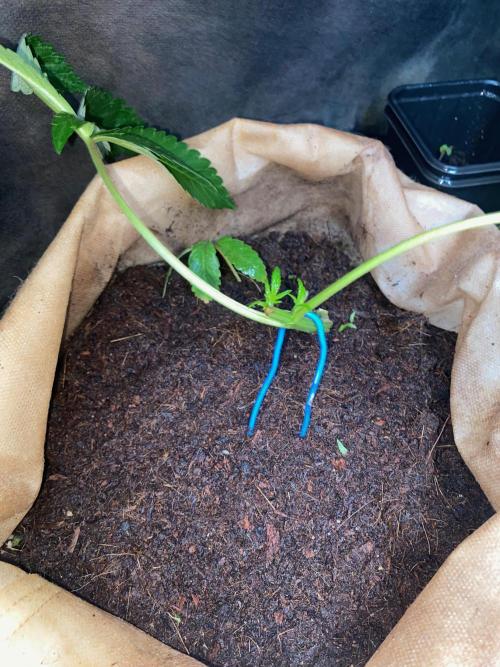
HoneyBlunt42 My friend is struggling with the heat. Growing slowly but surely.
Only after installing the Xiaomi temperature and humidity sensor did I see on the graph that the temperature often exceeds 30°C. This is causing the slow growth.
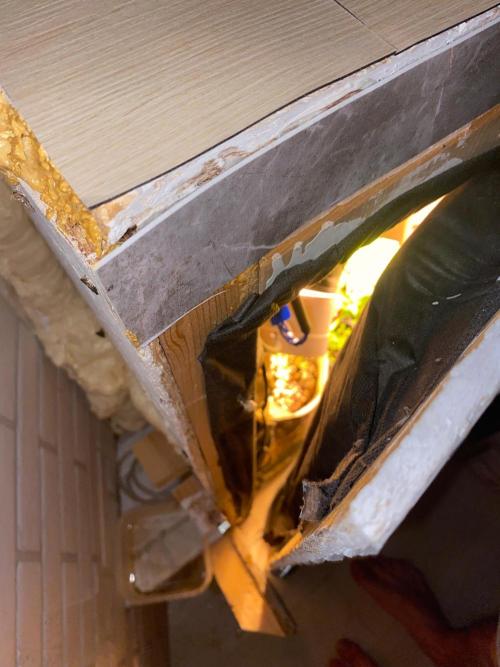
The plant is in a grow box, which itself serves as a heater and dehumidifier for the balcony. It has a 250W HPS lamp — it heats the balcony to +20°C when it's -20°C outside.
I started opening the windows and ventilating down to +10°C so the box stays at +27°C — a good temperature for a young seedling. Humidity stays at 30-35%, so for now I'm keeping a 0.5L cup as a humidity dome over it with holes in the bottom.
A few days ago, new equipment arrived: a pH meter and TDS meter. I was mixing osmotic water with CalMag and SilicX, then mistakenly added too much acid. pH 2.6 in the solution tank — that's no joke.
I took a liter of that solution and refilled with fresh RO water with CalMag 1 ml/l. Added a liter of water with pH 2.5 and got pH 6.2 as a result. Moving forward, I'll carefully add 2 ml of pH Down at a time and measure. Goal — bring it down to 5.6. During the vegetative stage, this is a good pH level for the solution.
!GreenHouse BioGrow: 30 g in 10 l substrate
2 likes
comments
Share
3
Week 3. Vegetation5mo ago
3 cm
Height
18 hrs
Light Schedule
30 °C
Day Air Temp
6.0
pH
No Smell
Smell
250 PPM
TDS
35 %
Air Humidity
27 °C
Solution Temp
19 °C
Night Air Temp
4 l
Pot Size
0.2 l
Watering Volume
50 cm
Lamp Distance
Nutrients 2
CalMag
1 mll
pH Down
0.1 mll
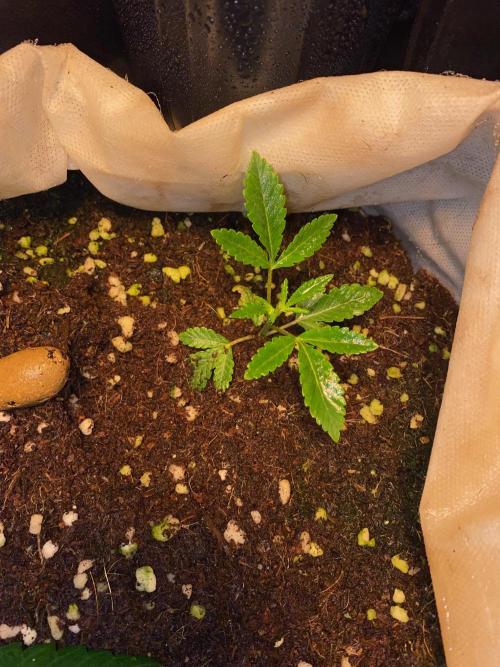
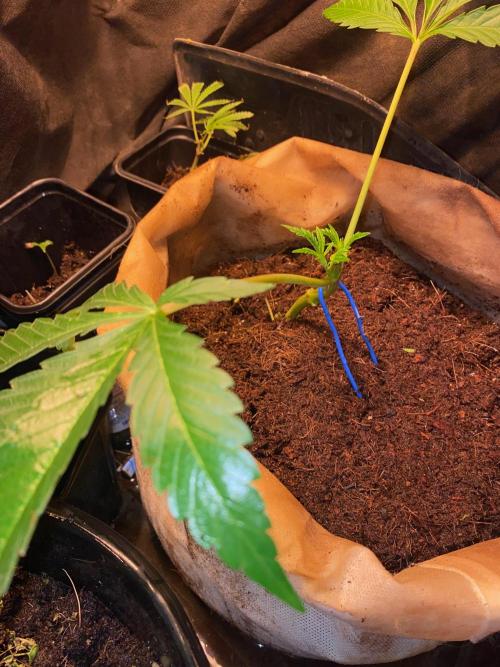
HoneyBlunt42 Seedling update
Watering the seedling with a spray bottle — water mixed with CalMag and Simplex Start Up, pH pre-adjusted to 6.3. The plant is coming up slowly but steadily. Keeping the heat down by opening windows — sometimes managing to hold it at +27°C. The stretch during veg is due to the high temps.
2 likes
comments
Share
4
Week 4. Vegetation5mo ago
7 cm
Height
18 hrs
Light Schedule
30 °C
Day Air Temp
6.0
pH
No Smell
Smell
110 PPM
TDS
45 %
Air Humidity
16 °C
Solution Temp
18 °C
Night Air Temp
4 l
Pot Size
0.3 l
Watering Volume
50 cm
Lamp Distance
Nutrients 7
CalMag
1 mll
pH Down
0.1 mll
Start Up
2 mll
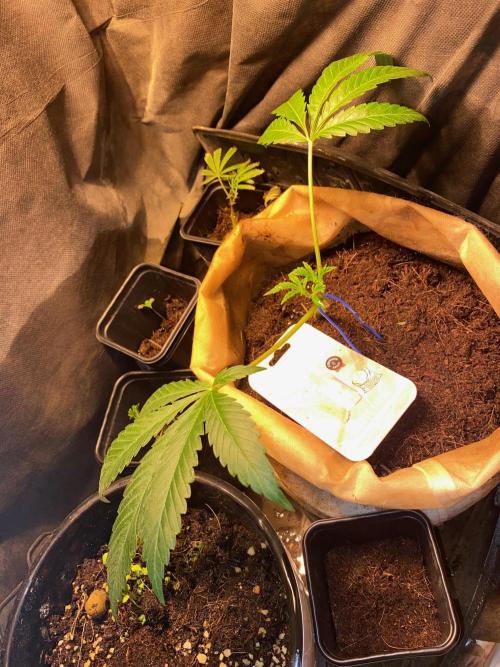
HoneyBlunt42 The seedling has stretched 1–2 cm and is slowly recovering from heat stress. Keeping a stable 26–28°C with 50% humidity isn't always easy — cooling and humidifying the tent with a 250W HPS lamp is quite a challenge.
That said, the lamp has its advantages: it heats two adjacent tents for other projects and provides a powerful light output for the mother plants, the new plant, and the rooting of 6 clones from the previous grow (Durban Poison sativa).
I'll be opening the tent more often for ventilation and misting with a spray bottle to try to speed up growth.
The larger plant next to it is doing great and handles the heat much better than the young seedling.
1 like
comments
Share
5
Week 5. Vegetation5mo ago

10 cm
Height
18 hrs
Light Schedule
28 °C
Day Air Temp
5.7
pH
No Smell
Smell
150 PPM
TDS
40 %
Air Humidity
16 °C
Solution Temp
18 °C
Night Air Temp
4 l
Pot Size
0.3 l
Watering Volume
50 cm
Lamp Distance
Nutrients 7
CalMag
1 mll
pH Down
0.1 mll
Start Up
2 mll
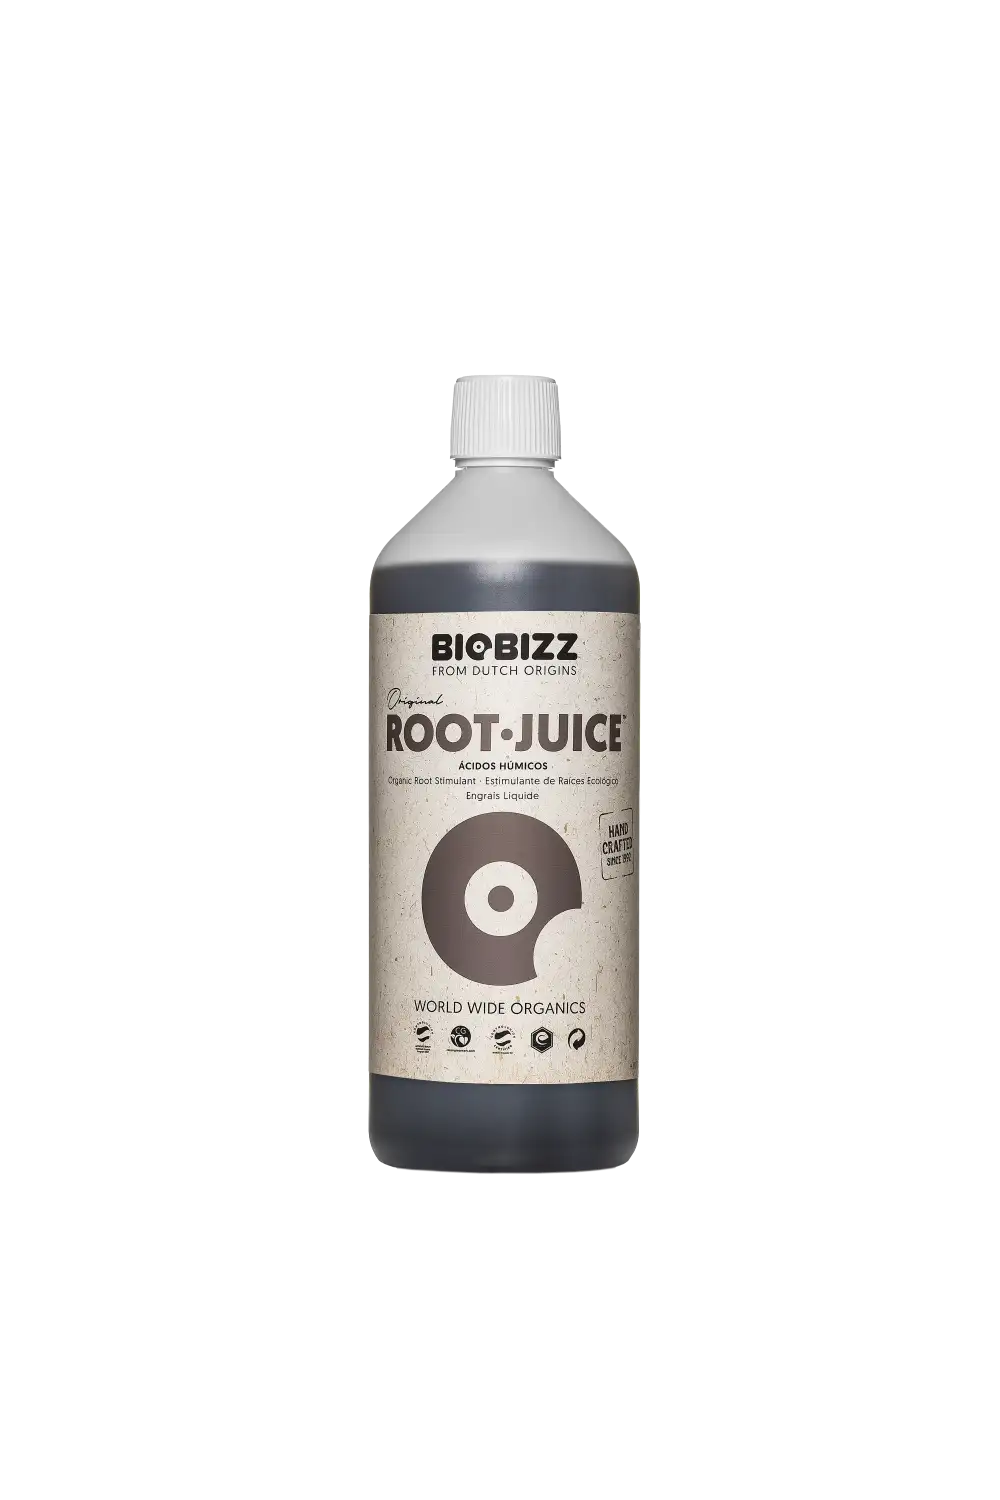
HoneyBlunt42 The plant has grown another 2 cm and is developing a bit more actively. Manual regular watering with a cordless spray bottle is unavoidable when using coconut substrate and a 250W HPS lamp. Added a powder supplement called "BioRoot" to the feeding schedule — it stimulates root system growth. Also using BioBizz Root Juice for the roots. Added HB-101 stimulator. The plant is responding with steady development without pauses, which is encouraging. Looking forward to more active growth.
Spring is here and outdoor balcony temperatures are no longer dropping to −30 °C, so it's time to hang the LED — I'll be trying to grow the plant under a 120W, 2700K standard outdoor floodlight.
2 likes
comments
Share
6
Week 6. Vegetation5mo ago
20 cm
Height
18 hrs
Light Schedule
23 °C
Day Air Temp
6.0
pH
No Smell
Smell
105 PPM
TDS
30 %
Air Humidity
16 °C
Solution Temp
14 °C
Night Air Temp
4 l
Pot Size
0.2 l
Watering Volume
45 cm
Lamp Distance
Nutrients 7
CalMag
1 mll
pH Down
0.1 mll
Start Up
2 mll
HoneyBlunt42 Two days ago I achieved a balance of 23°C during the day and 15°C at night.
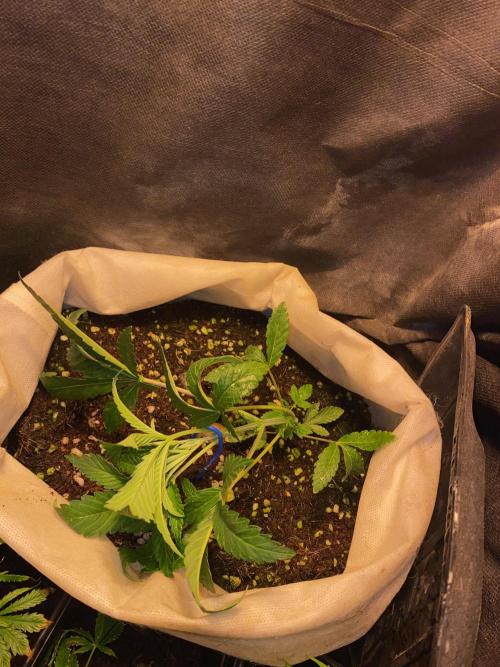
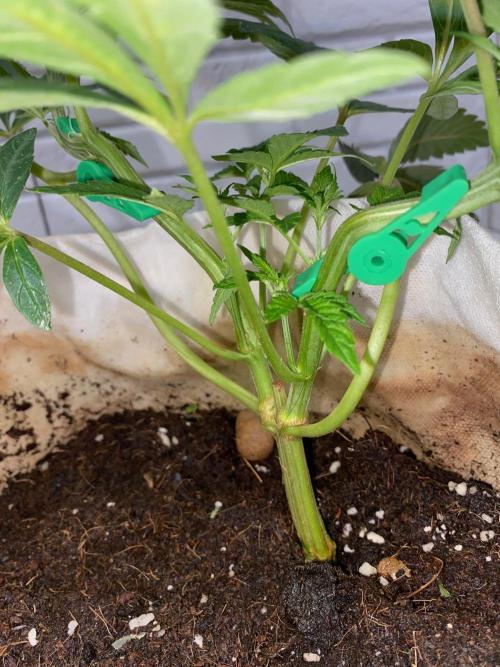
In the box with a 250W HPS heater lamp, I had to open the door slightly and also turn on the ventilation on the balcony window (not micro-ventilation). The sprout had grown to 20 cm.
I slightly bent it down with a plastic-insulated copper core parallel to the floor. This will result in a noticeable thickening of the central core in the next 3-5 days.
LST has officially started!
4 likes
comments
Share
Used techniques
LST
Technique
7
Week 7. Vegetation5mo ago


10 cm
Height
18 hrs
Light Schedule
26 °C
Day Air Temp
6.3
pH
No Smell
Smell
250 PPM
TDS
50 %
Air Humidity
16 °C
Solution Temp
18 °C
Night Air Temp
7 l
Pot Size
1 l
Watering Volume
45 cm
Lamp Distance
Nutrients 8
CalMag
1 mll
pH Down
0.1 mll
Start Up
2 mll
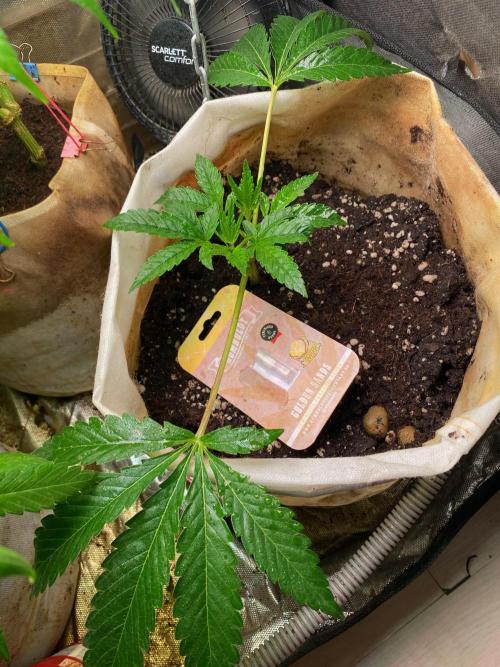
HoneyBlunt42 Day 46
Yesterday, I topped off the plant with about 2 liters of coconut coir. I left some room for more—a 15-liter bag allows for that. I watered a 650-gram coir block with 5 liters of water containing CalMag and a pH of 5.6 (I lowered it with Simplex pH Down).
Then I mixed 10 grams (one measuring spoon) of Power Feeding Bio Grow fertilizer into the coir. I also sprinkled about 2 grams of OrganicMix BioRoot. This mixture will nourish the plant for 30 days, according to the plan.
Then, either the same mixture on Vega or Power Feeding Bio Bloom at 3-5 g/l of substrate, and then a transition on 12/12. I covered the plant halfway with coconut coir to ensure more roots from the main cola.
The goal now is to get 5-10 liters of root stock in the bag to ensure a good flowering season and strong clones.
I also managed to get temperatures up to 26 degrees Celsius on average, with nights not dropping below 17 degrees Celsius. The plant is responding with vigorous growth!
4 likes
1 comment
Share
Used techniques
LST
Technique
8
Week 8. Vegetation5mo ago


22 cm
Height
18 hrs
Light Schedule
26 °C
Day Air Temp
6.2
pH
No Smell
Smell
140 PPM
TDS
45 %
Air Humidity
16 °C
Solution Temp
18 °C
Night Air Temp
7 l
Pot Size
1 l
Watering Volume
45 cm
Lamp Distance
Nutrients 7
CalMag
1 mll
pH Down
0.1 mll
Start Up
2 mll
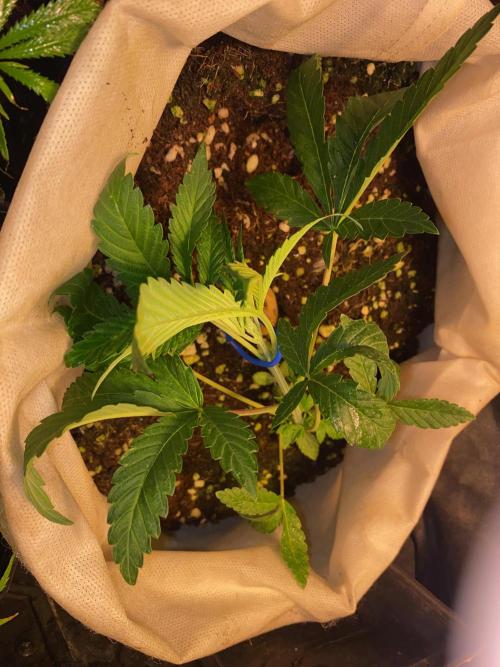
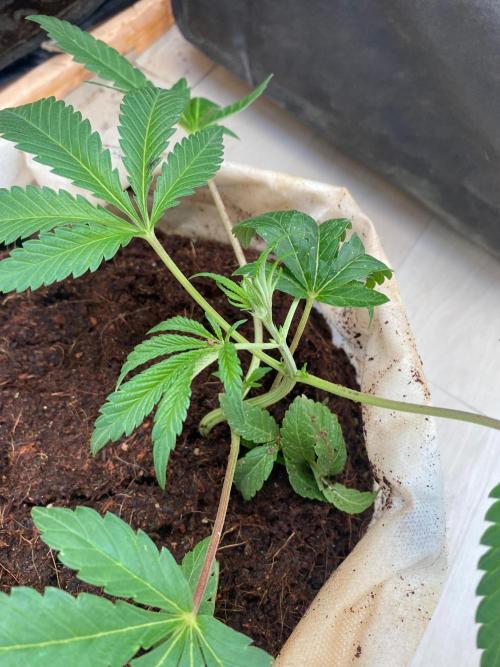
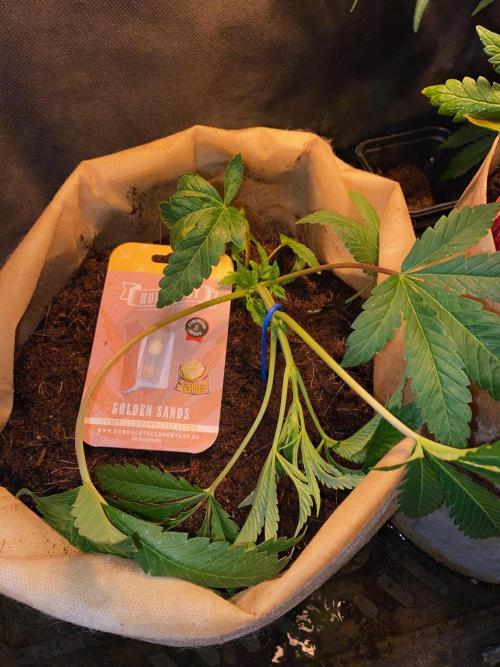
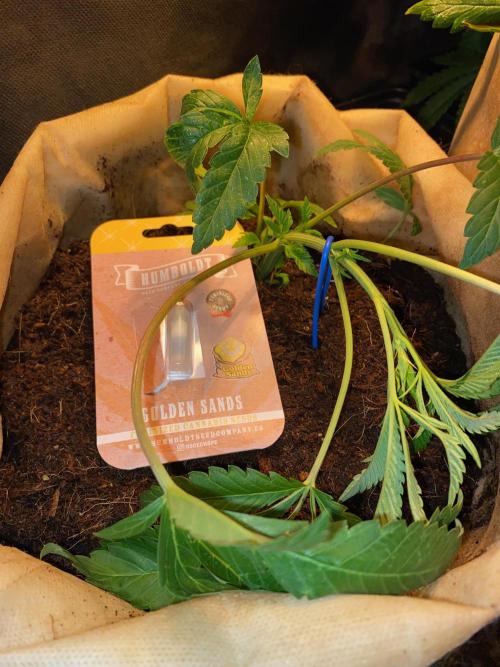
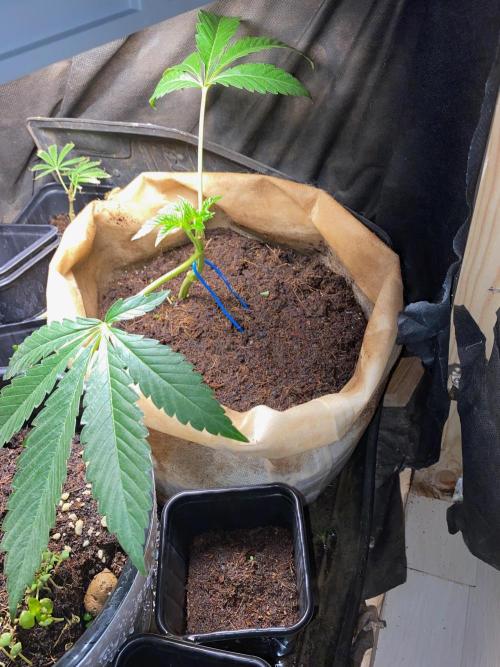
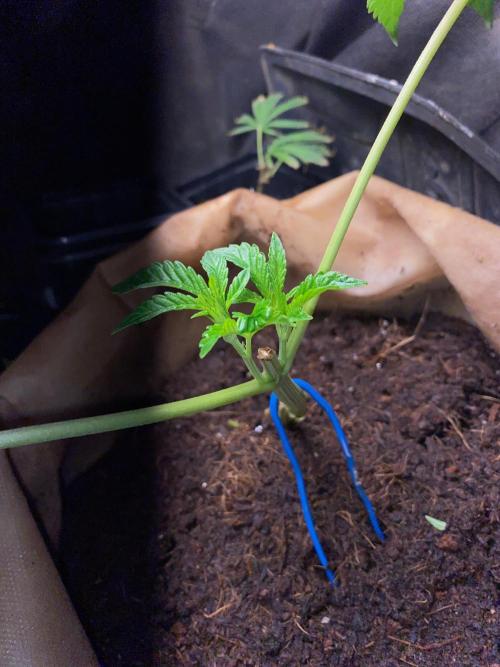
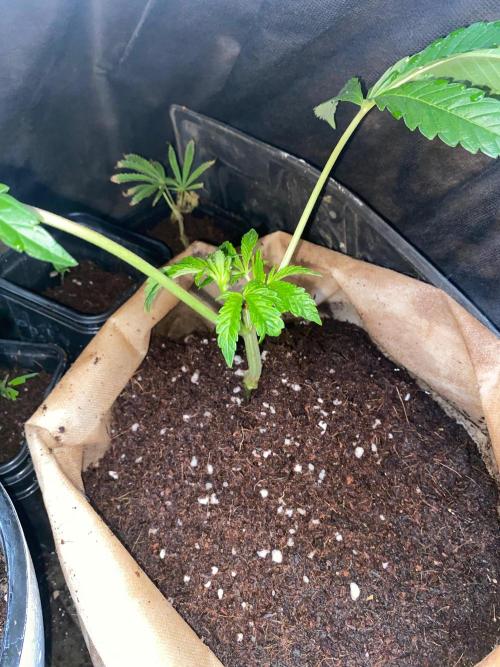
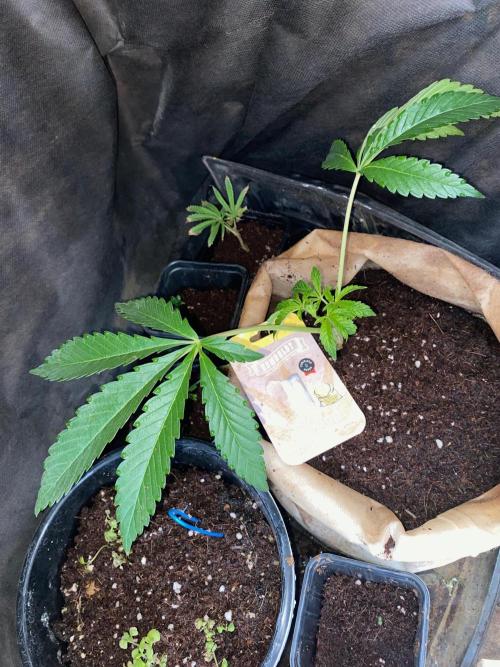
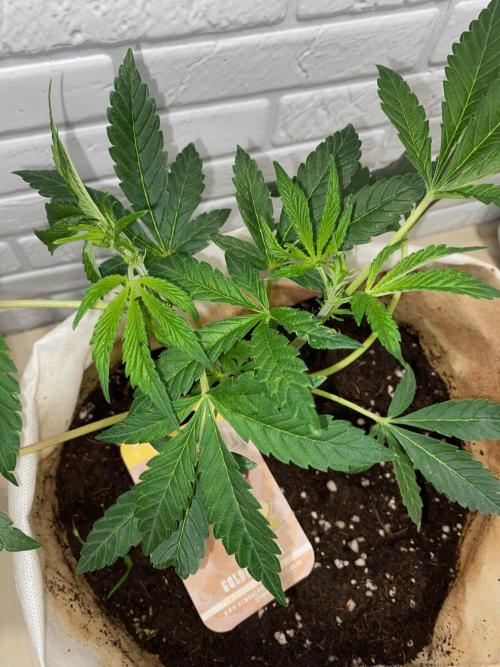
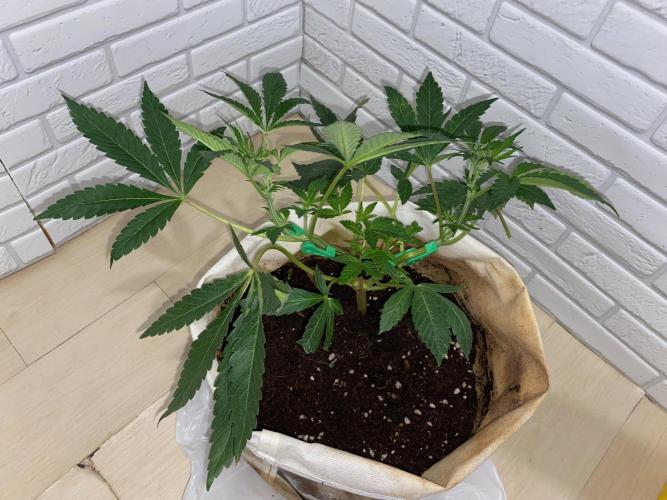
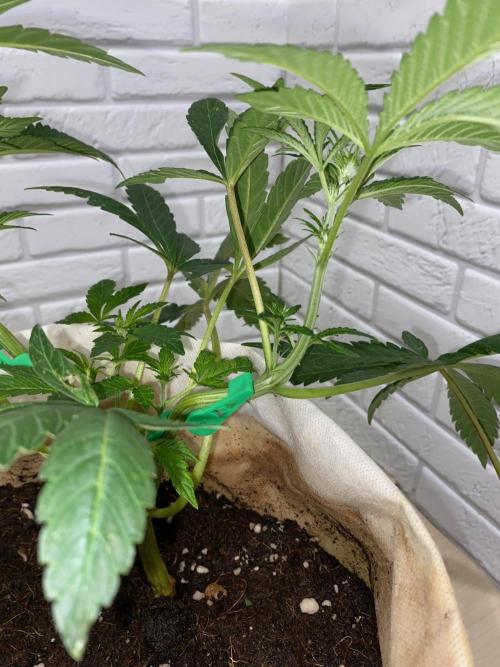
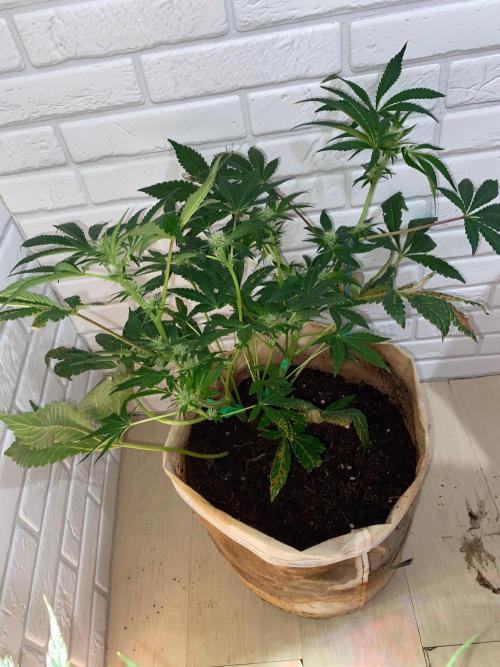
HoneyBlunt42 Yesterday I trimmed the top of the plant above the third row of leaves. I also removed the first and second rows. I need two main colas from this plant.
D51
After pruning, a couple of shoots grew from 5 mm each to 20 mm. I left large, palm-sized burdocks for them.
I water them generously 3-4 times a day—roughly 1 liter per day. I use a solution of osmolar water, CalMag, and Simplex StartUp, or one of the stimulants.
Then I adjust the pH to 6.0 with Simplex pH Down and spray. In a week or two, I expect full-fledged branches, each with three layers of leaves.
These mother colas will be used for cloning, and the plant, now with four main colas, will begin flowering.
3 likes
comments
Share
Used techniques
LST
Technique
Topping
Technique
Defoliation
Technique
9
Week 9. Flowering4mo ago

24 cm
Height
12 hrs
Light Schedule
23 °C
Day Air Temp
6.1
pH
No Smell
Smell
150 PPM
TDS
45 %
Air Humidity
16 °C
Solution Temp
19 °C
Night Air Temp
10 l
Pot Size
1 l
Watering Volume
40 cm
Lamp Distance
Nutrients 3
CalMag
1 mll
pH Down
0.1 mll
Aroma Punch
2 mll
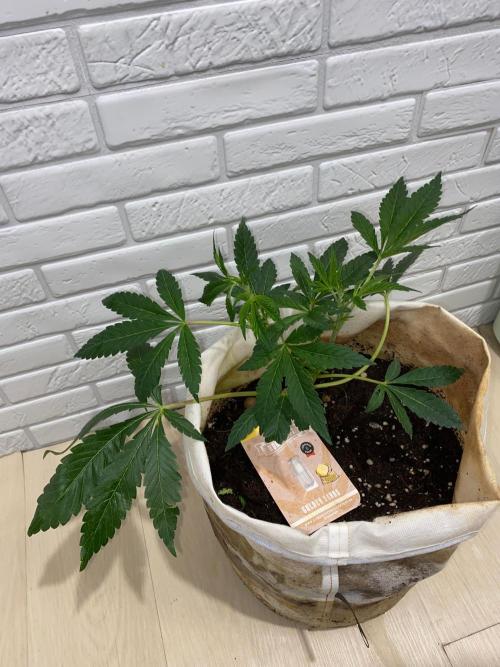
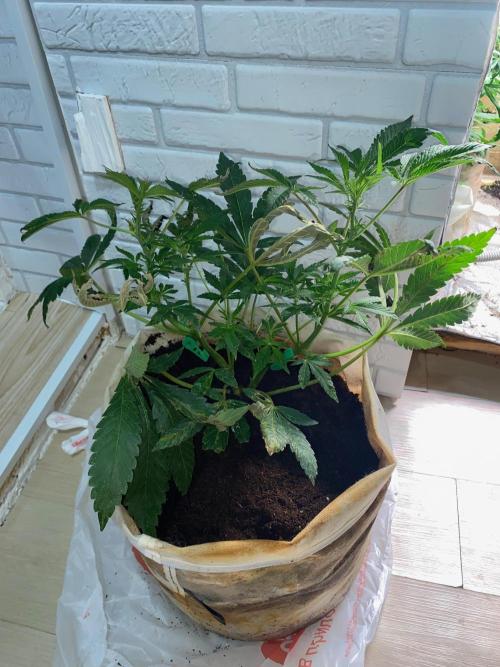
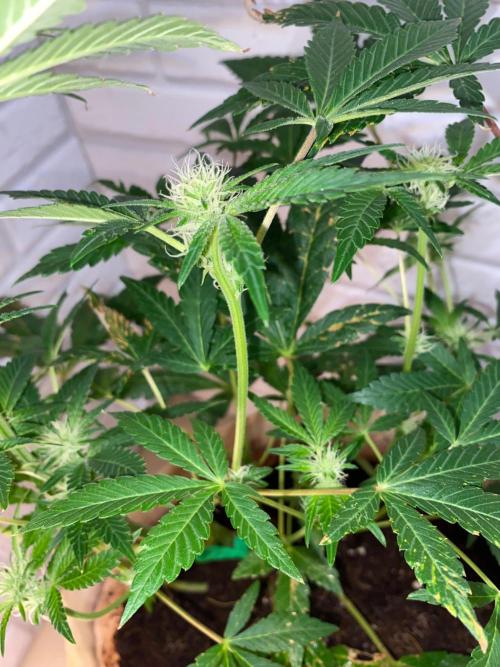
HoneyBlunt42 The plant has noticeably grown in size. The main colas have stretched out, and the plant is 22 cm tall. I water with CalMag water and a pH of 6.2. I sometimes add BioBizz Root Juice at 4 ml/l, and sometimes Simplex StartUp at 4 ml/l for nitrogen.
6 likes
1 comment
Share
Used techniques
LST
Technique
10
Week 10. Flowering4mo ago

30 cm
Height
12 hrs
Light Schedule
23 °C
Day Air Temp
6.2
pH
No Smell
Smell
140 PPM
TDS
45 %
Air Humidity
22 °C
Solution Temp
22 °C
Night Air Temp
11 l
Pot Size
0.6 l
Watering Volume
40 cm
Lamp Distance
Nutrients 3
CalMag
1 mll
pH Down
0.1 mll
Aroma Punch
2 mll
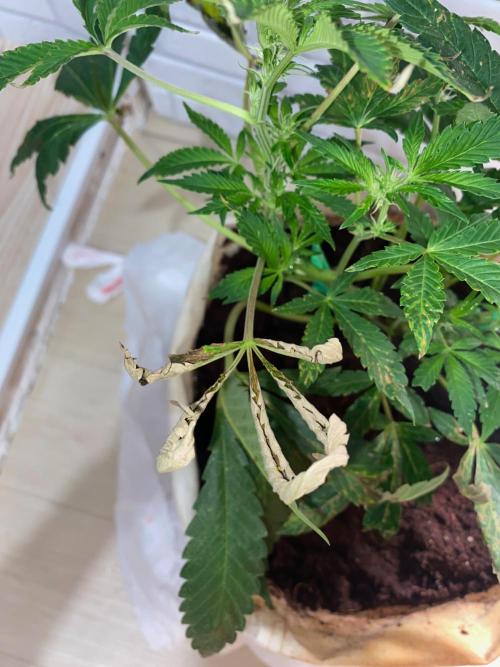
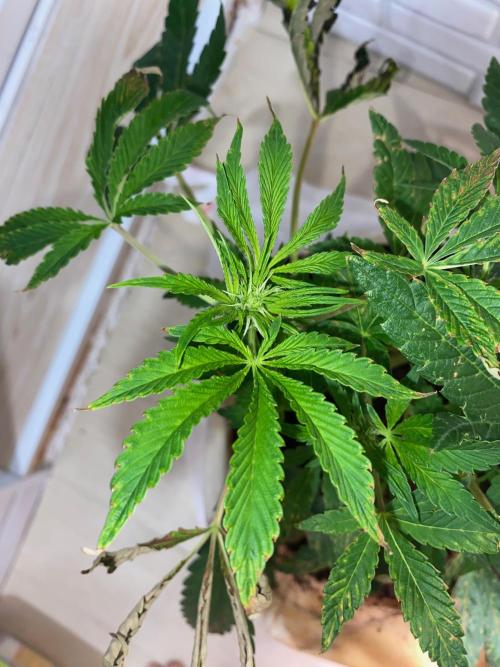
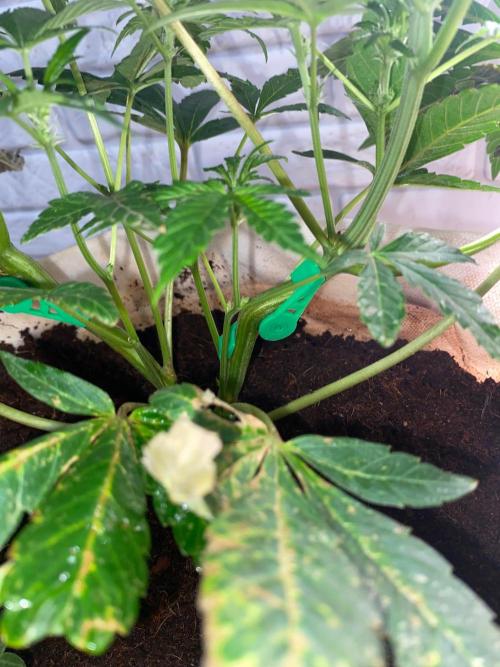
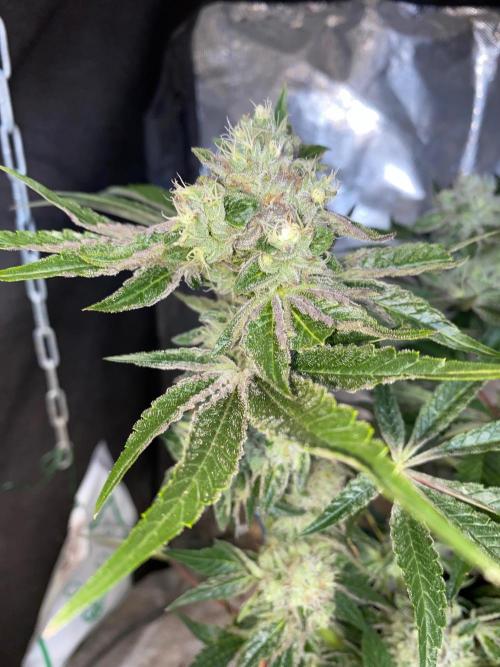
HoneyBlunt42 I accidentally scorched a plant so severely that its fan leaves curled up and dried out. I applied a drench of 2 liters of BioEnhancer—adjusting the pH to 5 using a meter, exactly as per the GHS instructions—at a concentration of 1 g/L. It was such a frustrating mishap. The key leaves near the buds show damage only at their tips.
For now, I am watering exclusively with plain water supplemented with CalMag and pH Down (metered out at 0.25 ml/L using a pipette). The plant's growth has slowed down, though it hasn't come to a complete halt. Visually, the first buds have already begun to form;
I hope I can start counting the 55–60 day flowering period from this point forward. Earlier this week, I also mixed 2 liters of coco substrate—amended with Power Feeding Bio Bloom at a rate of 5 g/L—into the top layer of the medium.
I didn't observe any adverse reactions like this during my previous grow using these same fertilizers. I’ve also hung a fresh CO2 Bag next to the plant, positioned at roughly the midpoint of the grow box's height.
3 likes
comments
Share
11
Week 11. Flowering3mo ago
35 cm
Height
12 hrs
Light Schedule
23 °C
Day Air Temp
6.3
pH
No Smell
Smell
140 PPM
TDS
45 %
Air Humidity
22 °C
Solution Temp
22 °C
Night Air Temp
15 l
Pot Size
0.6 l
Watering Volume
40 cm
Lamp Distance
Nutrients 4
CalMag
1 mll
pH Down
0.1 mll
PK Boost
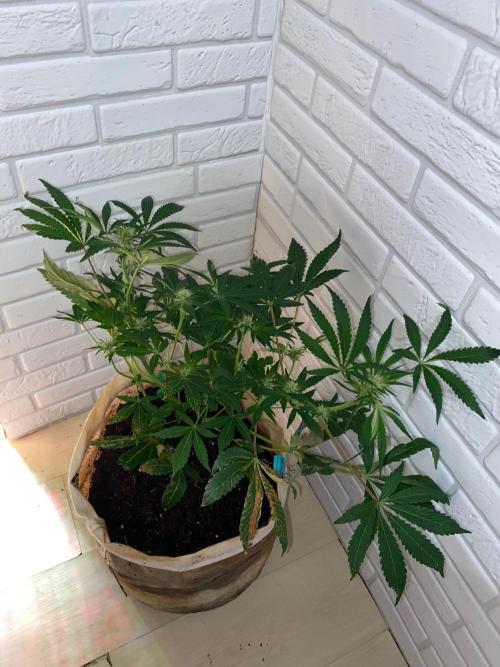
1 mll
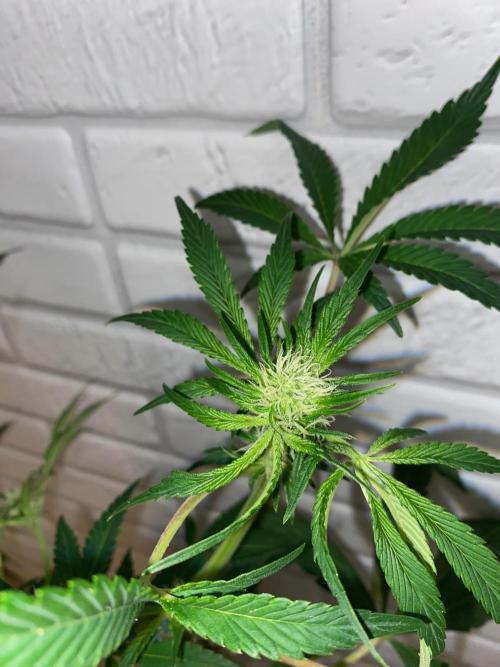
HoneyBlunt42 The last day of the 11th week. The plant is gradually blooming, with buds measuring 10 mm in diameter on the main stems. This is clearly smaller than I expected. The plant clearly hasn't yet mastered the 15 liters of substrate, slowed down by a pH error. A proper pH meter is essential. I added another 3 liters of substrate with 3 g/L of Power Feeding Bio Bloom fertilizer. It should last for about 4 weeks. For mid-flowering hybrids, GHS recommends adding another 2 g/L two weeks after the first addition. (For sativas, add another 4 weeks.)
3 likes
comments
Share
13
Week 13. Flowering3mo ago
40 cm
Height
12 hrs
Light Schedule
24 °C
Day Air Temp
6.4
pH
No Smell
Smell
190 PPM
TDS
45 %
Air Humidity
22 °C
Solution Temp
18 °C
Night Air Temp
15 l
Pot Size
0.6 l
Watering Volume
20 cm
Lamp Distance
Nutrients 3
CalMag
1 mll
pH Down
0.1 mll
HB-101 Vitalizer
0.1 mll
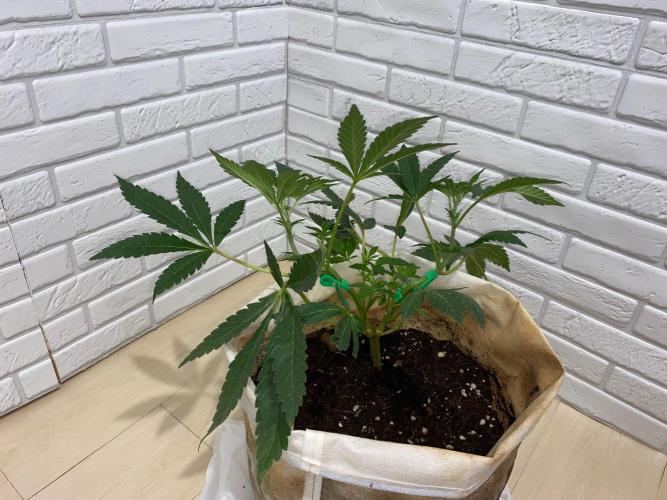
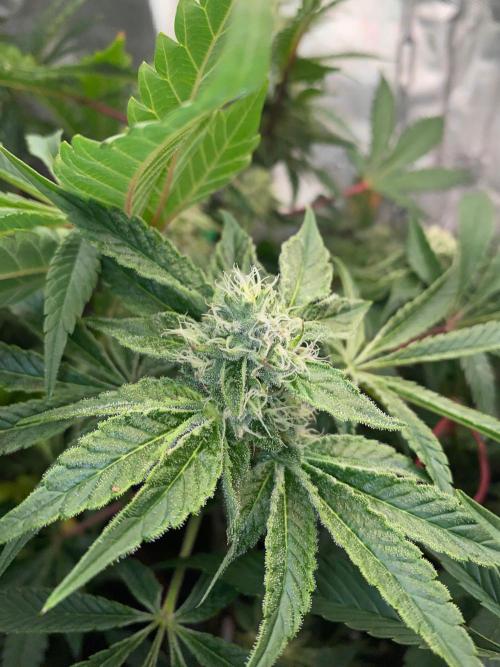
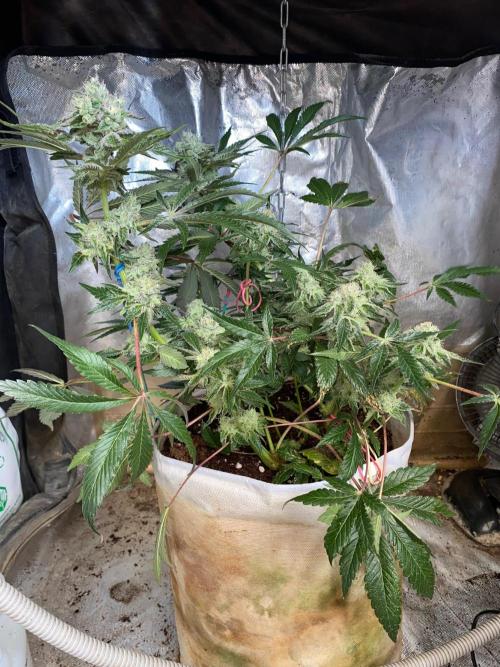
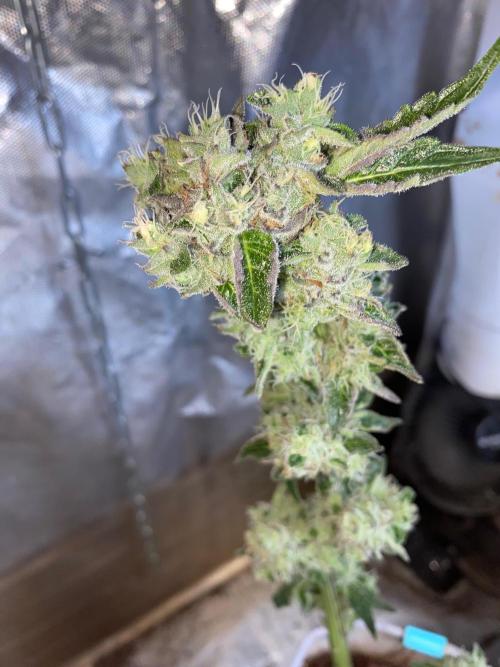
HoneyBlunt42 The plant is blooming very smoothly. Sugar has already appeared on the leaves. Due to the cold and pH issues on Vega, the plant is slightly larger than the automatic plant.
Glad I cut off the top, and at least two nice, plump main colas are swelling to their full potential.
It clearly hasn't mastered the 15 liters of coconut yet. I set it up for automatic watering with 0.2 liters every four hours.
I'm using RO + CalMag + pH Down.
3 likes
comments
Share
14
Week 14. Flowering3mo ago
40 cm
Height
12 hrs
Light Schedule
24 °C
Day Air Temp
6.4
pH
No Smell
Smell
190 PPM
TDS
30 %
Air Humidity
22 °C
Solution Temp
18 °C
Night Air Temp
15 l
Pot Size
0.6 l
Watering Volume
20 cm
Lamp Distance
Nutrients 2
CalMag
1 mll
pH Down
0.1 mll
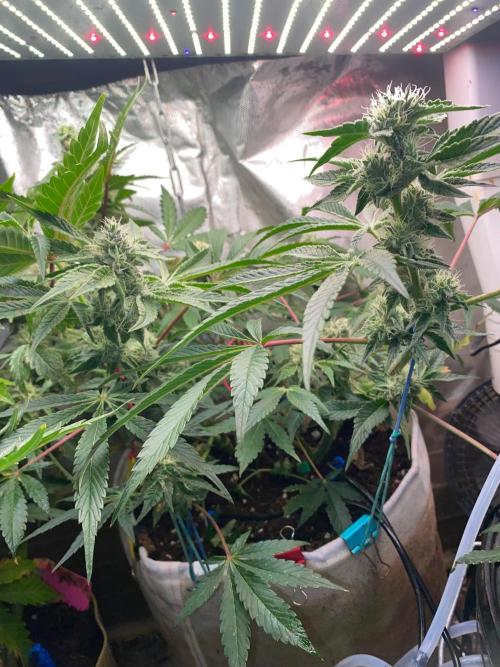
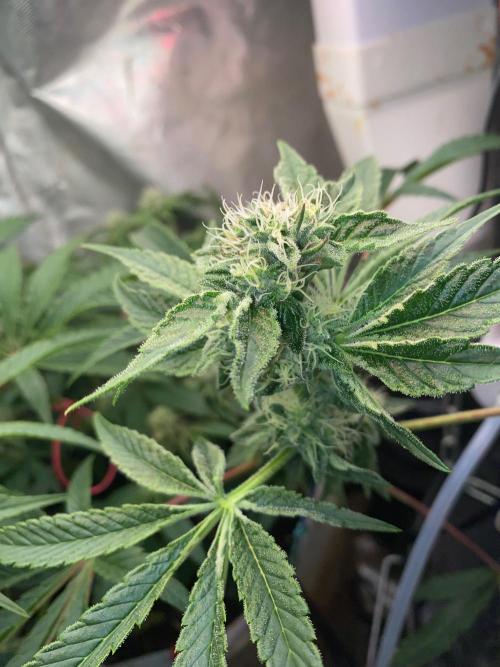
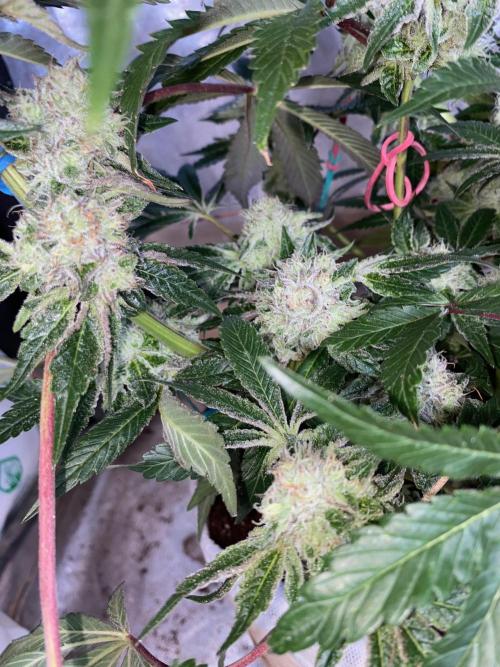
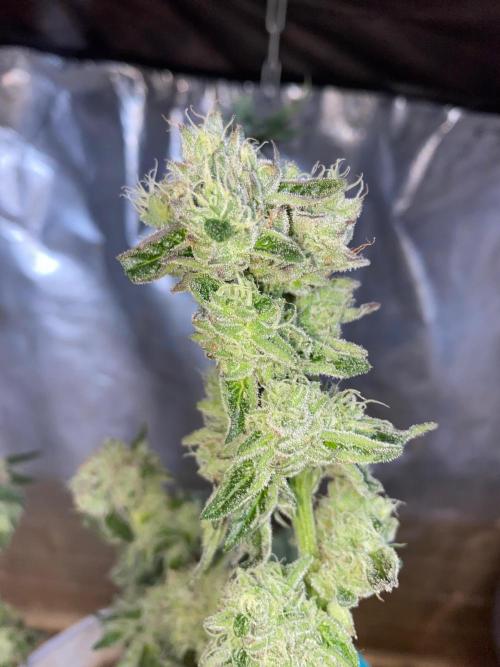
HoneyBlunt42 A plant with very sugary leaves and small, dense buds. Harvest is coming! Very sugar buds. Smells not too much
1 like
comments
Share
15
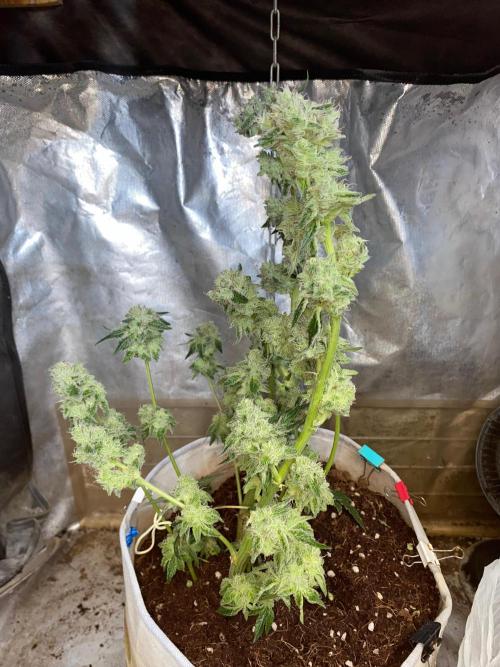
Week 15. Harvest3mo ago
Happy Harvest Day!


8/10
Rated
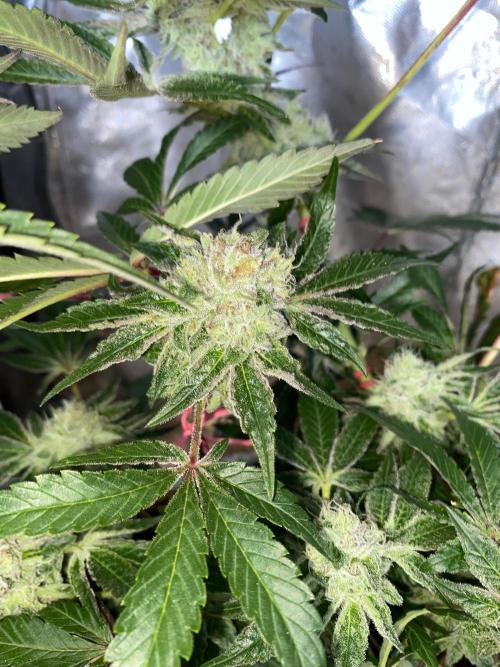
A good, strong, low-growing variety. It's poorly tolerant of low temperatures. The genetics are weak—out of three seeds, one bit off its tail, and the other didn't grow. In terms of harvest, I can say that two other nearby banks yielded 5-10 times more. These include hybrids and sattiva. I'll order other varieties from this bank, but this one is definitely not for me.
Show more
Translate
Spent 93 days
Ger Veg Flo Har
1
Plants
0.36 m²
Grow Room size
Hard
Difficulty
Height
Day air temperature
Air humidity
PPM
PH
Light schedule
Solution temperature
Night air temperature
Pot size
Lamp distance
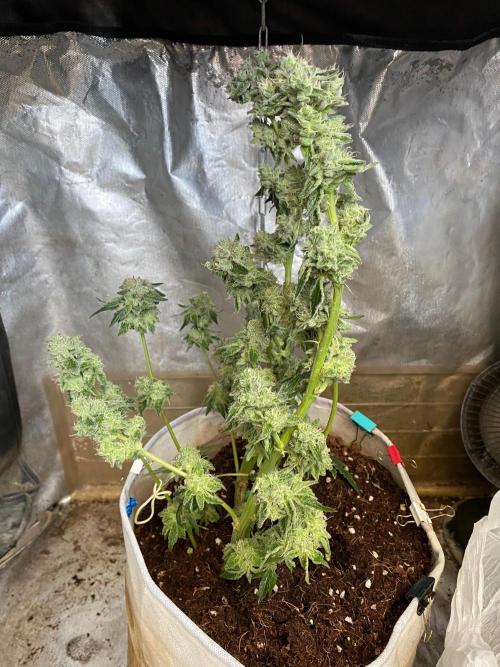
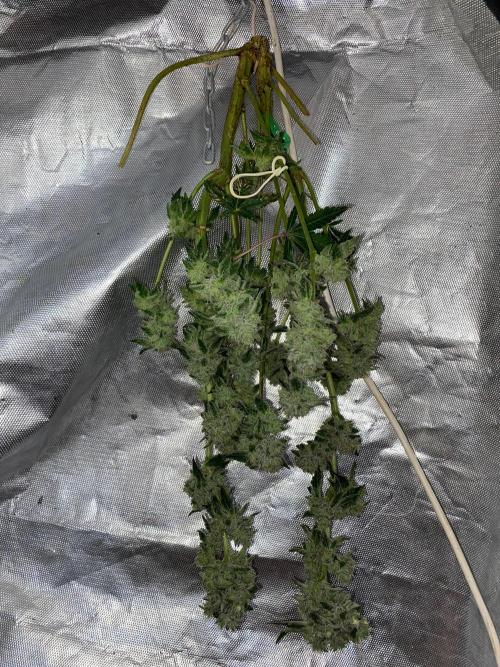
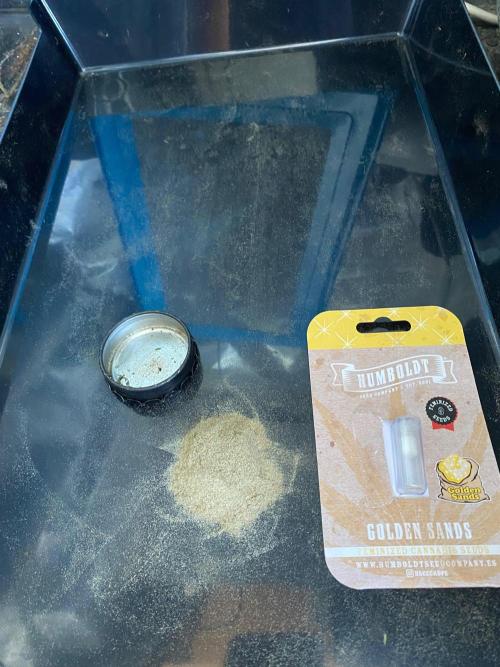
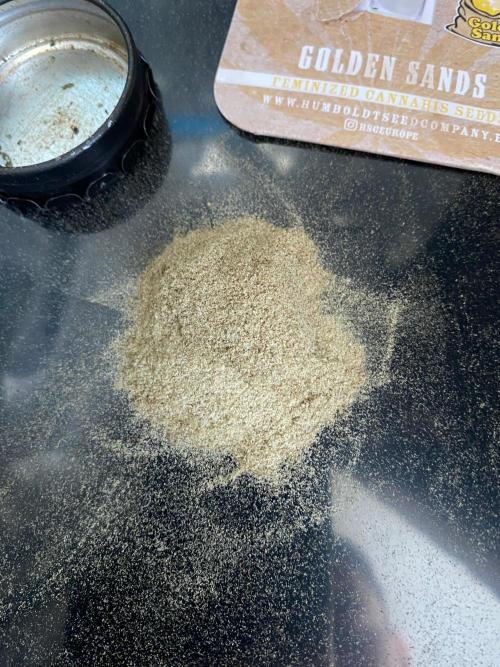
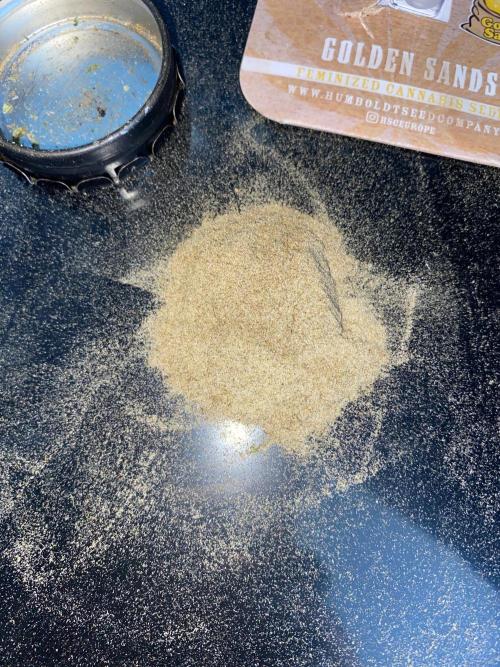
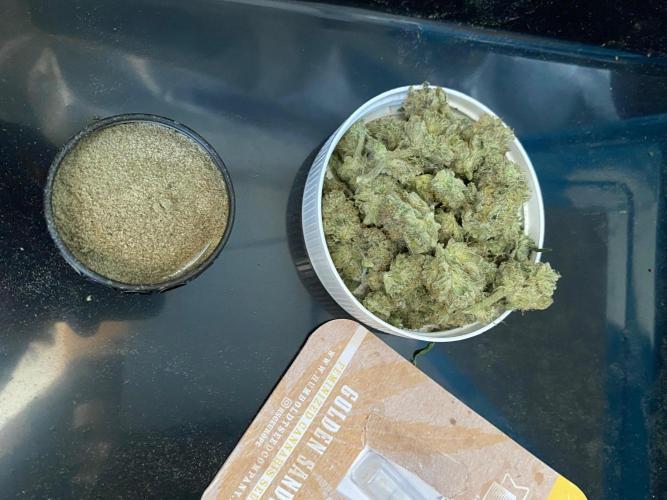
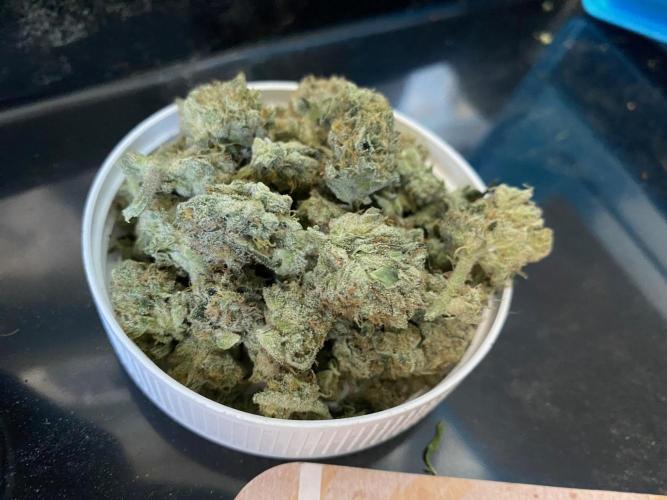
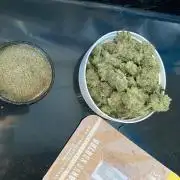
HoneyBlunt42 The burdocks peeled off easily—they were very ripe. The cones were very sugary. There weren't many of them—I didn't weigh the wet weight after trimming. I placed them in a dark box with a carbon filter and continuous ventilation to dry for seven days. Then they were cured for at least seven days in a glass jar.
5 likes
comments
Share
Equipment Reviews


2 comments
Sort by
popularity
popularity
newest
oldest

GhostTerpZ commentedweek 75mo ago
Looking really good ❗️ ❗️ ❗️
like 1

DutchFarmer commentedweek 94mo ago
🔥🌱 Yo this grow lookin mad healthy fr bro 👀💪 you doing your thing.
If you get a sec go check out my YouTube grow vids and peep my diaries too show some love 💚📺
likes

the end.
Enjoying this diary? Follow for more updates!

Prefer the old Diary view?
Go back to the old Diary view