


The Phoenix Redemtion: Dry another day



VEG
Sanlight Stixx 50 Light Emitting Diodes/54W

Tent
40x40x160

Fan
Rohrventi
SBONNI Rohrventilator

Filt
100mm/150m³/h
Can Lite
Drip
Dochtbewässerung FlexFeed
Vivosun

Professional Growmix Soil
Florargard

Indoor
Room Type
Topping
weeks 3
Defoliation
weeks 5-6
LST
weeks 5-7
12-12
weeks 6
11 liters
Pot Size
Start at Harvest
G
Germination9mo ago
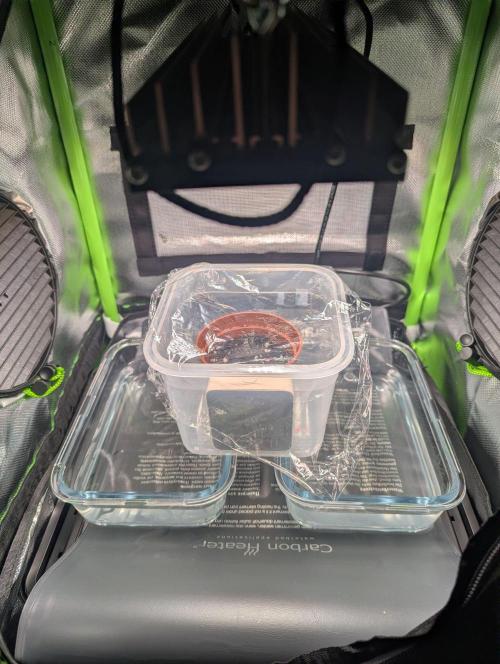
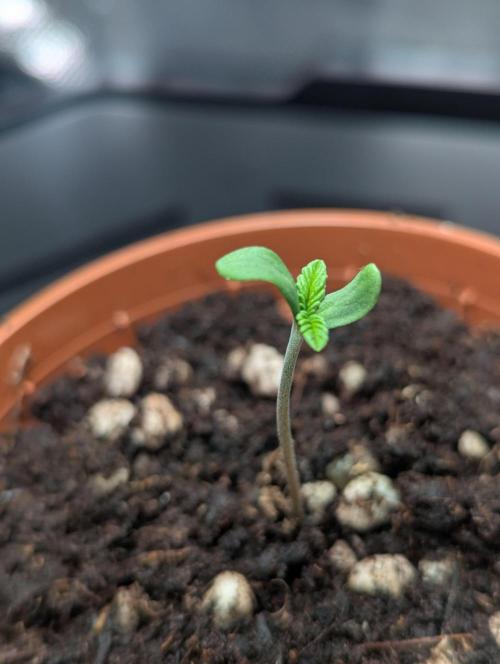
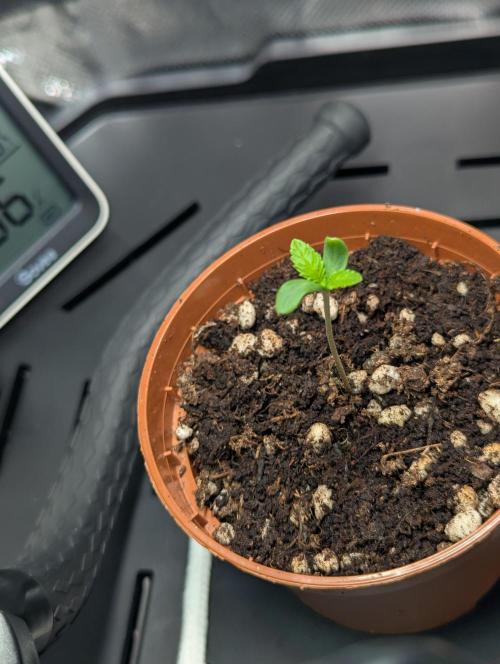
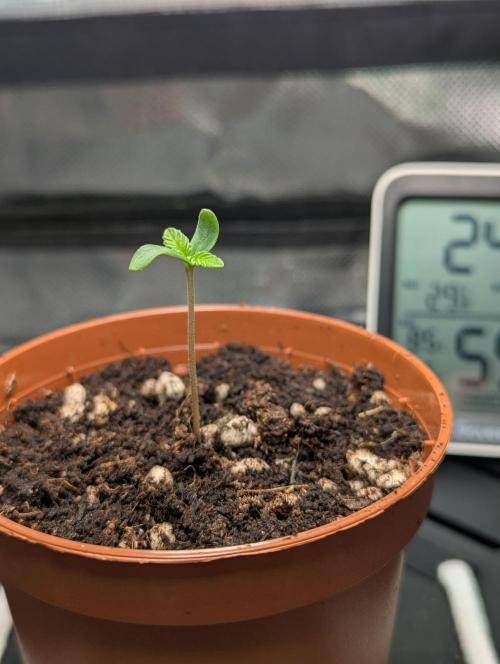
Herb-ert After my first plant stopped growing on day 3 due to being in the wrong soil (Neudorff Bio Seed and Seedling Soil), I buried it on day 16. For this new run, I want to implement what I've learned directly. So, this is my 2nd run overall.
What I've done differently this time:
- Changed the soil (Floragard Professional Growmix)
- Used a heating mat to let the seed germinate at 24 degrees substrate temperature (previously soaked the seed in water for 24 hours—no root visible when planting) instead of leaving it in a dark box at 24 degrees next to the heater
- Turned on the light (170ppfd) as soon as I saw the bent neck breaking through the substrate, instead of waiting for the light cycle
- Increased to 200ppfd earlier (this morning) instead of starting with 120ppfd
- Turned on the circulation fan as soon as the cotyledons began to open
- Took the seedling out of the microclimate (24 degrees 75% humidity) as soon as I saw the bent neck, instead of maintaining it for another week
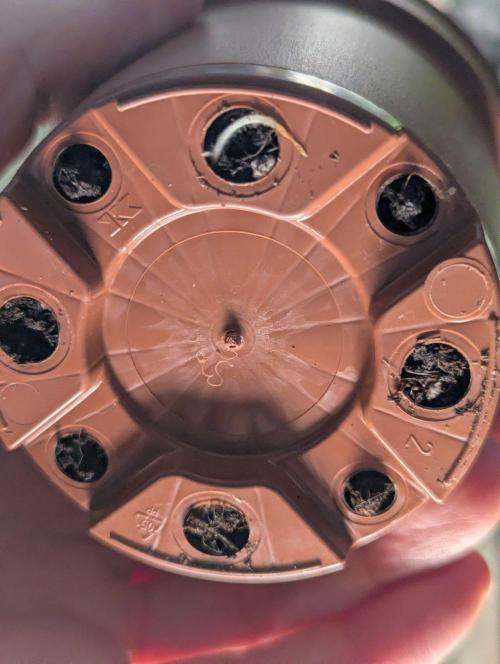
After I saw that the plant was stretching a root down, I repotted into a 1L pot. For the next run, I want to plant the seed directly into the final pot. The taproot stops deep growth as soon as it hits an obstacle and from then on grows mostly sideways. I want to establish a deep initial root for later wick watering.
The plant stretched a bit again. I think the Tropicana Cookies tend to do that. Obviously, the light was too weak. I calibrated my Photone app with data from Sanlight customer support and am giving the plant 40% at a distance of 20cm (256ppfd).
The light intensities at a 20cm lamp distance are:
100% = 640 µmol/m²/s
80% = 512 µmol/m²/s
60% = 384 µmol/m²/s
40% = 256 µmol/m²/s
20% = 128 µmol/m²/s
10% = 64 µmol/m²/s
The plant has developed well in the first week, and I am satisfied. Let me know what you think!
2 likes
comments
Share
Used method
Directly In Substrate
Germination Method
1
Week 1. Vegetation8mo ago
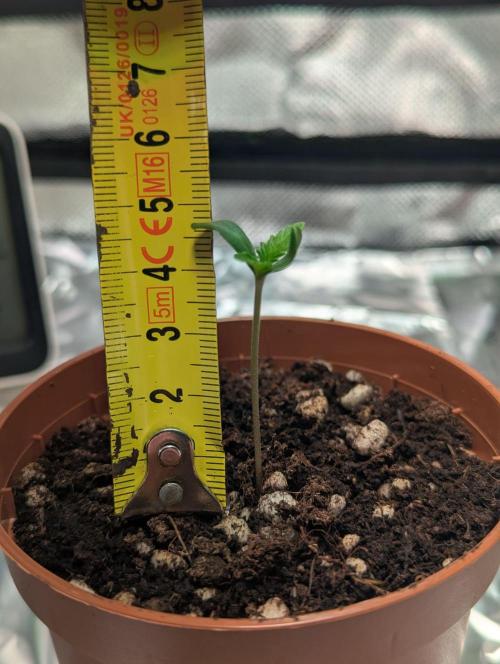
5.5 cm
Height
18 hrs
Light Schedule
25 °C
Day Air Temp
Weak
Smell
71 %
Air Humidity
20 °C
Night Air Temp
3.79 liters
Pot Size
1.36 liters
Watering Volume
20 cm
Lamp Distance
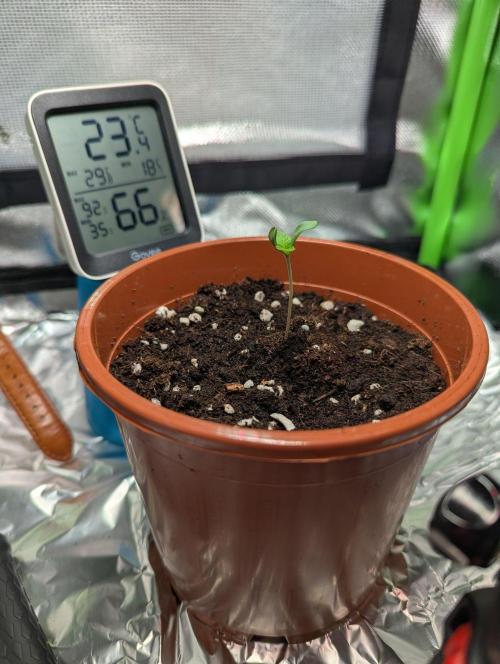
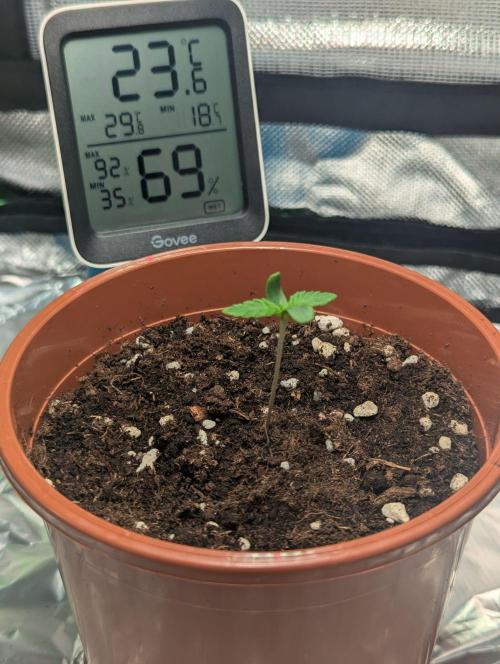
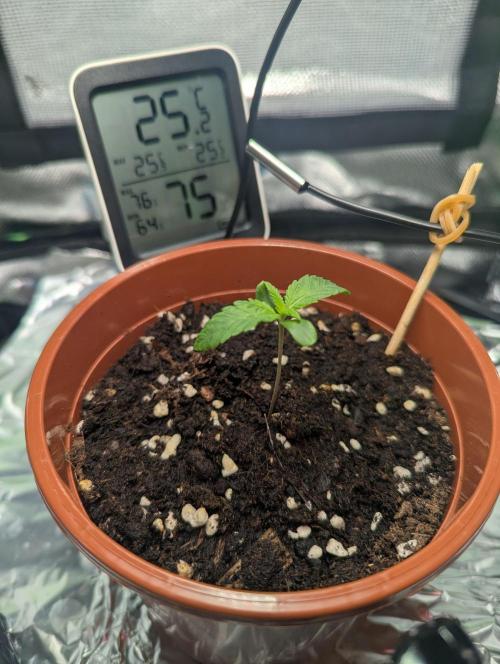
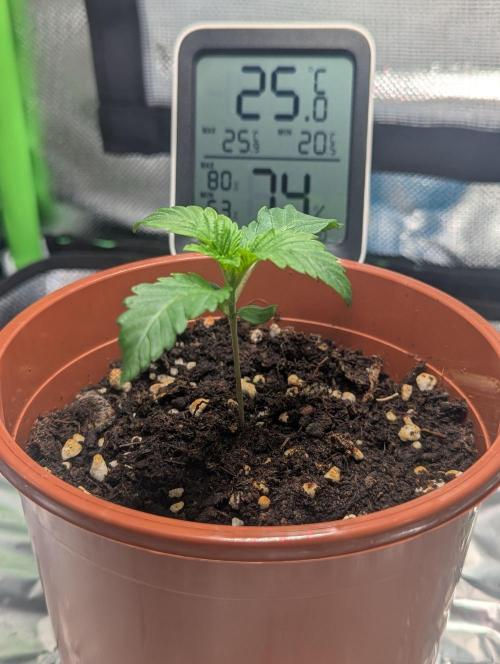
Herb-ert The plant was repotted into a 1L pot at the beginning of this week. This was followed by 2 days of growth stop. Since then, the plant has been growing a little more every day.
Growth: Size at the beginning of the week: ~4cm
Size at the end of the week: 5.5cm
Canopy at the end of the week: 8.5*5cm
The leaves have a nice green color, but they seem a bit thin/paper-like to me as a newbie. However, I can't see any spots or deficiencies.
Watering:
The water sits for at least 24 hours. I don't measure the pH value. An initial test with a strip showed a pH value of 6.
I've watered 3 times. I measure with a kitchen scale the dry (317g) and wet weight (513g).
The total amount I've watered this week is 300g of water.
The pot can hold about 220ml of water. I water when there's 70-75% remaining weight.
Environment:
Lamp at 20cm distance set to 40%. That corresponds to 256ppfd.
I maintain 25°C with a heating mat that I've hung in the tent. The sensor is hanging at plant height under the light.
The humidity is averaging 71% and is maintained with a damp towel. During the day, it's larger than at night. (From the plant's perspective). The VPD averages (day + night) at 0.84kPa.
The fan blows past the heating mat against the wall. The stem shakes every 1-2 seconds.
The circulation fan has been turned on and is running at a very low level (75m³/h).
3 likes
1 comment
Share
2
Week 2. Vegetation8mo ago
6 cm
Height
18 hrs
Light Schedule
25 °C
Day Air Temp
No Smell
Smell
70 %
Air Humidity
20 °C
Night Air Temp
1 liters
Pot Size
0.36 liters
Watering Volume
29 cm
Lamp Distance
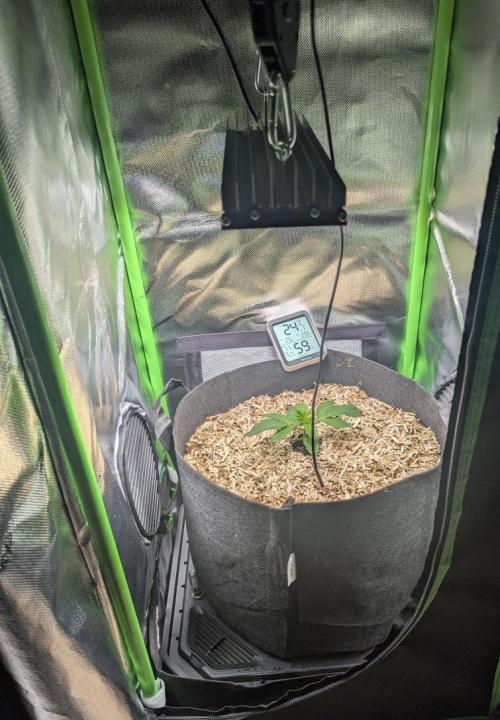
Herb-ert Repotting into the final pot and substrate change
Last week, "Phoenix" achieved complete root penetration of the 1-liter pot. The canopy was already extending over the edge of the pot, so the transfer to the final pot took place. An 11-liter fabric pot was used, filled with organic hemp soil (from Sonnenerde).
To optimize the capillary action in relation to the planned wick irrigation, the substrate was structurally loosened with 10% perlite (in addition to the perlite already contained). I consciously refrained from adding coconut fibers to further improve capillary action, as coconut substrate binds calcium and magnesium due to its pronounced cation exchange capacity, which could potentially contribute to a deficiency for the plant. Due to the high bulk density of the hemp soil, I deliberately avoided additional pressing.
To reduce a potential osmotic shock from the switch to the nutrient-rich final substrate, the planting hole was lined with Floragard Professional Growmix – the medium in which the plant was previously cultivated. This transition zone serves to gradually adjust the root space to the sharp soil.
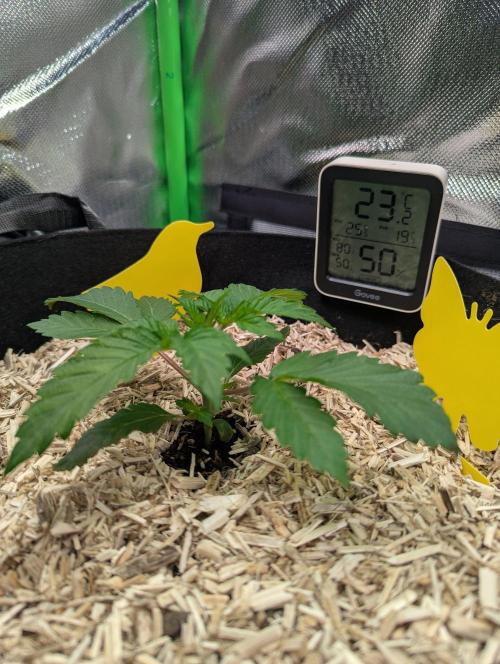
The repotting was done at a residual moisture of about 50%, allowing the root ball to come loose compactly and largely intact. A slight ring growth was noticeable at the bottom of the pot. A planned mycorrhiza inoculation was not carried out (forgotten); however, the Trichoderma strains contained in the Growmix provide a partial functional compensation regarding rhizosphere stability. Next time, I need to come up with a better process. A 1–2 cm thick layer of hemp mulch was applied to stabilize surface moisture and protect the soil life. Since the soil can indeed carry fungus gnat larvae, 2 monitors were set up.
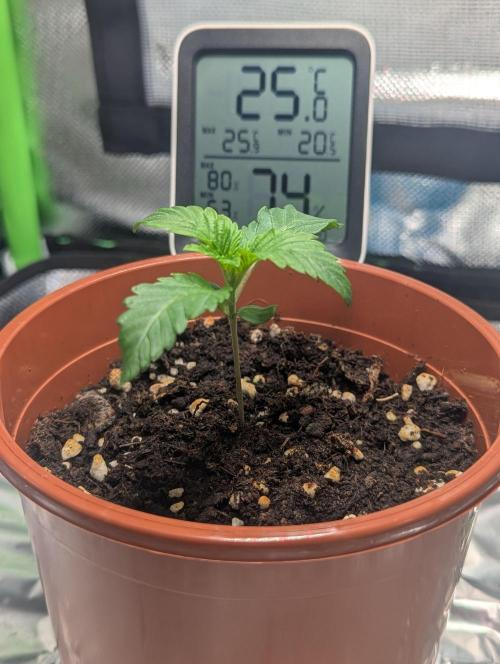
The plant showed strong tolerance regarding repotting. Growth interruption: about 36 hours of reduced growth (instead of the expected 3–5 days without growth). Follow-up reaction: noticeable "Praying" (upright leaf position) as well as the strongest increase in leaf span so far with +3 cm within 24 hours.
Light management and adjustments
At an intensity of 280 PPFD, symptoms of slight light stress appeared (including "tacoing" of leaf edges and discrete leaf spots). I consciously pushed the light configuration to the limit because I wanted to achieve a compact growth form. However, I wanted to avoid damage. The light configuration was then modified. Before: 20 cm distance, 40% dimming → 280 PPFD / 18.6 DLI After: 27 cm distance, 60% dimming → 260 PPFD / 17.0 DLI By reducing the photochemical load while simultaneously increasing the distance, the damage pattern stabilized. The newly formed tissue shows no deformations or stress markers.
Current development status:
Canopy at the beginning of the week: 9.5 × 6.5 cm
Canopy at the end of the week: 16.5 × 20 cm
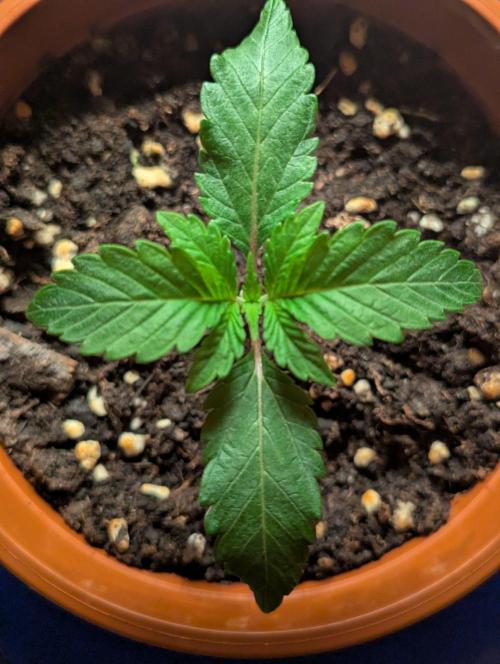
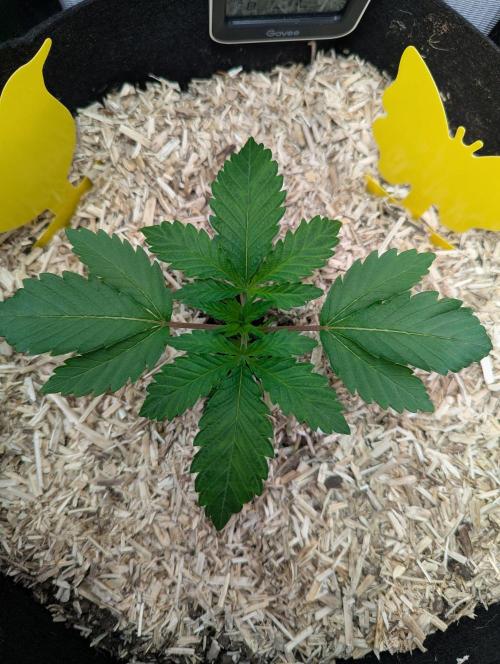
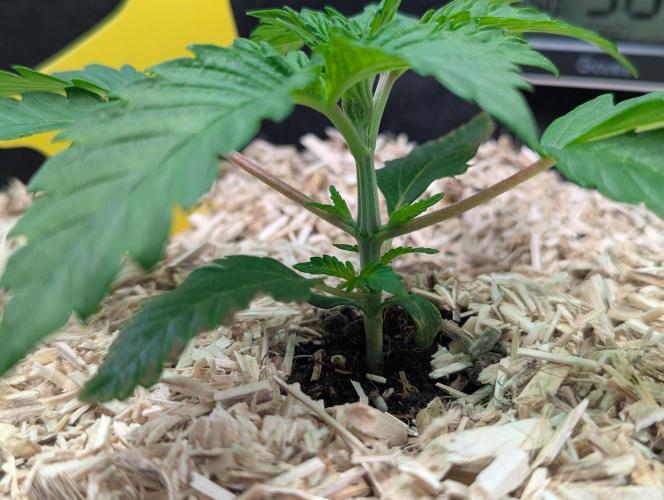
Three fully developed pairs of leaves; the fourth node is in development. Lateral shoots are already visible in the axils of the lower two nodes. Despite the sativa dominance in the genetics, the plant has been growing very compact so far. This works in my favor given my low tent height. The vegetative development is overall dynamic and structurally stable. The adaptability after the substrate change, as well as the rapid physiological recovery, indicate a functioning root-shoot ratio, overall robust plant health, and strong genetics.
3 likes
comments
Share
3
Week 3. Vegetation8mo ago
10 cm
Height
18 hrs
Light Schedule
25 °C
Day Air Temp
Weak
Smell
70 %
Air Humidity
20 °C
Night Air Temp
11 liters
Pot Size
0.29 liters
Watering Volume
40 cm
Lamp Distance
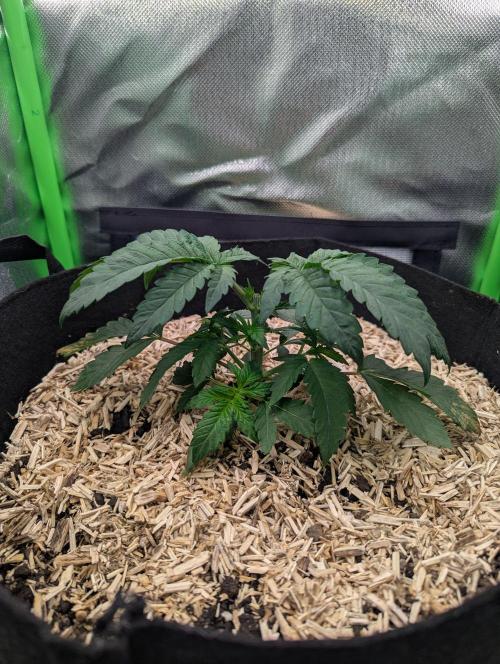
Herb-ert This week was a huge learning curve for me. After I transplanted the plant into its final 11L fabric pot, it seemed like the initial watering did it a lot of good, and it grew vigorously. But soon it appeared to be getting weaker: the leaves drooped and felt papery. In hindsight, I massively underestimated the size of the new root ball and the associated water needs in the final pot. In the larger pot, I had simply doubled the previous watering amount. My first watering attempts with 300ml and later 500ml showed no improvement. It was only when I increased the amount to 1.25L that I saw a noticeable recovery and vitality returned. Even with this amount, I'm at the lower limit for this pot size. However, the water supply hopefully won't be a problem soon.
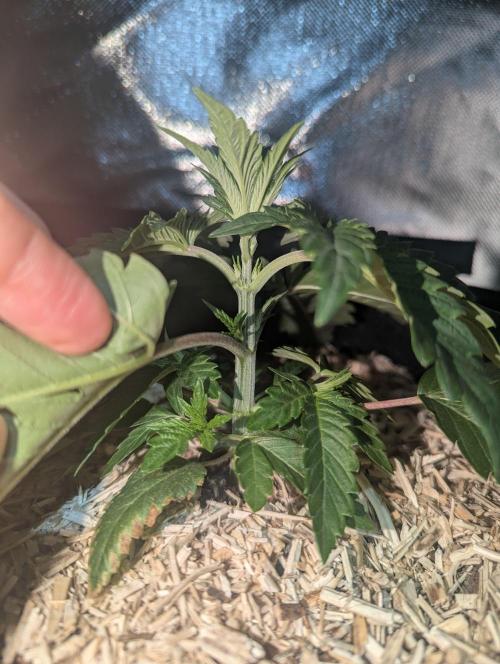
Since it looked so good after the big watering, I dared to top it above the 4th node. However, I made the next mistake right away: I waited eight hours after the cut to decide whether to remove the large fan leaves that were covering the strong shoots at the first node. As a result, the plant had to endure the stress over a longer period instead of processing everything in one go.
Currently, it is recovering from this exhausting week, but it seems to be on a good path. I continue to keep the environmental values stable at 25°C and an average humidity of 71%, which corresponds to a VPD of about 0.84kPa. However, the lamp is now hanging at a distance of 40cm at 60% (280ppfd). This is because I have the impression that more light is reflected off the side walls of the tent, which benefits the lower shoots.
2 likes
comments
Share
Used techniques
Topping
Technique
4
Week 4. Vegetation8mo ago
16 cm
Height
18 hrs
Light Schedule
24 °C
Day Air Temp
Weak
Smell
65 %
Air Humidity
20 °C
Night Air Temp
11.02 liters
Pot Size
0.57 liters
Watering Volume
36 cm
Lamp Distance
Herb-ert This week, 11 days after repotting, I activated the wick irrigation system (Vivosun FlexFeed Base). The last watering was 3 days ago and was 1250ml of stagnant tap water. To activate it, I first placed the fabric pot in a tub with about 3 cm of water (tap water) and let it soak for around 20 minutes. In hindsight, this duration was way too short for the pot volume. Presumably, only the lower layer of about 4–5 cm was moistened.
After that, I placed the pot on the wick system in the tent. The 6-liter reservoir was initially filled exclusively with stagnant tap water. Despite the incomplete initial saturation, the system has been functioning satisfactorily so far. It probably would have worked even if I had just filled the reservoir without moistening the substrate beforehand.
Overall, the plant has taken up at least 4 liters of water in the seven days of this week. Looking back, I realize that I significantly underestimated the water needs in the previous week. I refilled the water tank when it was half empty. Since my tap water has a hardness level of 14, I replaced the missing 3 liters with distilled water. This way, I can maintain a hardness level of 7. I wanted to continue with the 1:1 mixing ratio from now on to stabilize nutrient uptake and better manage any potential deficiencies that may arise later. So much for the BroScience. As I continue my self-study, this decision proves to be disadvantageous given the calcium and magnesium content in my tap water of 66mg/L (Ca) and 14mg/L (Mg). It would be smarter to add some Epsom salt to the water rather than halving the hardness (and thus the Ca/Mg concentration) out of vague fears. But I don't need to do that with organic hemp soil for now. I’ll chalk this up to overwatering.
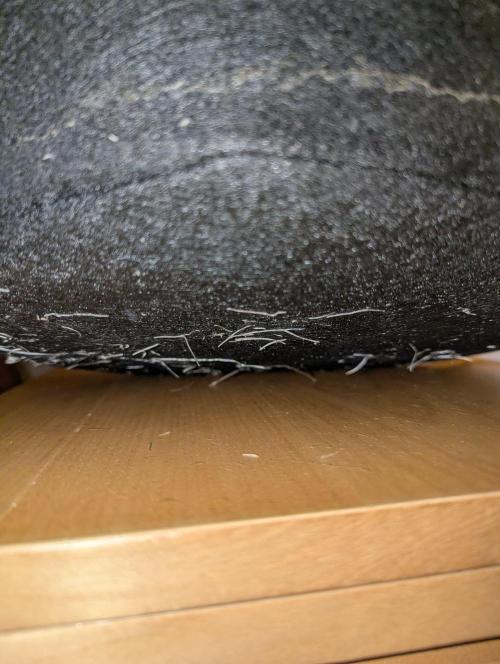
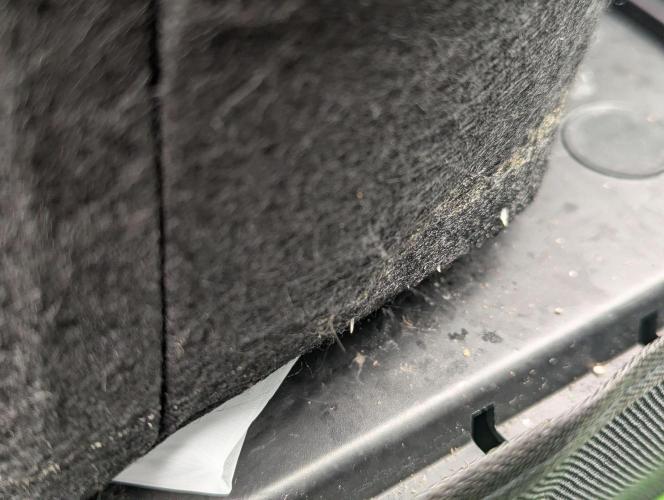
I checked if the fabric pot had rooted from the bottom. Due to a positive finding, I placed screen printing fabric with a mesh size of 150 microns, folded four times, on the wicks to prevent rooting into the water tank. Otherwise, I wouldn't be able to move the pot without tearing roots that would then hang dead in the tank. The water flow is not noticeably impaired by the fabric.
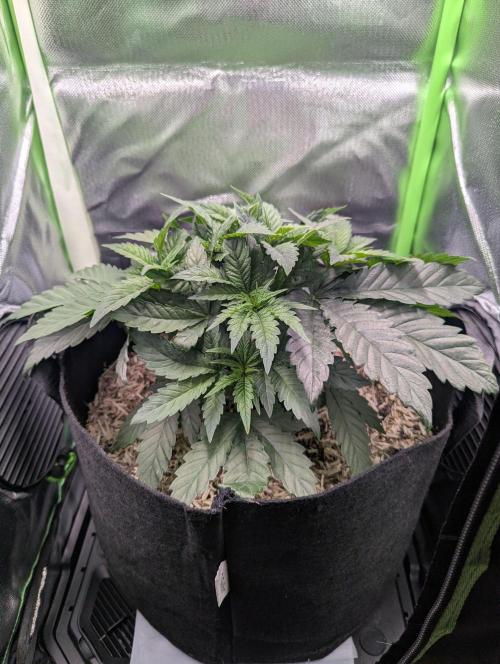
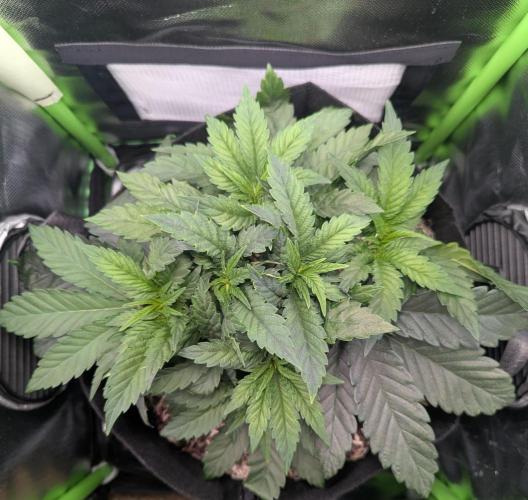
Since the plant was topped, I haven't changed anything about it. No training except for bending the fan leaves down to expose the underlying shoots. Currently, there are eight strong main shoots visible.
The plant is growing very compact with short internodal distances and broad leaves. By the end of the week, the height is 16 cm. The genetics (a cross between Girl Scout Cookies and Tangie) seem to phenotypically lean strongly towards GSC, which could explain the stout growth. Additionally, the comparatively high light level in the first weeks and the increased humidity may have contributed to the short internodes. Currently, the PPFD is about 300 at a lamp distance of 36 cm. The goal is to promote moderate stretching to create a more open plant structure and improve later ventilation in the tent. There is still about 18 cm of room before reaching the maximum available height before initiating flowering.
I am satisfied with the condition of the plant.
5 likes
comments
Share
5
Week 5. Vegetation8mo ago
21 cm
Height
18 hrs
Light Schedule
23 °C
Day Air Temp
Normal
Smell
60 %
Air Humidity
20 °C
Night Air Temp
11 liters
Pot Size
1 liters
Watering Volume
21 cm
Lamp Distance
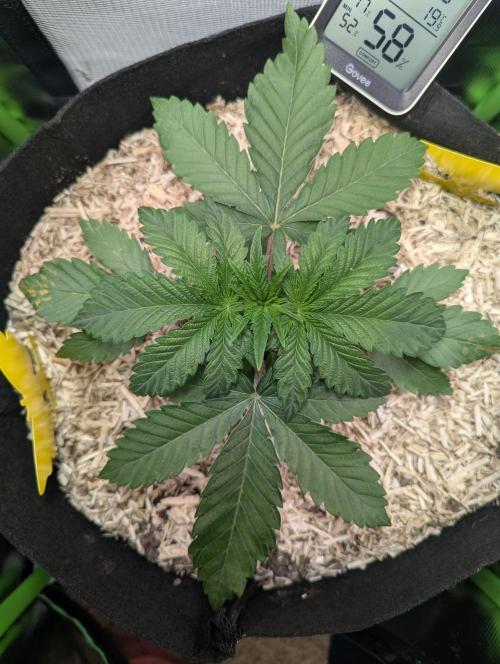
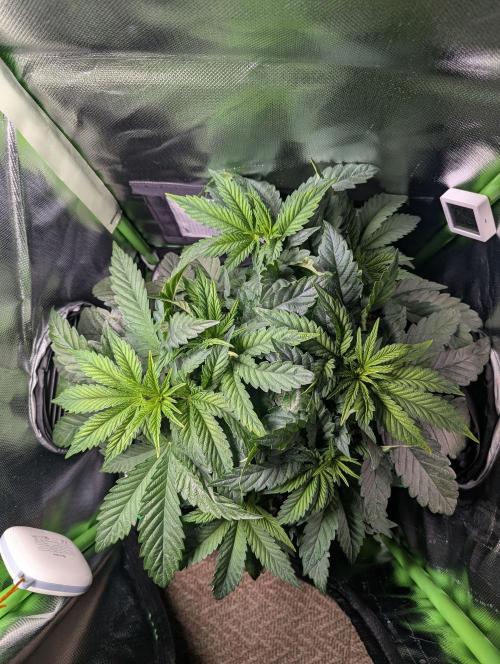
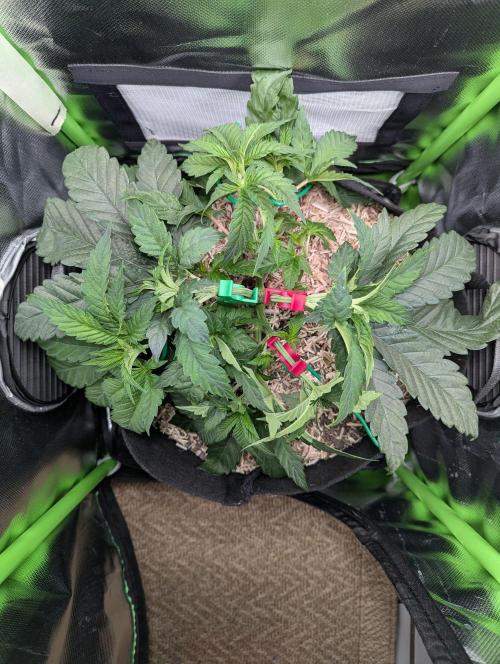
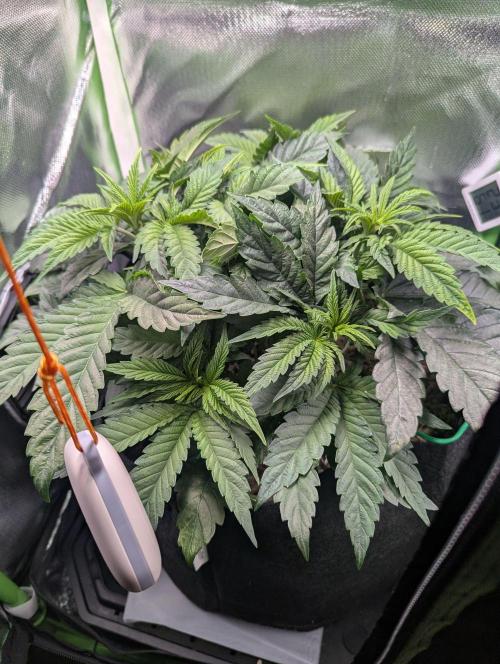
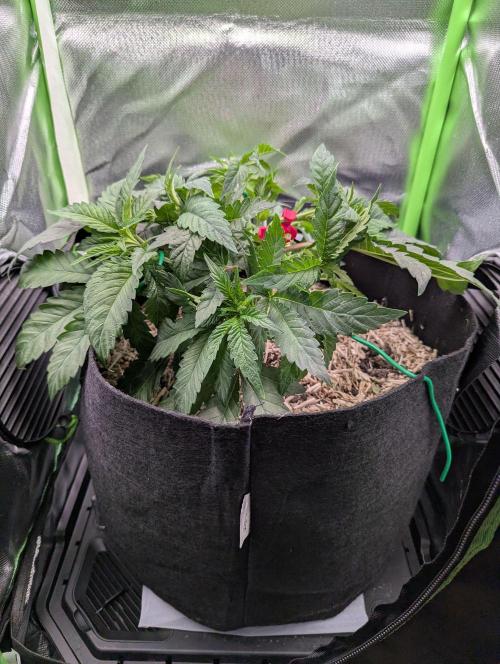
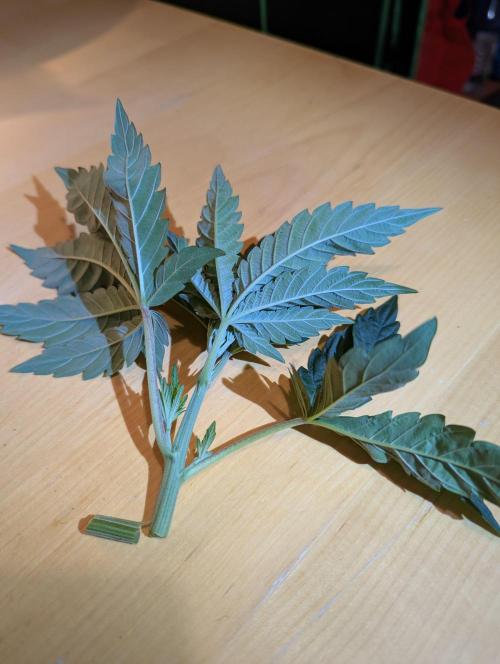
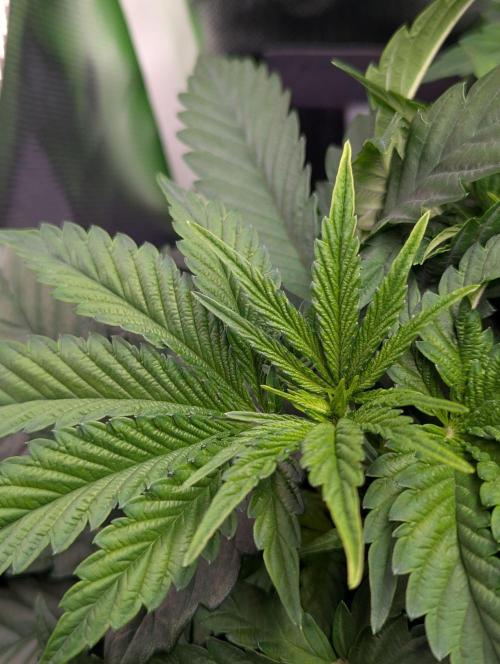
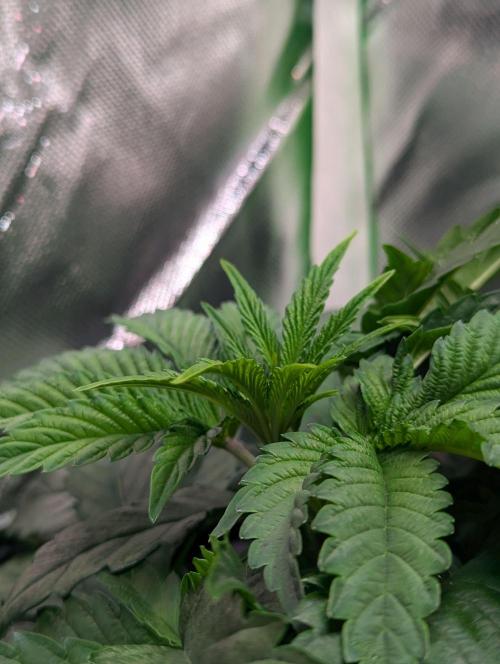
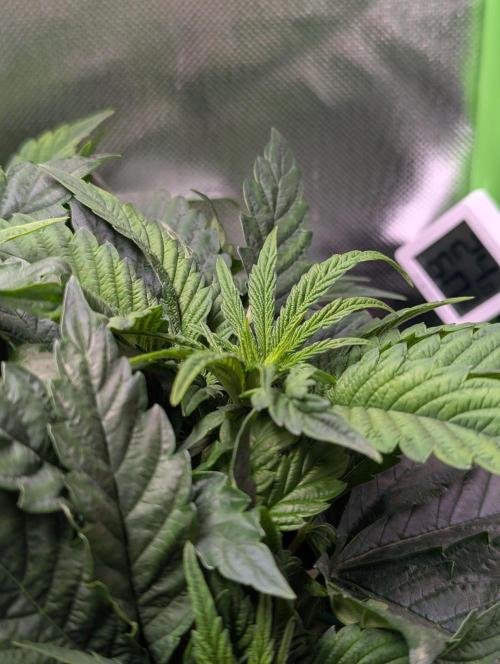
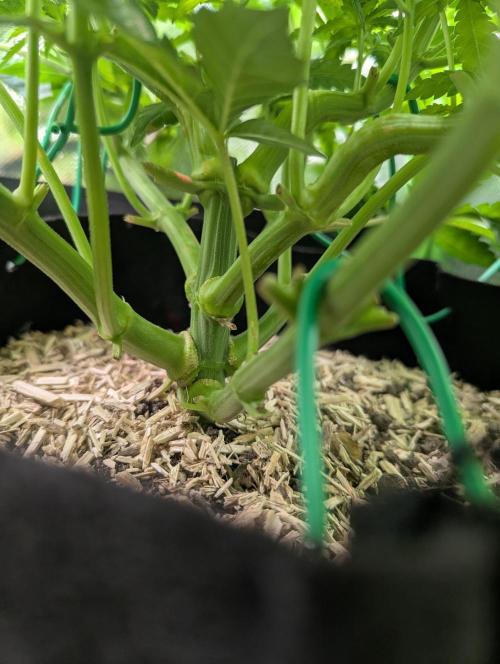
Herb-ert The plant was trained this week. Unfortunately, it lost a large branch. High turgor in the tissue + short internodes + too much force. I tried to bend it at a 90° angle, and the branch broke off. After that, I only trained with wire.
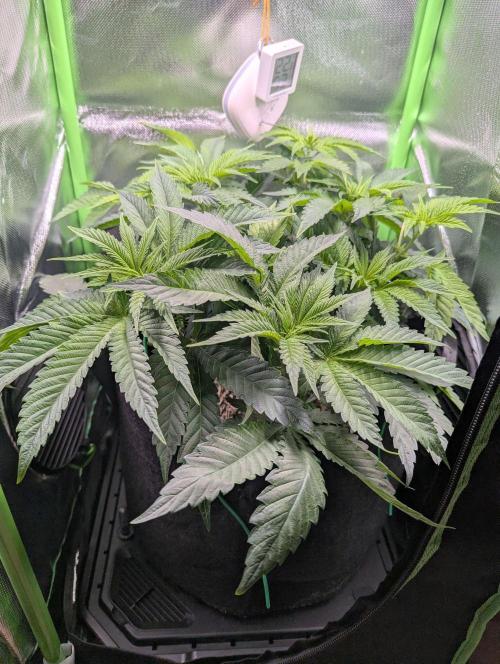
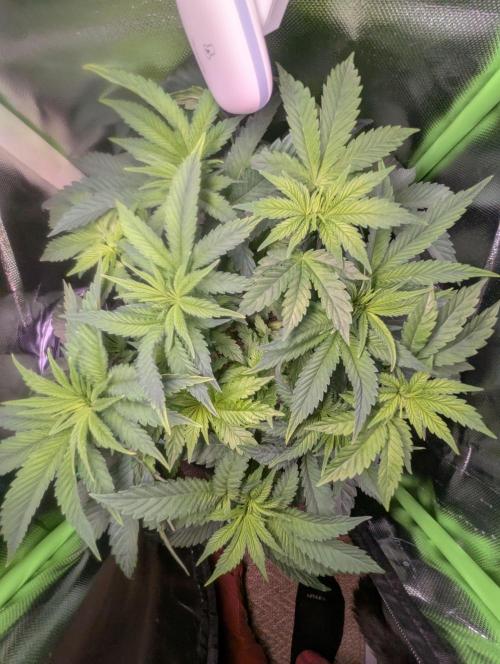
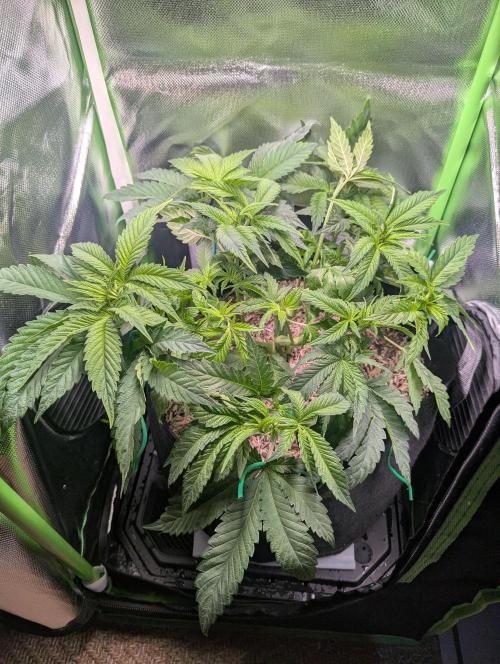
The plant recovered from the training and the accident in record time. In fact, there was no noticeable growth stop. The plant continued to grow straight and vigorously. The overhead views show the plant after training and today.
The watering system works surprisingly well. In 4 days, it has delivered just over 4 liters through the plant.
The plant looks vibrant, grows robustly, and shows no signs of deficiencies. So far, only water has been given. The organic hemp soil is living up to its promises so far. I expect the first deficiencies in the 2nd week of flowering. The flowering will begin today, 48 hours after the last training.
5 likes
comments
Share
Used techniques
LST
Technique
Defoliation
Technique
6
Week 6. Flowering7mo ago
26 cm
Height
12 hrs
Light Schedule
23 °C
Day Air Temp
Normal
Smell
55 %
Air Humidity
20 °C
Night Air Temp
11 liters
Pot Size
1.7 liters
Watering Volume
26 cm
Lamp Distance
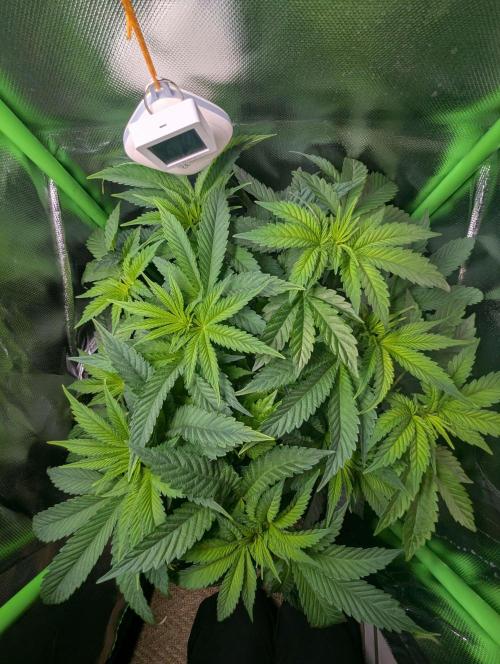
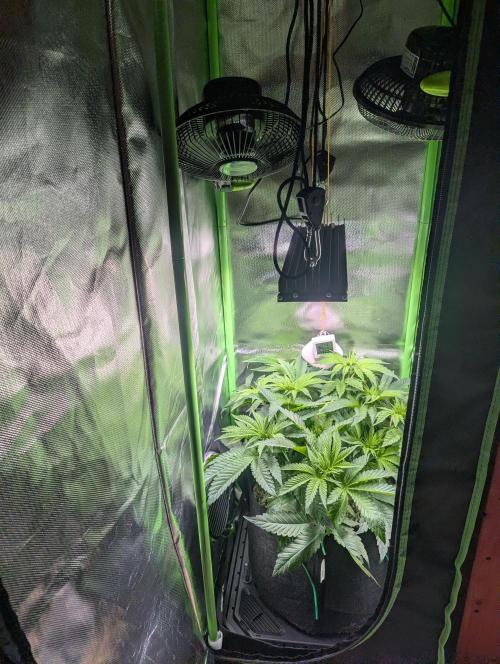
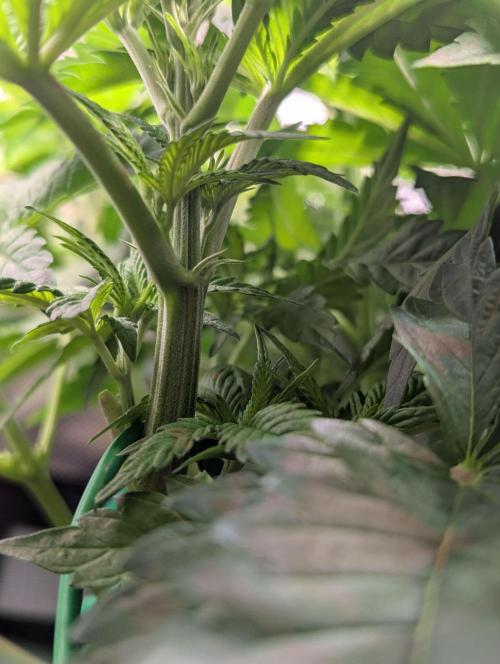
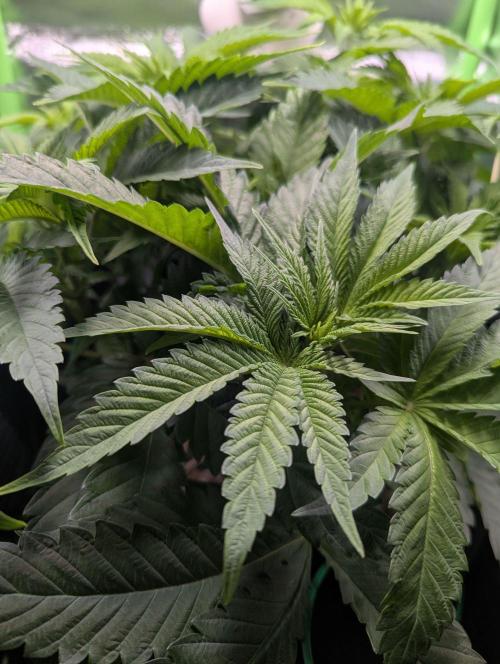
Herb-ert The first week of flowering is behind us.
This week, the canopy was trimmed. I felt moisture between some leaves, so I cut them away.
Visually, there was only a bit of difference for one day, then new leaves reclaimed the free space.
A second fan was hung up to bring more air movement into the canopy.
The internodes are still too short to fit a fan under the canopy.
The warmer nights led to the heating being turned off. This, in turn, resulted in cooler days in the grow tent (21.5-22°C). I’m using a space heater that has a thermostat.
It turns on every 15 minutes for 2-3 minutes. This keeps the tent around 24 degrees during the day while keeping electricity costs in check.
Every 2 days, I tighten the wires. The training is working well, and the canopy is level.
I had to refill the reservoir twice this week.
Since there was such high humidity in the tent (65%+), I removed 2 out of 4 wicks. The humidity went down, but I suspect it’s not because of the wicks. The pot is just as moist on the lower outside with 2 wicks as it is with 4. This gives me the idea that I could also water 3 pots of 4 liters with 4 wicks. I’ll keep that in mind.
She’s currently getting ~530 ppfd.
4 likes
1 comment
Share
Used techniques
LST
Technique
Defoliation
Technique
12-12
Technique
7
Week 7. Flowering7mo ago
38 cm
Height
12 hrs
Light Schedule
23 °C
Day Air Temp
Normal
Smell
65 %
Air Humidity
21 °C
Night Air Temp
11 liters
Pot Size
2 liters
Watering Volume
26 cm
Lamp Distance
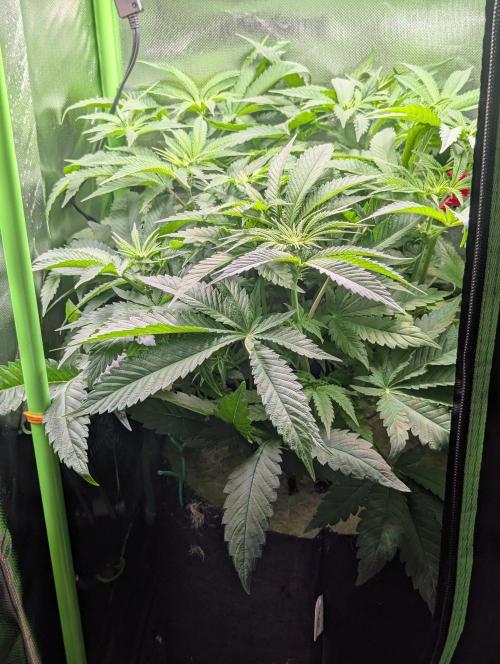
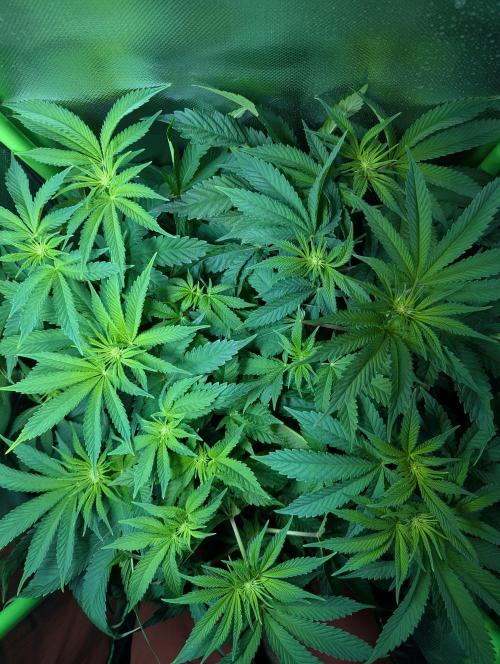
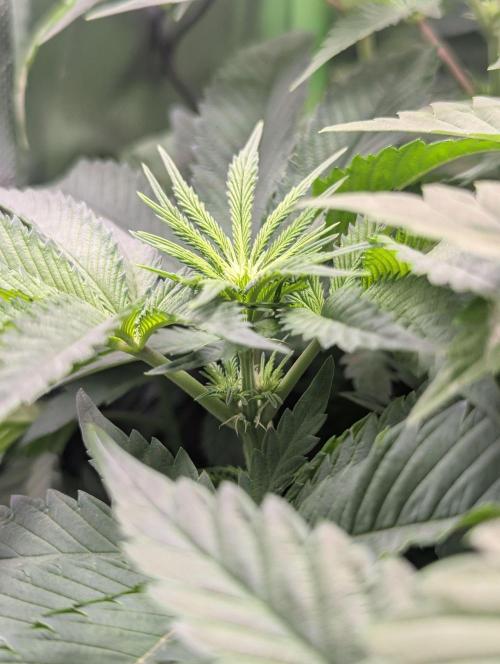
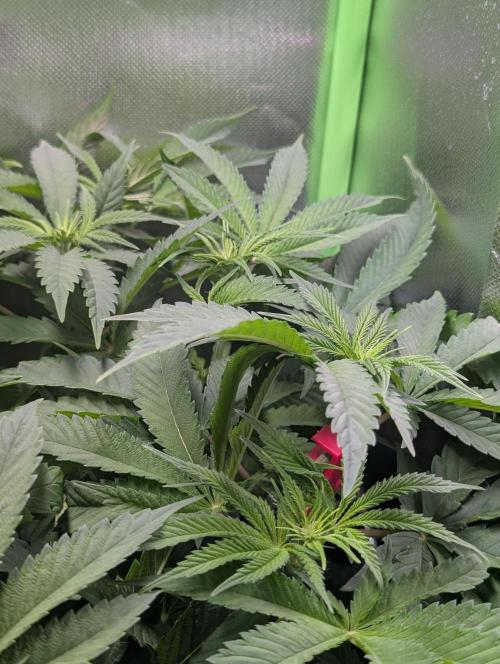
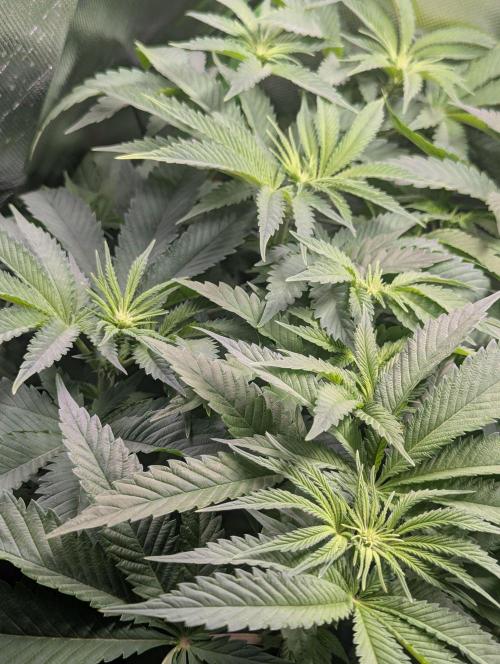
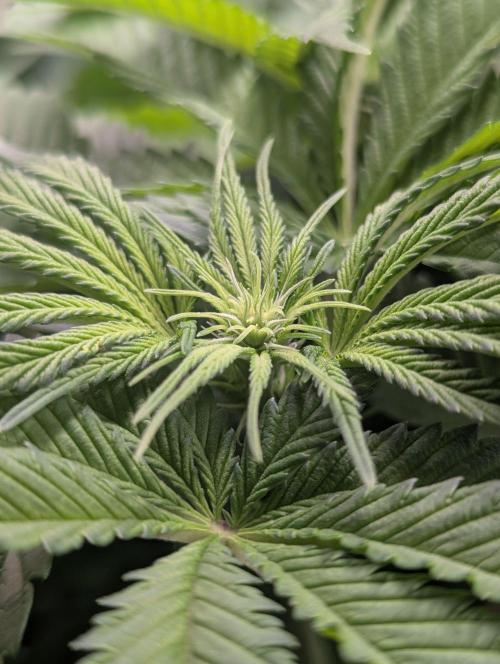
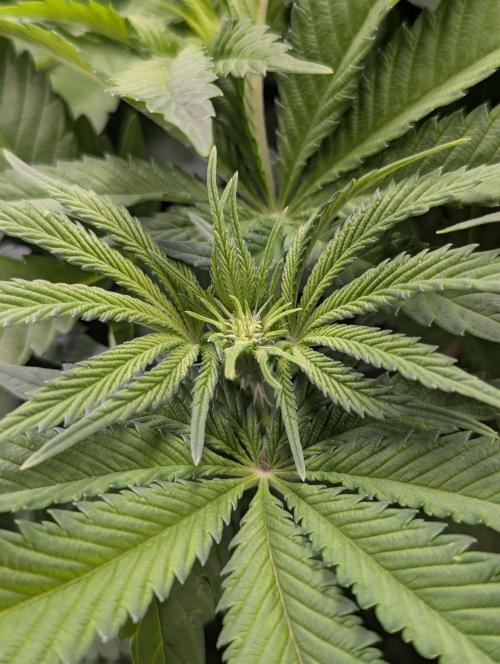
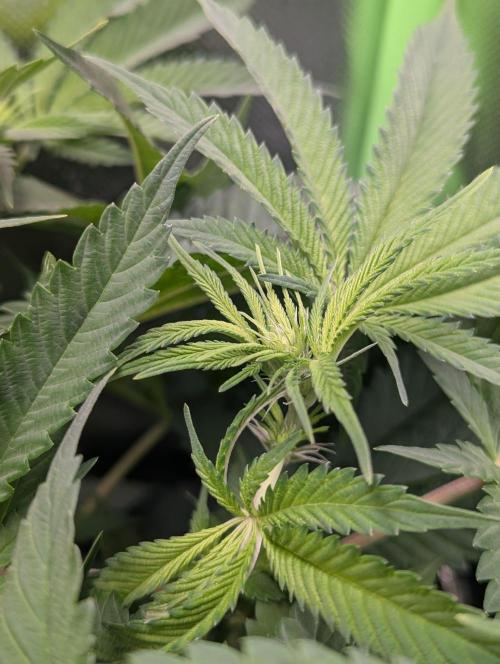
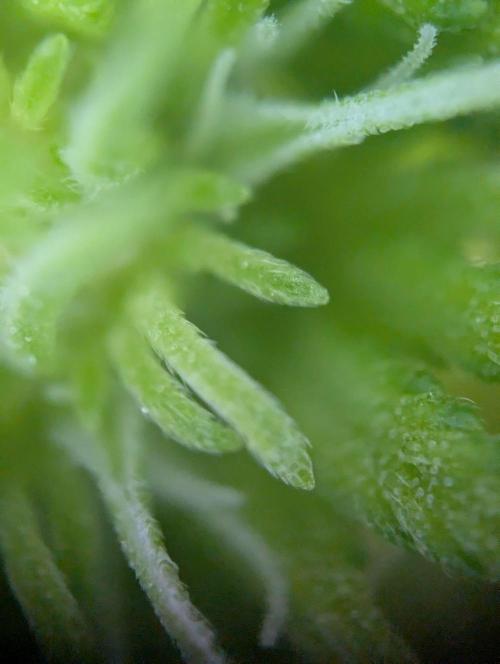
Herb-ert During the second week of flowering, Phoenix stretched 12cm to 38cm. I kept the PPFD at 500 ppfd. I let the water tank run empty once to provide the roots with more oxygen. Then I refilled it. By the end of the week, the plant had sucked the entire tank of the Vivosun Flexfeed base (6l) dry in 48 hours. The water consumption is enormous. I removed the hemp bedding and filled the gaps created by the soil settling with organic hemp soil.
It's very difficult to keep the humidity in the tent low enough.
1. The fan can handle 380m³/h, but the carbon filter only 150m³/h. A larger one won't fit in the 40 tent.
2. I removed too little foliage before flowering. The canopy is now very dense with many leaves.
3. It's too cold outside to keep the window permanently open.
To address these issues, I have:
A. acquired a space heater from classifieds. It has a thermostat and keeps the temperature stable above 23°C, which lowers the humidity.
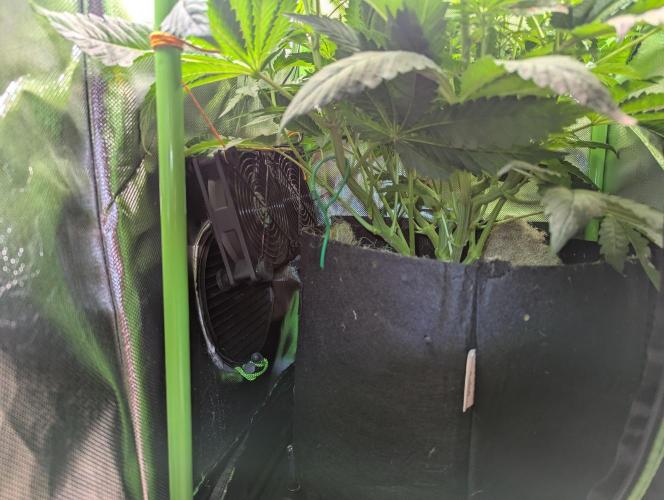
B. gotten a double USB PC fan that blows the incoming air directly under the leaf canopy.
C. replaced the hemp bedding with an 8mm thick hemp mat from the pet store.
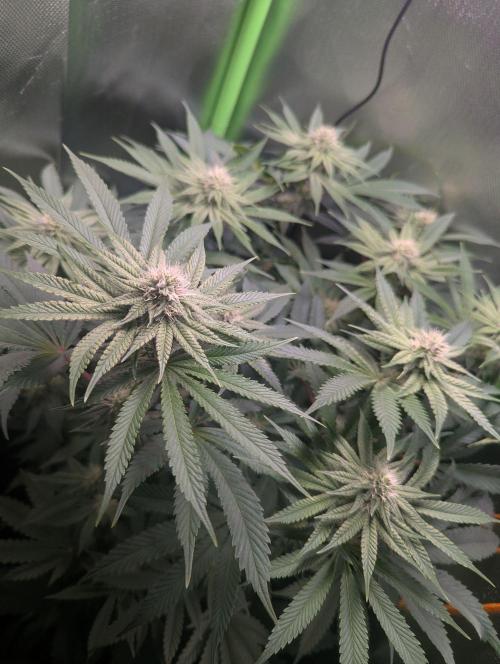
The humidity is now back under 70%, averaging 60-65%. I don't want to remove more leaves right now to avoid disturbing the stretch. However, after the stretch is complete, I will defoliate the plant to significantly reduce the risk of mold and humidity. I counted 15 buds on the upper canopy.
4 likes
comments
Share
Used techniques
LST
Technique
8
Week 8. Flowering7mo ago
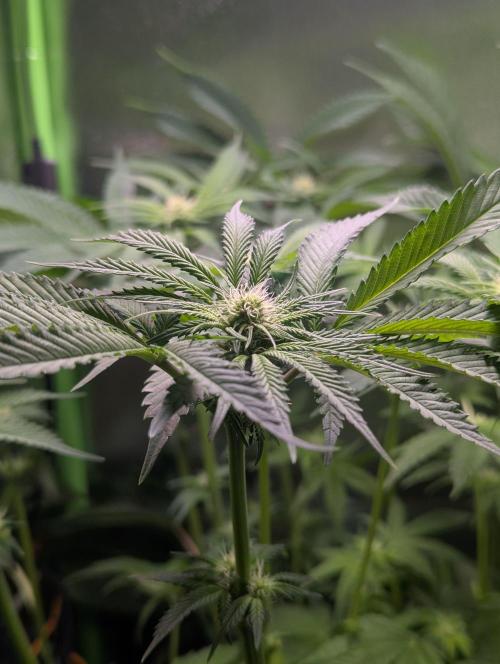
50 cm
Height
12 hrs
Light Schedule
23 °C
Day Air Temp
Normal
Smell
65 %
Air Humidity
21 °C
Night Air Temp
11 liters
Pot Size
2 liters
Watering Volume
26 cm
Lamp Distance
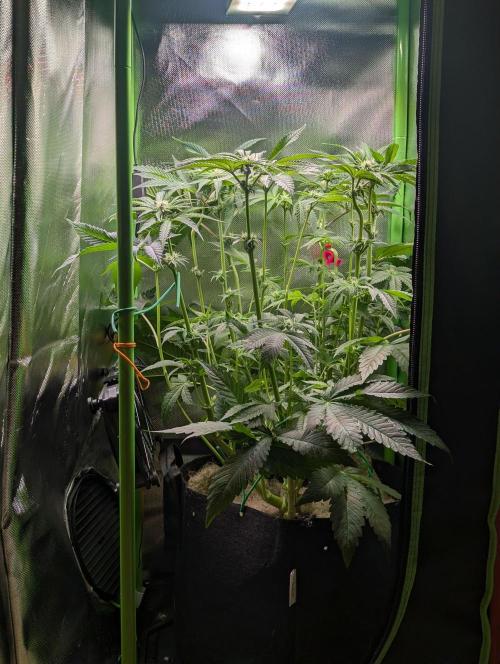
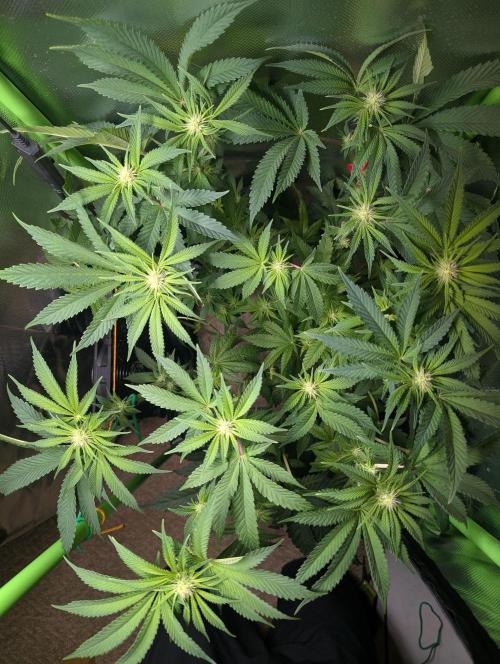
Herb-ert Due to vacation, no data this week. The plant has perfectly self-fed with the wick system for 6 days. The reservoir was only refilled once in my absence.
2 likes
comments
Share
9
Week 9. Flowering7mo ago
63 cm
Height
12 hrs
Light Schedule
23 °C
Day Air Temp
Normal
Smell
62 %
Air Humidity
21 °C
Night Air Temp
11 liters
Pot Size
1.5 liters
Watering Volume
26 cm
Lamp Distance
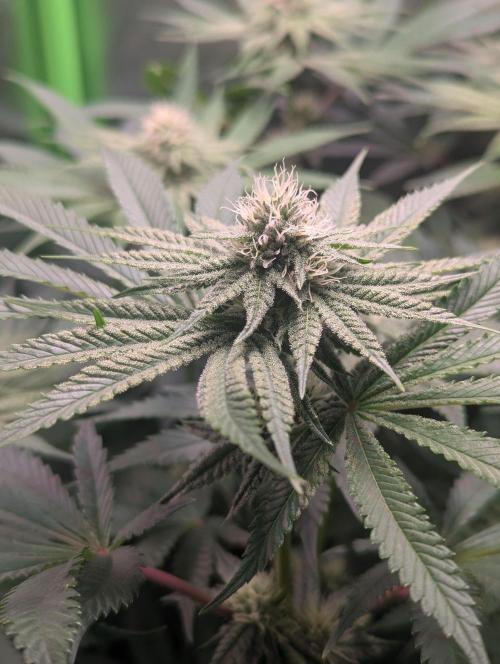
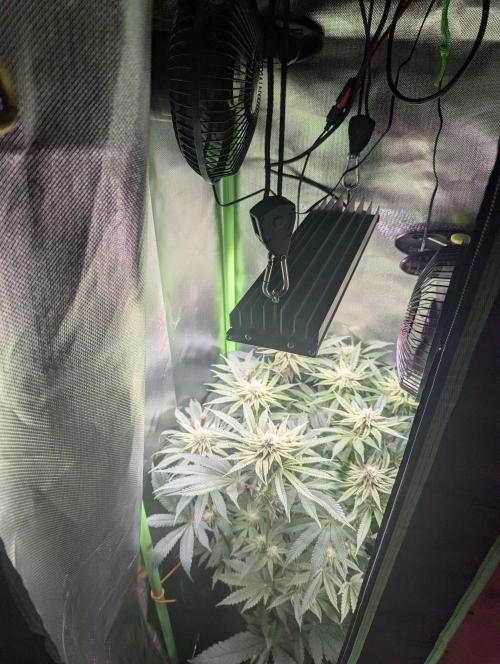
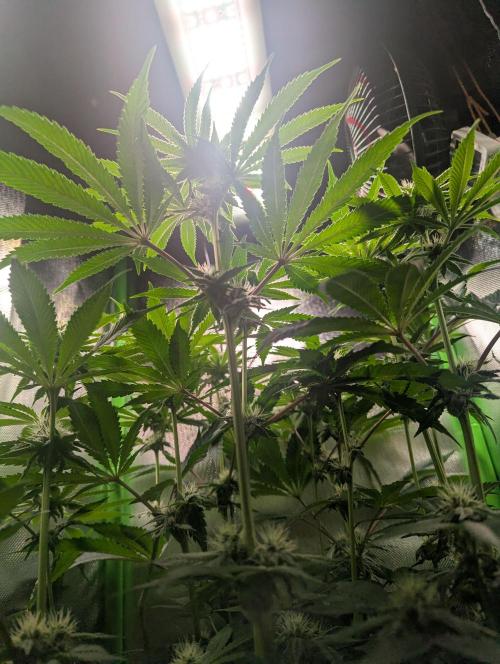
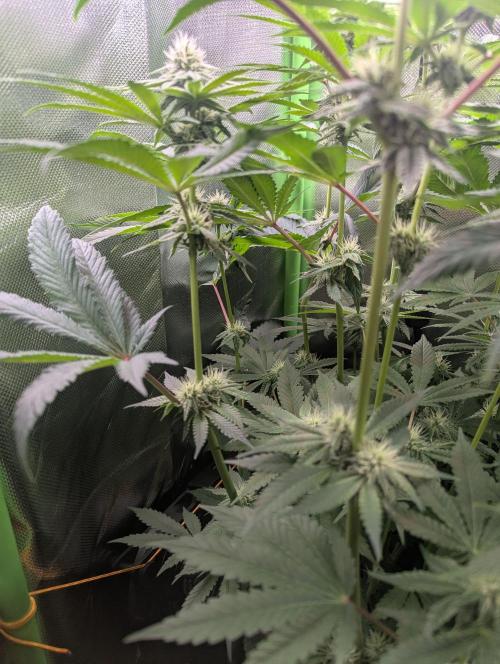
Herb-ert The stretch ended at 63cm. One stem has risen about 4cm above the others. I'll leave it like this as long as there are no problems. The lamp distance remains at 20cm for the canopy and shines with ~600ppfd. The maximum for this lamp. If I get closer, the lighting suffers. The buds are growing, I'm trying to keep the humidity as low as possible. My carbon filter doesn't seem to be filtering correctly anymore. I will replace it. I'm not really convinced by the Can Light product.
However, the soil is impressive in every way. No deficiencies are visible on the plant yet.
4 likes
1 comment
Share
10
Week 10. Flowering6mo ago
63 cm
Height
12 hrs
Light Schedule
22 °C
Day Air Temp
Normal
Smell
55 %
Air Humidity
21 °C
Night Air Temp
11 liters
Pot Size
1.5 liters
Watering Volume
20 cm
Lamp Distance
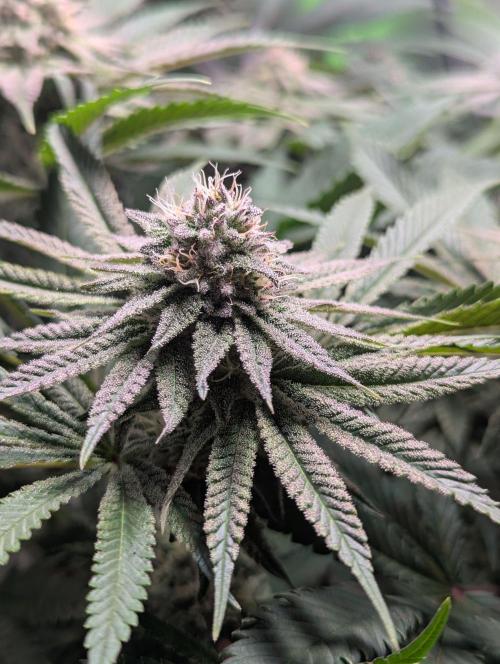
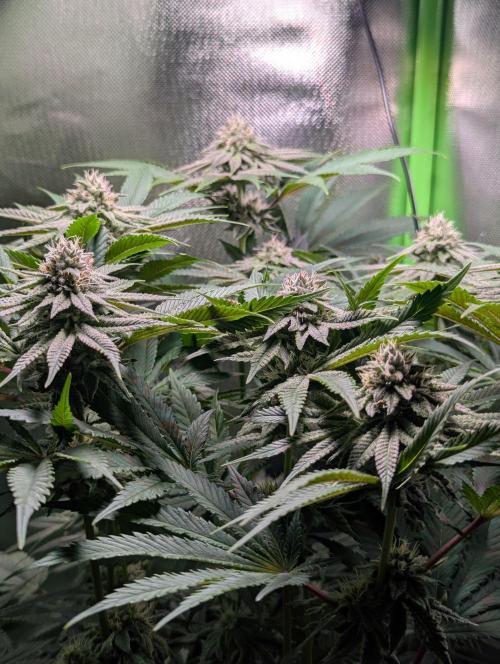
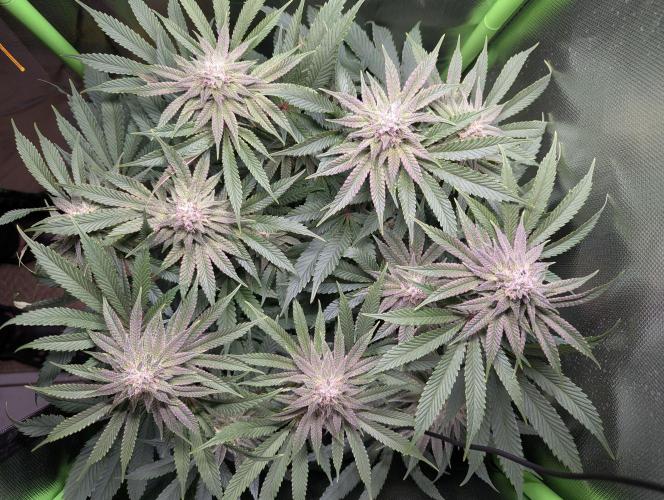
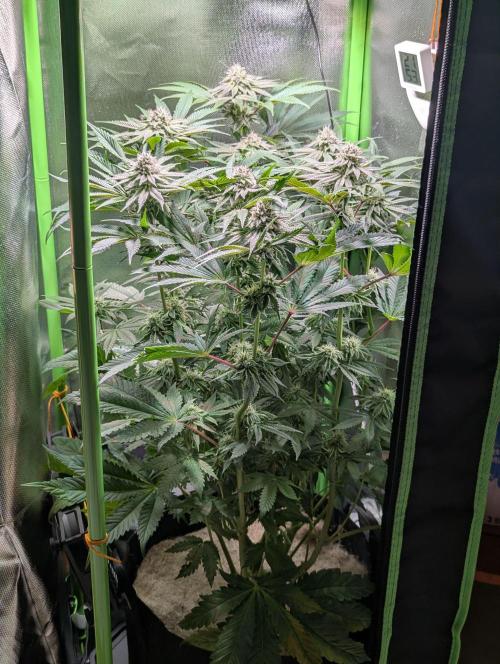
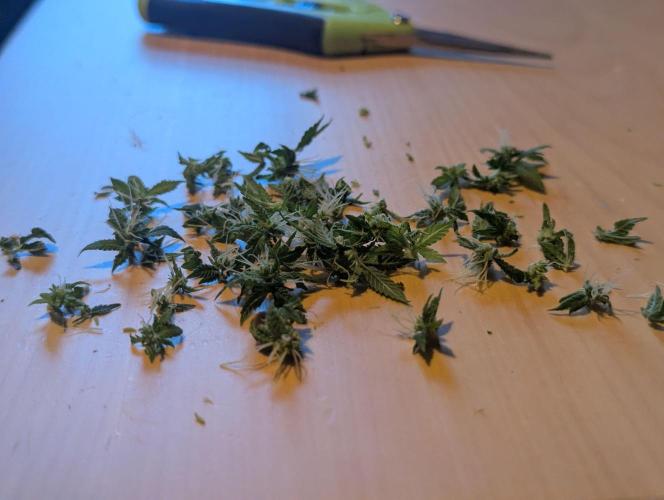
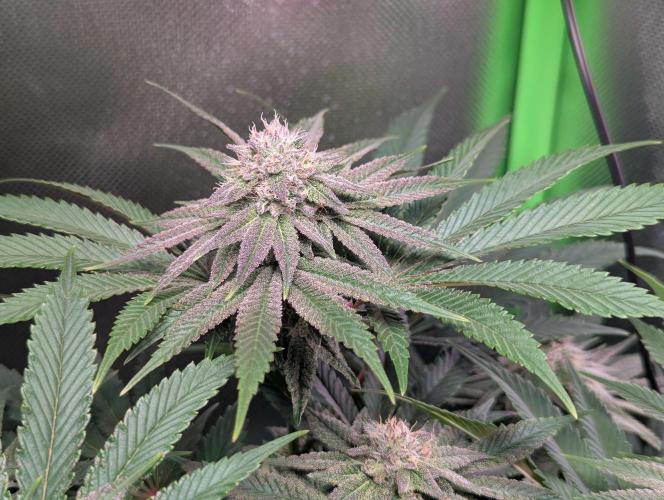
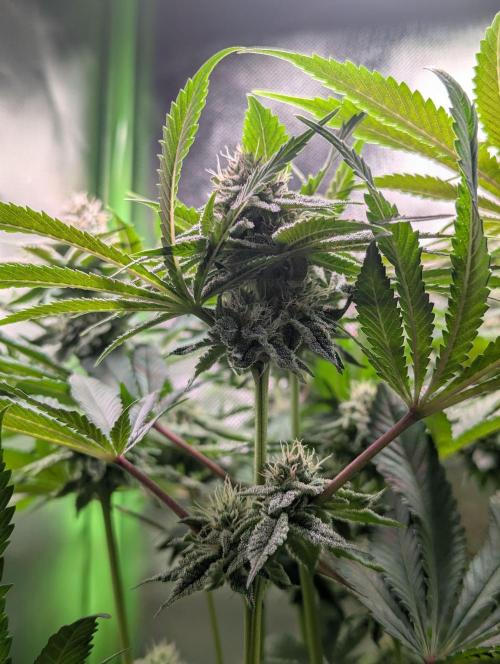
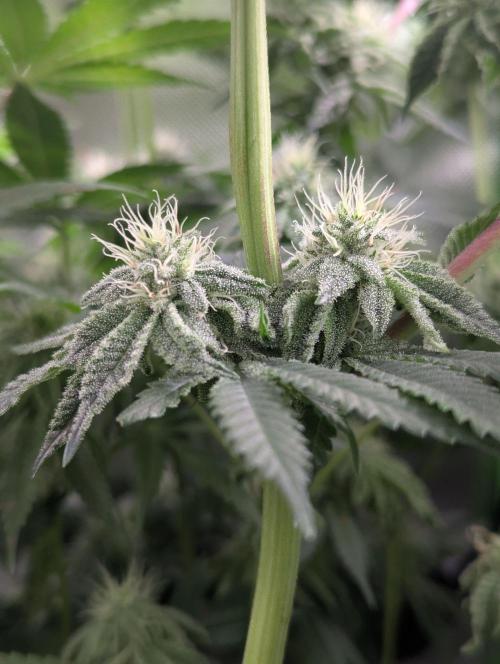
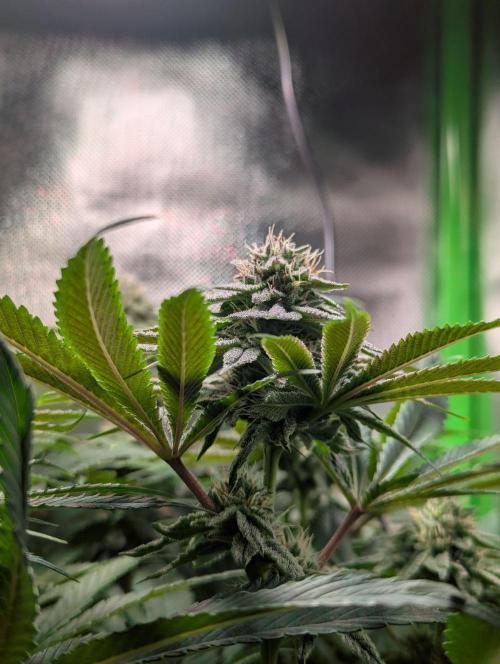
Herb-ert This week, I removed the micro-buds from the bottom part of the plant. I left them from halfway up. I'm curious to see how they develop. I will use this in the next grow to decide how much to sort out during the veggie phase.
I had to replace the carbon filter. The Can Light couldn't filter the smell anymore after not even 2 months. I'm now using a Hoan&Guan that I got through classifieds. The build quality impresses me, and so far, it doesn't smell at all. It has a 38mm carbon bed. The dimensions match the predecessor.
The other parameters remained untouched this week.
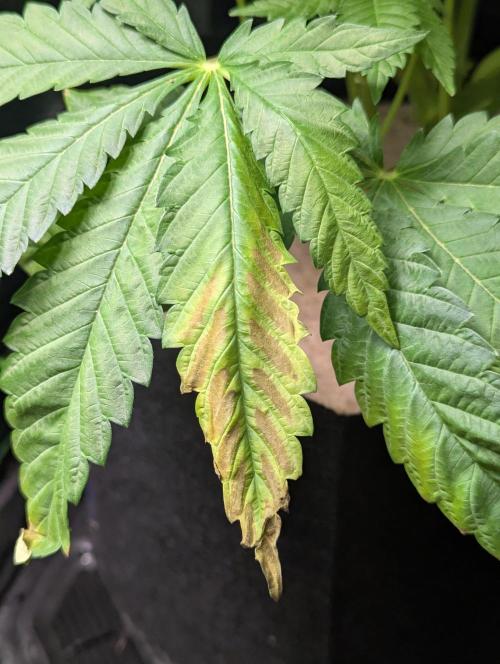
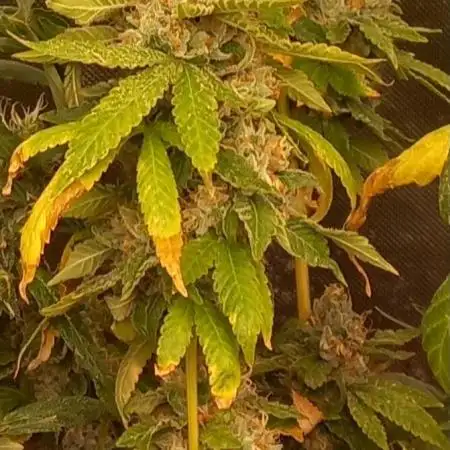
One of the bottom leaves shows how much the mobile nutrients like nitrogen and magnesium are being drawn into the buds (see photo). I'm glad I left many of the bottom leaves so they can now serve as nutrient suppliers. The rest of the plant looks vibrant and healthy. The wick watering system ensures that I only need to watch.
4 likes
1 comment
Share
11
Week 11. Flowering6mo ago
63 cm
Height
12 hrs
Light Schedule
22 °C
Day Air Temp
Strong
Smell
55 %
Air Humidity
21 °C
Night Air Temp
11 liters
Pot Size
1.5 liters
Watering Volume
20 cm
Lamp Distance
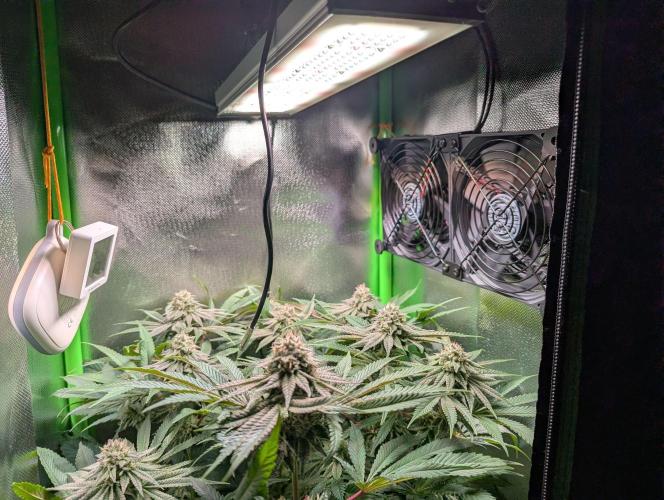
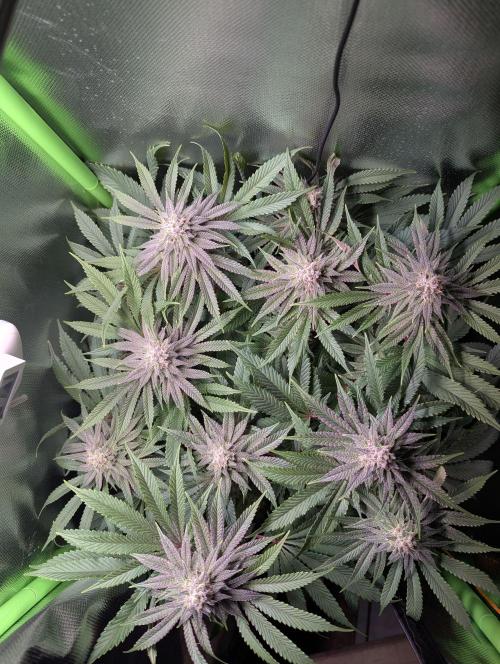
Herb-ert Phönix is in the 6th week of flowering. Since not much has visually changed on the buds, I want to focus more on the equipment and the problems I'm having this time.
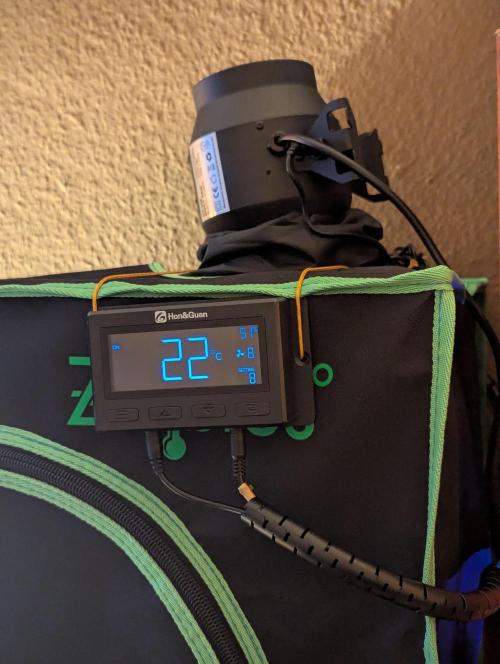
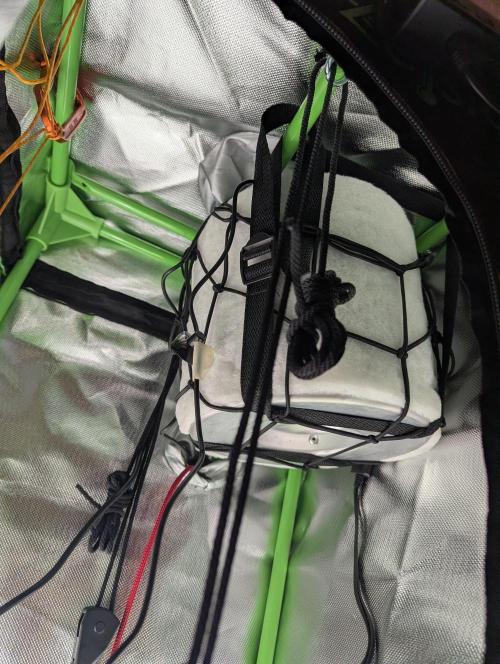
I have a smell leak. My SBONNI 100mm inline fan and the Canlite 100 have not managed to maintain the same odor neutrality as in the first few weeks. I then organized a new Hon&Guan carbon filter through classifieds. 100mm with a 38mm carbon bed. The result was perfect, neutral smell for the first few hours. The next morning, the same smell as before directly from the fan. Theory: The exhaust hose is not sealed. So I got a new one and replaced it. That didn't solve the problem. Thought: I can't seal it properly without aluminum tape. Action: Got a rubber coupling, connected the fan directly to the carbon filter. Hung the carbon filter under the exhaust hole and placed the fan outside. Without a hose. That didn't solve the problem. Thought: The fan is probably too weak. 100mm inline axial fan with 8w and 310m³/h (without back pressure). Test: Turned the fan up to maximum and felt how strong the airflow was with my hand held in front. Tried the same with the fan removed without the carbon filter and hose. With the carbon filter, about 90% less air seems to come through at the same power consumption. Action: Got a new fan. Hon&Guan duct fan. 360m³/h at 28W, max. 580 Pa and 5700RPM. Additionally, because I had also ordered it, a Rhino Pro carbon filter 100mm with a 50mm carbon bed. I installed both. To attach the Rhino, I repurposed a SCROG net. Secured the fan with a cuff. That's sealed. Result: 6 hours of clean air. Now the same smell as before again. On every one of the 10 levels. The tent is pulled together well so the smell can't possibly escape through seams. It's not directly a strong cannabis smell, but it's also not something you could dismiss. Sweet. Earthy. I can't leave the windows open for 7 days due to the single-digit outside temperatures.
I won't solve the problem today and I have to hope that the smell doesn't disturb the neighbors in my absence.
The great thing about the new fan is the sensor and the digital control unit. I can now see the temperature and humidity in the tent at a glance while passing by without having to open it or take my phone in hand. If I wanted, I could also let it be controlled "smartly," depending on temperature or humidity. However, I leave it on one setting.
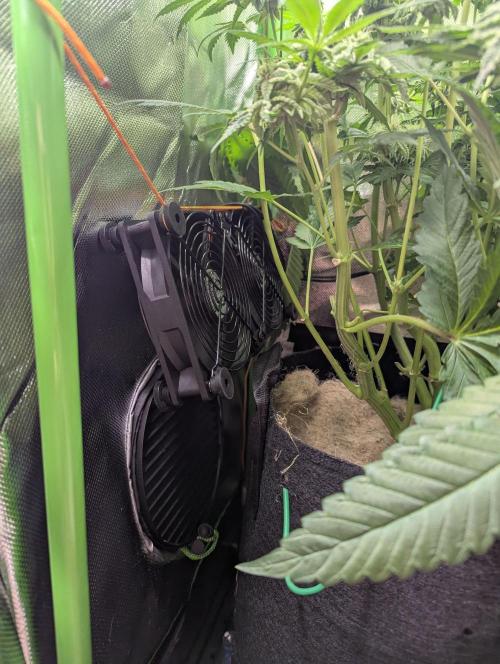
Furthermore, I hung a double 140mm USB fan in the tent and replaced the 5W Garden High Pro fans that were just too loud for me.
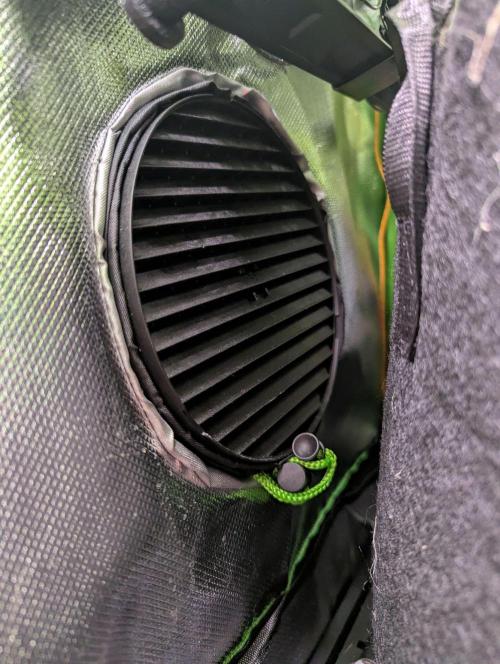
You can also see my light traps that I built into the intake openings.
I'm off on vacation hoping that the police haven't conducted a search when I return.
5 likes
1 comment
Share
12
Week 12. Flowering6mo ago
63 cm
Height
12 hrs
Light Schedule
22 °C
Day Air Temp
Strong
Smell
55 %
Air Humidity
21 °C
Night Air Temp
11 liters
Pot Size
1.5 liters
Watering Volume
20 cm
Lamp Distance
Herb-ert This week there was nothing to see. I was on vacation. The plant's reservoir was filled once during this time, but the plant could have managed without it.
2 likes
comments
Share
13
Week 13. Flowering6mo ago
63 cm
Height
12 hrs
Light Schedule
22 °C
Day Air Temp
Strong
Smell
55 %
Air Humidity
21 °C
Night Air Temp
11 liters
Pot Size
1.5 liters
Watering Volume
20 cm
Lamp Distance
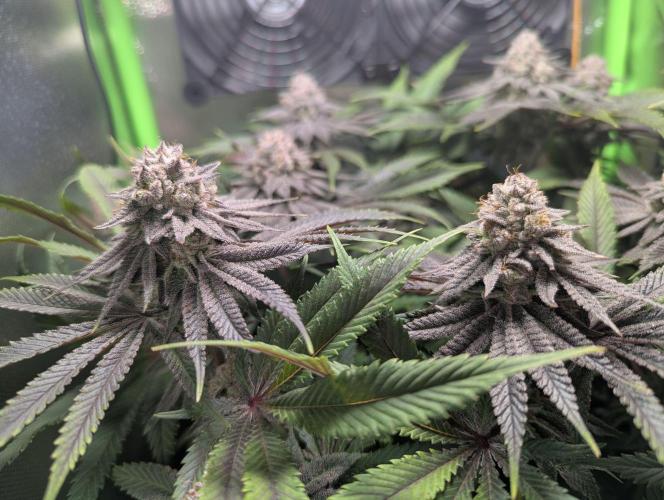
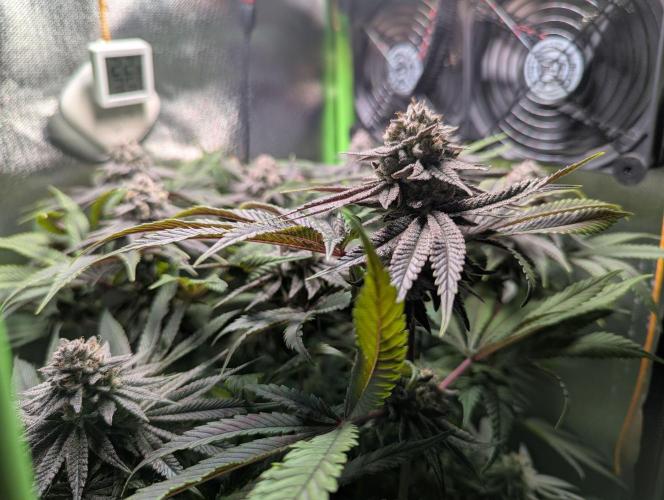
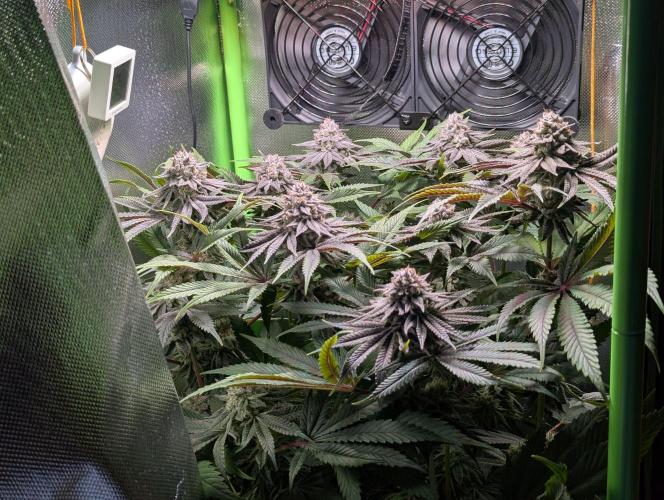
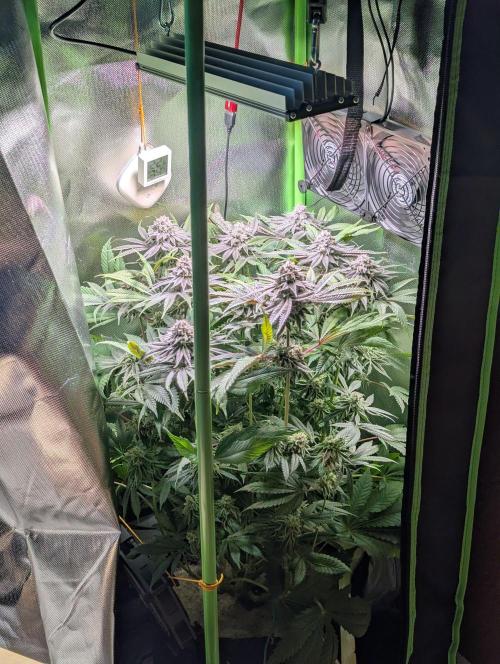
Herb-ert I still haven't managed to get the smell under control. I even ordered a PK125 EC-TC. Connected directly to the carbon filter via an adapter. The smell is the same. I'm now living in hope that the smell only bothers me.
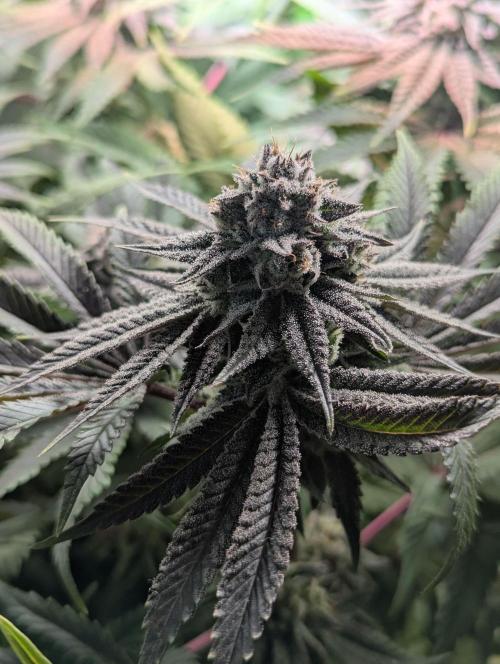
The trichomes are now almost all milky white with a few amber-colored CBD pearls.
Otherwise, I'm letting the reservoir run empty. Almost there.
6 likes
comments
Share
14
Week 14. Harvest5mo ago
Happy Harvest Day!


5/10
Rated
I'm pretty sure I treated the plant well, I don't know why it hermied.
Show more
Original
Spent 93 days
Ger Veg Flo Har
36.6 g
Bud wet weight per plant
1
Plants
0.16 m²
Grow Room size
Easy
Difficulty
Height
Day air temperature
Air humidity
PH
Light schedule
Night air temperature
Pot size
Lamp distance
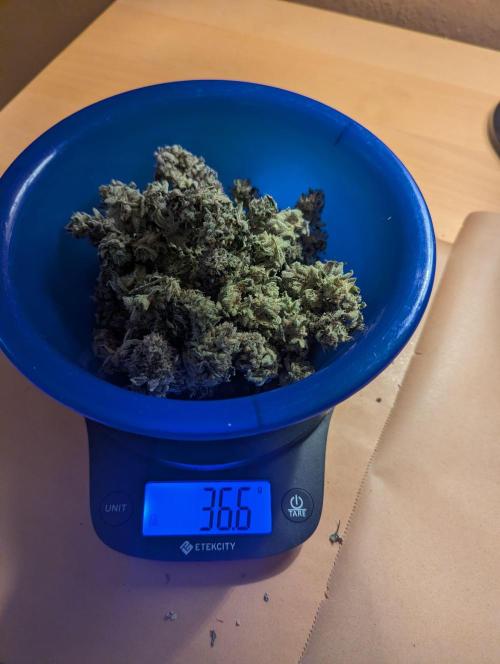
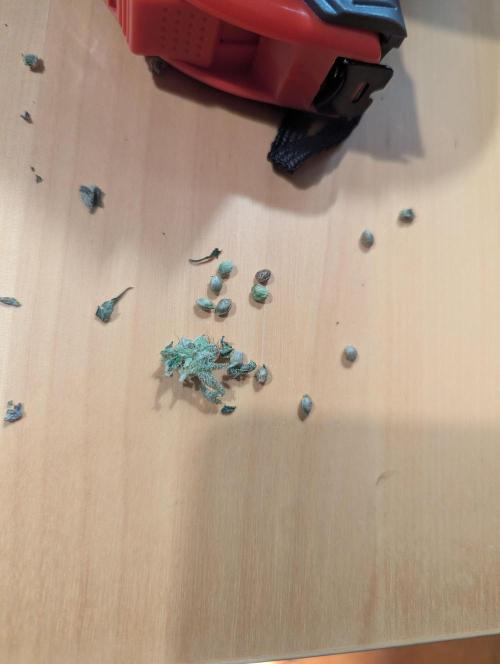
Herb-ert After the plant has dried, the sad certainty. It had hermied at some point during the flowering. All the buds on the lower levels were full of seeds. To be honest, I don't know where the stress came from. I need to analyze that more closely. The final result was just under 40g. Presumably, there are even more seeds in some of the denser buds near the stem, so you can subtract a few grams from the final result. Very unfortunate, very frustrating.
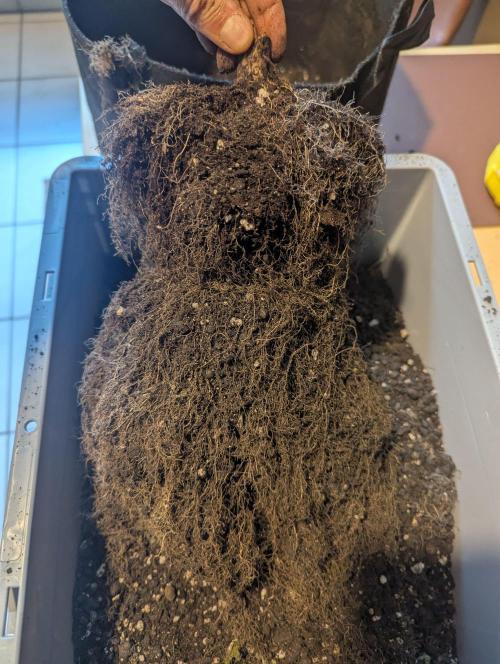
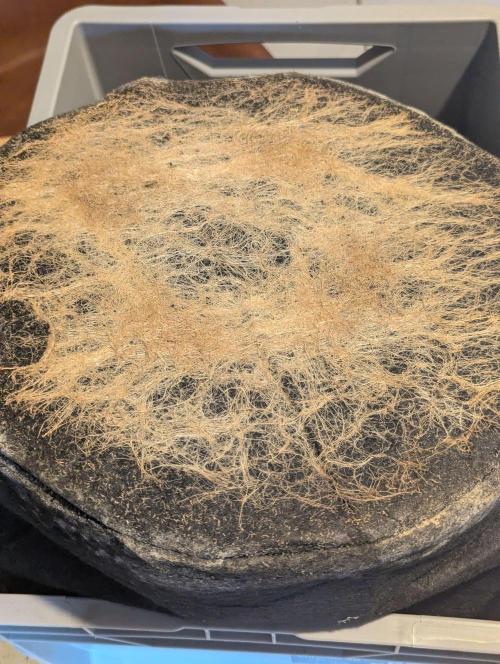
Here are some pictures of the root formation in the wick system. In summary, almost the entire soil was filled with a very fine root network. It reminded me of wool.
As a final note, I relied on the Vivosun description and never questioned it. But today while emptying, I noticed that the pot says "5 Gallons." So it was never an 11l pot. I conducted the grow with 15l, not 11. Embarrassing.
4 likes
comments
Share
Equipment Reviews
5 comments
Sort by
popularity
popularity
newest
oldest

UnorthadoxDude commentedweek 18mo ago
Lovely clear photos, and nice little start to the grow. Wish you all the best luck and success!
likes 3

GhostTerpZ commentedweek 67mo ago
Looking really good ❗️ ❗️ ❗️
likes 2
GhostTerpZ commentedweek 116mo ago
Looking really good
like 1
Riddle_Fawkes commentedweek 106mo ago
Top Shelf grown
like 1

GERGrowDesigns commentedweek 97mo ago
Really great work Growmie , good Luck for the next weeks 🏆🤝
like 1

the end.
Enjoying this diary? Follow for more updates!
Prefer the old Diary view?
Go back to the old Diary view