
IZI AK47 Fem Indoor


VEG
Lisma HPS 250 W High-Intensity Discharge/250W
HPS 250 W
FLO
Rooster Light Emitting Diodes/240W
Big Cock Desogn

Box
60*60*130
HB -30C Prod

Fan
107 m3/h
Profit4
Fan
190 m3/h
Profit5

Filt
M350 125 mm
Klever

Contr
RT-820 Temp Relay
EKF
Contr
Temp sensor
Xiaomi

Coco Coir
Simplex
Indoor
Room Type
LST
weeks 7-9
10 l
Pot Size
1.5 l
Watering
Start at Harvest
G
Germination5mo ago
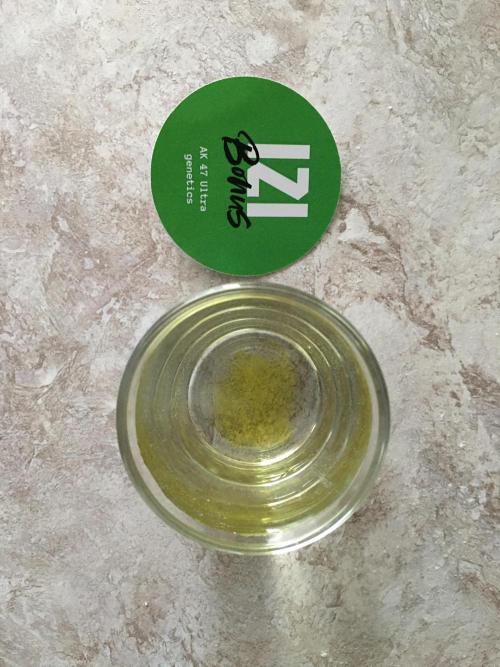

HoneyBlunt42 Day 0
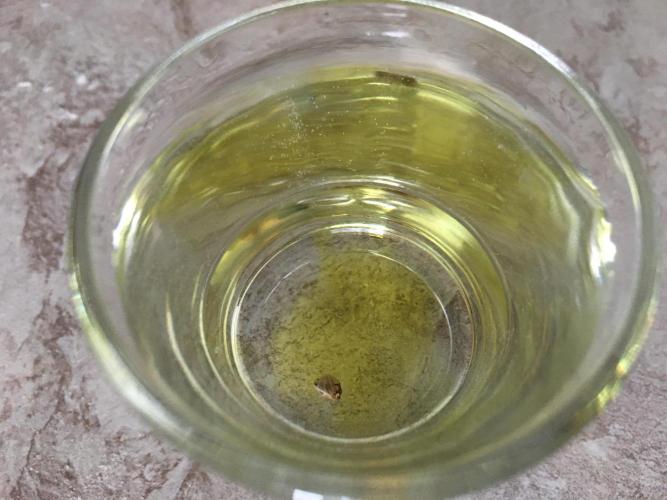
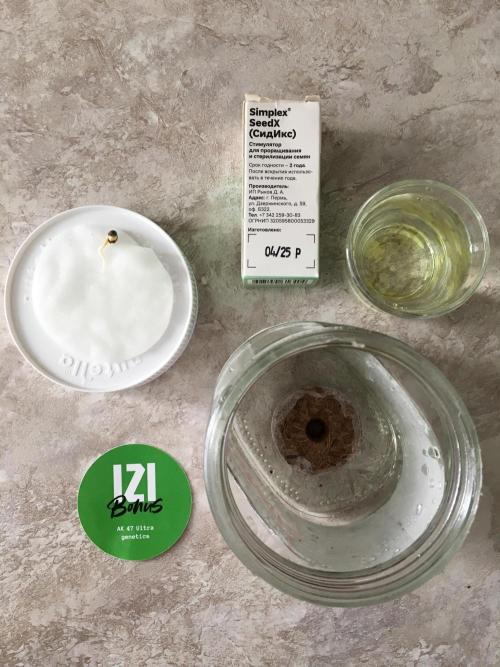
I added 2 drops of osmosis solution to a shot glass of SeedX per 50 ml of water. It sank immediately. I put it in a dark place at 25°C (77°F). I think it will sprout a root in 24 hours.
Day 1
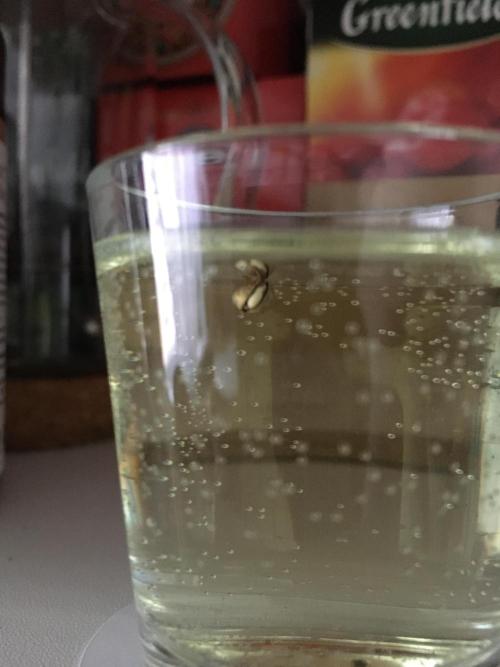
A 1 mm root appeared, I placed it on a damp cotton pad, put it in an empty Nutella jar, and sealed it. Air twice a day, keep it in a dark place at 26°C (77°F).
Day 2
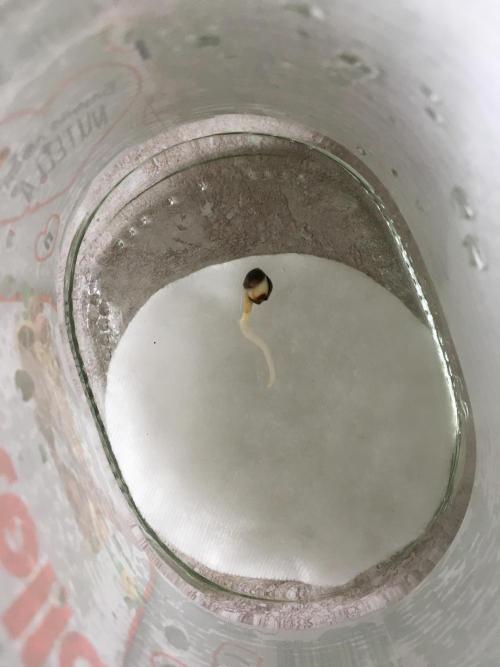
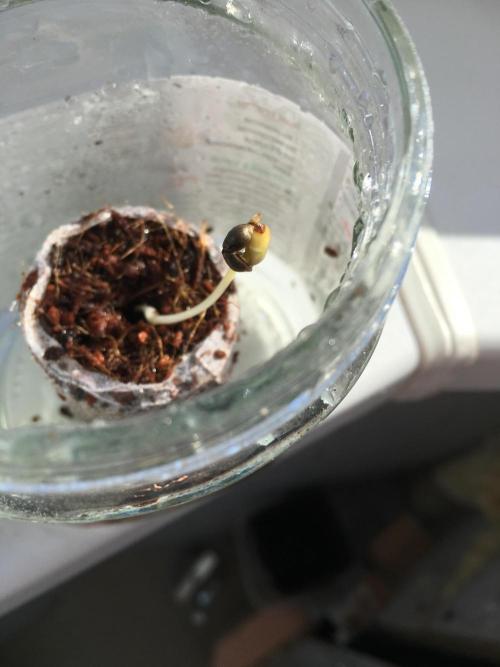
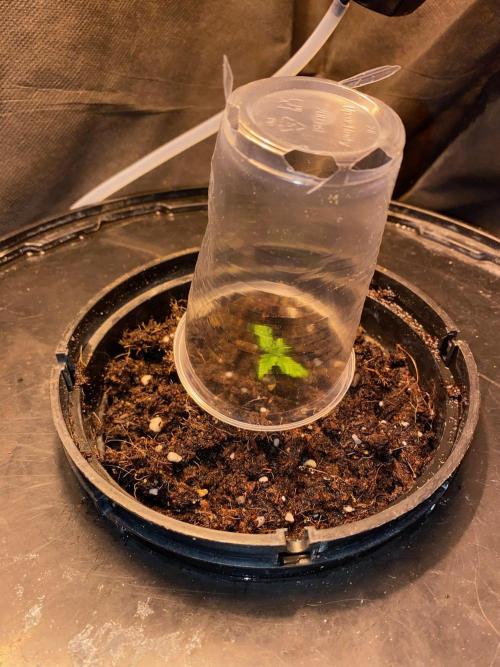
Yesterday, a 5 mm root sprouted. Today, the root is 1 cm. It's time to move it to a coconut cork to root. I moisten it with a shot glass of Simplex SeedX. Previously, I used 10 drops of hydrogen peroxide from the pharmacy – a shot glass per 50 ml of water. I didn't notice much of a difference with Simplex. Both sterilize perfectly, and the peroxide also breaks down into oxygen. Once the bottle is finished, I'll return to the peroxide.
Day 4
The plant has grown 2-3 mm from the cork, almost taking off its helmet. I placed it in the sun on the windowsill for an hour and opened it slightly to breathe.
Day 5
I planted the cork in a 0.8-liter cup with prepared coconut coir. I sprinkled it right up to the petals and watered it with a spray bottle containing Simplex Start Up.
Day 6
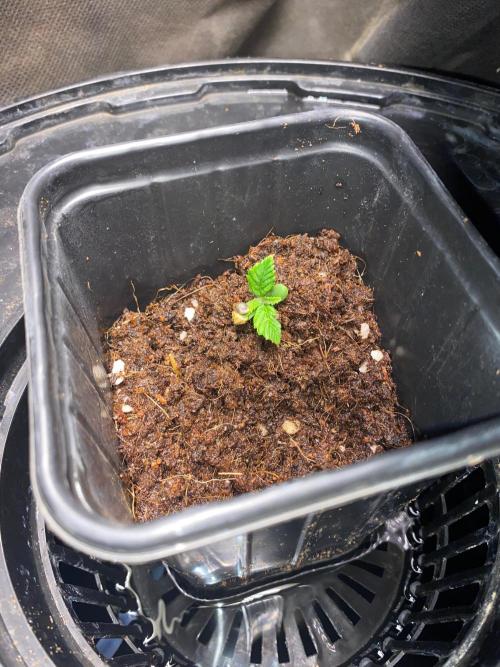
It has grown 1 cm, and the cotyledons have turned from pale to greenish. These are good signs. We're continuing to grow the root system as much as possible.
6 likes
2 comments
Share
Used method
Glass Of Water
Germination Method
1
Week 1. Vegetation5mo ago

3 cm
Height
18 hrs
Light Schedule
27 °C
Day Air Temp
6.0
pH
No Smell
Smell
140 PPM
TDS
50 %
Air Humidity
18 °C
Night Air Temp
0.8 l
Pot Size
0.2 l
Watering Volume
50 cm
Lamp Distance
Nutrients 5
CalMag
1 mll
StartUp
4 mll
pH Down
0.2 mll
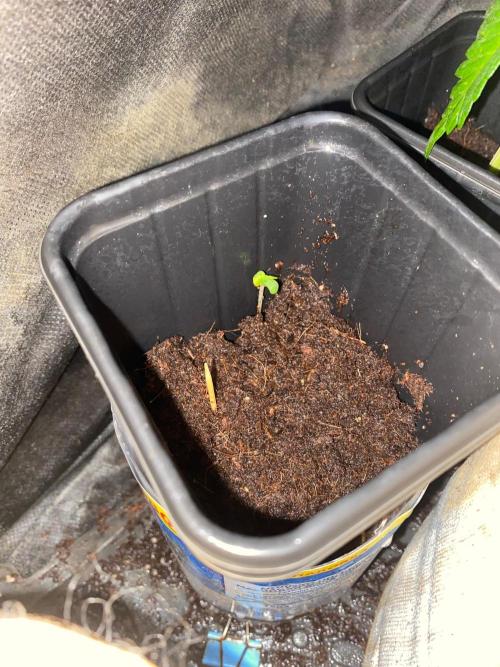
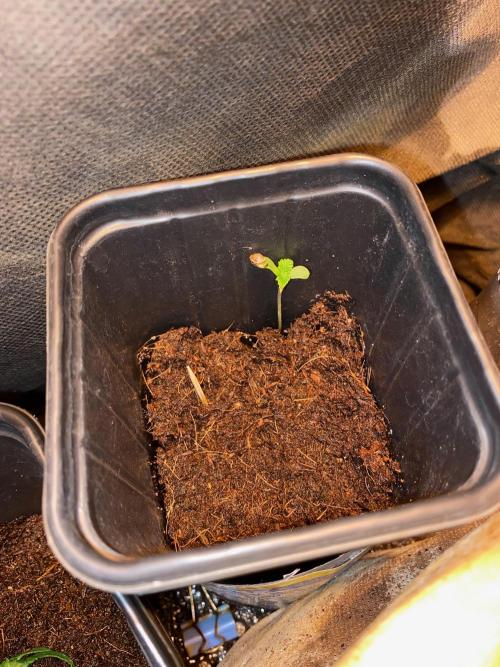
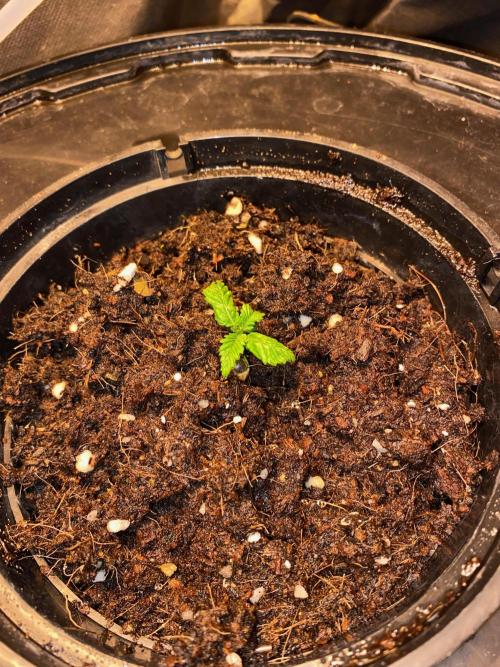
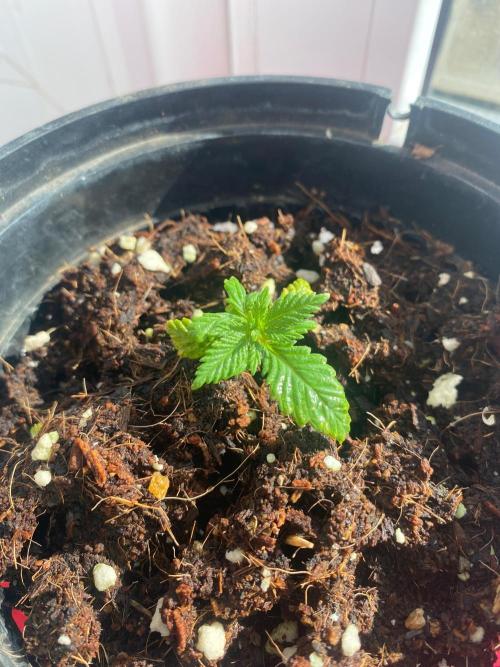
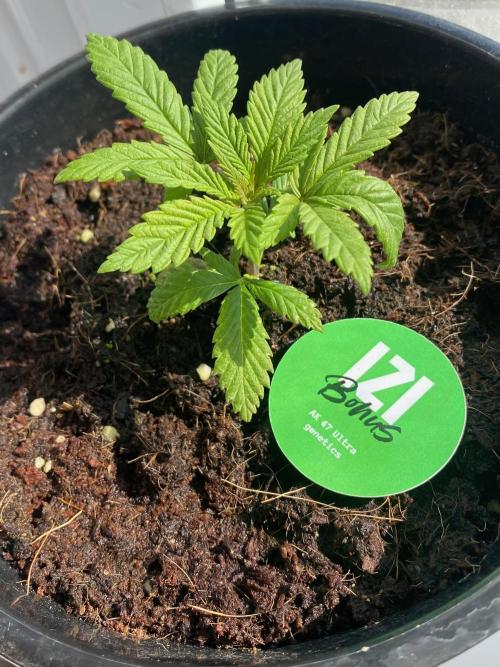
HoneyBlunt42 The first pair of leaves has appeared - the first week of vegetation!
6 likes
comments
Share
2
Week 2. Vegetation4mo ago
3 cm
Height
18 hrs
Light Schedule
25 °C
Day Air Temp
5.7
pH
No Smell
Smell
140 PPM
TDS
40 %
Air Humidity
18 °C
Night Air Temp
1.5 l
Pot Size
0.2 l
Watering Volume
40 cm
Lamp Distance
Nutrients 4
CalMag
1 mll
StartUp
4 mll
pH Down
0.2 mll
HoneyBlunt42 Yesterday, I returned the 250W HPS. The sprout stopped abruptly in the light from the LED spotlight. Using that on the Vega is definitely a mistake. I'll run a second cycle with supplementary lighting, and then I'll have a rough idea if it's suitable or if it's better to light the path near the house.
Three days of delays at the end of the experiment. I added another liter of coco coir and carefully placed it in a 1.5-liter AquaPot basket. I placed it in the AquaPot with osmotic water with CalMag additive and adjusted the pH to 5.7. 2 cm from the basket, the water bubbles off the stone and moistens it.
Under the HPS 250 W, the coco dries faster; I hope this solution will help. I also put the greenhouse back on. In the insulated box with the HPS, it stays at 23-25 degrees Celsius if I leave the door ajar. 23 degrees Celsius is the threshold for hydroponics. After that, the water starts to bloom. I'm hoping for a cool inflow from the balcony, which a 100mm duct fan blows onto a bucket of water. The DWC has a standard Hailea 2-liter/hour compressor and a 2x4 cm barrel aeration stone.
3 likes
1 comment
Share
3
Week 3. Vegetation4mo ago
4 cm
Height
20 hrs
Light Schedule
26 °C
Day Air Temp
6.0
pH
No Smell
Smell
200 PPM
TDS
50 %
Air Humidity
18 °C
Night Air Temp
1.5 l
Pot Size
0.2 l
Watering Volume
50 cm
Lamp Distance
Nutrients 5
CalMag
1 mll
StartUp
4 mll
pH Down
0.2 mll
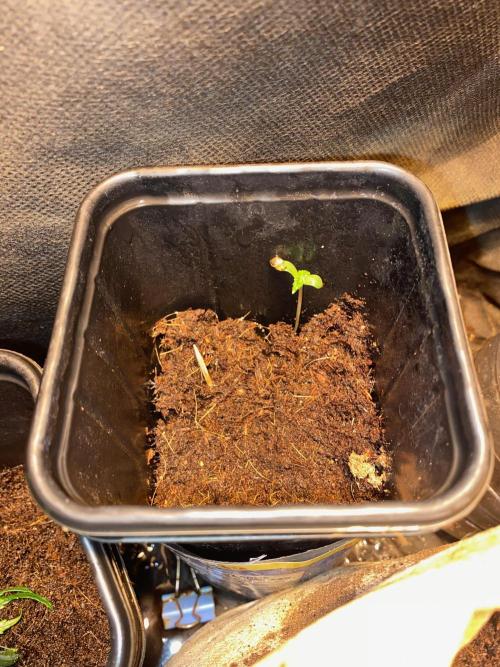
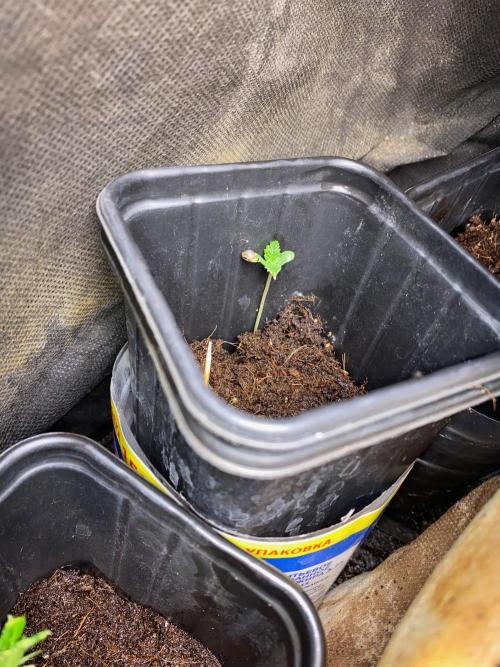
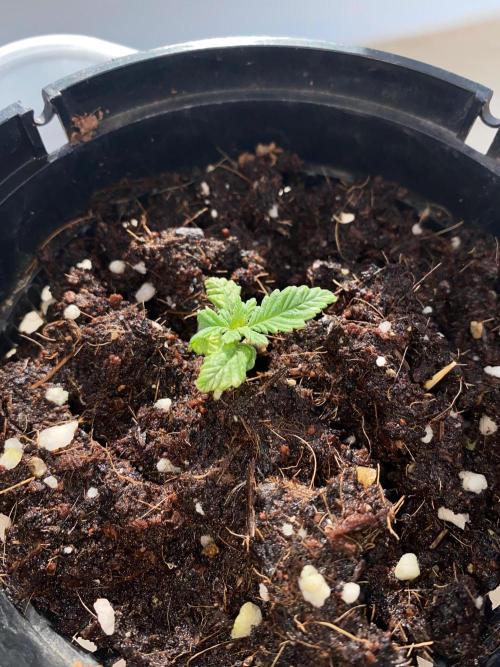
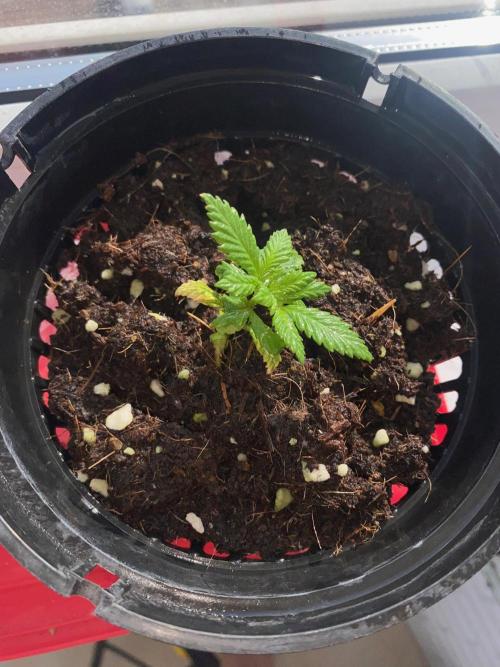
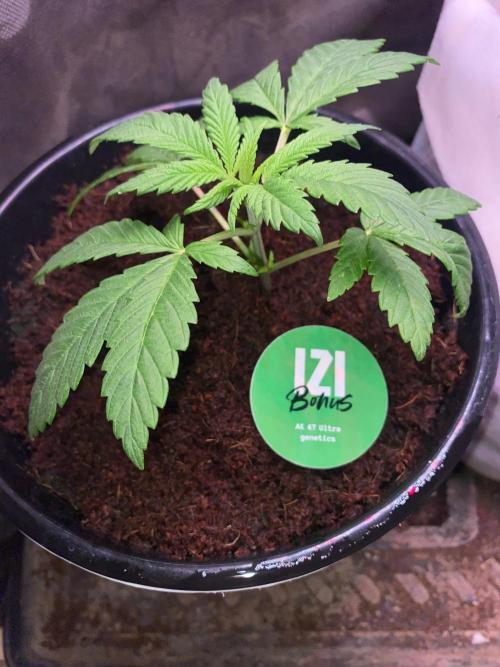
HoneyBlunt42 The sprout is growing slowly but surely. It's tiny for its third week. I'm glad it's the Fem version. I'll keep it on the Vega for a little while longer.
A new light for the Vega will arrive soon, and the growth will be more stable. I'm also planning on repotting it into 5 liters of coco coir with mycorrhiza. I hope this will give the roots a boost and accelerate growth.
It's in the sun for six hours, then under an LED in a 12/12 box for 12 hours. Then it's in the dark for four hours, and then back in the sun. I don't have a propagator and lamp for it yet, so I'm making do with this.
I hope to get all stuff within a week.
2 likes
comments
Share
4
Week 4. Vegetation4mo ago
6 cm
Height
18 hrs
Light Schedule
27 °C
Day Air Temp
5.6
pH
No Smell
Smell
140 PPM
TDS
40 %
Air Humidity
22 °C
Night Air Temp
1.5 l
Pot Size
0.2 l
Watering Volume
50 cm
Lamp Distance
Nutrients 7
CalMag
1 mll
StartUp
4 mll
pH Down
0.2 mll
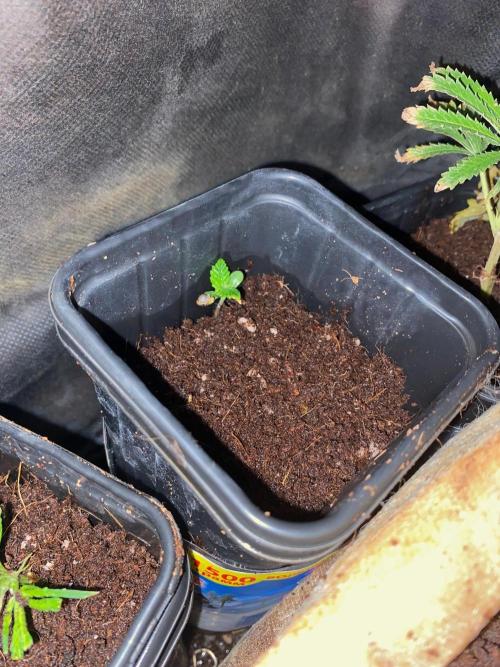
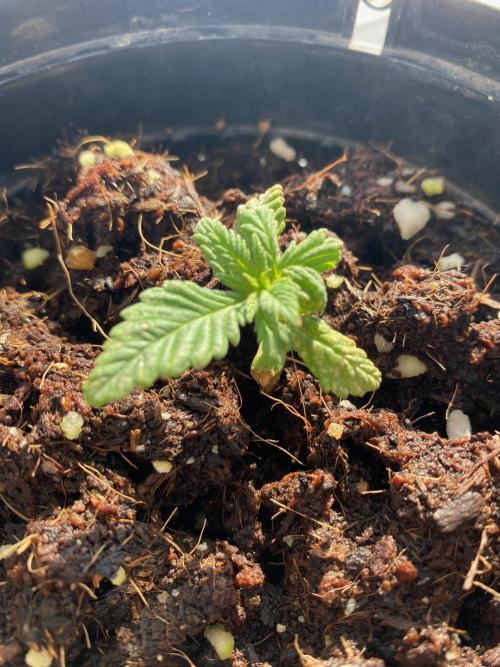
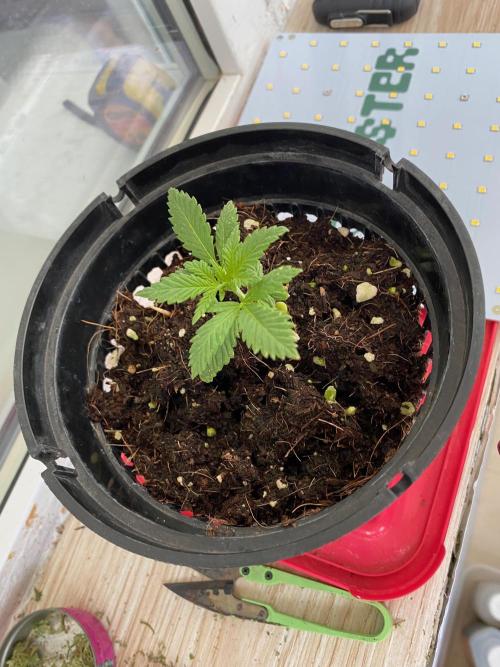
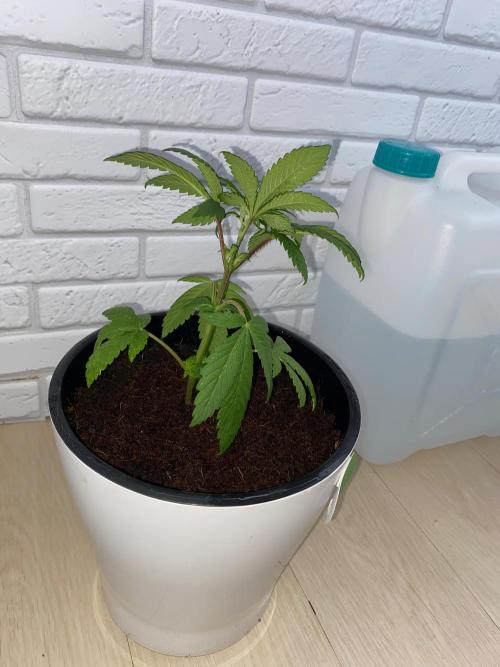
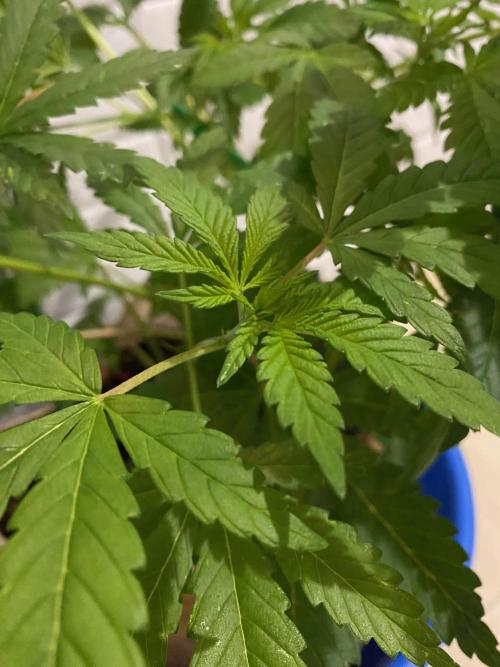
HoneyBlunt42 Day 1 of Week 4. It looks perkier; the stem has started to take on a lilac hue. I gave it a foliar feed using Simplex Start Up (3 ml/L).
I prepared a separate solution of CalMag adjusted to a pH of 5. Into a one-liter container of this solution, I added 1 gram of Power Feeding Bio Enhancer (it barely covered the bottom of the measuring scoop).
After 3–5 minutes—once the "tea" has brewed—I use it for watering every two weeks.
Early on, the seedling experienced stunted growth due to a nutrient solution with a pH below 5.5; however, over the last two weeks, I’ve seen it growing and gaining strength.
For the first time, I’m experimenting with a lighting regimen combining 6 hours of bright spring sunlight with 12 hours under a 40W Rootster LED. The seedling is clearly responding positively to the sunlight.
Starting today, the light cycle will be set to 18/6.
4 likes
1 comment
Share
5
Week 5. Vegetation3mo ago


20 cm
Height
18 hrs
Light Schedule
23 °C
Day Air Temp
6.2
pH
No Smell
Smell
140 PPM
TDS
55 %
Air Humidity
20 °C
Solution Temp
18 °C
Night Air Temp
4 l
Pot Size
0.1 l
Watering Volume
50 cm
Lamp Distance
Nutrients 5
CalMag
1 mll
StartUp
4 mll
pH Down
0.2 mll
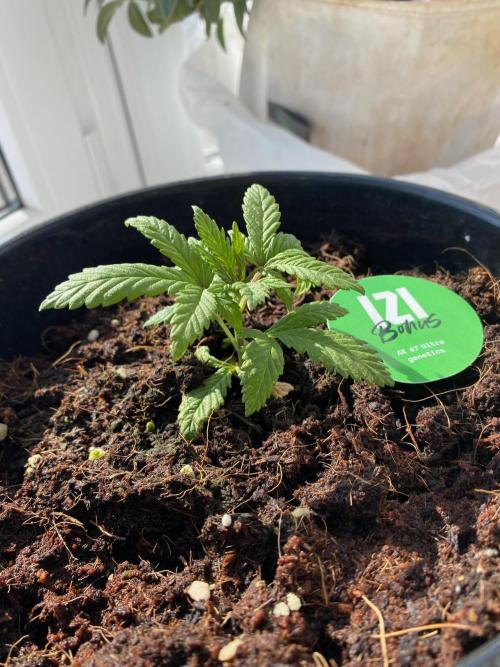
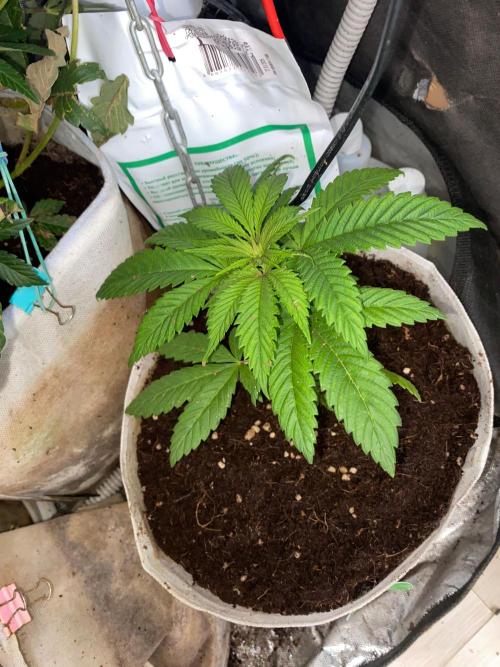
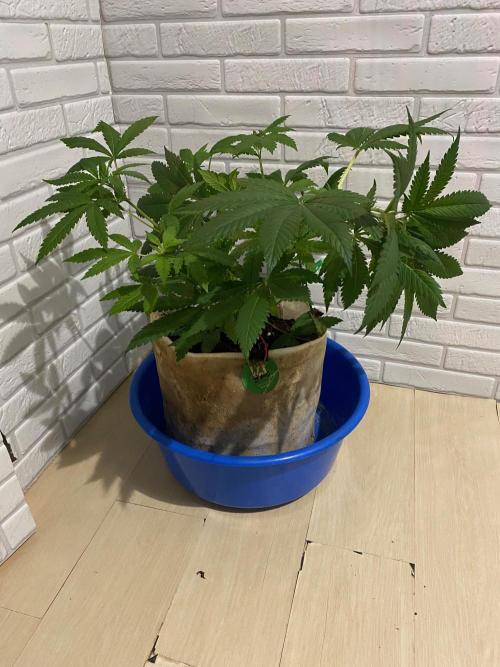
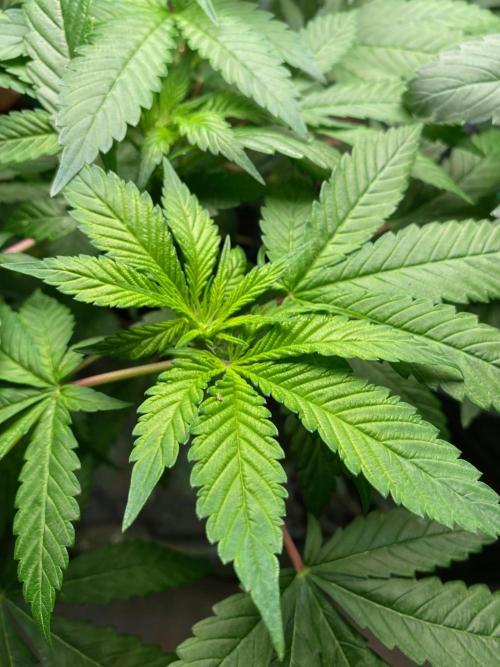
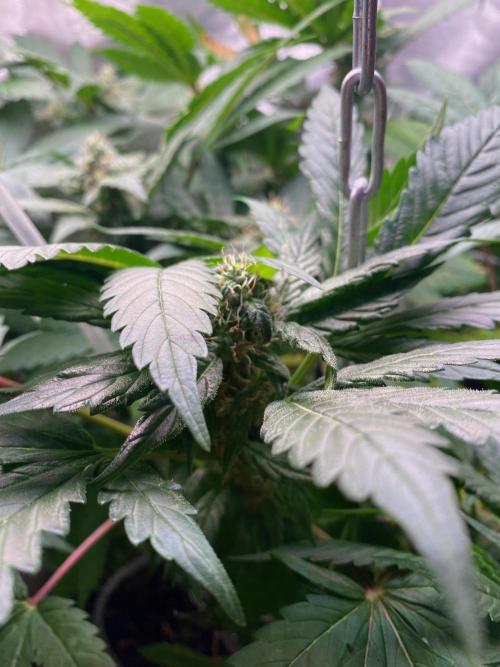
HoneyBlunt42 The plant has grown stronger. Upper and middle leaves are 10 cm long. The plant itself is 20 cm tall.
I'll wait another week and then top it, leaving only 2 branches with leaves. When growing a single plant, this technique gives 2 to 4 main colas. I used to cut to 8 branches before – that takes too long and isn't worth it in my opinion.
Mixed into the soil: GreenHouse Power Feeding Bio Grow at 3 ml/g.
I water once a day for a couple of seconds with a sprayer using Simplex StartUp (organic nitrogen, on leaves and roots). Also Simplex Vega and VitaS. The plant is standing next to other very young ones, so I also use a pipette to give Rafifarm at 4 ml/l.
Over the next couple of weeks, root growth is my main focus. Then the tent will become free for flowering.
Pre‑flower will start around week 6. It's taken a couple or three weeks longer than expected. Mistakes with temperature and overwatering sometimes lead to this. Good that the plant forgave me and keeps growing. Green foliage, zero signs of necrosis.
Humidity stays at 55–60 almost by itself. Sometimes the sensor shows a drop – then I spray water next to a 15 L grow bag with spare coconut until it drains. This helps keep humidity stable without a humidifier.
2 likes
comments
Share
6
Week 6. Flowering3mo ago
25 cm
Height
12 hrs
Light Schedule
23 °C
Day Air Temp
6.1
pH
No Smell
Smell
140 PPM
TDS
55 %
Air Humidity
20 °C
Solution Temp
18 °C
Night Air Temp
10 l
Pot Size
0.2 l
Watering Volume
40 cm
Lamp Distance
Nutrients 6
CalMag
1 mll
pH Down
0.2 mll
Coco A
1.5 mll
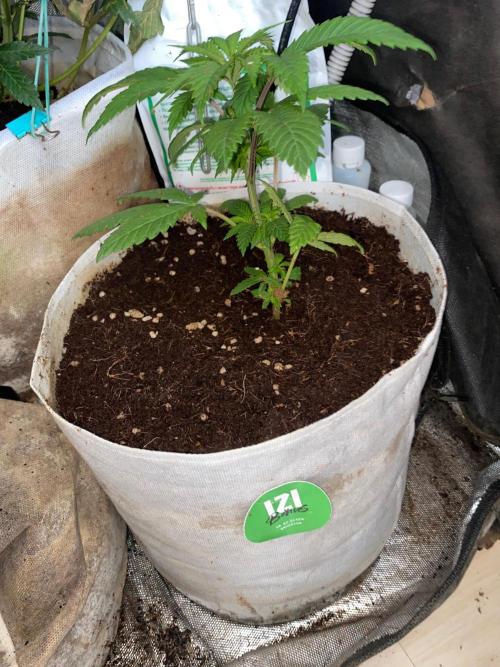
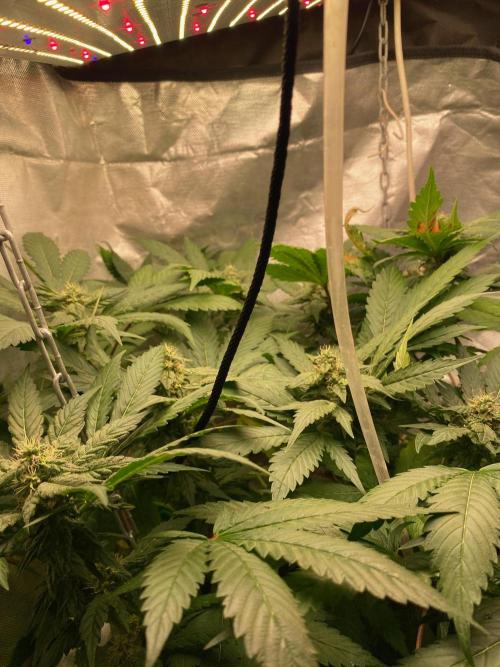
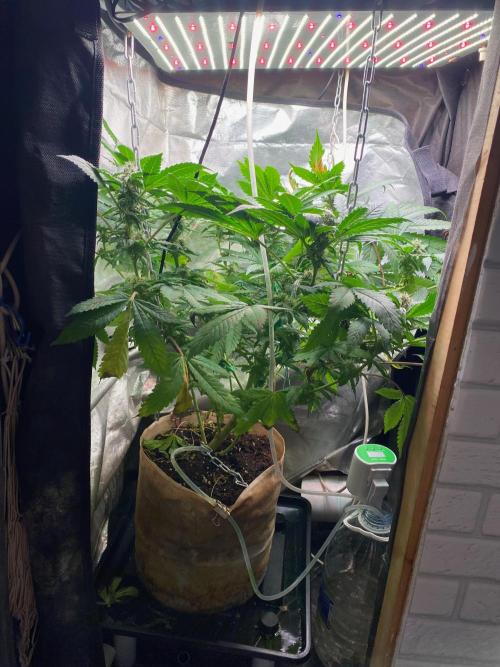
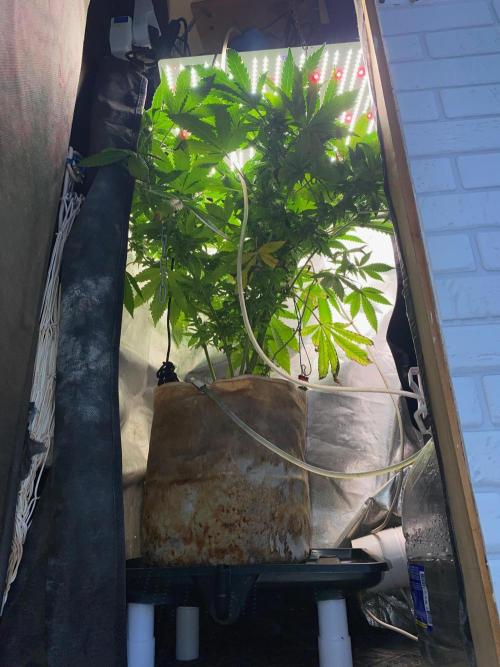
HoneyBlunt42 Yesterday I moved the plant to a 10L grow bag for pre-flowering in a 12/12 box. I think it will stretch out 2-3 times and start flowering in a couple of weeks. I decided to avoid stress and pruning and see the plant's potential without them.
I mixed 2 spoons of PowerFeeding Bio Bloom on top of the substrate. I also poured 4-5 liters of coconut around and on top. Before transplanting, it is important to water the coconut heavily, then the root ball will hardly crumble. I only had 2 cm of coconut left at the bottom.
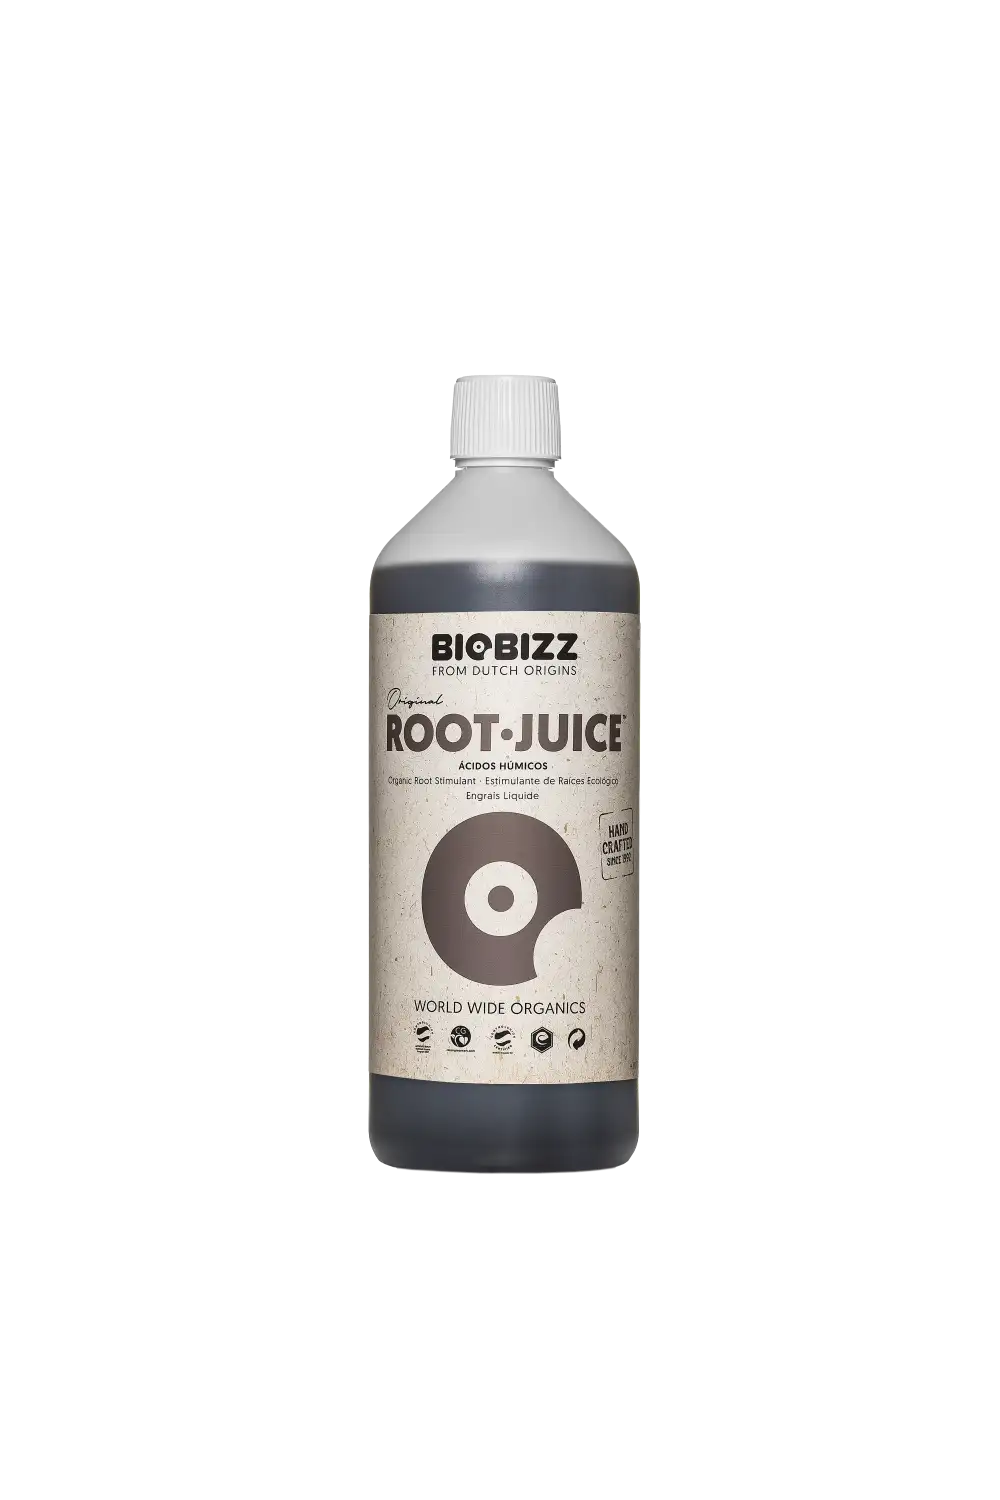
The roots slightly held the rest. I watered the bag with a solution from a spray bottle - 3 liters up to drainage. The solution contained: Simplex CalMag - 1 ml/l; Simplex Coco A - 1.5 ml/l; Coco B - 1.5 ml/l; BioBizz RootJuice - 3 ml/l; Simplex pH Down - 0.2 ml/l. The resulting solution pH was 6.1. The plan is to water only with water containing CalMag and pH Down.
I'll also use Simplex Mass and Power foliar stimulants. I'll also apply HB-101 and VitaS once a week to each leaf. I'll be doing this grow with a charged system. Someday I'd like to grow one plant using only bio feeders, without anything else.
I'll just add a root stimulant to the mix. I'll be interested to see if the complete absence of stimulants and additives will be critical, and how it will turn out using only biobase.
2 likes
comments
Share
7
Week 7. Flowering3mo ago

30 cm
Height
12 hrs
Light Schedule
24 °C
Day Air Temp
6.4
pH
No Smell
Smell
190 PPM
TDS
55 %
Air Humidity
22 °C
Solution Temp
18 °C
Night Air Temp
10 l
Pot Size
0.3 l
Watering Volume
30 cm
Lamp Distance
Nutrients 4
CalMag
1 mll
pH Down
0.2 mll
Vitalizer
0.2 mll
HoneyBlunt42 It's been actively growing and stretching upwards since the 12/12 change.
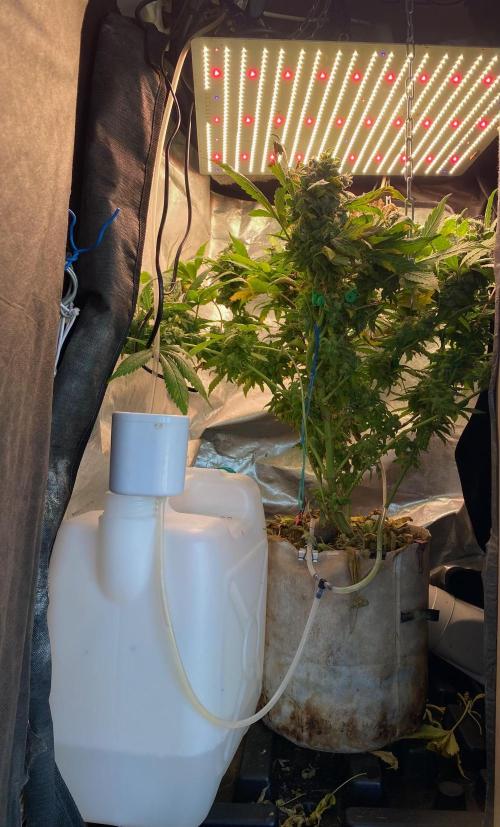
I installed a tank with an automatic watering pump. The pump waters about 0.5 liters every four hours for this and two other plants. I use reverse osmosis water (50 ppm) in the AquaPot, plus SilliX 0.25 ml/l, CalMag 1 ml/l, and Simplex pH Down 2 0.2 ml/l.
I like GHS Powder Feeding as a fertilizer base because it needs to be mixed in. After that, I can just use water and water with BioEnchancer every two weeks
. I'll try using them outdoors if I get the chance.
1 like
comments
Share
Used techniques
LST
Technique
8
Week 8. Flowering3mo ago
35 cm
Height
12 hrs
Light Schedule
26 °C
Day Air Temp
6.2
pH
No Smell
Smell
145 PPM
TDS
50 %
Air Humidity
22 °C
Solution Temp
19 °C
Night Air Temp
10 l
Pot Size
0.3 l
Watering Volume
25 cm
Lamp Distance
Nutrients 4
CalMag
1 mll
pH Down
0.2 mll
Vitalizer
0.2 mll
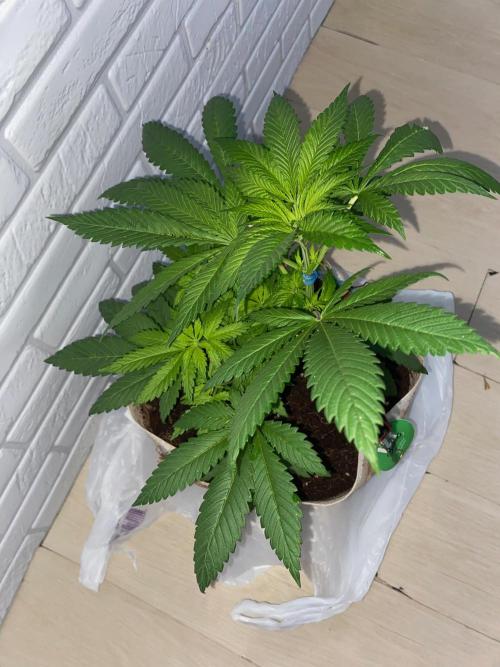
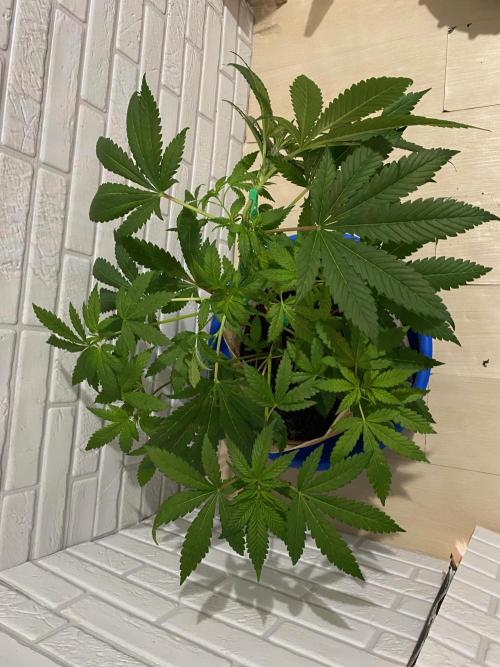
HoneyBlunt42 The plant has grown significantly in height, approximately 2-3 times in the two weeks since I switched to 12/12.
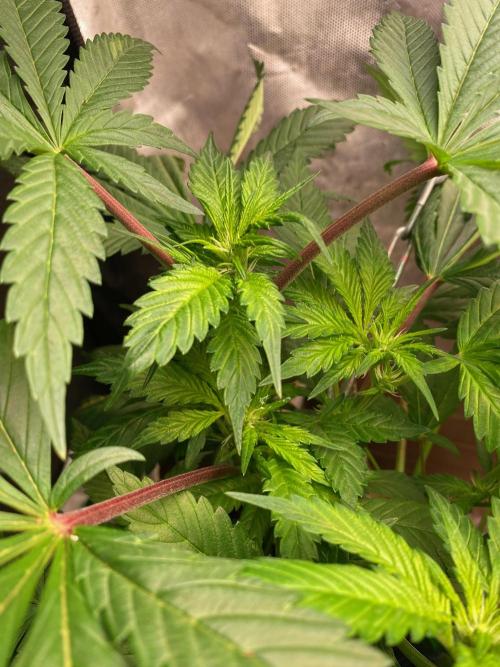
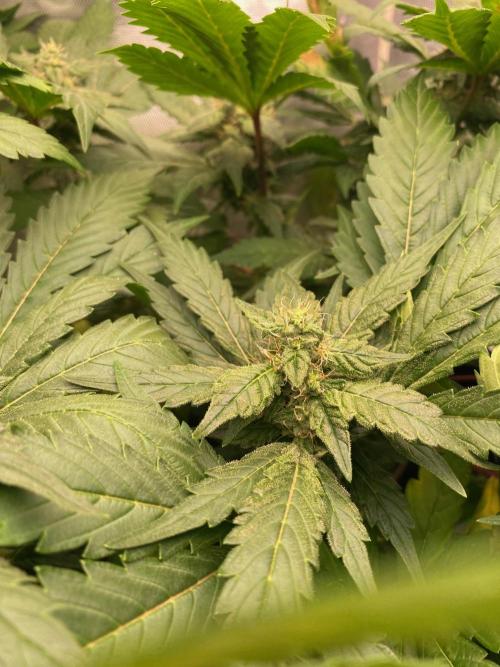
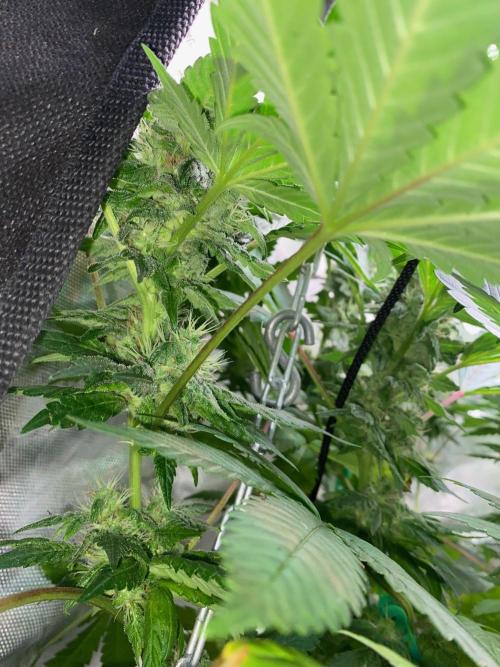
It looks healthy and green, with large burdocks the size of a palm and larger on the central cola. I didn't top or trim this shoot.
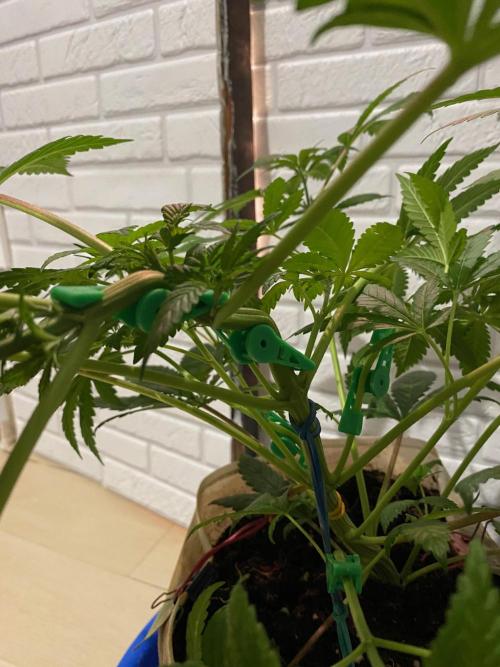
I started bending it this week, using plastic clips from AliExpress that I stole from Milya. They're even more convenient than rubber bands—no need to tie a ring around the pot and tie to it.
I simply form the main cola parallel to the floor, and the side colas as far away from the main one as possible. This way, I can fill the entire space of the box, and air circulation between the branches will be better.
Yesterday, I watered it with 0.2 liters of BioEnchancer solution.
likes
comments
Share
Used techniques
LST
Technique
9
Week 9. Flowering2mo ago
37 cm
Height
12 hrs
Light Schedule
26 °C
Day Air Temp
6.3
pH
No Smell
Smell
145 PPM
TDS
50 %
Air Humidity
22 °C
Solution Temp
19 °C
Night Air Temp
10 l
Pot Size
0.3 l
Watering Volume
25 cm
Lamp Distance
Nutrients 4
CalMag
1 mll
pH Down
0.2 mll
Vega
1 mll
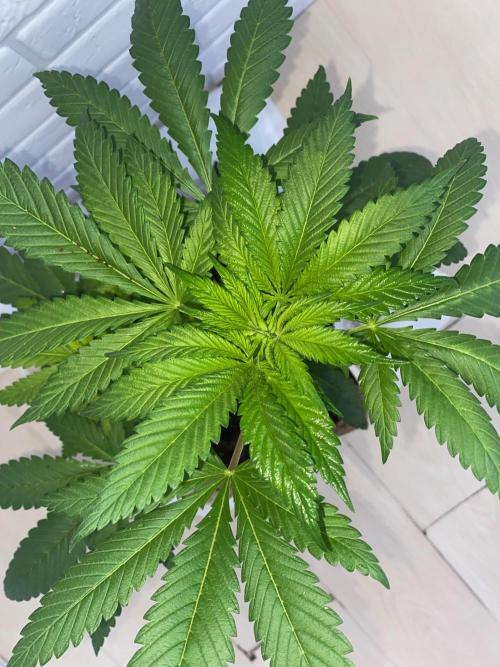
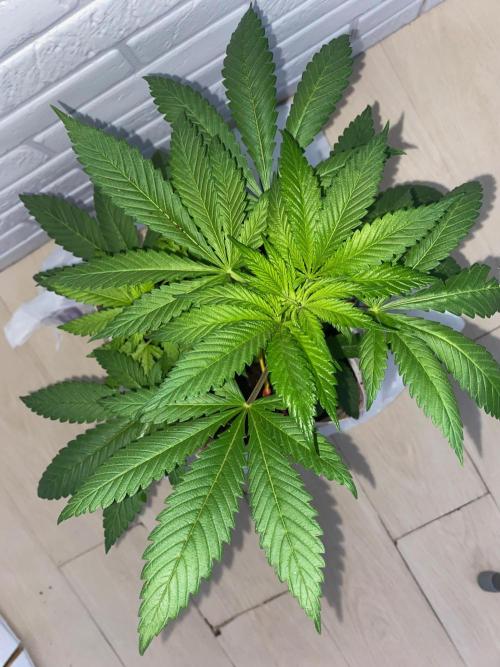
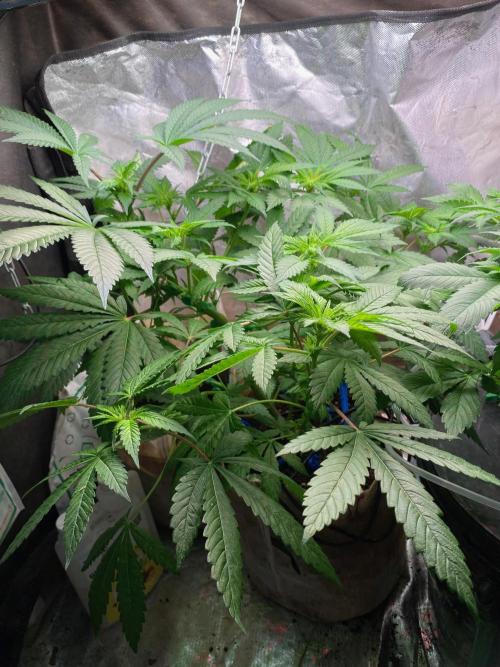
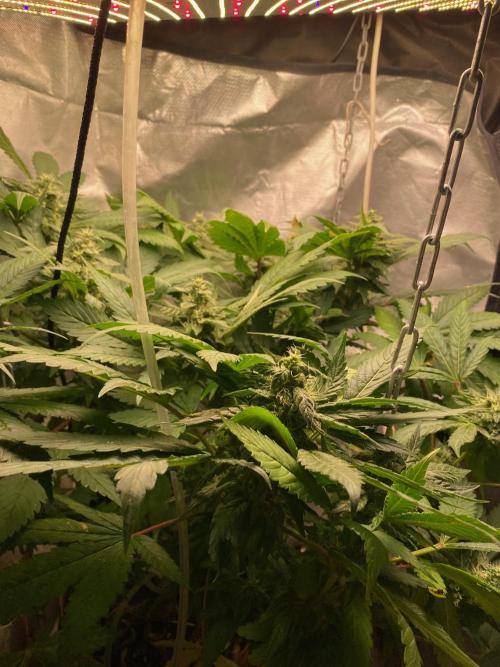
HoneyBlunt42 The plant has already filled 70% of the 60 x 90 cm box. Small flowers are starting to appear. I'm bending the branches with plastic clips—the maximum height of the space is 100 cm.
I sprayed stimulants on the leaves.
1 like
comments
Share
Used techniques
LST
Technique
12
Week 12. Flowering2mo ago
50 cm
Height
12 hrs
Light Schedule
29 °C
Day Air Temp
6.2
pH
No Smell
Smell
145 PPM
TDS
40 %
Air Humidity
28 °C
Solution Temp
24 °C
Night Air Temp
10 l
Pot Size
1 l
Watering Volume
20 cm
Lamp Distance
Nutrients 3
CalMag
1 mll
pH Down
0.2 mll
PK Boost
1 mll
HoneyBlunt42 Watering with CalMag and Simplex PK Boost (1 ml/L), then lowering pH to around 6.0–6.3. Adding 5 drops of Simplex pH Down – I transferred it into a 10 ml dropper bottle (from VitaS stimulator) for easier dosing without a pipette.
Three days ago, there was a heatwave, and I left for the mountains for a few days. The plant got dried out – leaves drooped. Realized I need to upgrade the 3L auto‑watering tank – it only lasts two days max. Switched to a 5L tank, but a 15L canister with a drainage tray would be better. That would easily last 3–4 days. At +29°C, the plant drinks and evaporates at least a liter per day.
Other than that, leaves look healthy, buds are beautiful. IZI is delightfully low‑maintenance :)
Watering is done with an auto‑watering pump (1 L/min flow rate) – 5 seconds every hour. There’s also an airstone in the solution for mixing and oxygen saturation.
The plant has slowed down in vertical growth and is now bulking up the buds. I’ll continue feeding PK Boost for another 3 weeks, then a flush – and then wait for harvest.
likes
comments
Share
13
Week 13. Flowering2mo ago
55 cm
Height
12 hrs
Light Schedule
28 °C
Day Air Temp
6.3
pH
Weak
Smell
145 PPM
TDS
40 %
Air Humidity
28 °C
Solution Temp
23 °C
Night Air Temp
10 l
Pot Size
1.5 l
Watering Volume
20 cm
Lamp Distance
Nutrients 5
CalMag
1 mll
pH Down
0.2 mll
PK Boost
1 mll
HoneyBlunt42 It's blooming beautifully. It's been on automatic watering all week. A 5mm tube is attached to the roots. Currently, a 5-liter bottle lasts 2-3 days per plant. I'm thinking of installing a 15-liter canister so I can go at least a week without having to look at it.
Currently, the 5-liter tank with the solution is pumped with oxygen by an aquarium aeration stone and a 2.5-watt Hailea pump (a powerful one, but that's the only one I had in stock).
likes
comments
Share
15
Week 15. Flowering1mo ago

55 cm
Height
12 hrs
Light Schedule
28 °C
Day Air Temp
6.3
pH
Weak
Smell
145 PPM
TDS
40 %
Air Humidity
28 °C
Solution Temp
23 °C
Night Air Temp
10 l
Pot Size
1.5 l
Watering Volume
20 cm
Lamp Distance
Nutrients 2
CalMag
1 mll
pH Down
0.2 mll
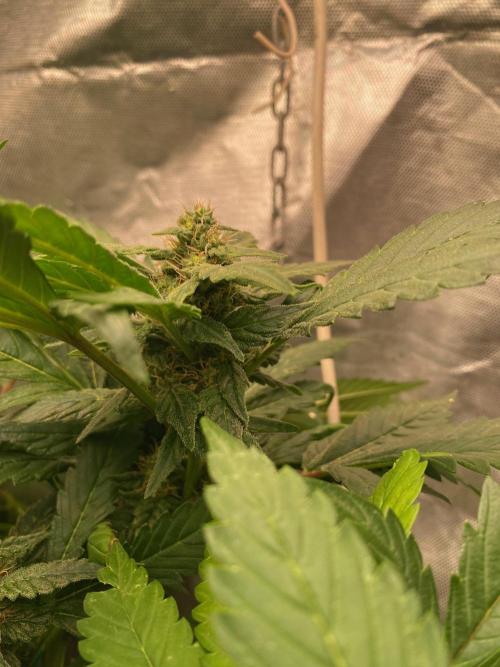
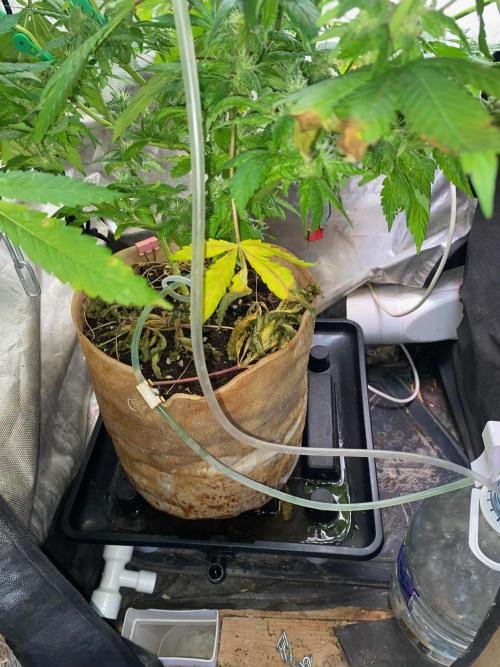
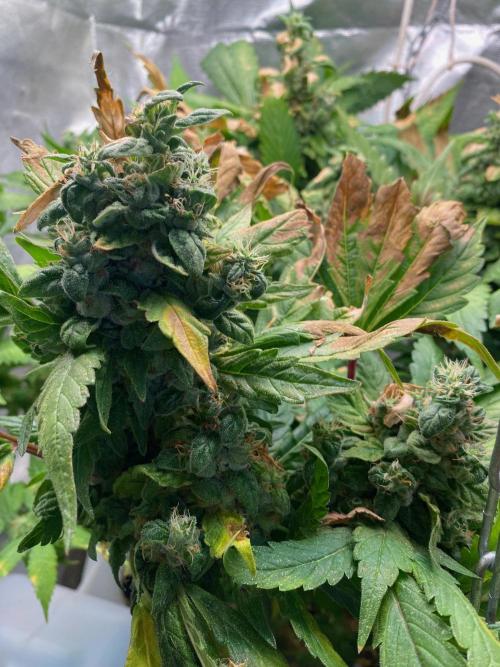
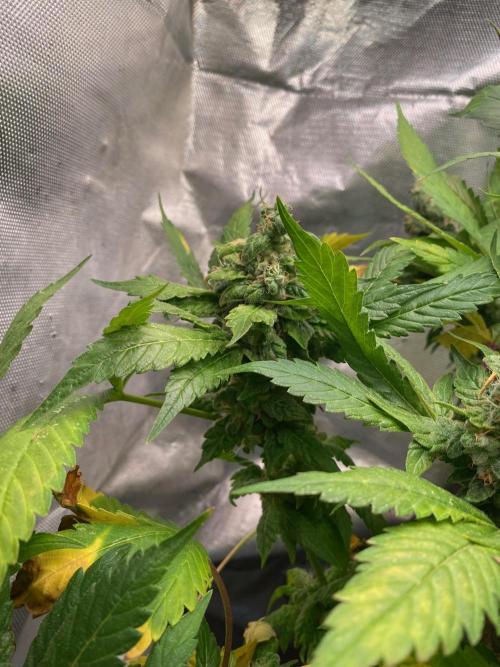
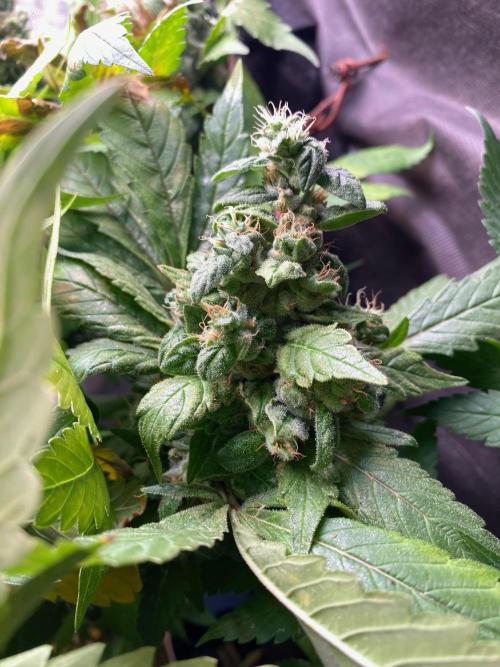
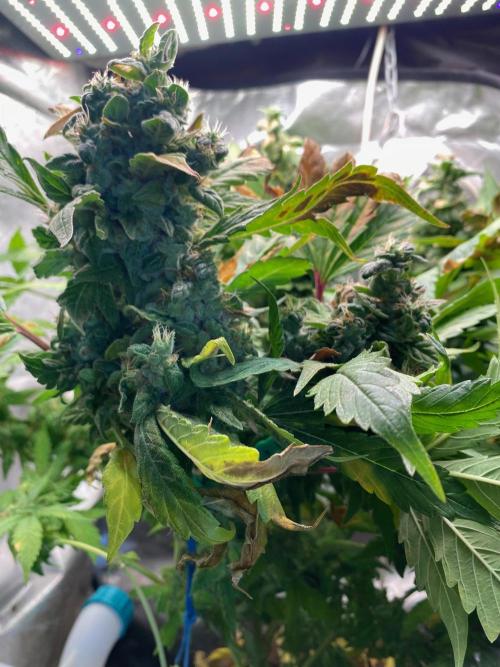
HoneyBlunt42 Harvest time! The colas have swollen up; the main ones are the size of a palm or bigger. I estimate the dried plant will weigh in at just under a kilo. It’s getting 7 days of drying in the tent—in the dark, with a carbon filter running.
Then, at least 2 weeks of curing in glass jars. The plant was fed plain water for the entire cycle, so there was no need to flush out nitrogen, and the buds don't spark when smoked. Dense, sticky buds—remotely reminiscent of GHS Super Lemon Haze.
I grew Lemon before this, and it really won me over with its flavor and bud density—I even ordered 4 more autoflower seeds of it. Once it’s dried and I’ve had a taste, I’ll write up a smoke report. I’ll also post a review of the gear, nutrients, and anything else you guys ask for in the comments, bros :)
likes
comments
Share
16
Week 16. Harvest1mo ago
Happy Harvest Day!


9/10
Rated
Dense, sticky buds; the plant stays short. I managed to fit it into a space with a total height of 1.2 meters, and the top didn't get burned.
Aromatic buds with a fruity scent—though my girlfriend says it smells like a meadow. Definitely a strain and a seed bank I had previously underestimated. I’ll be ordering a whole patch of these autoflowers—or maybe the photoperiod versions.
Wishing the breeder success and sending my respect!
Show more
Translate
Spent 86 days
Ger Veg Flo Har
265 g
Bud wet weight per plant
40 g
Bud dry weight per plant
1
Plants
0.36 m²
Grow Room size
Easy
Difficulty

Relaxed, Happy, Giggly
Positive effects

Tropical, Fruity, Pine
Taste
Height
Day air temperature
Air humidity
PPM
PH
Light schedule
Solution temperature
Night air temperature
Pot size
Lamp distance
HoneyBlunt42 Harvest Time! 265 g wet from 1 plant
likes
comments
Share
Equipment Reviews


4 comments
Sort by
popularity
popularity
newest
oldest

RockoCalenberg commentedweek 05mo ago
Enjoy the run – fat buds and strong terps!💚✌️🍀
likes 3

UnorthadoxDude commentedweek 05mo ago
Good luck with your grow! Hoping this little one turns out mahoosive!
likes 3

GERGrowDesigns commentedweek 24mo ago
Good Luck and keep up Growing 🤝🌱
likes 2

GhostTerpZ commentedweek 44mo ago
Looking really good ❗️ ❗️ ❗️
likes

the end.
Enjoying this diary? Follow for more updates!


Prefer the old Diary view?
Go back to the old Diary view