AccidentalB Water Science & Perfect Starts: 100% Germination!🍌
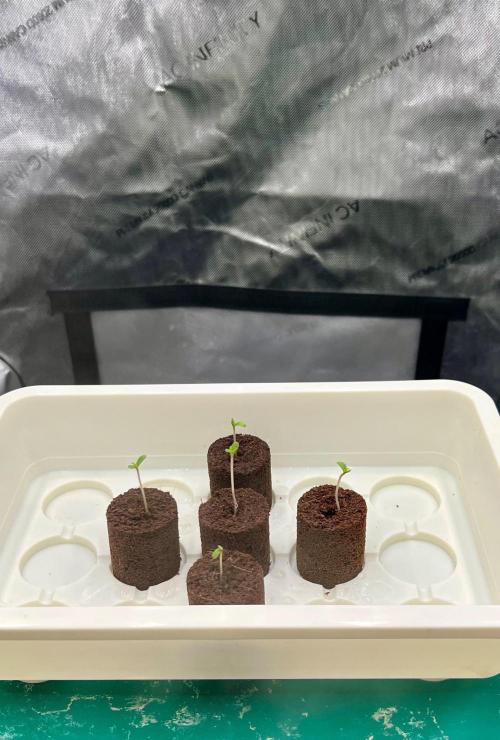
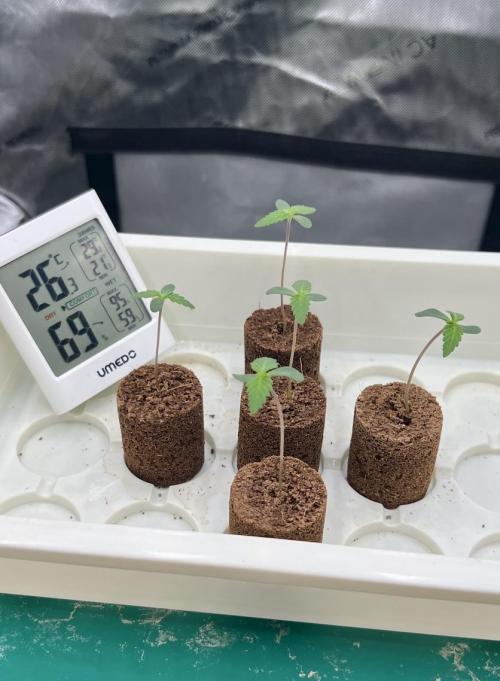
Awesome news: all 5 of the RQS Orbital Banana F1 seeds sprouted after just 3 days! 🌱 To give them a little head start, I moistened the plugs with water containing 7 drops of Seedbooster Plus per liter.
Let's talk water management for a second. Since I use a water softener at home, tap water is a no-go for my girls. Even the raw tap water before the softener isn't an option because it's way too hard (18 dH). Because of this, I’ve decided to go full-DIY and use distilled water exclusively for this run. I'm making it myself using a Vevor water distiller. Honestly, this gives me total control and maximum flexibility to dial in my own feeding schedule. Of course, the baseline rule here is adding CalMag to reach an EC of 0.4 mS/cm with every single watering.
Starting tomorrow, August 23rd, the babies are going on an 18/6 light schedule. I'll start them off easy with a PAR of 120 PPFD, gradually ramping it up to 200 PPFD toward the end of the week to keep them nice and compact.
To keep the plugs perfectly moist over the coming week, I’ve prepped a plant sprayer with a custom seedling mix. The recipe:
* CalMag (up to EC 0.36 mS/cm)
* Power Roots (1 ml/L)
* Pure Zym (1 ml/L)
* pH locked in at 6.2
Other than that, no extra nutrients are needed yet. The plugs and the seedlings themselves have all the fuel they need to crush this first week! 🚀💚
4 likes
4 comments
Share
Used method
Peat Pellet
Germination Method
1
Week 1. Vegetation
3d ago
1/3
6 cm
Height
18 hrs
Light Schedule
25 °C
Day Air Temp
6.2
pH
No Smell
Smell
200 PPM
TDS
70 %
Air Humidity
23 °C
Solution Temp
23 °C
Substrate Temp
23 °C
Night Air Temp
0.05 liters
Pot Size
0.01 liters
Watering Volume
55 cm
Lamp Distance
Nutrients 4
Seedbooster Plus
0.1 mll
CalMag Pro
0.4 mll
Power Roots
1 mll
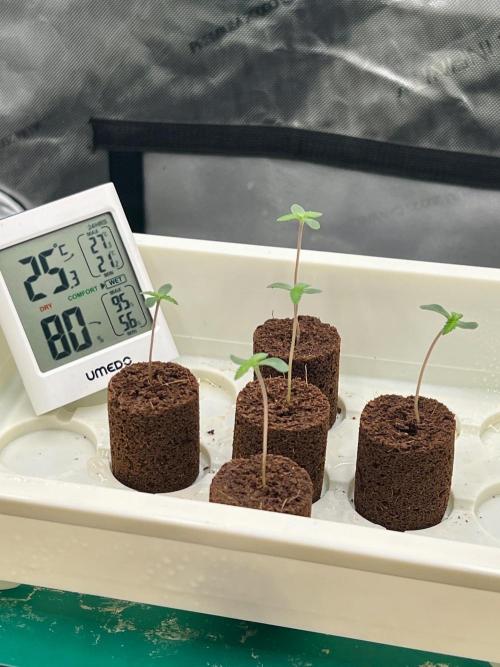
AccidentalB Day 3: It’s all about the roots! 🌱
The seedlings are now 3 days old! 👶 I’ve set the ePAR to 185 PPFD, giving them a DLI of 12. This is the absolute sweet spot—just enough to prevent them from stretching, but low enough to avoid any unwanted stress.
These days, it’s all about root development! Right now, light is actually secondary. It needs to be just enough to keep the girls short and stocky, but definitely not too intense to damage those delicate tiny leaves.
Another golden rule right now: do NOT overwater! ⚠️ Since they can't photosynthesize properly yet, their main focus is digging those roots deep into the medium. To keep them happy without drowning them, I've just been moistening the outside of the plugs twice a day using a plant sprayer.
So far, so good! The ladies are looking happy and healthy. 🤙💚
A Tuesday’s Holiday Project: I fucking did it! 🛠️
My first—and only—grow was 4 years ago, as you can see. Back then, I used the sophisticated AC Infinity Controller 67. It was absolute bliss, of course, because I could already automate a ton of processes and dial in my VPD.
Now, 4 years later, I obviously wanted to upgrade my setup to the current standards so I can run the Cloudray Clip Fan and the Thermoforge S7 heater. Plus, I really wanted to connect my Spider Farmer SE3000 to the AC Infinity Controller.
Since the Controller 67 unfortunately only supports Bluetooth, I was forced to replace it. So today, the Controller 69 Pro arrived! (I figured the AI controller was a bit overkill for my needs right now). It’s UIS-compatible and has Wi-Fi, so I can finally monitor and control my tent remotely.
The only issue? My old Cloudline S6 inline fan isn’t compatible with the new UIS system on the 69 Pro. But that’s where an amazing new tool comes in—one that didn't even exist during my last grow: A Fucking I!
How cool is that?! Thanks to AI, I converted my old Cloudline S6 with its Molex connector into a fully functioning UIS device! It took some serious tinkering because the UIS cable has 7 wires while the Molex only has 3. On top of that, the Controller 69 Pro identifies device types based on specific resistance values. But AI guided me through it like a pro.
For anyone looking to do the same and give their old Cloudline S6 a second lease on life as a UIS device, here is the trick: The yellow Molex wire goes to the white UIS wire (not the yellow one!), and you need to solder a 47 or 56 kOhm resistor between the green and orange wires. I literally tore apart an old toaster and used AI to identify the correct resistor on the circuit board. Talk about a true DIY day... ⚙️ but hey, the old Cloudline works flawlessly now and is fully integrated into the UIS ecosystem!
Of course, due to the older EC motor, it still adjusts in steps from 0 to 10 (no smooth ramping up, but who cares!), but other than that, it runs like a charm. Plus, it saves some electronic waste! 😉
Tomorrow, my Cloudray, Thermoforge, and the adapter for my SE3000 are arriving... From that moment on, my setup will be fully up-to-date and 100% ready for the 2027 season!
Damn, I’ve really missed you guys over the past 4 years. It's so good to be back! 😍💚
@GERGrowDesigns,
Thanks, buddy! After four years, I’ve finally started a new grow. I dusted off and cleaned my equipment—I’m totally ready to go again.😀
@James,
Thank you, James,
I'm really looking forward to taking care of these bananas. I'm very curious to see how they'll grow and eventually take care of me 😉
Thanks for your comment, and I hope you'll continue to follow my grow—RQS forever.